Steps to Add to My Calendar :
-
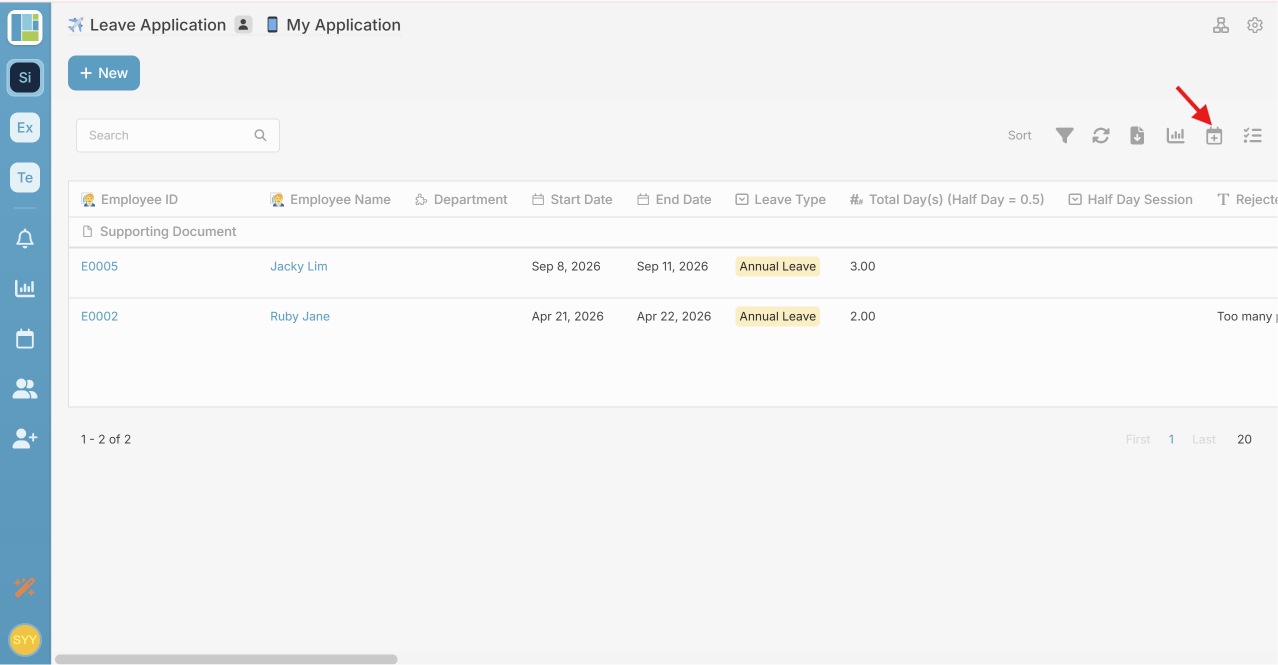
Click the “Calendar” icon at the top-right corner of the page.
-
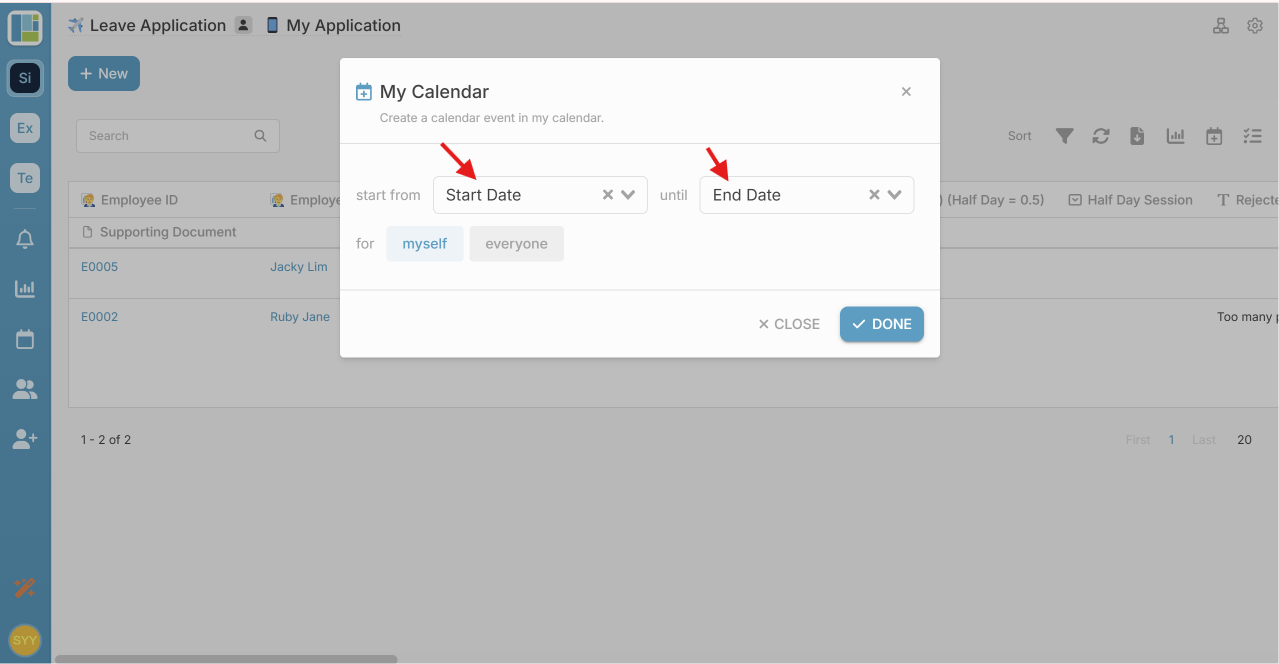
Choose to start from which period to which period. E.g. Start from Start Date until End Date.
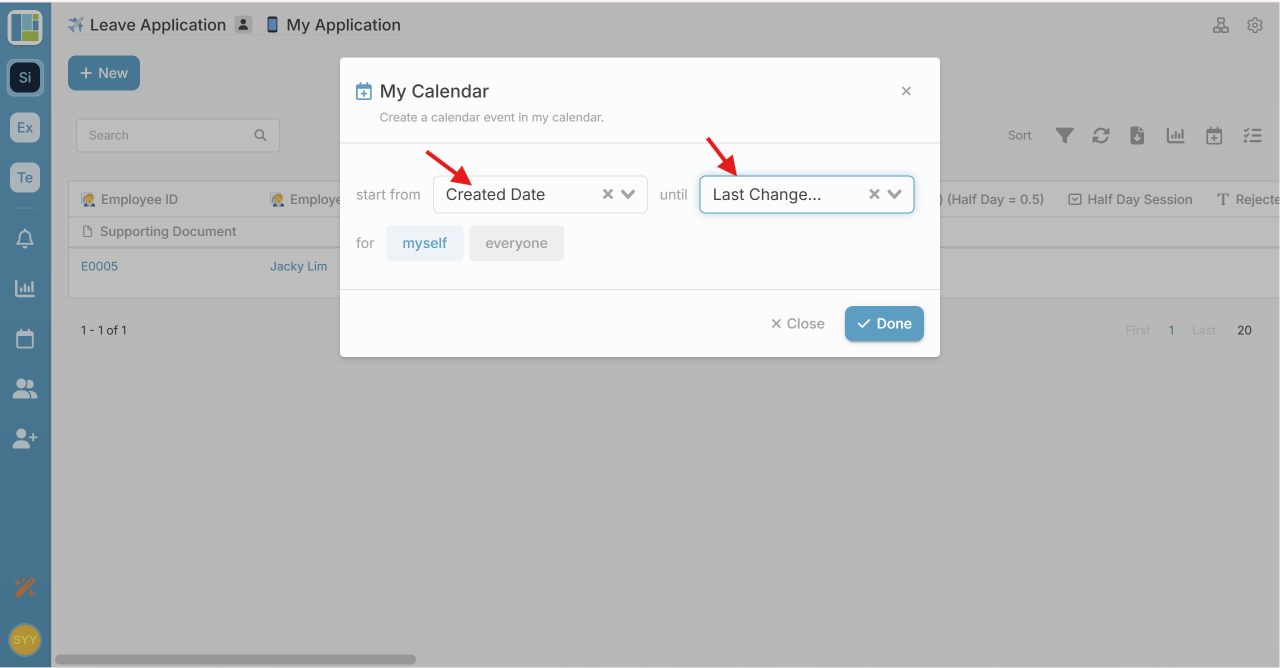
You can select either a Date or Date Time field:
Date — Contains the date only.
Date Time — Contains both the date and specific time.
For example, selecting Start Date and End Date displays the record as a date range
while selecting Created Date and Last Change Date displays the specific time in the Calendar.
-
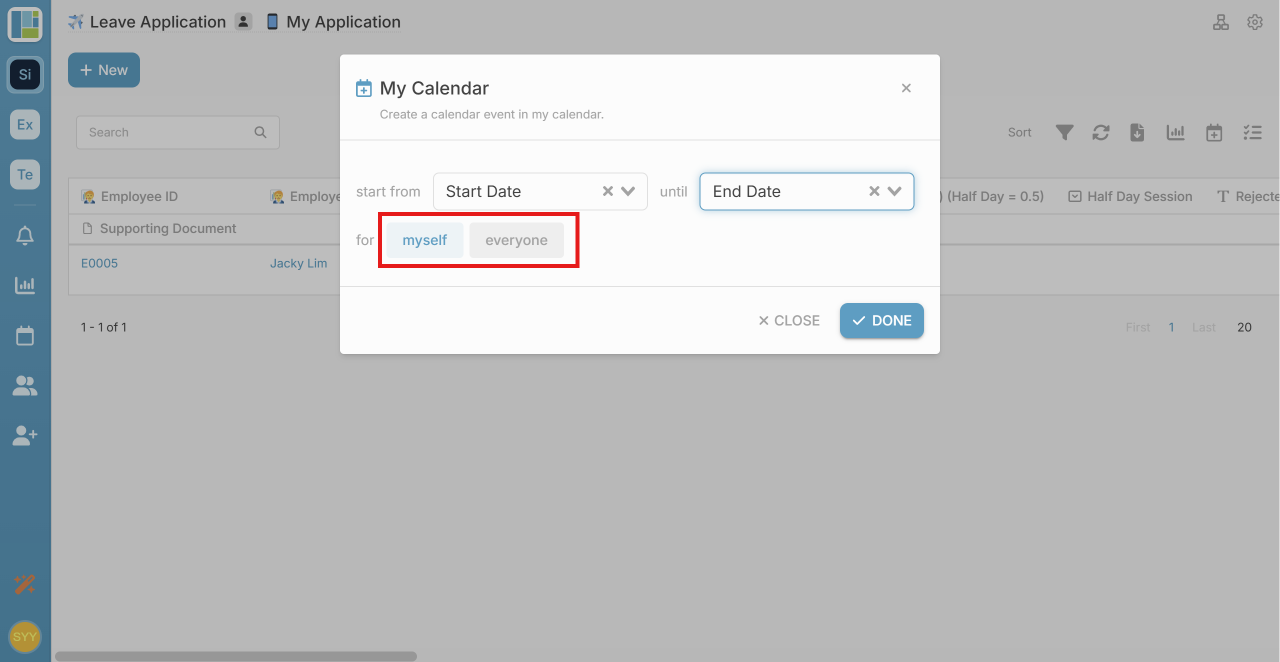
Choose who the calendar is for:
myself — Adds the calendar configuration for your own account. Use this when you only want the calendar to be available in your own My Calendar.
everyone — Adds the calendar configuration for everyone who has access to the application. Use this when the calendar should be available to all applicable users, rather than only yourself.
-
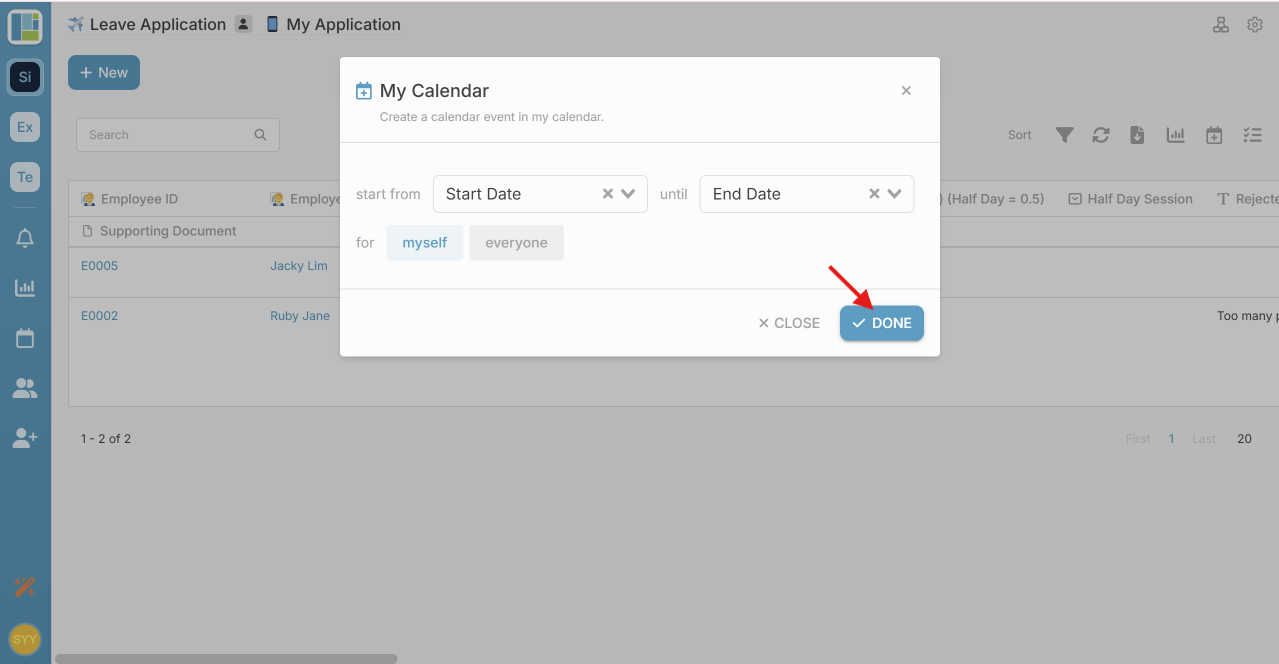
Click “DONE”.
-
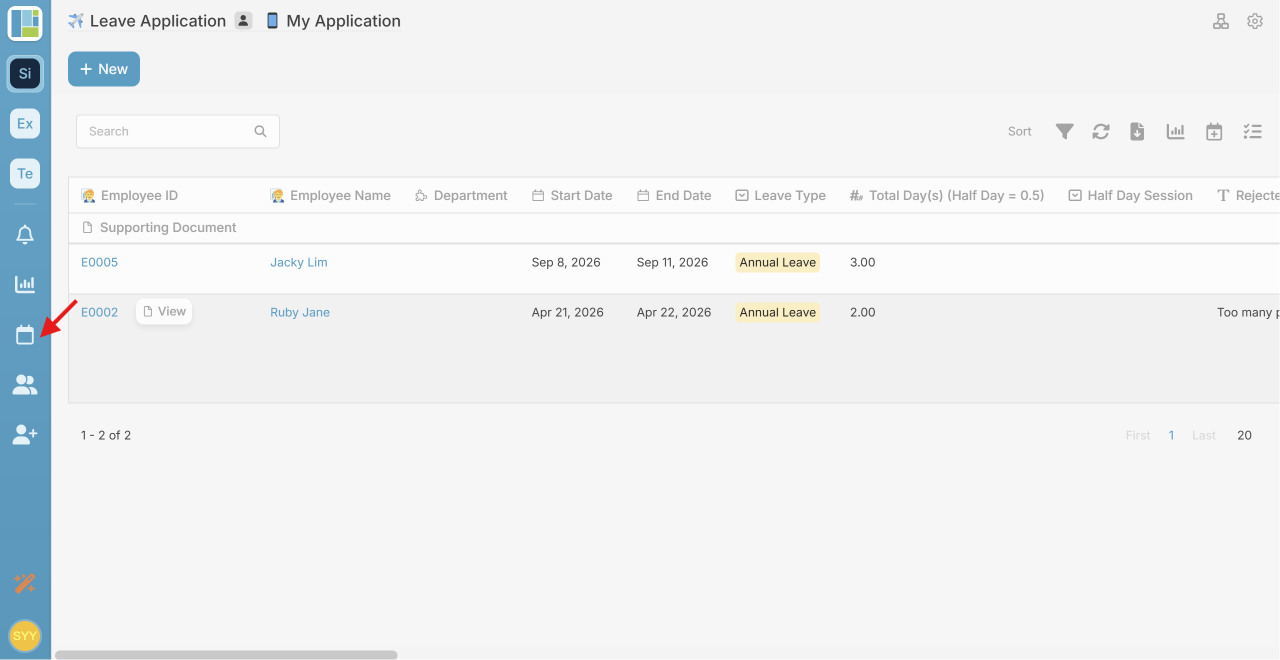
Click “Calendar” from the left-side menu to open the Calendar view.
-
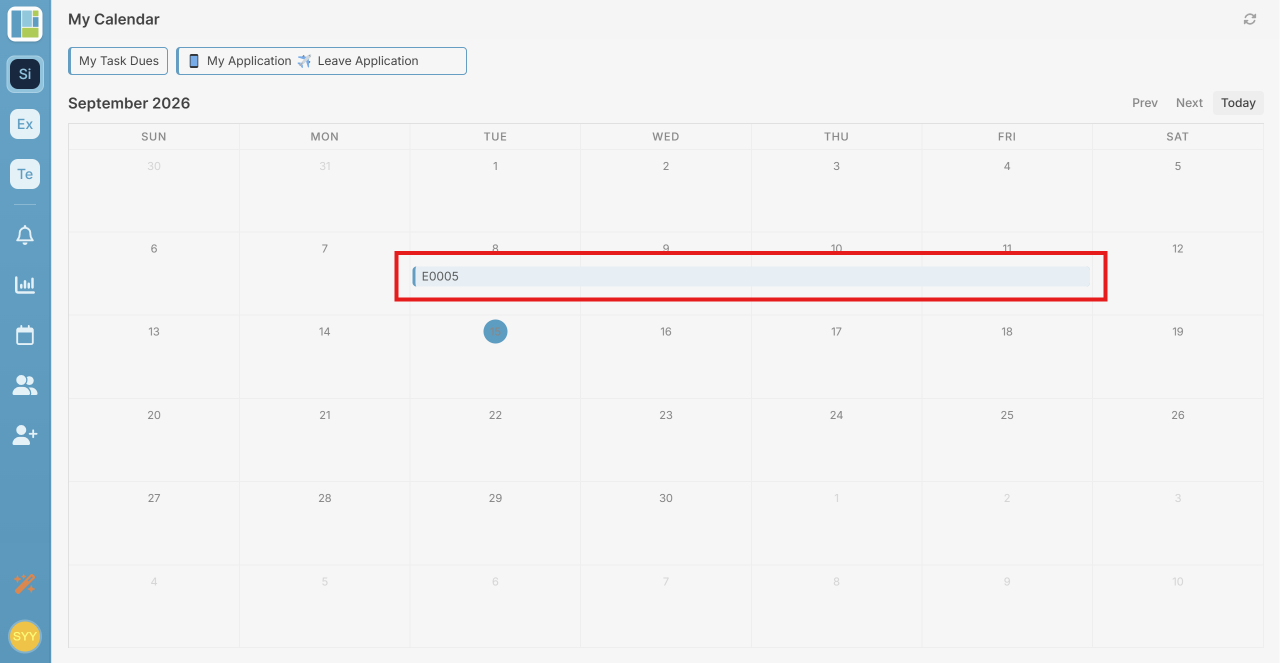
Your records will now appear in the Calendar.
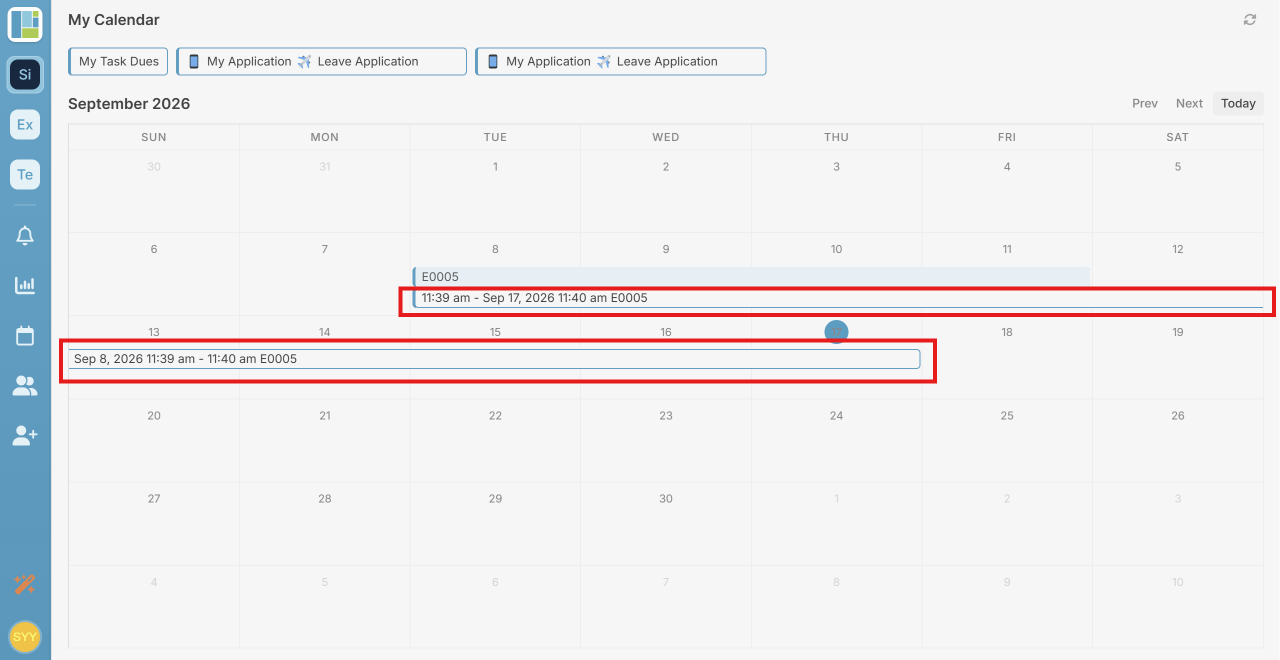
The Calendar displays the selected field differently depending on its type:
-
Date — The record is displayed based on the selected date or date range.
-
Date Time — The record also displays the specific time.
-
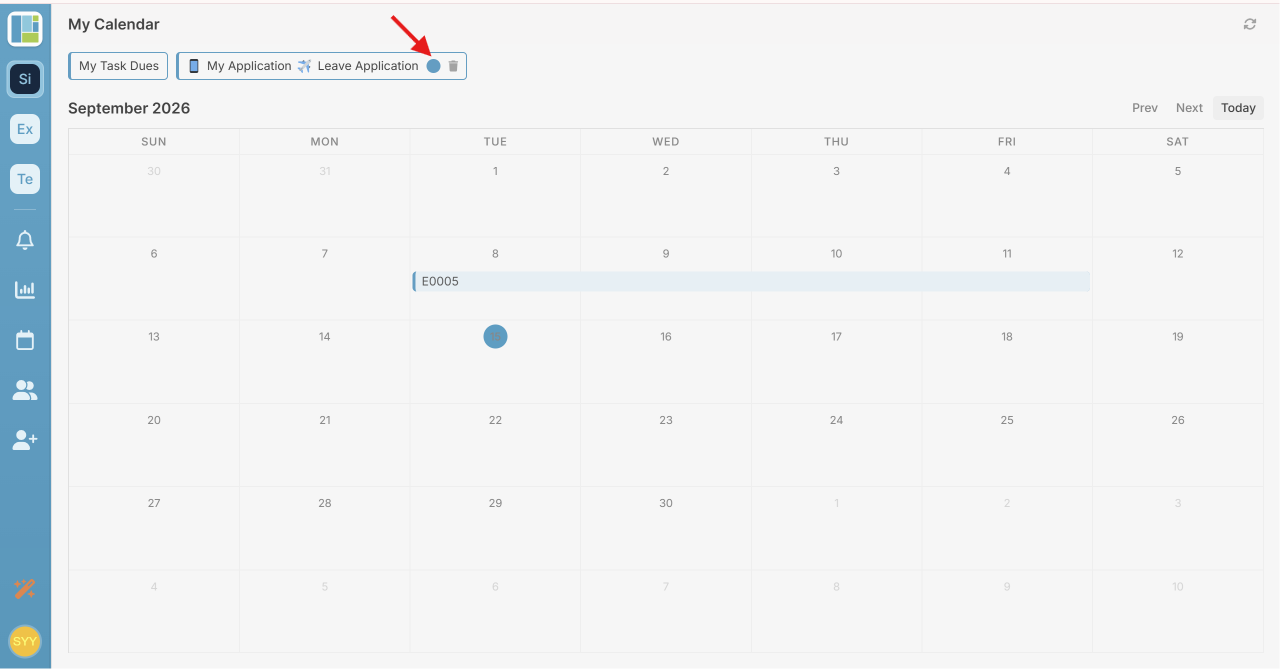
Find the calendar that you want to customise and click the coloured circle beside the calendar name.
-
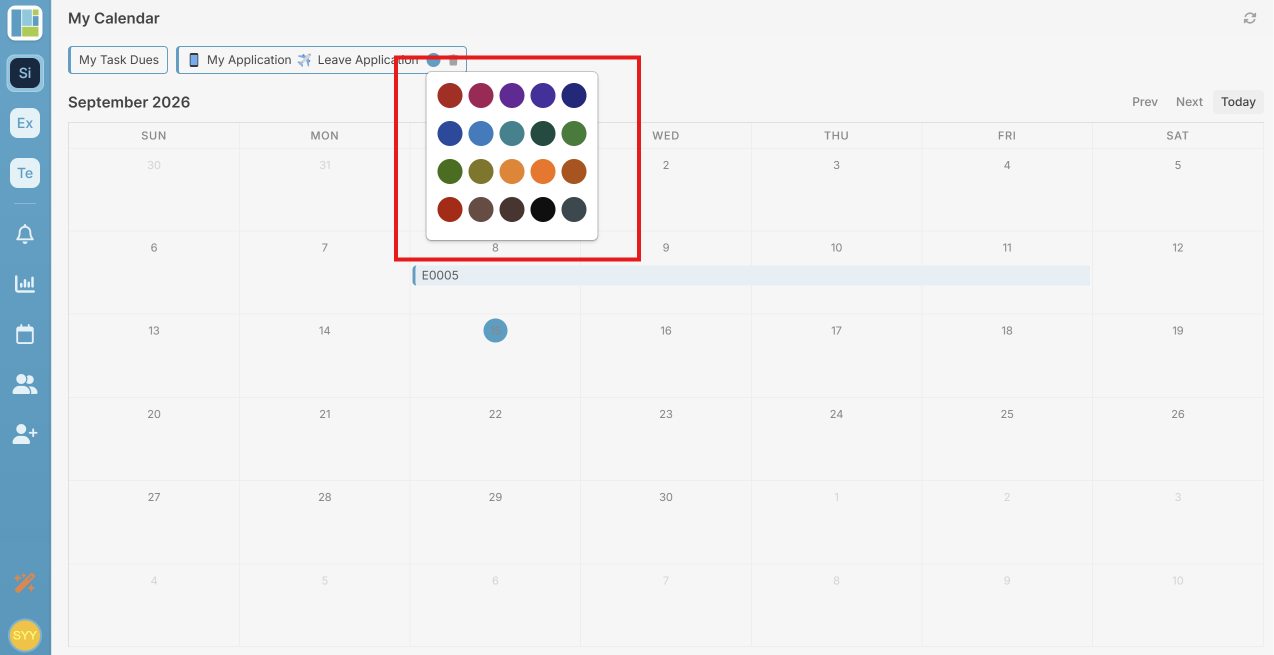
Select your preferred colour.
-
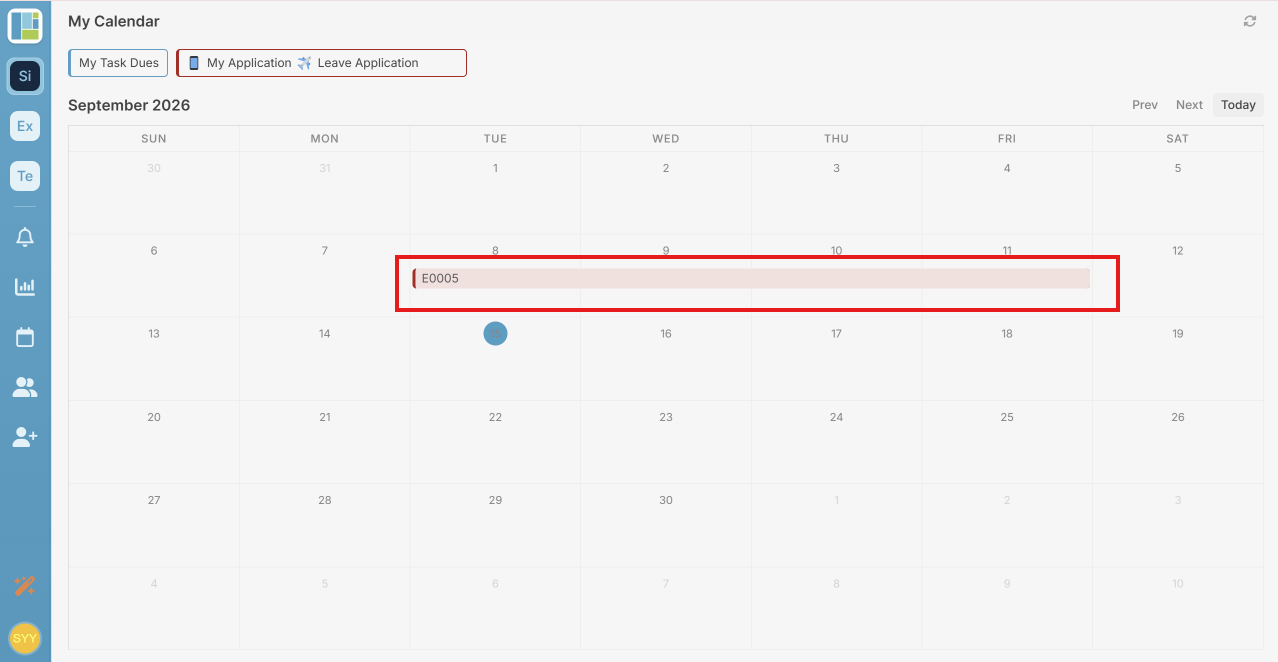
The calendar colour will be updated accordingly.