Hi ![]()
Today, I would like to share with you how to configure an approvals module in INISTATE.
The approvals module allows you to review and manage employee requests.
Problem
Inefficient Employee Request Handling - The current manual system for reviewing and managing employee requests is prone to delays, leading to inefficiencies and potential disruptions in workflow. There is a need for a more streamlined and automated process to ensure timely responses and a smoother workflow.
Objective
1. Enhance Workflow Efficiency - To implement an automated Approval system that significantly improves the efficiency of reviewing and managing employee requests, reducing processing time and minimizing delays in response.
2. Optimize Employee Satisfaction - To create a user-friendly interface and responsive system that enhances the overall employee experience, resulting in increased satisfaction with the request submission and approval process.
Step & Configuration
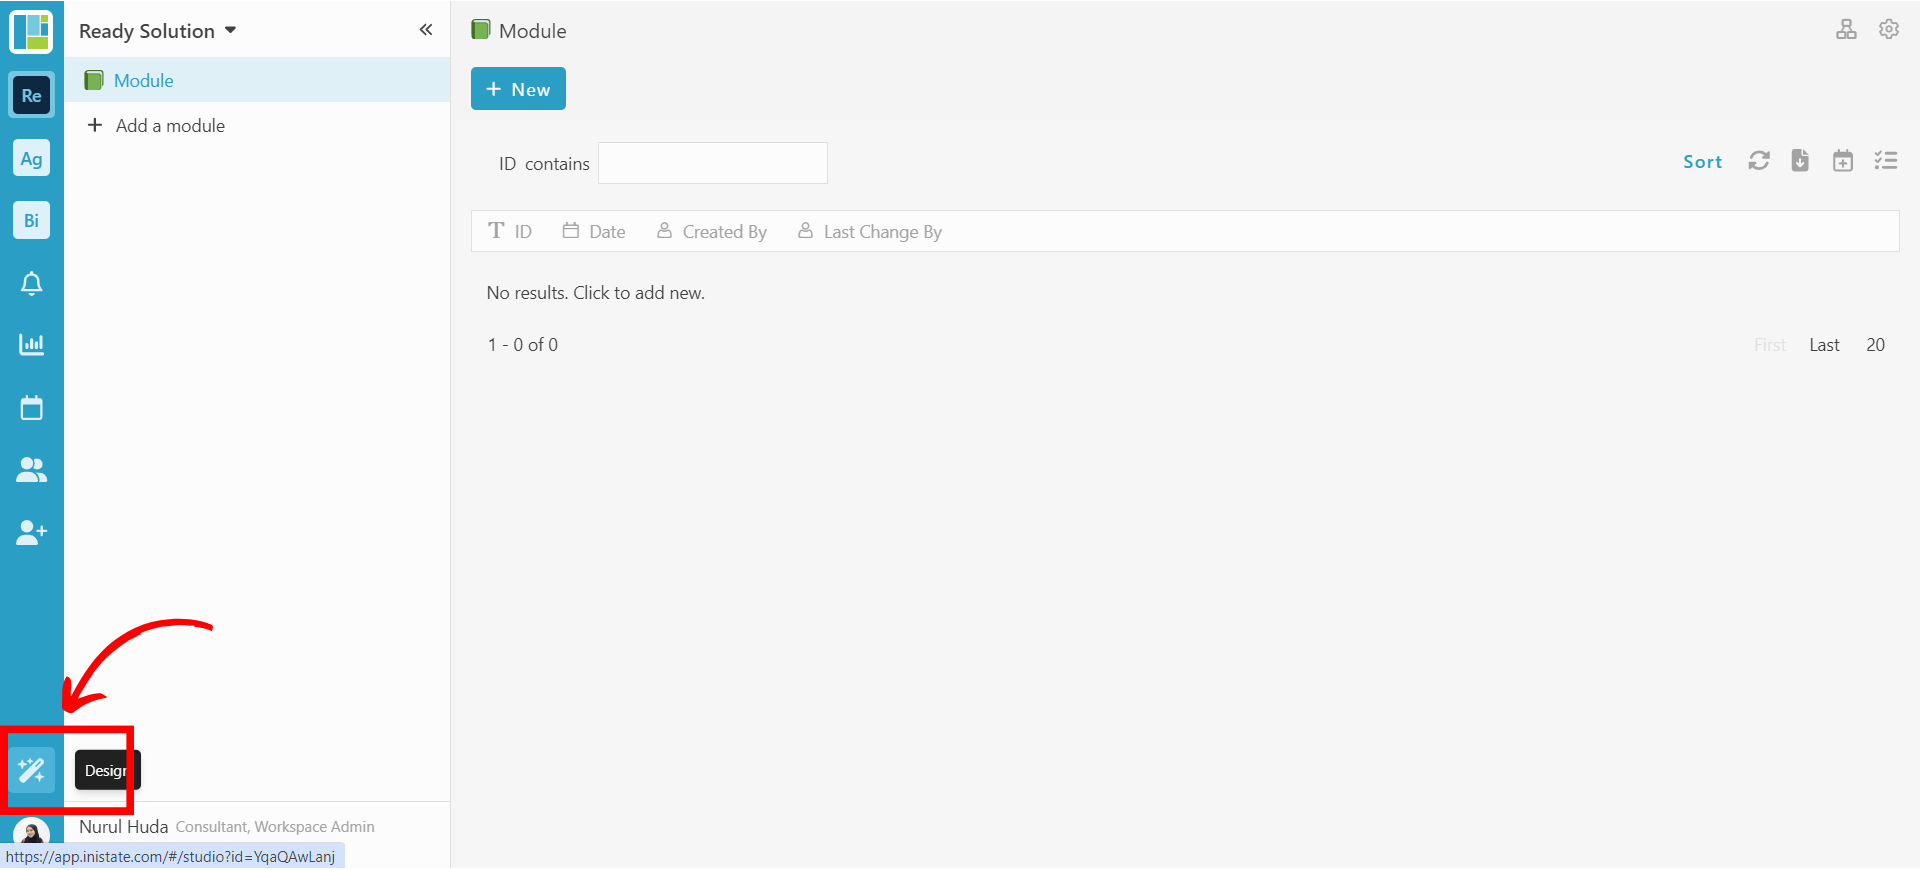
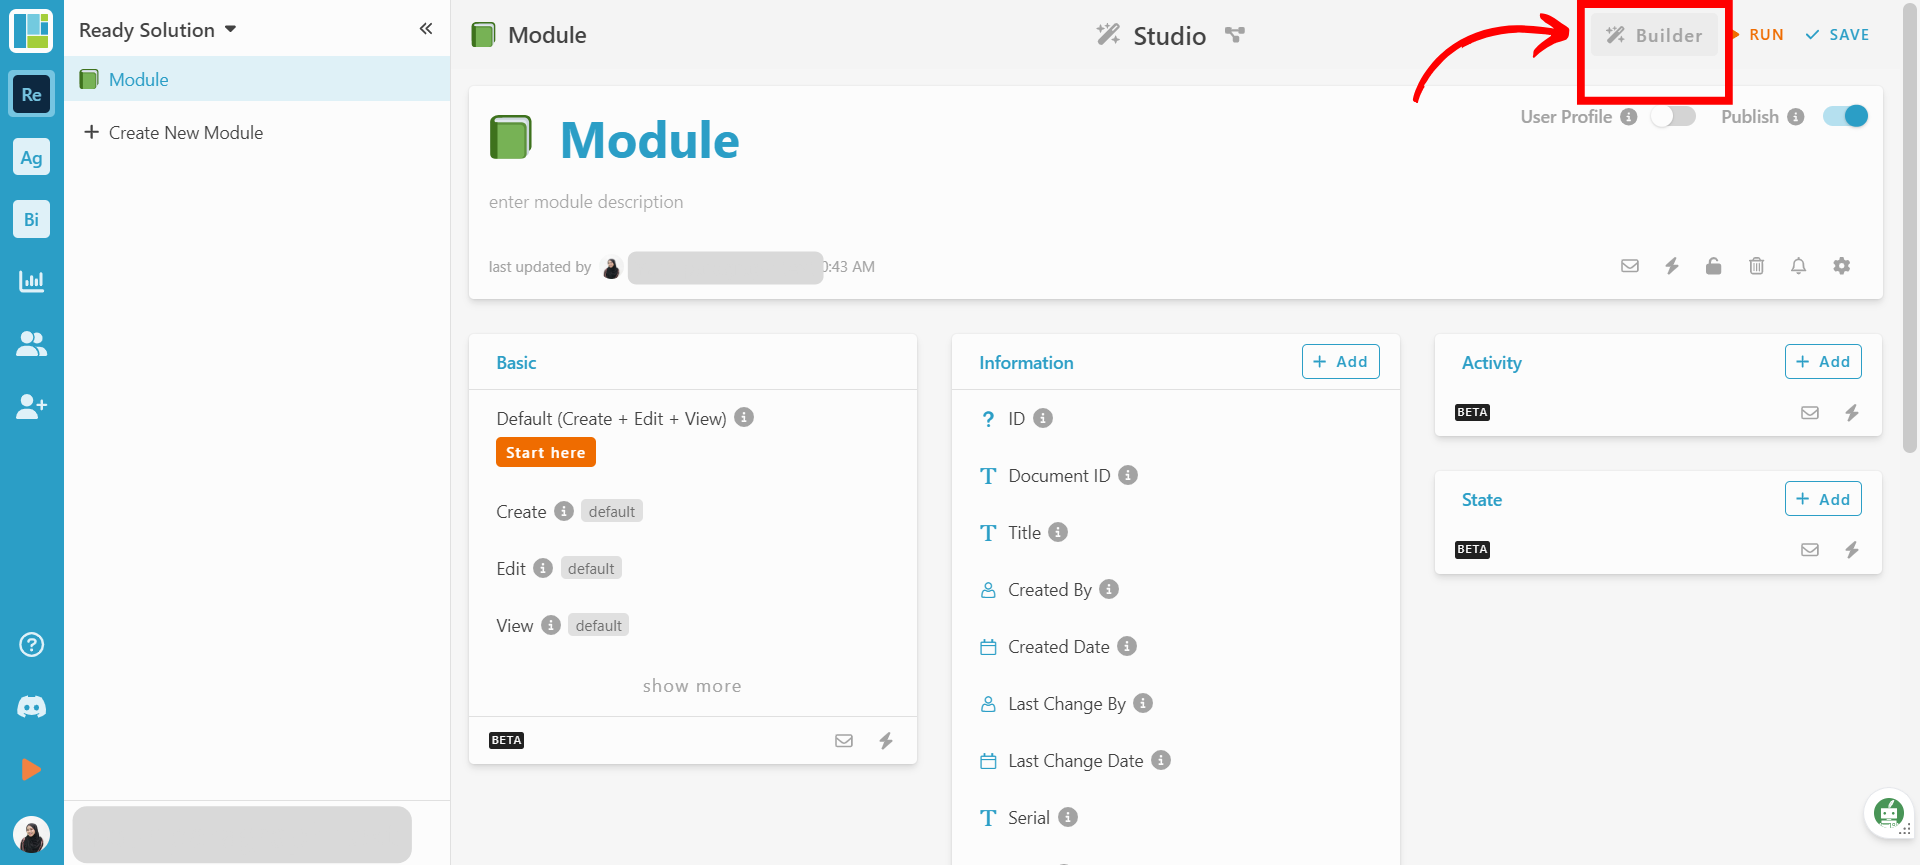
- Access your workspace builder.
-
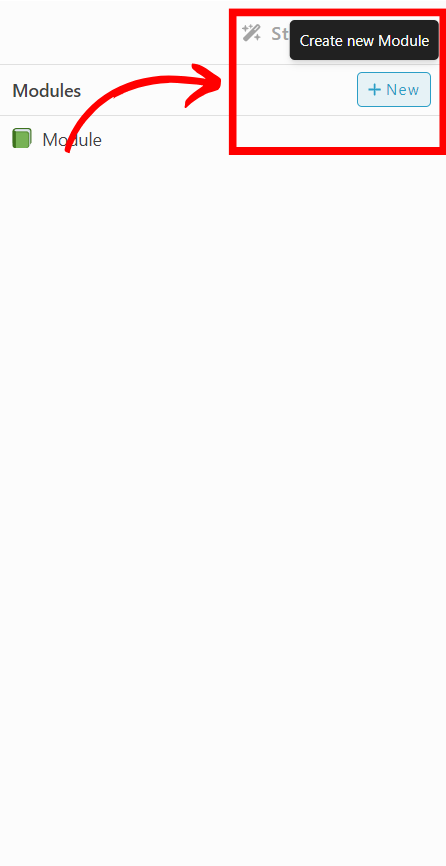
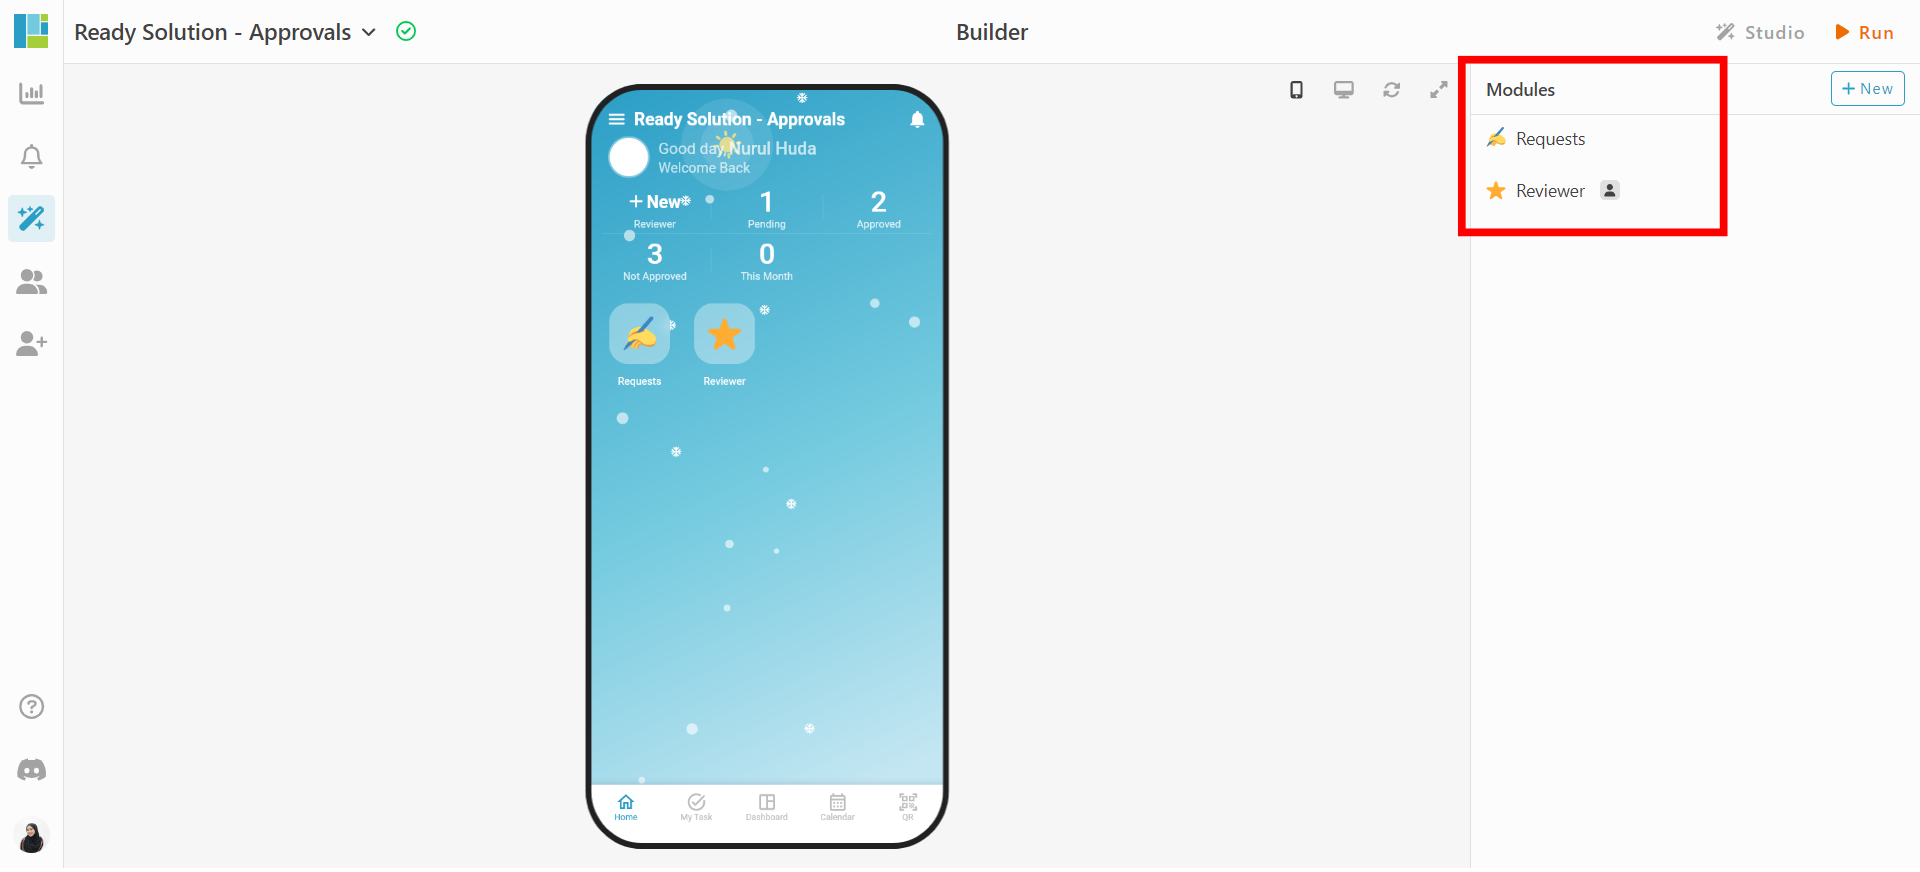
In builder, click “+ New” on top right to add new module.
-
Set a name and emoji for your module. eg : Requests, and Reviewer
-
In builder, select the module and choose information tab, click “+ New” to add new information.
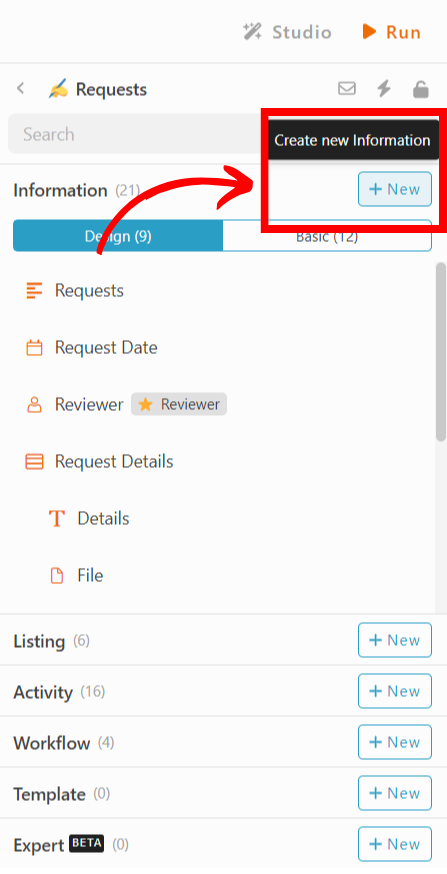
Add Information
1. Module: Reviewer
Add information as below :
- Email : Email
- Text : Name
-
Table : Related Requests
- Module (Requests Module - DocumentId) : Details
- Multiline Text : Requests
- Date : Request Date
- Text : Status
2. Module: Requests
Add information as below :
- Multiline Text : Requests
- Date : Request Date
- User (Reviewer Module - Name) : Reviewer
-
Table : Request Details
- Text : Details
- File : File
- Link : Link
- Text : Detail
- File : File
- Link : Link
- Select ([Pending, Approve, Not Approve]) : Approval
- User (Reviewer Module - Name) : Request by
Add State
-
Select module Requests.
-
Under section workflow
-
Click “+ New” and “+ State”
-
Set State name, color :
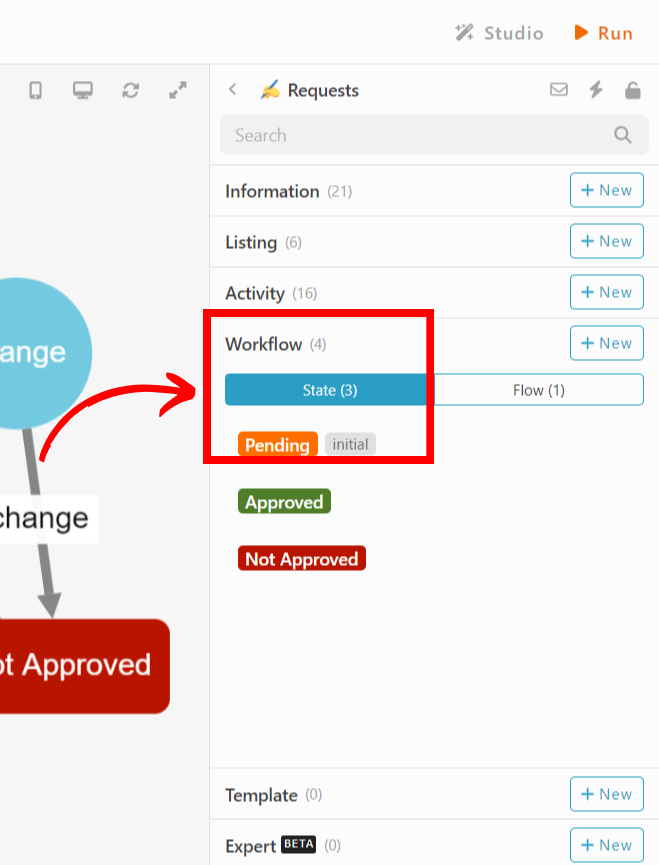
- Pending
- Approved
- Not Approved
Flow
-
Select Module Order Deliveries
-
Under section workflow
-
Click “+ New” and “+ Flow”
-
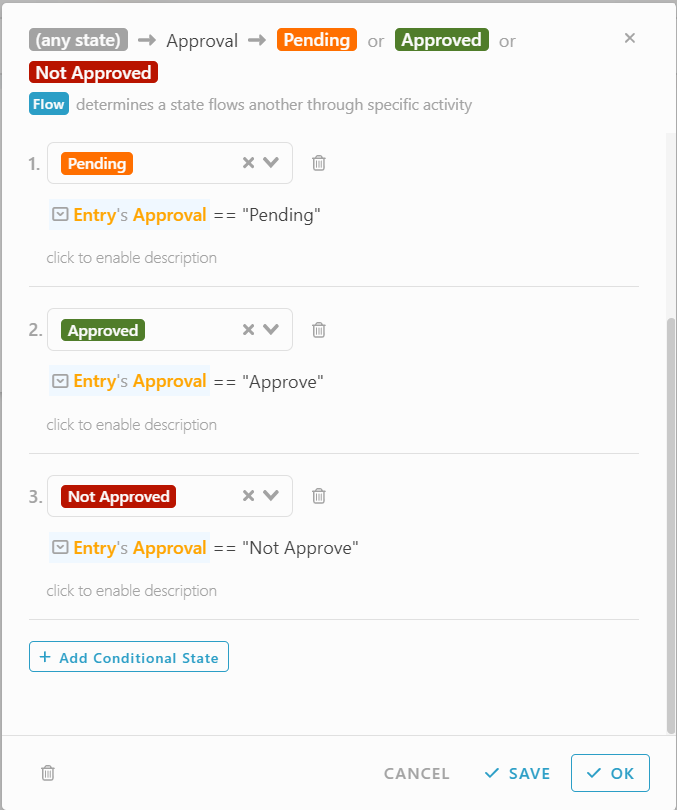
Create a Flow :
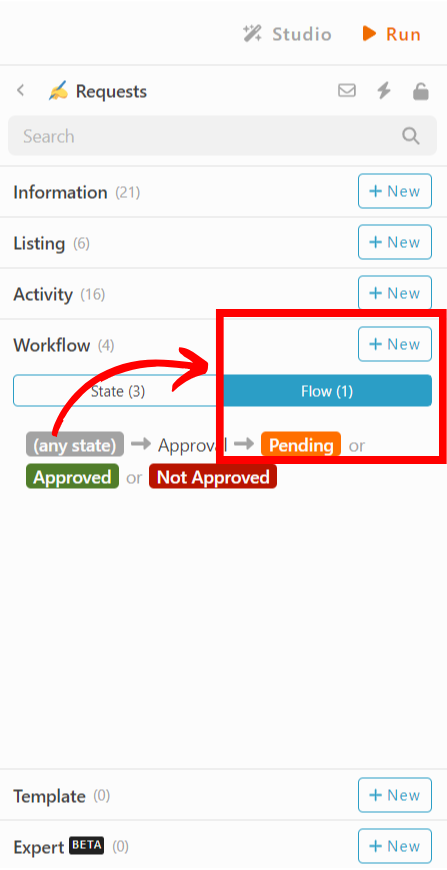
- From state : (any state) → Activity : Approve → Conditional To state : Pending or Approved or Not Approved

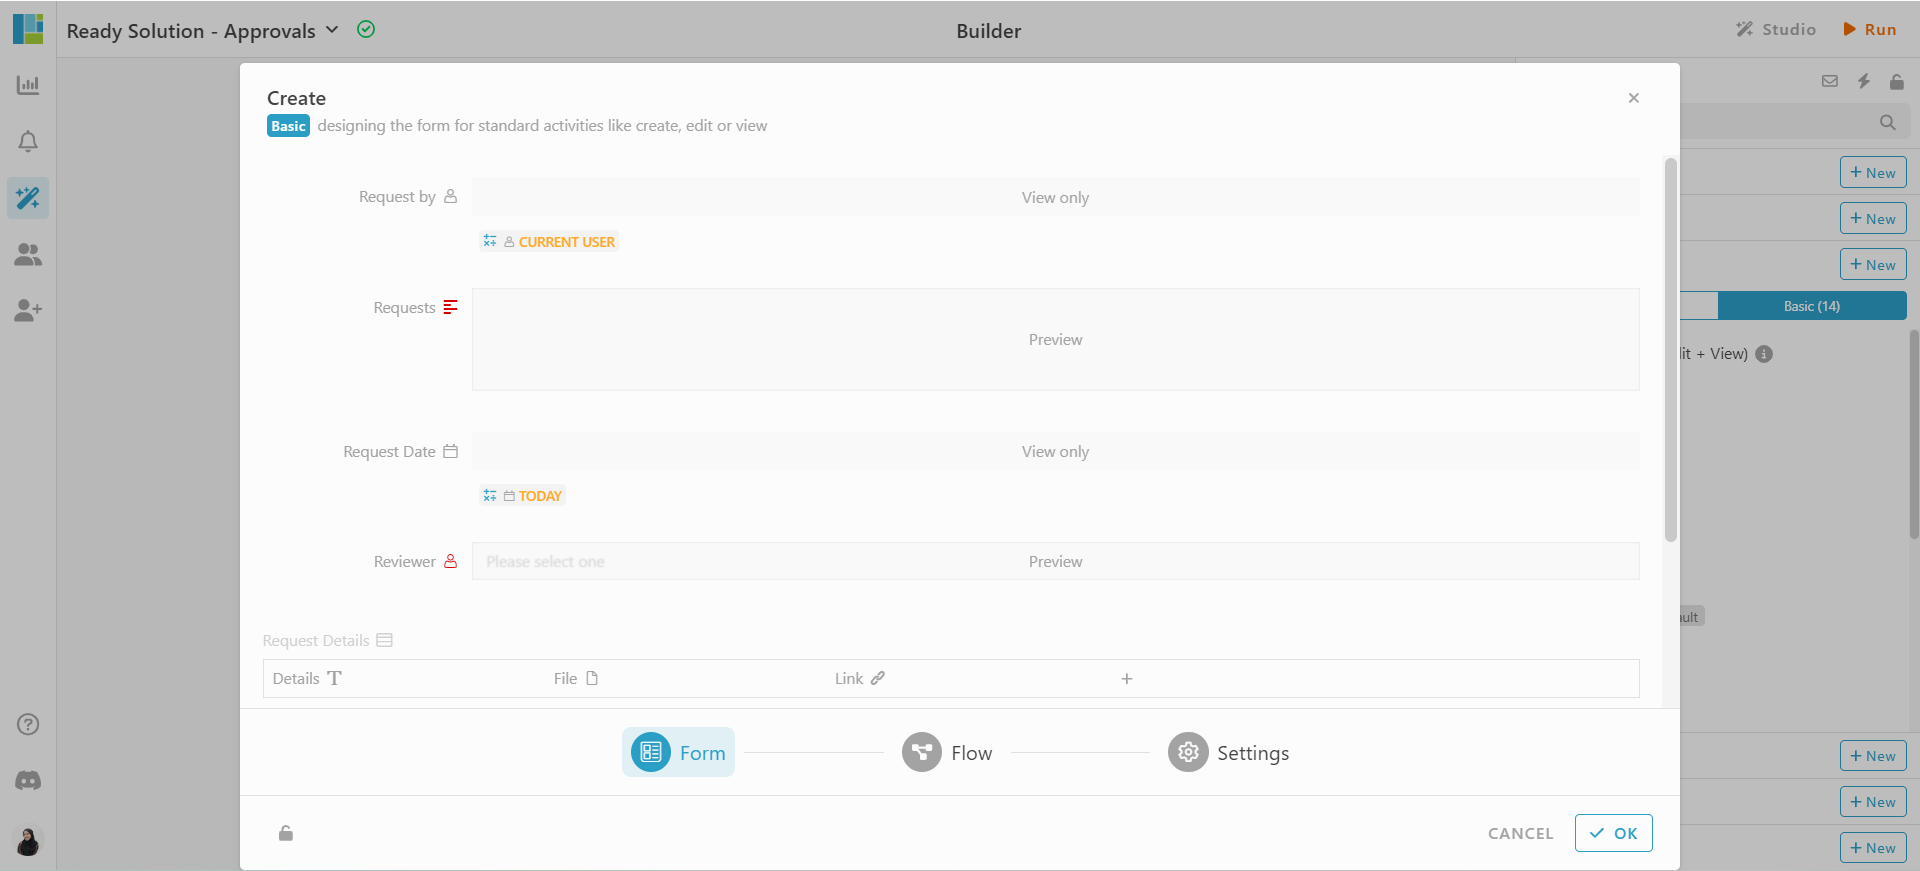
Set Formula
- In Requests module, go to Activity section, click Basic tab. click "Create’ to view form
- Drag all information into the form.
- Hover on information “Request by ”, “Date Time”, and “Percent”, click the “Operation” icon to set formula.
- For Information “Text” : To set visible only after “Button” information got selected.
On visible column insert formula : #Form#Button
Automation
Condition : ----To add new row to the Related Requests Table in Reviewer Module from Requests Module
-
Select Module Request
-
Go to Activity Section.
-
Click Basic and select “Create” form
-
Add new automation by click the “
 new automation”.
 -
Click “Do After”
-
Drag Action block
-
Add Actions, click “+ Add Action” and choose “Find”
*Variable Name : Reviewer Found
*Module : Reviewer
*Filter : Name is #Entry#Requestby#Name
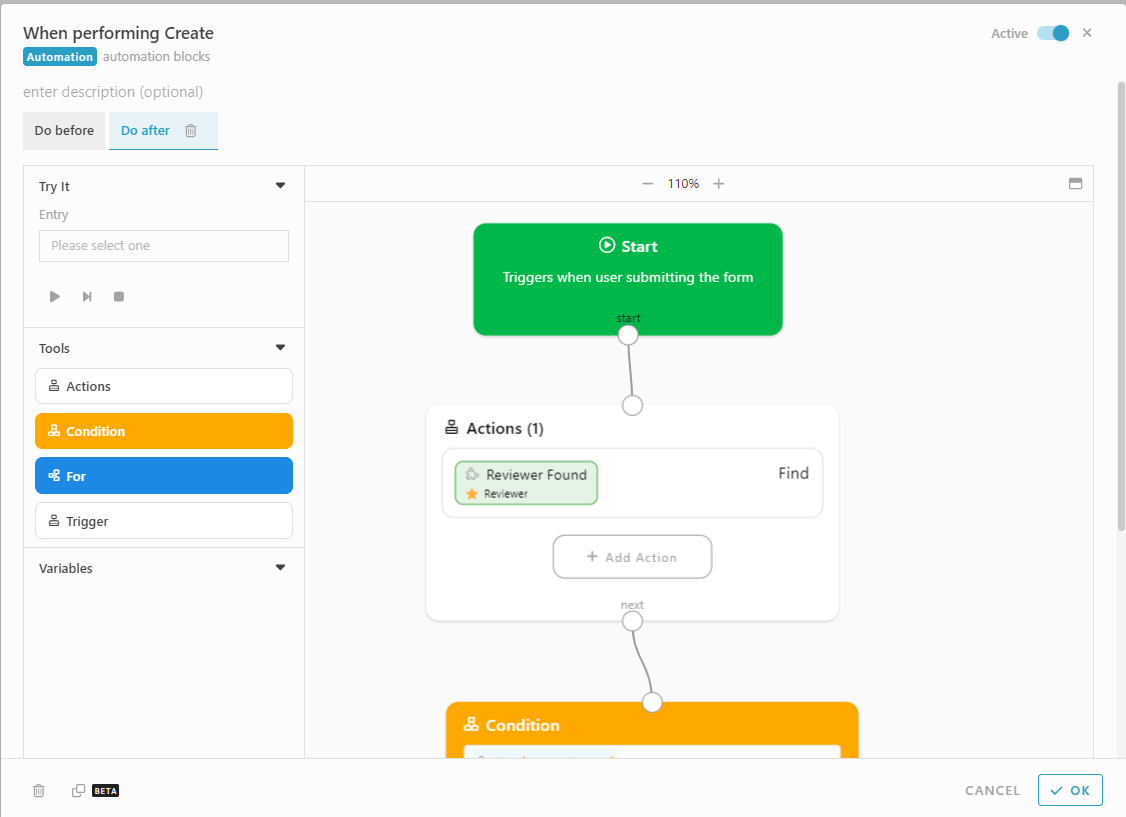
-
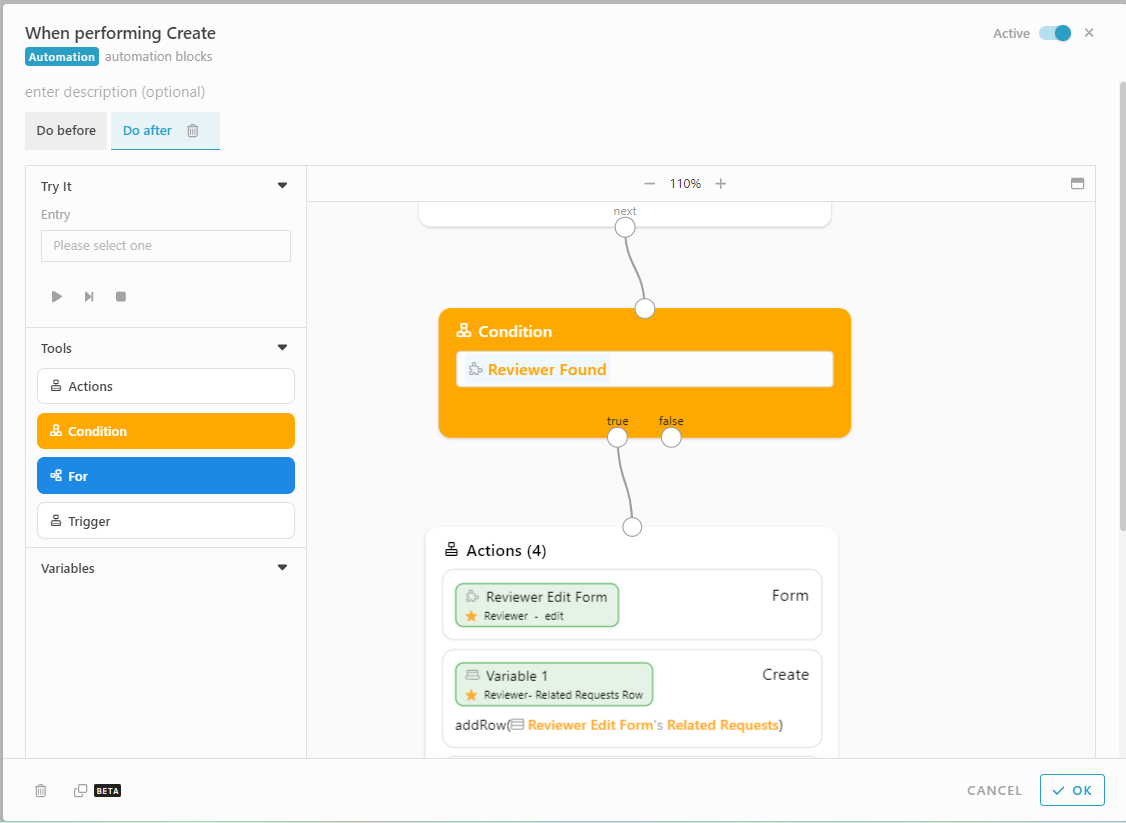
Add Condition, connect with “next” from Actions (1)
#ReviewerFound -
Add Actions, connect with “true” from Conditions
-
Actions (1) : Form
*Variable Name : Reviewer Edit Form
*Module : Reviewer
*Activity : Edit
*Entry : #ReviewerFound -
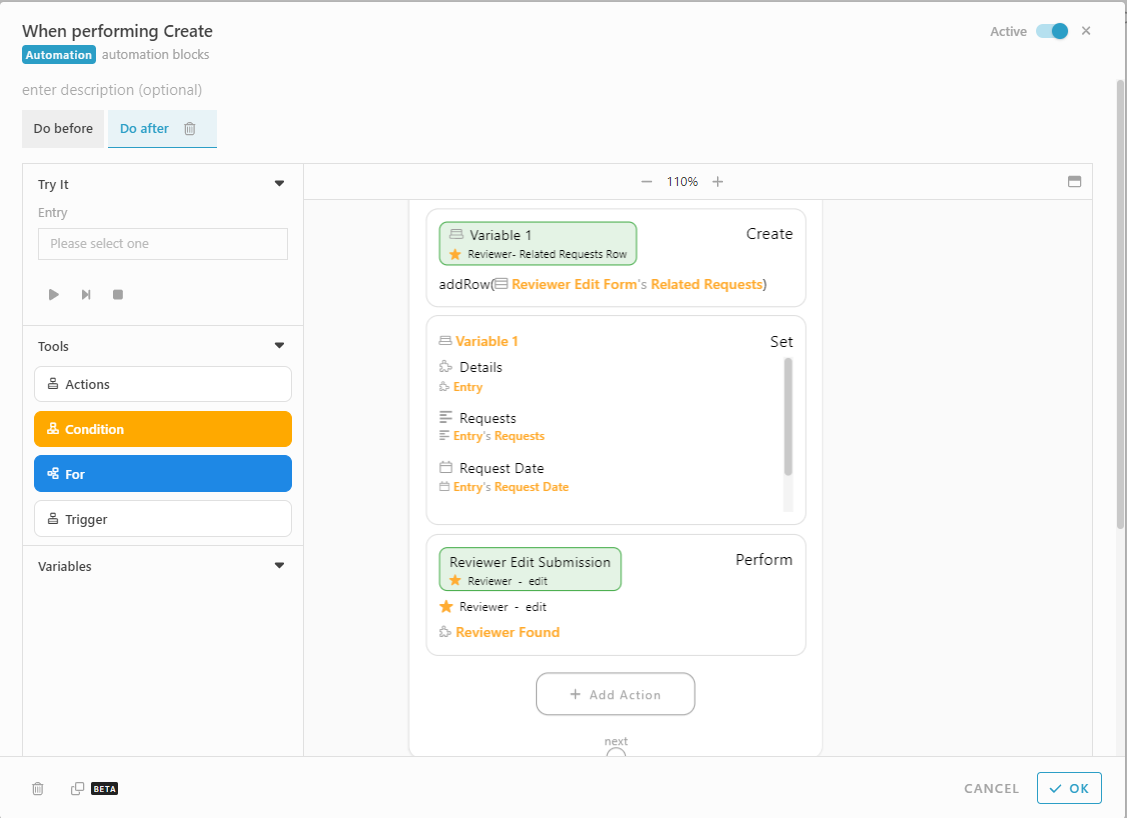
Actions (2) : Create
*Variable Name : Variable 1
*Value : addRow(#ReviewerEditForm#RelatedRequests)
-
Actions (3) : Set
*Variable Name : Variable 1
*Click Expand Property -
Actions (4) : Perform
*Variable Name : Reviewer Edit Form
*Module : Reviewer
*Activity : Edit
*Entry : #ReviewerFound
*Form : #ReviewerEditForm
Congratulations!!!![]()
![]() You have successfully created an Approvals module.
You have successfully created an Approvals module.
For more template and ready solution.
Try INISTATE for FREE now.
Sign up at https://inistate.com
Related topic : Ready Solution - Approval