Hi ![]()
Today, I would like to share with you how to configure a Vehicle Inspections module in INISTATE.
The Vehicle Inspection module allows you to streamline vehicle inspections, ensure safety compliance, and generate detailed inspection reports.
Problem
Oversight important Inspection details - When it comes to inspection, every aspect and details is important to ensure everything is safe and sound especially for vehicle inspection. This problem usually happen due to the human mistakes when they oversight it during manual vehicle inspection.
Objective
To ensure meticulous oversight - To ensure every details and information for the inspection will be taken care off and minimalize the mistakes during inspection.
Step & Configuration
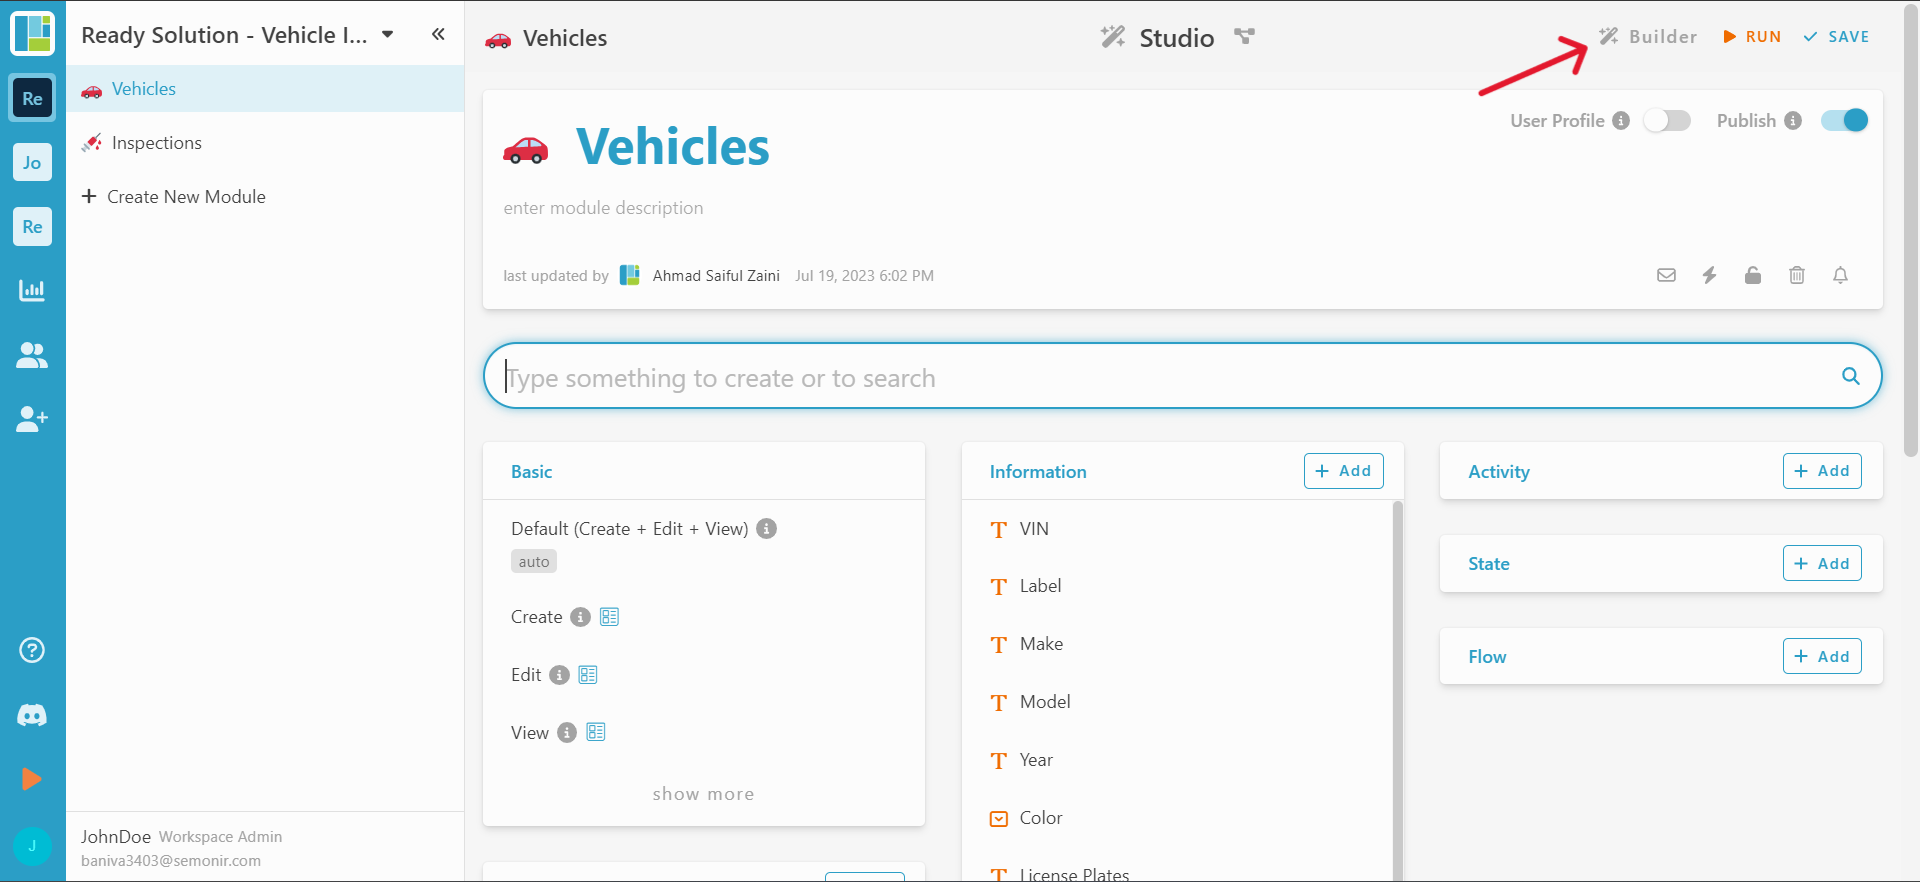
-
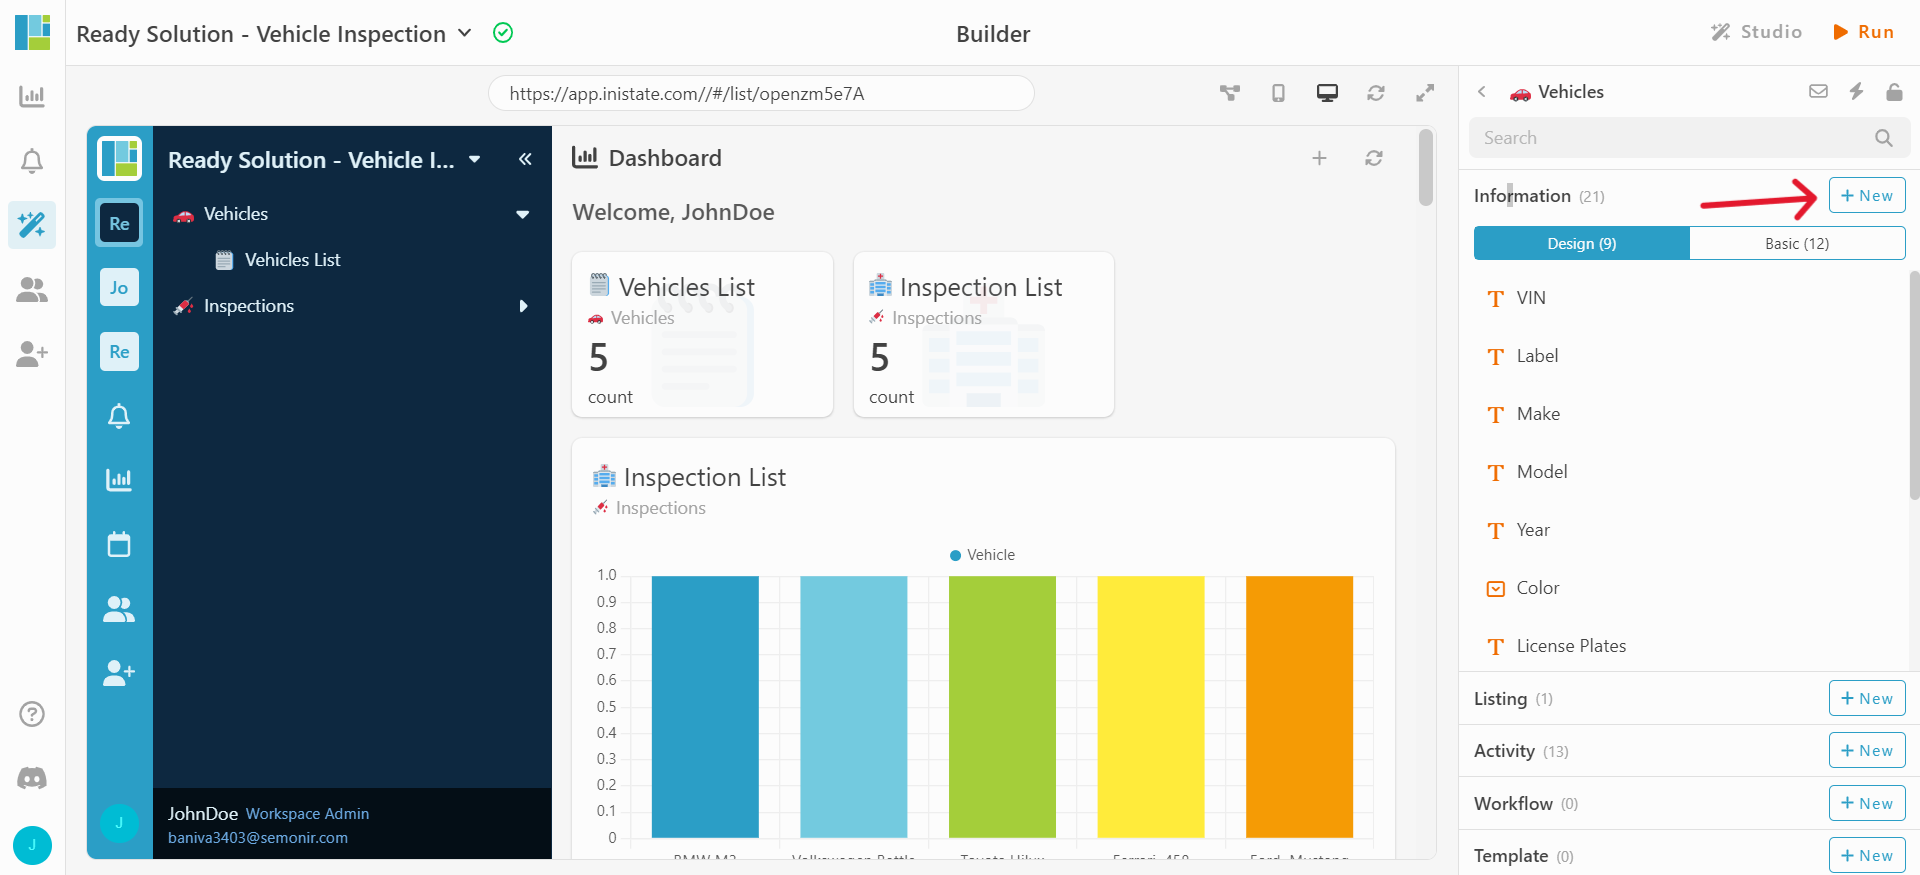
Access your workspace builder.
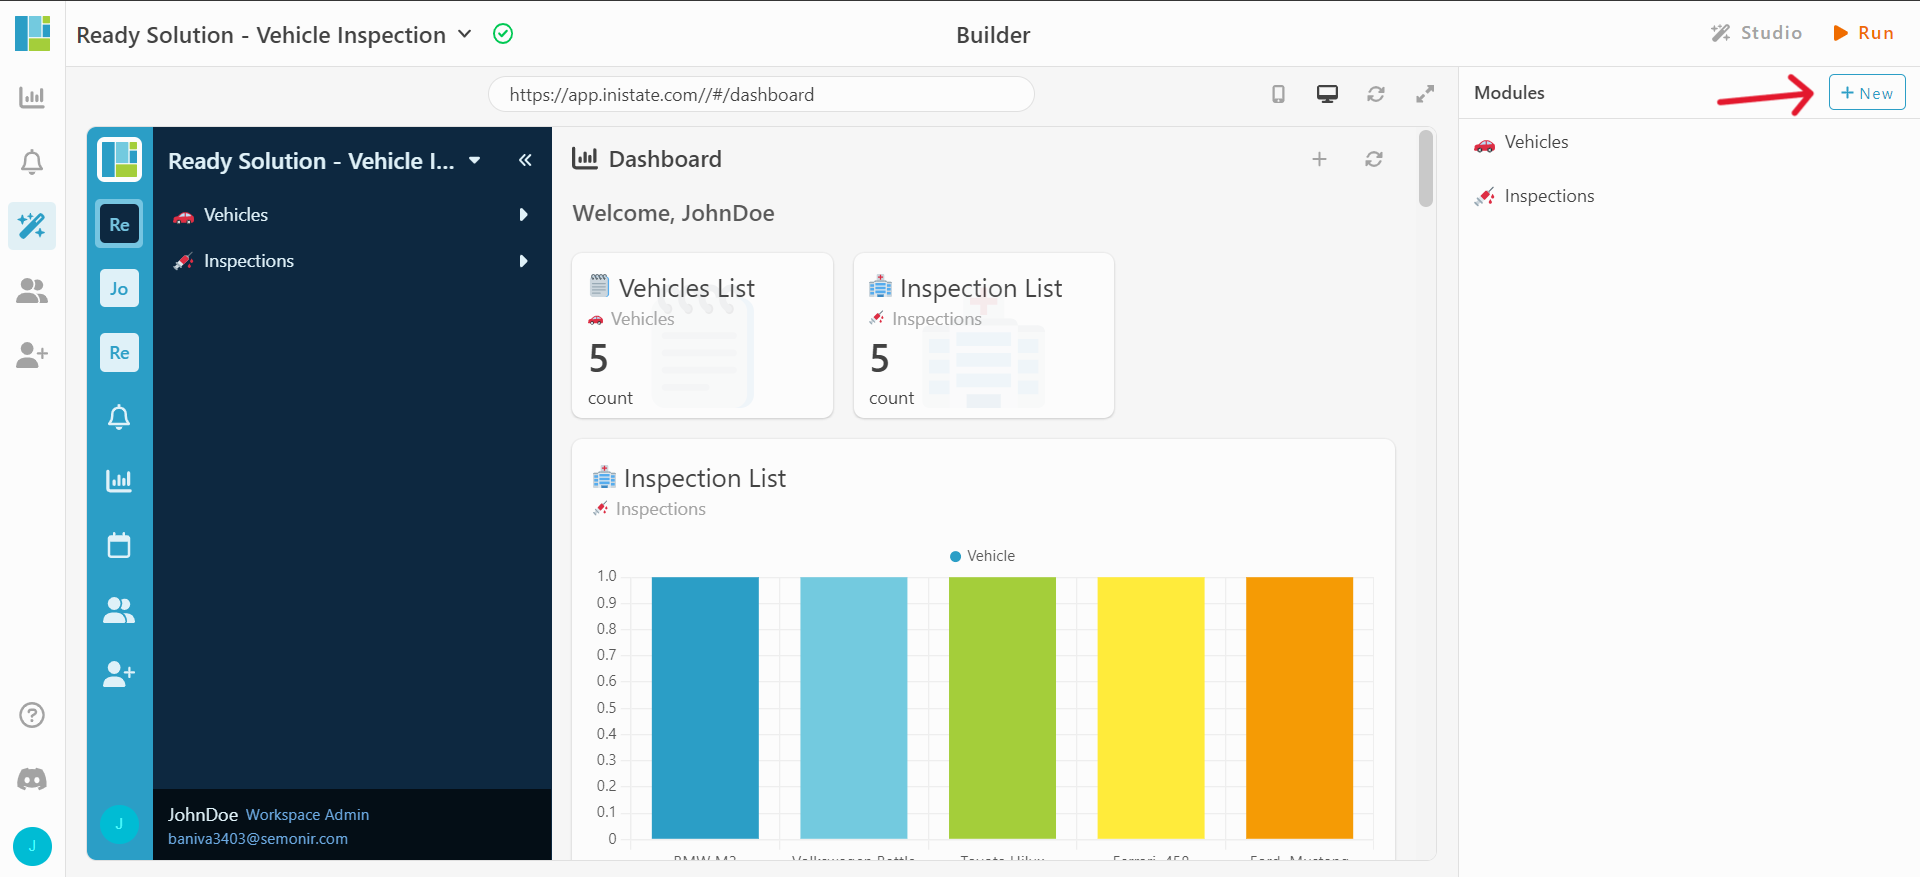
-
In builder, create 2 new module by click the “+ New” on the top right.
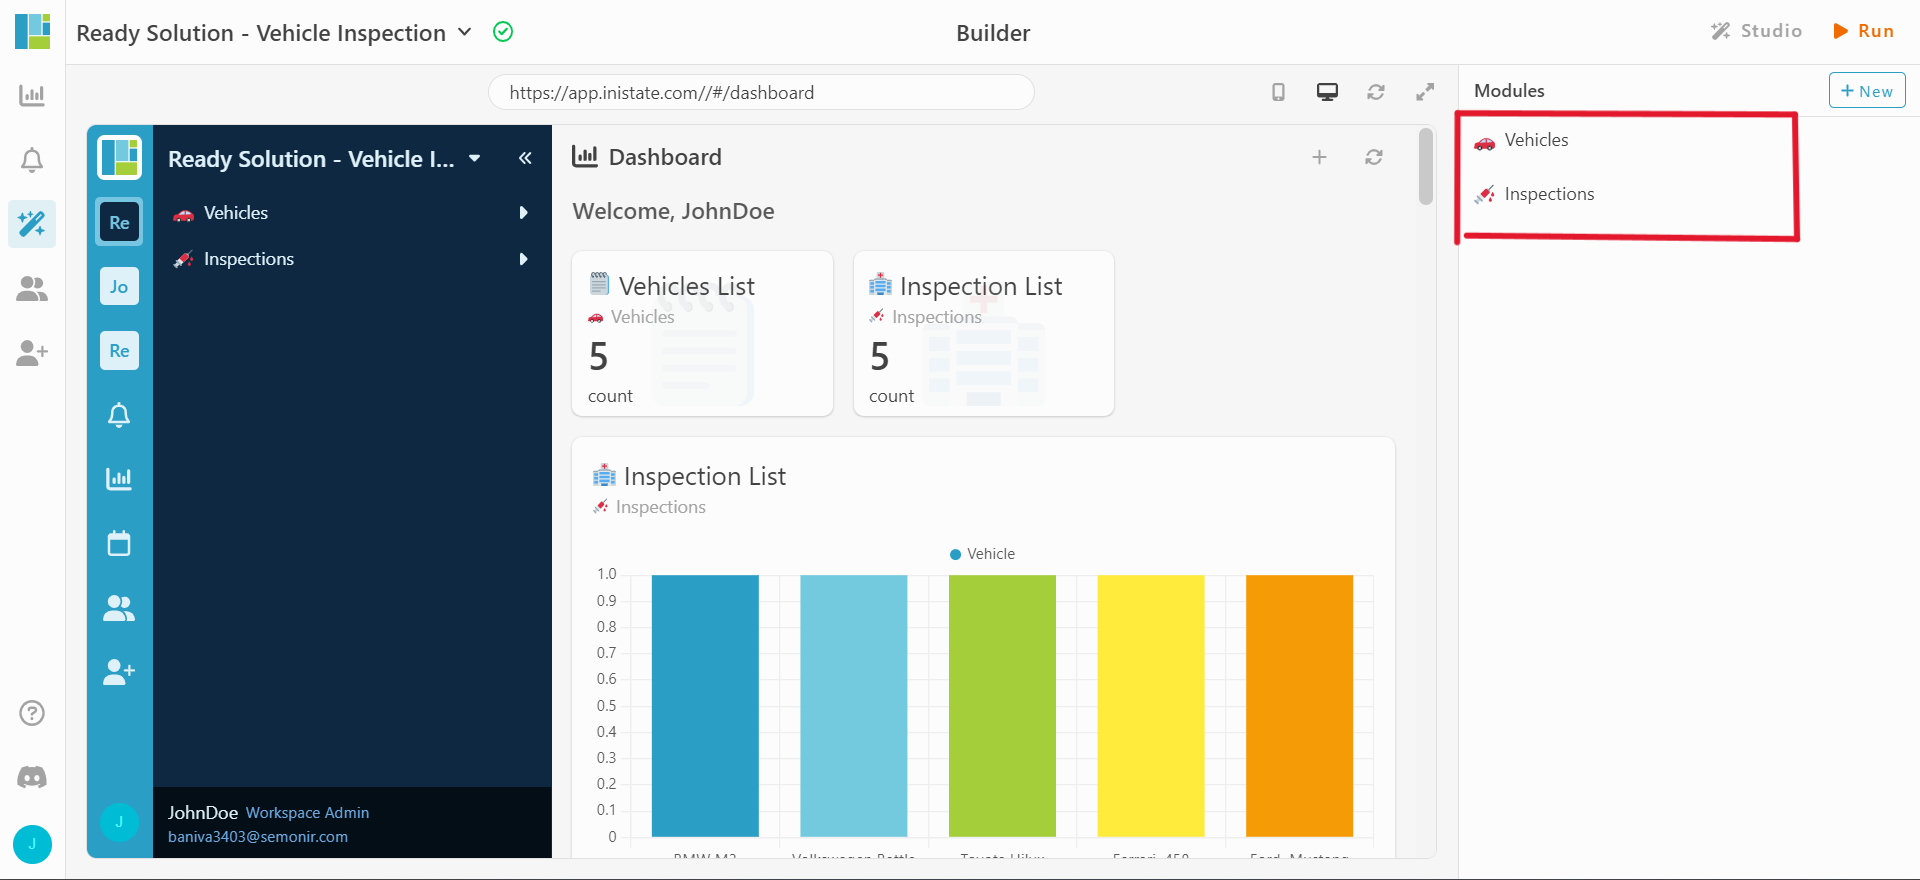
-
Set a name and emoji for the modules. eg : Vehicles and Inspections
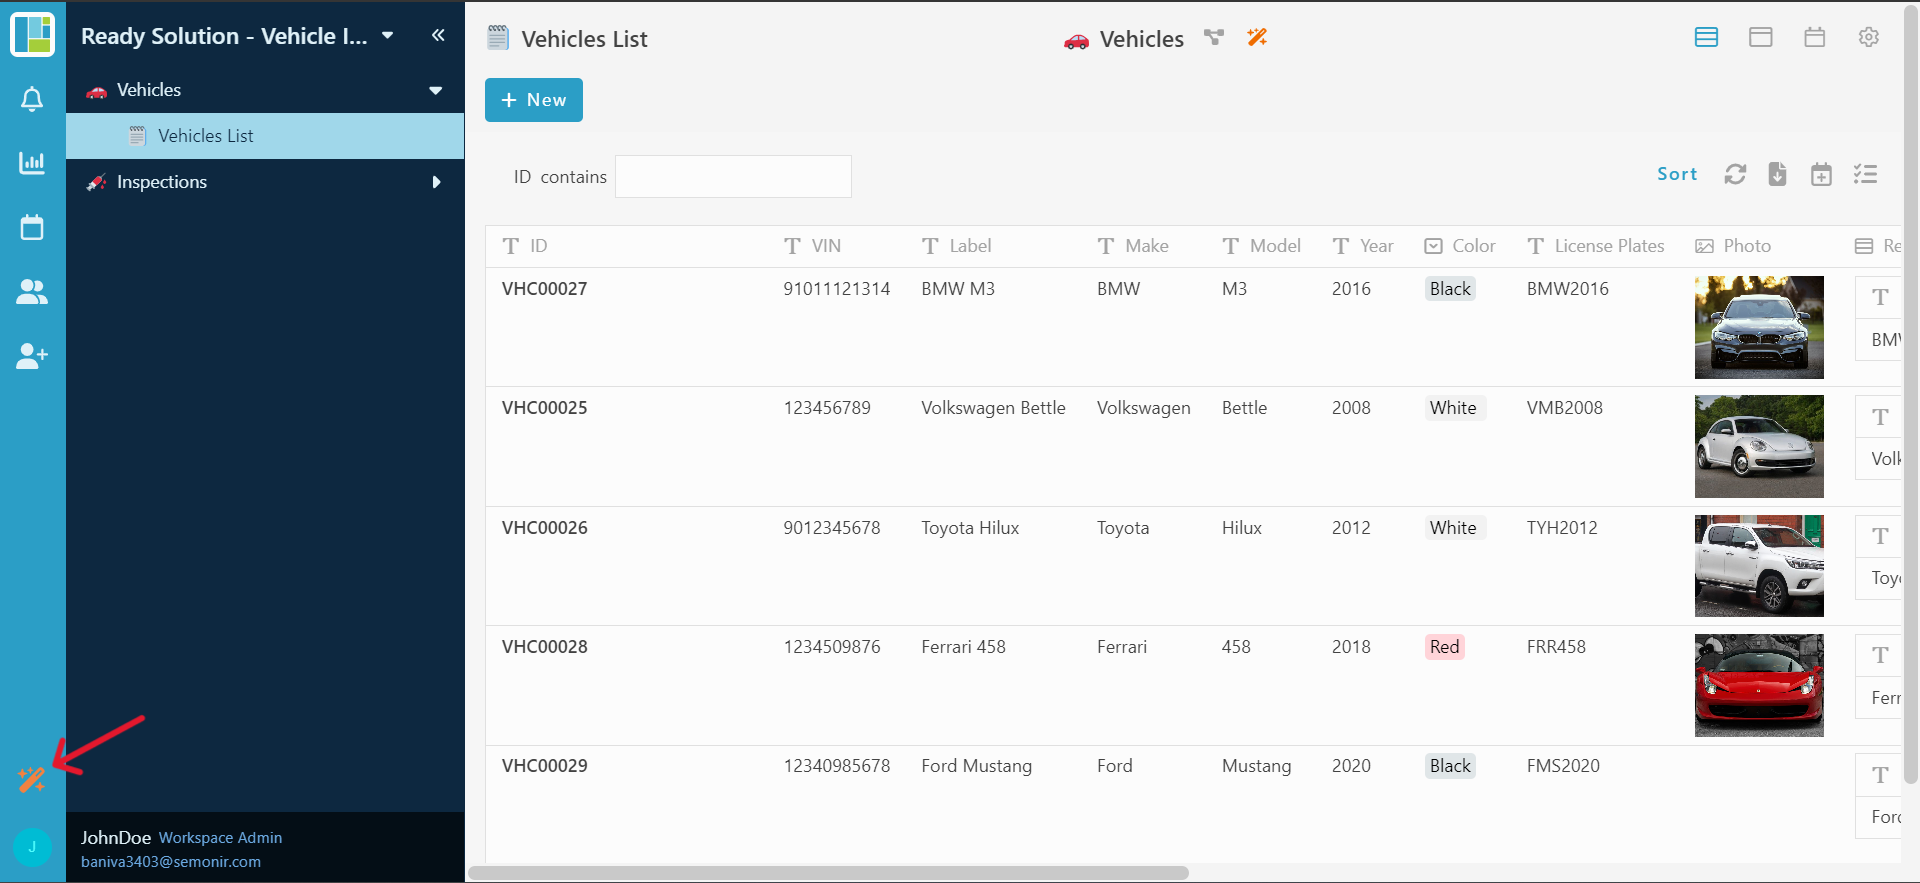
Add Information
Module : Vehicles
-
Under module ‘Vehicles’ go to information section.
-
Click ‘+ New’ to add new information.
-
Add a few information :
-
VIN - Text
-
Label - Text
-
Make - Text
-
Model - Text
-
Year - Text
-
Color - Select
*Green
*Yellow
*Orange
*Red
*Violet
*Blue
*White
*Black -
License Plates - Text
-
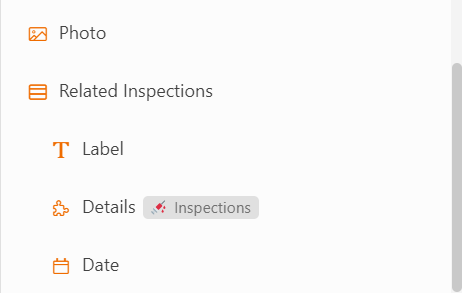
Photo - Image
-
Related Inspections - Table
*Label - text
*Details-Module
*Module : Inspections
*Display Information : DocumentID -
Date - Date

Modules : Inspections
-
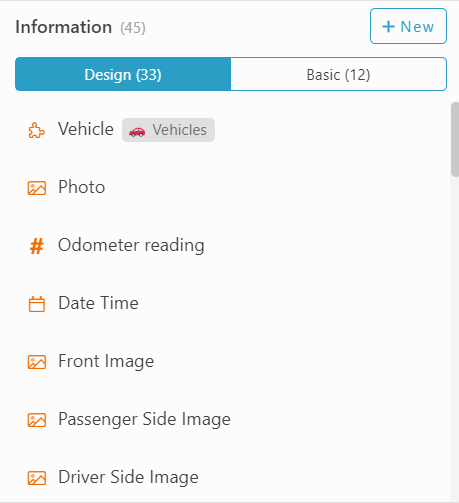
Under modules ‘Inspections’, select information section.
-
Click “+ New” to add new information.
-
Add a few information.
-
Vehicles - Modules
*Modules : Vehicles
*Display information : Label -
Photo - Image
-
Odometer reading - Integer
-
Date Time - Date Time
-
Front Image - Image
-
Passenger Side Image - Image
-
Driver Side Image - Image
-
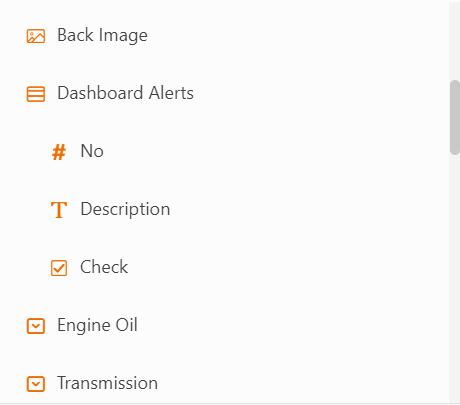
Back Image - Image’
-
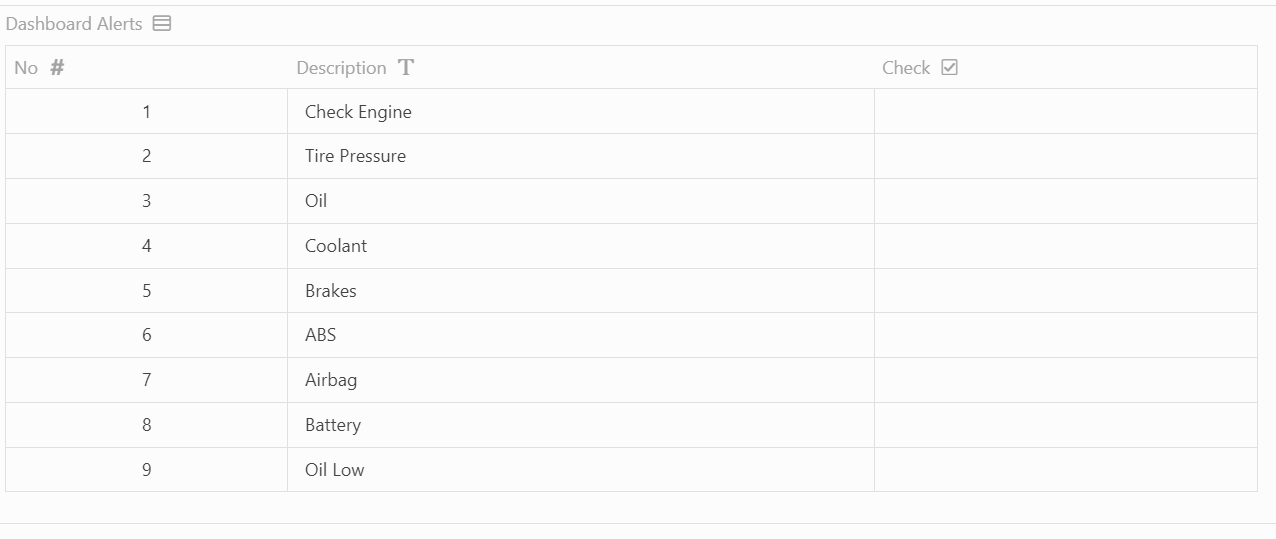
Dashboard Alert - Table
*No - Integer
*Description - Text
*Check - YesNo -
Engine oil - Select (Enable Radio button)
*Requires Attention
*OK
*Filled
*N/A -
Transmission - Select (Enable Radio button)
*Requires Attention
*OK
*Filled
*N/A -
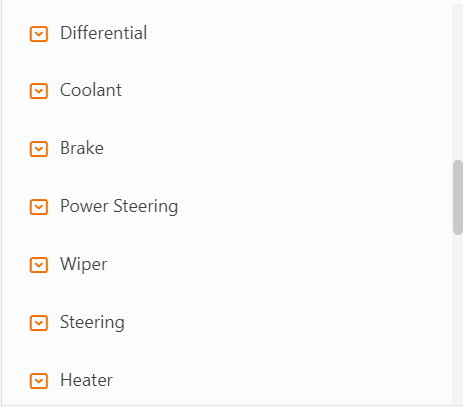
Differential - Select (Enable Radio button)
*Requires Attention
*OK
*Filled
*N/A -
Coolant - Select (Enable Radio button)
*Requires Attention
*OK
*Filled
*N/A -
Brake - Select (Enable Radio button)
*Requires Attention
*OK
*Filled
*N/A -
Power Steering - Select (Enable Radio button)
*Requires Attention
*OK
*Filled
*N/A -
Wiper - Select (Enable Radio button)
*Requires Attention
*OK
*Filled
*N/A -
Steering - Select (Enable Radio button)
*Requires Attention
*Future Attention
*OK -
Heater - Select (Enable Radio button)
*Requires Attention
*Future Attention
*OK -
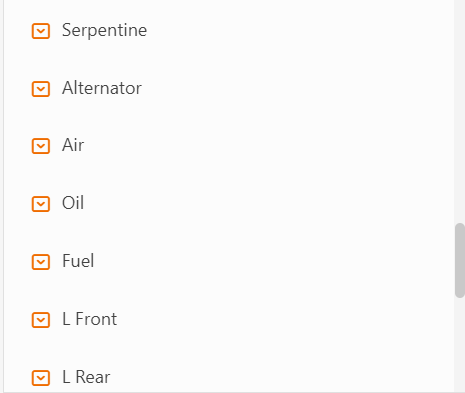
Serpentine - Select (Enable Radio button)
*Requires Attention
*Future Attention
*OK -
Alternator - Select (Enable Radio button)
*Requires Attention
*Future Attention
*OK -
Air - Select (Enable Radio button)
*Requires Attention
*Future Attention
*OK -
Oil - Select (Enable Radio button)
*Requires Attention
*Future Attention
*OK -
Fuel - Select (Enable Radio button)
*Requires Attention
*Future Attention
*OK -
L Front - Select (Enable Radio button)
*Requires Attention
*Future Attention
*OK -
L Rear - Select (Enable Radio button)
*Requires Attention
*Future Attention
*OK -
R Front - Select (Enable Radio button)
*Requires Attention
*Future Attention
*OK -
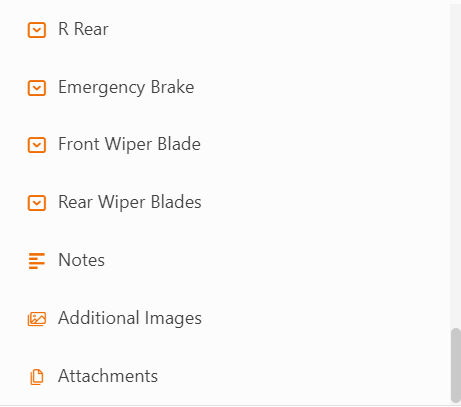
R Rear - Select (Enable Radio button)
*Requires Attention
*Future Attention
*OK -
Emergency Brake - Select (Enable Radio button)
*Requires Attention
*Future Attention
*OK -
Front Wiper Blade - Select (Enable Radio button)
*Requires Attention
*Future Attention
*OK -
Rear Wiper Blade - Select (Enable Radio button)
*Requires Attention
*Future Attention
*OK -
Notes - Multiline Text
-
Additional Images - Images
-
Attachment - Files
Set Formula
Module : Vehicles
-
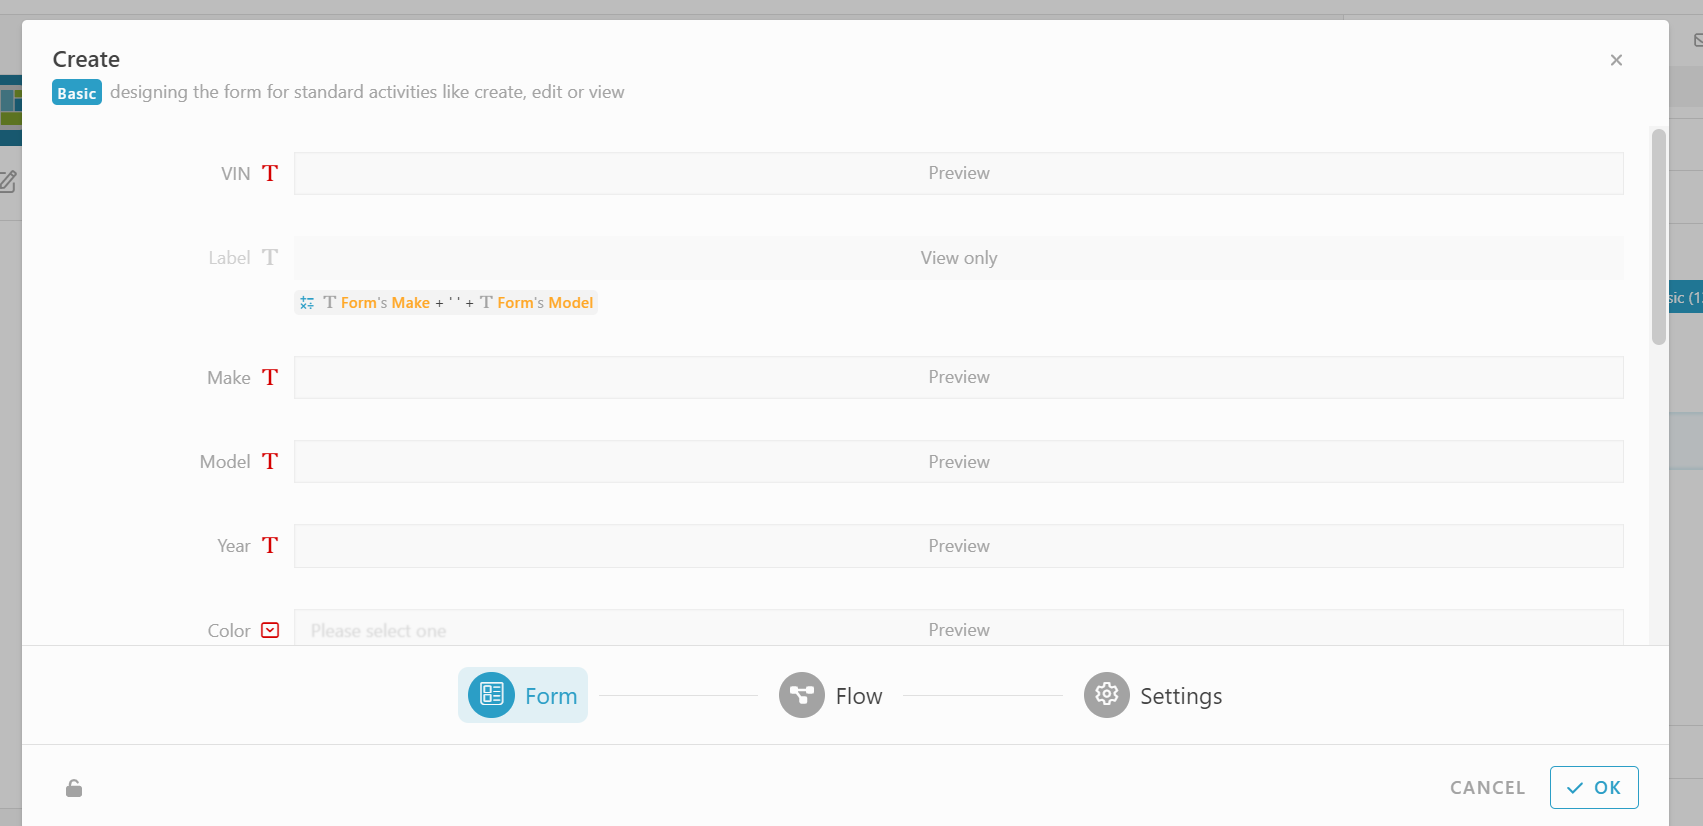
Under module Vehicles, go to Activity section, click “Basic” Tab and click “Create” to view form.
-
Customize the form by drag and drop all the information added.
-
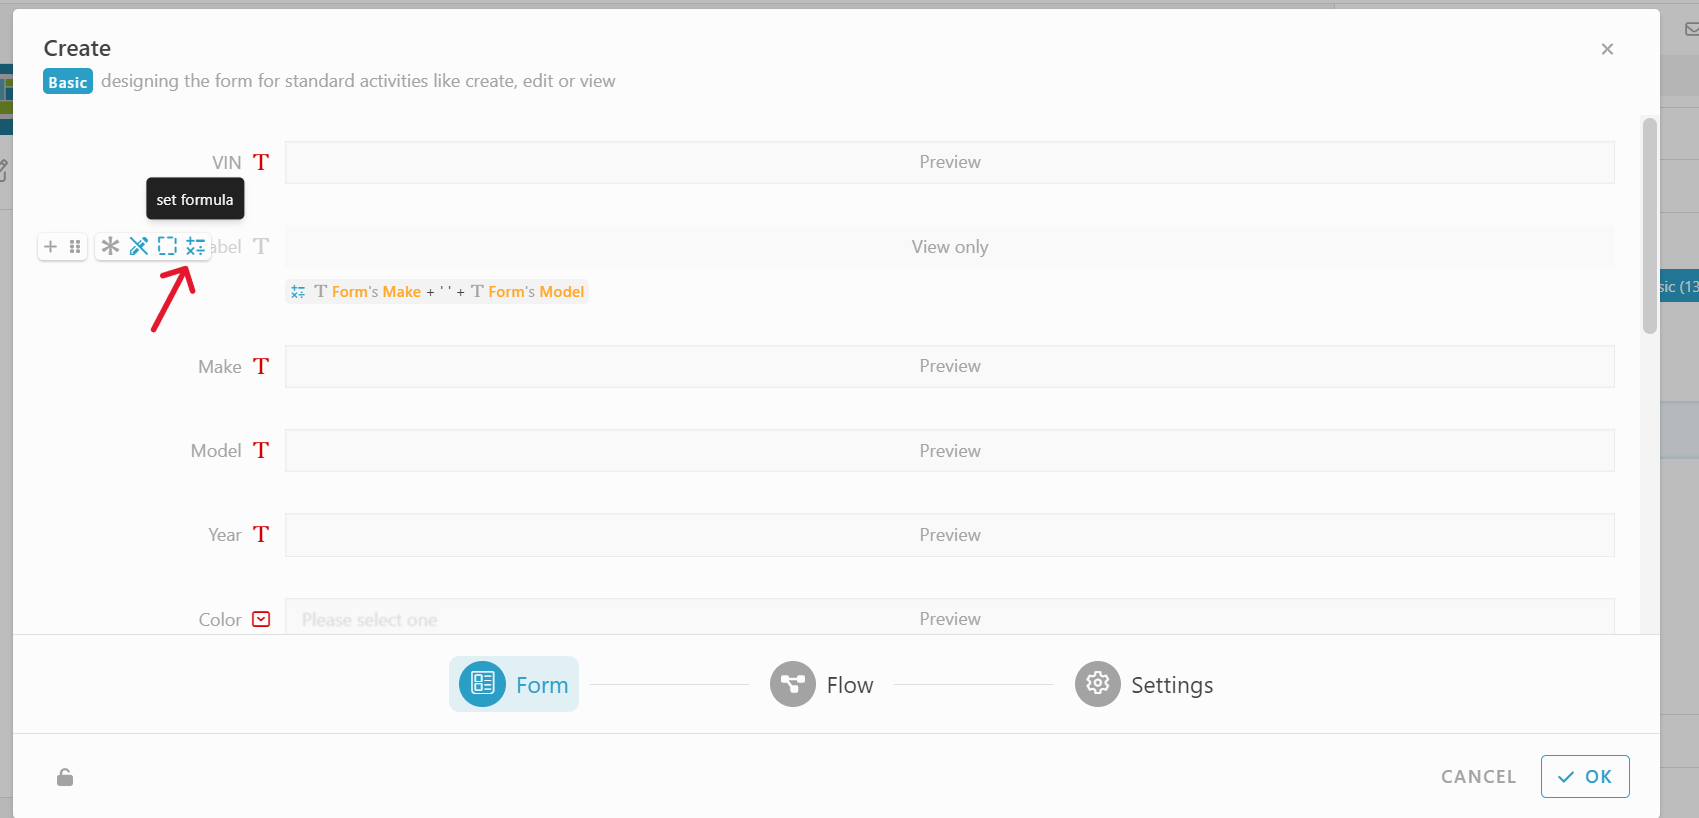
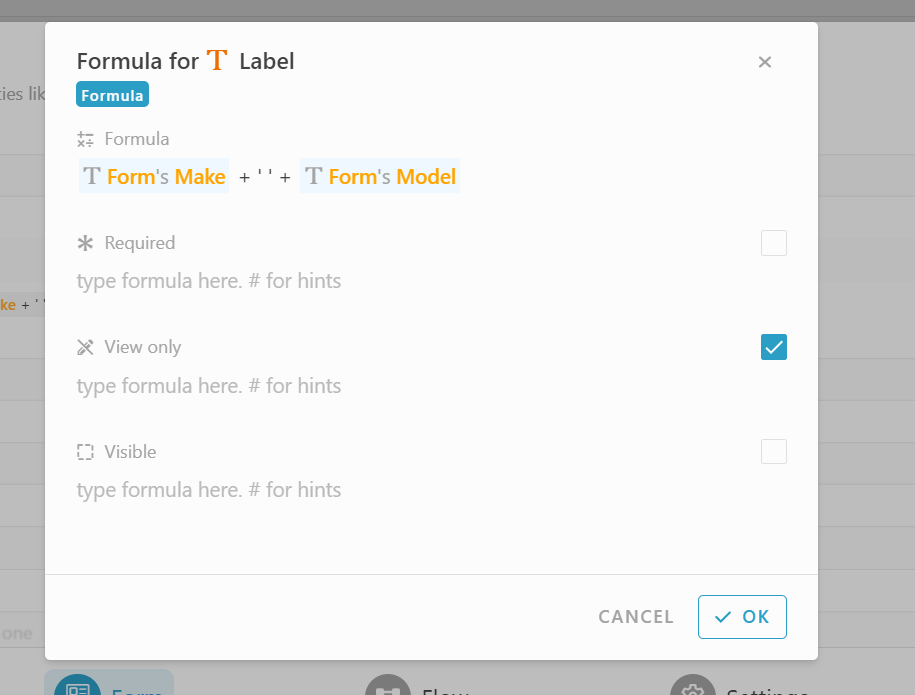
Hover on the information ‘Label’, click “Operations” icon to set formula.
-
In formula column, insert : #Form#Make + ’ ’ + #Form#Model
Modules : Inspections
-
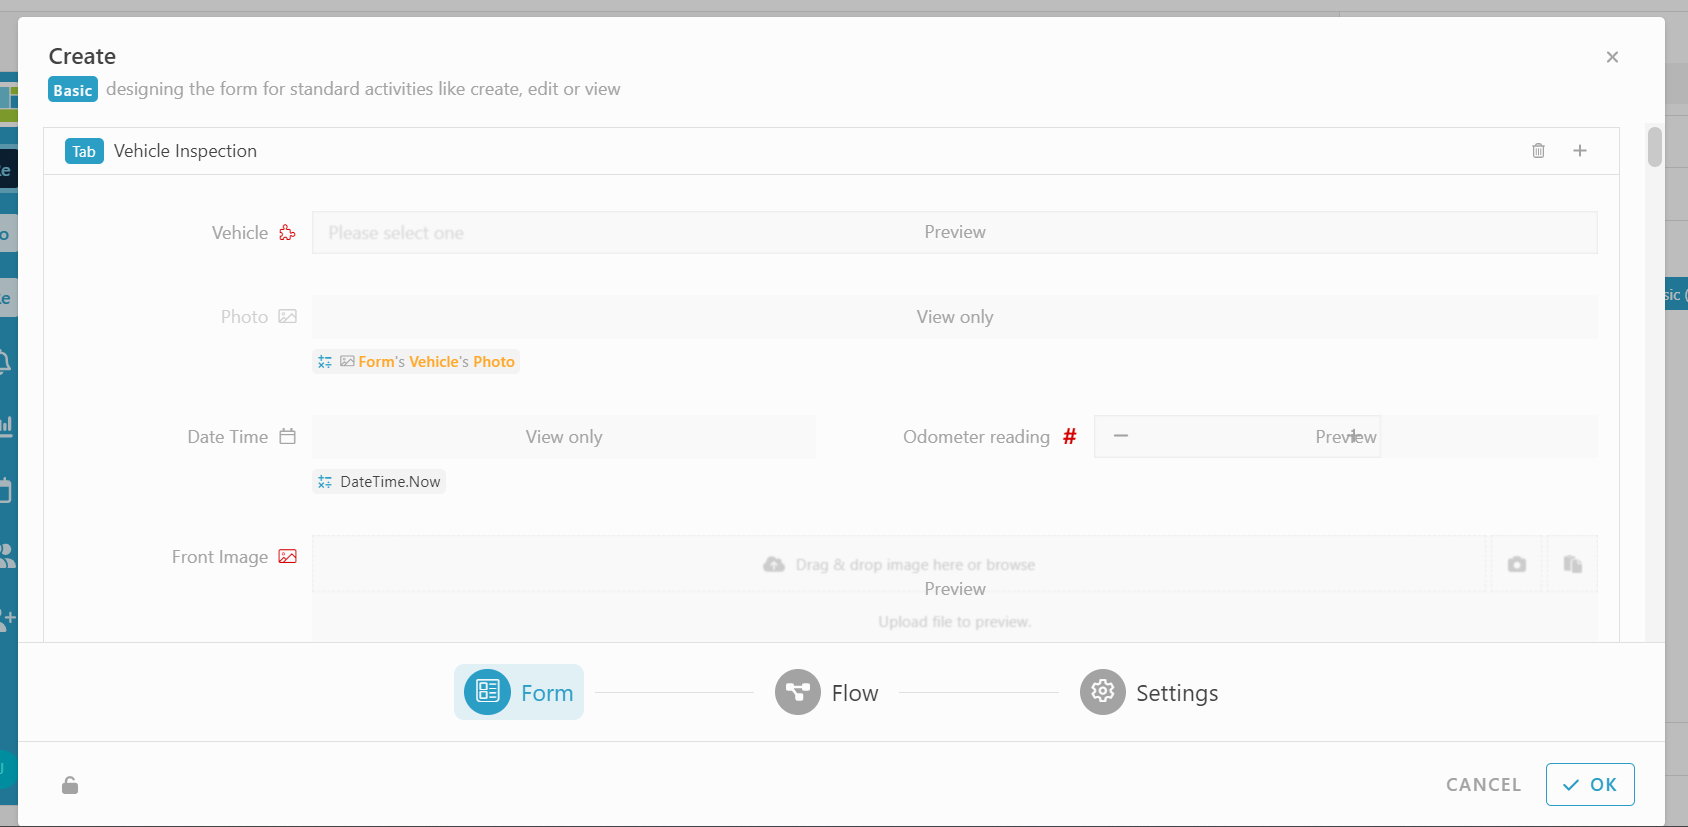
Under module Inspections, go to Activity section, click “Basic” Tab and click “Create” to view form.
-
Customize the form by drag and drop all the information added.
-
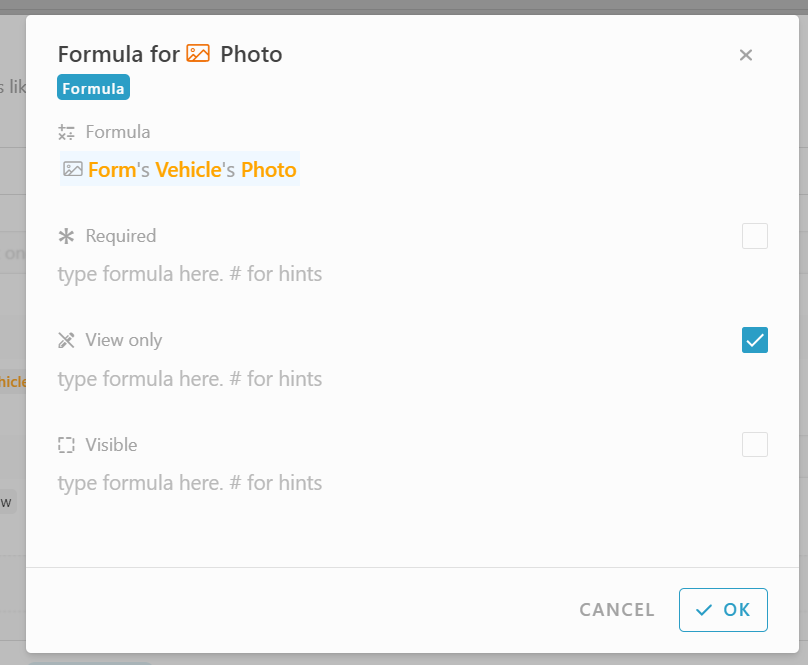
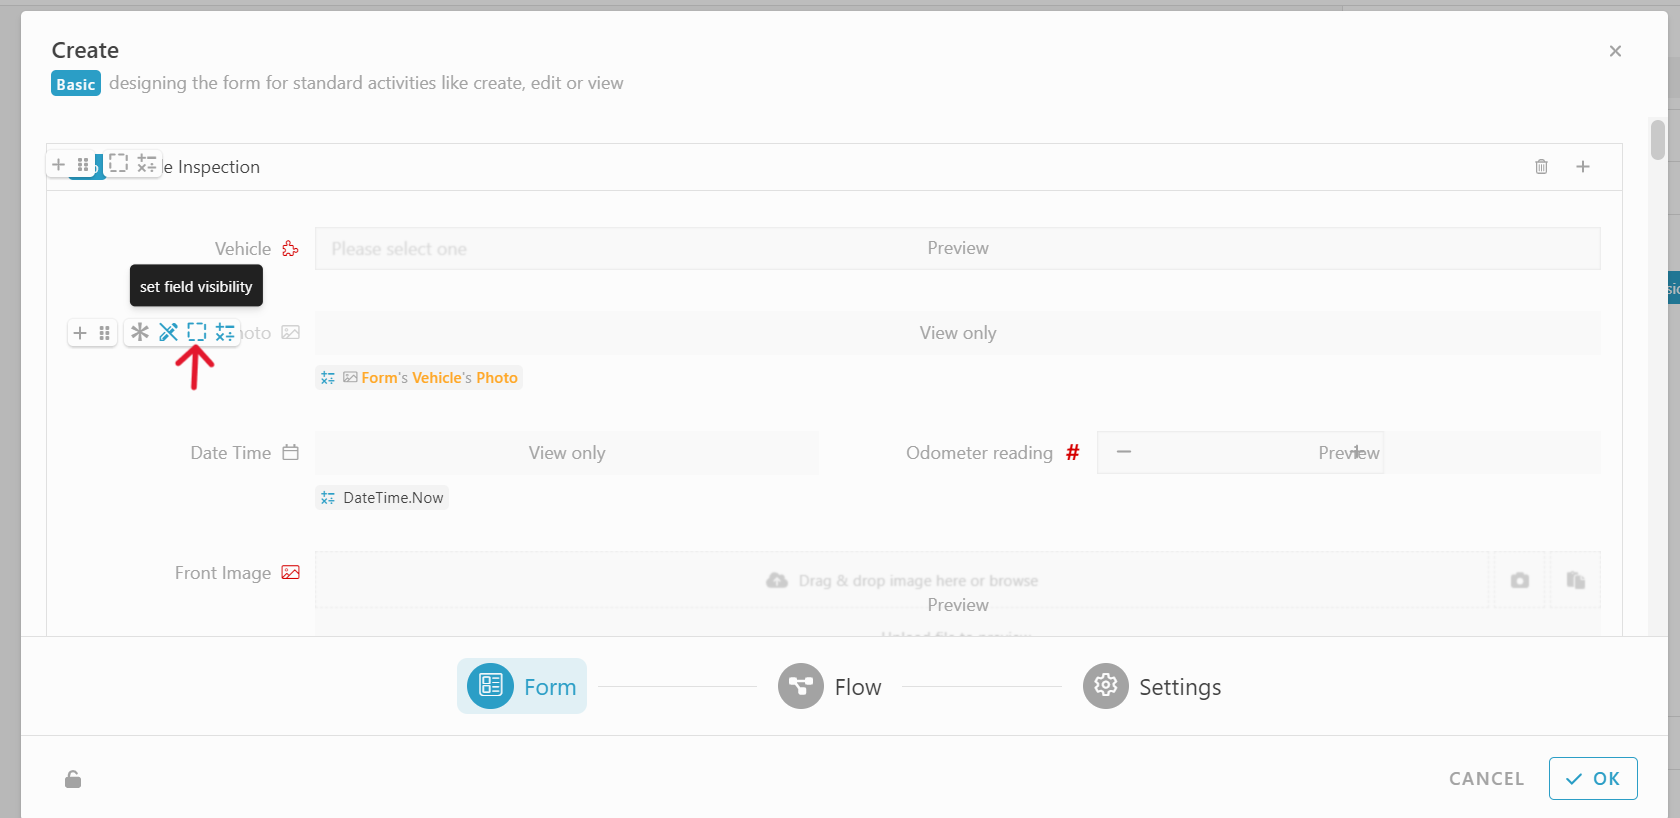
Set Formula on Information “Photo”, in formula column insert : #Form#Vehicle#Photo, to retrieve the “Photo” from the “Vehicle” that we selected.
-
Set the field visibility by click the “Square” icon beside the set formula.
-
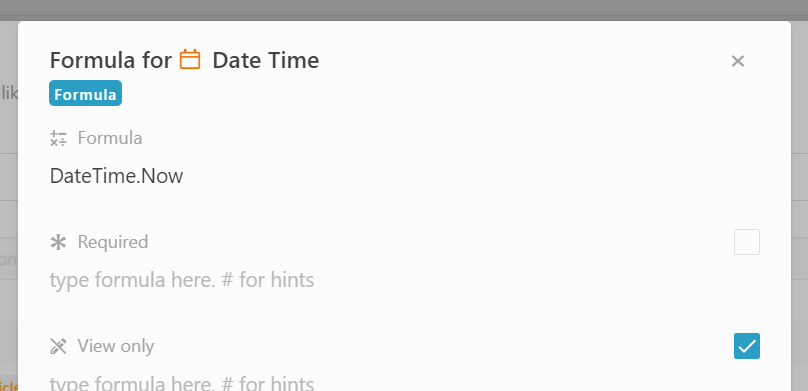
Set formula for “Date Time”, to auto set current date and time. In formula column, insert : DateTime.Now.
-
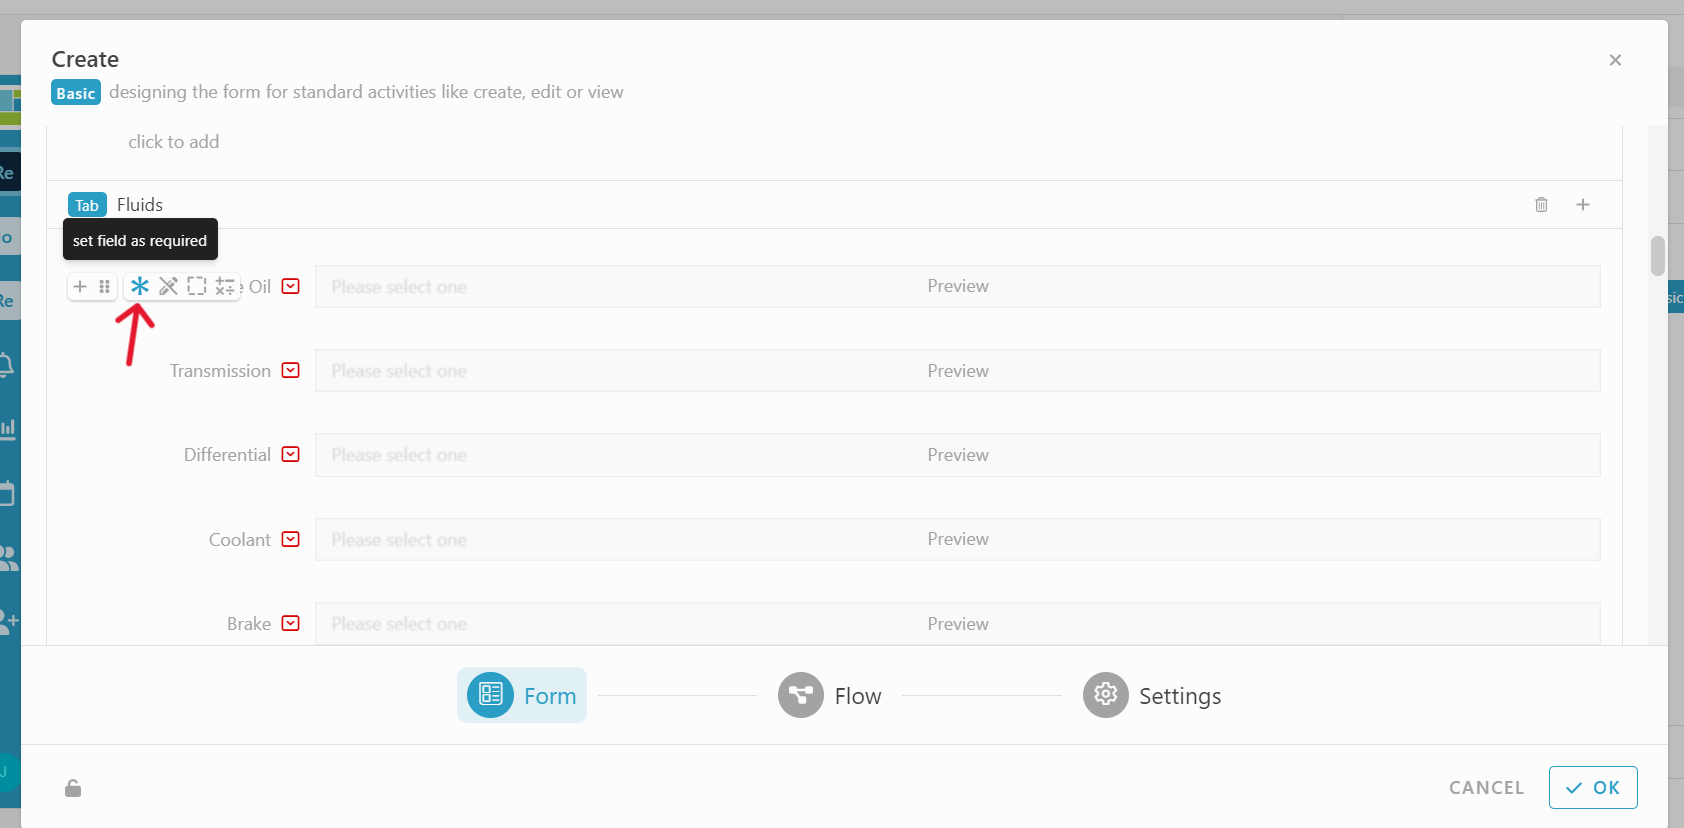
Set the field as requires for all the “Select” information type and important details by click the “star” icon.
-
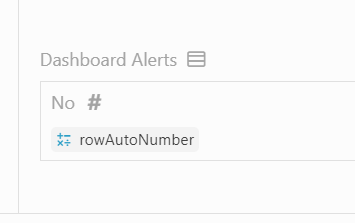
In “Dashboard Alert” table, set formula for field “No”, in formula column, insert : #rowAutoNumber.
Automation
Condition : To set a fix data or detail inside the table “Dashboard Alert” like below :
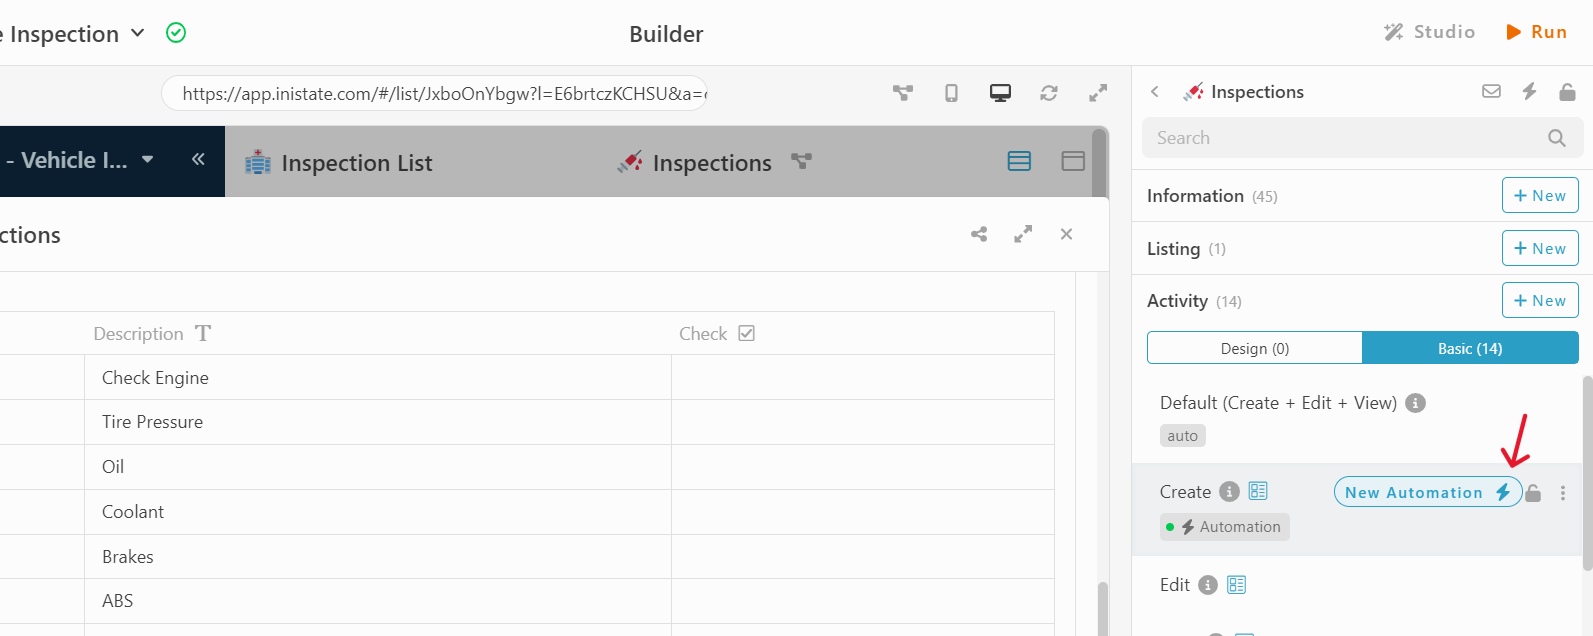
-
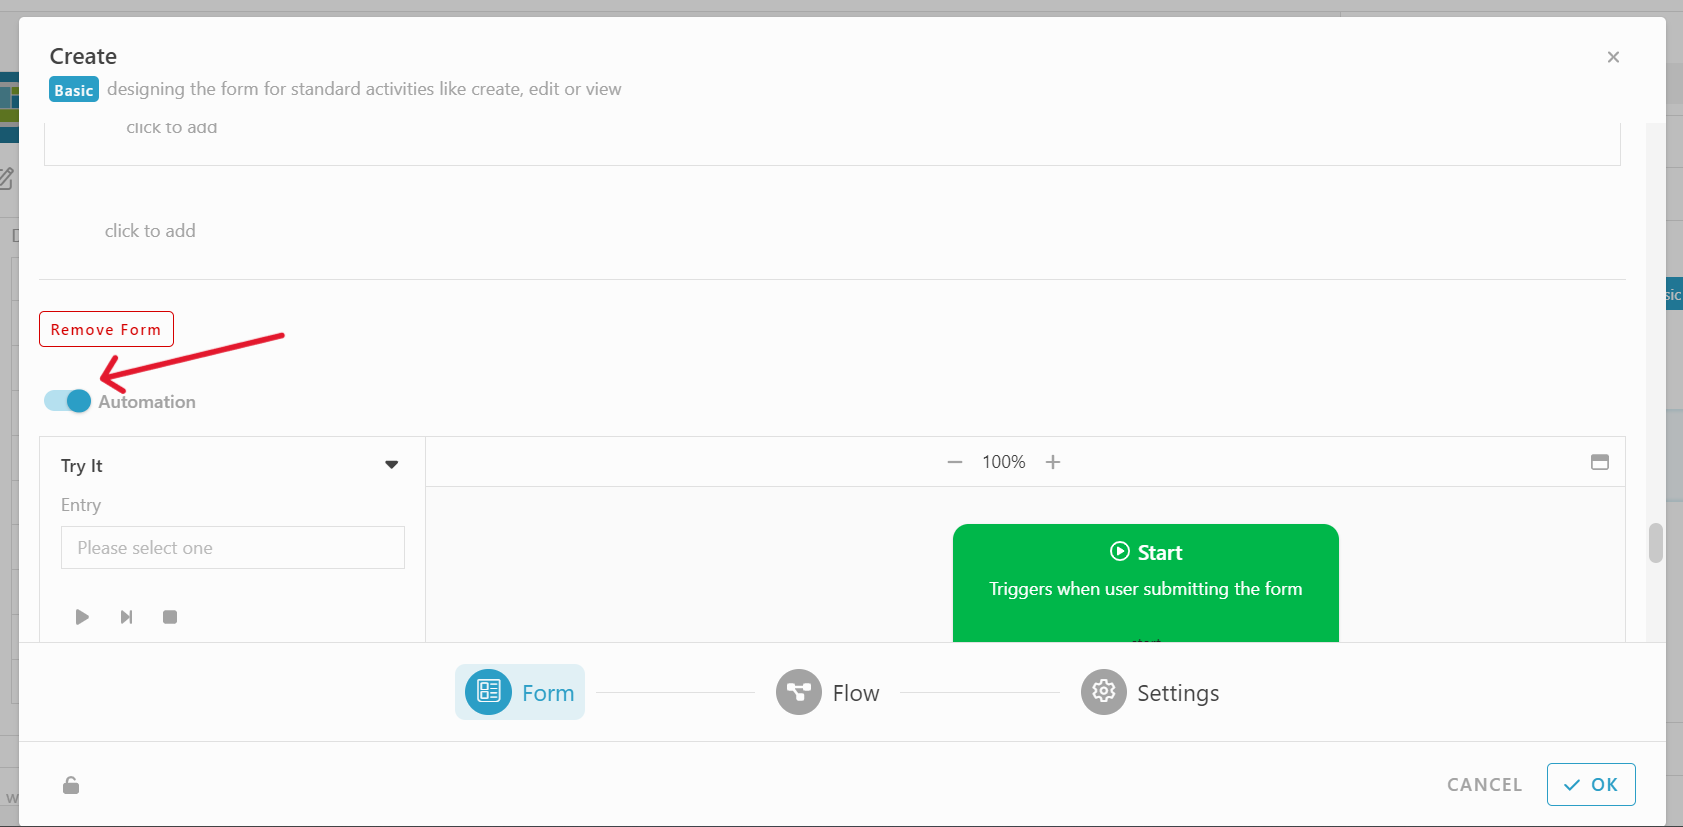
On activity section, click “Basic” tab, click “Create” to view form
-
Scroll down the form and enable the Automation.
-
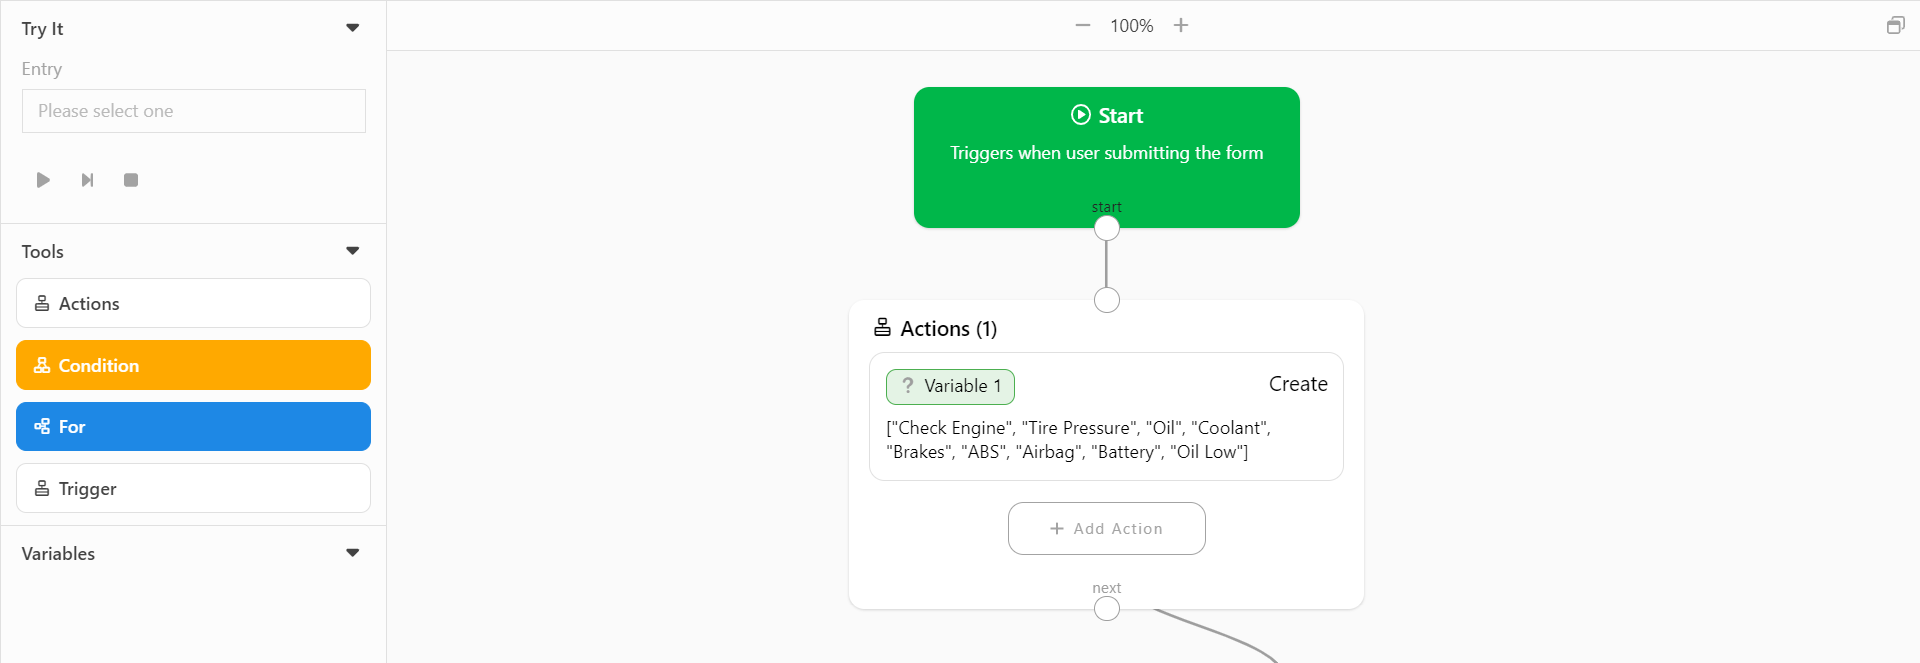
Drag and drop ‘Action’ block.
-
Add Action, Select ‘Create’.
-
Fill the ‘value’ : [“Check Engine”, “Tire Pressure”, “Oil”, “Coolant”, “Brakes”, “ABS”, “Airbag”, “Battery”, “Oil Low”]
-
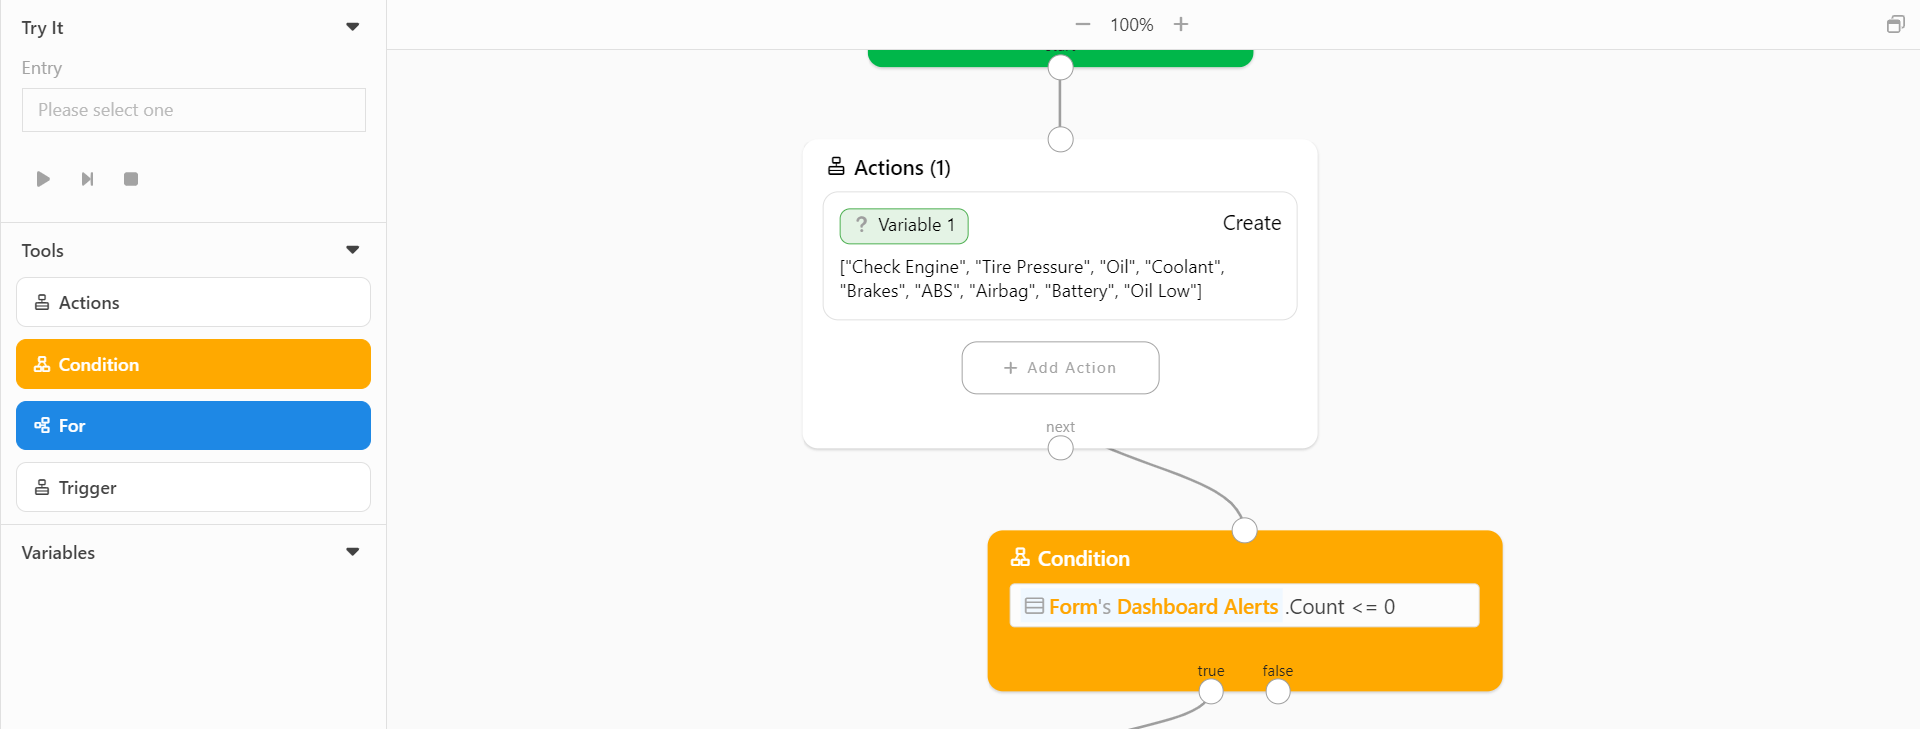
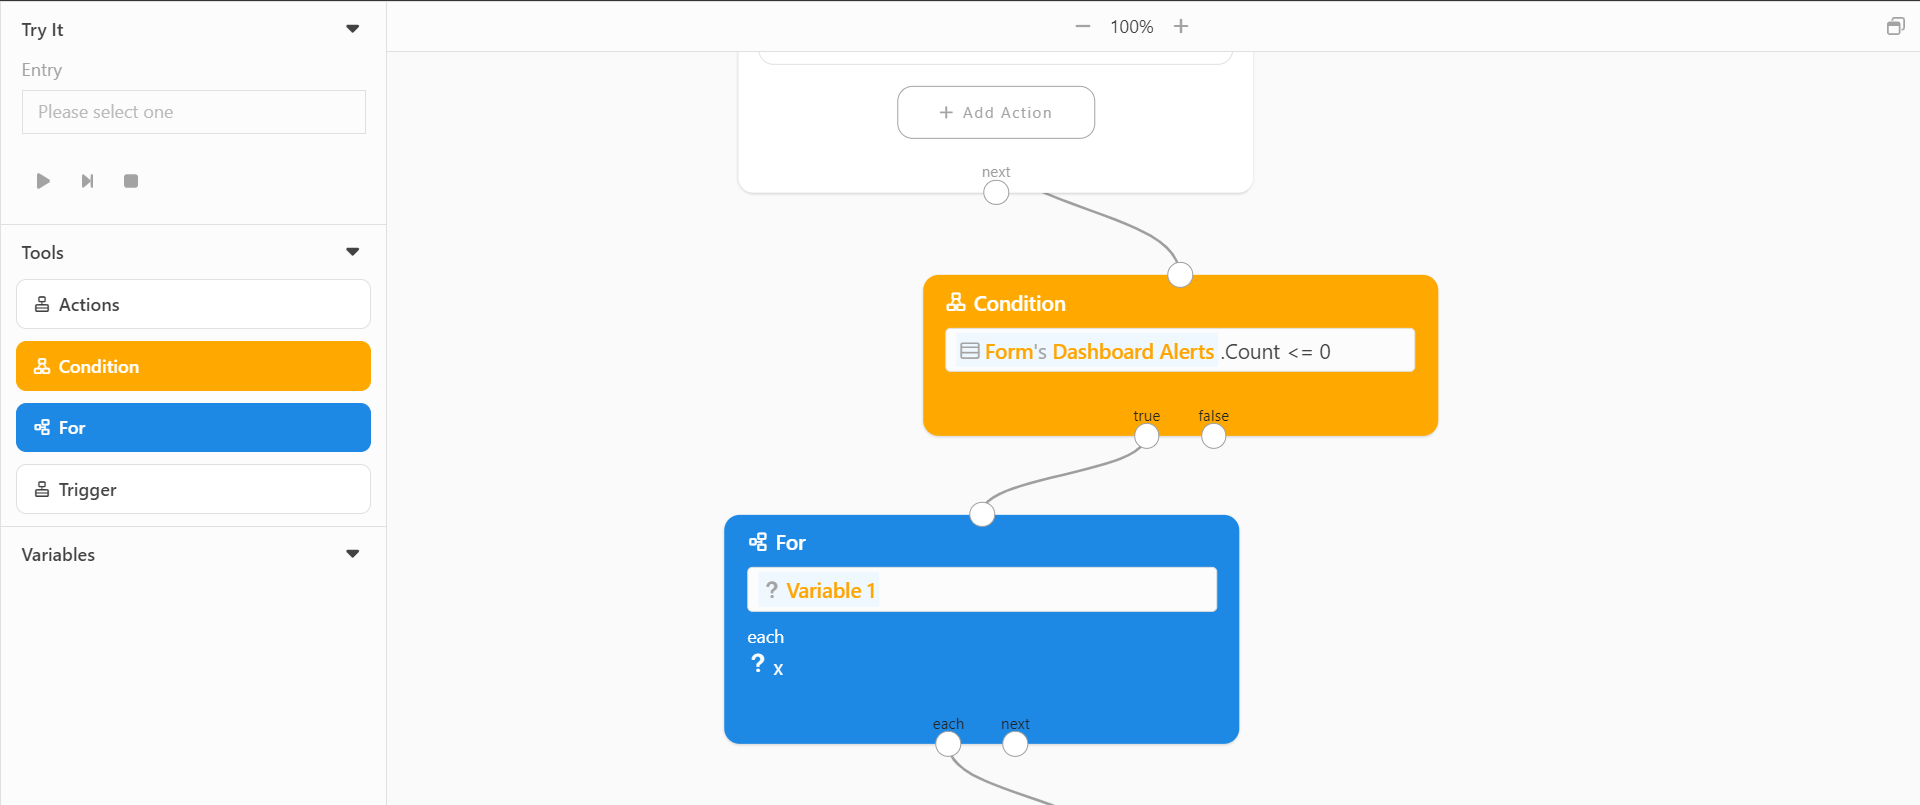
Drag and drop ‘Condition’ block.
-
Insert formula : #Form#DashboardAlerts.Count <= 0
-
Drag and drop ‘For’ block.
-
Insert #Variable1 each x
-
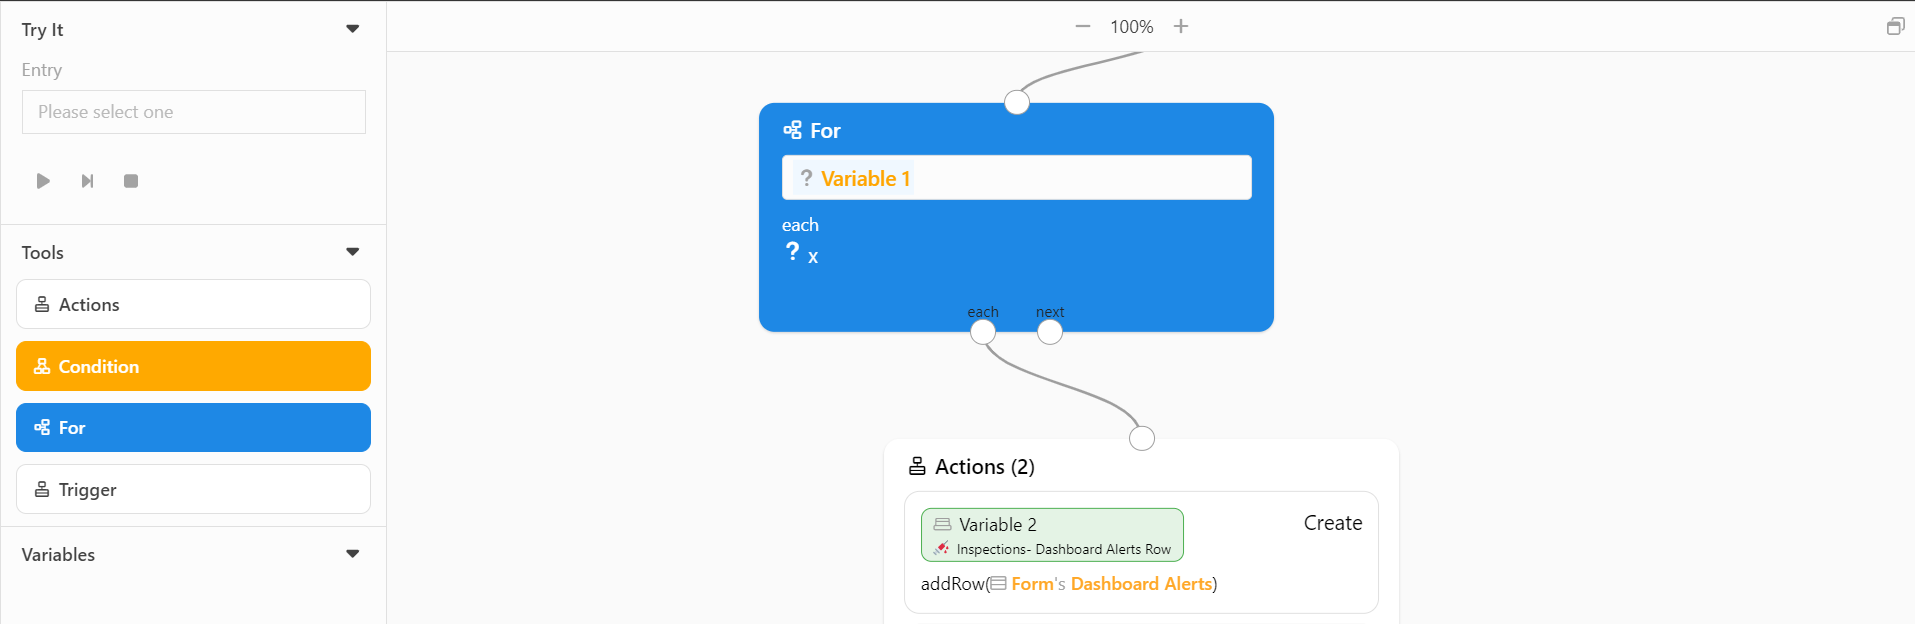
Drag and drop ‘Action’ block
-
Add Action, Select ‘Create’
-
Insert ‘Value’, #addrow(#Form#DashboardAlerts)
-
At the same ‘Action’ block, add action, “Set”
-
Insert "Variable, #Variable2, Expand property select value, “Description” and enter formula #x

Condition : To pass Details and DocumentID From Modules Inspection to Table “Related Inspections” In Module Vehicles based on selected car.
-
Under module Inspections, got to Activity section, click Basic, Add new automation on Create activity.
-
Click “Do After”
-
Drag and drop “Action”
-
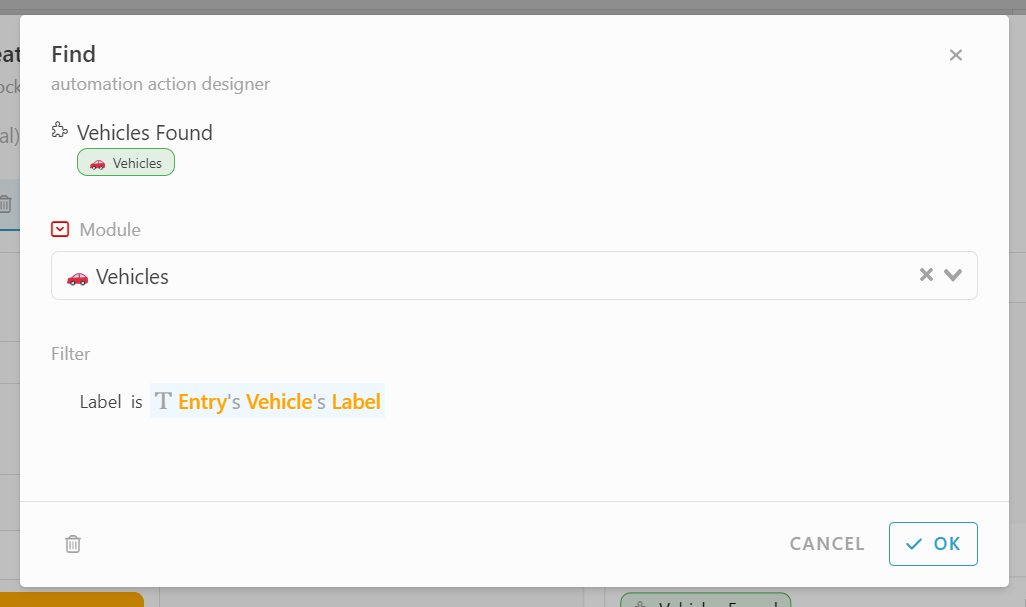
add Action, Find.
-
Select Modules “Vehicles”
-
Insert Filter, #Label is [Add Formula]#Entry#Vehicle#Label.
-
Drag and drop Condition block
-
Add Value, #VehiclesFound.
-
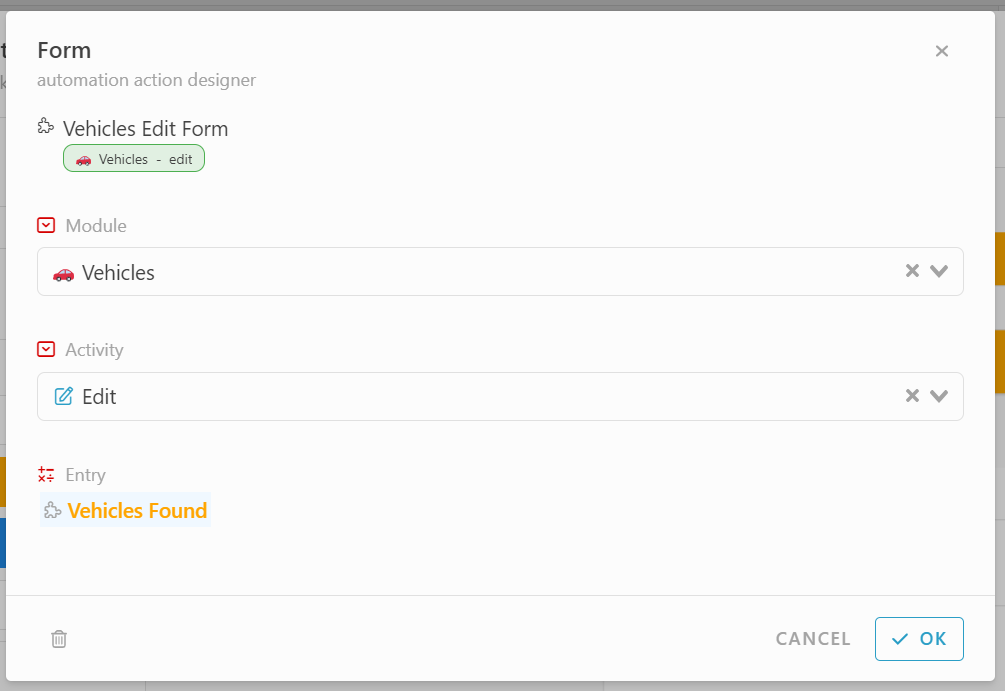
Drag and drop Action block
-
Add action, Form.
-
Set Module, “Vehicles”, Activity “Edit”, Entry #VehiclesFound
-
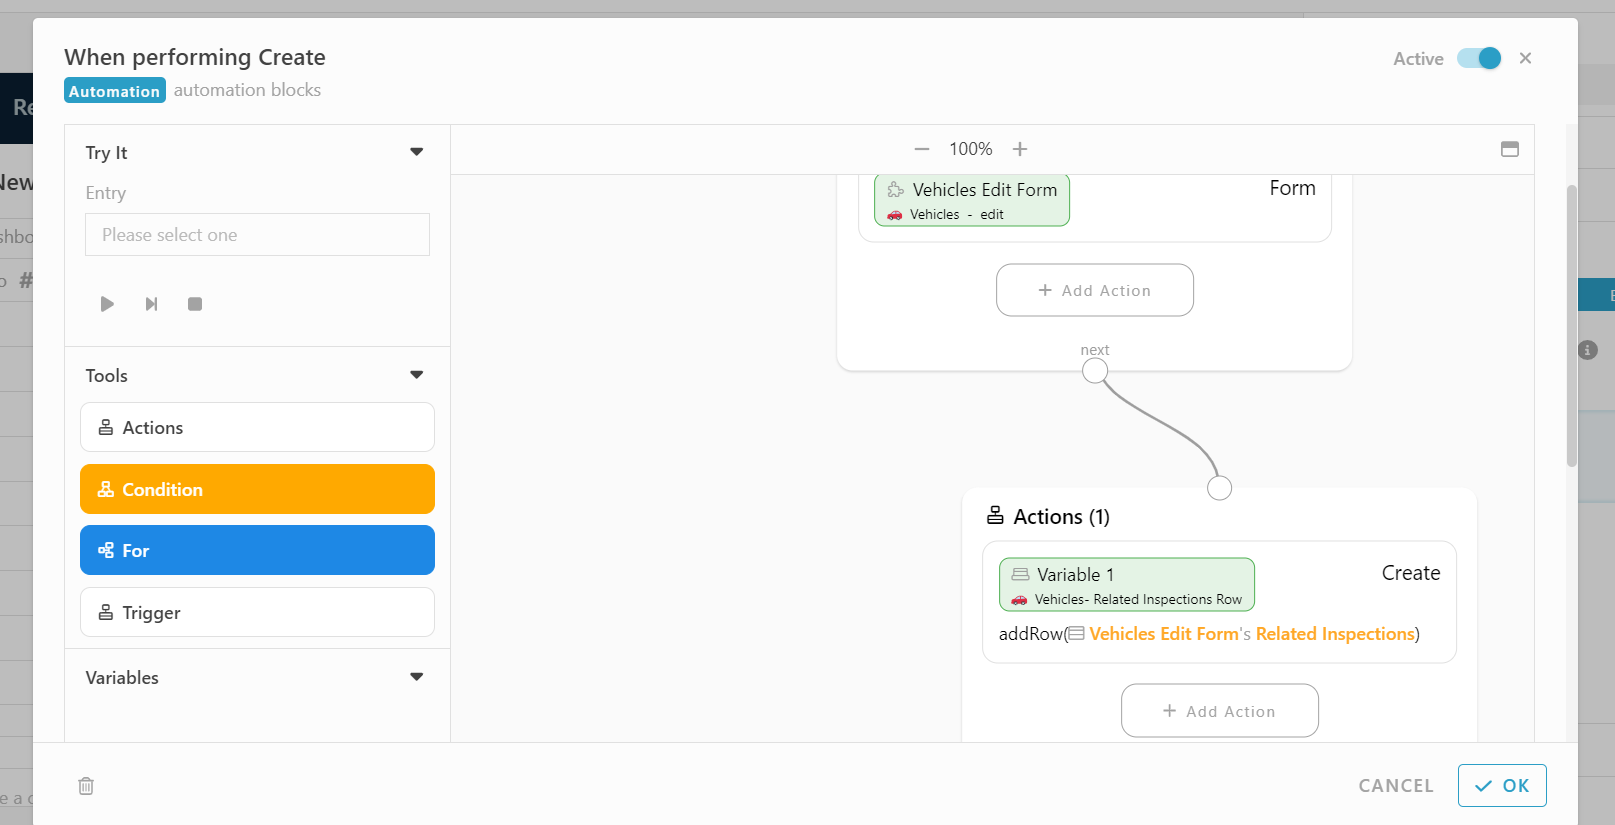
Drag and drop Action block
-
Add action, Create
-
Insert Value, #addrow(#VehicleEditForm#RelatedInspections)
-
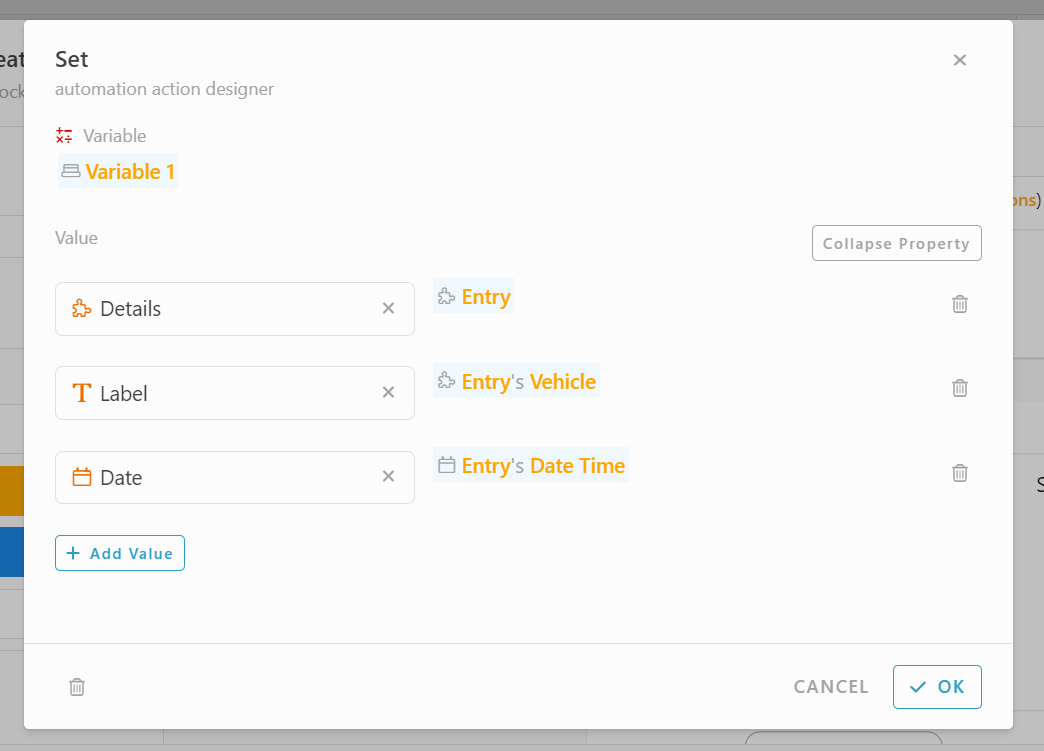
Drag and drop Action block
-
Add Action, Set.
-
Set Variable #Variable1
-
Expand Property
-
Add details and formula : Details - #Entry , Label - #Entry#Vehicle, Date - #Entry#DateTime
-
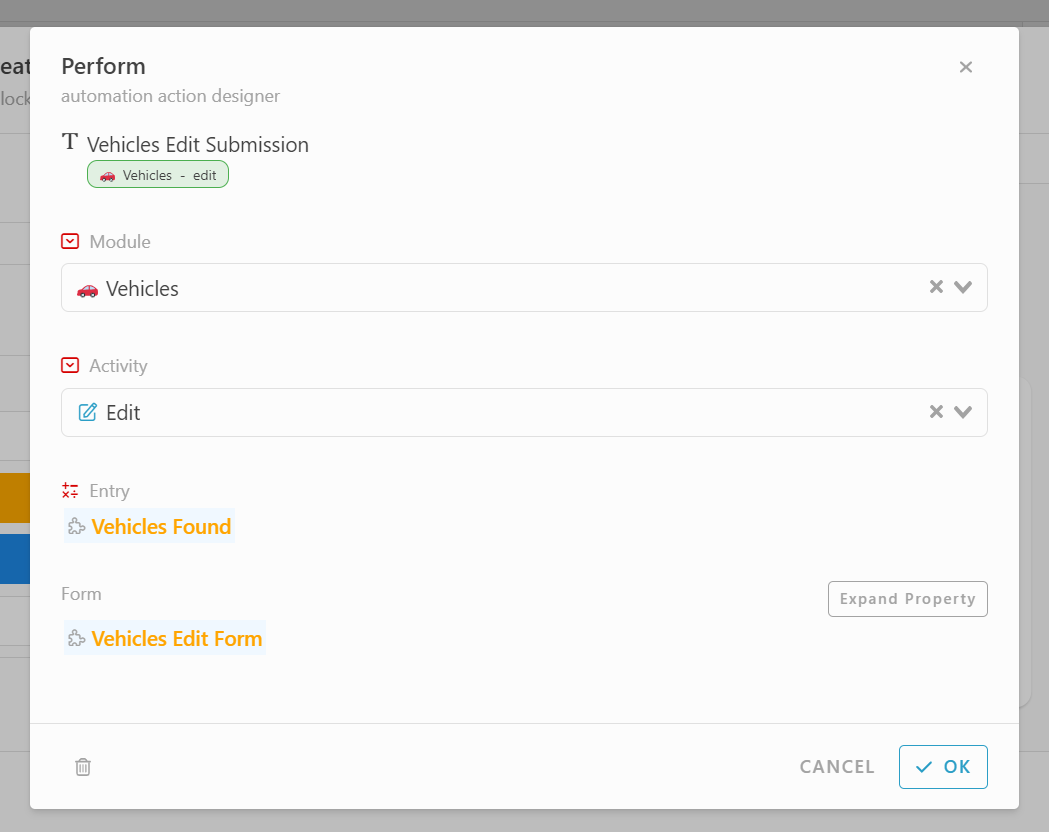
Drag and drop Action block.
-
Add Action, Perform
-
Set Module : Vehicles
-
Set Activity : Edit
-
Set Entry : #VehiclesFound
-
Set Form : #VehicleEditForm

Congratulations!!!![]()
![]() You have successfully created a Vehicle Inspections module.
You have successfully created a Vehicle Inspections module.
For more template and ready solution.
Try INISTATE for FREE now.
Sign up at https://inistate.com
Related topic :