This module can help users on managing when to renew their vehicle’s road tax when it’s due.
Problem
Difficult to keep track of vehicles’ road tax due dates.
- Sometimes people just forget to renew it. Especially if they have multiple vehicles keep tracking them is very troublesome.
Objective
Convenient
Let the user be reminded of the due dates of the road tax.
Step by step configuration
Information
Below are the information needed for the road tax renewal system.
- Name: Old Renewal Information, Information Type: Text
- Name: Date (Request Date), Information Type: Text
- Name: Plate No, Information Type: Text
- Name: Renewal Category, Information Type: Selection
- Insurance
- Roadtax
- Name: Start Date, Information Type: Date
- Name: Expiry Date, Information Type: Date
- Name: Vendor, Information Type: Text
- Name: Price, Information Type: Money
- Name: Attachment, Information Type: Files
- Name: Remark, Information Type: Multiline Text
- Name: Requested By, Information Type: Text
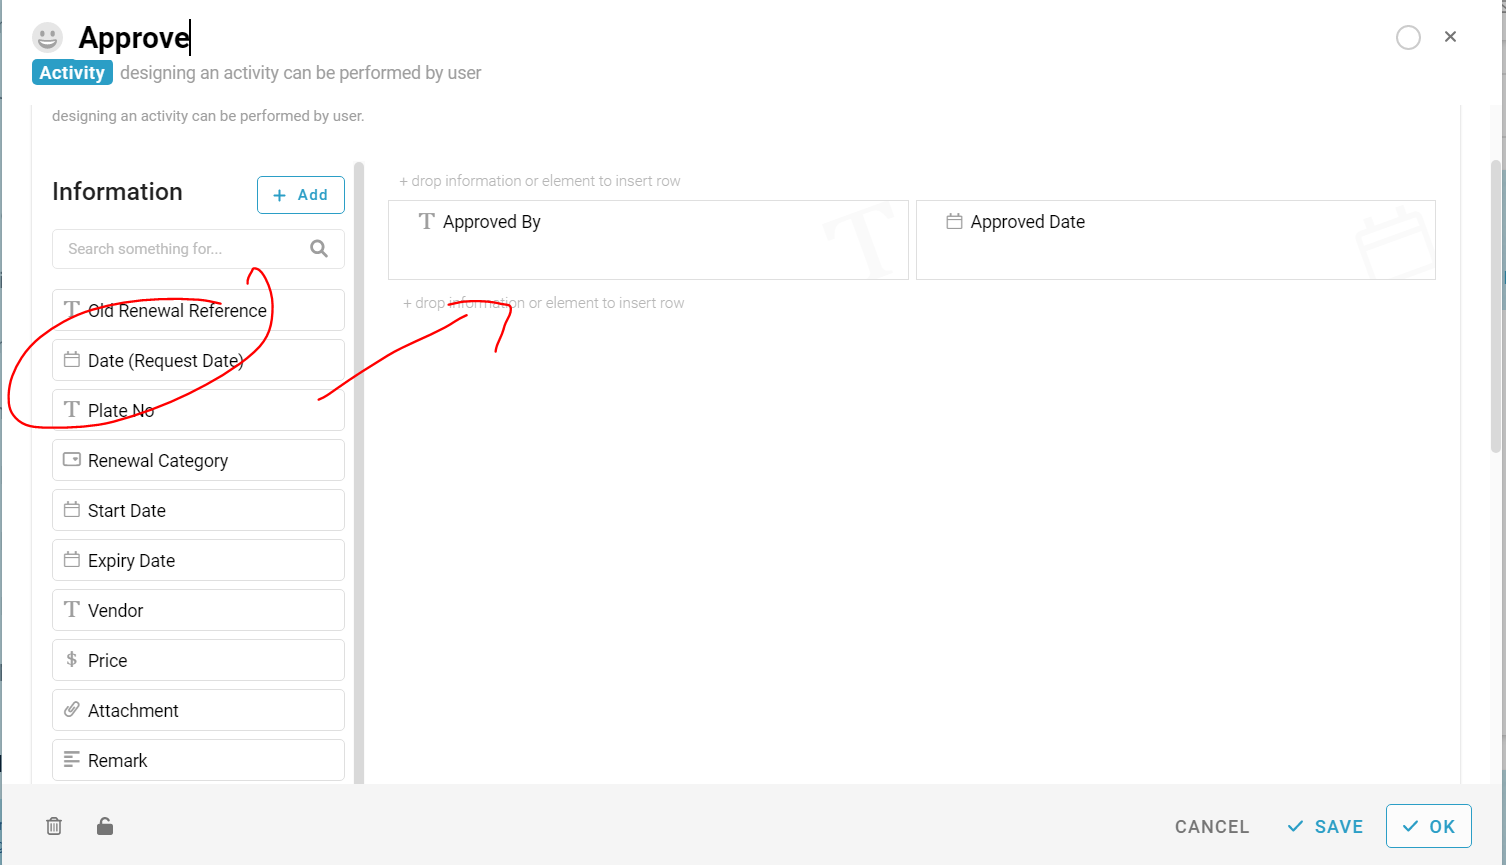
- Name: Approved By, Information Type: Text
- Name: Approved Date, Information Type: Date
- Name: Invoice Number, Information Type: Text
- Name: Invoice, Information Type: Files
- Name: Company, Information Type: Text
- Name: Location, Information Type: Text
- Name: Submitted By, Information Type: Text

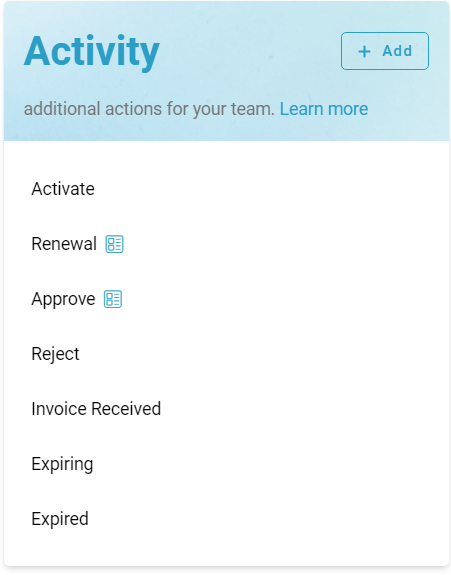
Activity
Configure the following activity to be able to change the state later.
- Activate
- Renewal
- Approve
- Reject
- Invoice Received
- Expiring
- Expired
Only Renewal and Approve require the use of form.
Use the drag and drop feature to complete both of the activities with form.

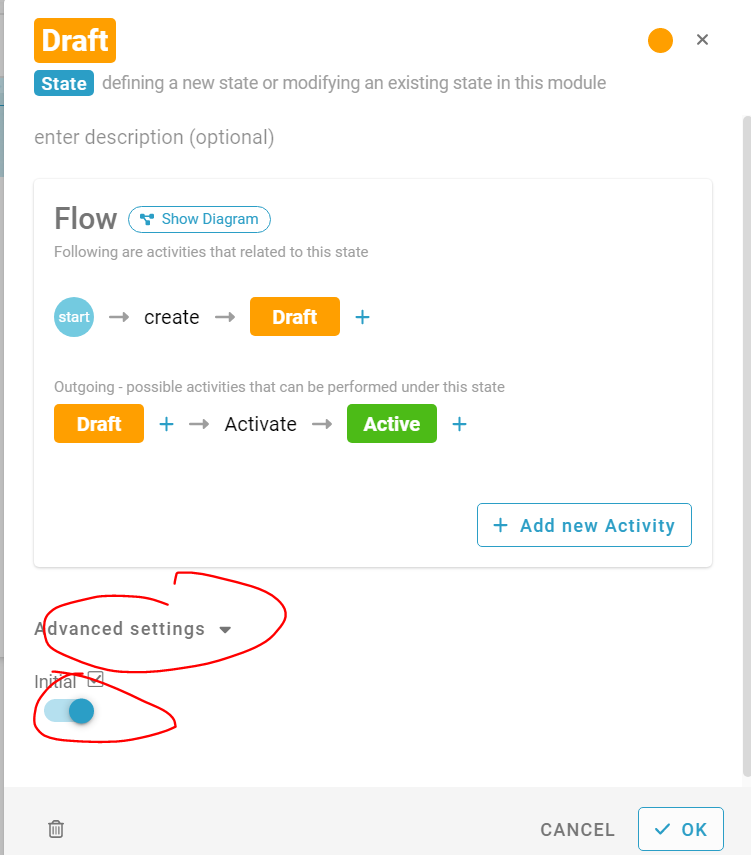
State
Configure the following State in the studio menu.

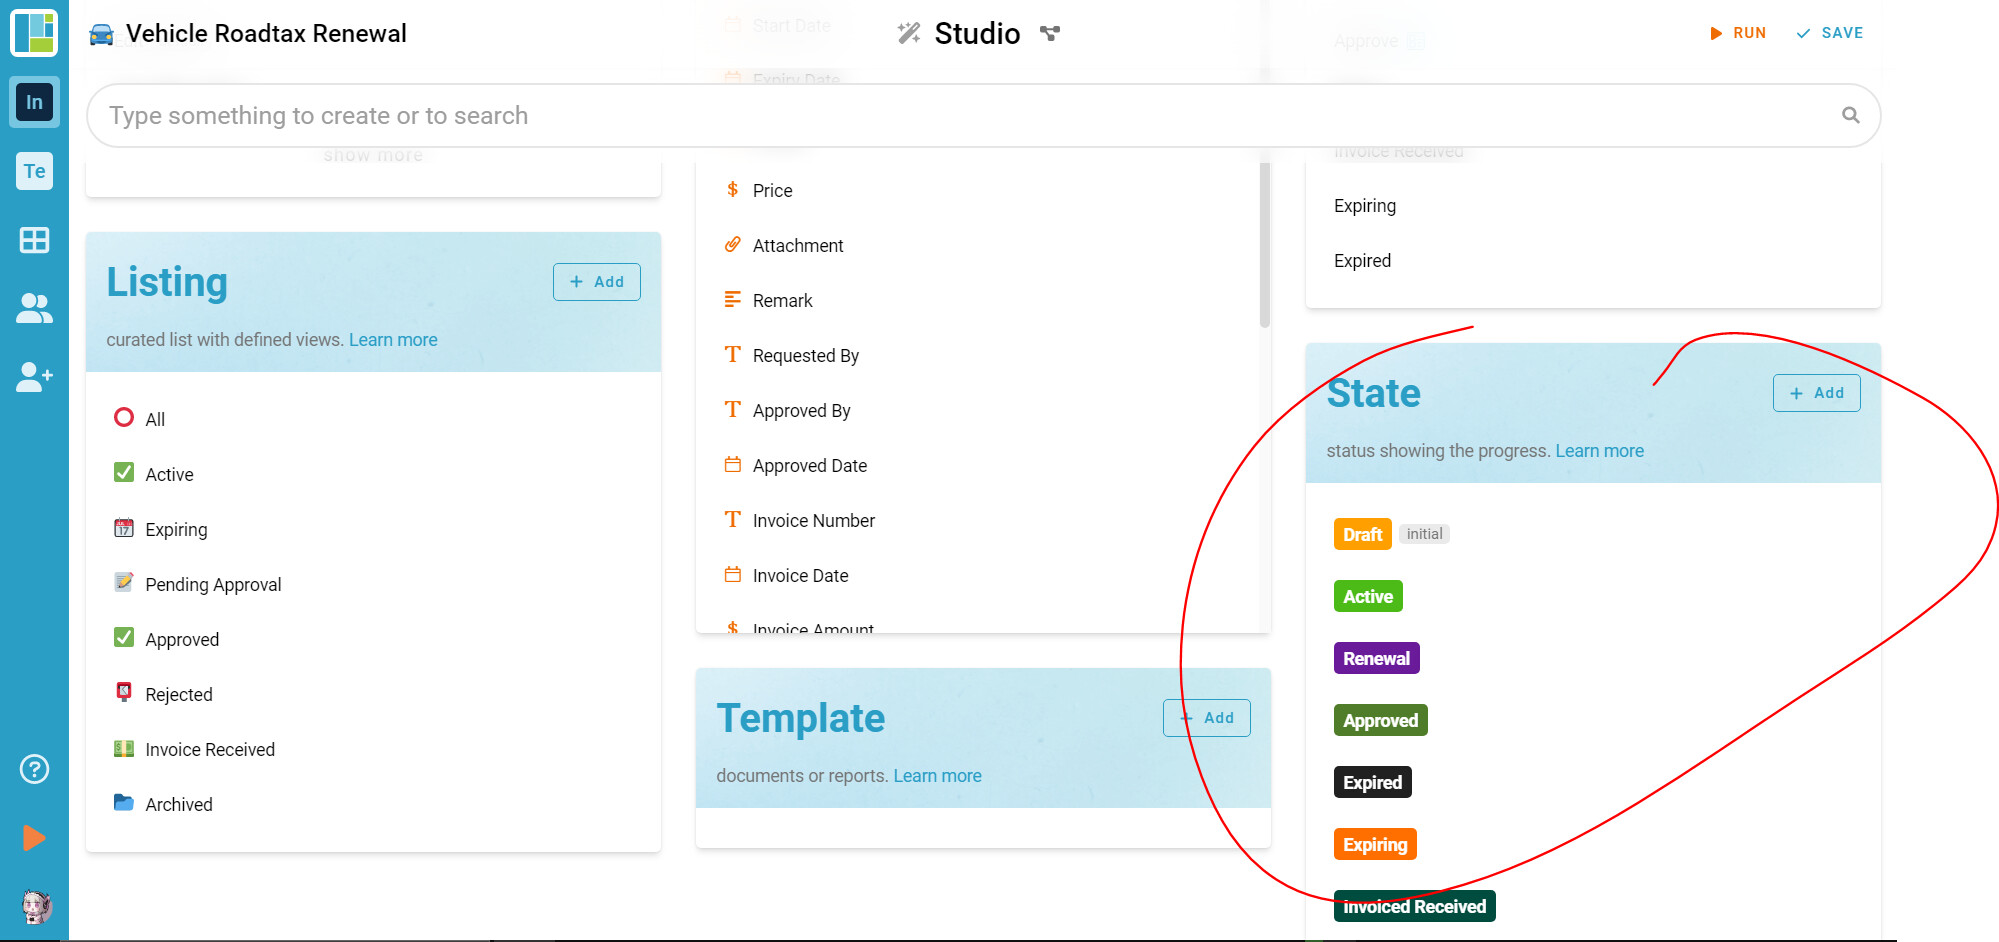
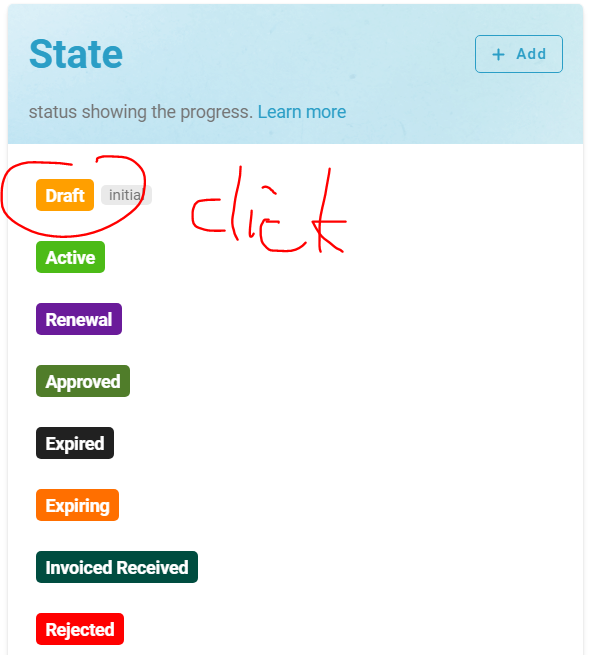
- Draft (Make sure you enable the initial function, it will auto-assign the submitted entry as this state, refer to the picture below on how to do it.)
- Active
- Renewal
- Approved
- Expired
- Expiring
- Invoiced
- Rejected
Flow
A flow is a process that changes state depending on what activity you perform with the entry.
It goes like this (initial state > activity>changed state).
Below is the flow that will be used in this module.
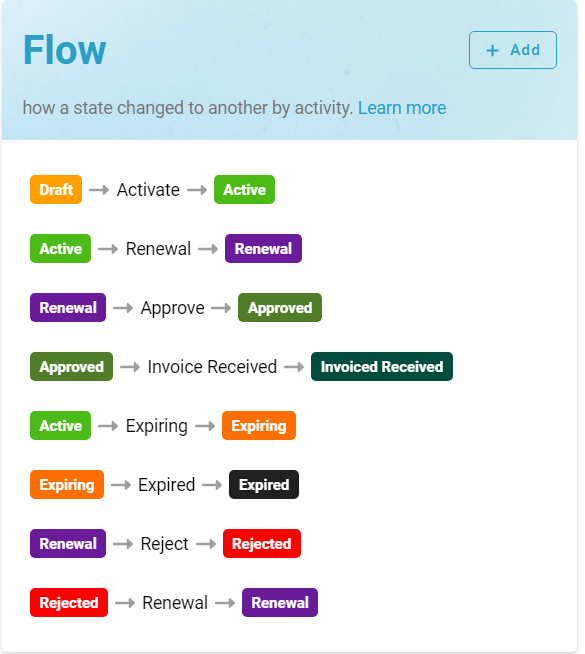
You can just click the flow and pick the respective state/activity, the system will handle the rest.
Basic
Only the Default (Create/Edit/View) has a form.
Design your Default (Create/Edit/View) according to the picture below.
Click on the Default (Create/Edit/View).
Drag the button like the picture below.
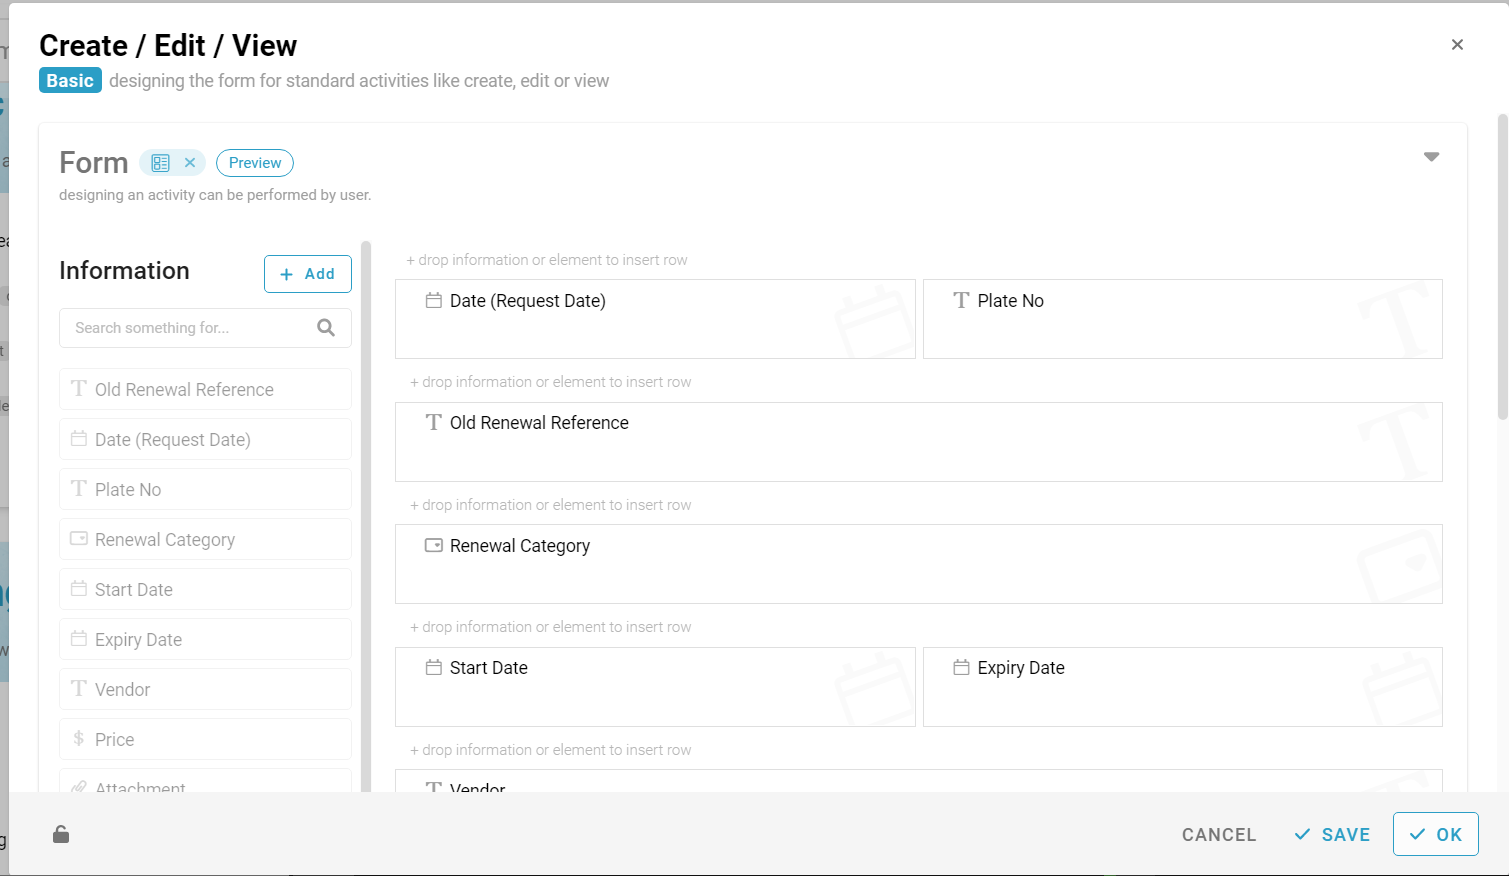
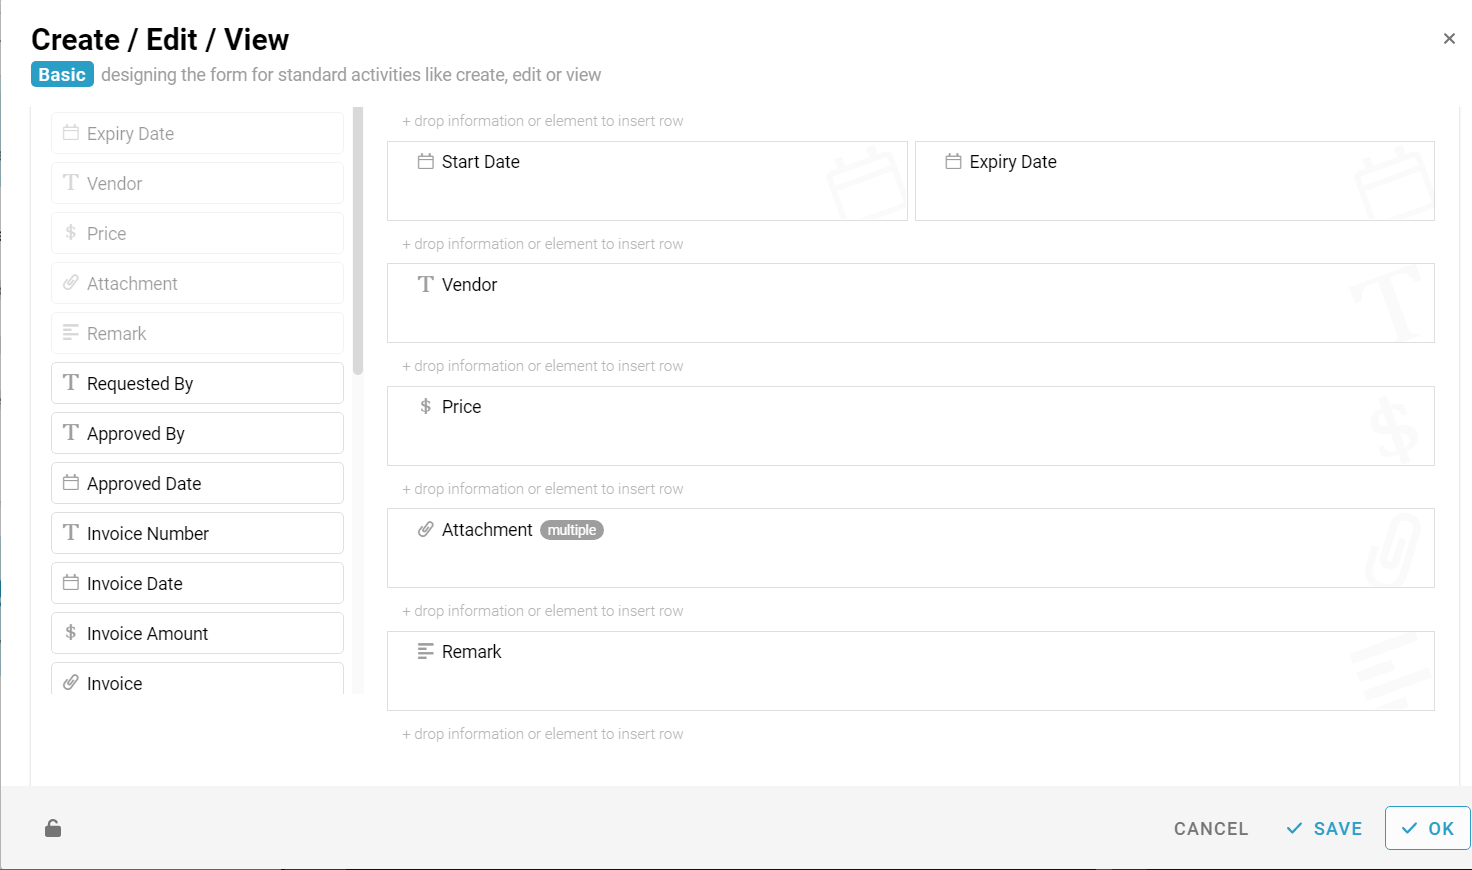
When done, click save and ok.
Listing
Listing will filter every entry by your settings. For instance, you can create a listing that only consists entry from today, when clicking on the listing, only today’s entry will be displayed.
Below is the required listing for this module.
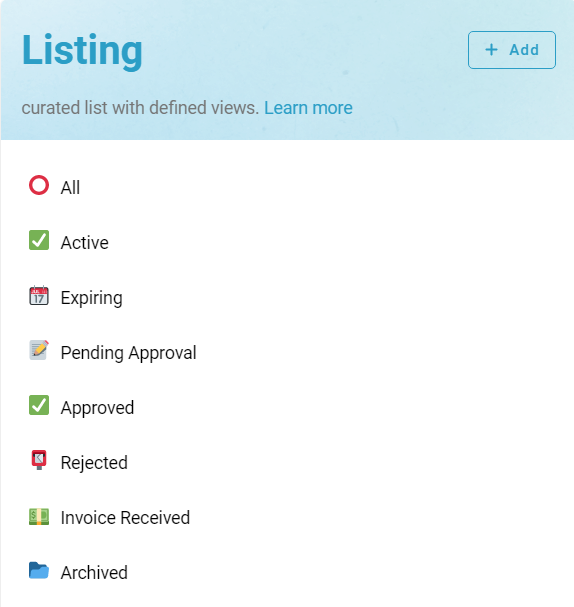
- All (the unfiltered listing)
- Active (Condition: State must be Active)
- Expiring (Condition: State is Expiring)
- Pending Approval (Condition: State is Renewal)
- Approved (Condition: State is Approved)
- Rejected (Condition: State is Rejected)
- Invoice Received (Condition: State is Invoice Received)
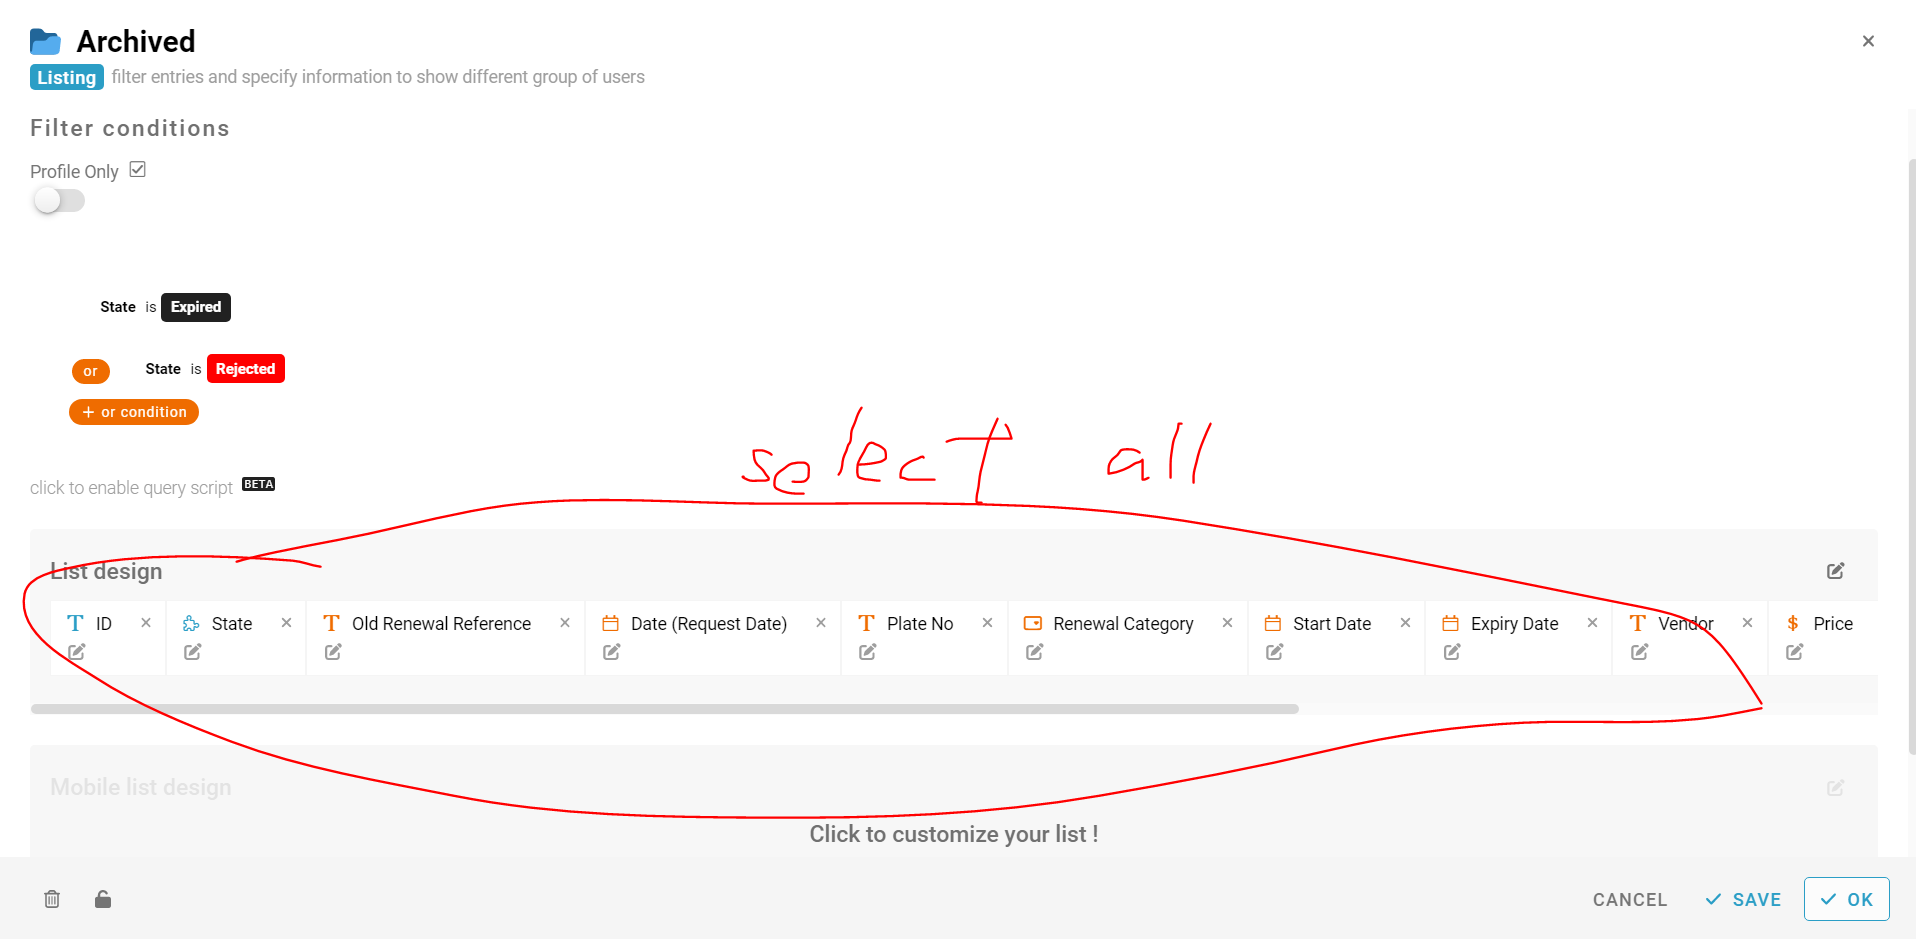
- Archived (Condition: State is Expired OR State is Rejected)
For most of the listing, you can just click the state filter you like, but the Archived is a little bit different.
First, click the new condition and scroll to the bottom to find or.
Then click the +or condition to add filter that work as an OR statement.
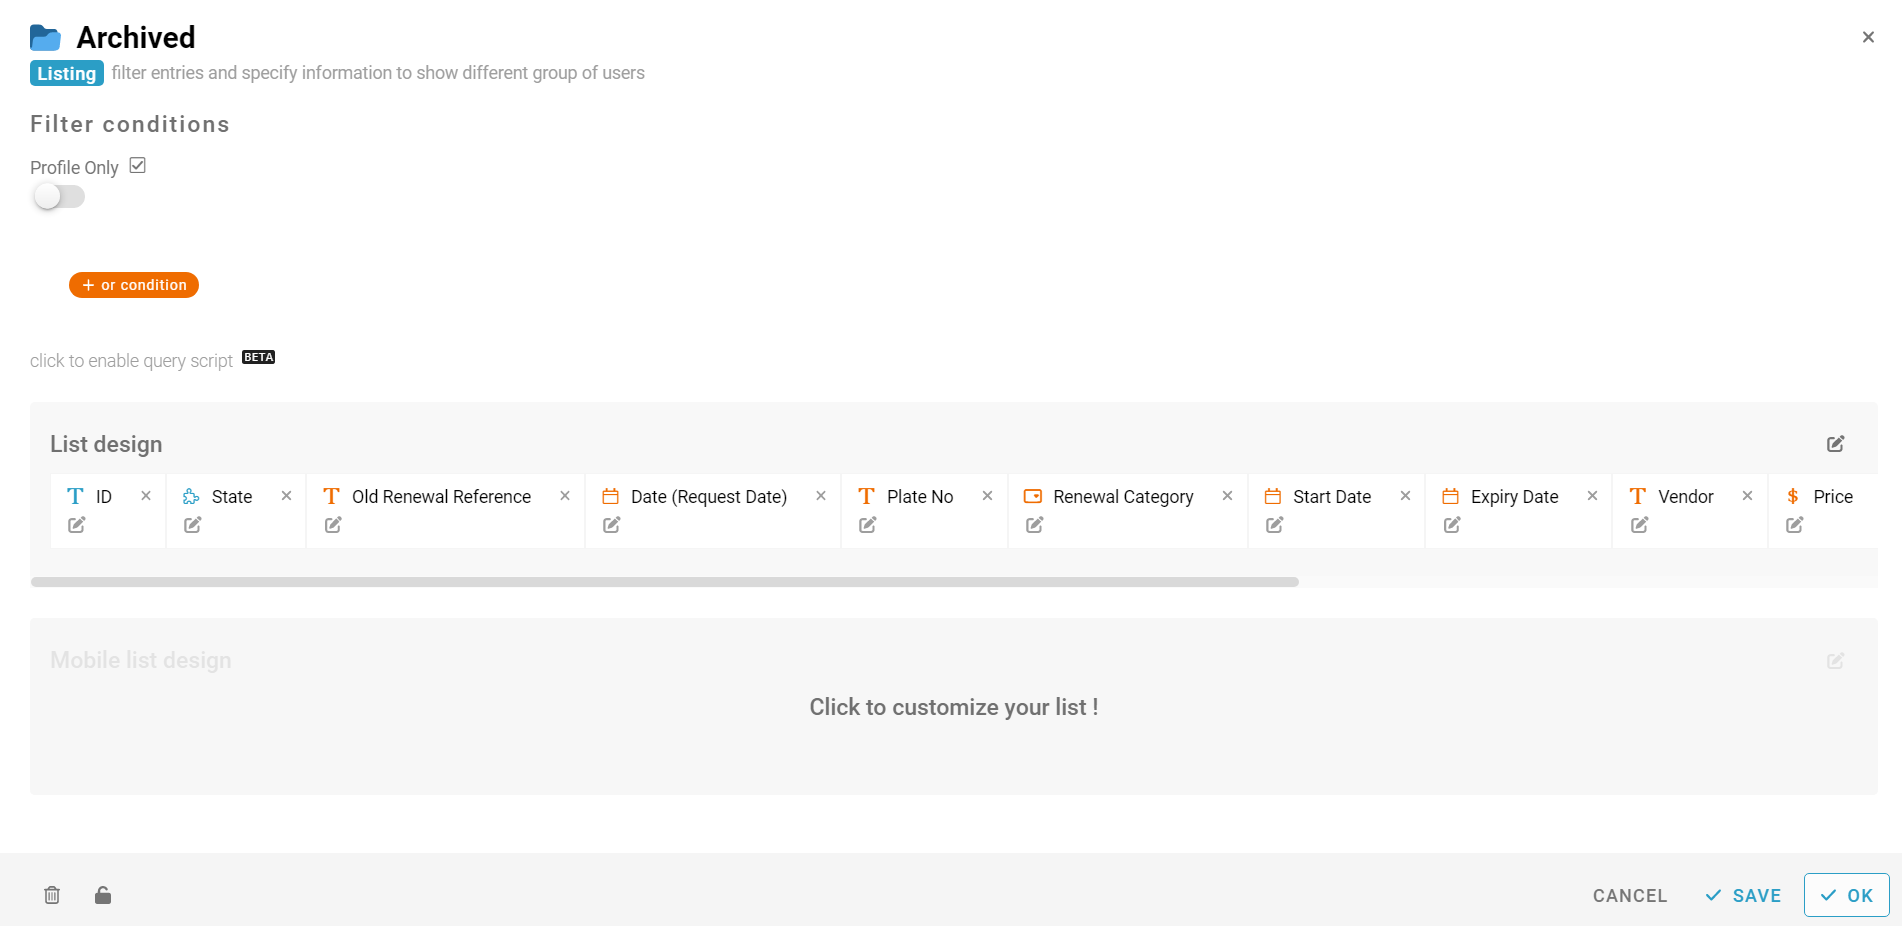
To add another filter, click the +or condition button again.
Return to the main menu after configuring all of the listing, click Save at the top right button and it is done.

For more templates:
Try inistate for FREE now.
Sign up at https://inistate.com/