Hi ![]()
Today, I want to share with you how to configure a workstation booking module in INISTATE. The workstation booking module allows you to easily book flexible spaces within your organization.
This template makes it easy for you to reserve workstation.
Problem
Difficult to book workstation * *-Managing workstations manually is challenging due to time-consuming and difficult to track the availability of workstation.
Objective
Efficiency-* * Enables you to easily book the workstation via the online service. Save you time in managing your schedule.
Step & Configuration
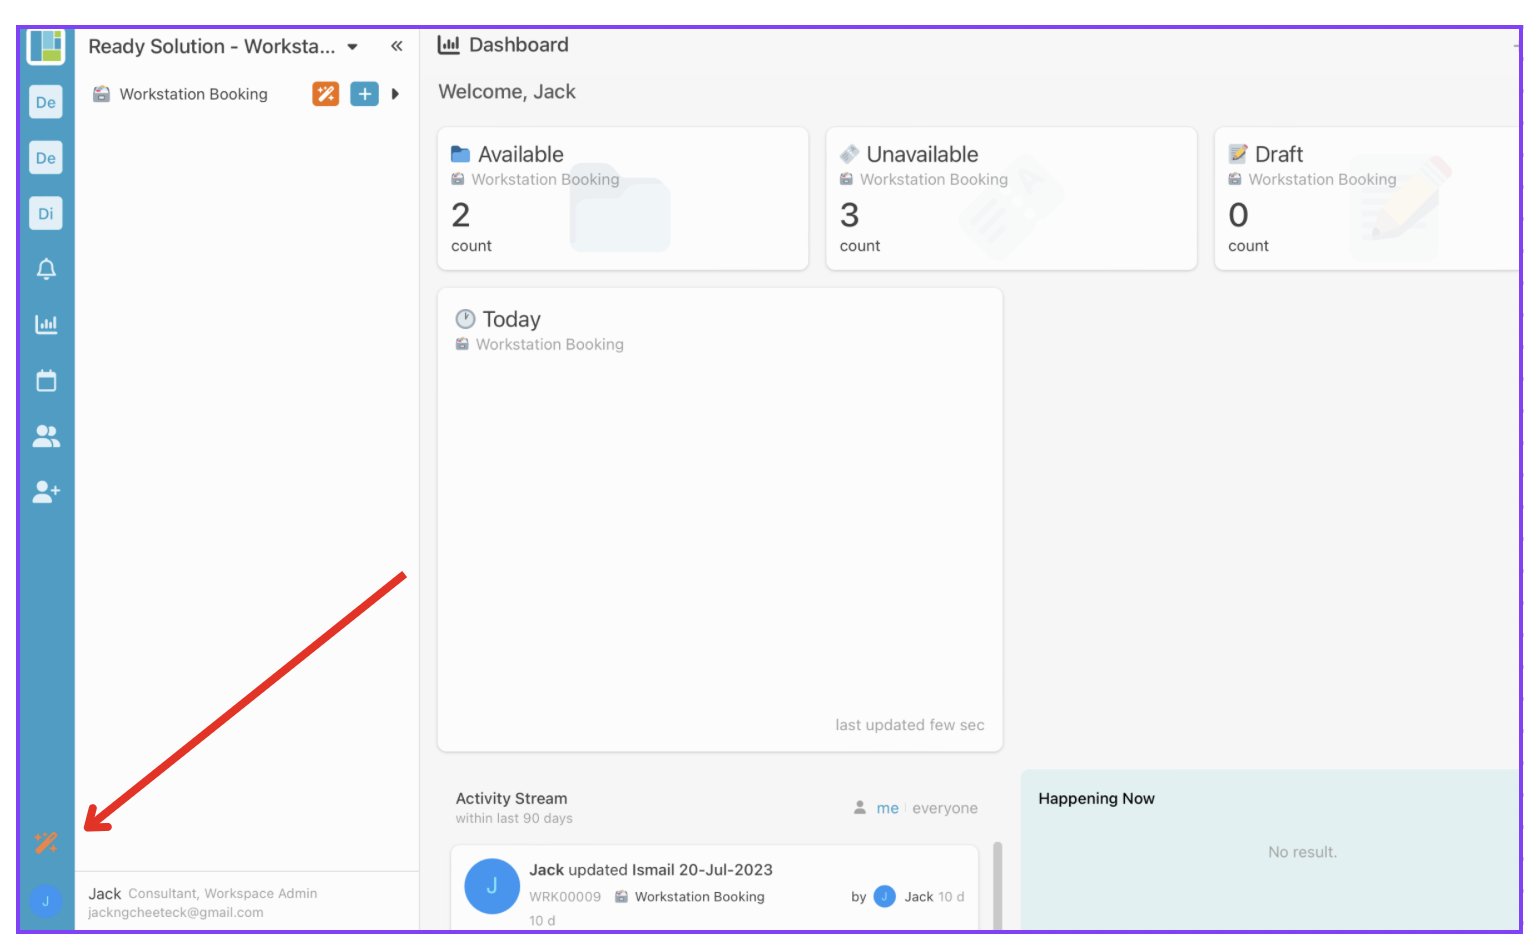
1.Access your workspace builder.
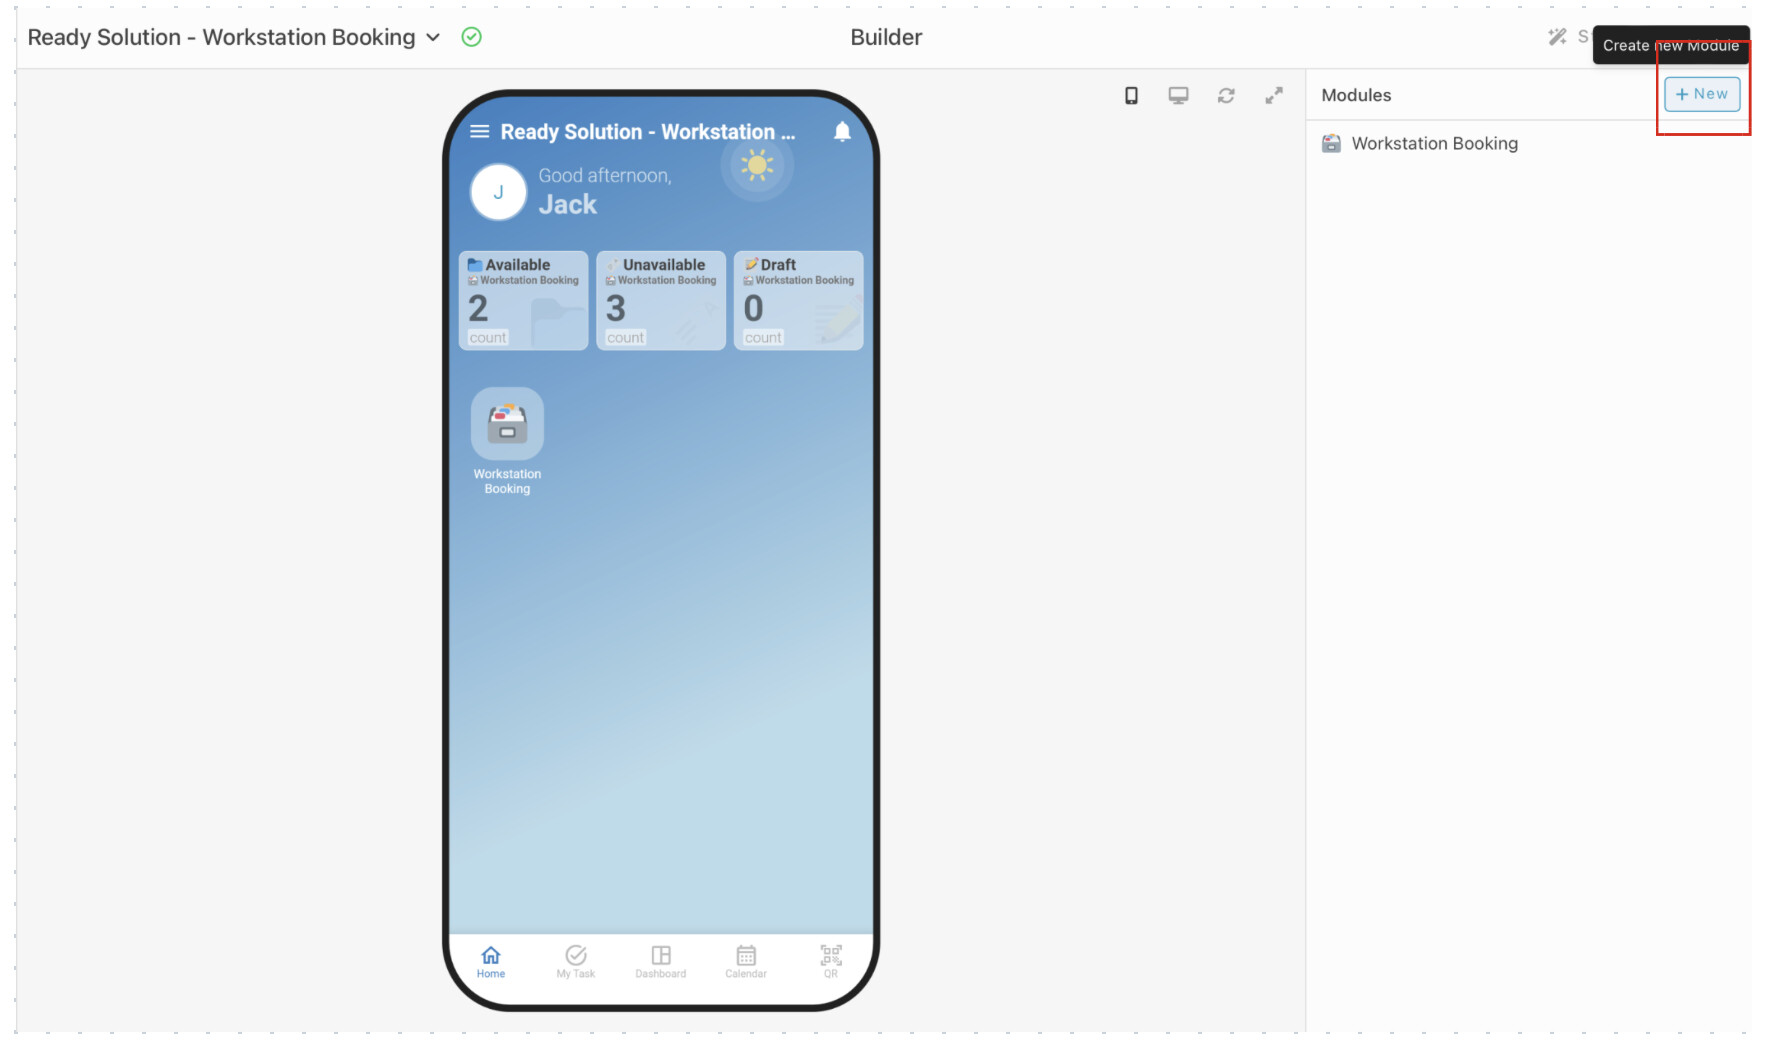
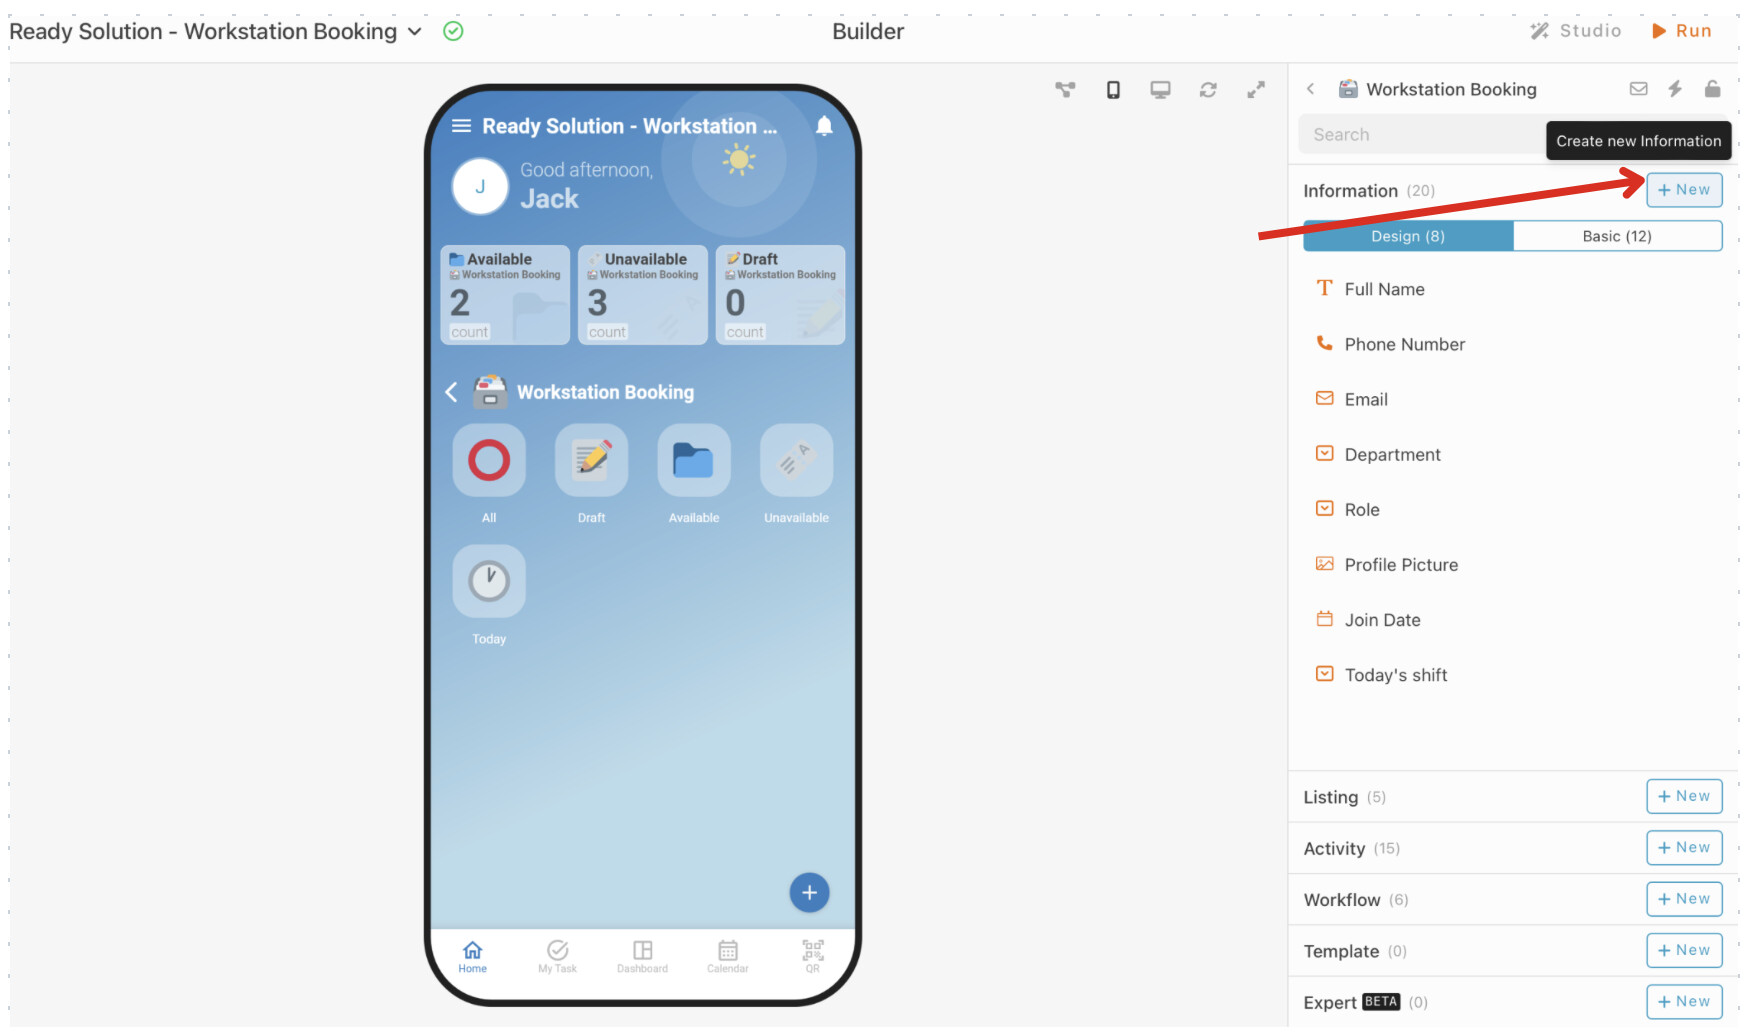
2.In builder, on top right, on module tab, click “+ New” to add new module.
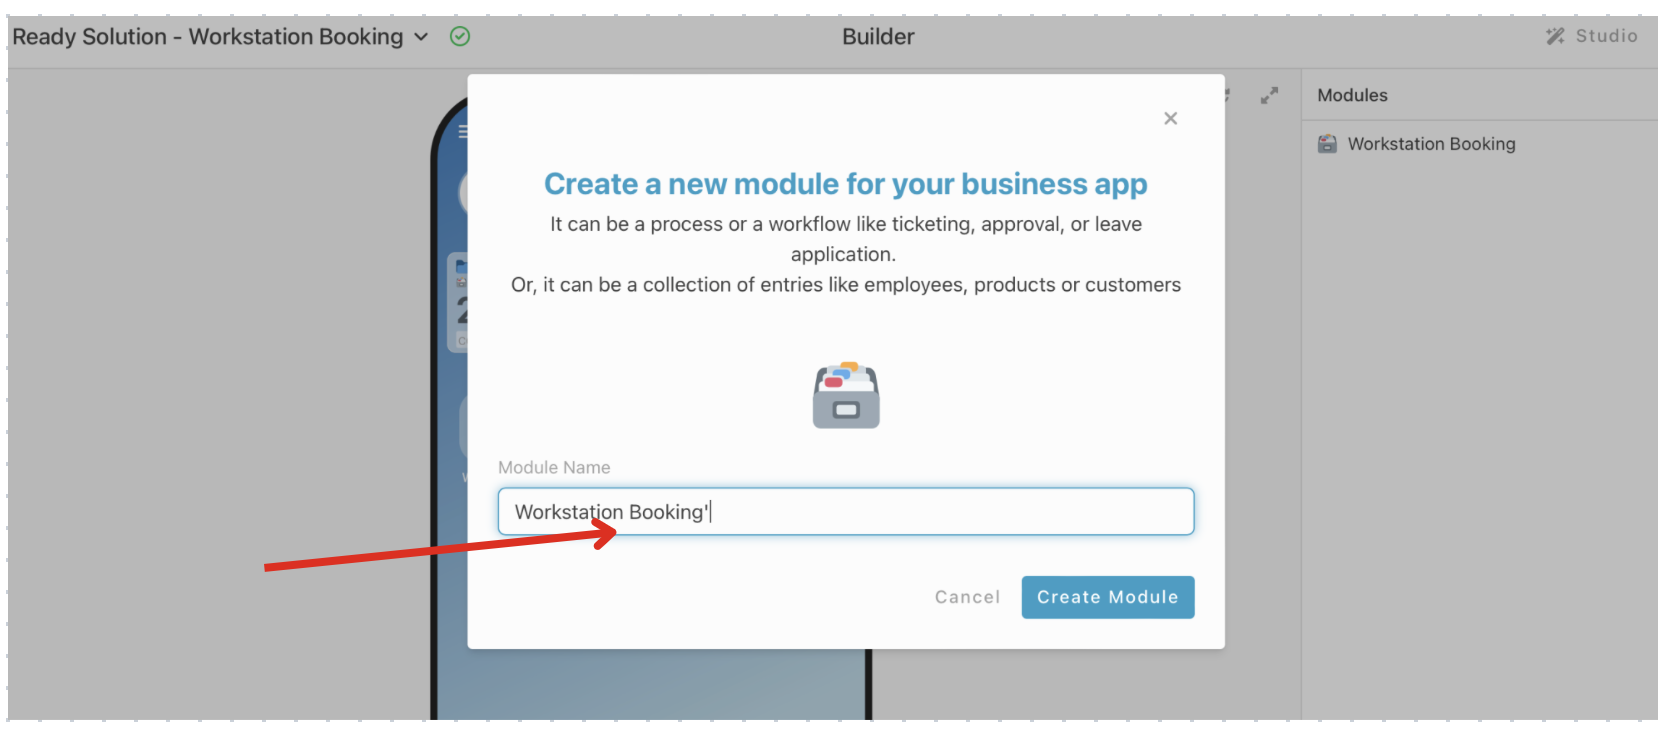
3.Create 1 module. Give your modules a name and set an emoji. eg : Workstation booking
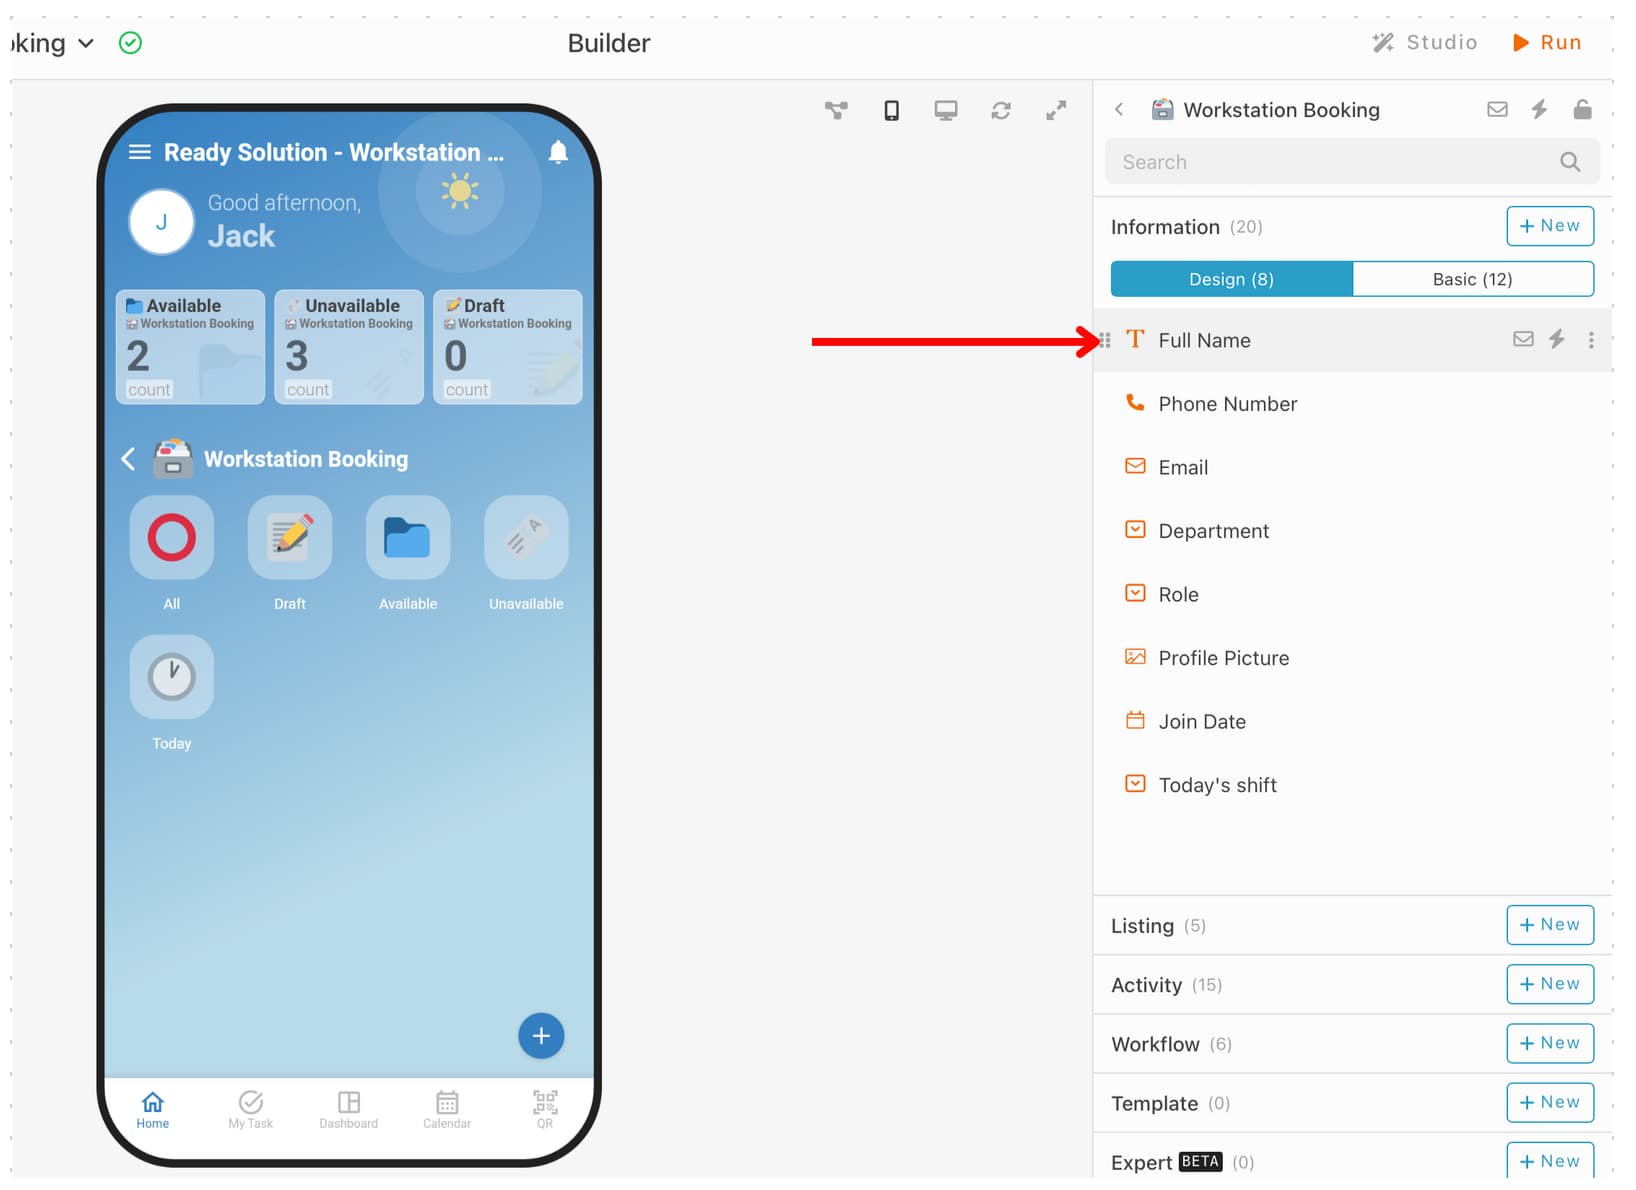
4.Select module and add some information for your modules by click “+ New” in Information tab.
- Add information like below. eg : Name - Information Type
[Module :Workstation Booking]
*Full Name - Text
[Module : Workstation Booking]
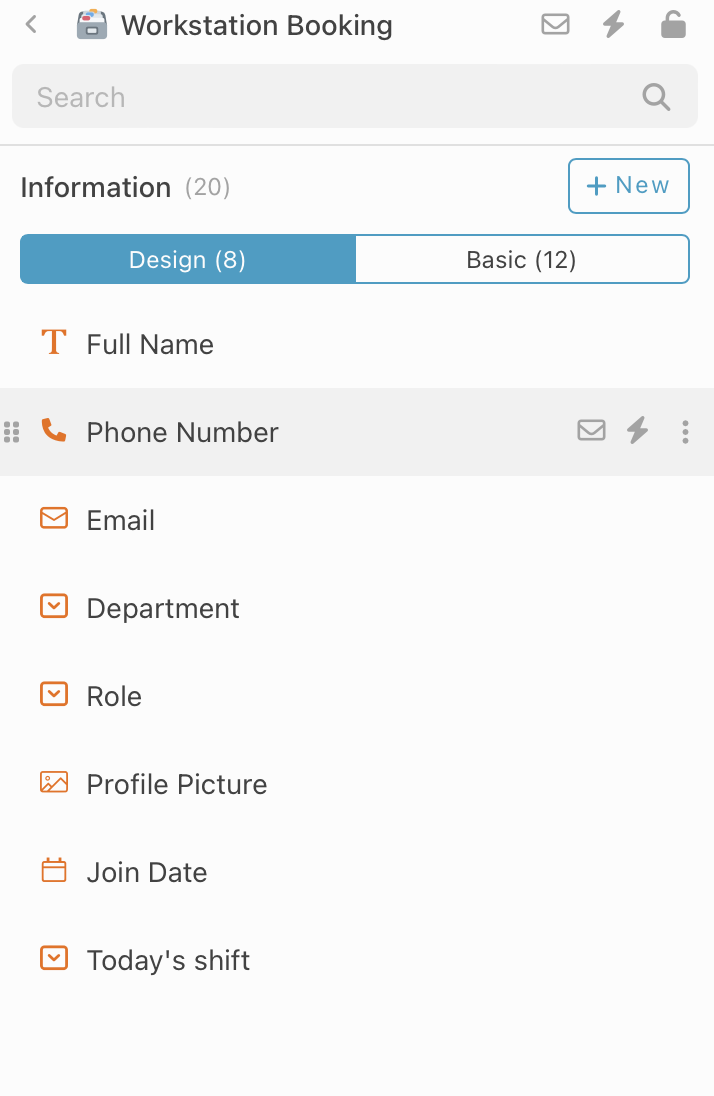
- Full Name - Text
- Phone Number - Phone Number
- Email - Email
- Profile Picture - Image
- Join Date - Date
*Department - Select
- HR *
- Account *
*Role - Select
- Admin*
- Programmer *
*Today’s shift - Select
- Available*
- Unavailable *
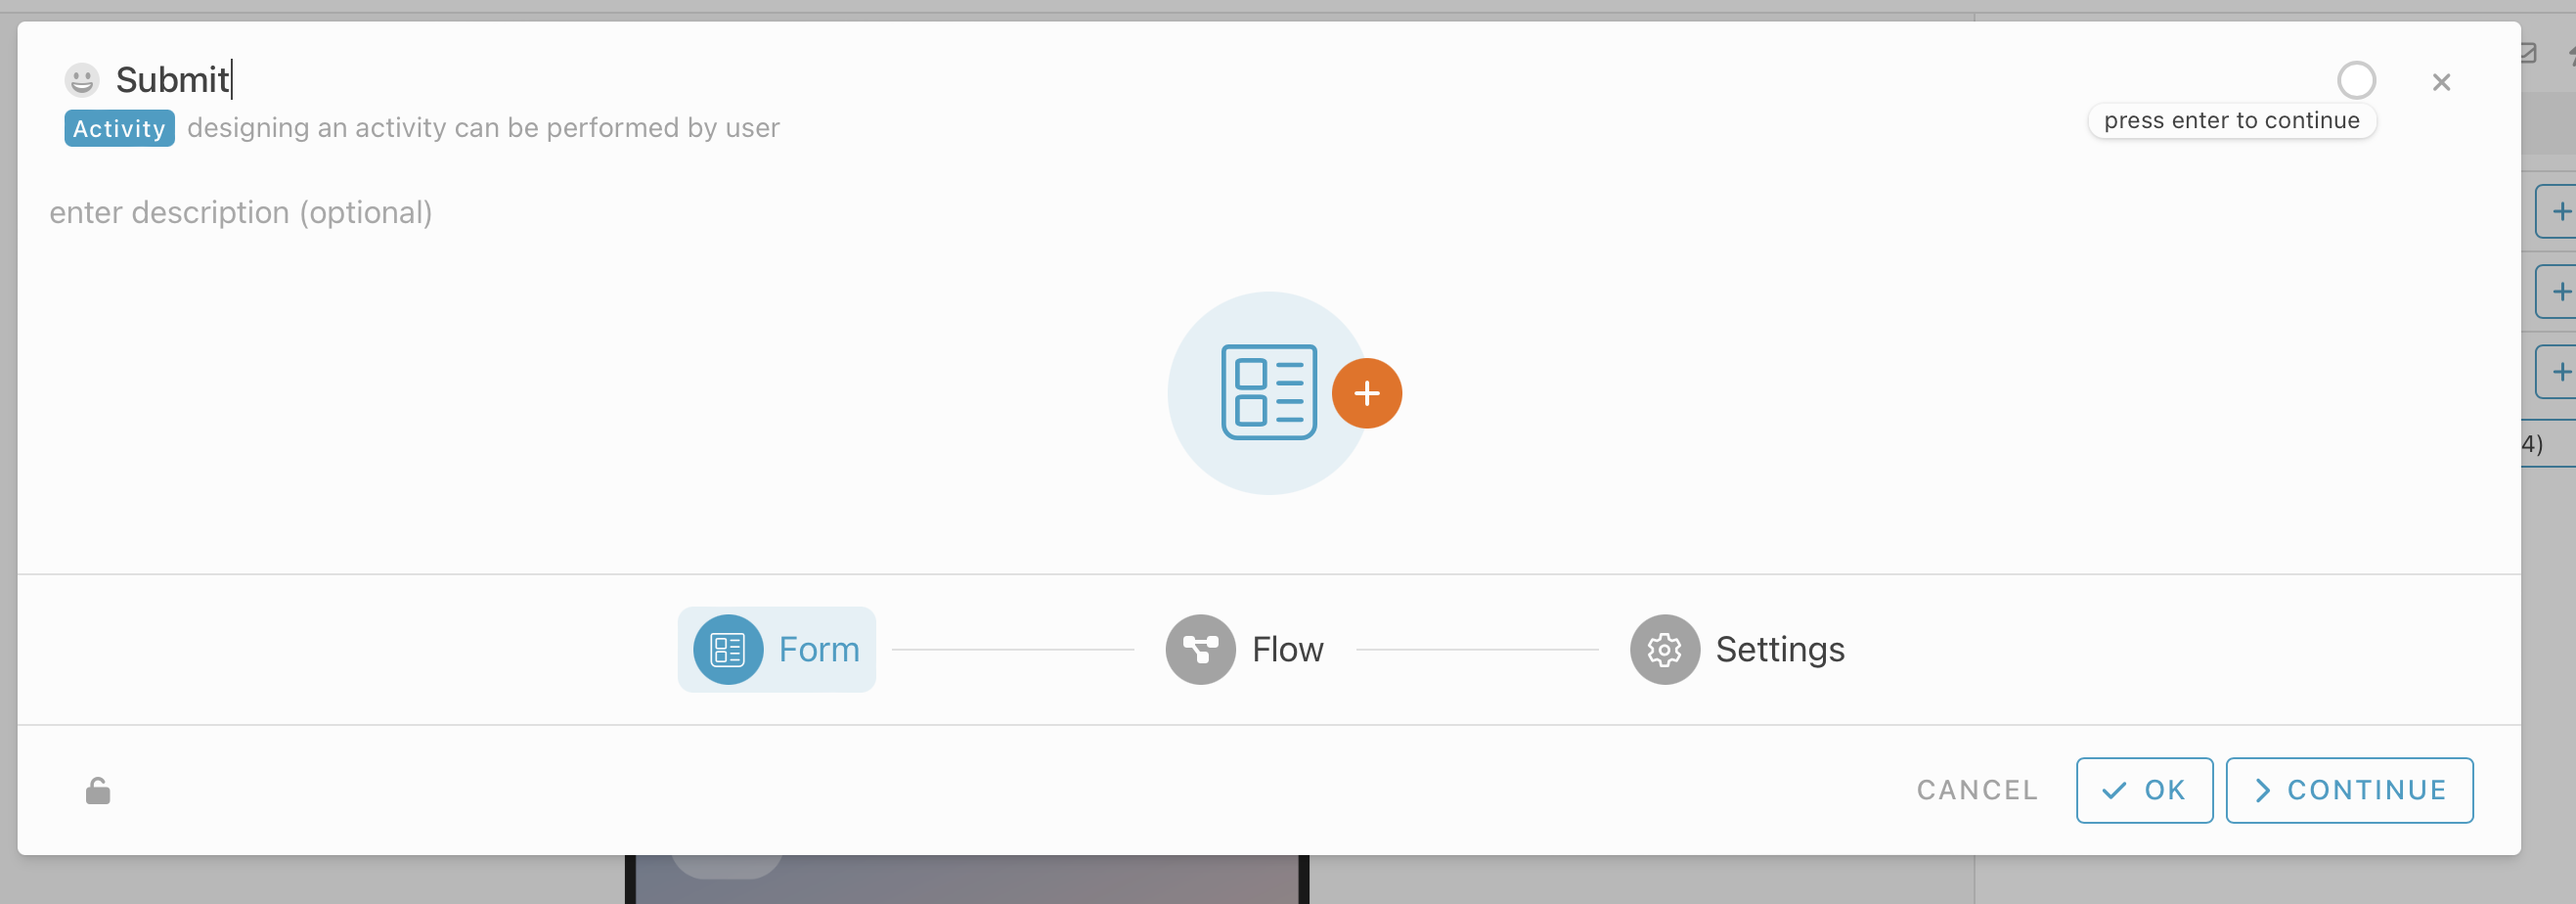
- Go to module “Workstation Booking”, choose Activity tab and click “+ New” to add new activity.

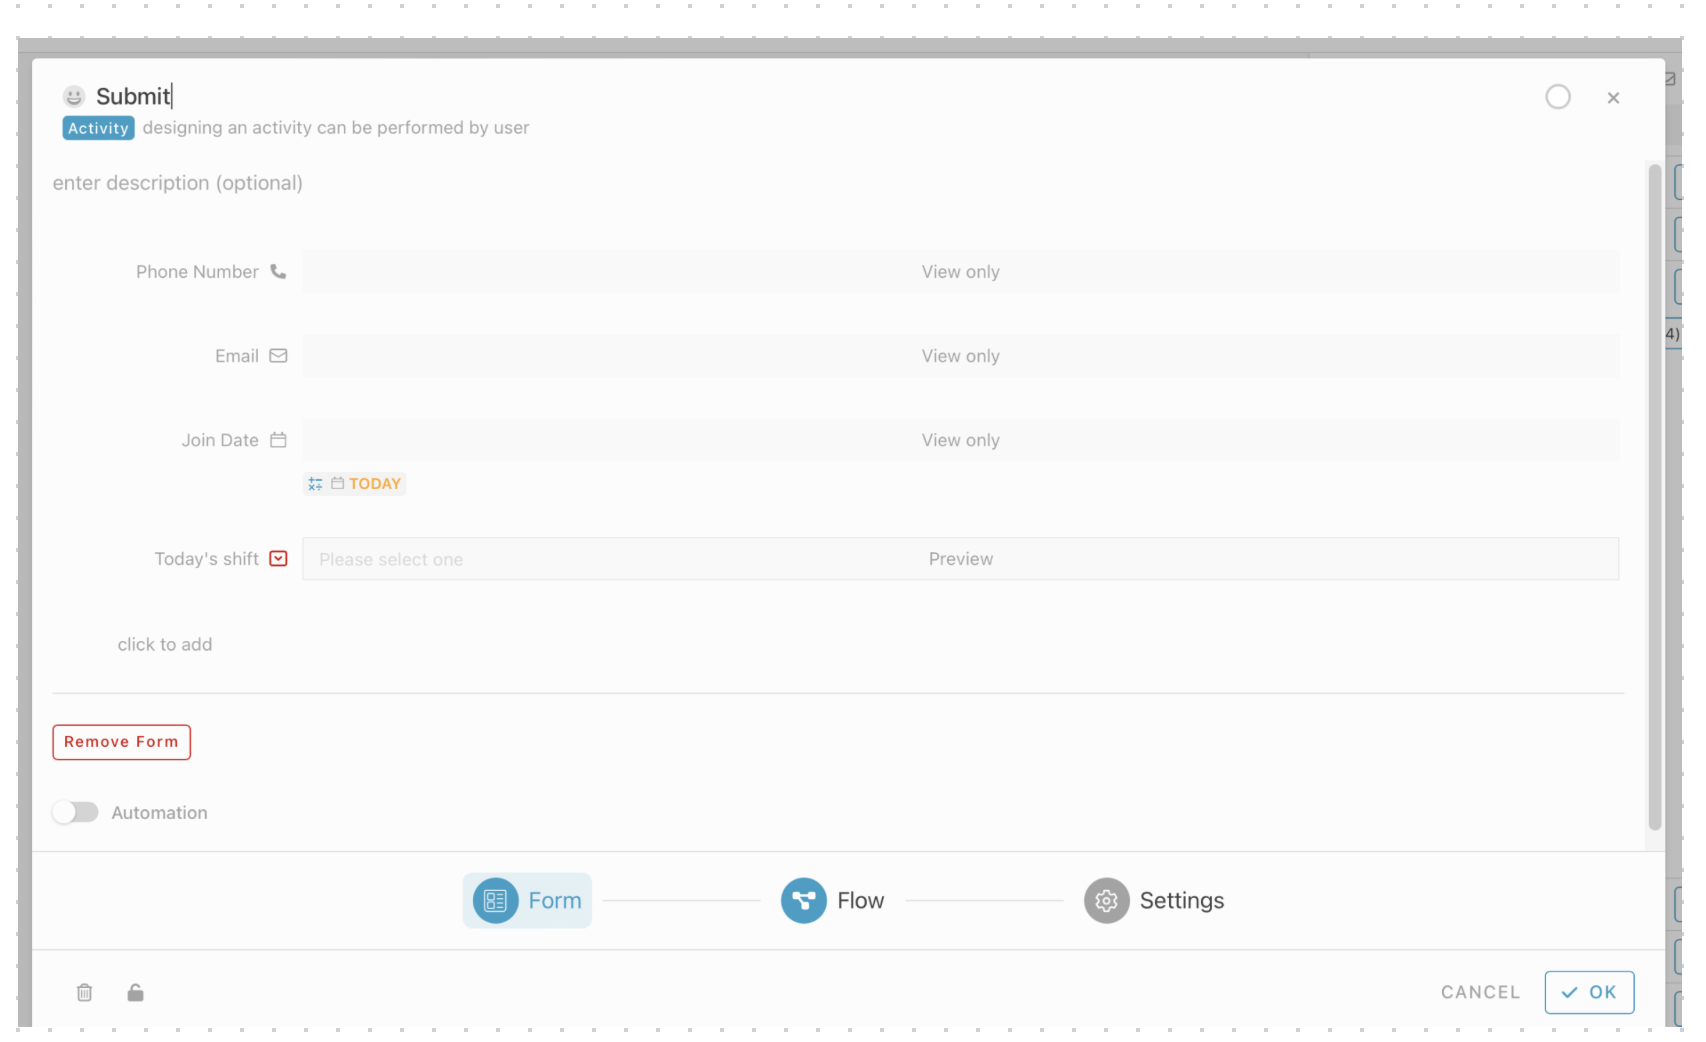
7.Give a name for the activity. eg : Submit (emoji is optional), click the plus button to do a form
- Add information like below. eg :Phone Number - Phone Number Type
[Module :Workstation Booking]
- Phone Number - Phone Number
- Email - Email
- Join Date- Date
- Today’s shift- Date
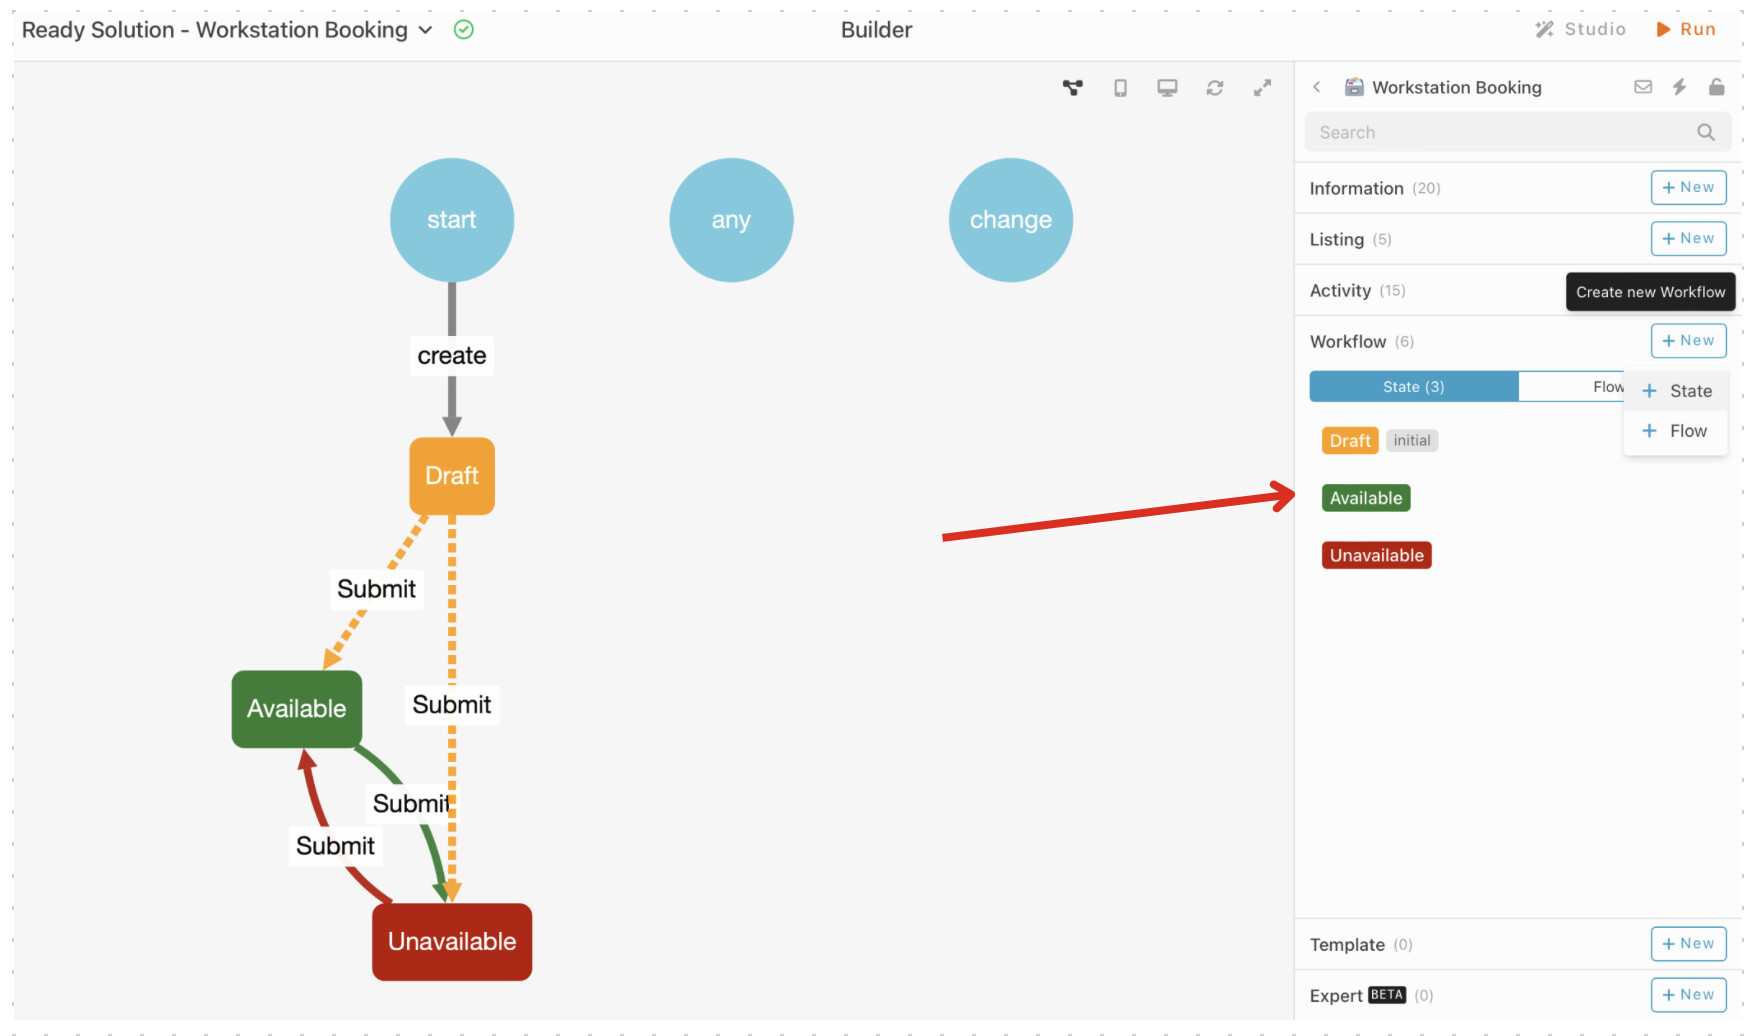
- In Workstation Booking module, select workflow tab, click “+ New” and choose “+ State” to add state.
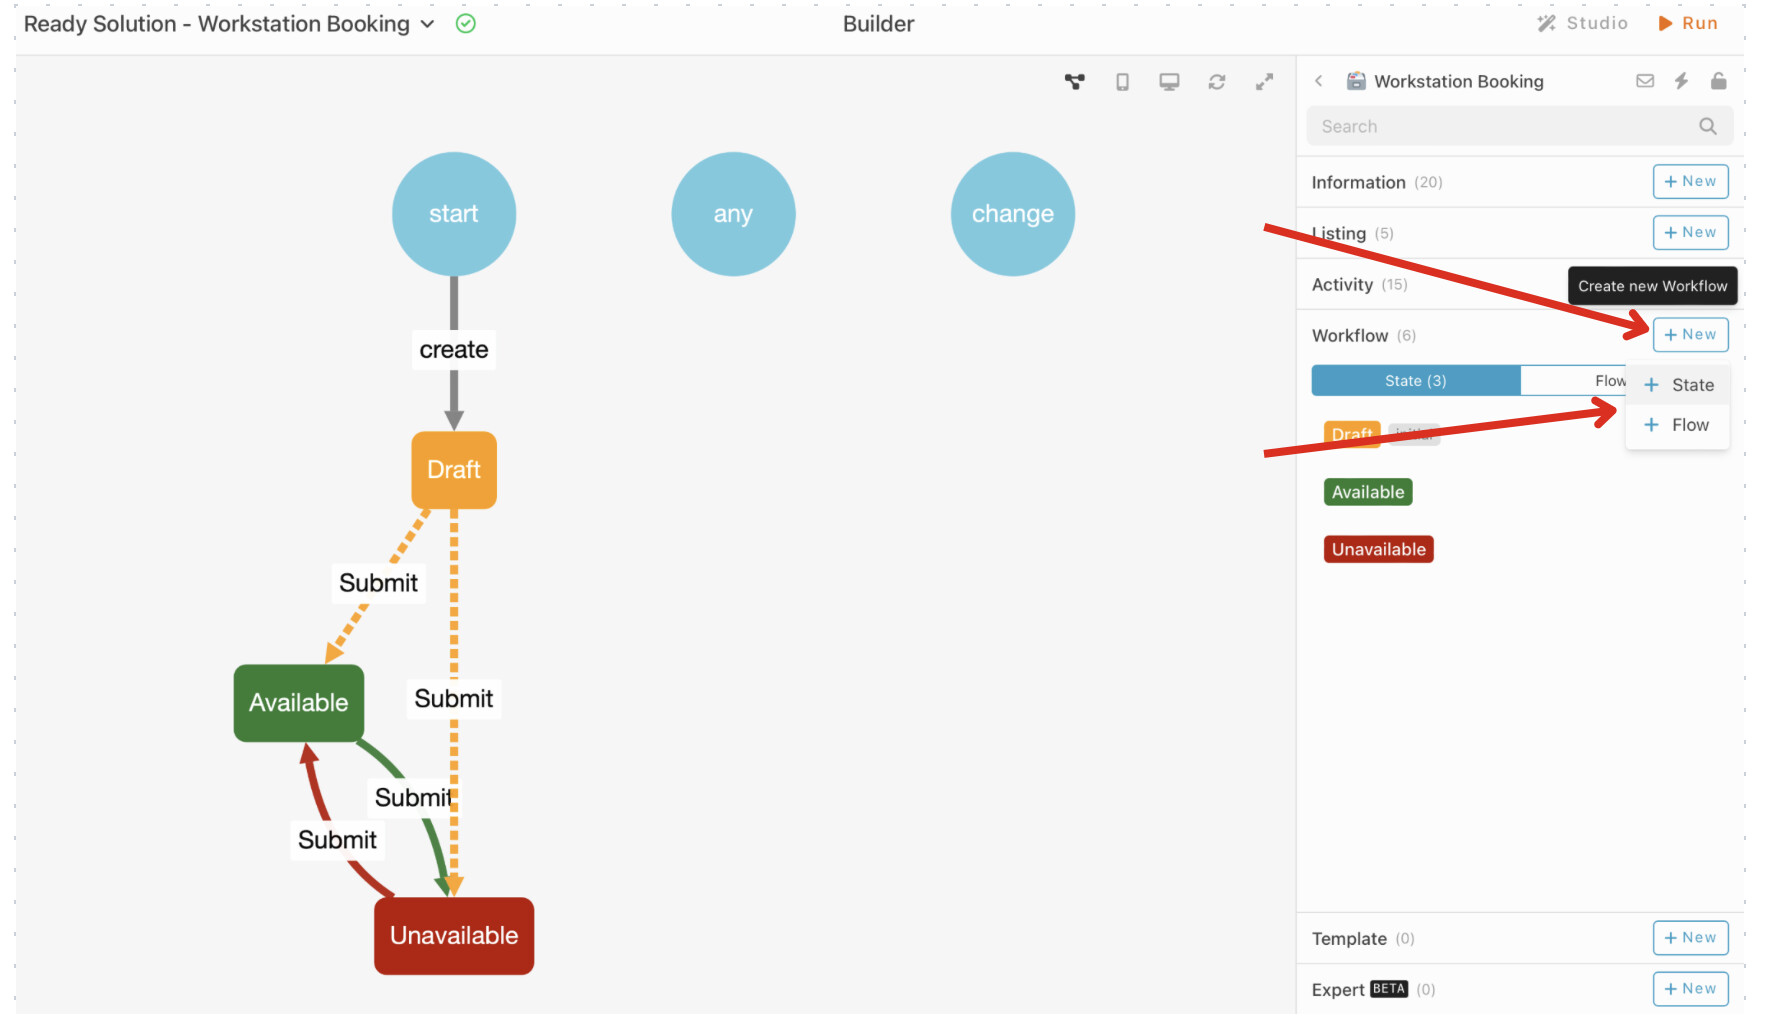
10.Create 3 state, give each state a name, and color.
eg : Draft,Available,Unabailable.
11.In Workstation booking module, select workflow tab, click “+ new” and choose “+ Flow” to add flow.
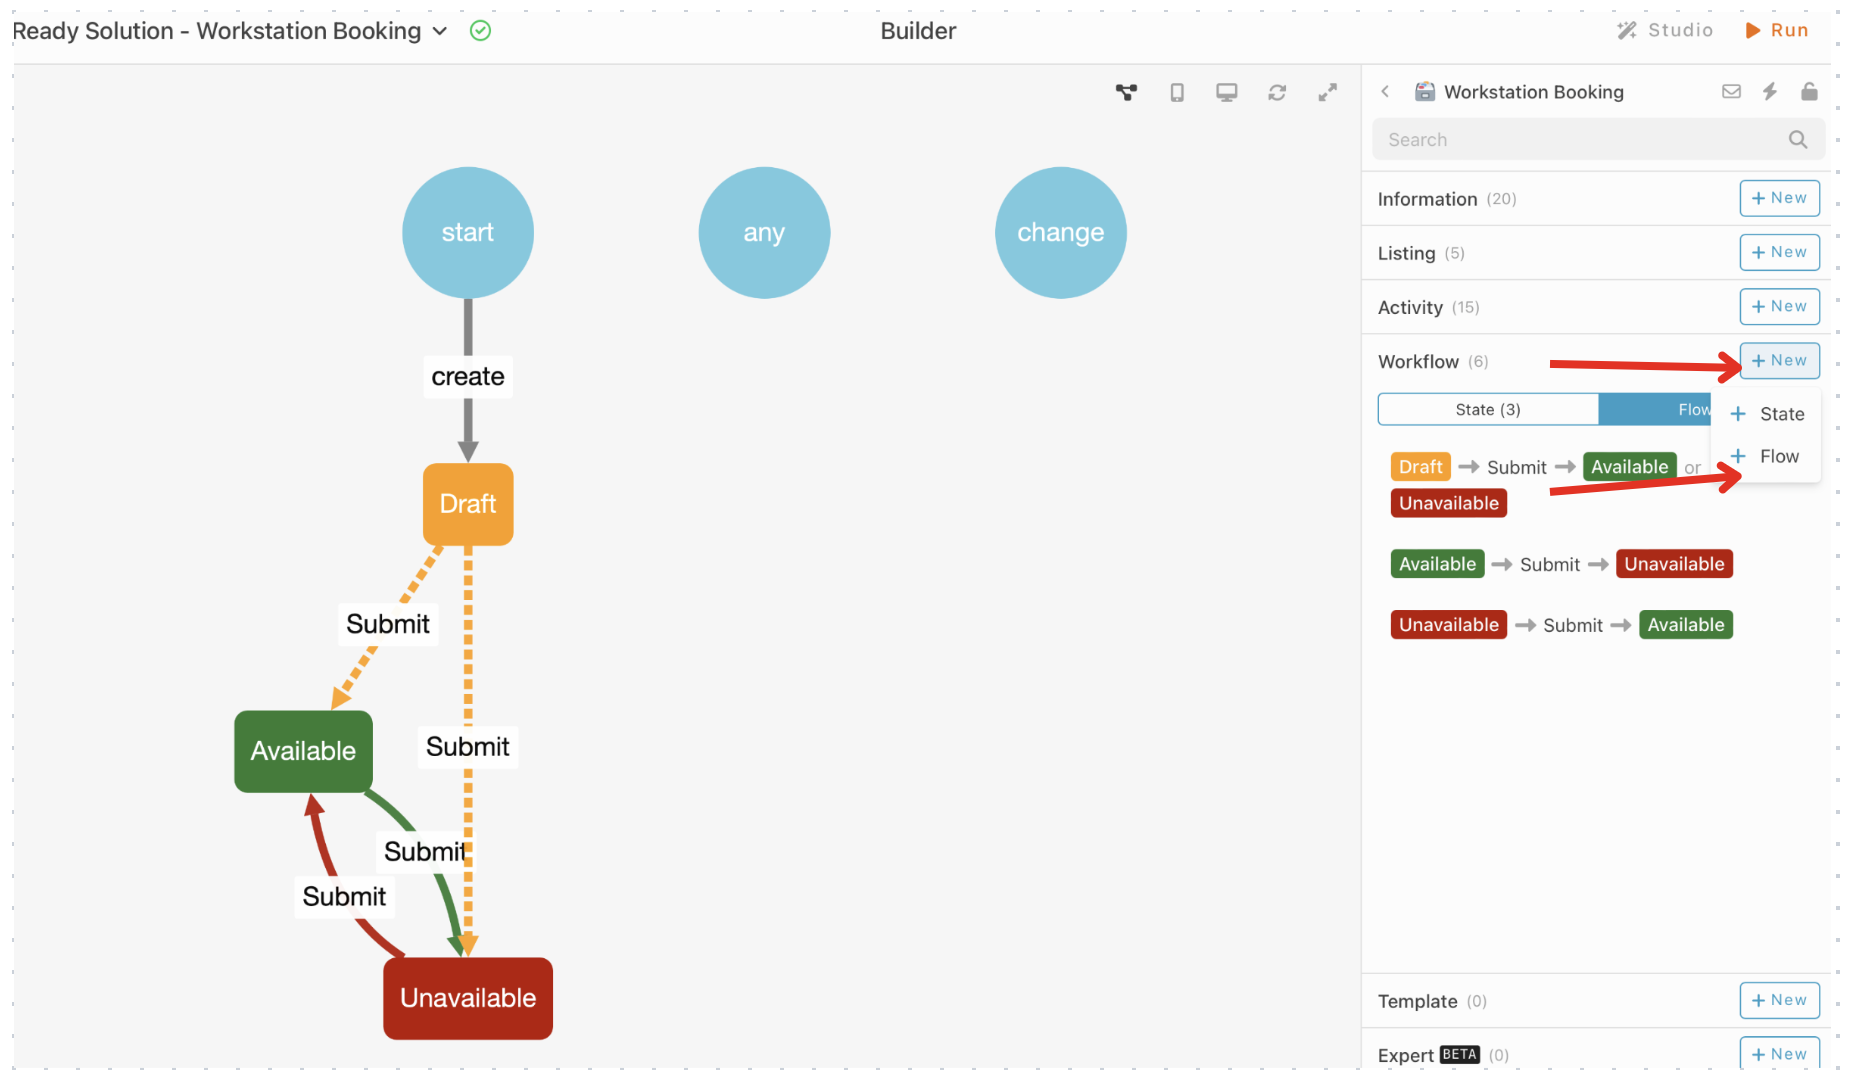
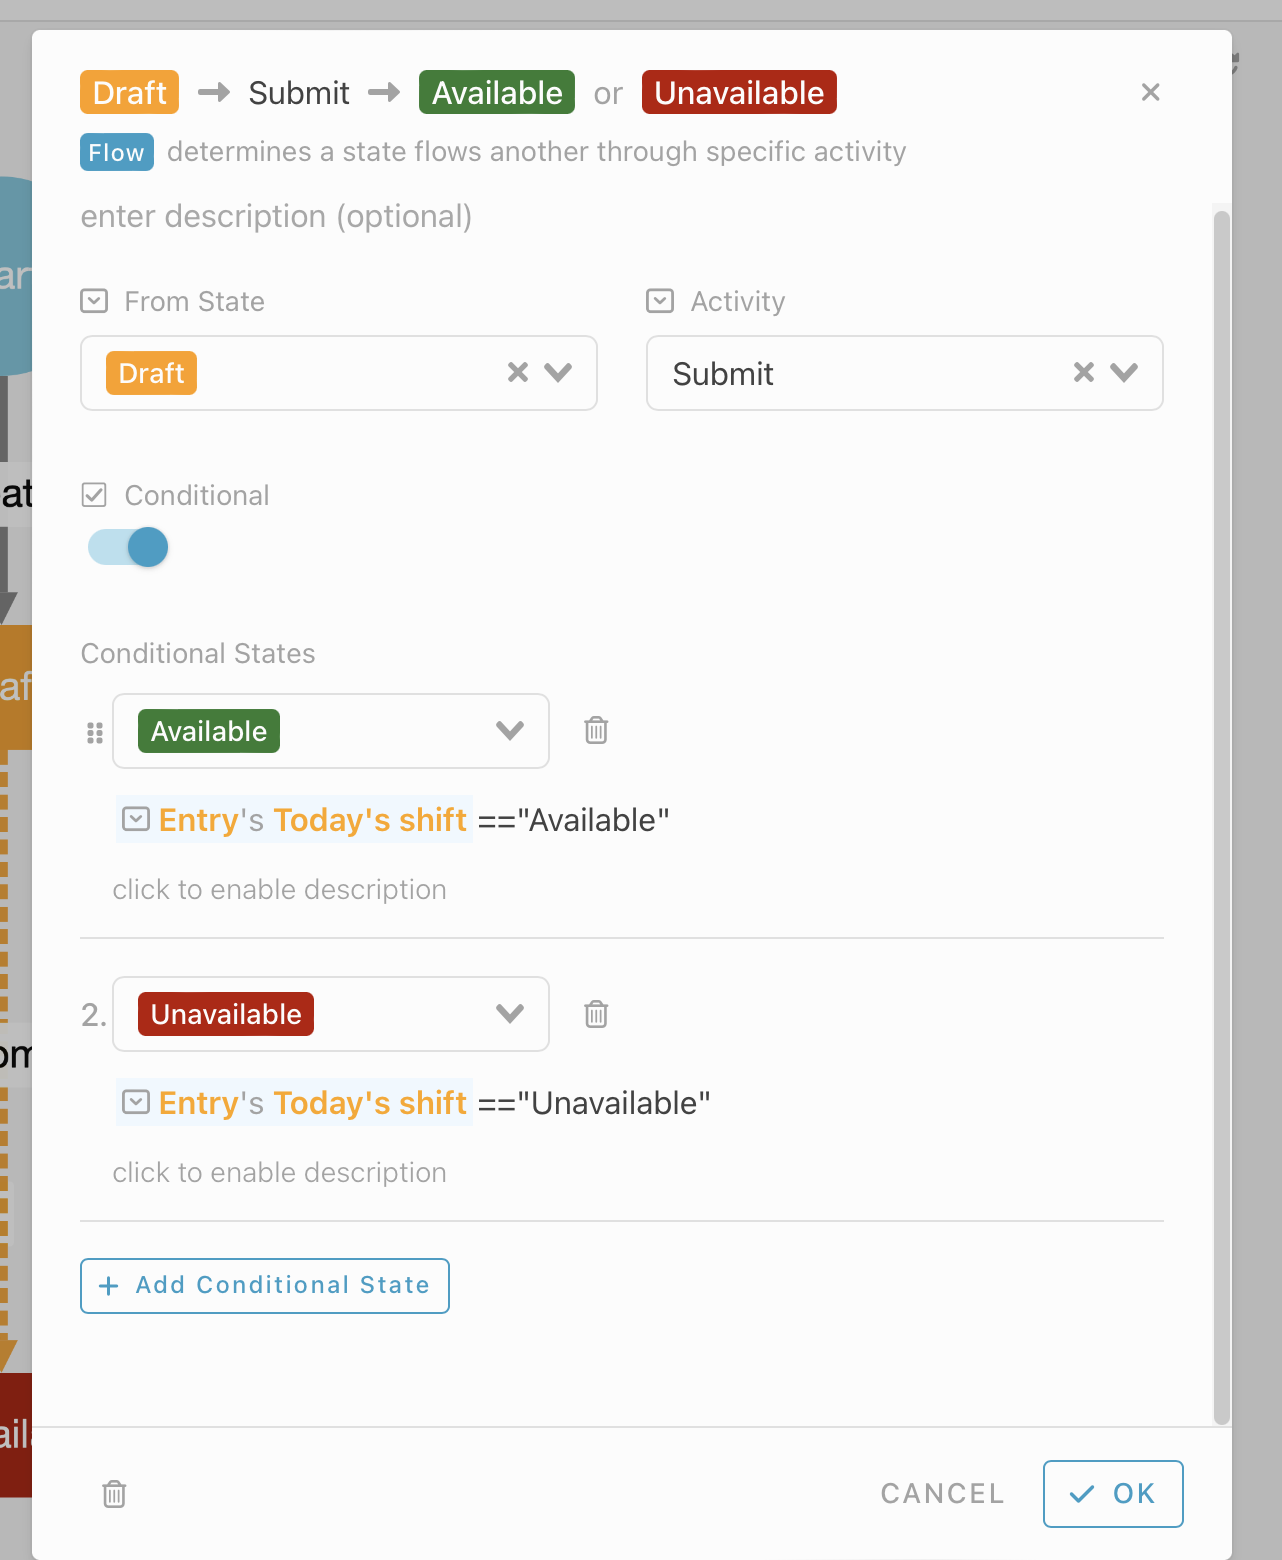
Set your flow ![]()
-
From state - Draft
-
Activity - Submit
-
To Conditional State - Available
#Entry#Today’s shift == “Available” -
To Conditional State - Unavailable
#Entry#Today’s shift == “Unavailable”
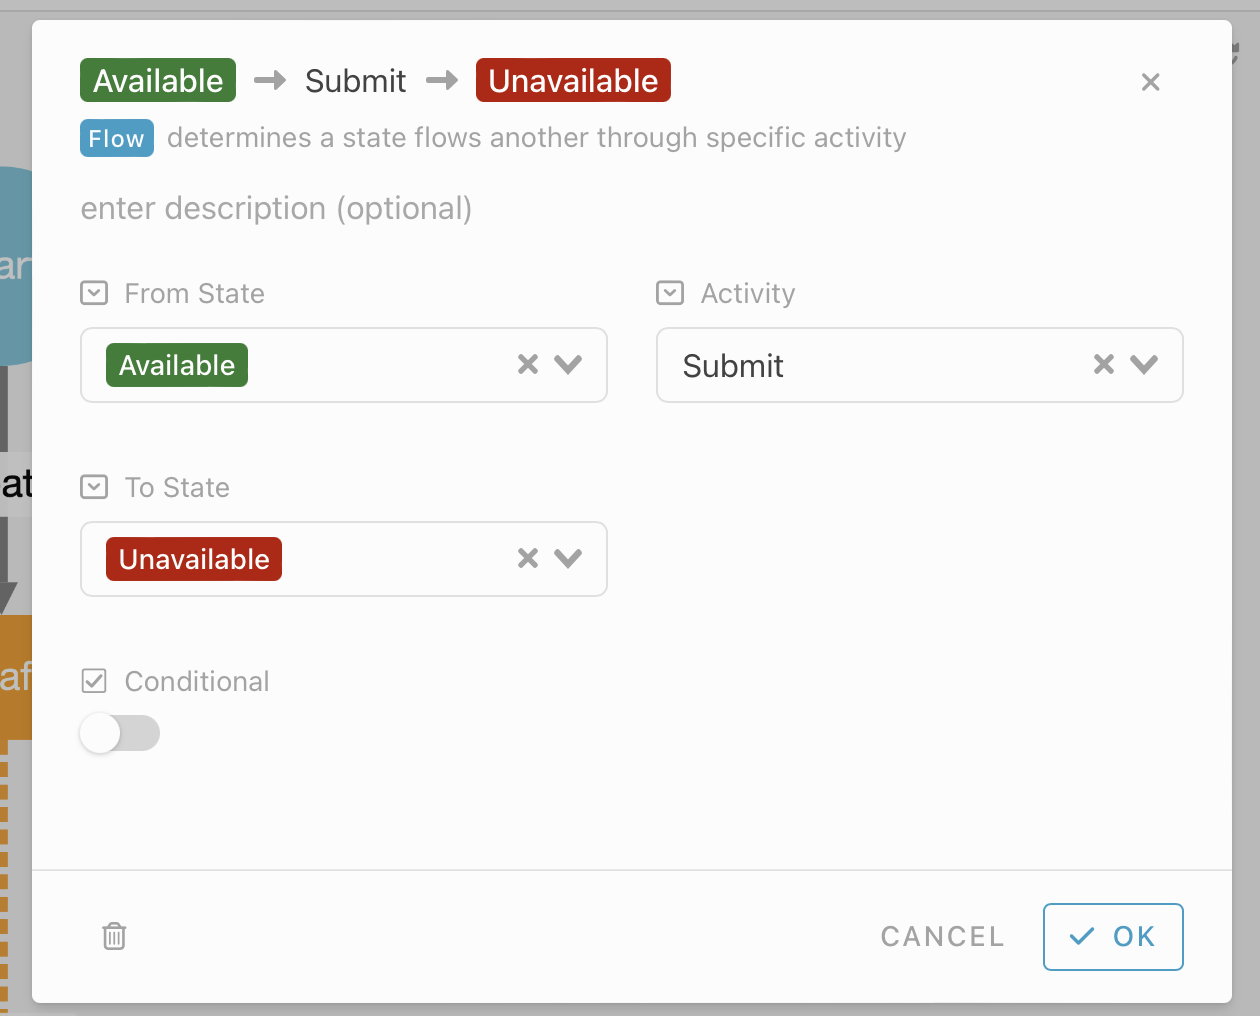
- From state - * Available*
- Activity - Submit
- To State - Unavailable
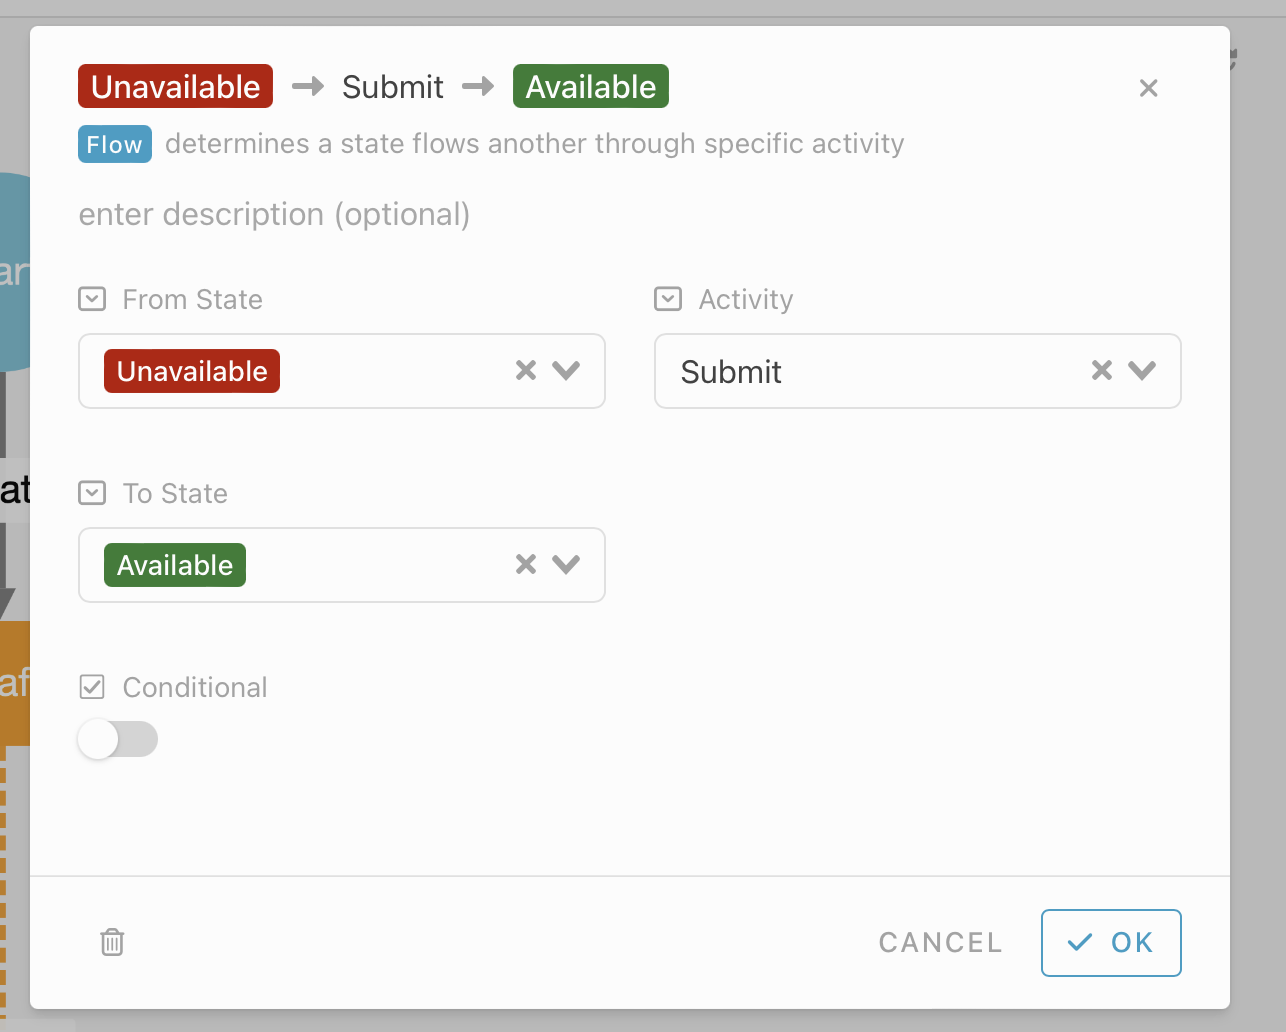
- From state - * Unavailable*
- Activity - Submit
- To State - Available
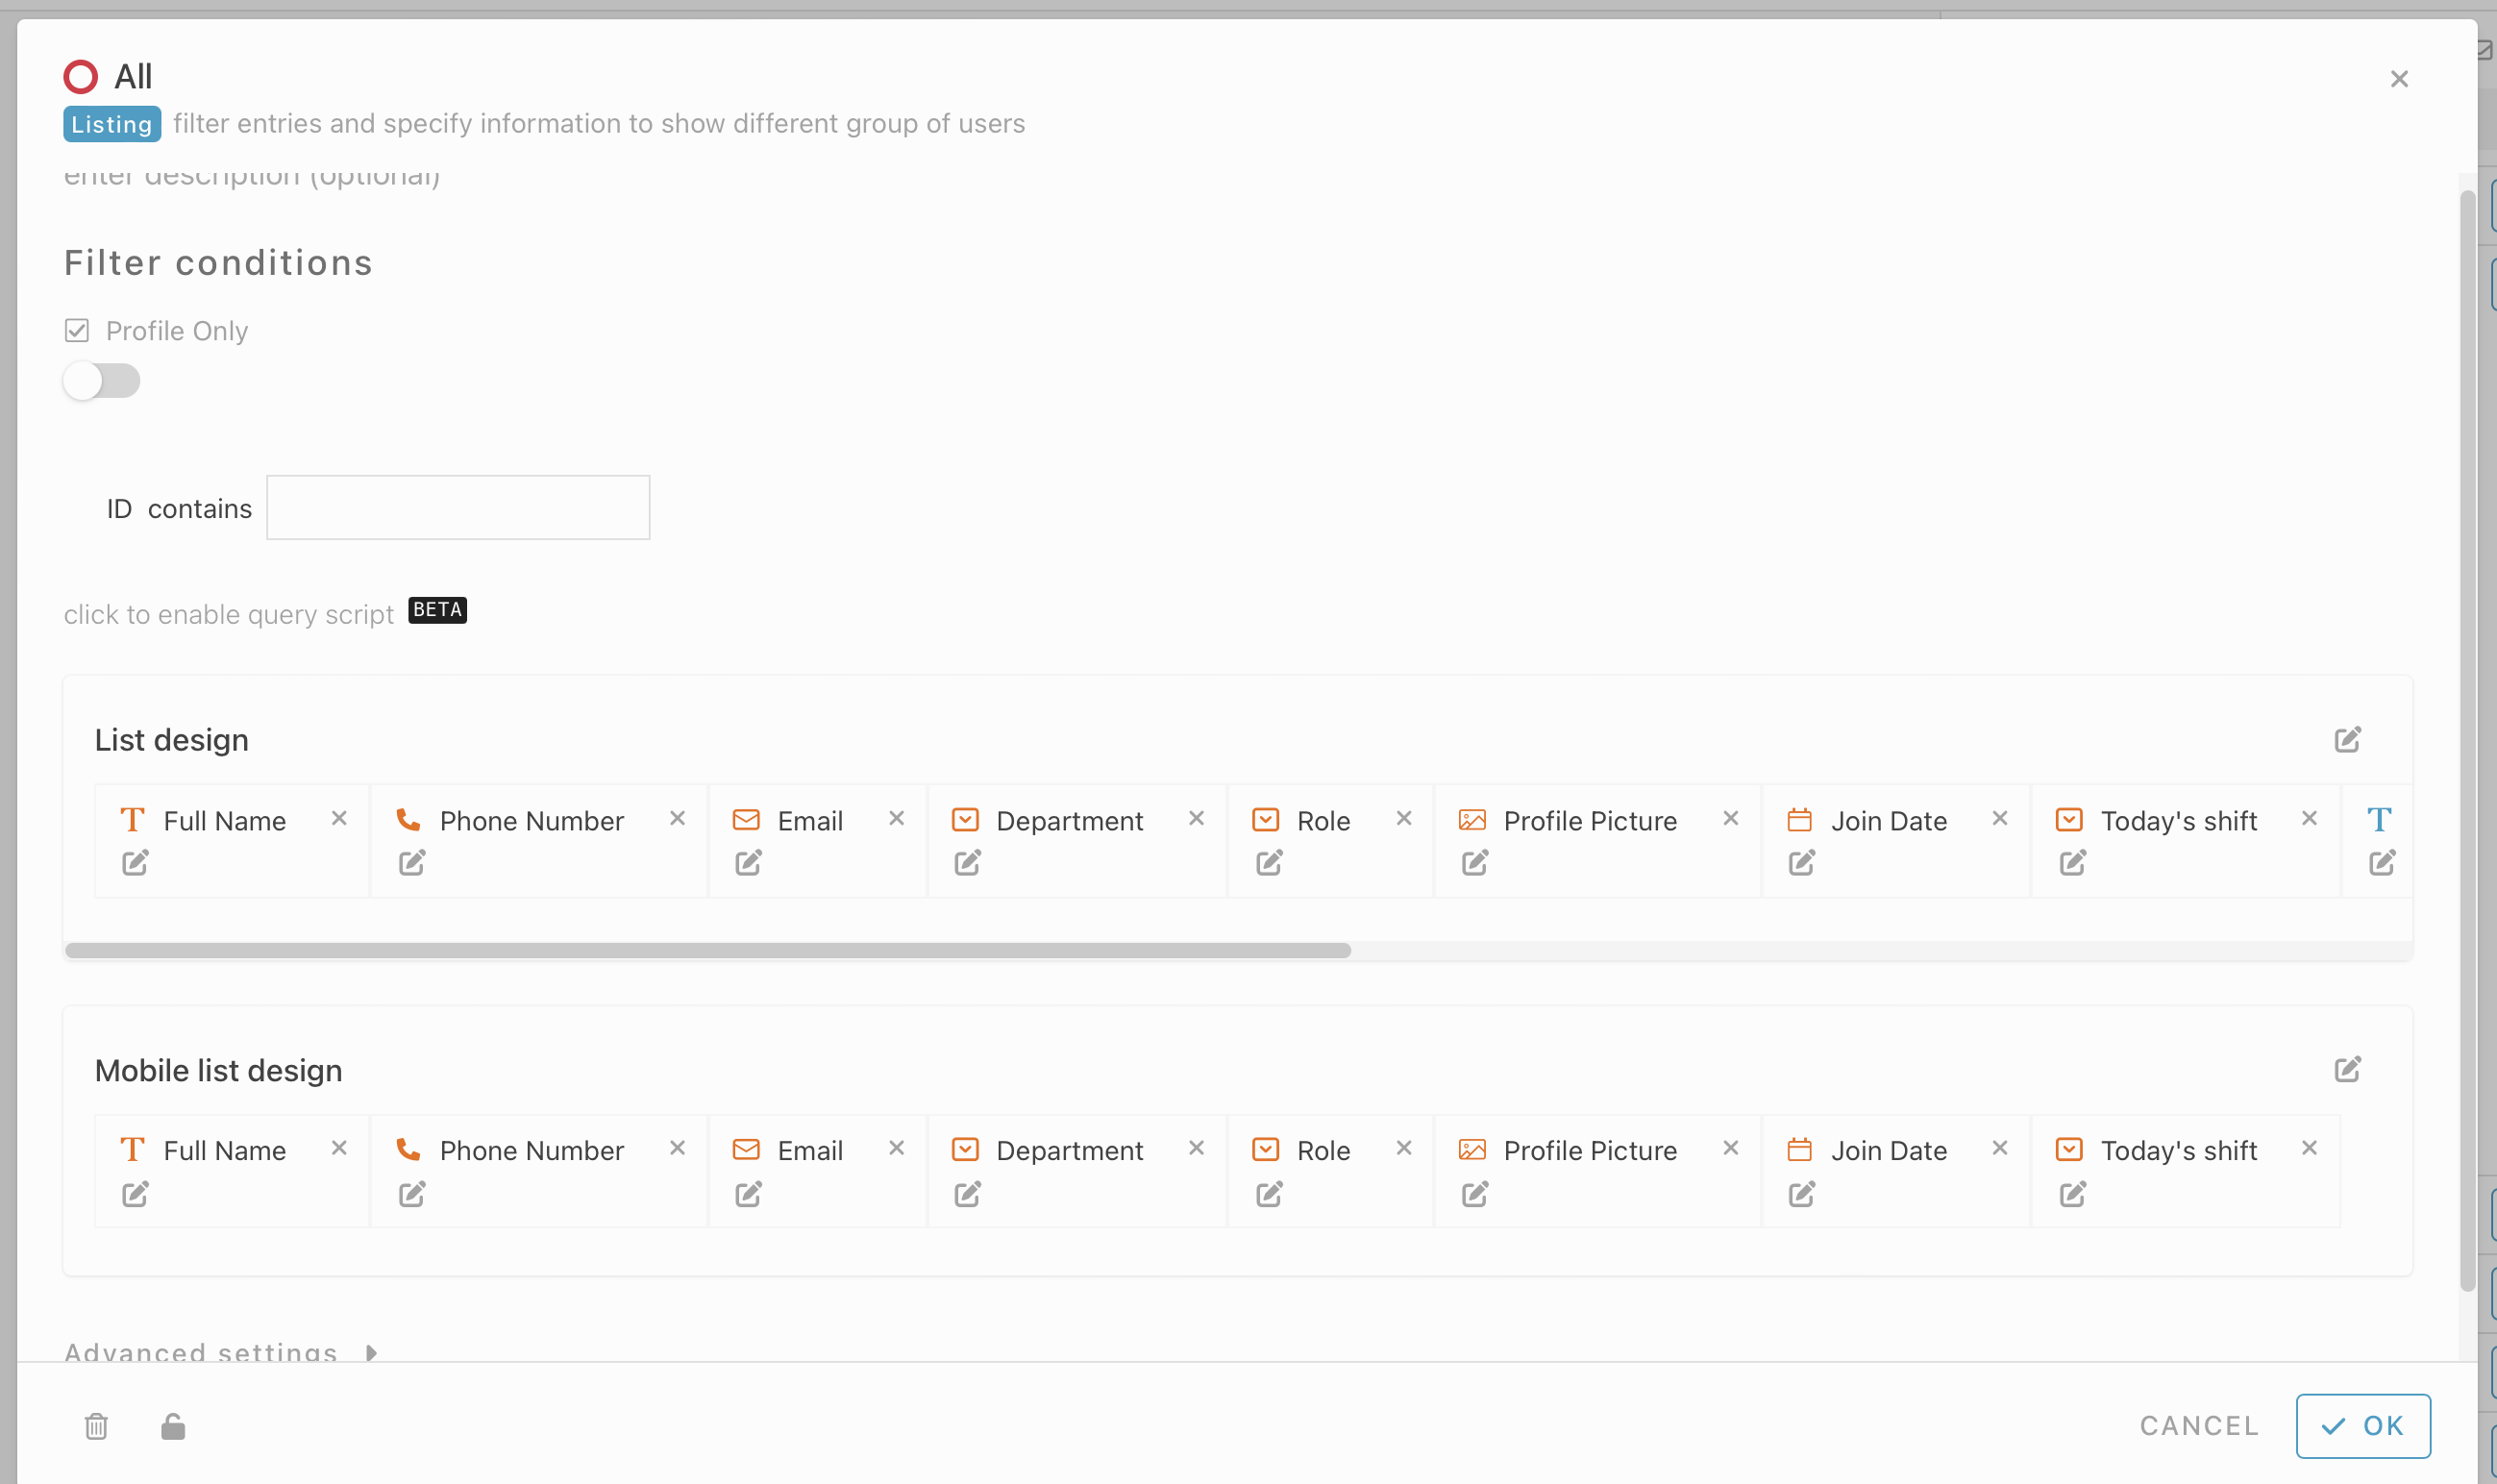
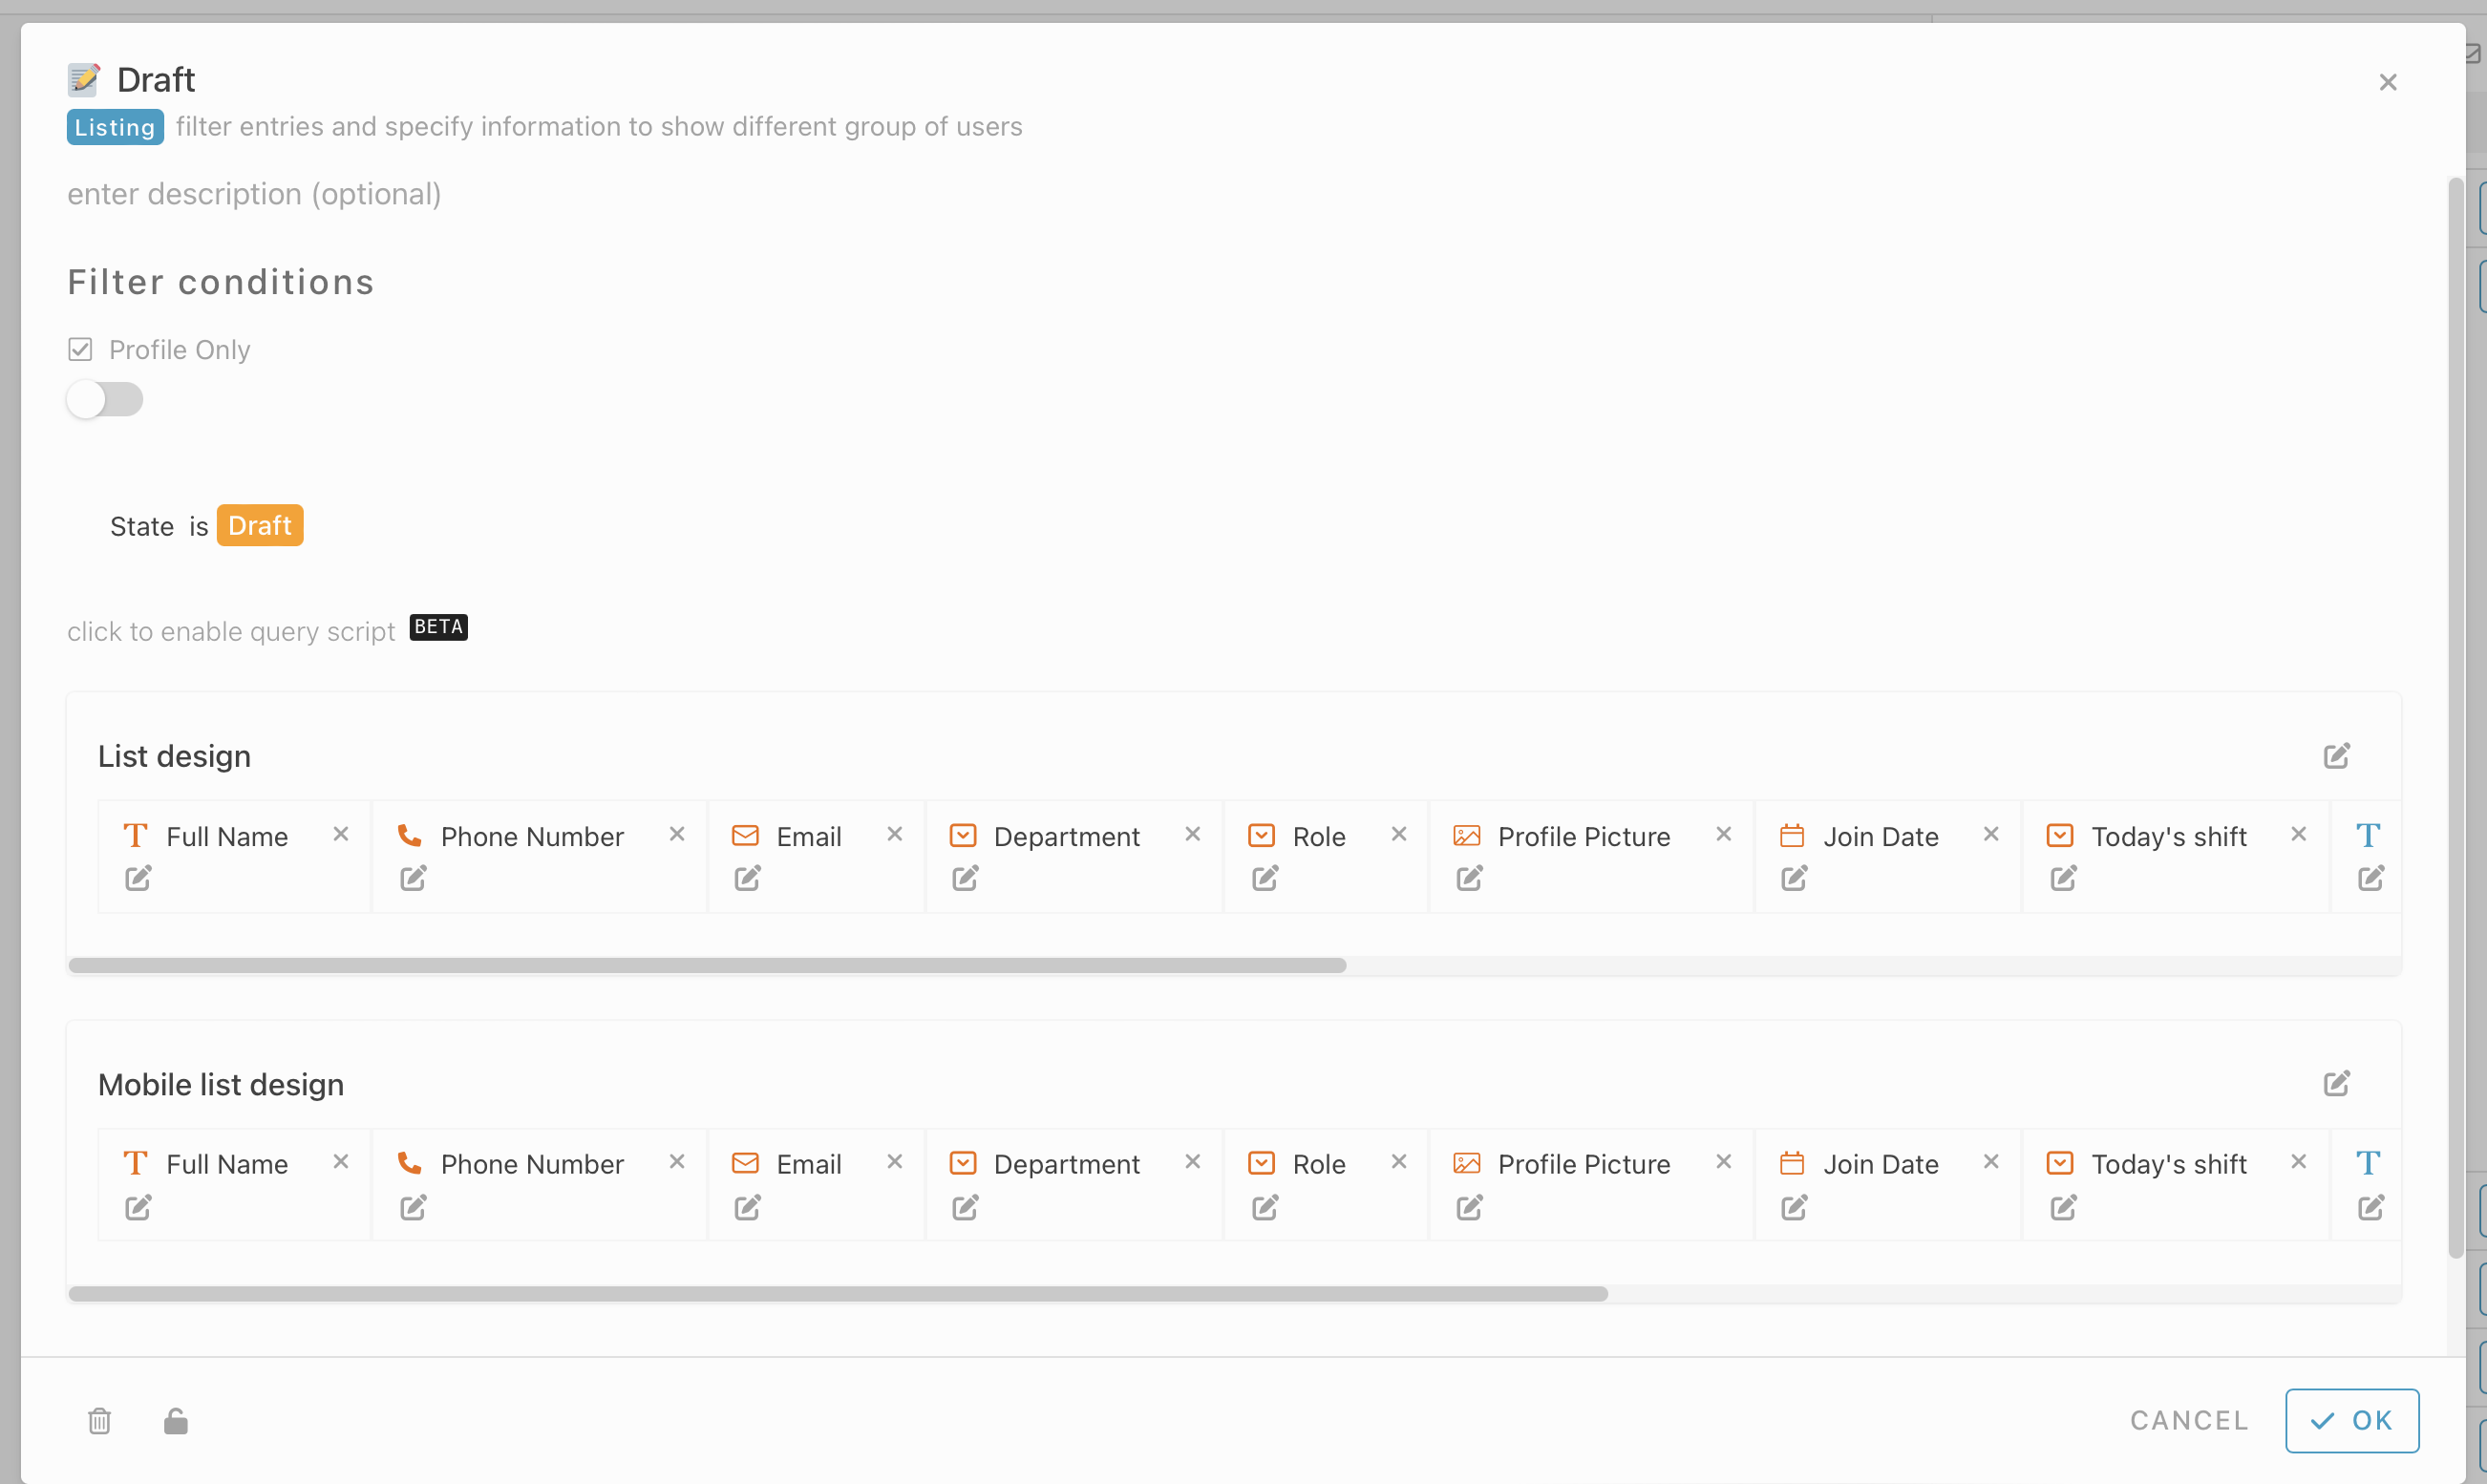
- In workstation booking module, select Listing tab and choose “+ New” to add new listing.

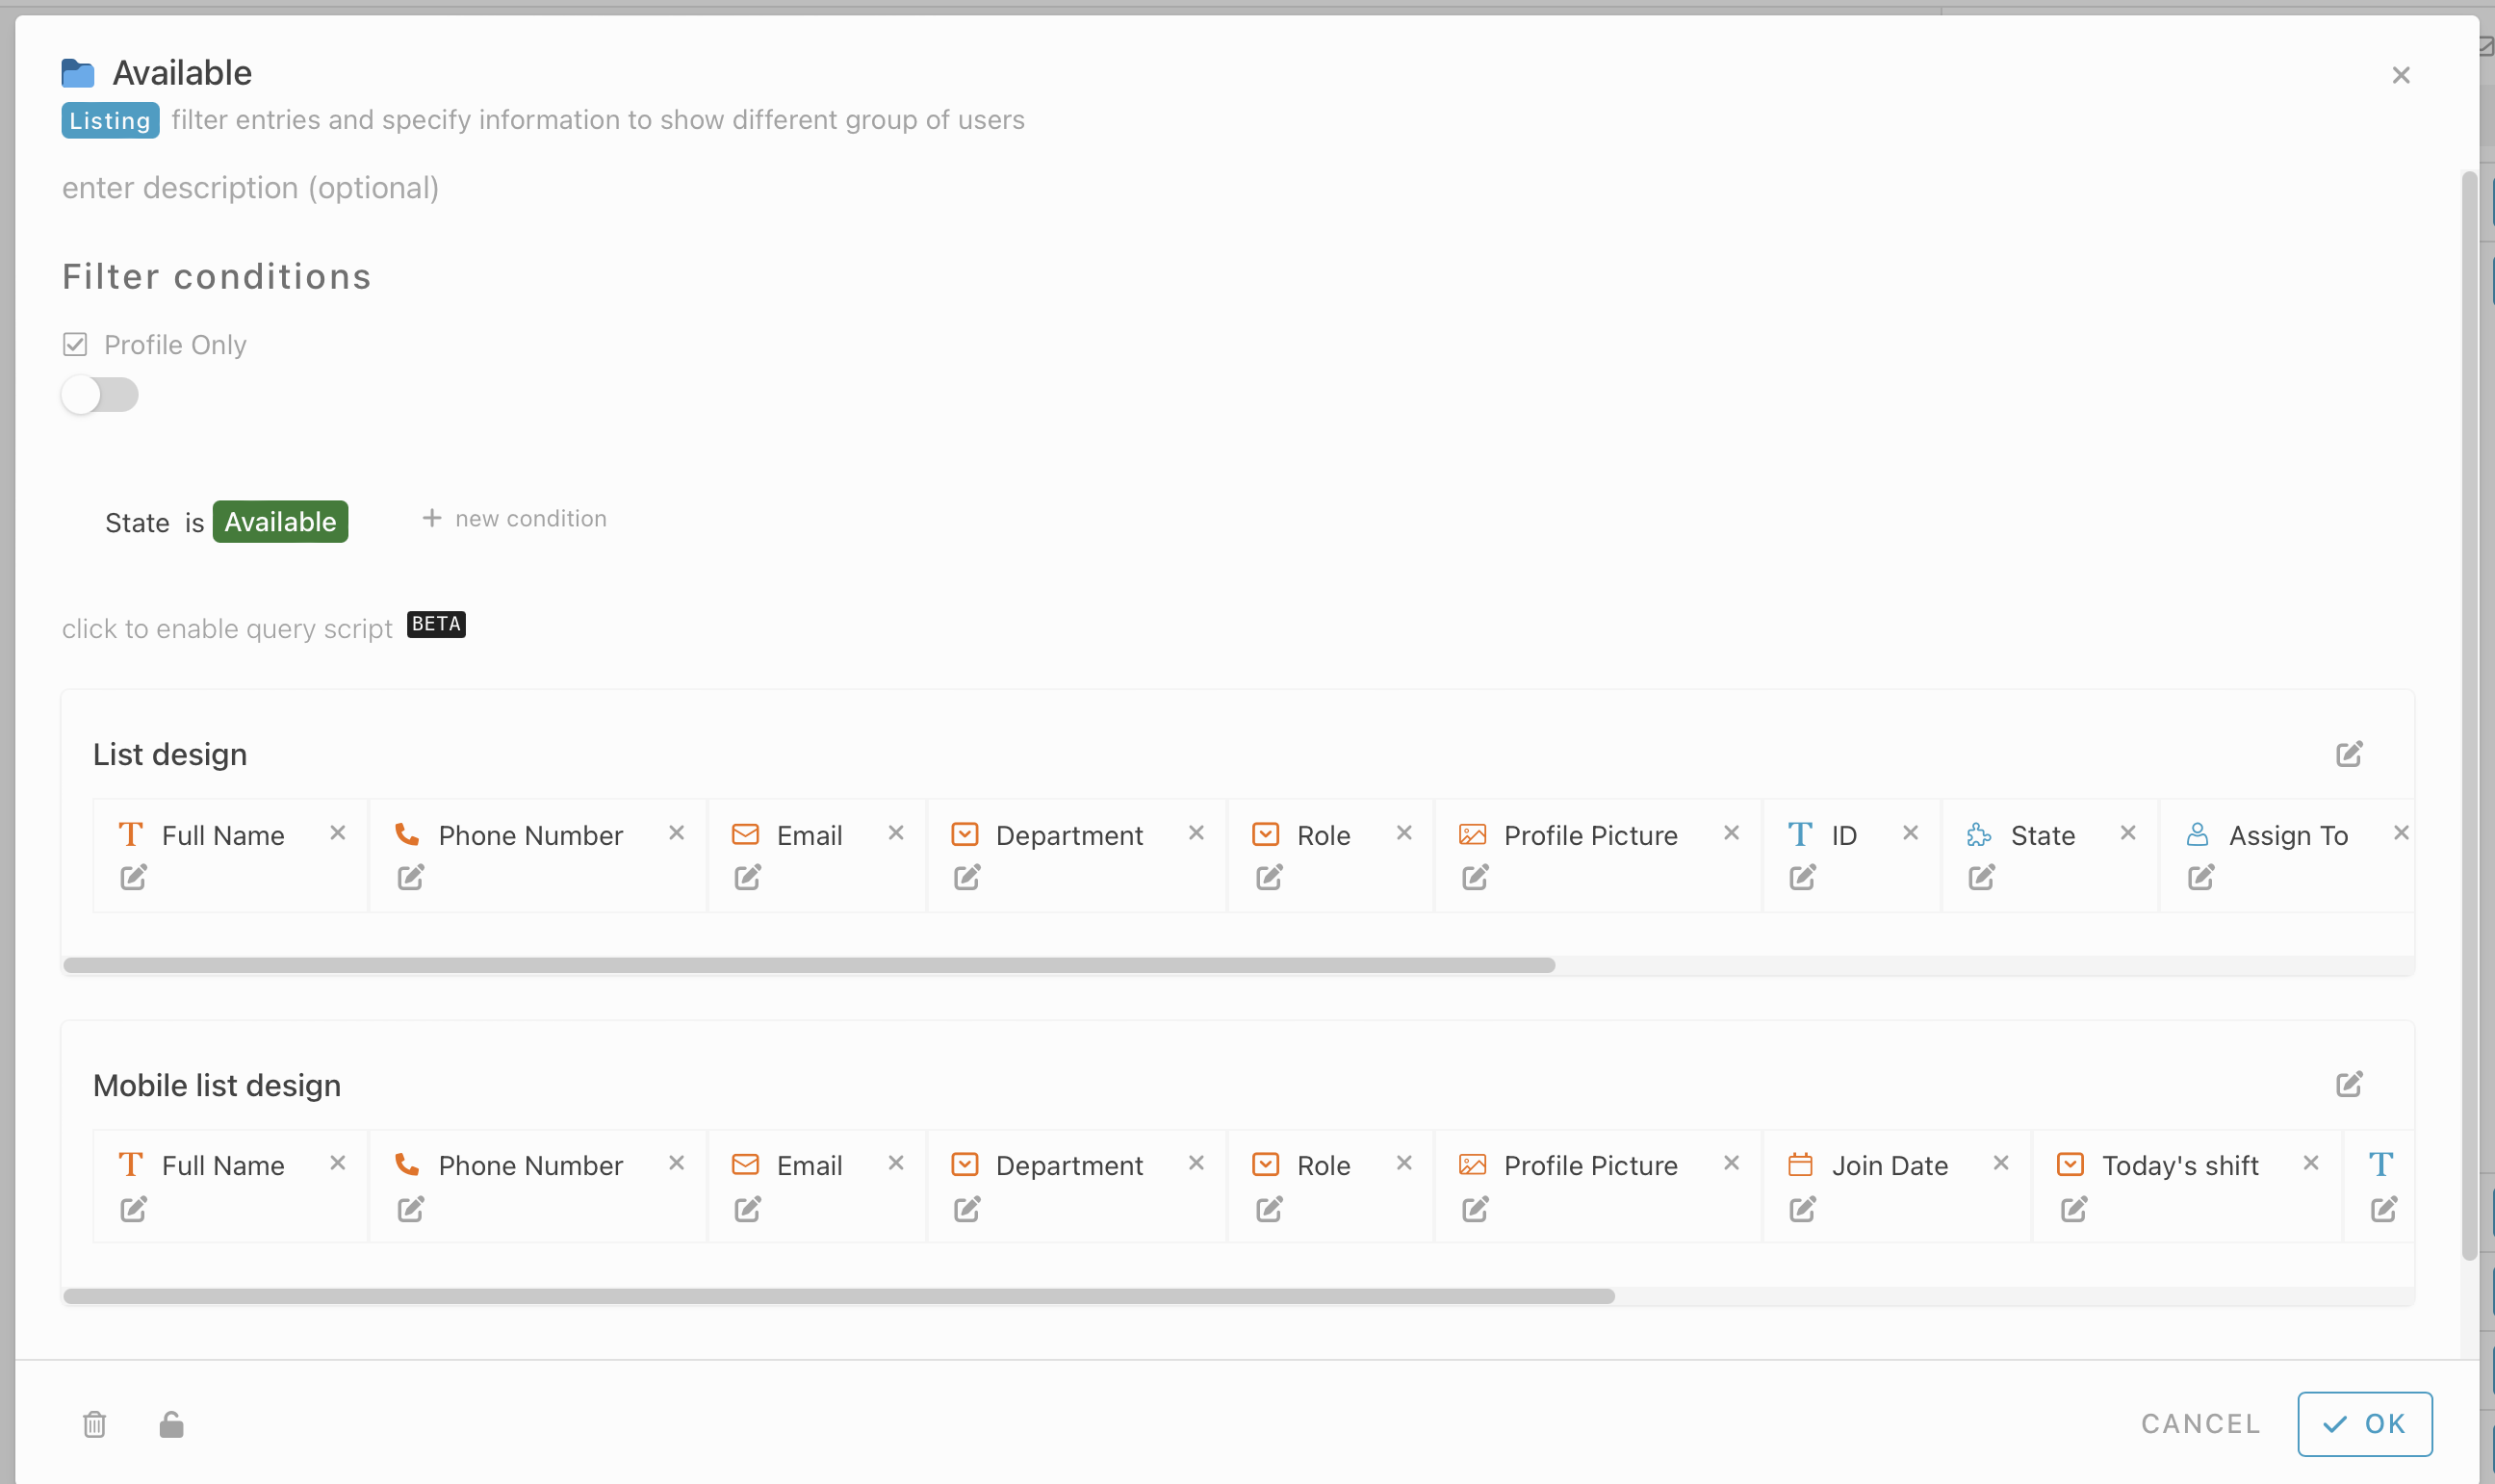
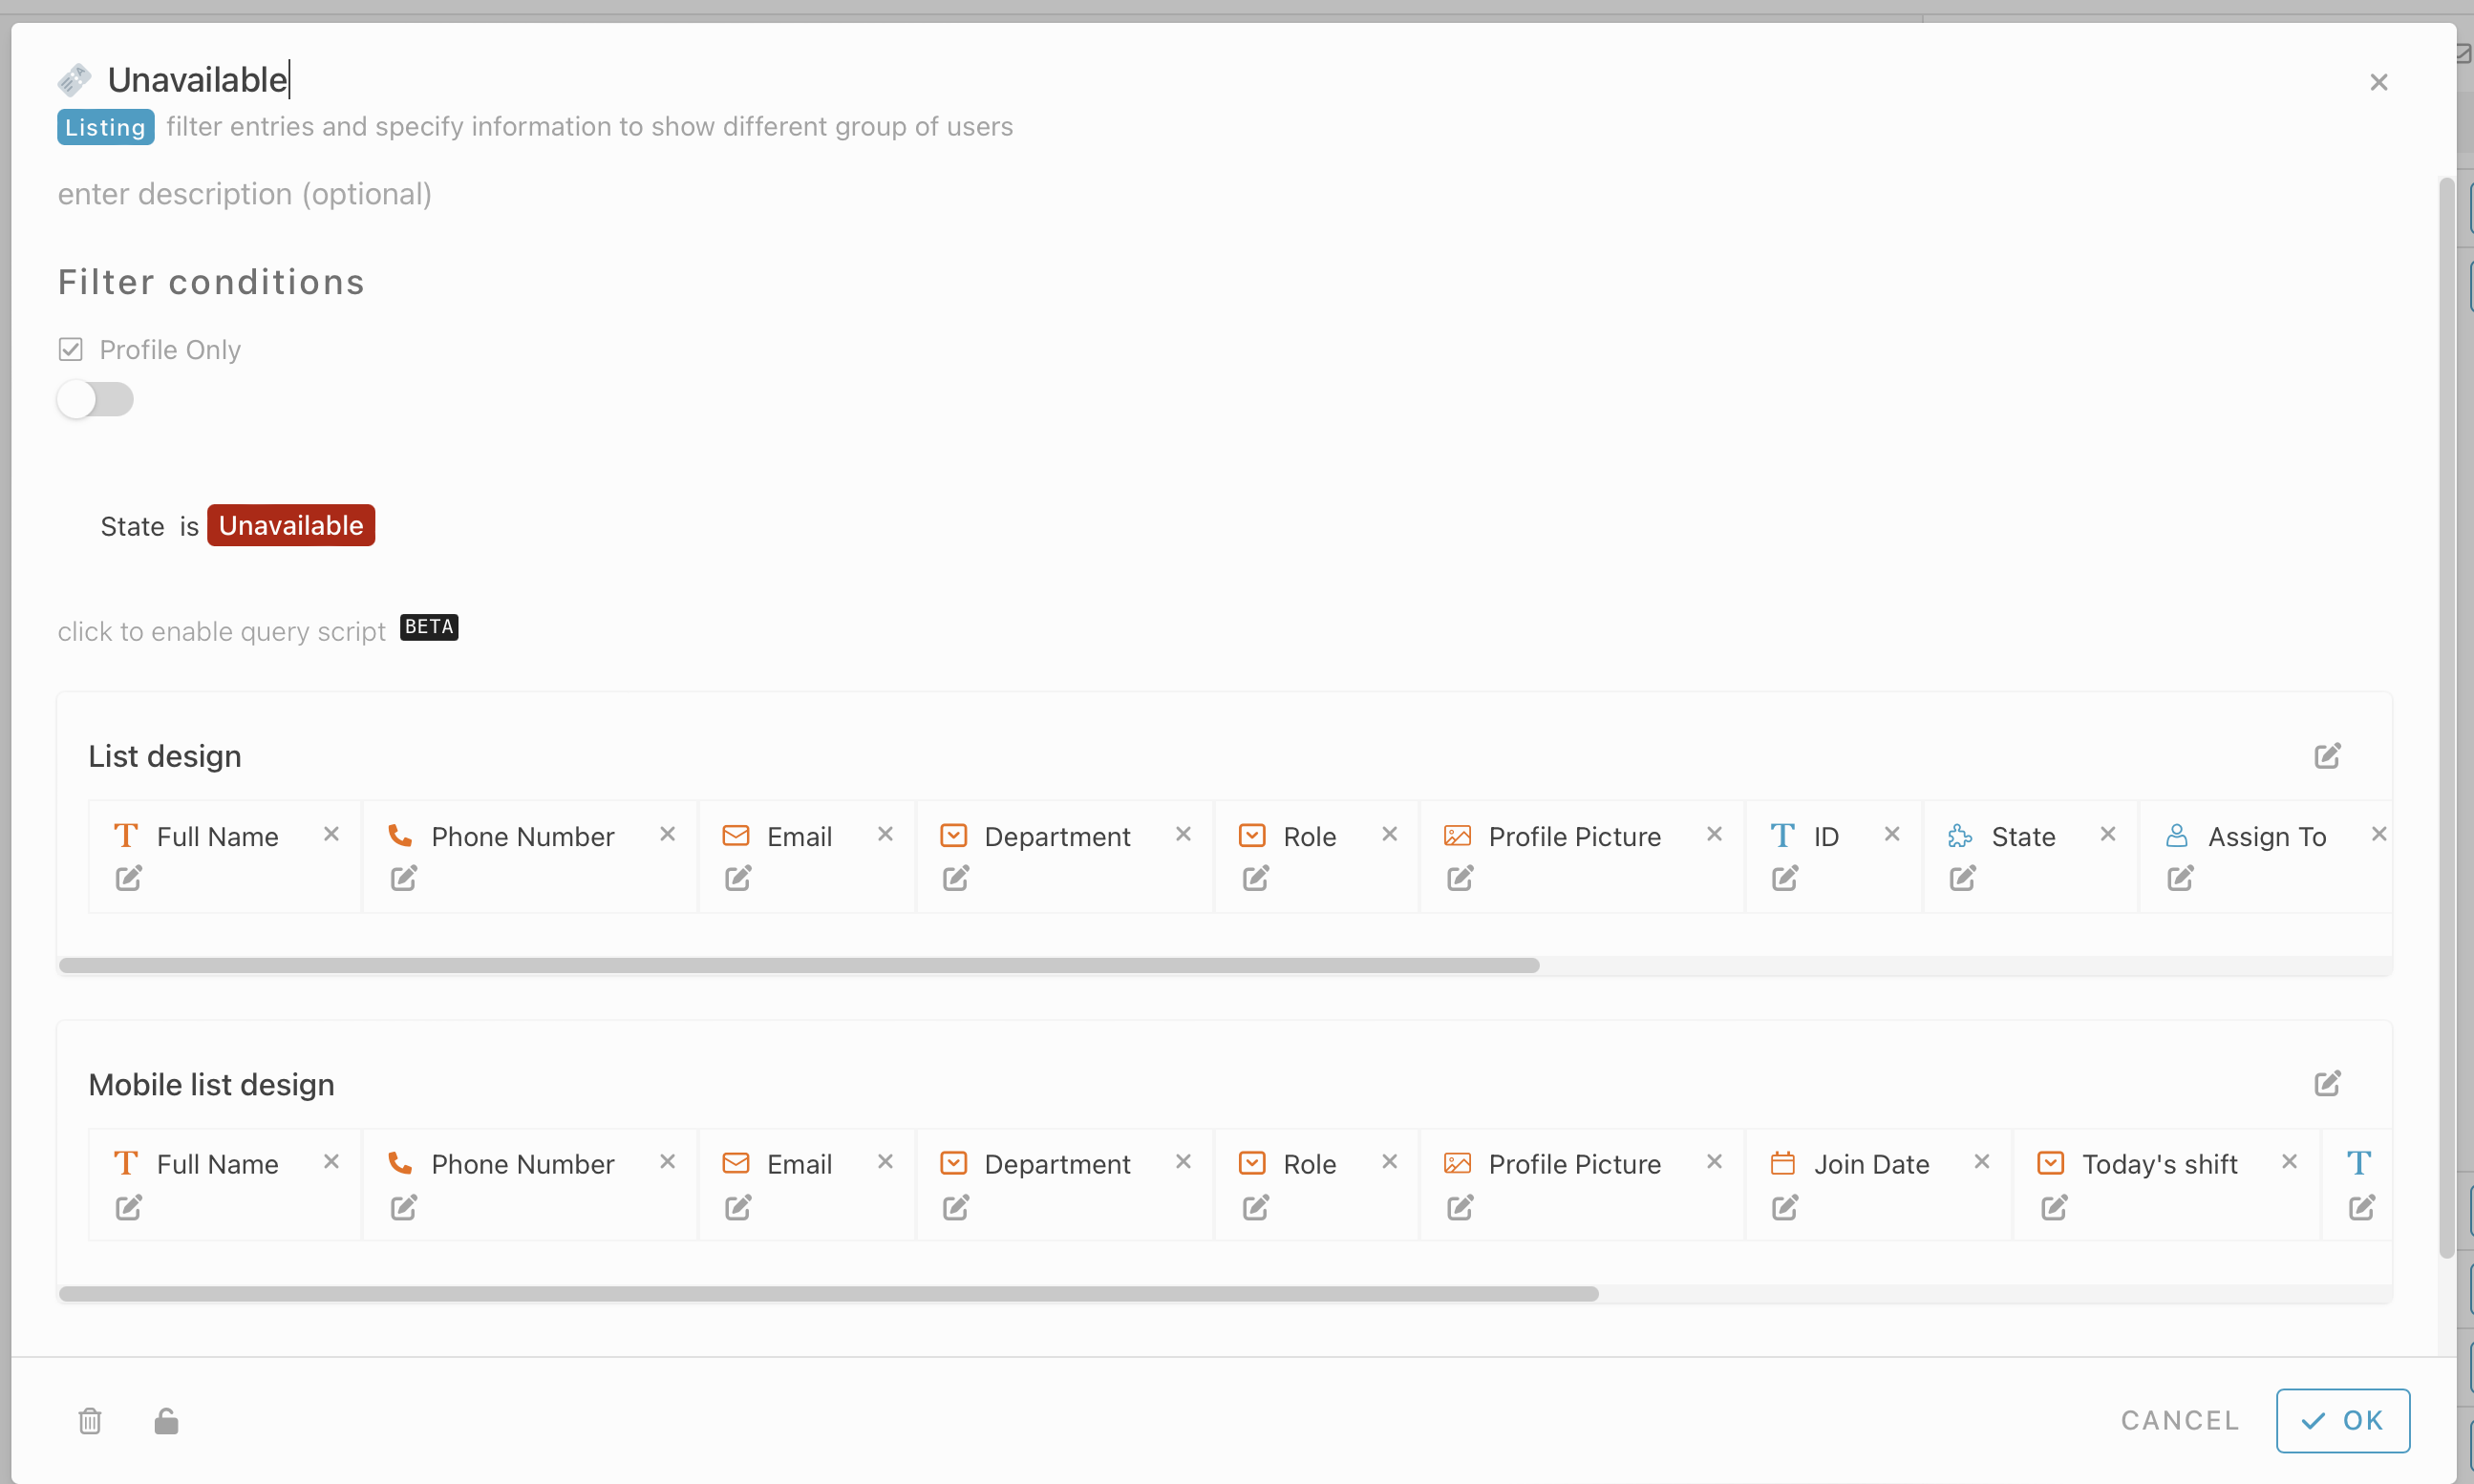
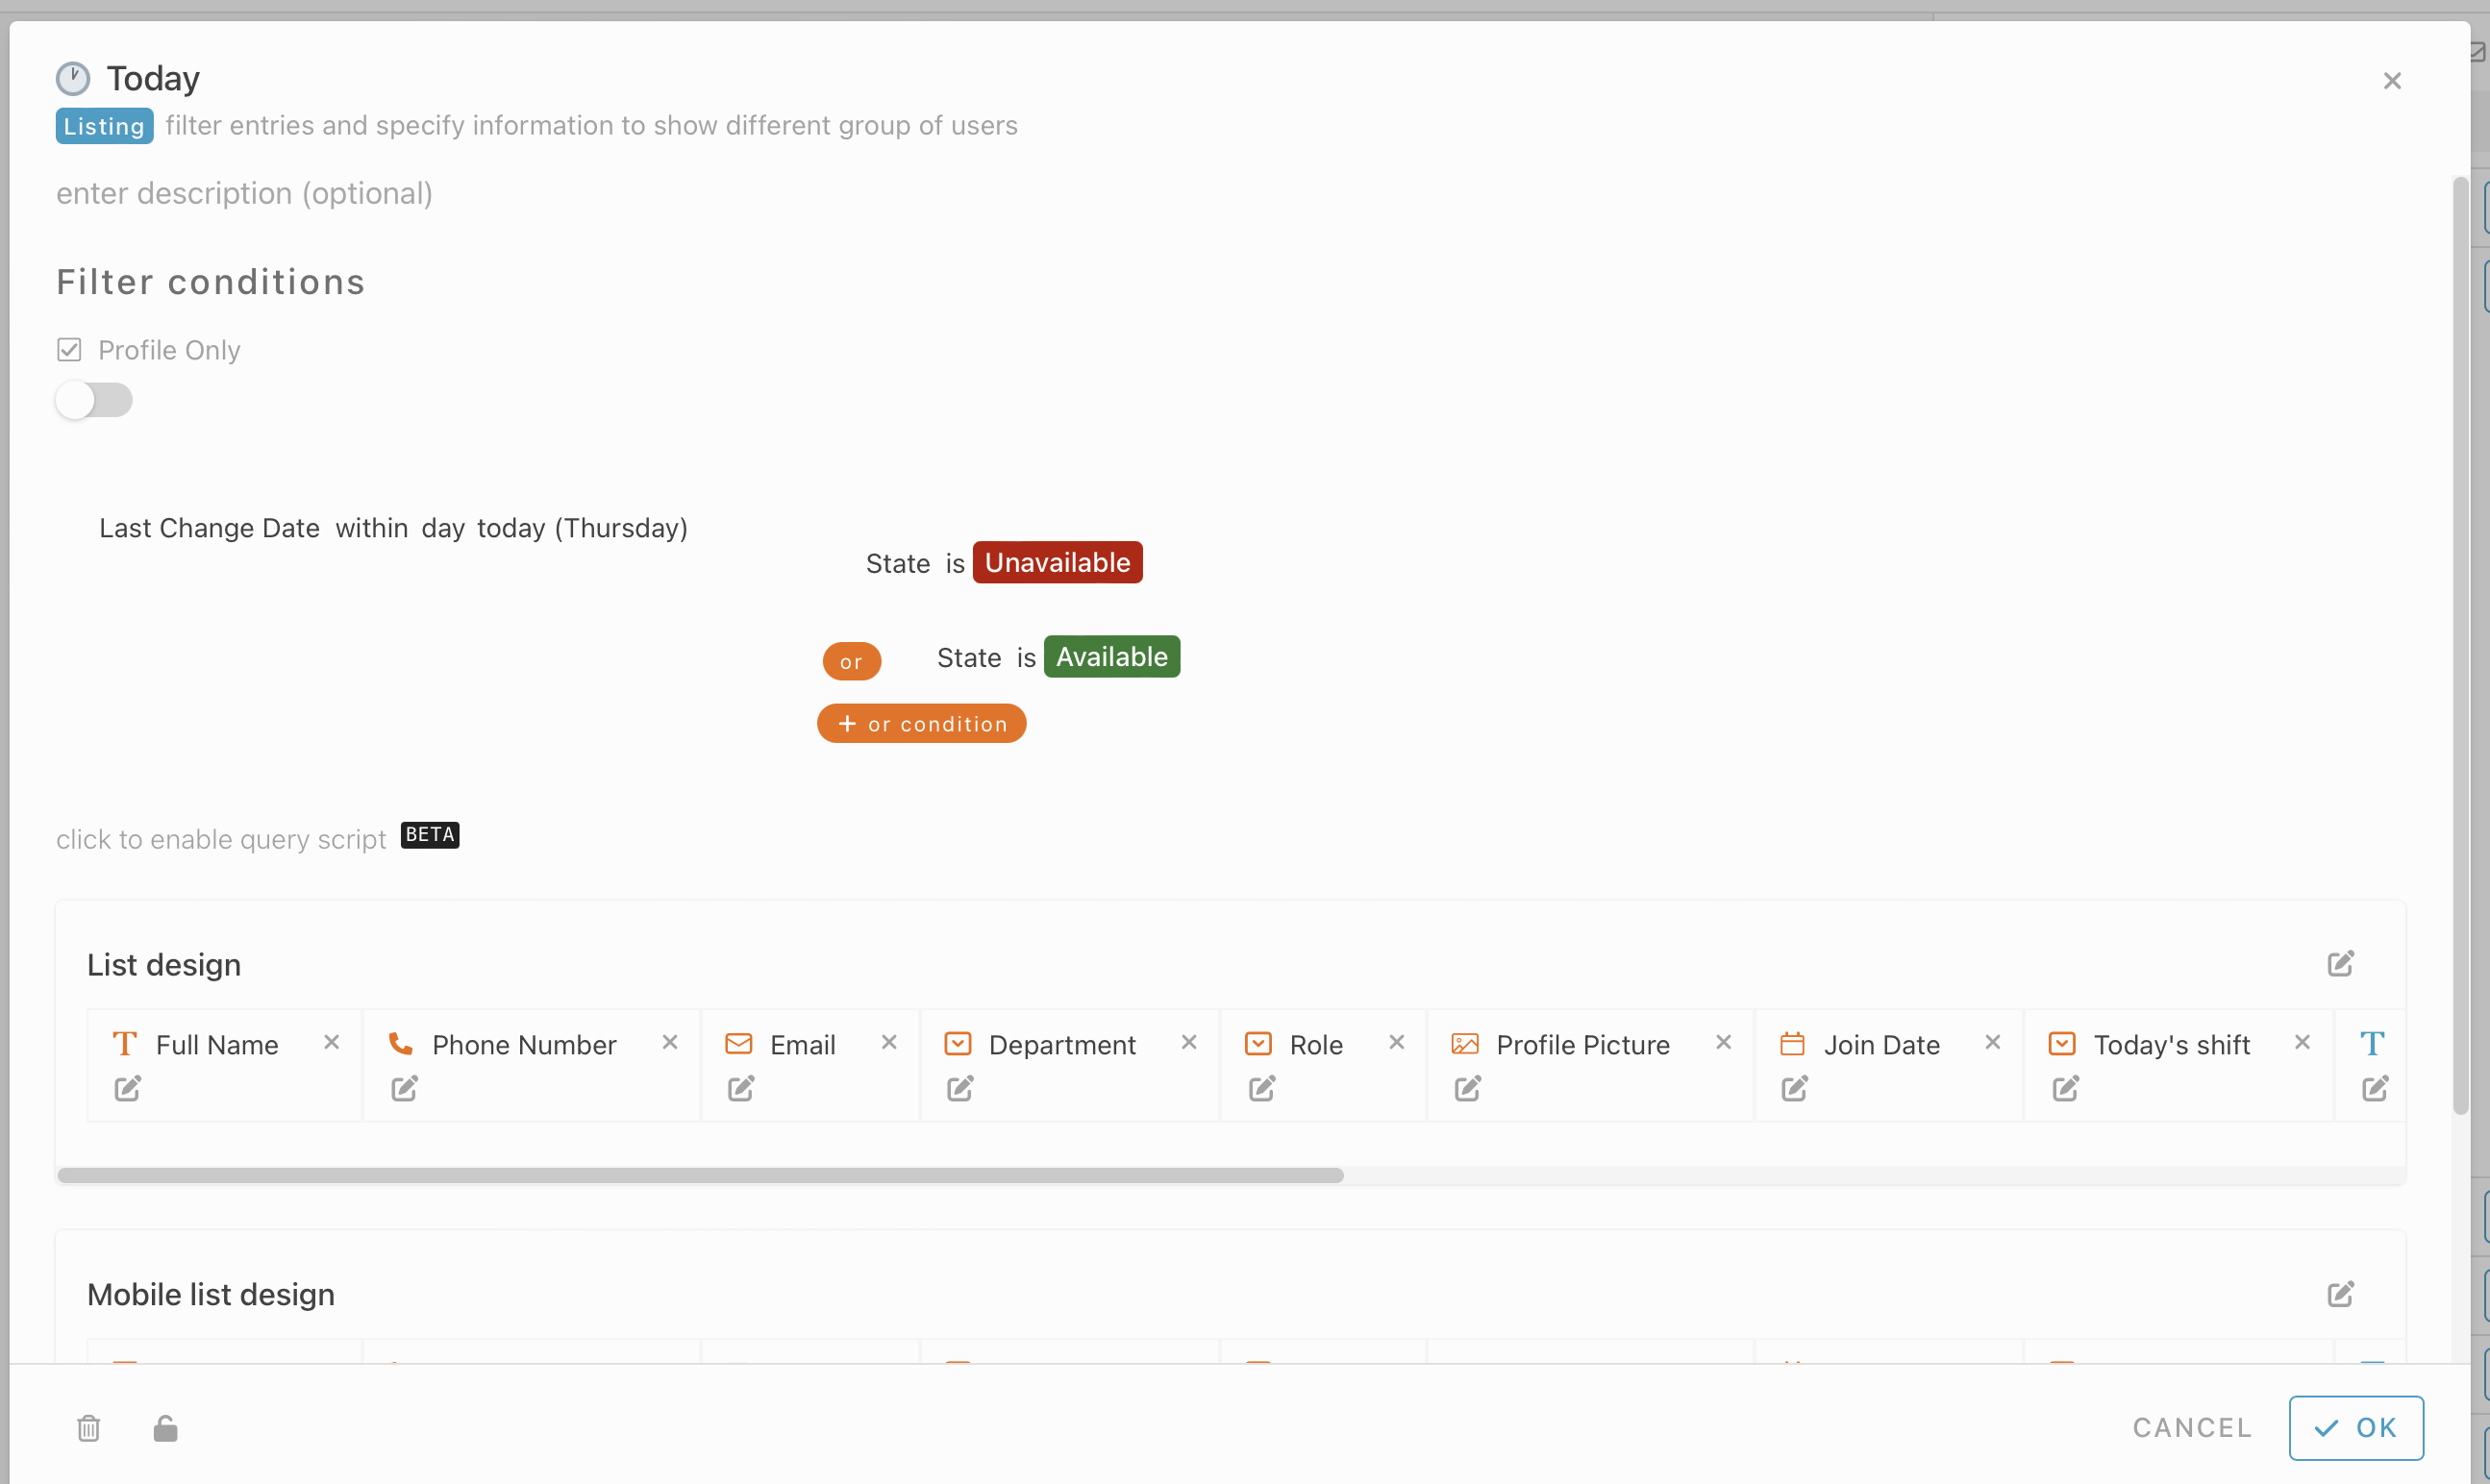
- Create a few listing, give your listing a name and customize the list design and filter condition.
All - Include all condition for entry
State - To filter state is Draft
State - To filter state is Available
State - To filter state is Unavailable
Last Change Date within day “Today”
State - To filter state is Unavailable or State - To filter state is Available
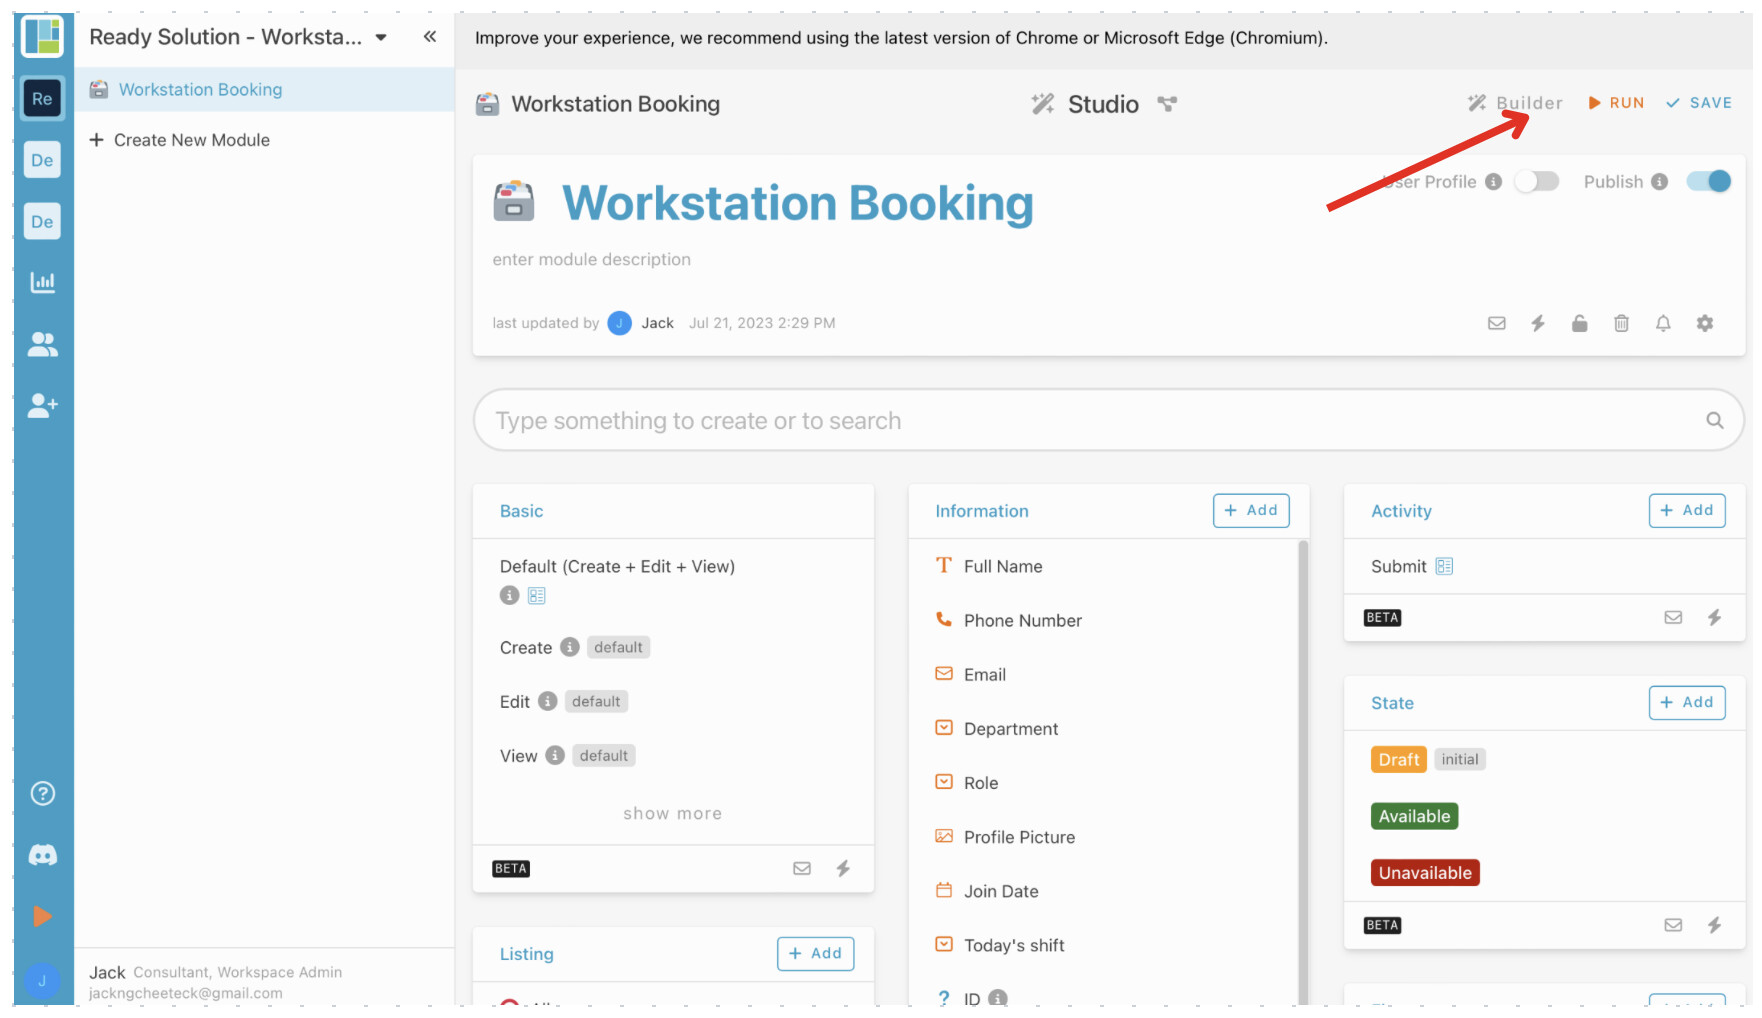
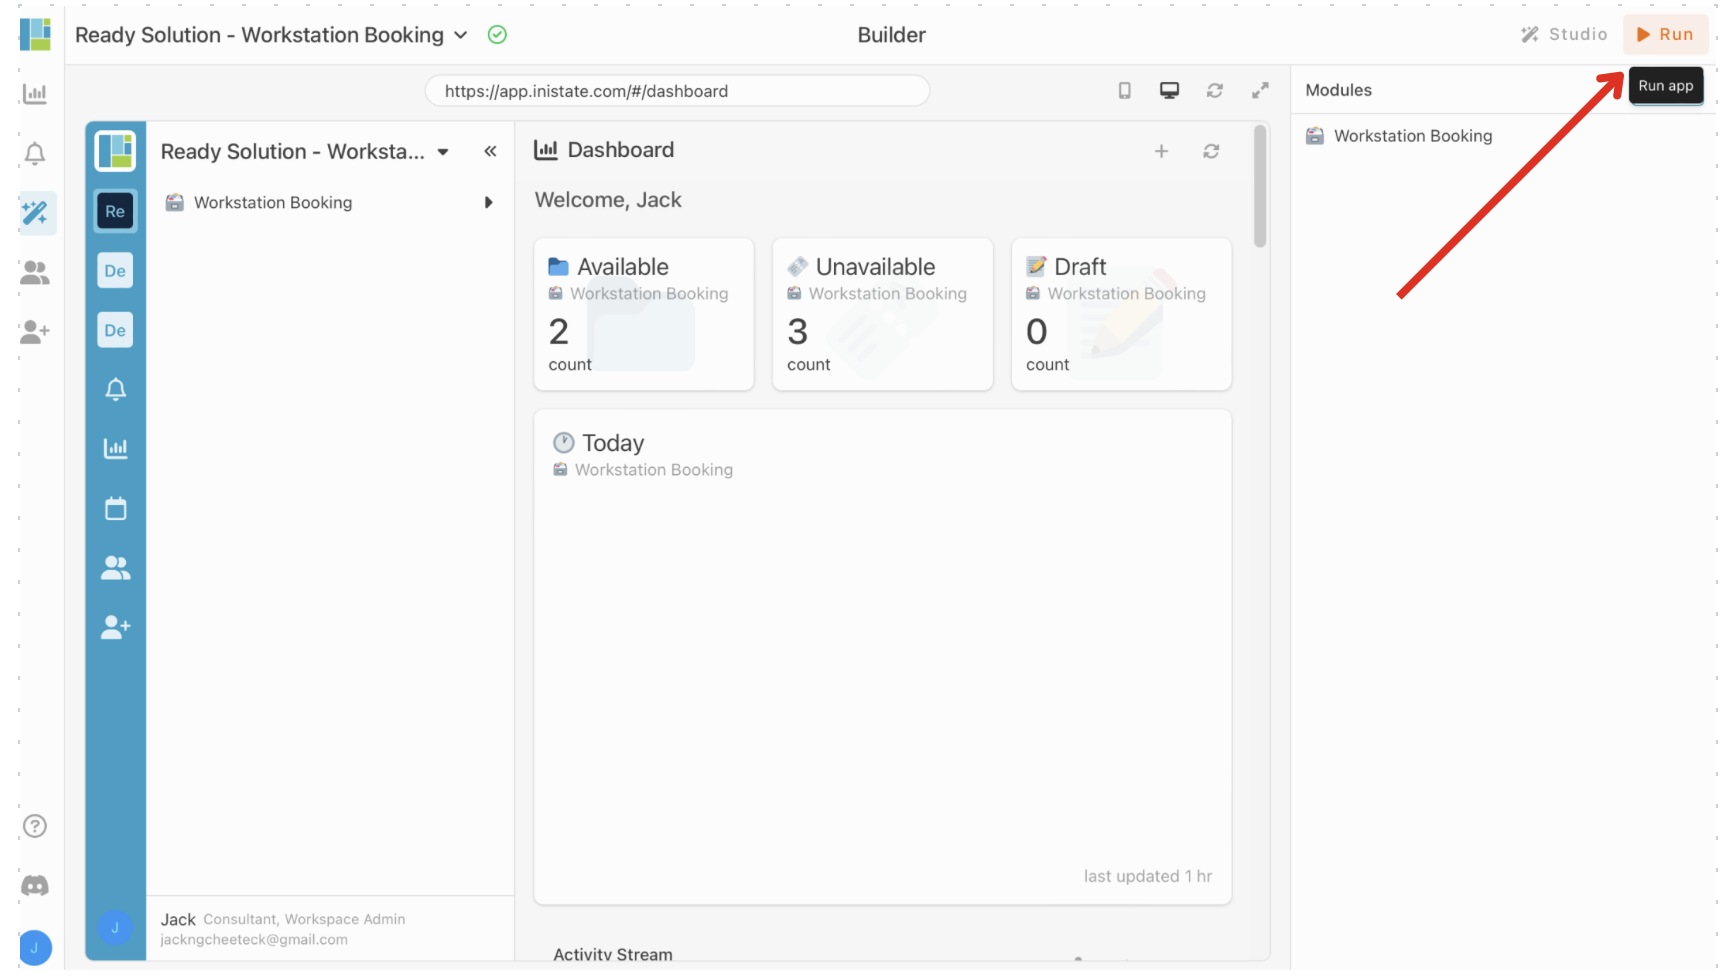
- Done with the configuration, click “Run” to use your workstation booking app.
Congratulations!!!![]()
![]() You have successfully created a IT ticketing module.
You have successfully created a IT ticketing module.
For more template and ready solution.
Try INISTATE for FREE now.
Sign up at https://inistate.com
Related post: Ready Solution - Workstation Booking