Goal:
Create a custom export template that includes images from your entries, formatted as an HTML table, and export it as a spreadsheet.
Description:
This guide shows how to build a custom export template in Studio that pulls data from Entries and displays both text and images in a spreadsheet-compatible format. We’ll write HTML code to structure the output and embed images directly using file paths.
Steps / Instructions:
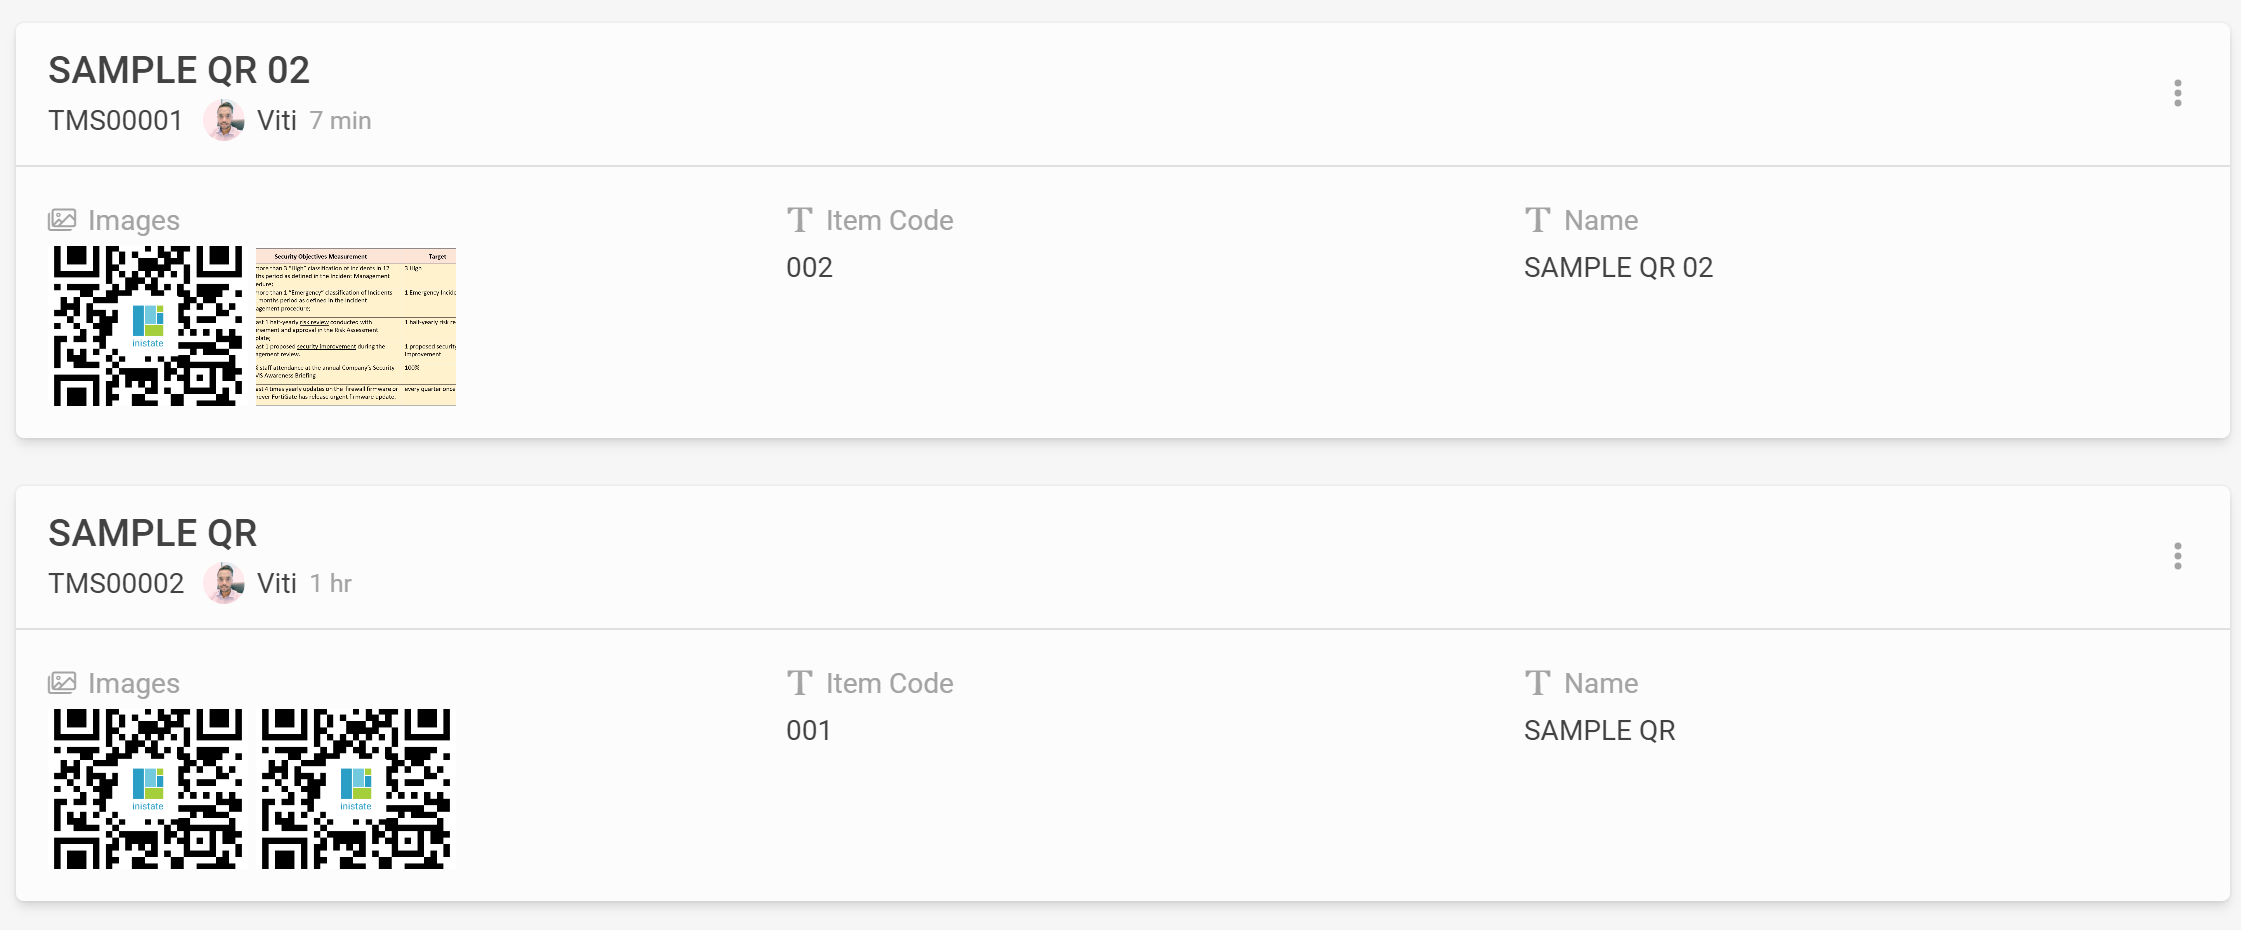
Sample entries type template HTML code to export images. [BETA]
1. Open Studio
- Go to Studio in your Inistate workspace.
2. Create a New Template
- Navigate to Template.
- Click Add New.
- Under the Code section, prepare to enter HTML code.
3. Set Advanced Settings
- Type: Select Spreadsheet.
- Data Source: Choose Entries.
4. Add Sample Entries for Testing
- Add or select sample entries to preview your template output.
5. Write the HTML Code
- Use the following code as an example:
{
def getPhoto(path):
     return "<img height=50% width=50% src='https://api.inistate.com/" + path.ToString() + "'/>"
}

<table>
    <tr>
        <td>Images</td>
        <td>Item Name</td>
        <td>Name</td>
    </tr>
    {start-repeat:x in entries}
    <tr>
        <td>{start-repeat:image in x.field('Images')}
            {getPhoto(image.path)}
            {end-repeat}
        </td>
        <td>{x['Item Code']}</td>
        <td>{x['Name']}</td>
    </tr>
    {end-repeat}
</table>
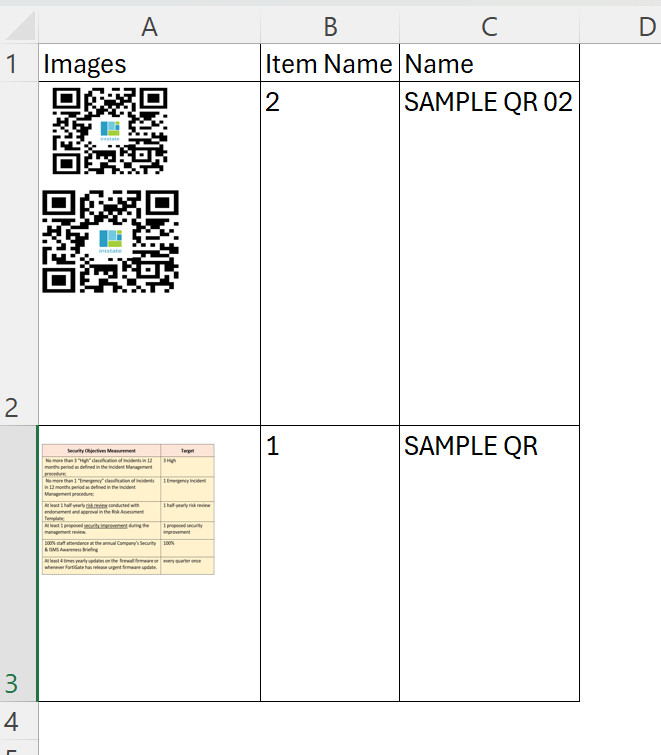
6. Save and Preview
- Save the template.
- Preview the output to confirm images and text appear correctly in the table.
![]() Tips / Notes:
Tips / Notes:
- Make sure your image field name in
x.field('Images')matches exactly with the field name in your module. - Adjust
heightandwidthingetPhoto()to control image size in the export. - The
https://api.inistate.com/path should remain as is for proper image rendering.