Hi everyone  ,
,
In this post, I’ll show you How to Customize Card Design in Detail View. You can customize how cards are displayed in the Detail View to make important information easier to see.
Step 1 - Switch to Detail View
Open your module.
Click the view menu at the top-right corner and select:
Switch to detail view
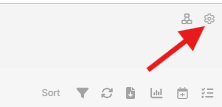
After switching, your records will be displayed using the Detail View layout.
Step 2 - Open Card Design
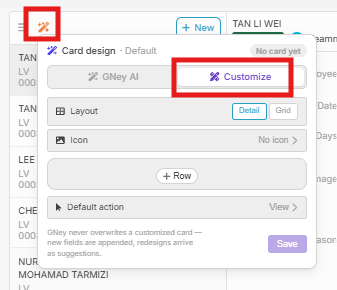
In Detail View, click the Card Design icon.
This will open the Card Design settings.
Select Customize to start editing the card layout.
Step 3 - Choose the Card Layout
Under Layout , you can choose how the information is displayed.
For example:
- Detail
- Grid
You can choose the layout that best fits the information you want to show.
Step 4 - Customize the Card Icon
Under Icon , choose the field you want to use as the card icon.
You can also select the icon size:
- XS
- S
- M
- L
This allows you to control how prominently the icon appears on the card.
Step 5 - Add Fields to the Card
Click + Row to add another row to the card.
Then select the fields you want to display. You also can choose the Default Card for Default display.
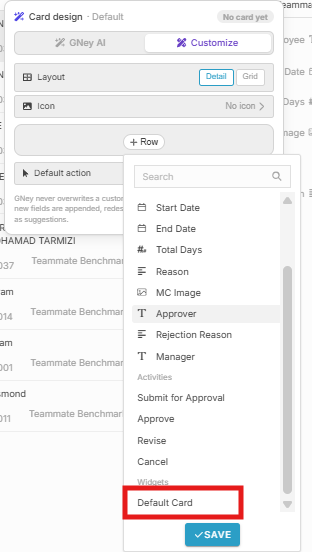
You can arrange the fields into different rows depending on how you want your card to look.
Step 6 - Preview and Save
Preview section to check how the card will look.
Once you are satisfied with the design, click Save .
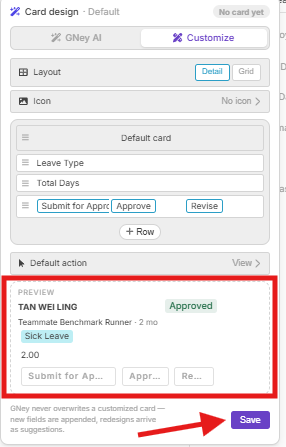
Your customized card design will now be displayed in Detail View.
This makes it easier to highlight important information and organize records based on your workflow.