A schedule runs a notification or automation at a time you choose. You can use it for reminders, follow-ups or regular updates.
Open your module in Studio and click Add Schedule.

Here’s what each section means:
Name
Give your schedule a clear name, such as “Payment reminder”.

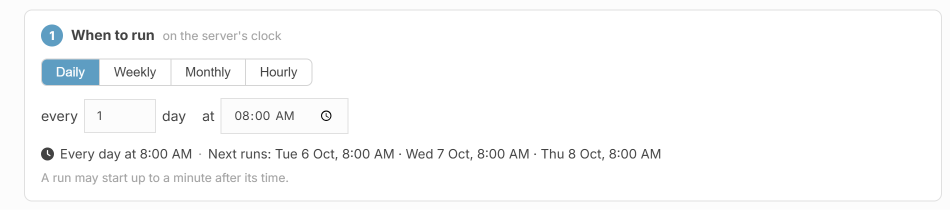
1. When to run
Choose Daily, Weekly, Monthly or Hourly, then set how often it runs and the time.
For example, “every 1 day at 8:00 AM” means it runs every morning at 8:00 AM. The time follows the server’s clock.
2. Find entries where
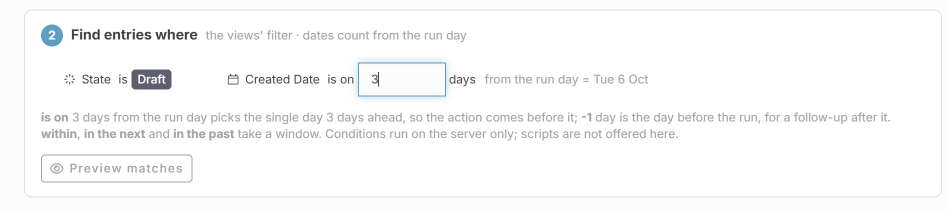
This section tells the schedule which entries to use.
In this example, the condition is State is Draft :
Each time the schedule runs, it finds entries with the state Draft and uses them for the action in the next section.
Click Preview matches to see which entries match your conditions. This does not run the action or send a notification.
If you add a date condition:
Dates are counted from the day the schedule runs. For example, is on 3 days from the run day finds entries with a date exactly three days later. Within, in the next and in the past find entries within a range of dates.
3. Then
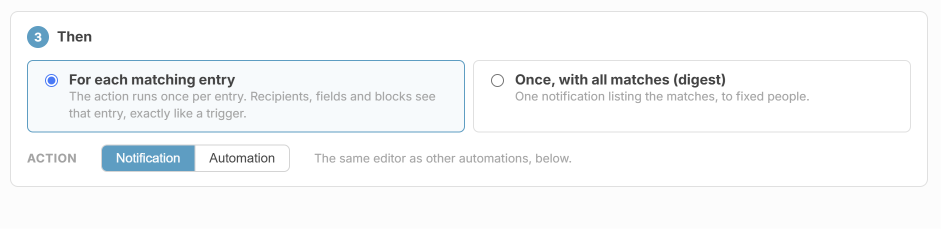
Choose what happens to the matching entries:
- For each matching entry: Run the action separately for each entry.
- Once, with all matches (digest): Send one notification that lists all matching entries.
- Beside Action, choose Notification to send a message or Automation to run an automation
Notification settings
- Channel: Choose where to send the notification, such as App Notification or Email.
-
To: Choose who receives it.

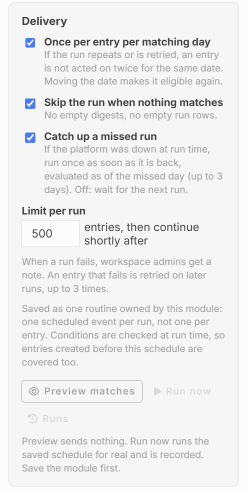
Delivery settings
- Once per entry per matching day: Avoid repeating the action for the same entry and date.
- Skip the run when nothing matches: Skip the run if no entries meet your conditions.
- Catch up a missed run: Run a missed schedule when the platform is available again.
-
Limit per run: Set how many entries it handles at a time. The default shown is 500.
Click “Save” and then “OK” to save the schedule.
