Scenario: Integration of inistate and Google Sheets - Entry Updated
Description: When an entry is updated in inistate, a row is updated in Google Sheets.
Trigger: Watch Entry Updates (inistate)
Action: Update a Row (Google Sheets)
Step-by-step (Integration)
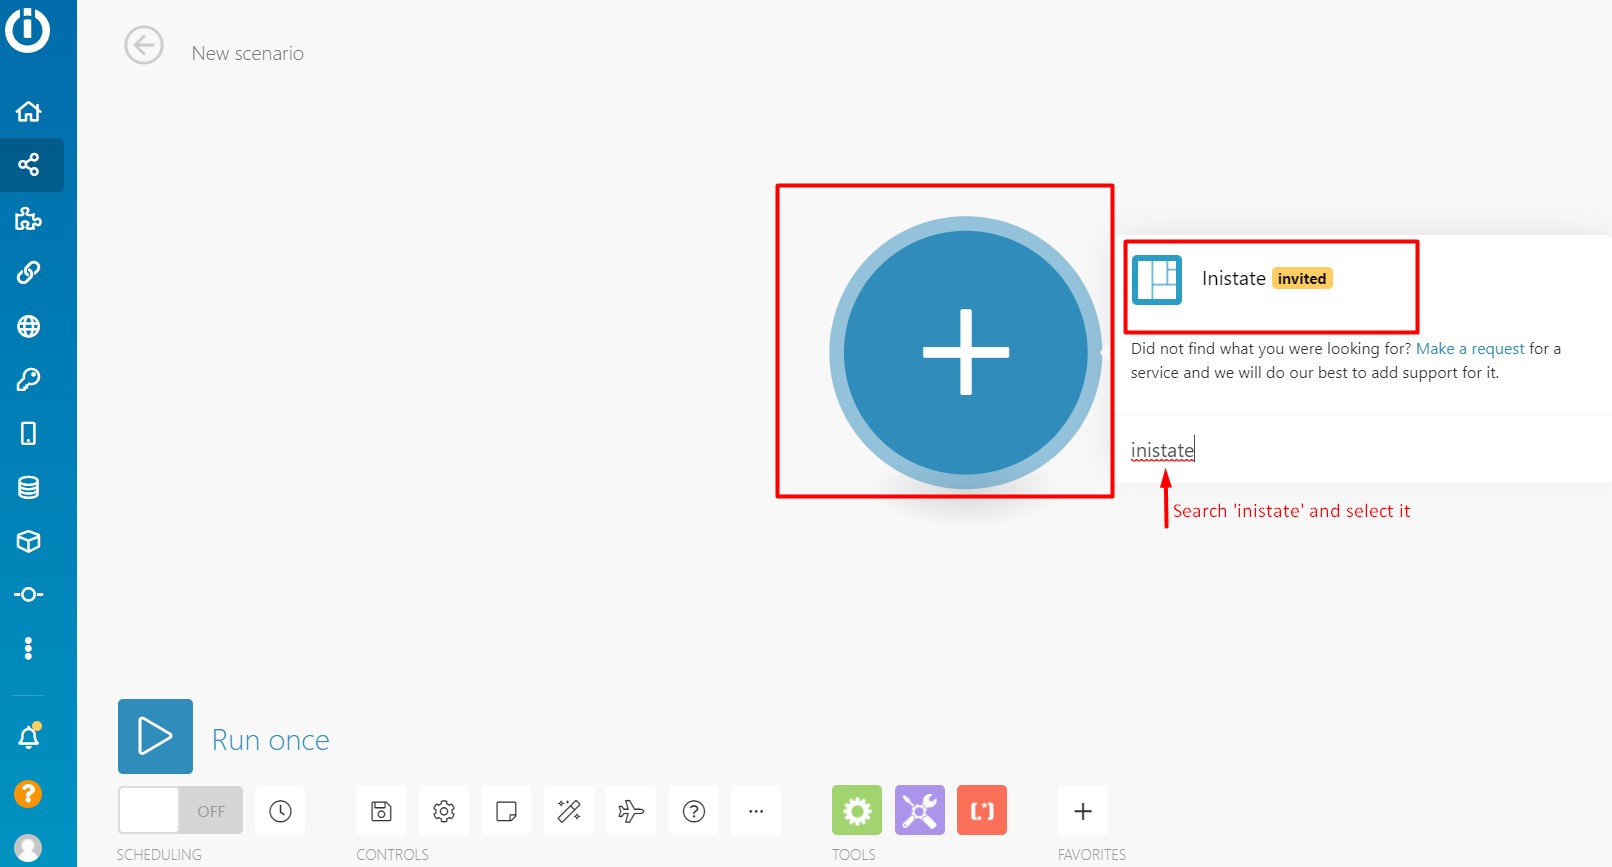
- First of all, create a new scenario by clicking ‘+ Create a new scenario’ button in ‘Scenarios’ (Refer Picture 1).

- Click the ‘blue circle with + symbol’, search ‘inistate’ and select ‘Inistate’ (Refer Picture 2).
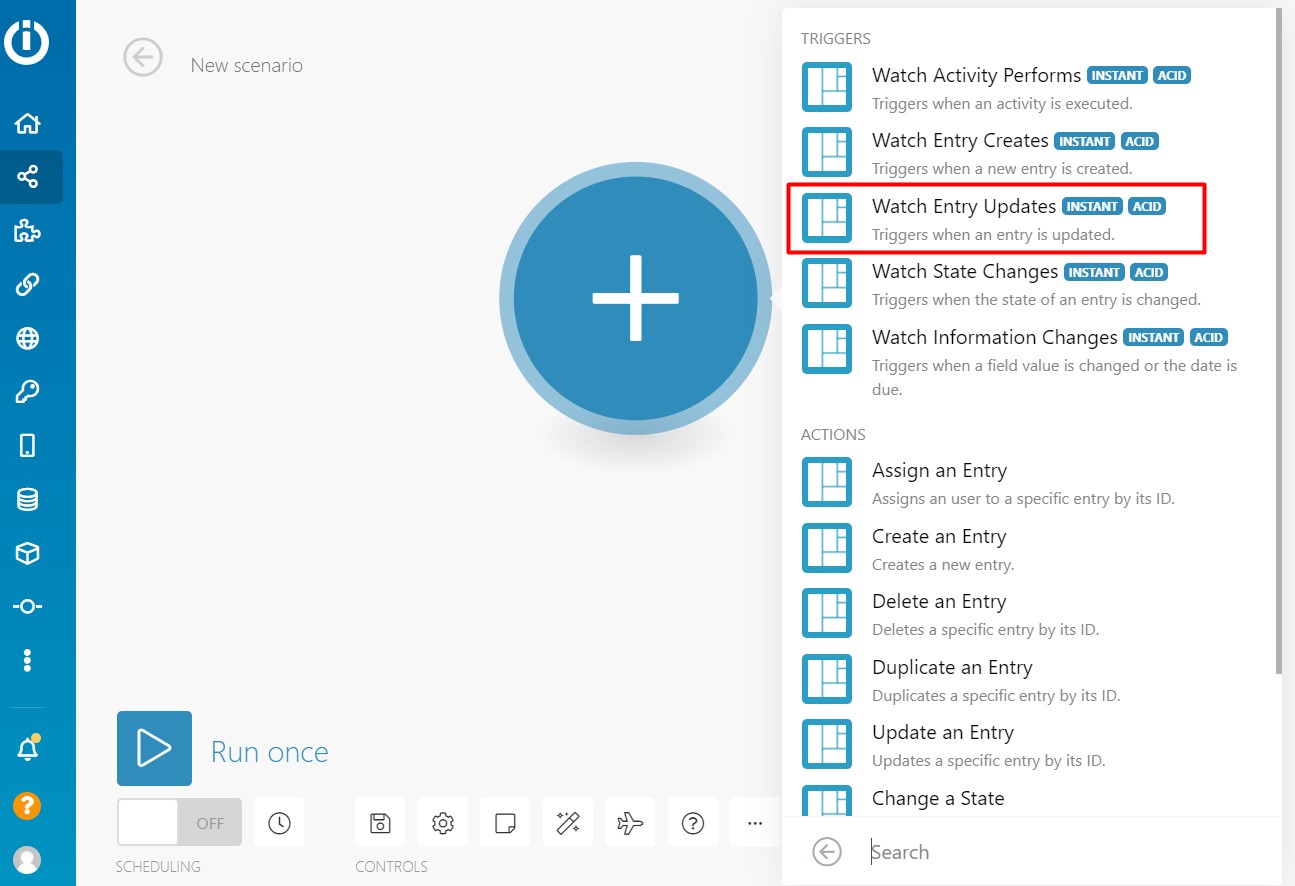
- Select ‘Watch Entry Updates’ Trigger (Refer Picture 3).
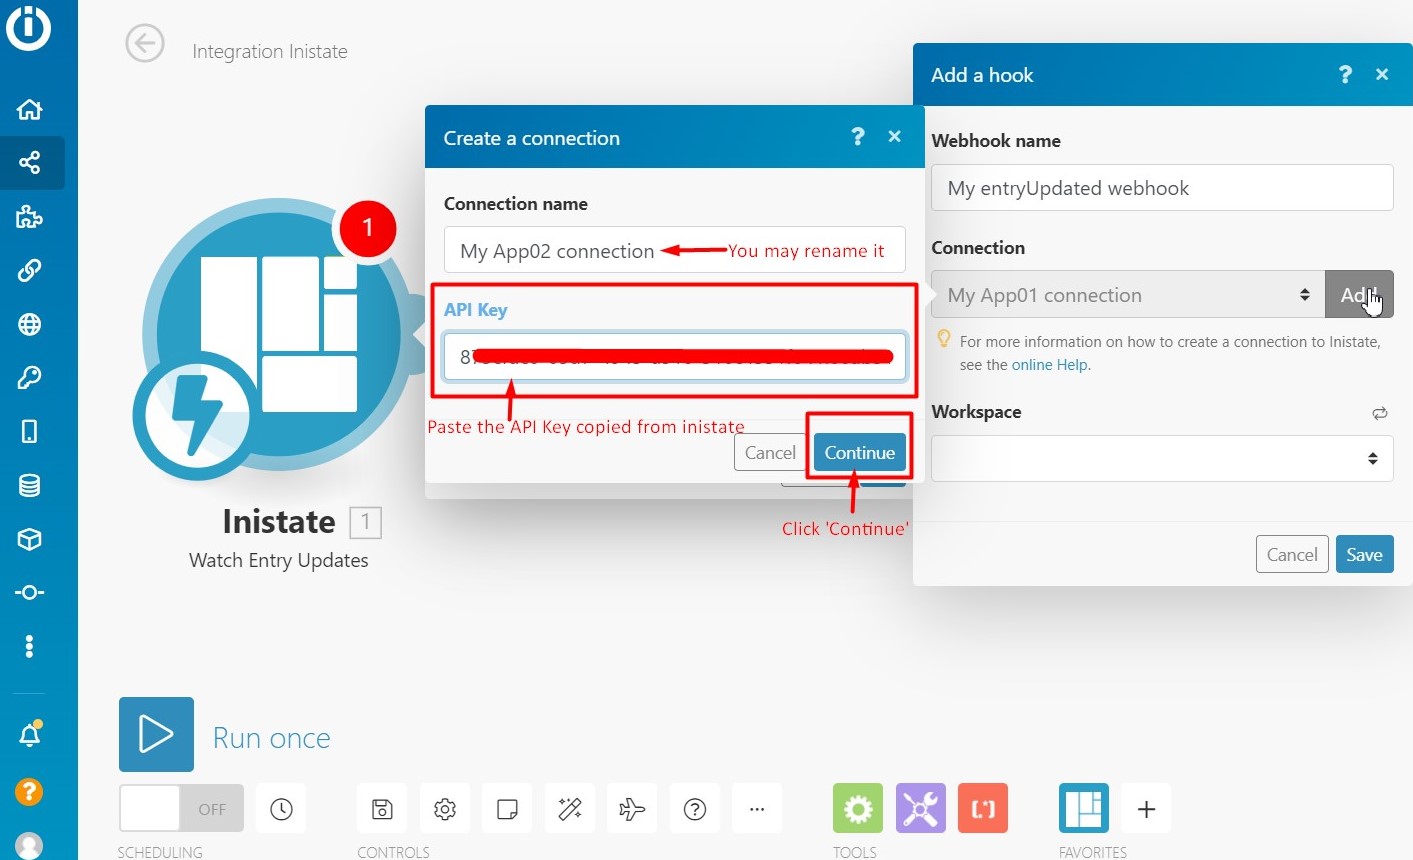
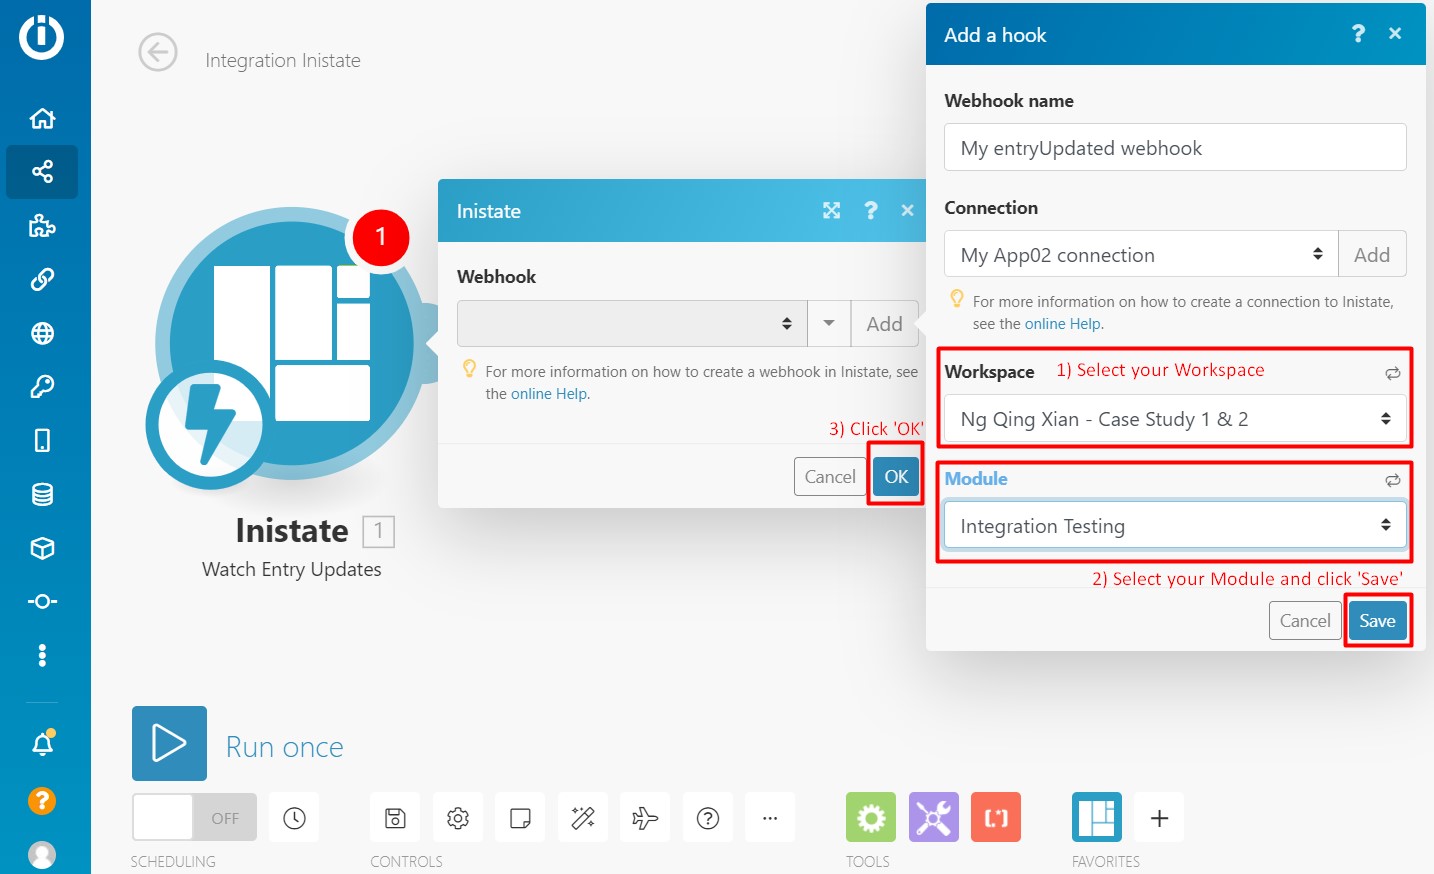
- ‘Watch Entry Updates’ Trigger module is created. Click the Trigger module, click ‘Add’ to add a hook, and click ‘Add’ again to create a new connection (Refer Picture 4).

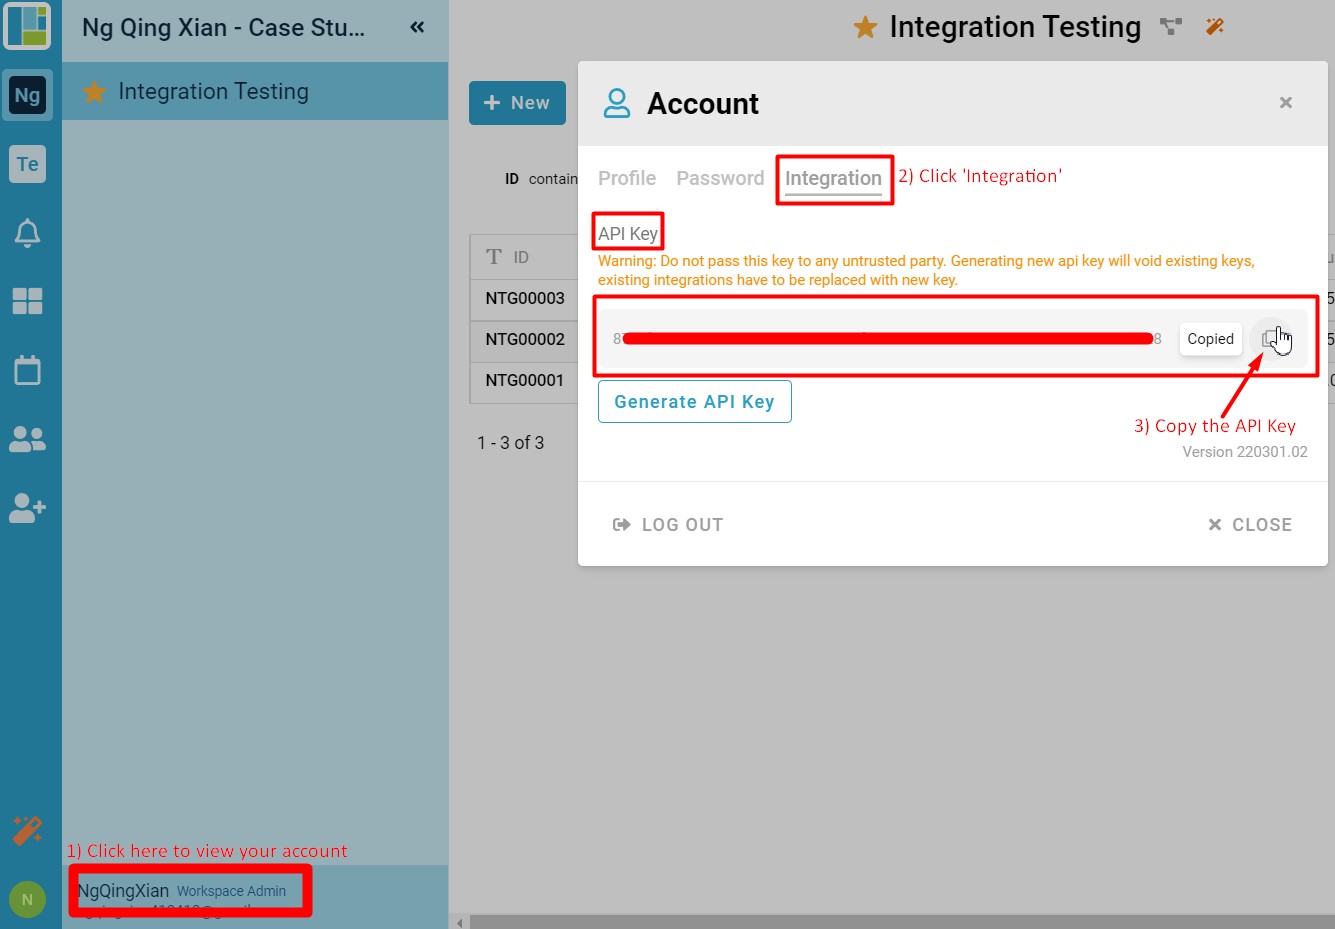
- In the workspace of inistate, click the bottom-left area, click ‘Integration’ and copy the API Key generated and paste it in Integromat (Refer Picture 5 & 6).
- Select your Workspace and then select your ‘Module’, click ‘Save’ to save it and click ‘OK’ (Refer Picture 7).
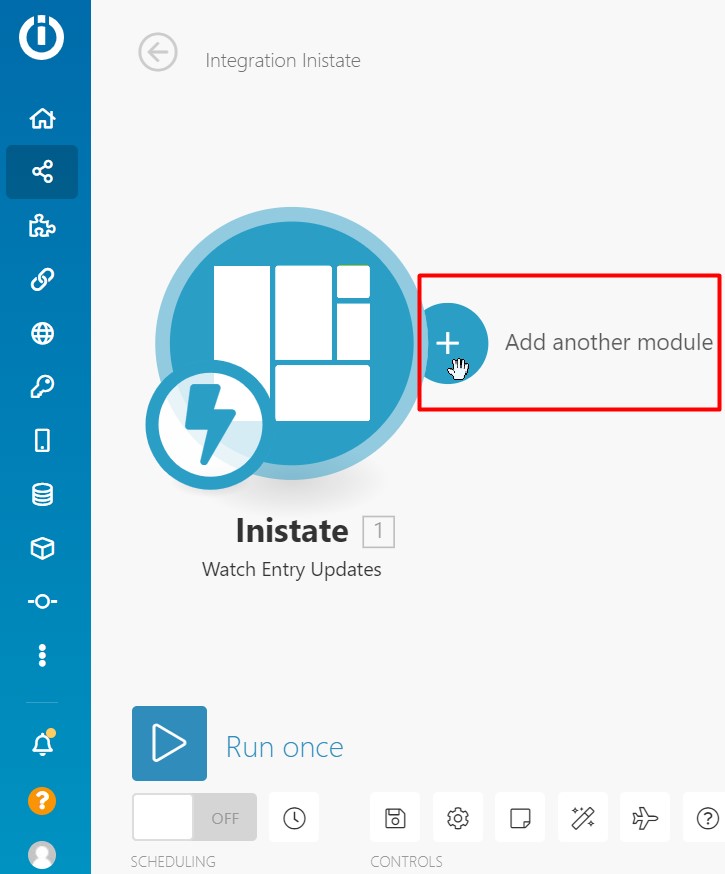
- Click ‘Add another module’ (Refer Picture 8).
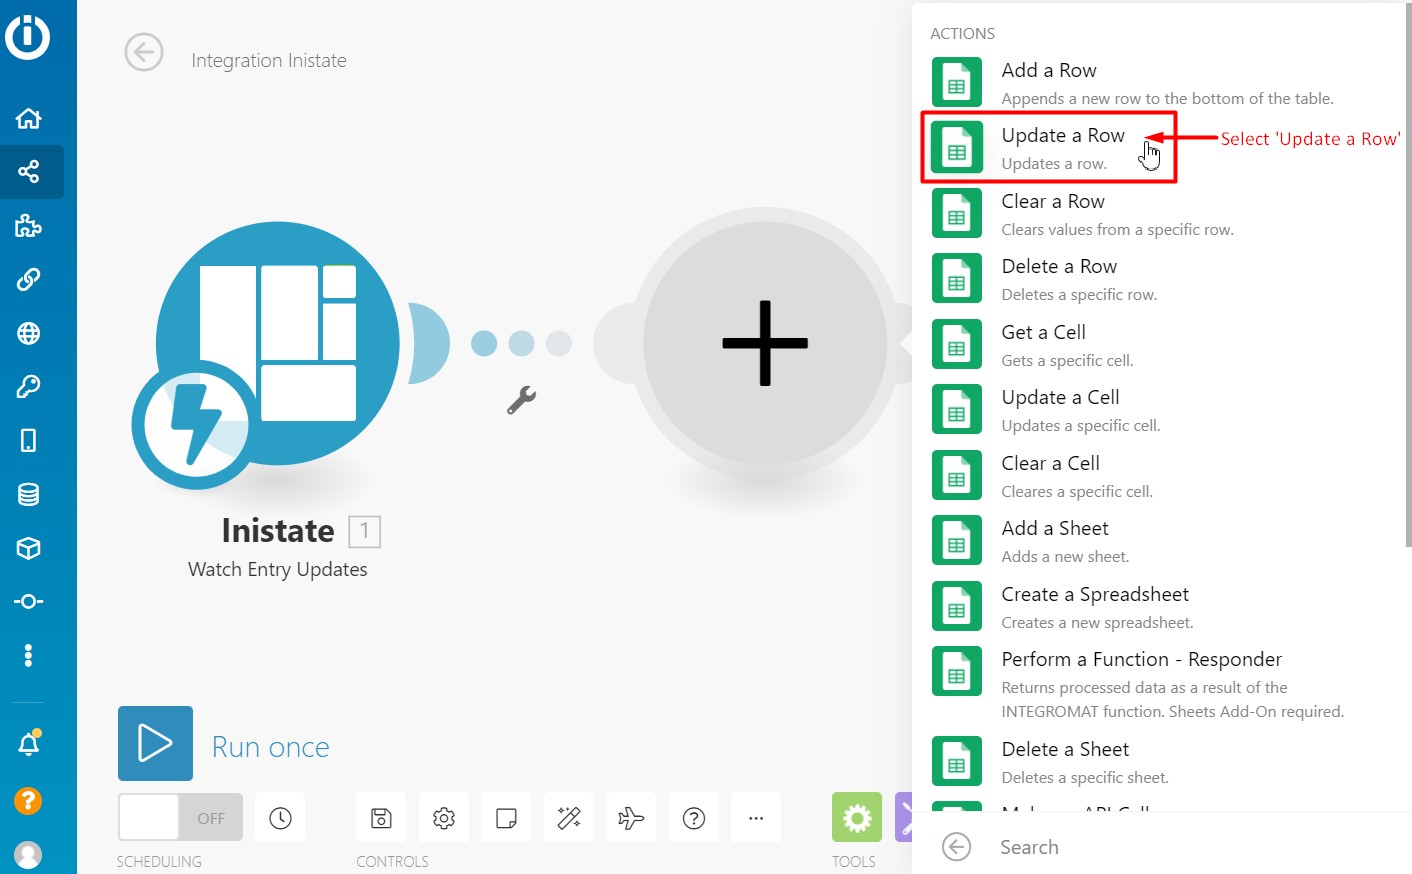
- Click + at the created module, search ‘google sheets’ and select ‘Google Sheets’ (Refer Picture 9).

- Select ‘Update a Row’ Action (Refer Picture 10).
- Click ‘Add’ and then click ‘Continue’ to add a connection (Refer Picture 11).

- You are required to sign in with Google, choose an account to continue, and then click ‘Allow’ (Refer Picture 12 & Picture 13).


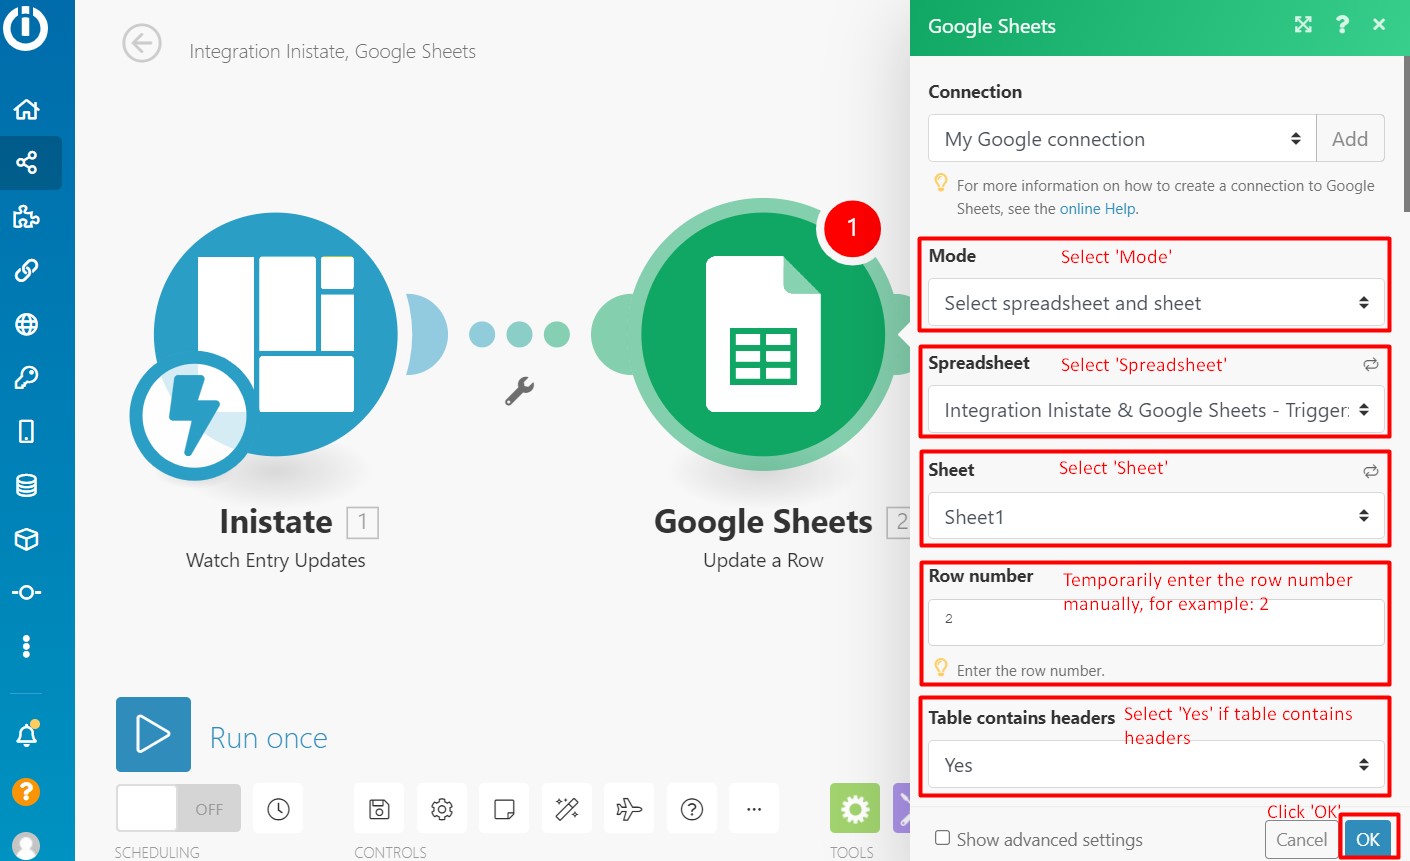
- Select ‘Mode’ (you may choose ‘Select spreadsheet and sheet’), select ‘Spreadsheet’, select ‘Sheet’, temporarily enter the row number manually (for example: 2) and choose ‘Yes’ for ‘Table contains headers’ if the table contains headers and then click ‘OK’ (Refer Picture 14).
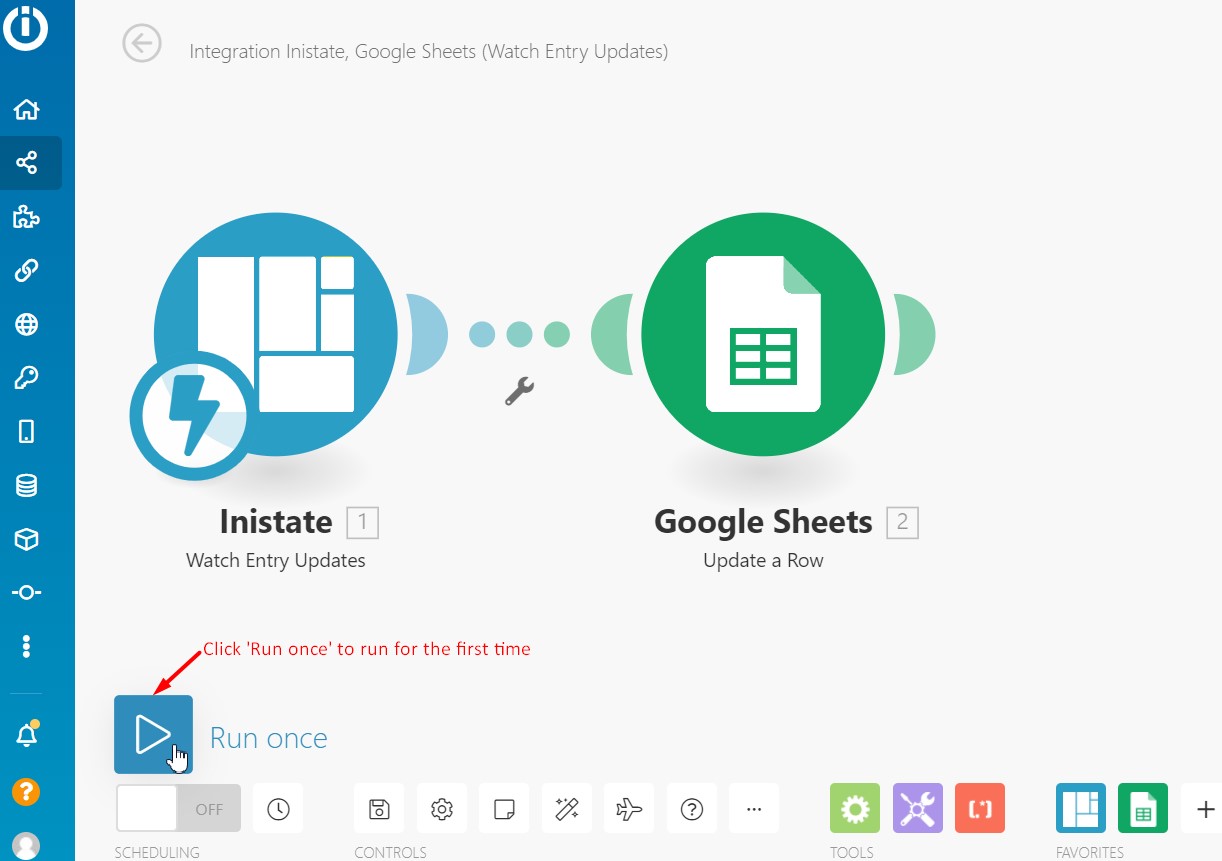
- Click ‘Run once’ to run for the first time (Refer Picture 15).
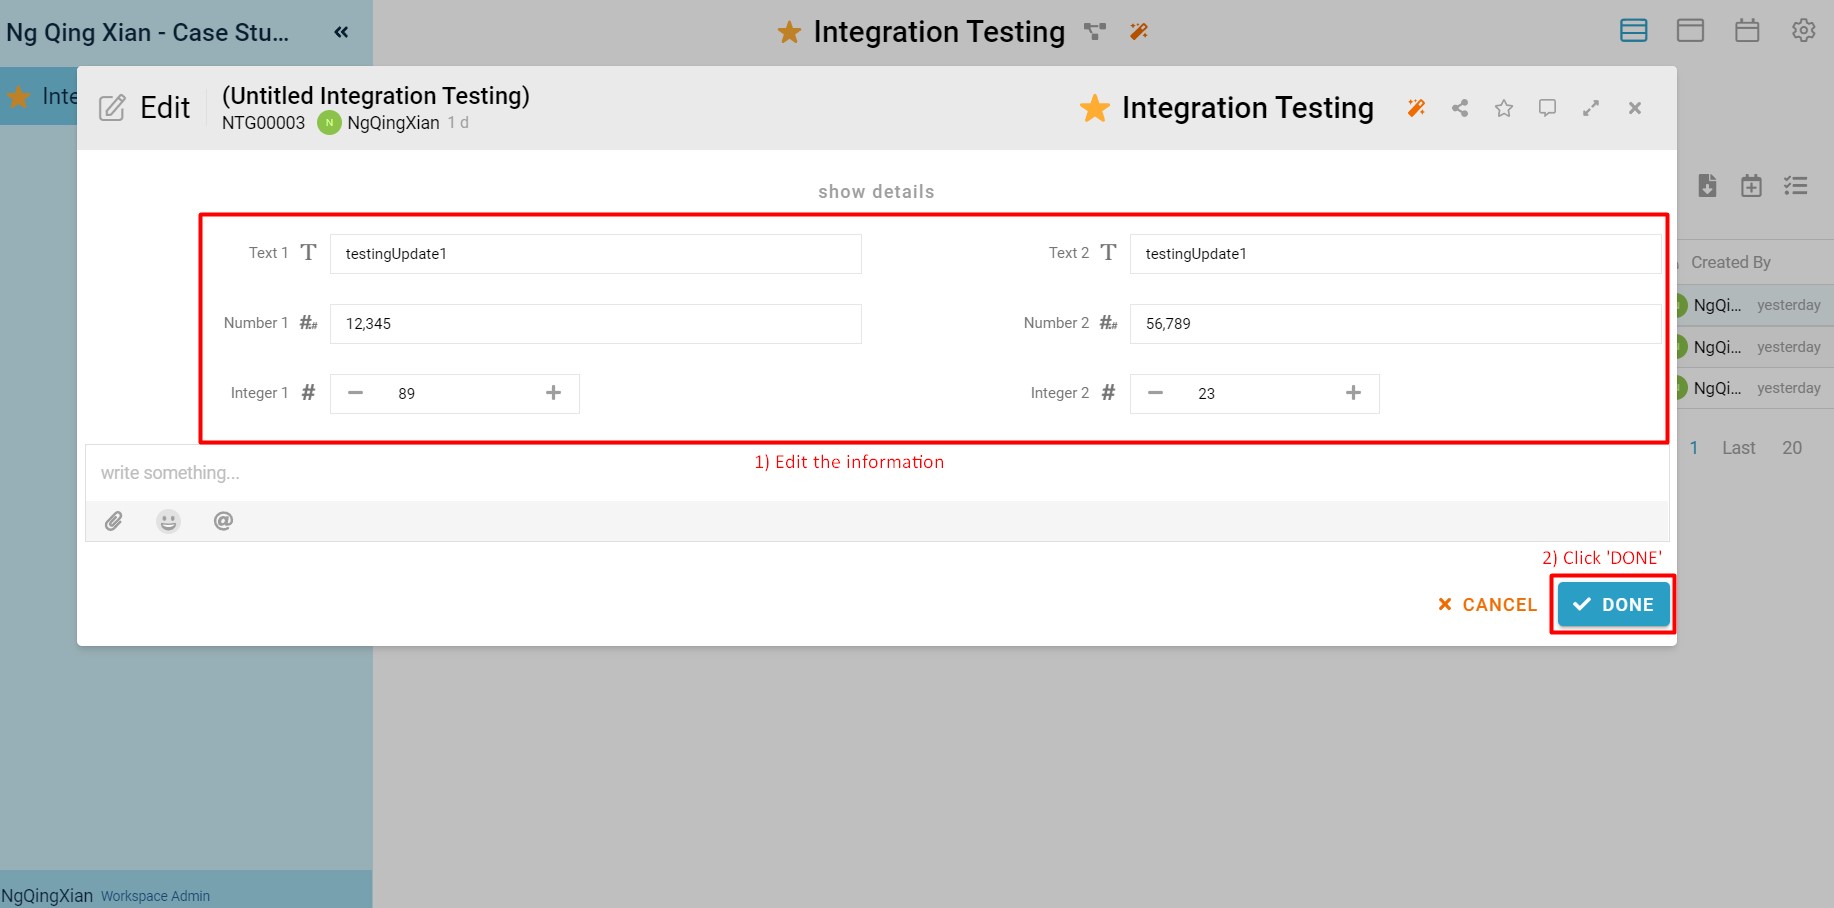
- In the workspace of inistate, select an entry by clicking it, click ‘3 dots’, and select ‘Edit’ to edit the entry (Refer Picture 16).

- Edit the information and submit the entry by clicking ‘DONE’ at the bottom-right of the form (Refer Picture 17).
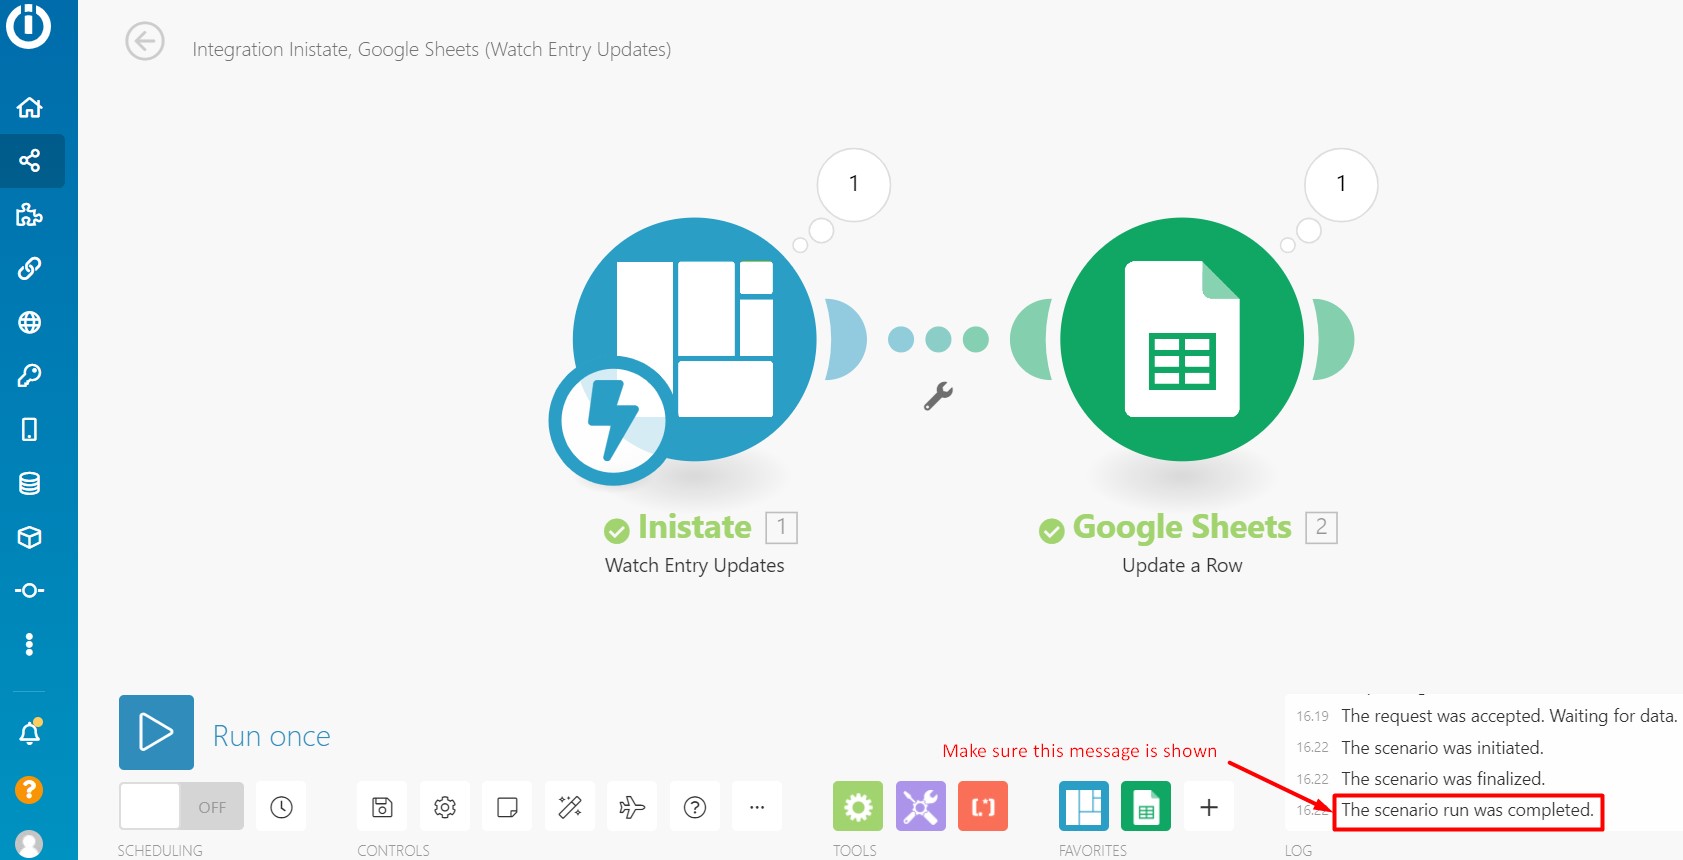
- In Integromat, make sure ‘The scenario run was completed.’ Message is shown in ‘LOG’ (Refer Picture 18).
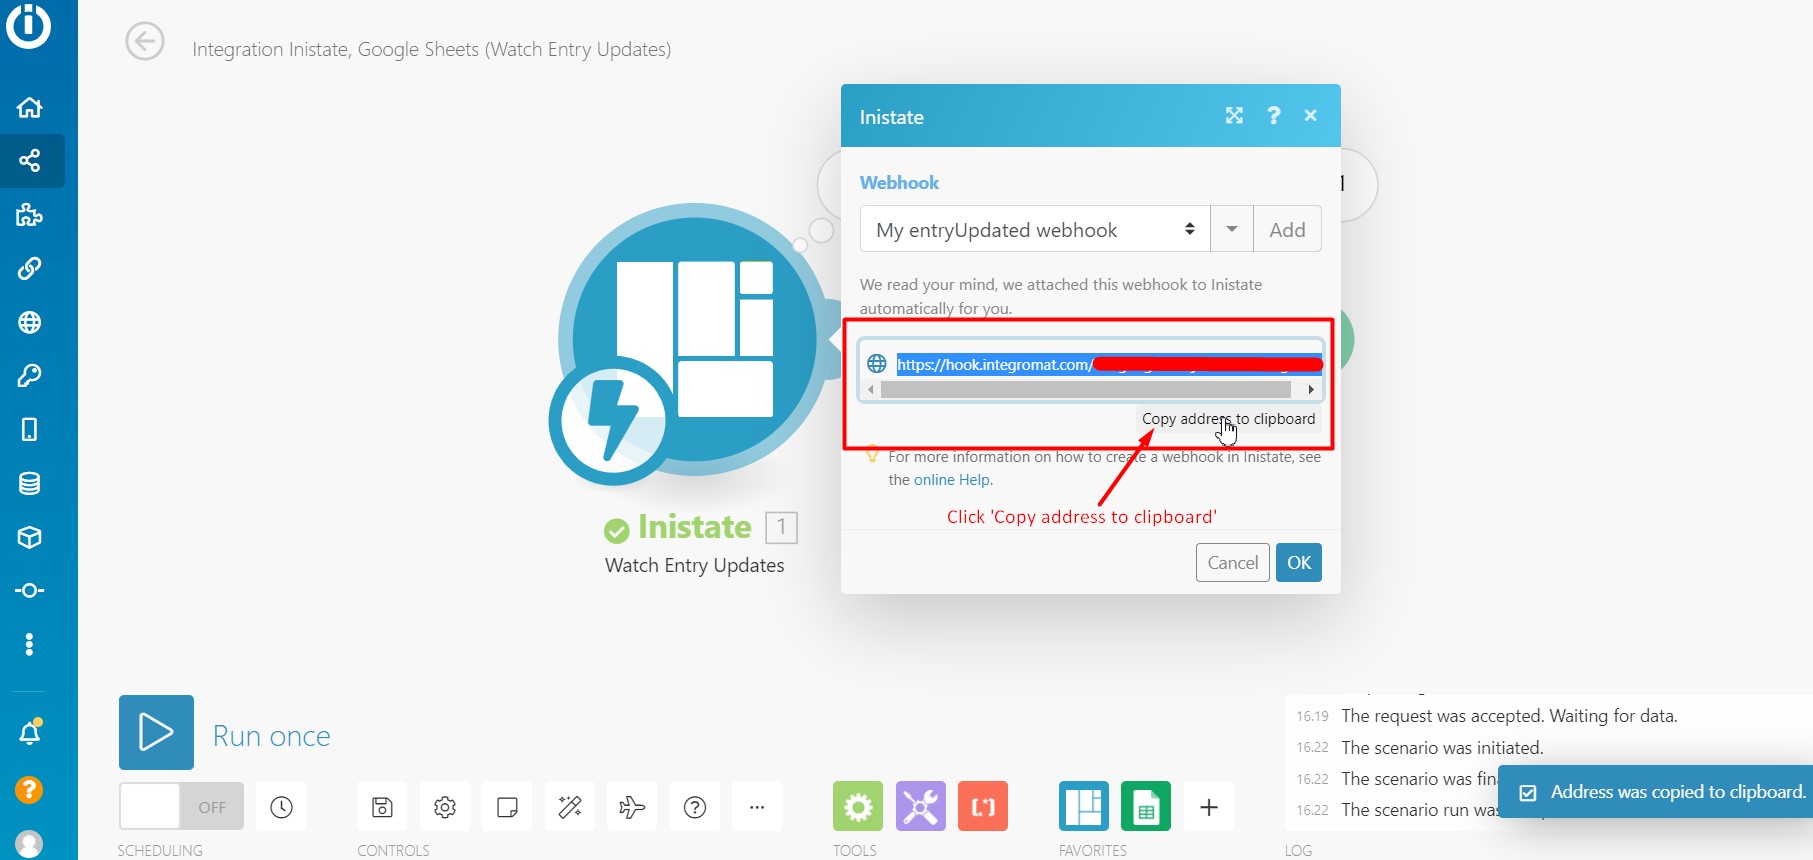
- Click ‘Inistate – Watch Entry Updates’ Trigger module, click ‘Show address’, click ‘Copy address to clipboard’ (Refer Picture 19).
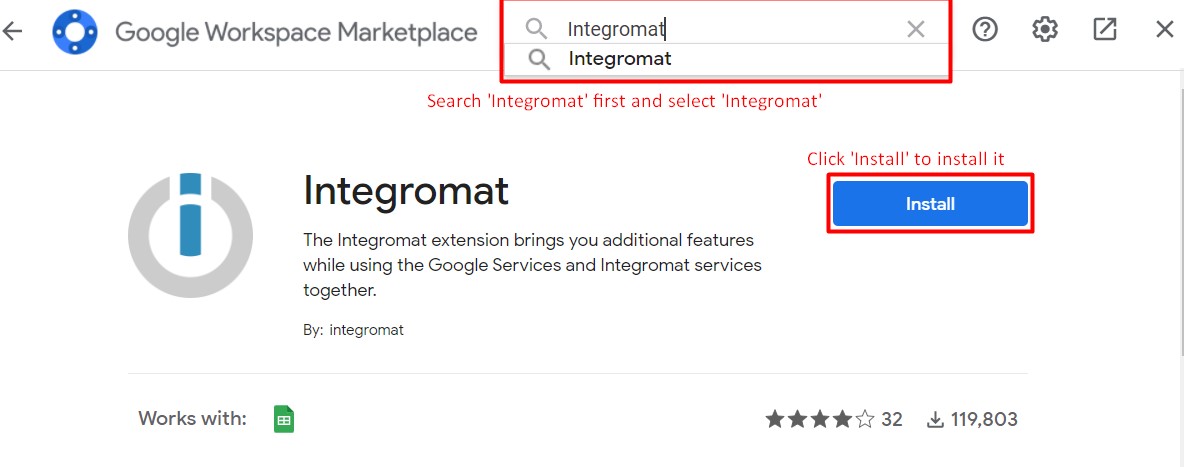
- In Google Sheets, you are required to install ‘Integromat’ add-on by clicking ‘Extensions’ → ‘Add-ons’ → ‘Get add-ons’, and then search ‘Integromat’ and install it (Refer Picture 20 & Picture 21). You may proceed to next step if you have already installed ‘Integromat’ add-on.

- If you have already installed ‘Integromat’ add-on, click ‘Extensions’ → ‘Integromat’ → ‘Settings’ and paste the Webhook URL copied from ‘Inistate – Watch Entry Updates’ module in Integromat to ‘Webhook URL’, click ‘Save’ to save it (Refer Picture 22).

- You may add headers at the first row of the spreadsheet we selected before (Refer Picture 23).

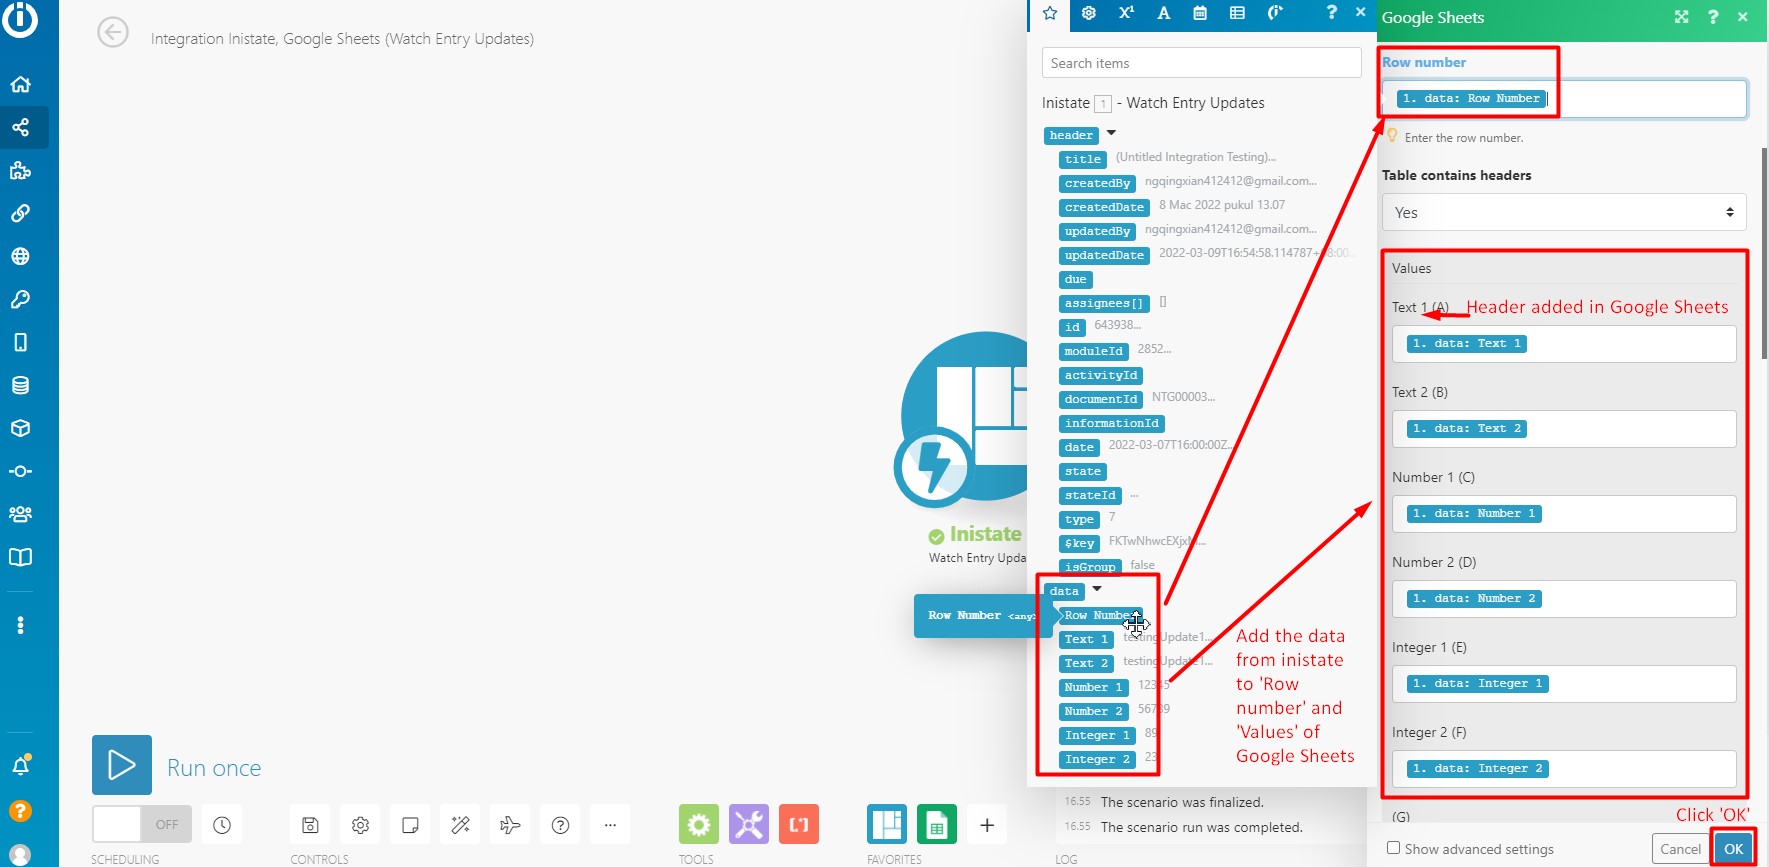
- Click ‘Google Sheets – Update a Row’ Action module, add the data from inistate to ‘Row number’ and ‘Values’ of Google Sheets one by one to each box (Refer Picture 24).
- Click ‘Run once’ to run again (Refer Picture 25).

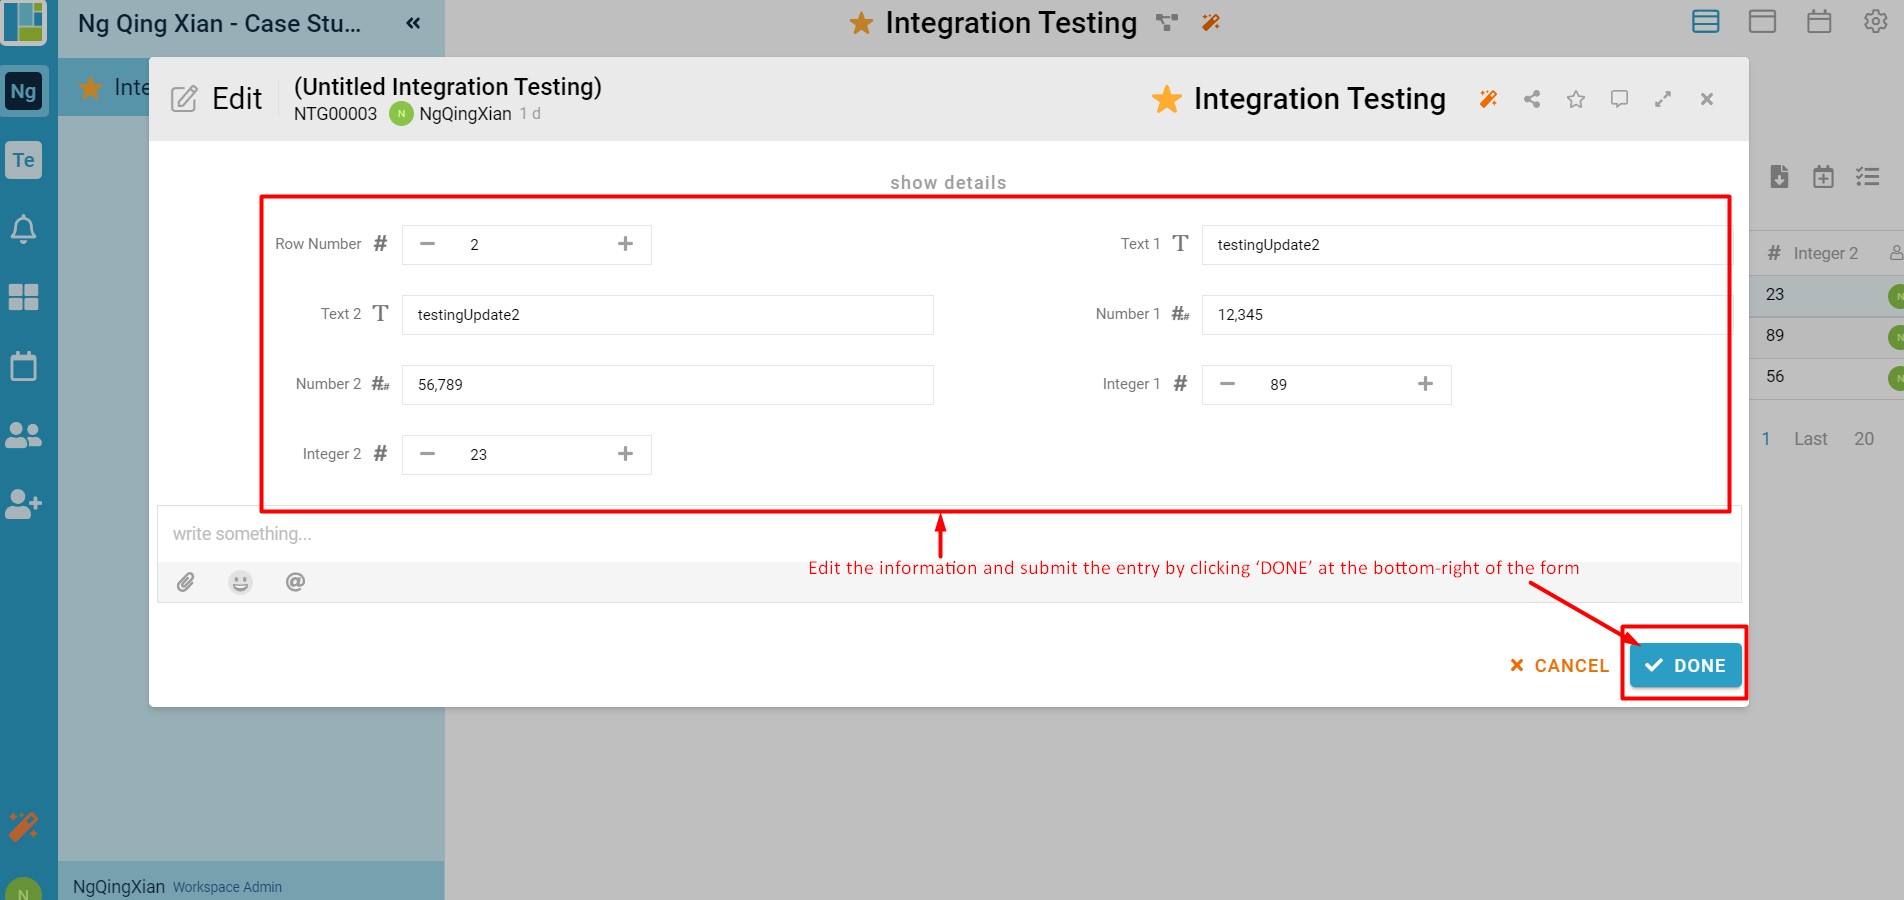
- In the workspace of inistate, select an entry by clicking it, click ‘3 dots’, and select ‘Edit’ to edit the entry. Edit the information and submit the entry by clicking ‘DONE’ at the bottom-right of the form (Refer Picture 26).
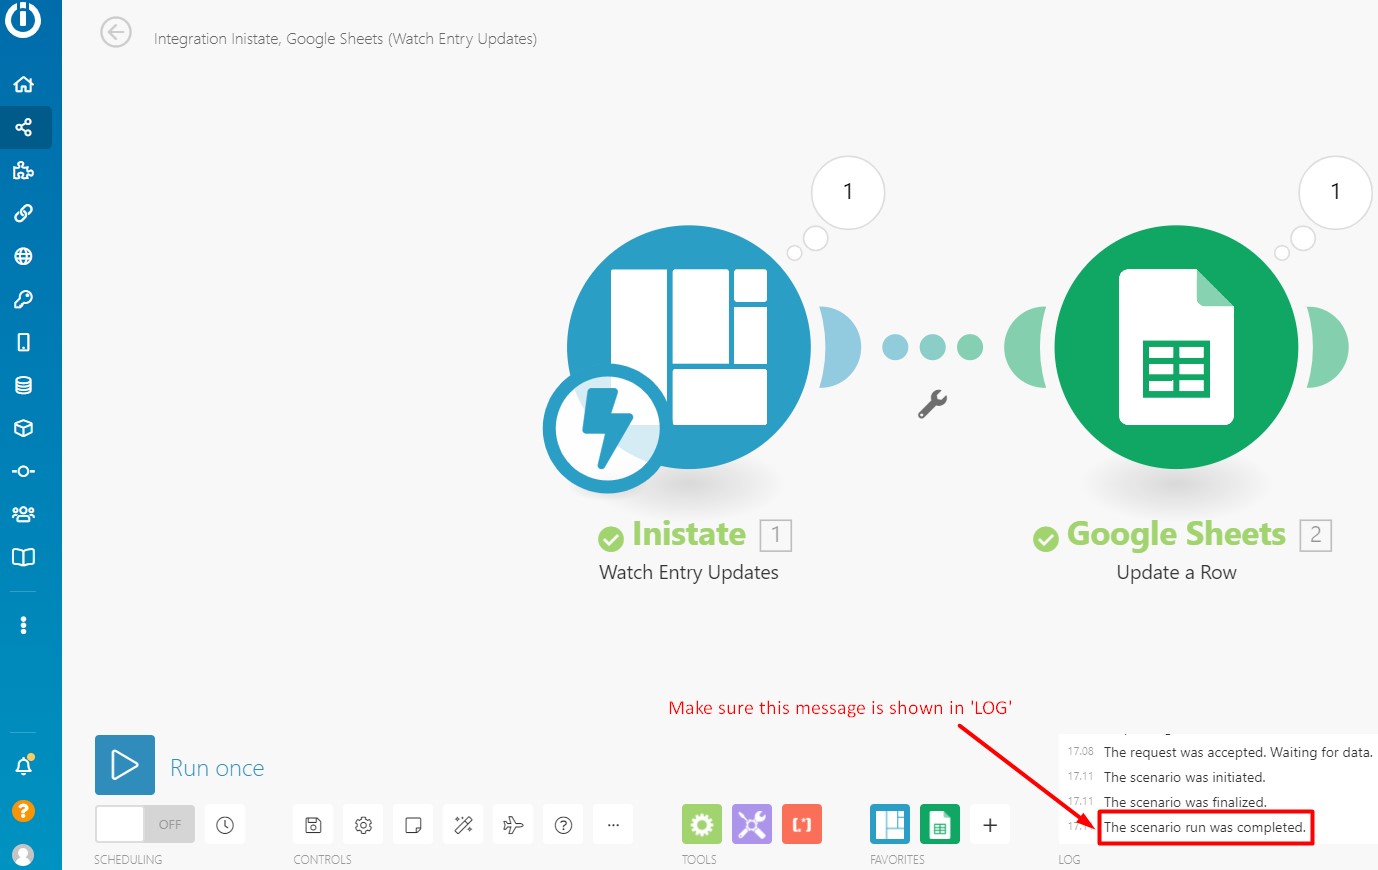
- In Integromat, ‘The scenario run was completed.’ Message is shown in ‘LOG’ (Refer Picture 27).
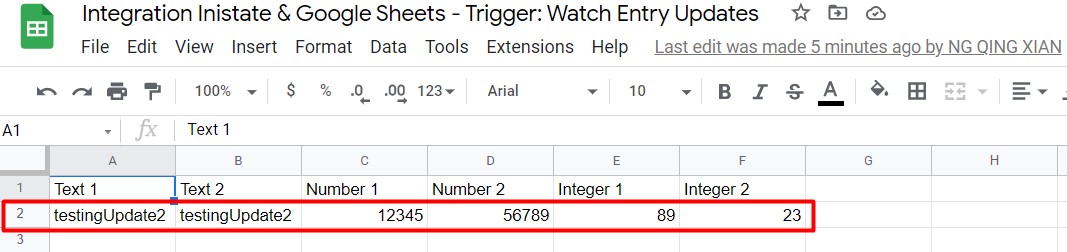
- In Google Sheets, ‘row number:2’ is automatically updated, the values are same with what we input when editing the entry of inistate just now (Refer Picture 28).
Congratulations!!!![]()
![]() You have successfully integrated inistate with Google Sheets!
You have successfully integrated inistate with Google Sheets!
Try inistate for FREE now.
Sign up at www.inistate.com