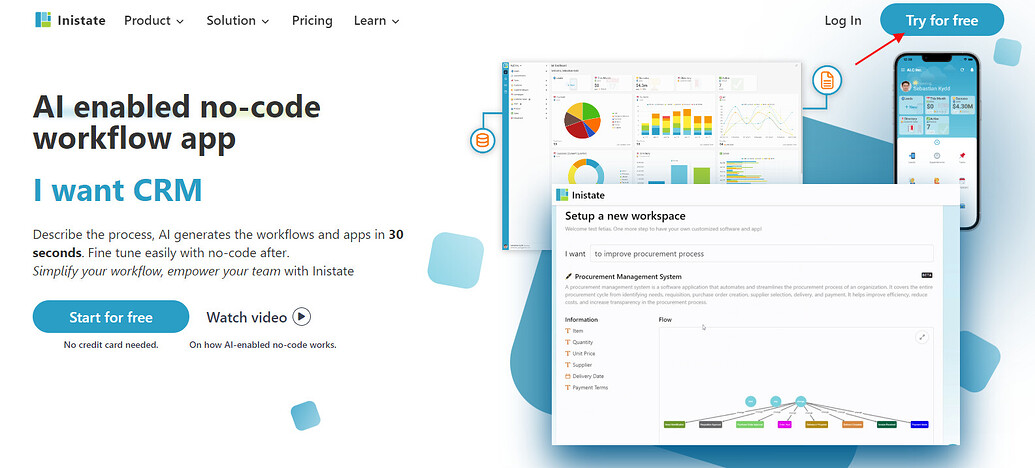
Hi Inistate community 
This post will guide you on how to sign up with Inistate and get a ready solution.
-
Open your browser
-
Go to https://inistate.com/
-
Click on ‘Try for free’ button in the top right corner
-
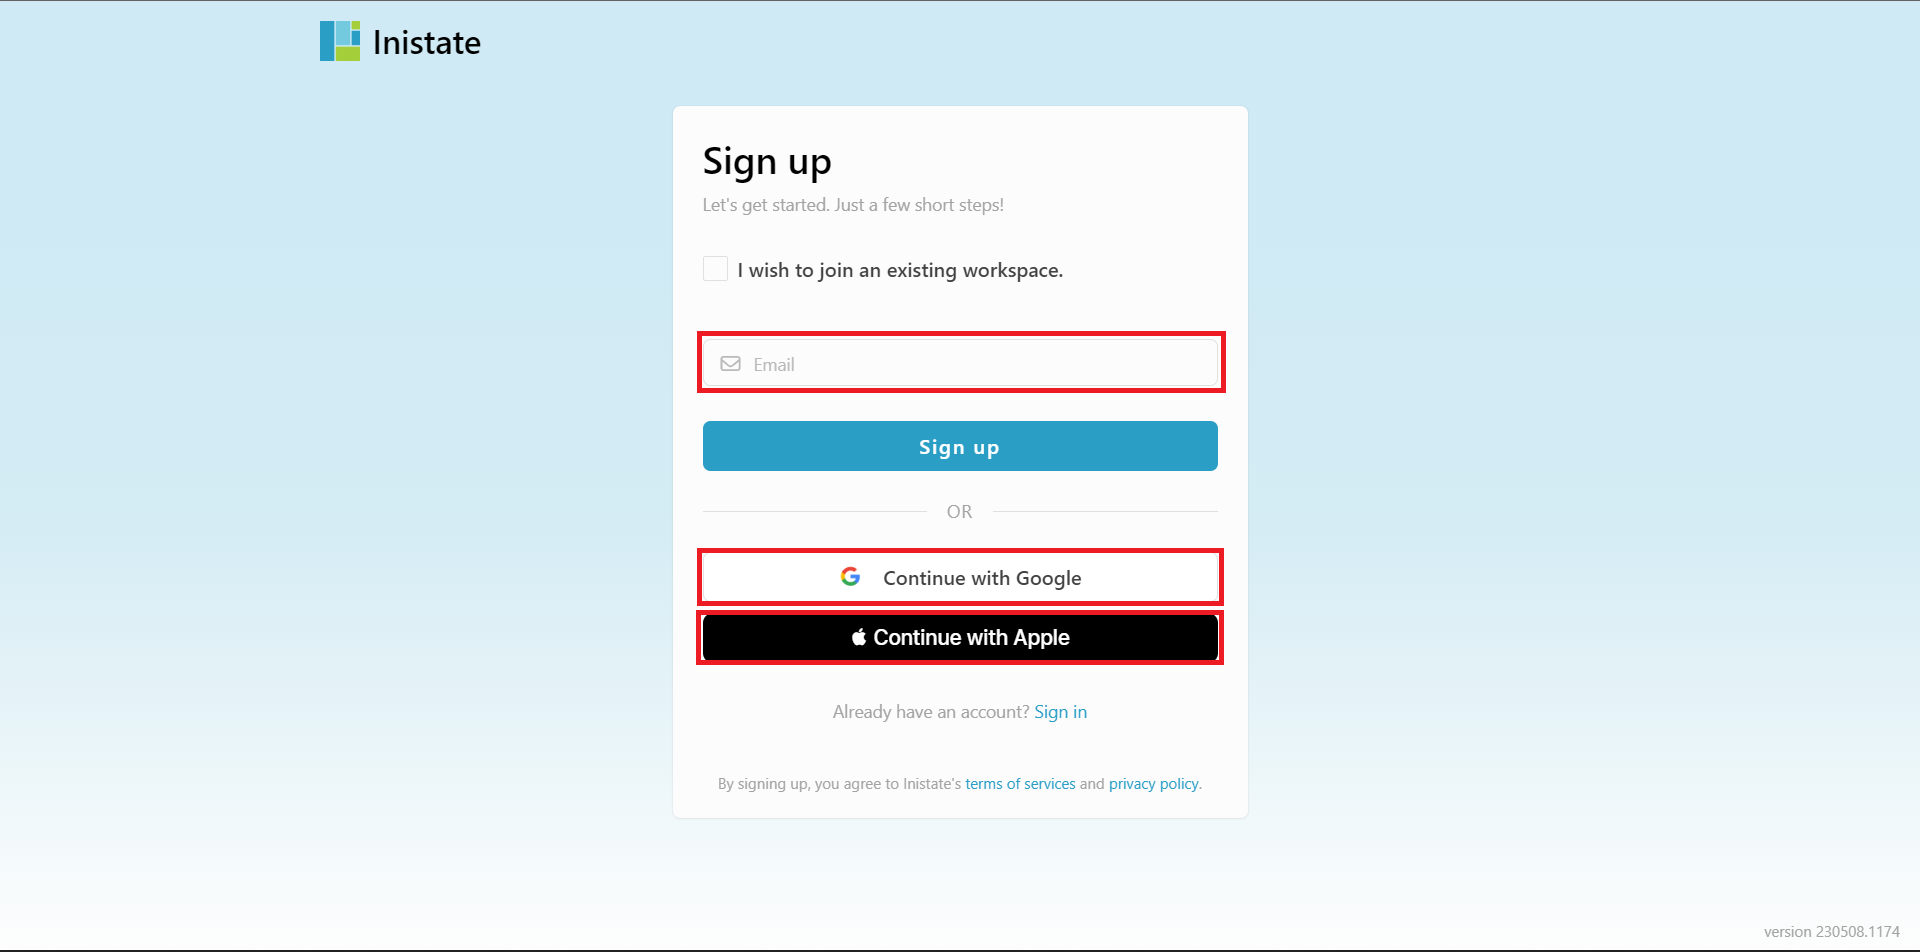
Fill in your email OR ‘Continue with Google’ OR ‘Continue with Apple’
-
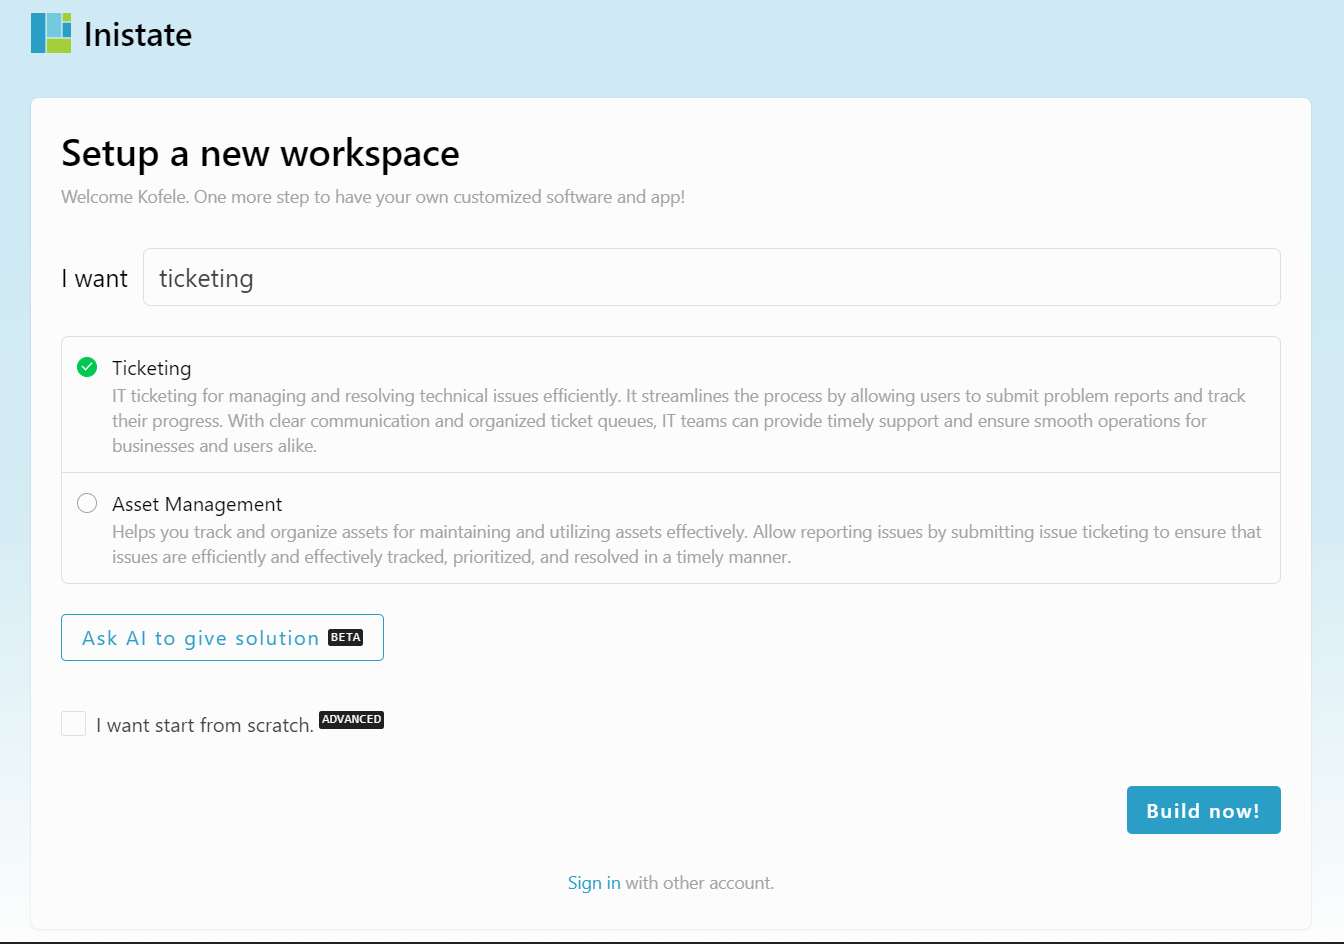
Then, you will direct to ‘Setup a new workspace’ page[image]
-
You type asset management after the words ‘I want’
-
Choose ‘Ticketing’ from the ready solution.
-
Click ‘Build now’.
-
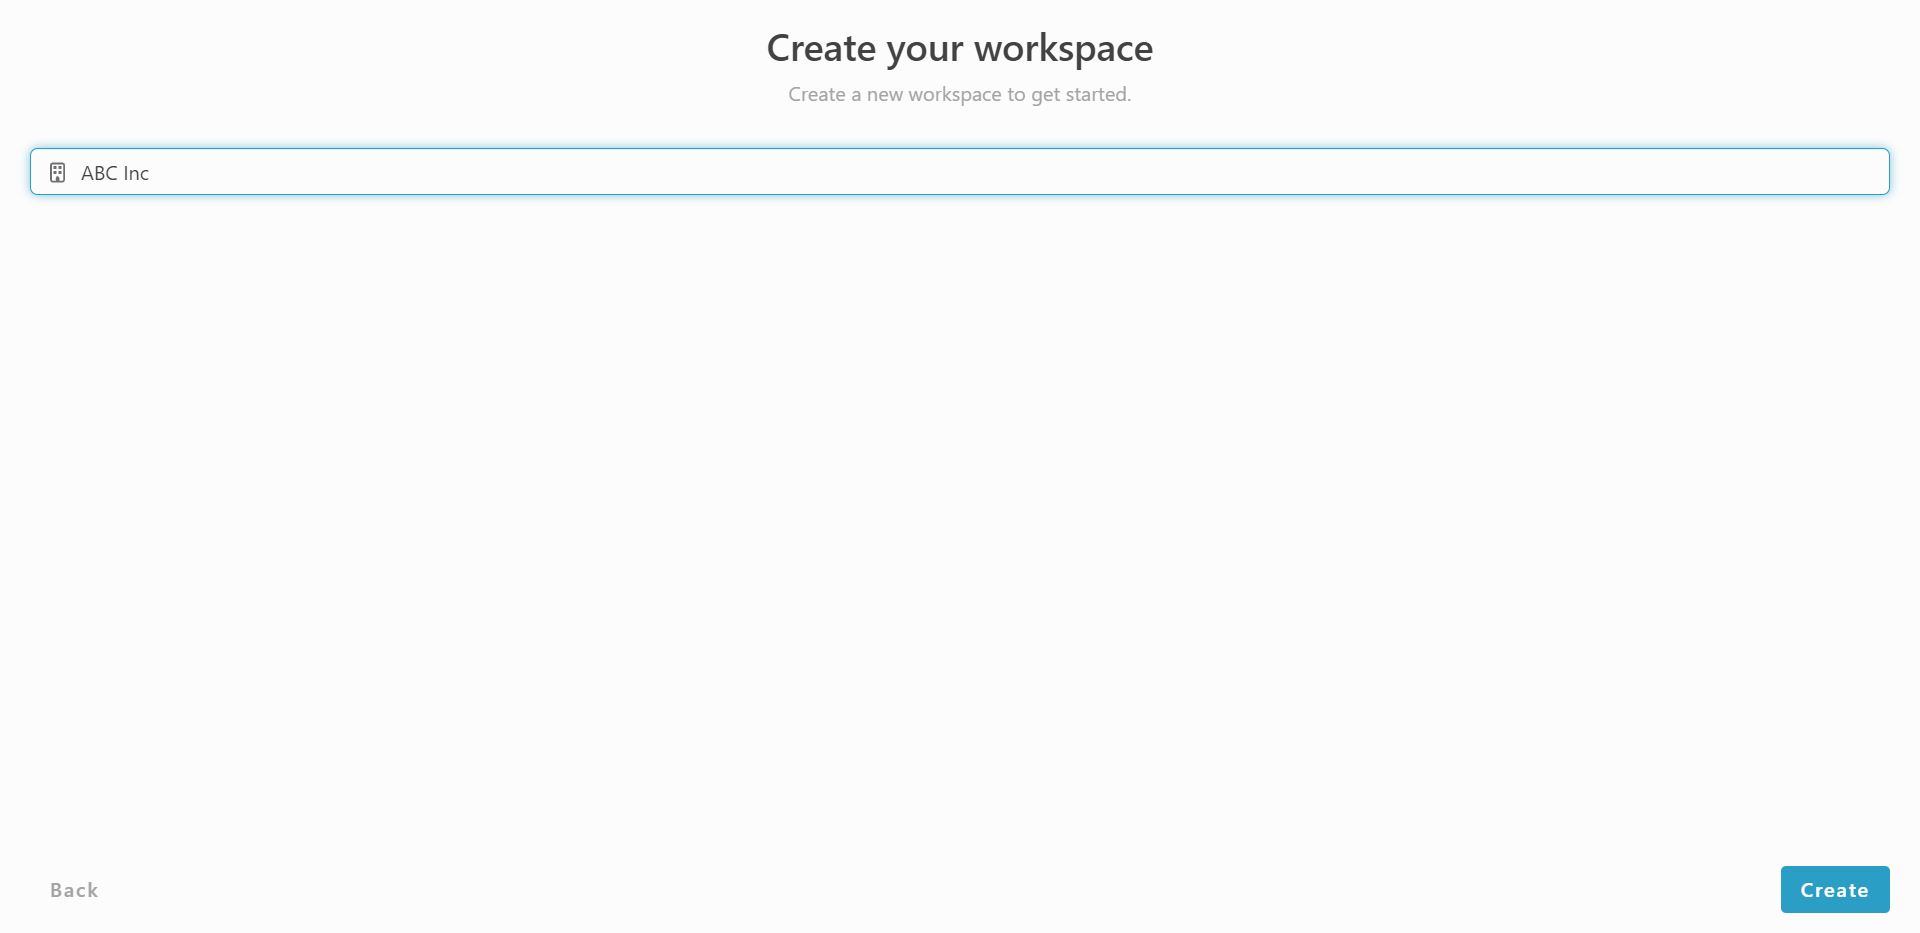
Input your workspace name. It can be your company name or anything.
-
Click ‘Create’.
-
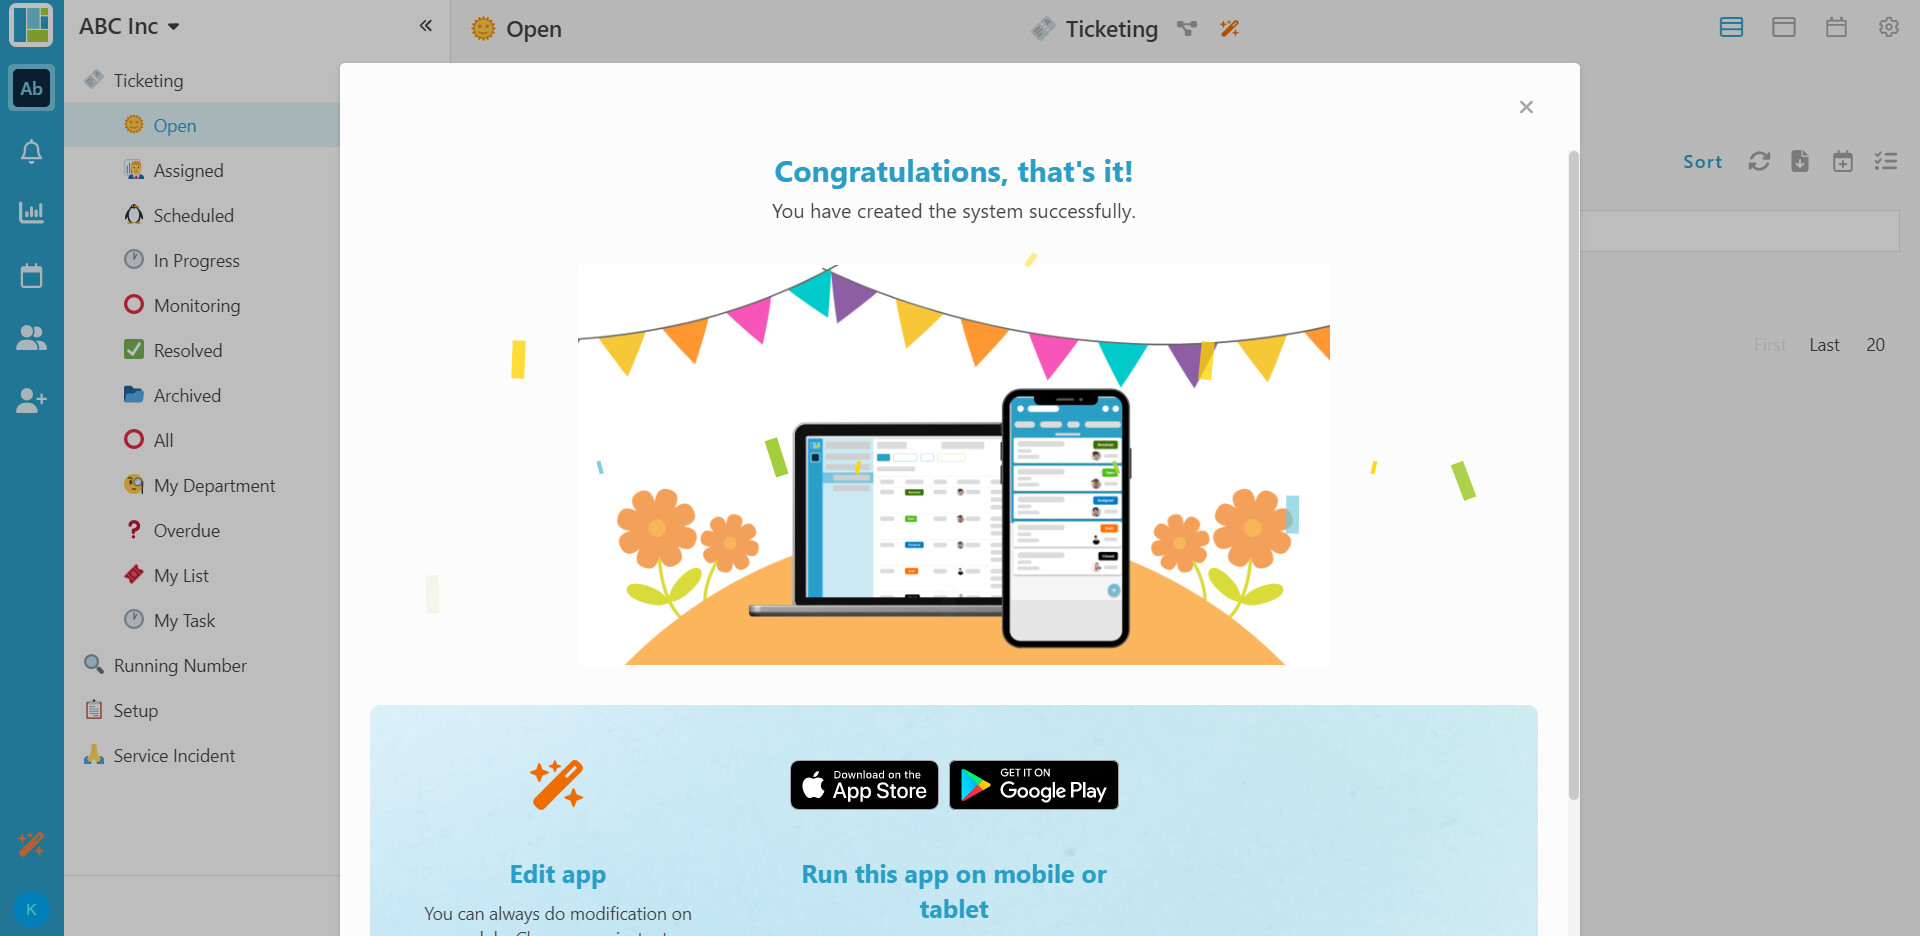
Great! You have successfully installed theticketing-ready solution and are good to use now.
HOW TO USE READY SOLUTION - TICKETING
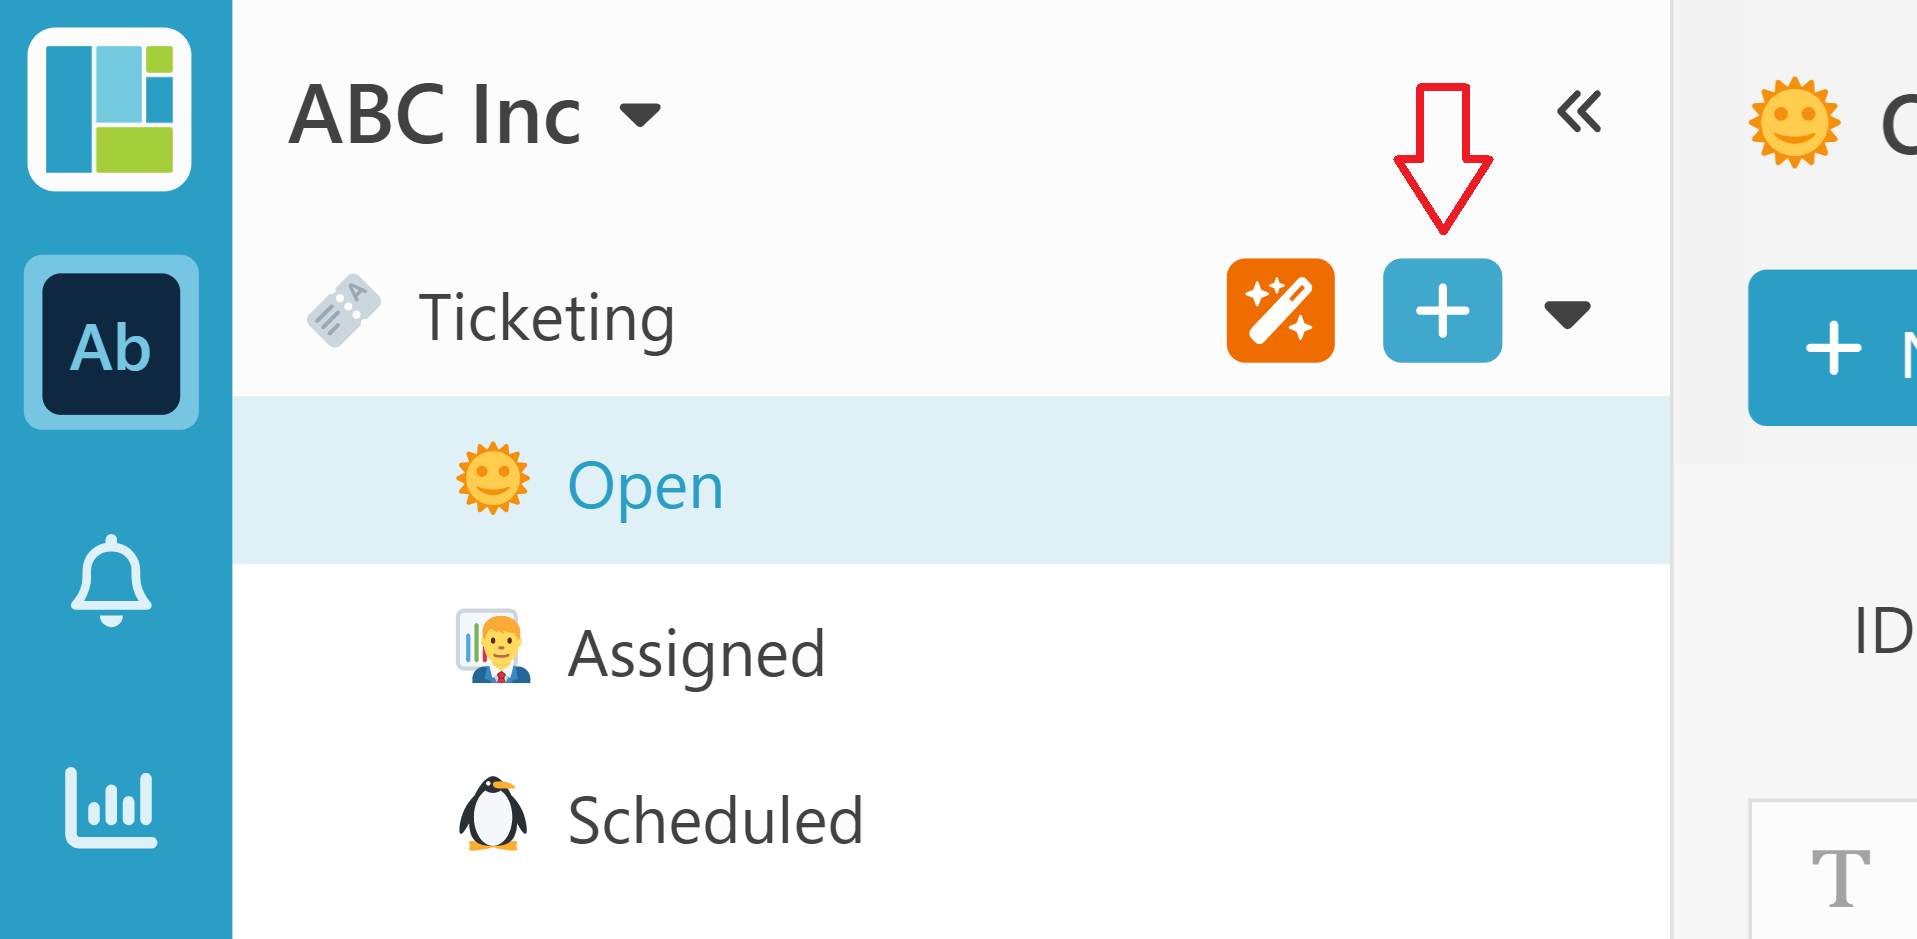
Create A New Ticketing
-
Select module ‘Ticketing’ (below the workspace’s name)
-
Click “+” button to add new ticketing (entry)
-
Fill in information
-
Click ‘OK’ button at the right, bottom page to save the entry
-
A ‘Successfully created’ pop up in a green box will temporarily appear at the top of the page.
Edit the Ticketing Information
-
Select module ‘Ticketing’
-
Choose ‘Open’ listing
-
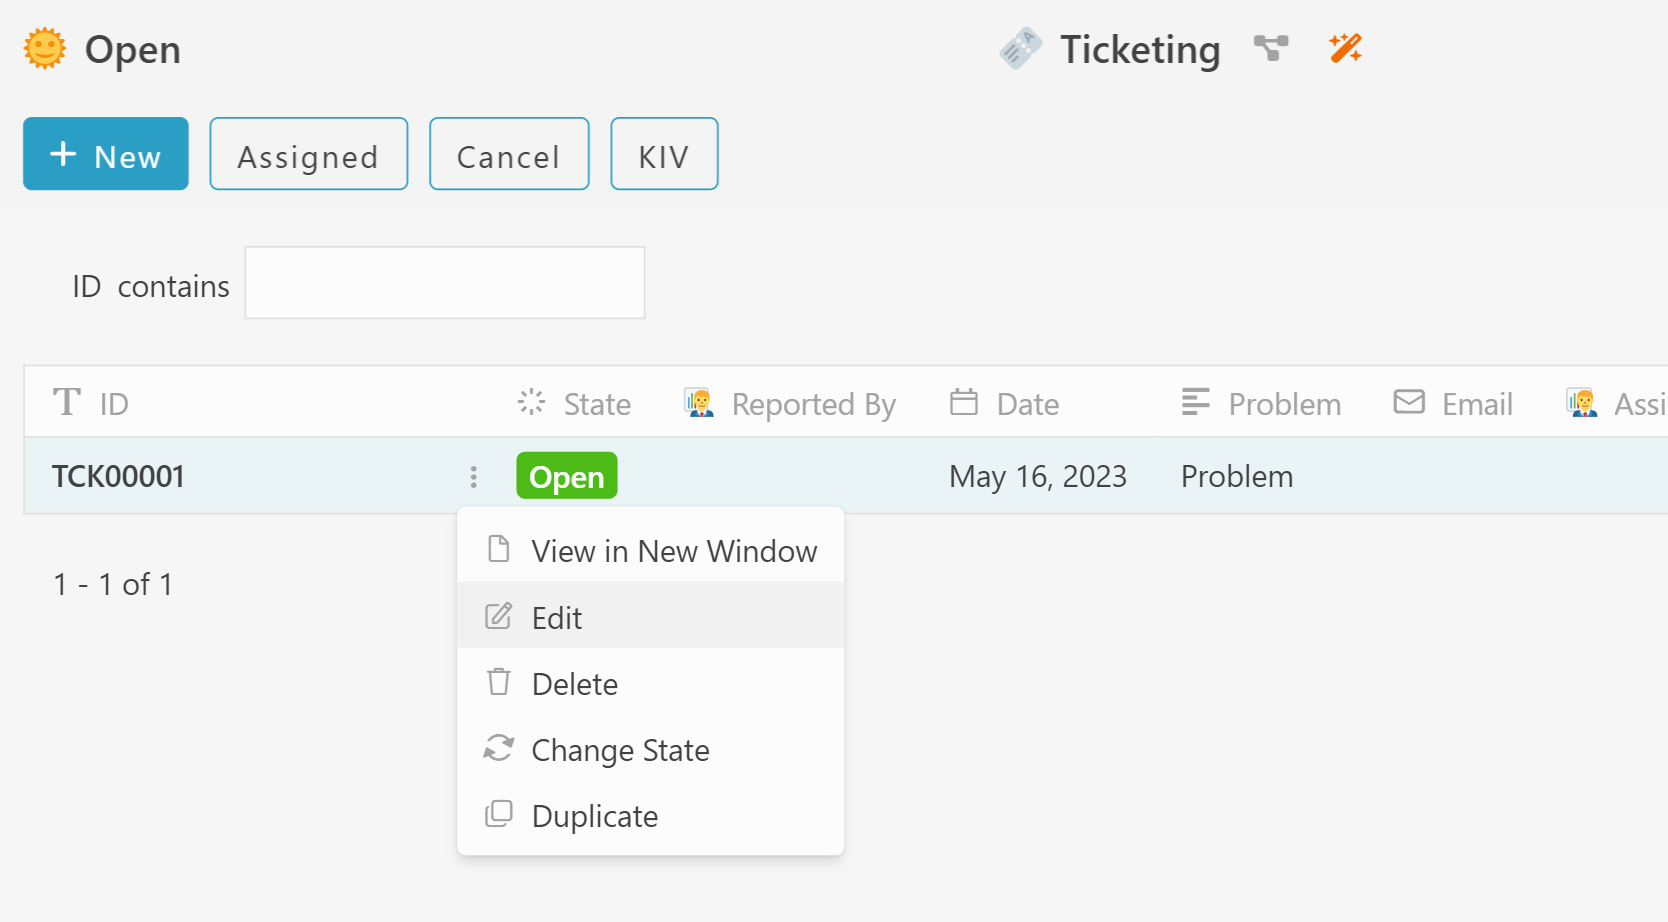
Select one of the ticketing entries.
-
Click the ‘3 dots’ icon, choose ‘edit’
-
You can edit the information.
-
Click ‘OK’ button at the right, bottom page to save the entry
View Created Ticketing
-
Can access through both web and mobile application
-
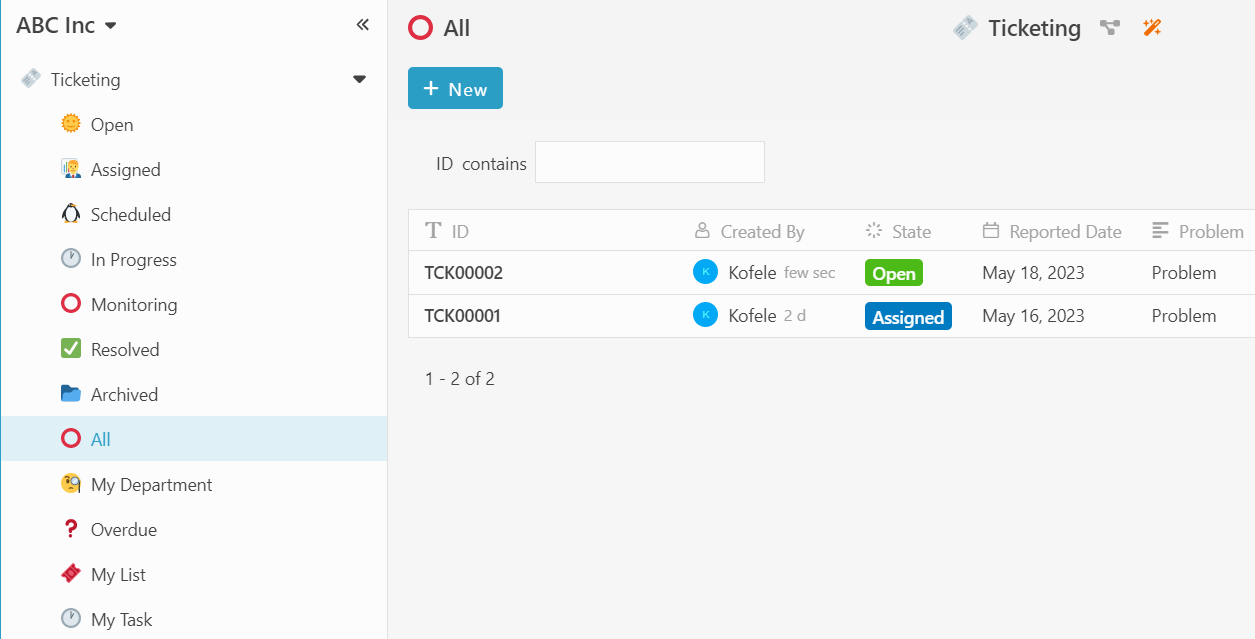
From the modules, select ‘Ticketing’
-
Select ‘All’
-
View all ticketing created. The latest ticketing created will be on the top by default.
TICKETING FLOW
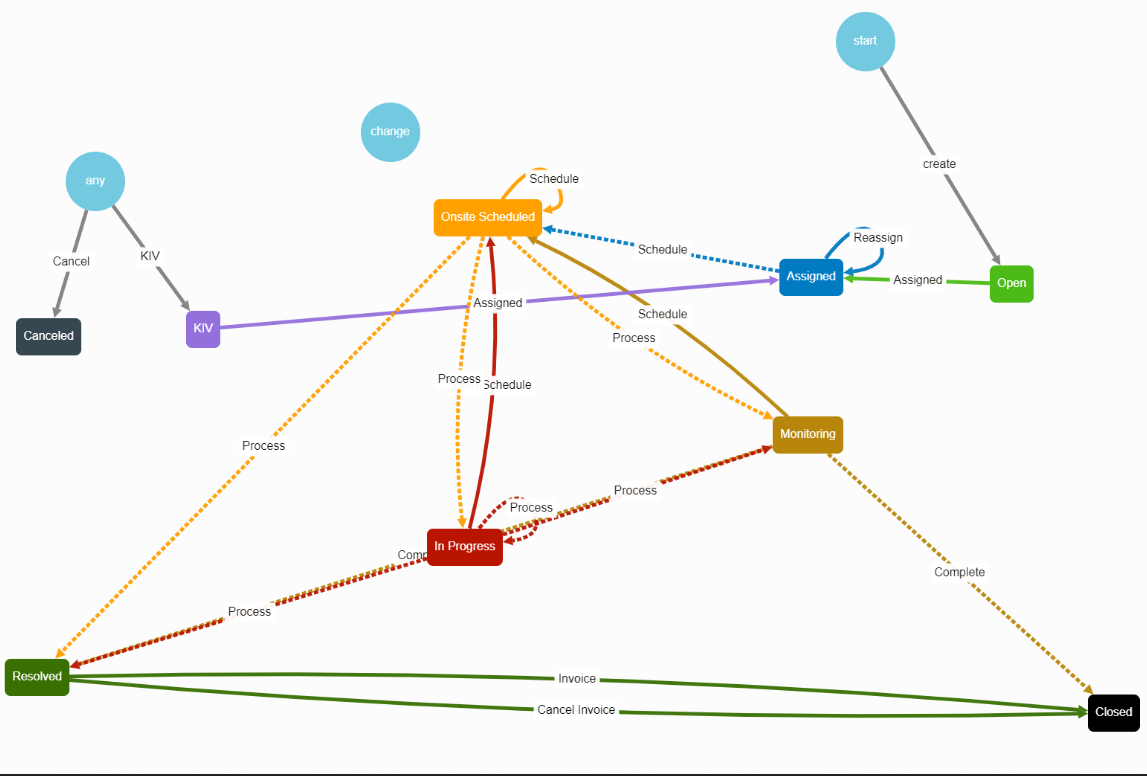
Assign Open Ticketing

-
Choose Open ticketing entry
-
Select activity “Assigned”
-
Choose Assign person name
-
Submit ticketing.
-
Assigned person receives the App notification.
-
Can view on both Web and Mobile App.
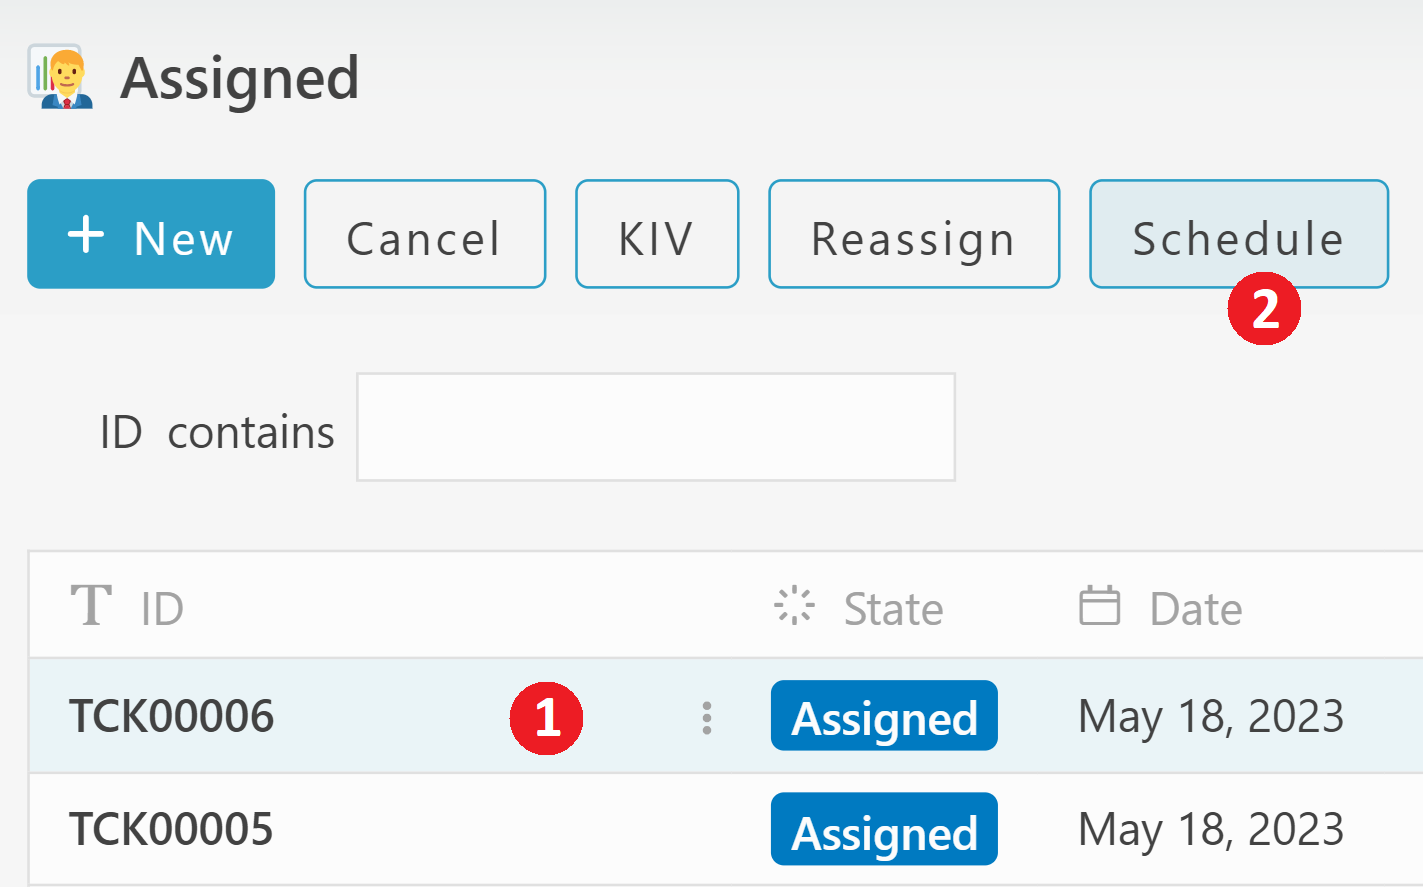
Schedule Assigned Ticketing
-
Choose Assigned ticketing entry
-
Click ‘Schedule’ at the top of the page
-
Click the ‘OK’ button at the bottom of the page
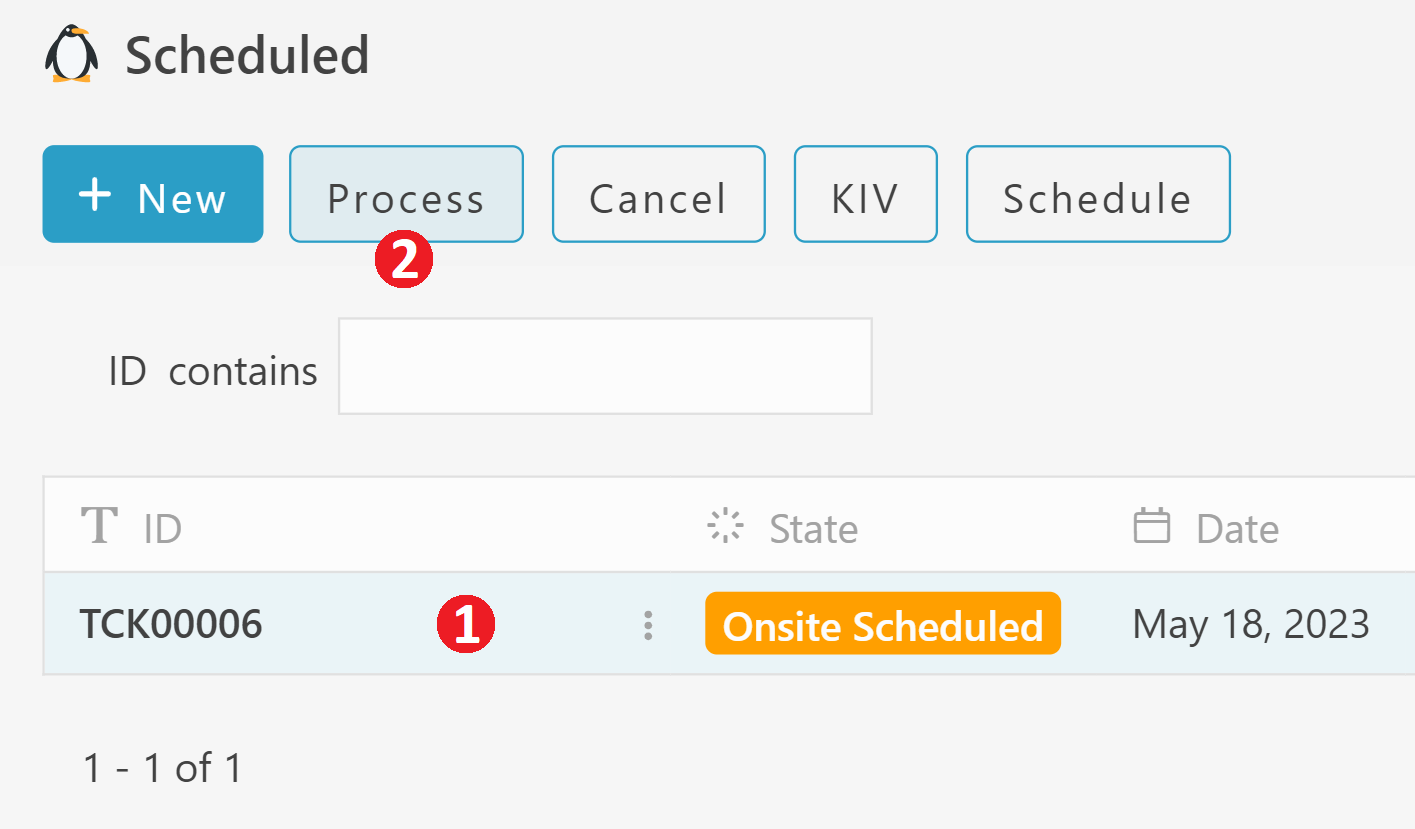
Process Scheduled Ticketing
-
Choose Scheduled ticketing entry
-
Click ‘Process’ at the top of the page
-
Fill in the informations
-
In the form, you can choose Resolved or Monitor the ticketing
-
Click the ‘OK’ button at the bottom of the page
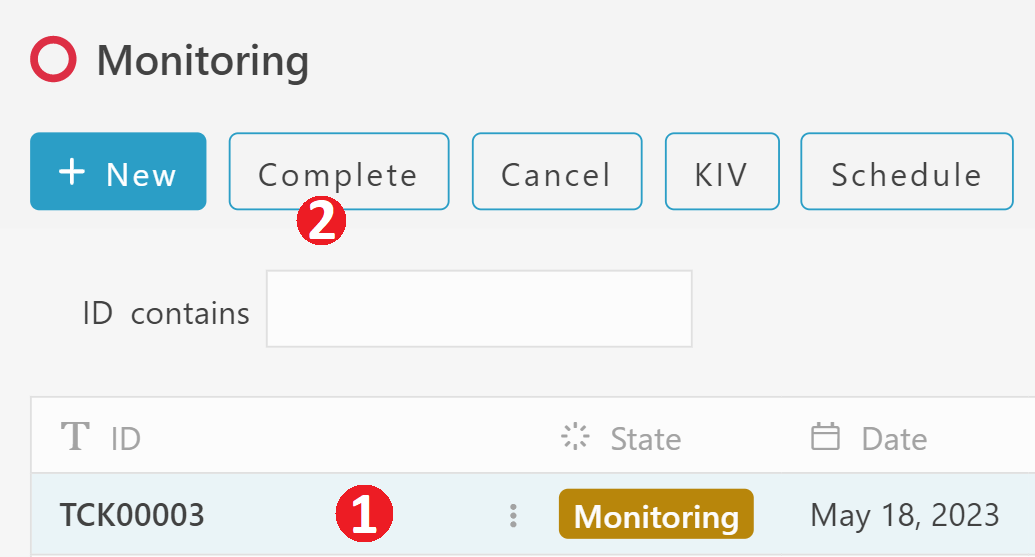
Complete Monitoring Ticketing
-
Choose Monitoring ticketing entry
-
Select ‘Complete’
-
Fill in the informations
-
Click the ‘OK’ button at the bottom of the page
-
Ticketing entry is Closed.
Invoice Resolved Ticketing

-
Choose Resolved ticketing entry
-
Can choose ‘Invoice’ or ‘Cancel Invoice’ at the top of the page
-
Fill in the informations
-
Click the ‘OK’ button at the bottom of the page
-
Ticketing entry is Closed.
Create A New Service Incident
-
Select module ‘Service Incident’
-
Click “+” button to add new entry
-
Fill in information
-
Click ‘OK’ button at the right, bottom page to save the entry
-
A ‘Successfully created’ pop up in a green box will temporarily appear at the top of the page.
SERVICE INCIDENT FLOW
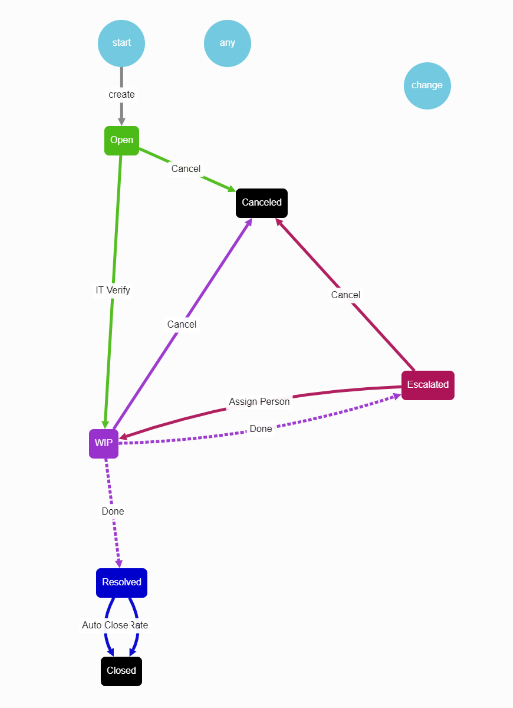
IT Verify Open Service Incident
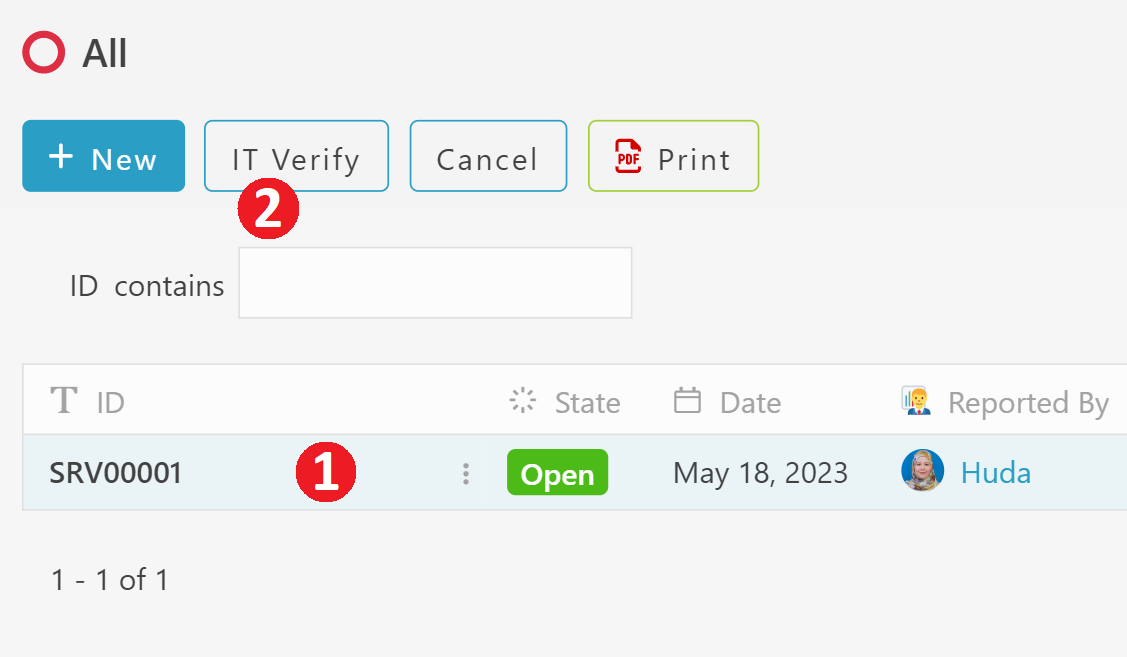
-
Choose All from Service Incident module
-
Select IT Verify at the top of the page
-
Fill in the informations of Person In Charge
-
Click the ‘OK’ button at the bottom of the page
-
Person In Charge will receive email notification regarding the service incident
-
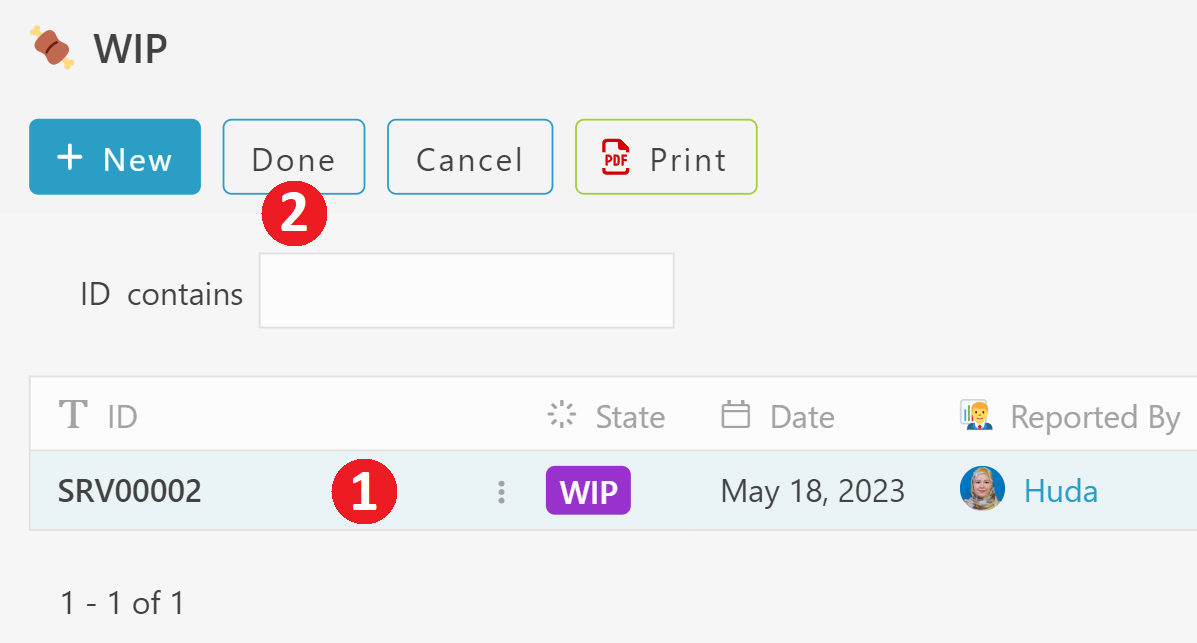
Choose WIP from Service Incident module
-
Select Done at the top of the page
-
Fill in the informations and select Yes for Resolved
-
Click the ‘OK’ button at the bottom of the page
-
Reported by will receive app notification to rate the service incident
-
Reported by can rate the service and the service is Closed