Incorporated all the information that a traveler needs to forward for approval from a higher authority. This template gives the approver to get know about the details and purposes of the travel.
Problem
Difficult to manage - Hard to manage and record the travel request
Objective
Convenient - Convenient to manage and record the travel request and easily forward for approval from a higher authority
Process Flow
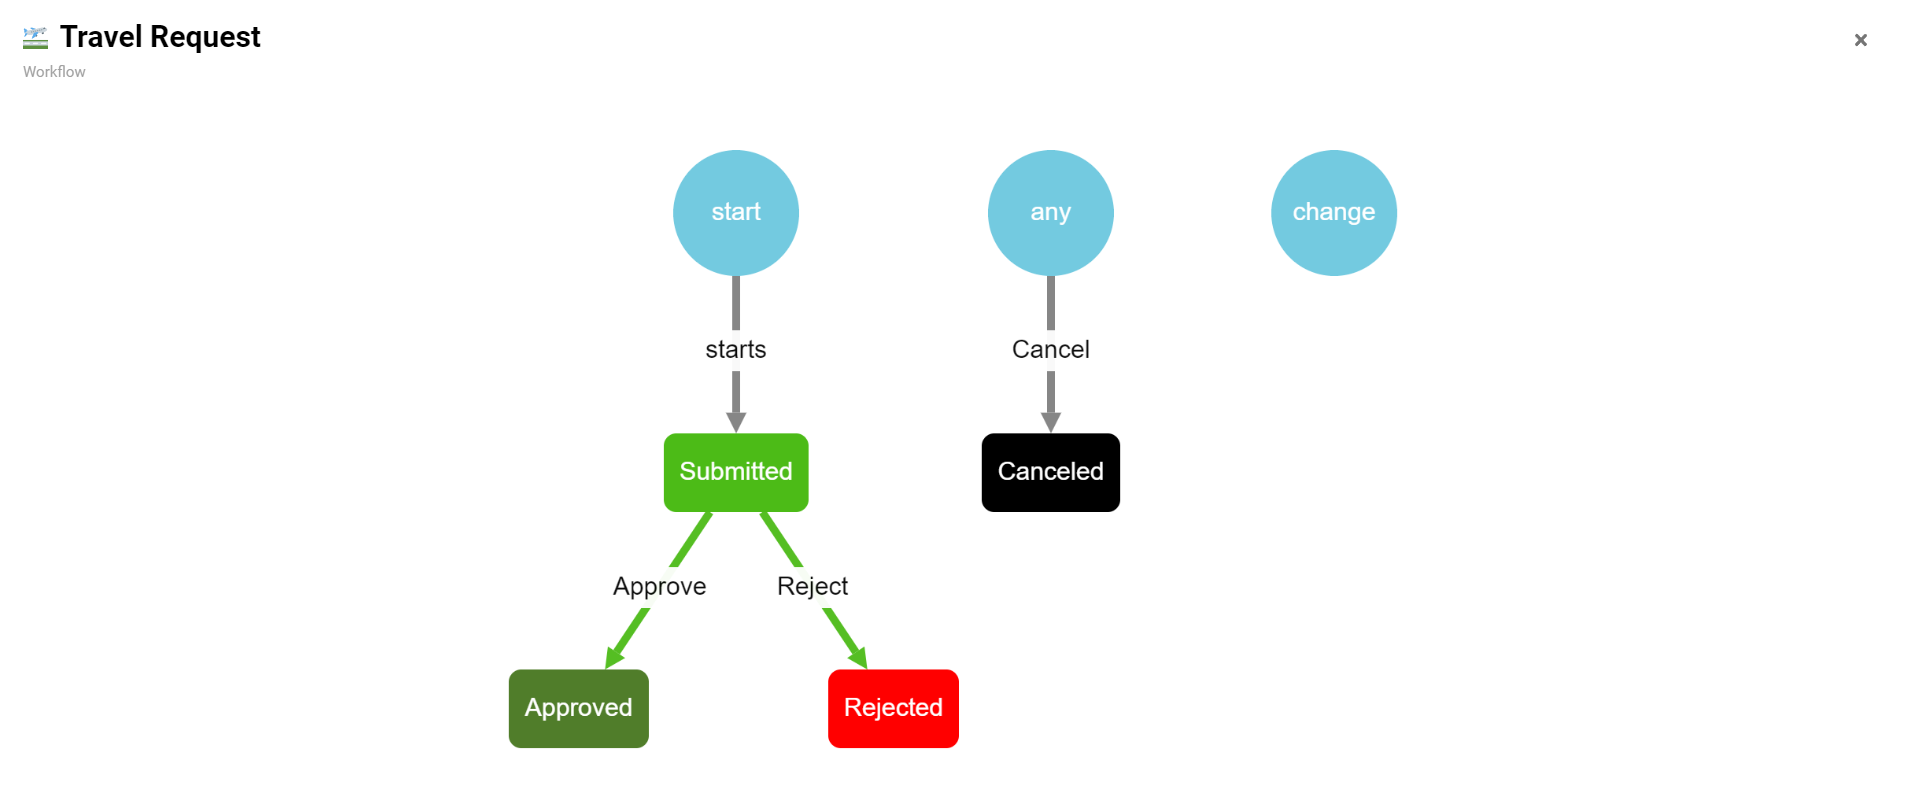
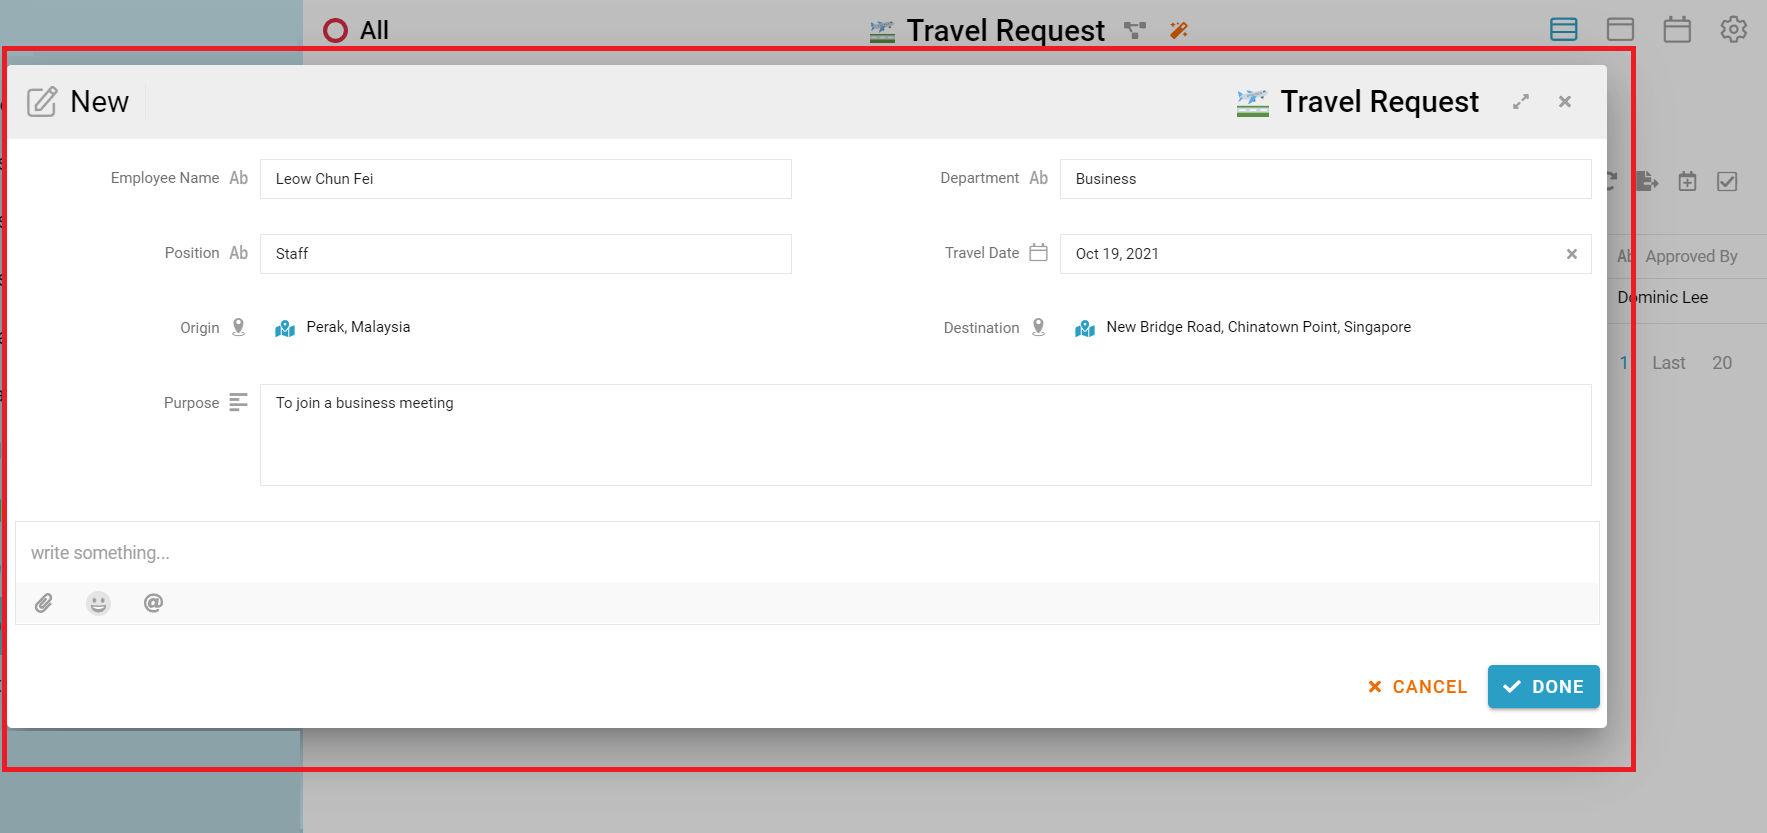
User can click the “New” button to create new travel request, fill in the field “Employee Name” with user’s name, fill in the field “Department” with user’s department, fill in the field “Position” with user’s position, fill in the field “Travel Date” with user’s date of travel, fill in the field “Origin” with user’s departure place, fill in the field “Destination” with user’s arrive place and fill in the field “Purpose” with user’s purpose to travel. The initial state of the request is the “Submitted”, when the relevant department click the button “Approve” to approve the travel request, the state change to “Approved”. When the relevant department click the button “Reject” to reject the travel request, the state change to “Rejected”. Relevant department or the user who create the travel request can cancel the request at any state.
Step
-
User click “New” button
-
User fill in all the field and click “Done” button
-
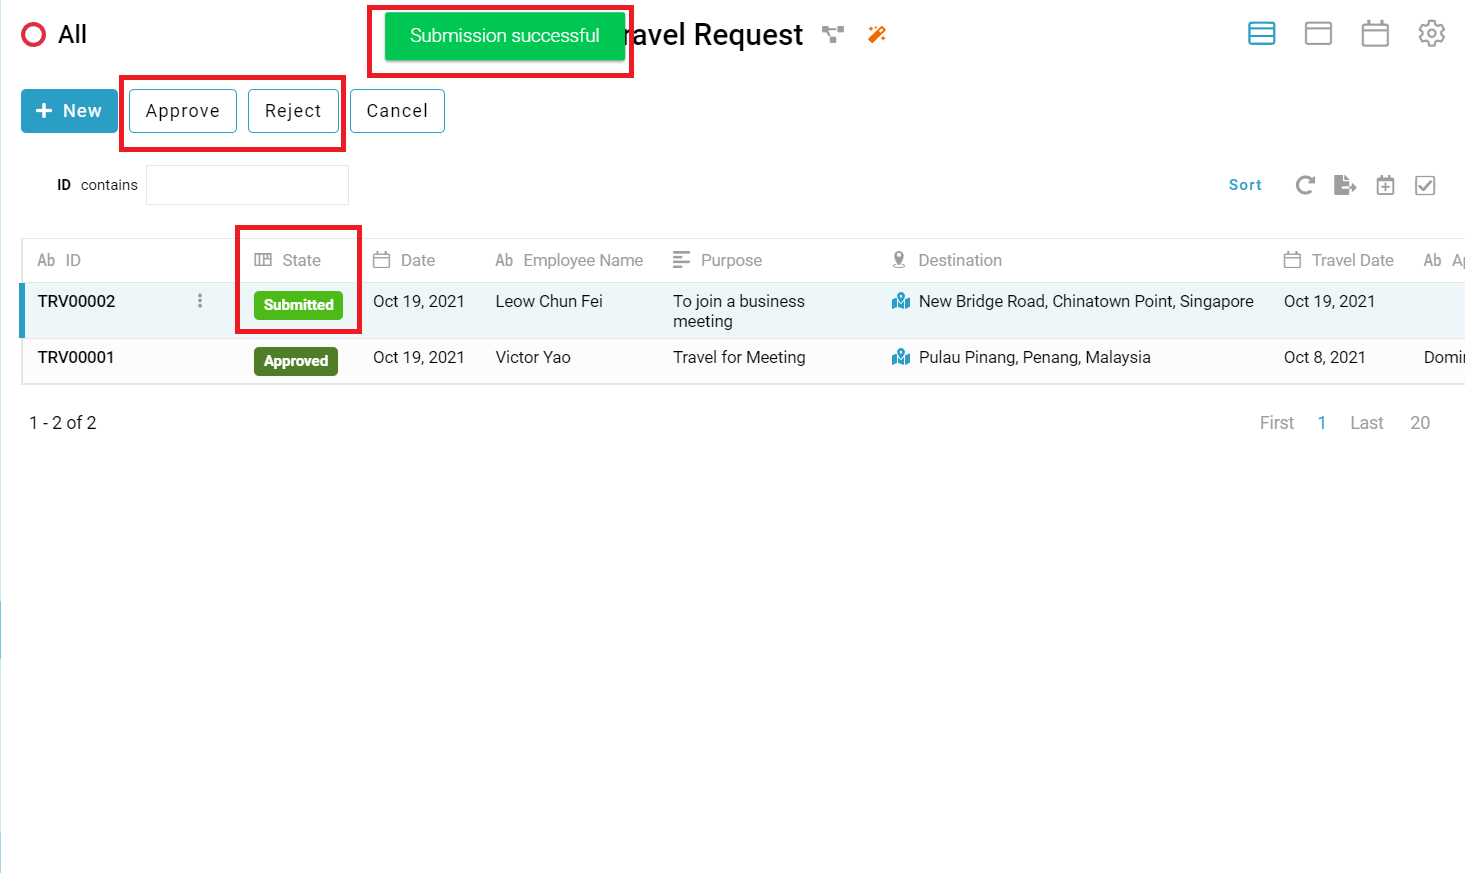
A message “Submission successful” showed, the initial state of the request is the “Submitted”, there are two button “Approve” and “Reject”, if the relevant department click the button “Approve” it is to approve the travel request or he relevant department click the button “Reject” it is to reject the travel request. Let say the relevant department click the button “Approve”
-
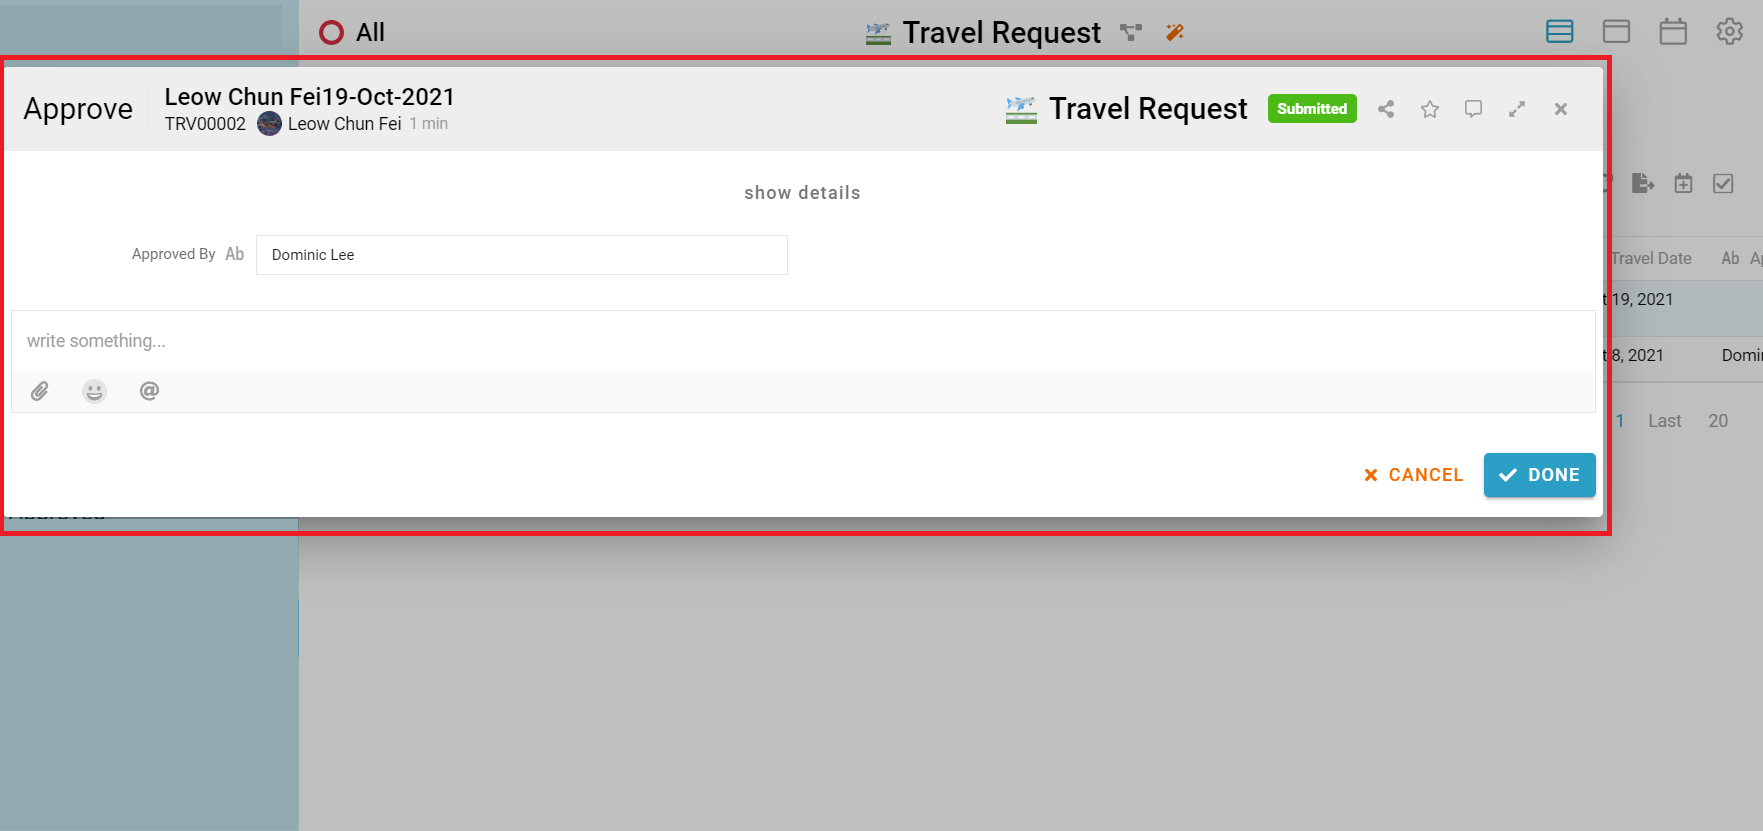
A window name “Approve” showed, relevant department fill in the field “Approved By” and click “Done” button
-
A message “Submission successful” showed and the state of the request change to “Approved”
-
If the relevant department click the button “Reject”, a window name “Reject” showed, relevant department click the “Done” button, A message “Submission successful” showed and the state of the request change to “Rejected”. Relevant department or the user who create the travel request can cancel the request at any state which is “Submitted”, “Approved” and “Rejected”
-
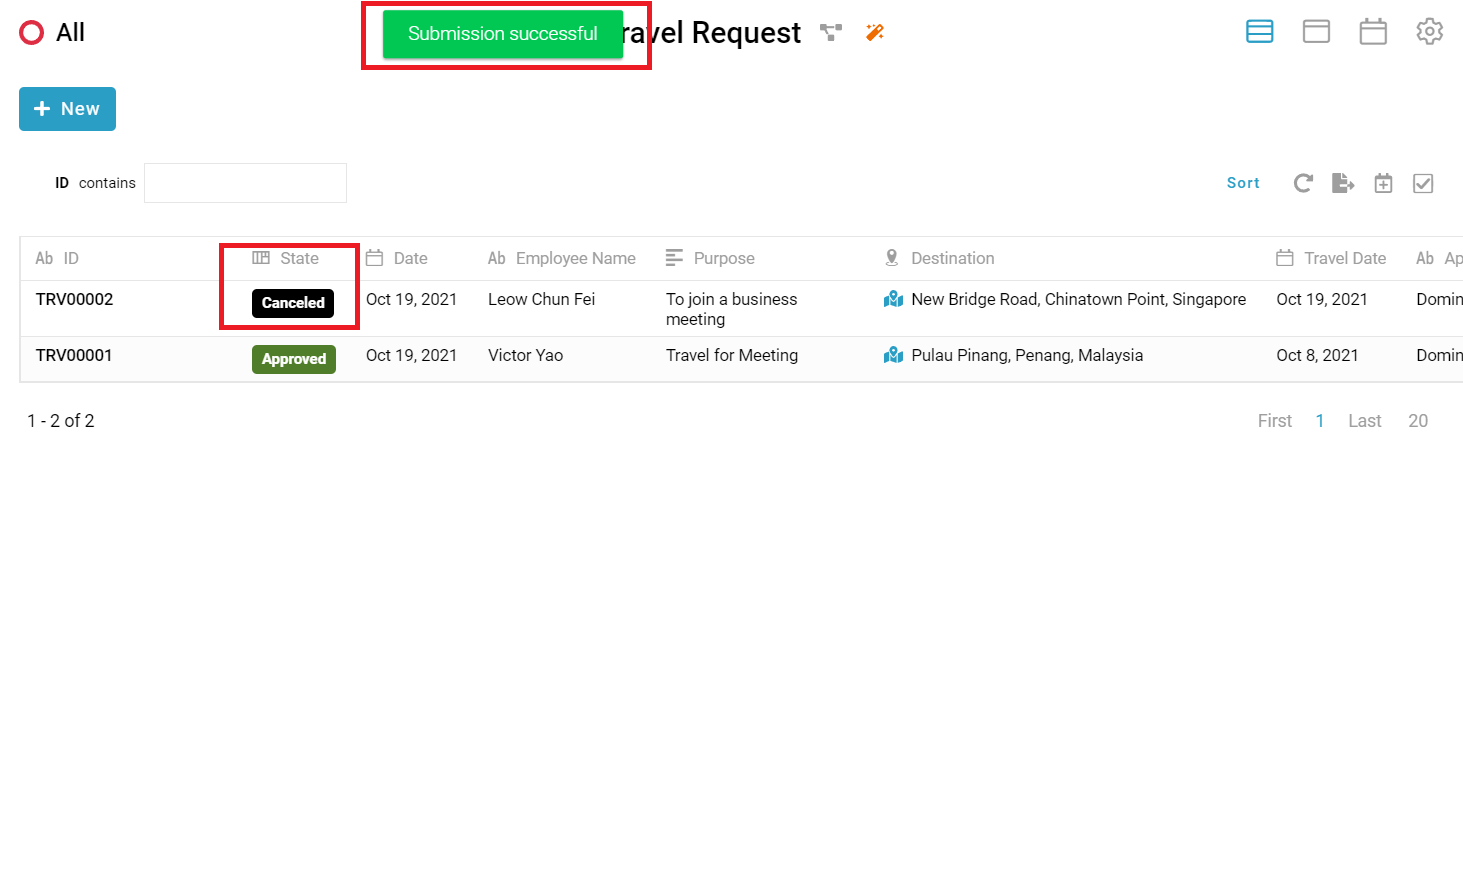
A message “Submission successful” showed and the state of the request change to “Canceled”


For more templates:
Try FETIAS for FREE now.
Sign up at https://fetias.com
Related topic
How to install template package