This feature is currently under BETA.
Only consultant role is able to use this feature, please contact your administrator if you don’t have access.
Hi Inistate community!
Let’s take a look on how to perform activity using QR code.
In this tutorial, you will learn how to configure an activity QR code which will aloow you to perform an activity without editing a form, making event handling more efficient and simple.
This feature also has its limitations as it can only perform custom activity, unable to perform standard activity like: ‘create’, ‘edit’, ‘view’, ‘delete’.
In addition, it will submit the activity form as empty value.
- To start, we will need to create a module along with its information, activities and states.
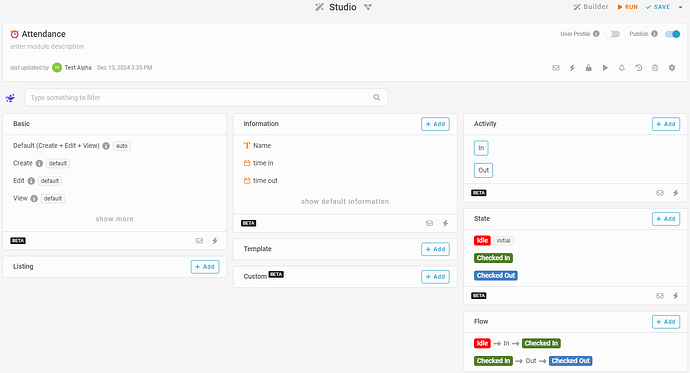
For this tutorial, I will be creating “Attendance” with the following basic configurations:
-
Information:
- Name
- time in
- time out
-
States:
- Idle
- Checked In
- Checked Out
-
Activities:
- In
- Out
-
Flow:
- Idle -(In)-> Checked In
- Checked In -(Out)-> Checked Out
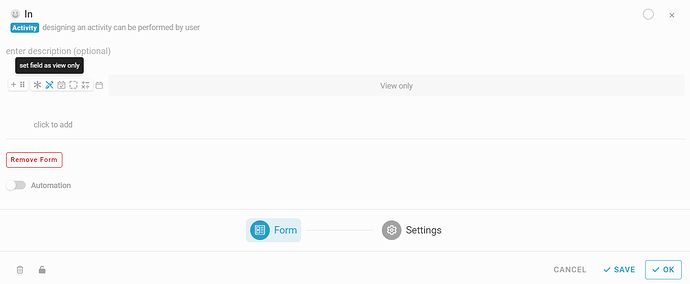
- Next click on activity ‘In’ to edit it, place time in, set it as view only and save it.
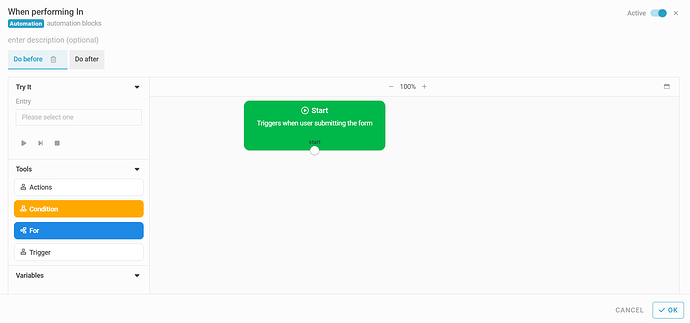
- Then click new automation beside ‘In’
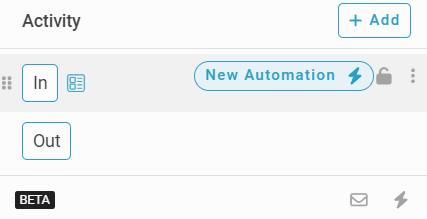
- Select ‘Do before’
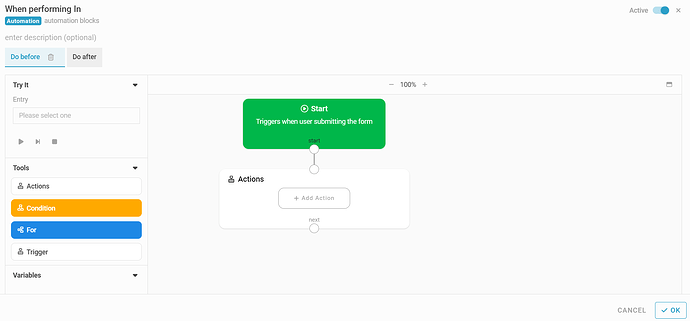
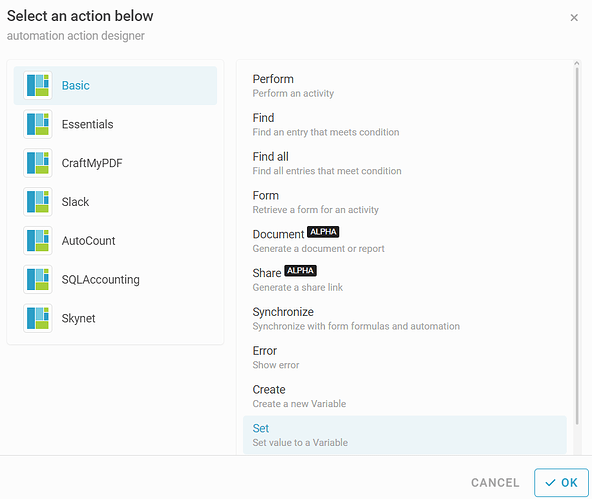
- Drag an action block and click ‘+ Add Action’
- Choose ‘Set’ in Basic category
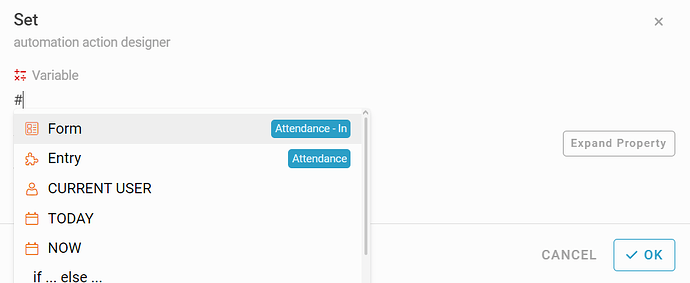
- In the variable slot input: #, then select form
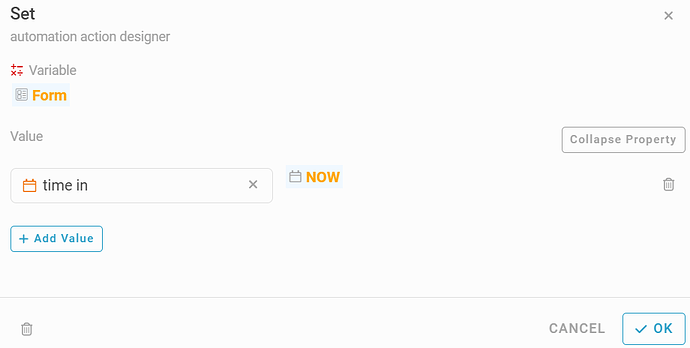
- Next, click ‘Expand Property’ on the right
Click ‘+ Add Value’ button, select ‘time in’ and input #now on the right
After setting the variable, click OK to save it.
DO NOT add other information that you would NOT want to change into the automation above.
It will be triggered and changed.
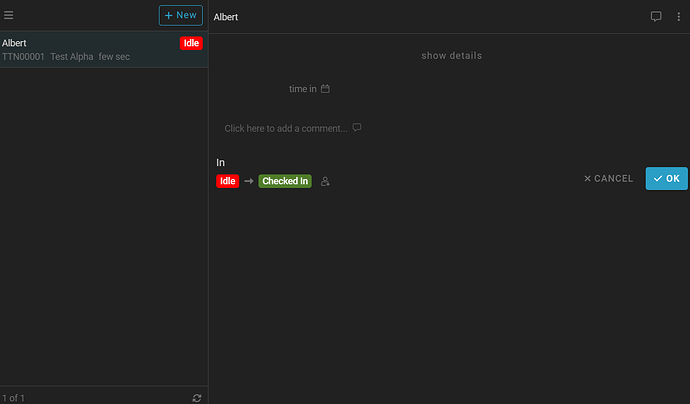
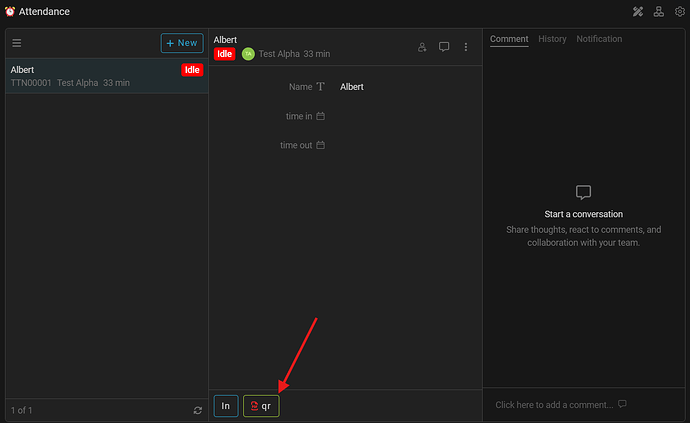
- After finish setting up the module, we will need to run it and create an entry with input only in ‘Name’.
- After creating an entry, try to perform activity ‘In’
- Copy the link on top when performing ‘In’, save it and edit it accordingly
Original link example: https://app.inistate.com/#/list/xxxxxxxxxx?id=aenmkl_Le31l6mMb6&a=0642ebb9-2432-4eac-8986-4c633b85eca7
In the link above replace the id = a with b and words behind the underscore(_)
from: ?id=aenmkl_Le31|6mMb6
to: ?id=benmkl_’ + entry.Id.ToString() + ’
And add &submit=true at the end of the link.
Edited link example: https://app.inistate.com/#/list/xxxxxxxxxx?id=benmkl_’ + entry.Id.ToString() + '&a=0642ebb9-2432-4eac-8986-4c633b85eca7&submit=true
Save this for later.
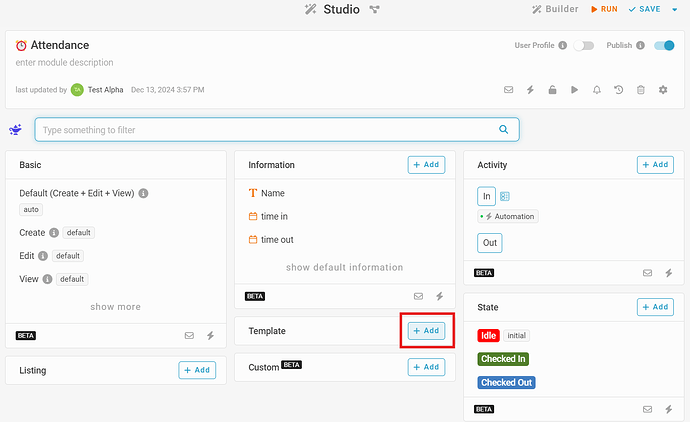
- Next, return to design view of Attendance and click Add in Template
- Enter the name ‘qr’ and select ‘code’, input the following script:
{
clr.AddReference("ZXing")
clr.AddReference("System.Drawing")

from System import Convert
from ZXing import *
from System.IO import *
from System.Drawing.Imaging import ImageFormat


def printQR(content1):
    content = content1.ToString()
    writer = BarcodeWriter()
    writer.Options.Height = 200
    writer.Options.Width = 200
    writer.Options.Margin = 0
    writer.Format = BarcodeFormat.QR_CODE
    bitmap = writer.Write(content)
    memoryStream = MemoryStream()
    bitmap.Save(memoryStream, ImageFormat.Jpeg)
    memoryStream.Position = 0
    byteBuffer = memoryStream.ToArray()
    memoryStream.Close()
    return Convert.ToBase64String(byteBuffer)

year = DateTime.Today.Year
month = DateTime.Today.Month
day = DateTime.Today.Day
link1 = ' your link '

#bax24B_1000
#b = prefix code
#ax24B = encode moduleId
#1000 = entryId
}
<style>
.page-setup {{
    padding-top: 30;
    padding-bottom: 30;
    padding-right: 30;
    padding-left: 30;
    width:250;
    height: 350;


}}

.label {{
    font-size: 10px;
    font-weight: bold;
}}

.content {{
    font-size: 12px;
    font-weight: bold;
    text-align: center;
}}
</style>
<div>
    <div>
    <div align="center"><img style="border: 0.3pt solid black; width: 170px; height: 170px; padding-left: 2px;padding-top: 2px;" src="data:image/jpeg;base64,{printQR(link1)}" /></div>
    </div>
    <div class="content">{entry['Name']}</div>
</div>
- In the script replace link1 with your edited link:
Edited link: https://app.inistate.com/#/list/xxxxxxxxxx?id=benmkl_’ + entry.Id.ToString() + '&a=0642ebb9-2432-4eac-8986-4c633b85eca7&submit=true
- Click OK, save and run the module.
- Now try and perform the new activity ‘qr’
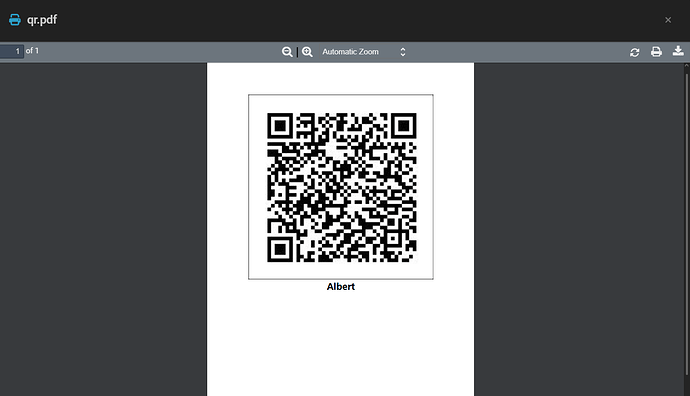
- A qr code should pop-up
- Scan the qr code with the Inistate app using an account with access to the workspace.
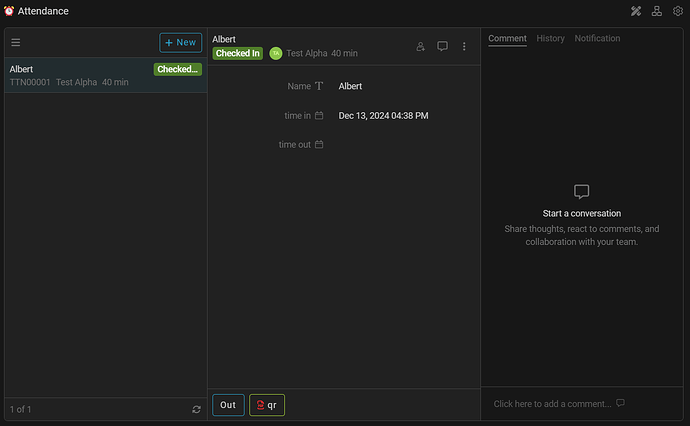
The state of the entry should be updated.
- Now that you have learned to configure the ‘In’ qr code, you can configure the ‘Out’ qr code in the same way.
Congratulations!!!![]()
![]() You have successfully learned to perform activity without form using QR.
You have successfully learned to perform activity without form using QR.
After finishing this configuration, every entry created in the module can be triggered.
Try FETIAS for FREE now.
Sign up at https://fetias.com
