This system allows customers to make appointments for services depending on their needs, and employees can view the information of the appointments filled in by the customers to decide whether to approve or reject their appointments.
Problem
Appointments for different services are difficult to arrange - this is especially true when there are a lot of appointments and the times for the appointments are overlapped.
Objective
Employees in charge of scheduling appointments can manage their appointments for various services and choose whether or not to accept or reject the appointments.
Step by step (Configuration)
Information
- Recognize and configure all the Information names and types required to create a new entry in the ‘Appointments Management System - Employee’ module. (Refer Picture 1):
- Name: Employee Name, Information Type: Text

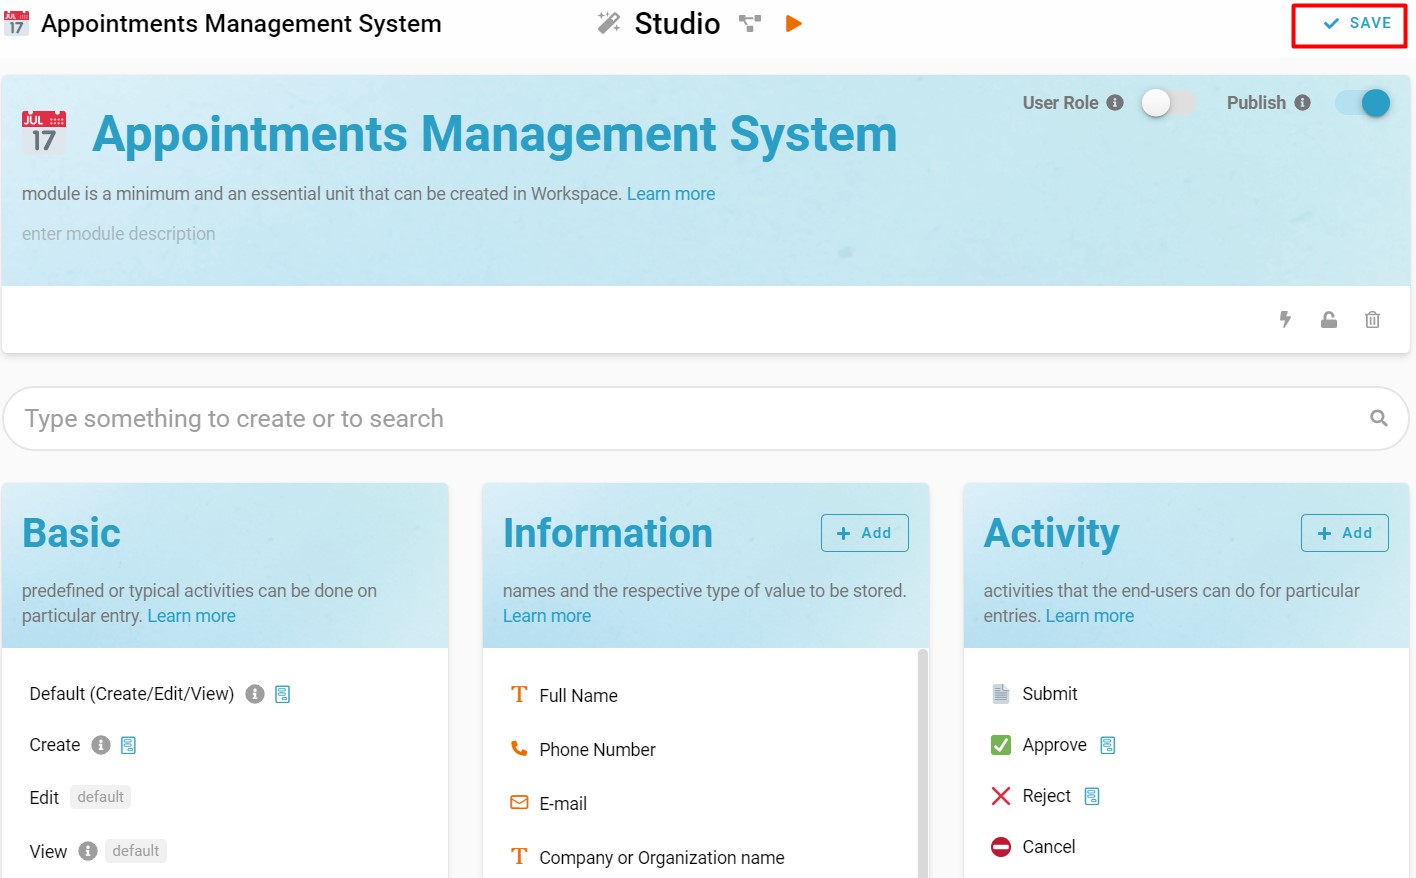
- Recognize and configure all the Information names and types required to create a new entry in the ‘Appointments Management System’ module. (Refer Picture 2 & Picture 3):
-
Name: Full Name, Information Type: Text
-
Name: Phone Number, Information Type: Phone Number
-
Name: E-mail, Information Type: Email
-
Name: Company or Organization name, Information Type: Text
-
Name: Consultation Interest, Information Type: Select, Options:
- Network Solutions
- Hosting Solutions
- Business Development
- Procurement
- Telephony
- Web Design
- Support
- Other
-
Name: Platform, Information Type: Select, Options:
- Face-to-face (Physical)
- Online
-
Name: Appointment Date and Time (Start), Information Type: Date Time
-
Name: Appointment Date and Time (End), Information Type: Date Time
-
Name: Additional Information/Comments, Information Type: Multiline Text
-
Name: Approved, Information Type: YesNo
-
Name: Approved By, Information Type: Profile (Module), Module: Appointments Management System – Employee, Display Information: Employee Name
-
Name: Rejected, Information Type: YesNo
-
Name: Rejected By, Information Type: Profile (Module), Module: Appointments Management System – Employee, Display Information: Employee Name


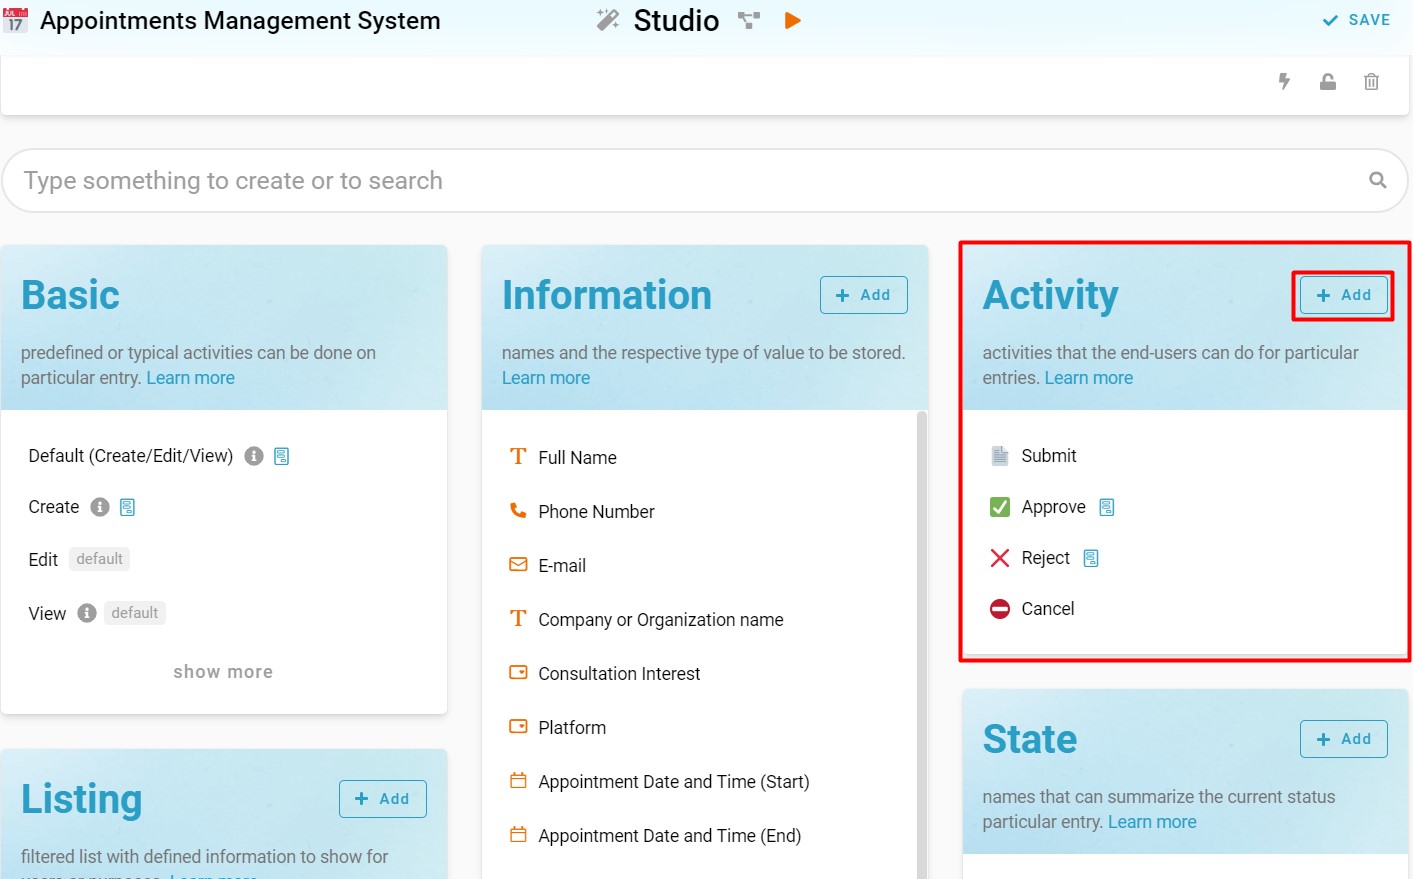
Activity
- Recognize and configure all the Activity able to perform to change State (Refer Picture 4):
- Submit
- Approve
- Reject
- Cancel
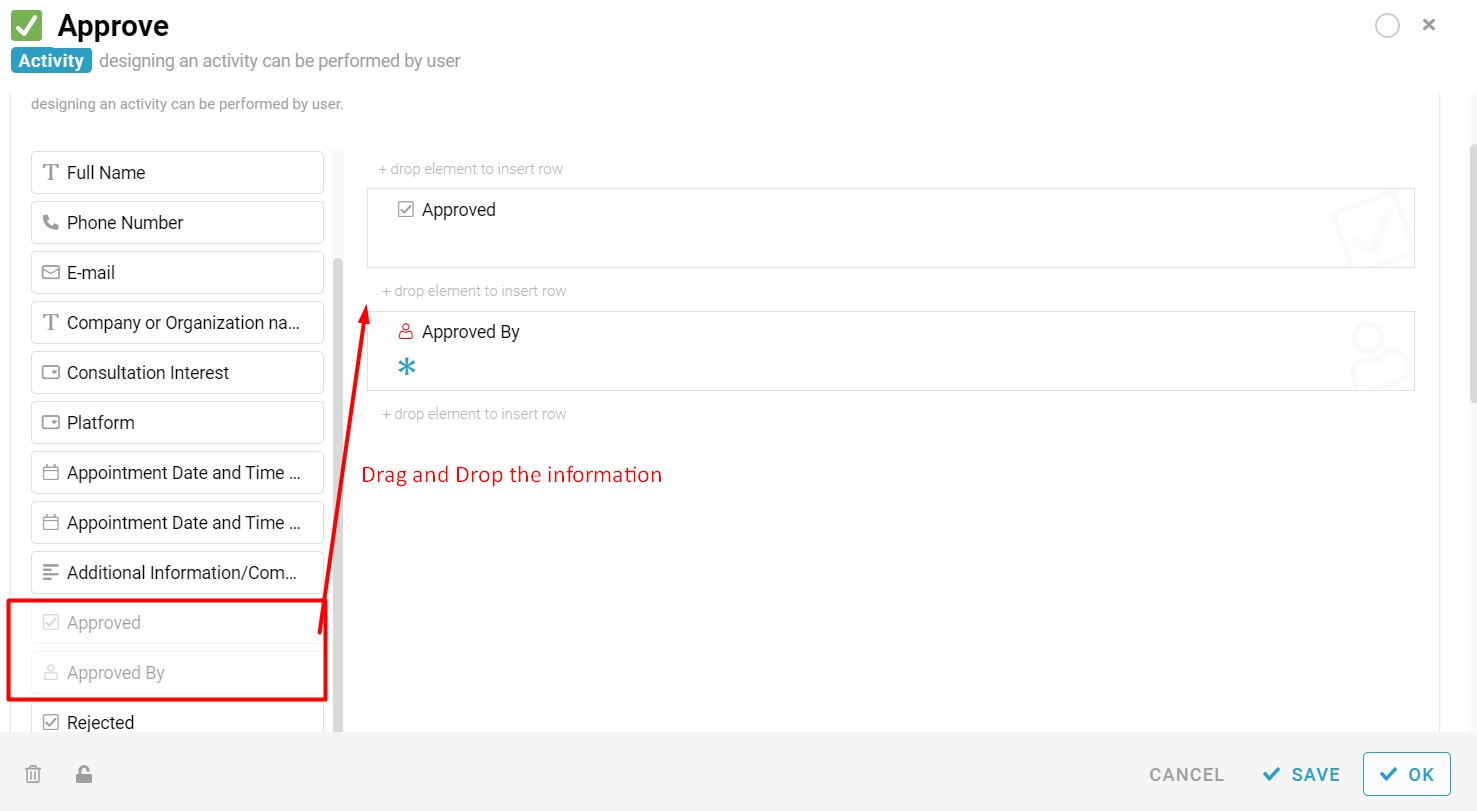
- Drag & drop to design form that consists of the respective Information for each Activity created (Refer Picture 5):
- Approve
- Approved
- Approved By
- Reject
- Rejected
- Rejected By
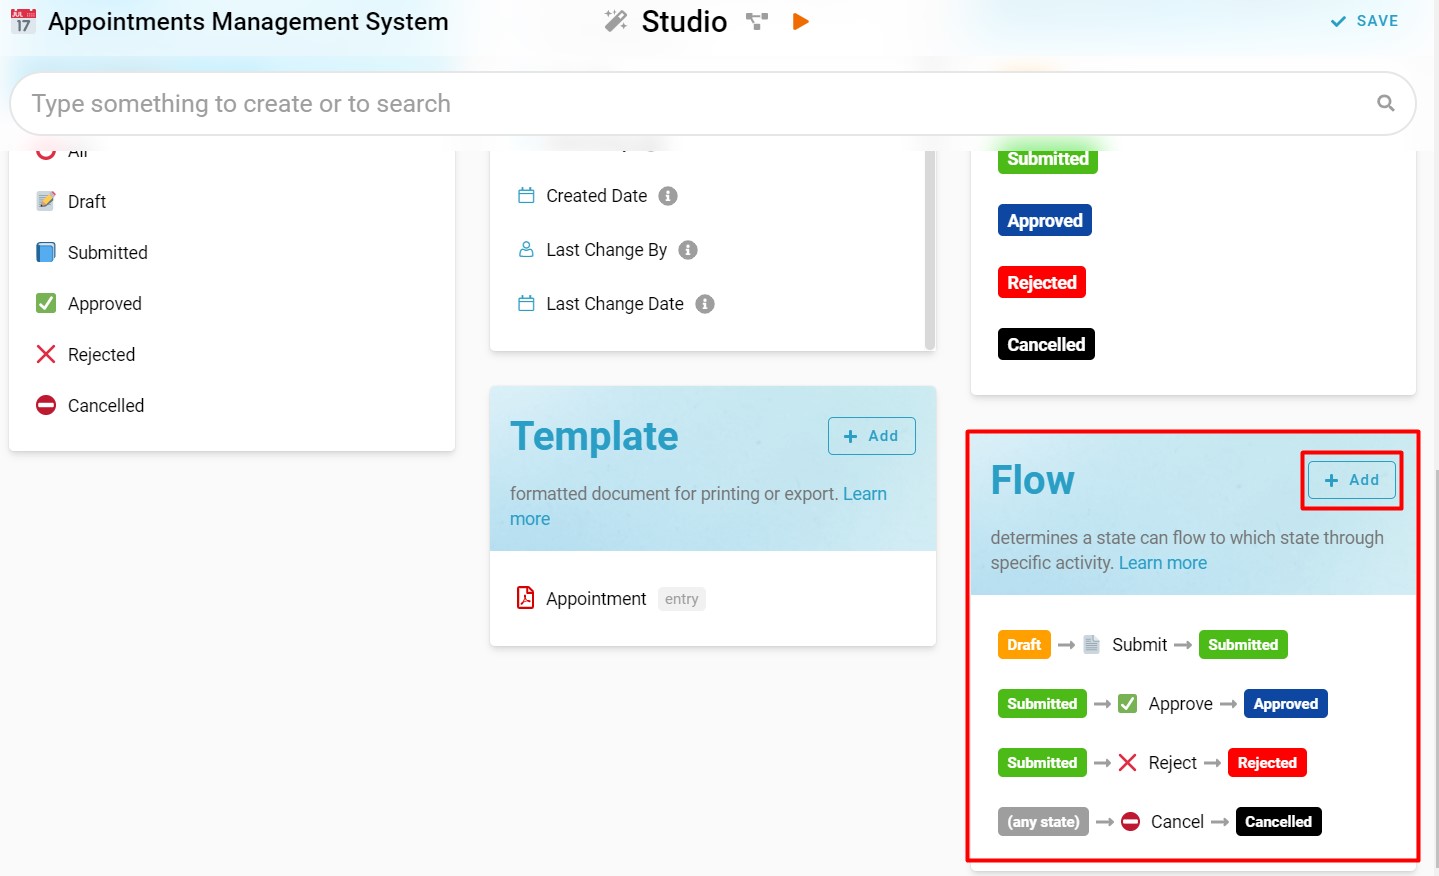
State
- Recognize and configure all the State in the whole Appointments Management System (Refer Picture 6):
- Draft (make sure there is an ‘initial’ grey box beside it, by clicking this state to open the state designer, toggle ‘Initial’, and make sure only one of the states is ‘Initial’.)
- Submitted
- Approved
- Rejected
- Cancelled

Flow
- Configure Flow by determines a state can flow to which state through specific activity and form a reasonable workflow diagram in whole progress (‘From State’ → ‘Activity’ → ‘To State’) – (Refer Picture 7):
-
Draft → Submit → Submitted
-
Submitted → Approve → Approved
-
Submitted → Reject → Rejected
-
(any state) → Cancel → Cancelled
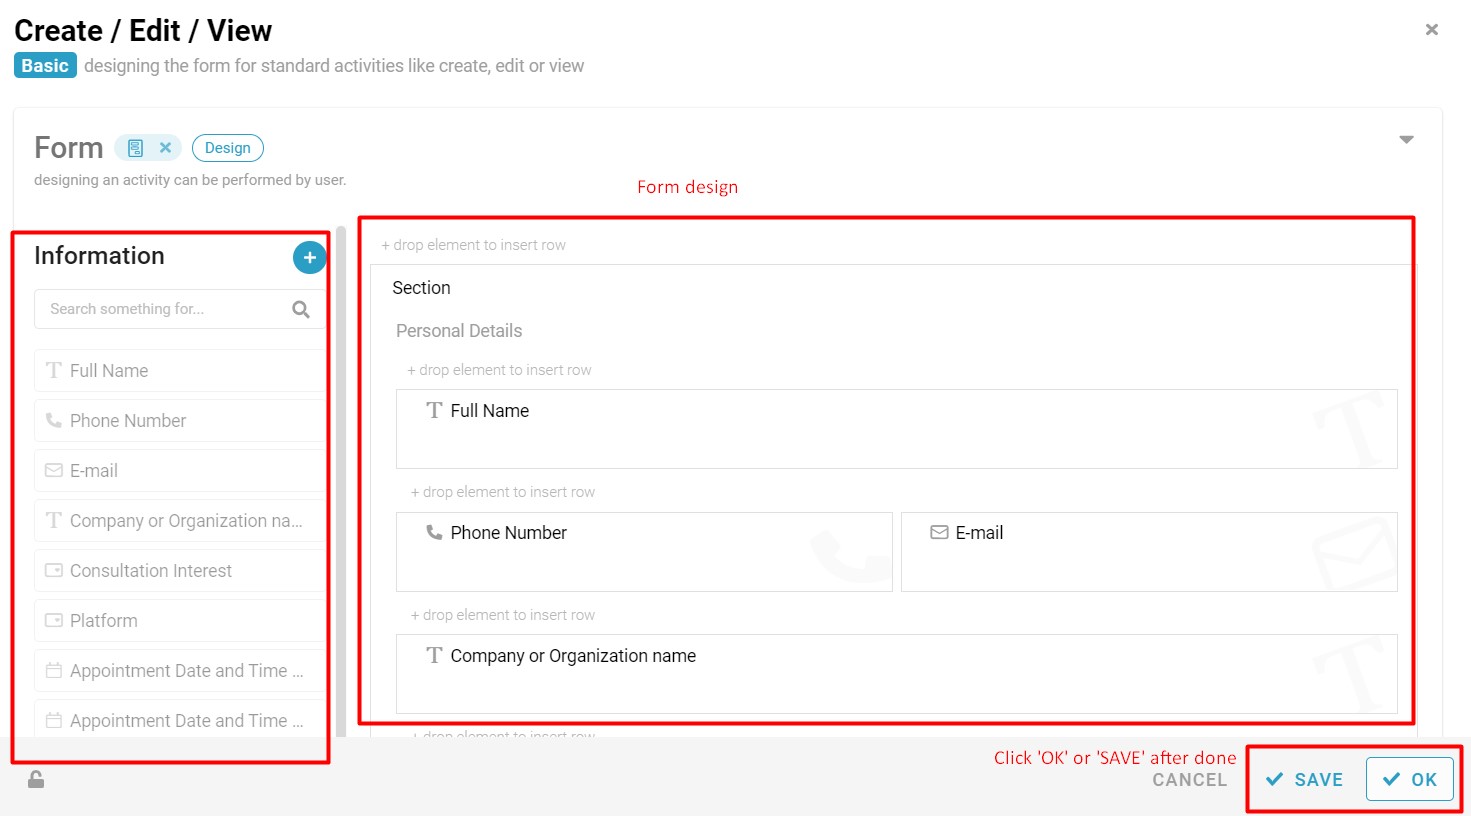
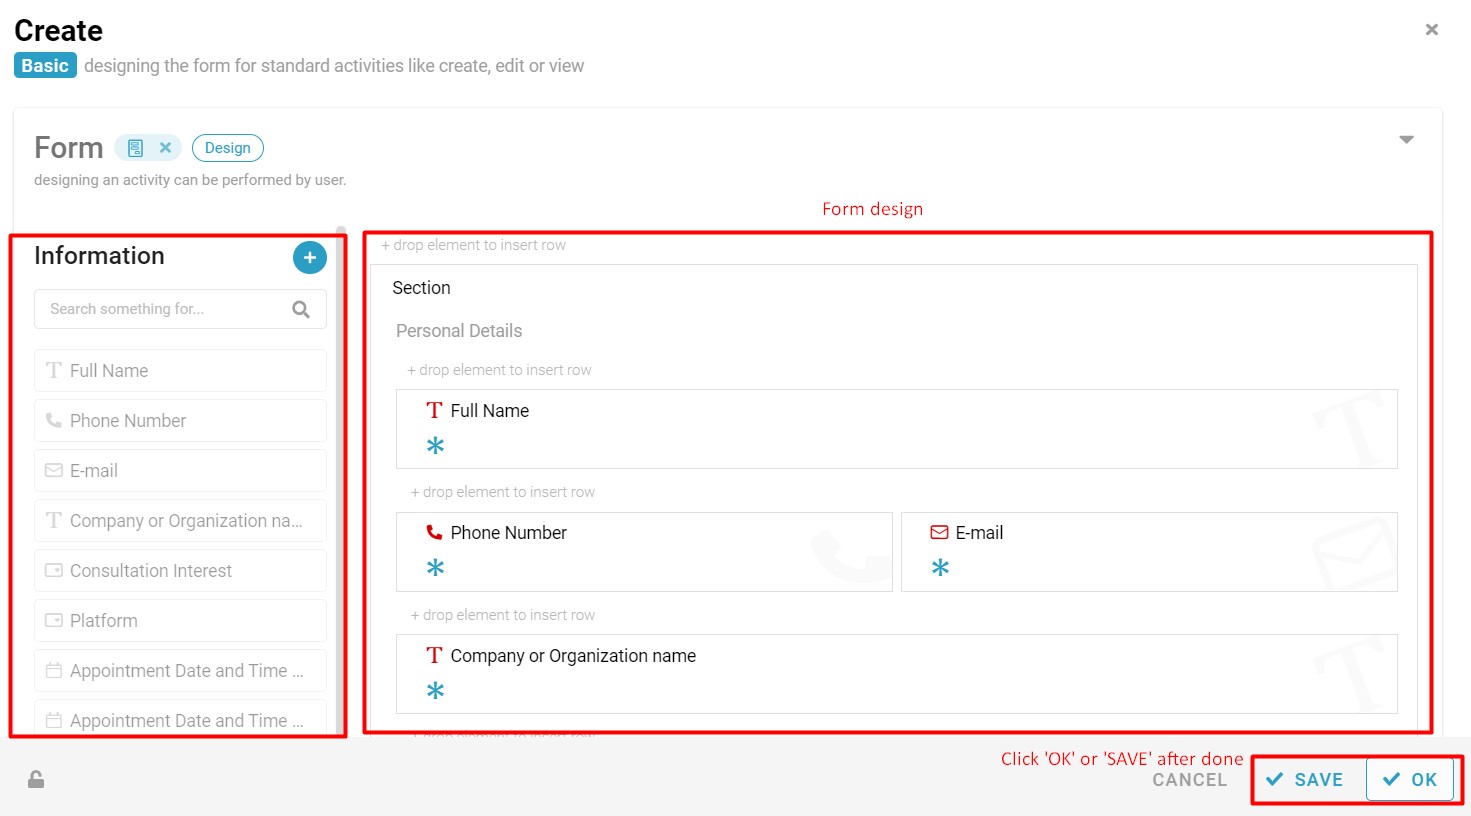
Standard
- Based on the selected Standard Activity, design the form with the Information below (Refer Picture 8 & Picture 9):
-
Default (Create/Edit/View)
- Click ‘Default (Create/Edit/View) under Standard.
- Click the grey box area with the message: ‘Click to add form’.
- Drag the information boxes listed in ‘INFORMATION’ and drop them into the form design area.
- Arrange the information boxes according to your preferences.
- Click the ‘SAVE’ button after done and click ‘OK’ to close the form.
-
Create
- Click ‘Default (Create/Edit/View) under Standard.
- Click the grey box area with the message: ‘Click to add form’.
- Drag the information boxes listed in ‘INFORMATION’ and drop them into the form design area.
- Arrange the information boxes according to your preferences.
- Click the ‘SAVE’ button after done and click ‘OK’ to close the form.
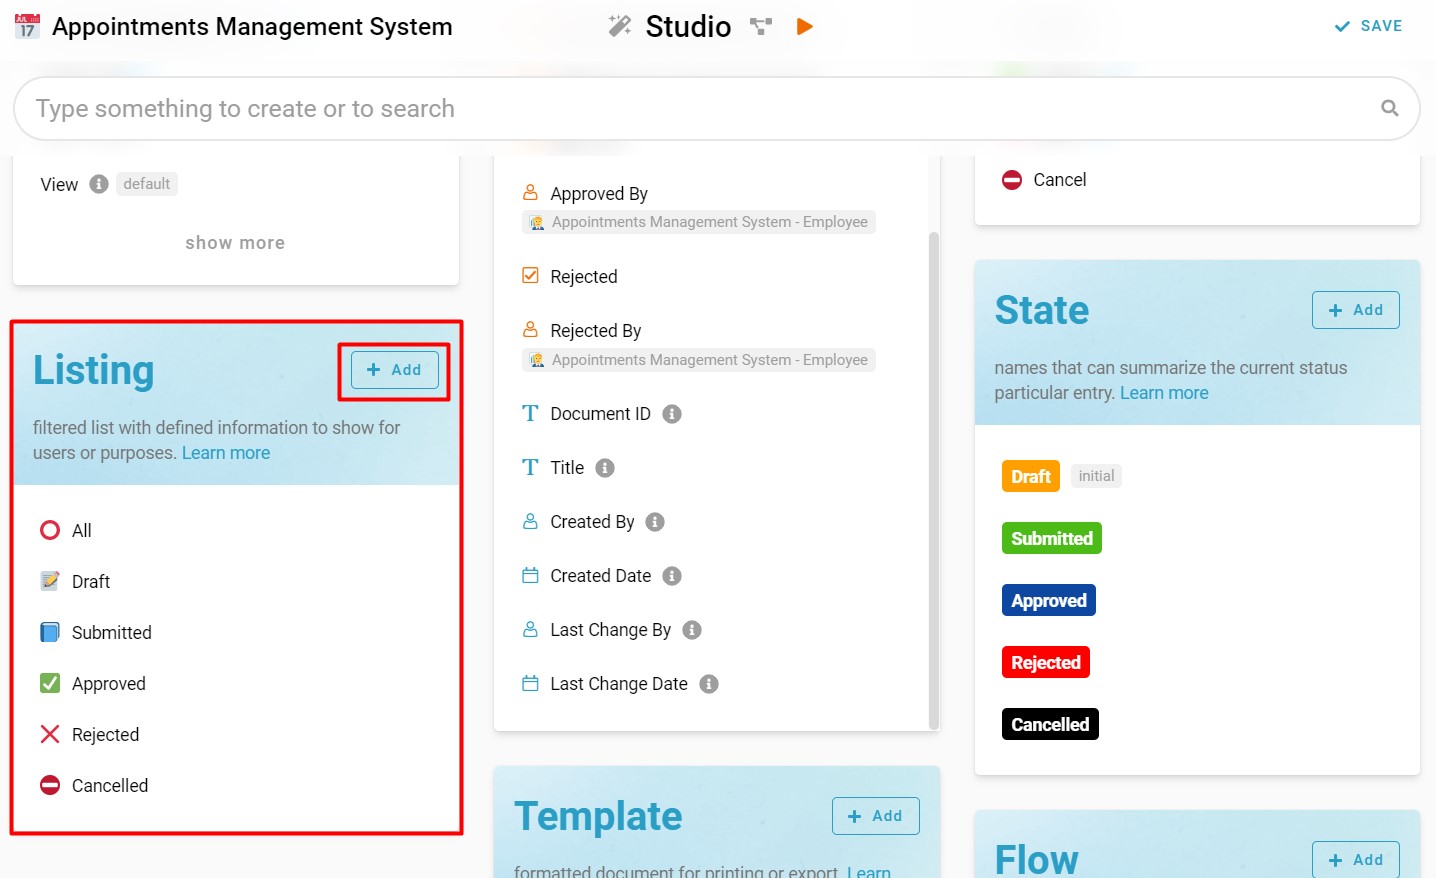
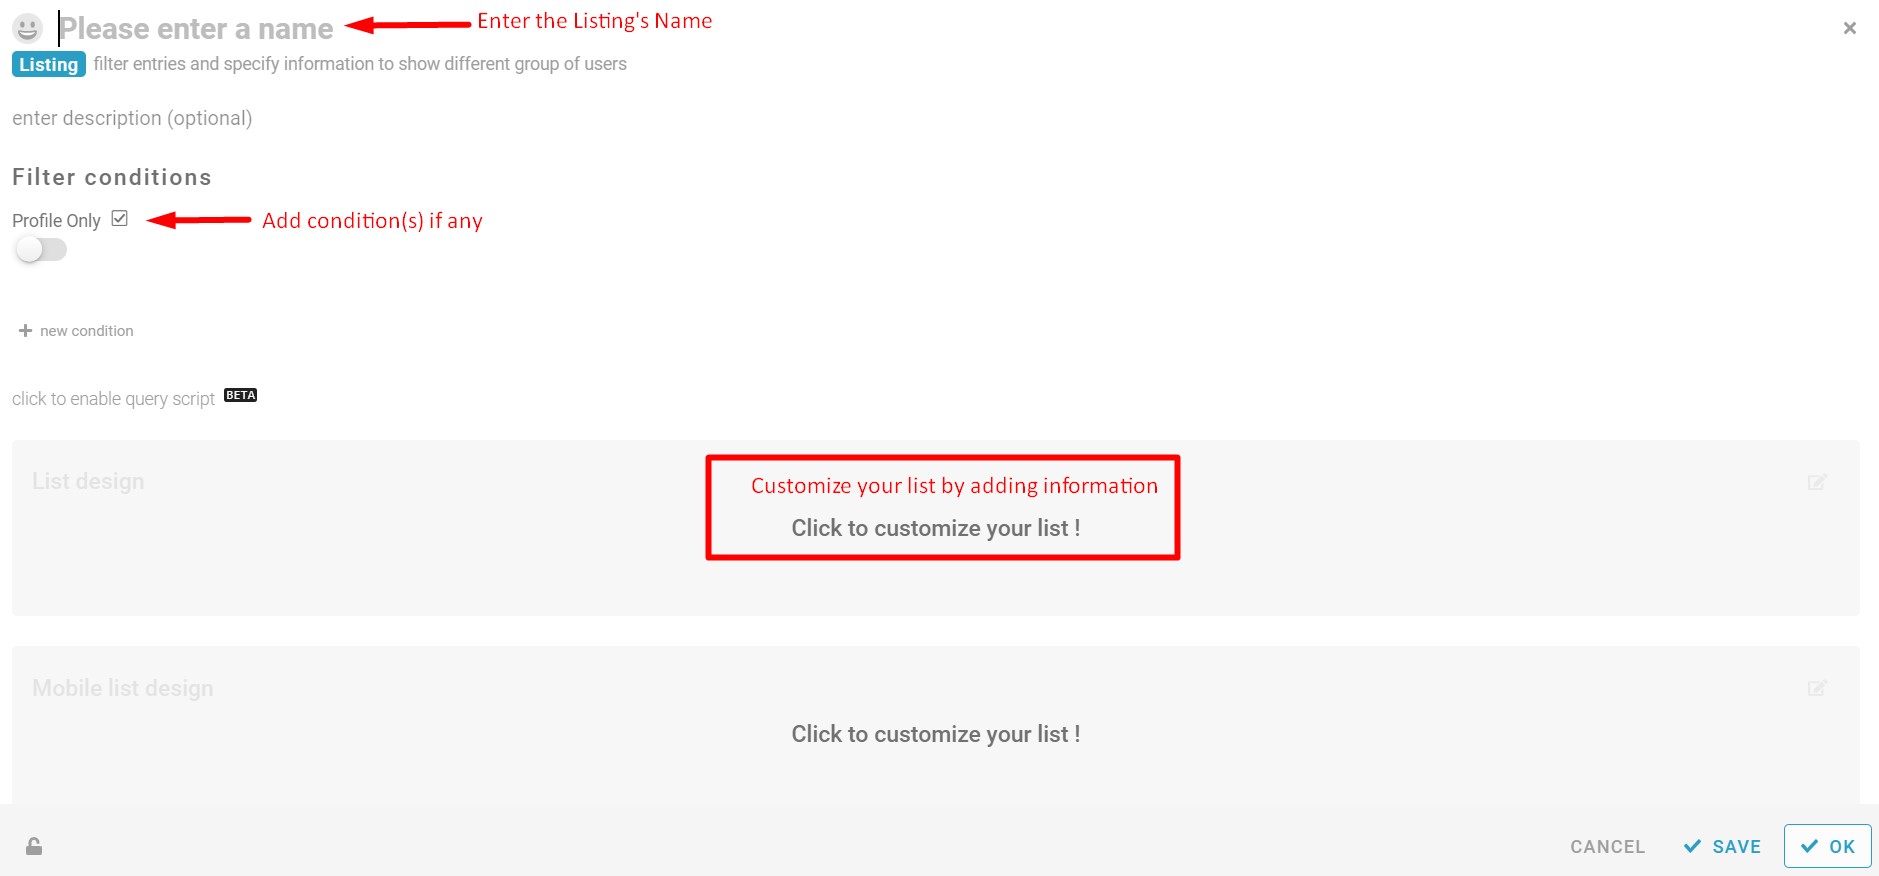
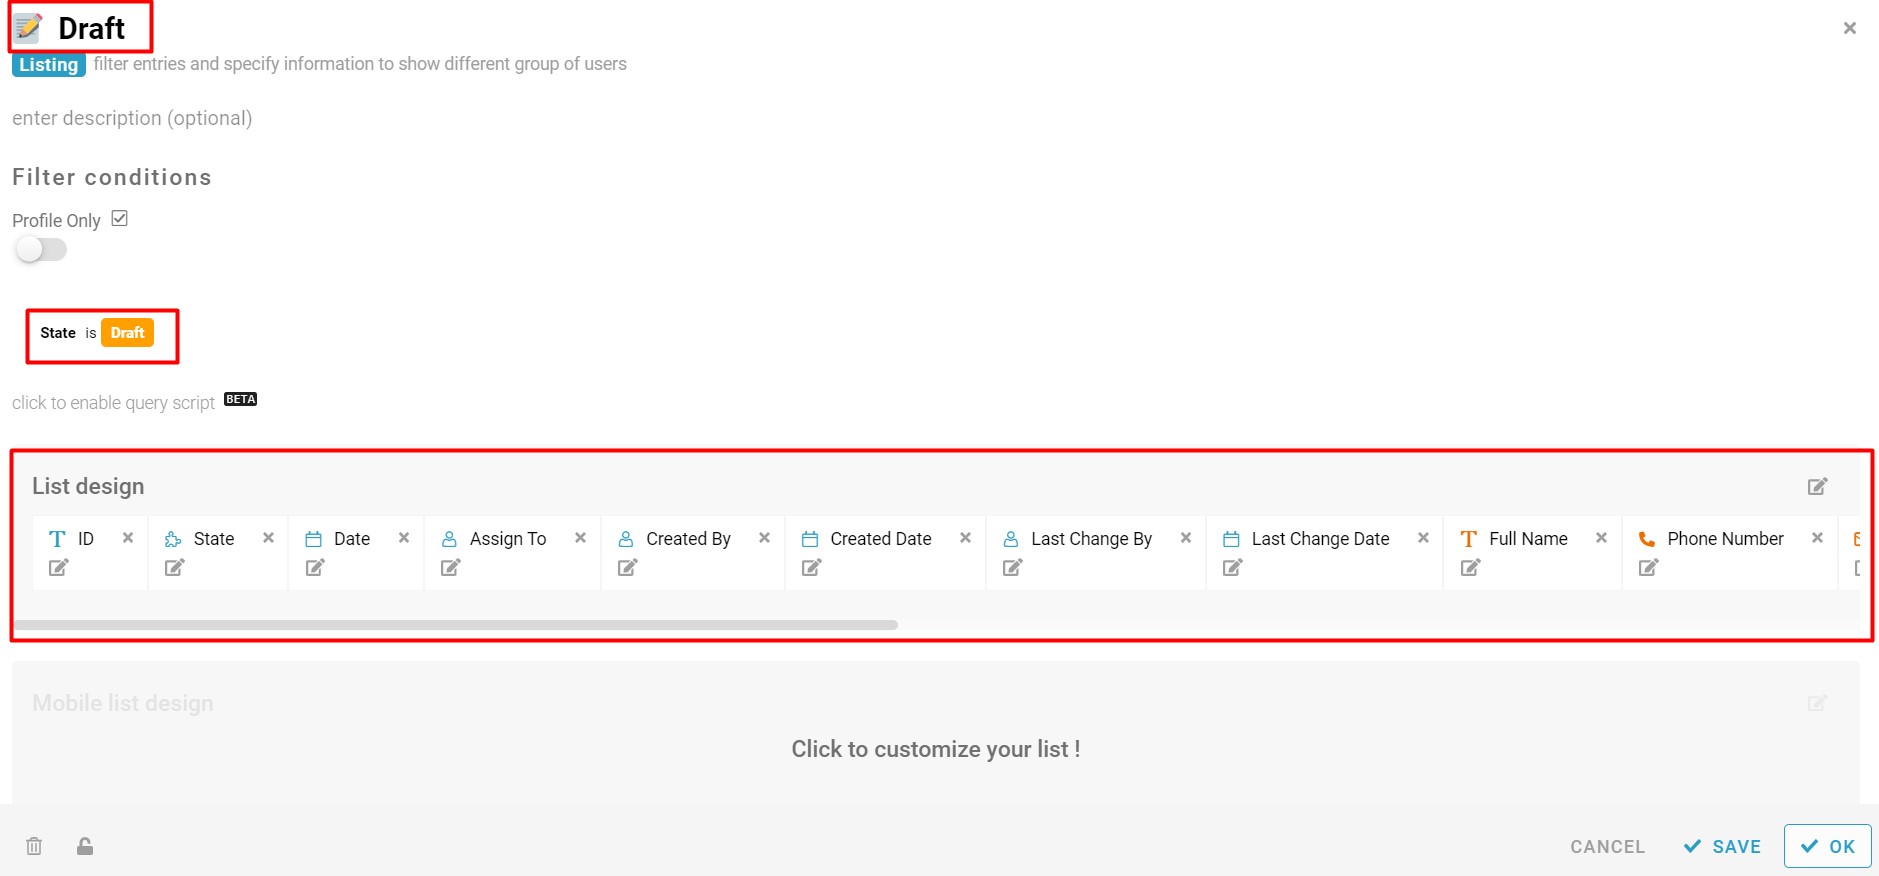
Listing
- Create all the Listing with filter condition, you may add and edit information to be displayed in the list of the entry using List design (Refer Picture 10 & Picture 11 & Picture 12):
-
All
-
Draft (Condition: State is Draft)
-
Submitted (Condition: State is Submitted)
-
Approved (Condition: State is Approved)
-
Rejected (Condition: State is Rejected)
-
Cancelled (Condition: State is Cancelled)
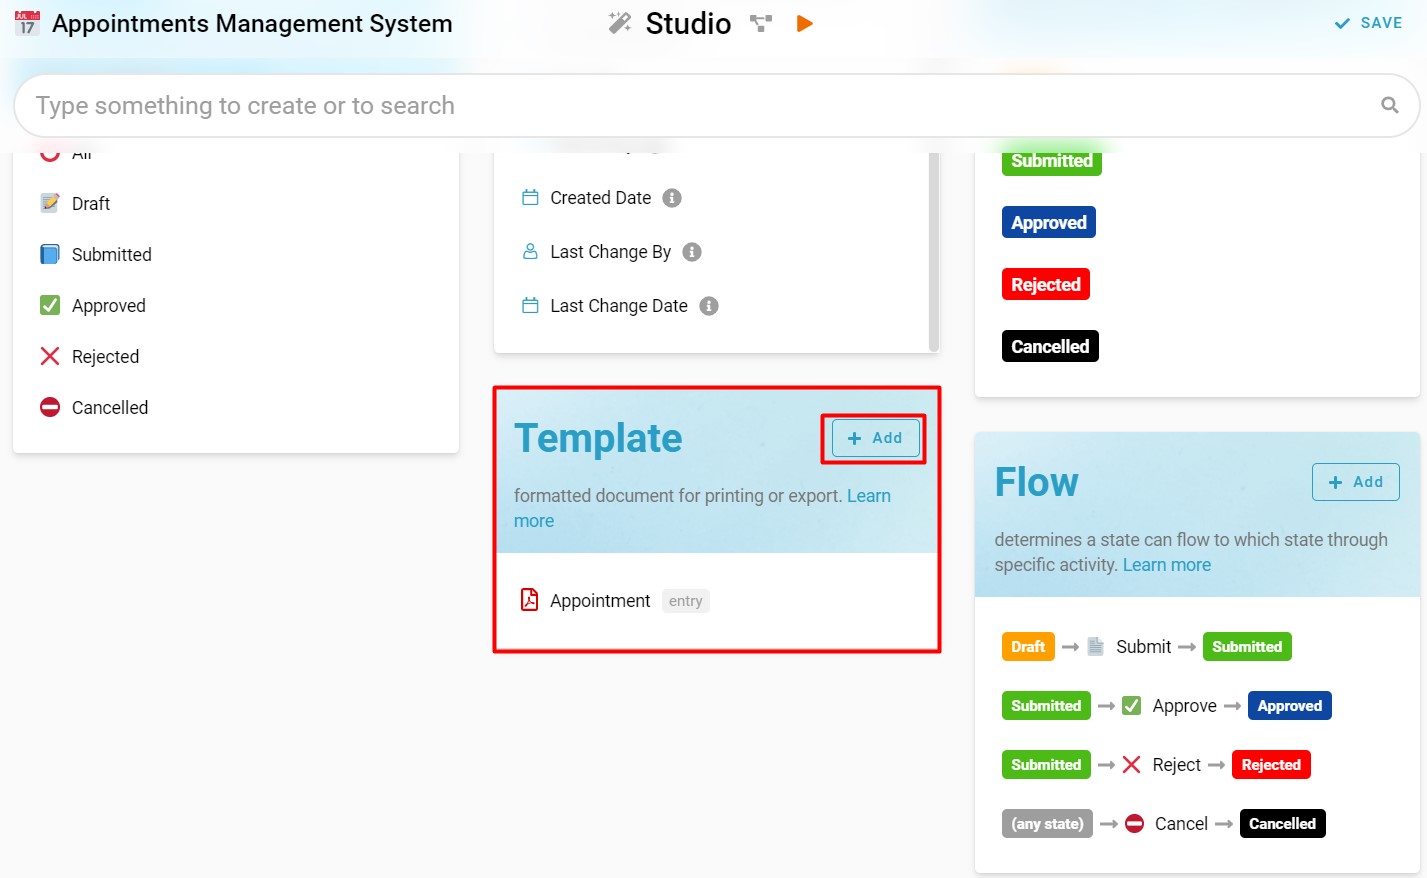
Template
- Create a formatted document for printing or export which is a pdf format file that consists of order details in Template, drag and drop the information to design form (Refer Picture 13 & Picture 14).

Save
- Click the ‘SAVE’ button at the top right to save all the configurations (Refer Picture 15).
Congratulations!!!![]()
![]() You have successfully created the Appointments Management System.
You have successfully created the Appointments Management System.
For more templates:
Try inistate for FREE now.
Sign up at https://inistate.com/
Related topic
Tutorial - Appointments Management System