This system allows customers to make appointments for services depending on their needs, and employees can view the information of the appointment filled in by the customers to decide whether to approve or reject their appointment.
Problem
Appointments for different services are difficult to arrange - this is especially true when there are a lot of appointments and the times for the appointments are overlapped.
Objective
Employees in charge of scheduling appointments can manage their appointments for various services and choose whether or not to accept or reject the appointments.
Process Flow
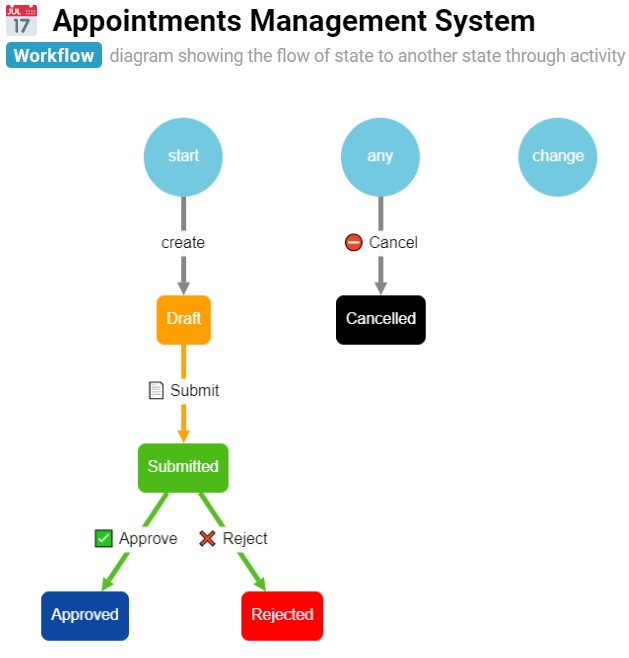
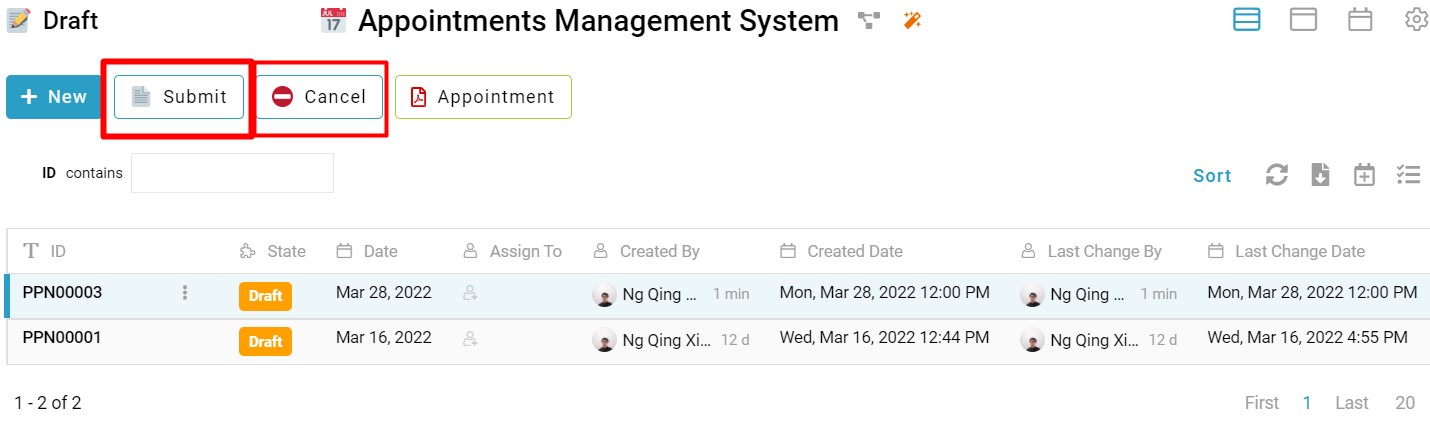
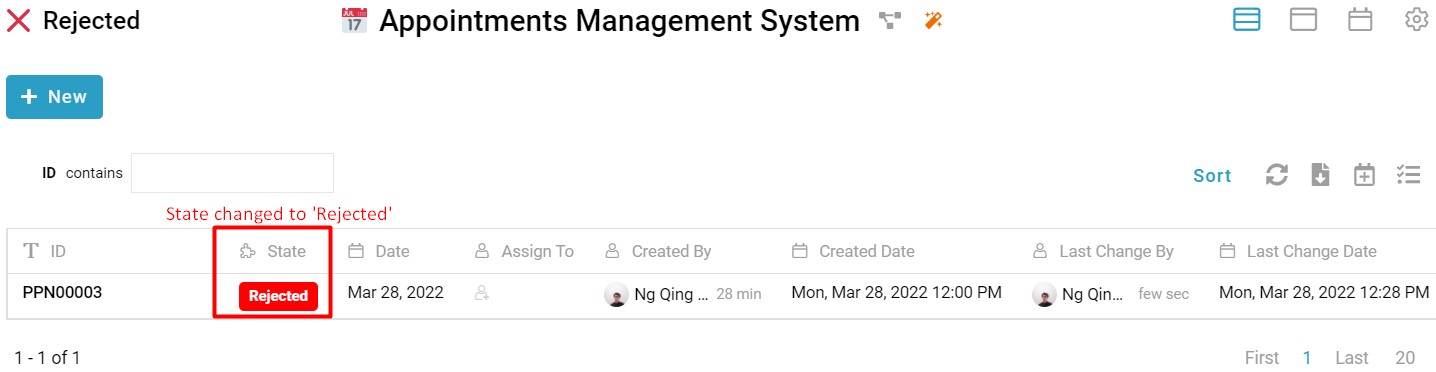
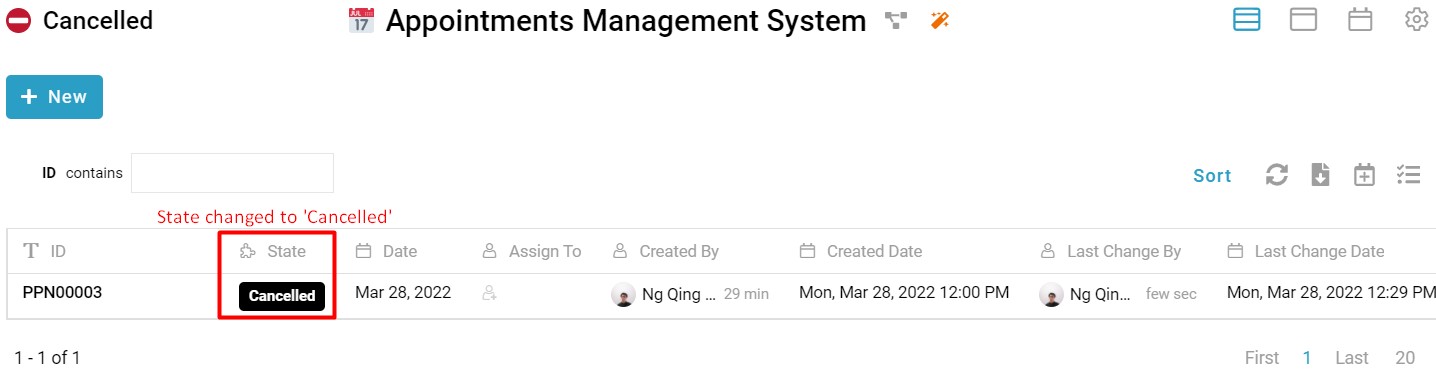
When creating an entry, the user can fill in all the required information for the appointment. When an appointment is created (after the entry is created), its initial state is ‘Draft’. If the entry is ready to be submitted, the user can fill in the ‘Submit’ activity and submit it, the state will be changed to ‘Submitted’. If the appointment is approved, the user can fill in the ‘Approve’ activity and submit it, the state will be changed to ‘Approved’. If the appointment is rejected, the user can fill in the ‘Reject’ activity and submit it, the state will be changed to ‘Rejected’. The appointment can be cancelled at any state by filling in the ‘Cancel’ activity, the state will be changed to ‘Cancelled’.
Step-by-step
- In this module, the user clicks the ‘+ New’ button, the system will display a form to input the required information of the appointment (Refer Picture 1).
- User can input all the relevant fields: Full Name, Phone Number, E-mail, Company or Organization name, Consultation Interest, Platform, Appointment Date and Time (Start), Appointment Date and Time (End) and Additional Information/Comments (Refer Picture 2).

- After completing the form, the user can click the ‘Done’ button (Refer Picture 3).

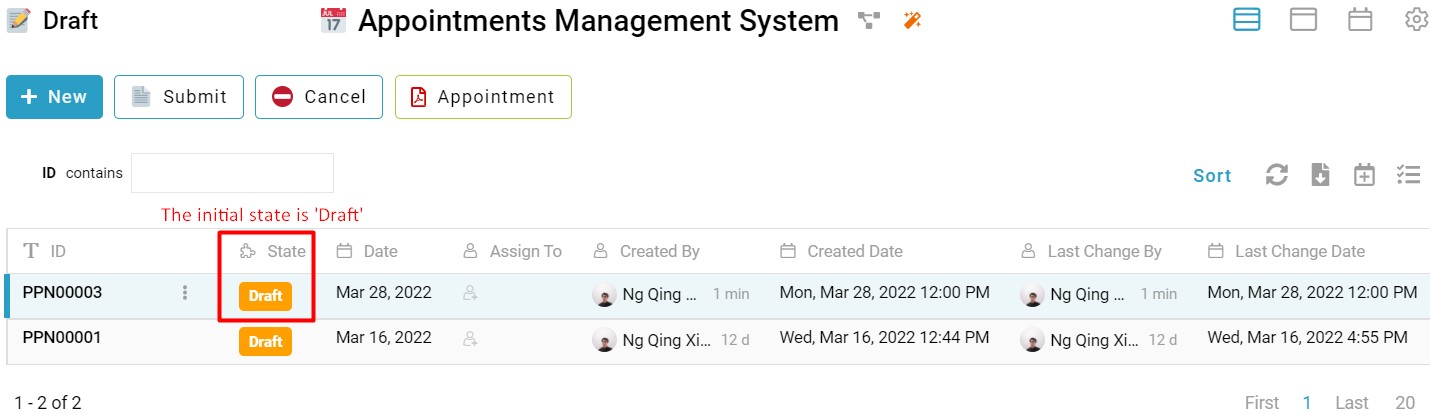
- New entry is created successfully, and the state is initialized as ‘Draft’ (Refer Picture 4).
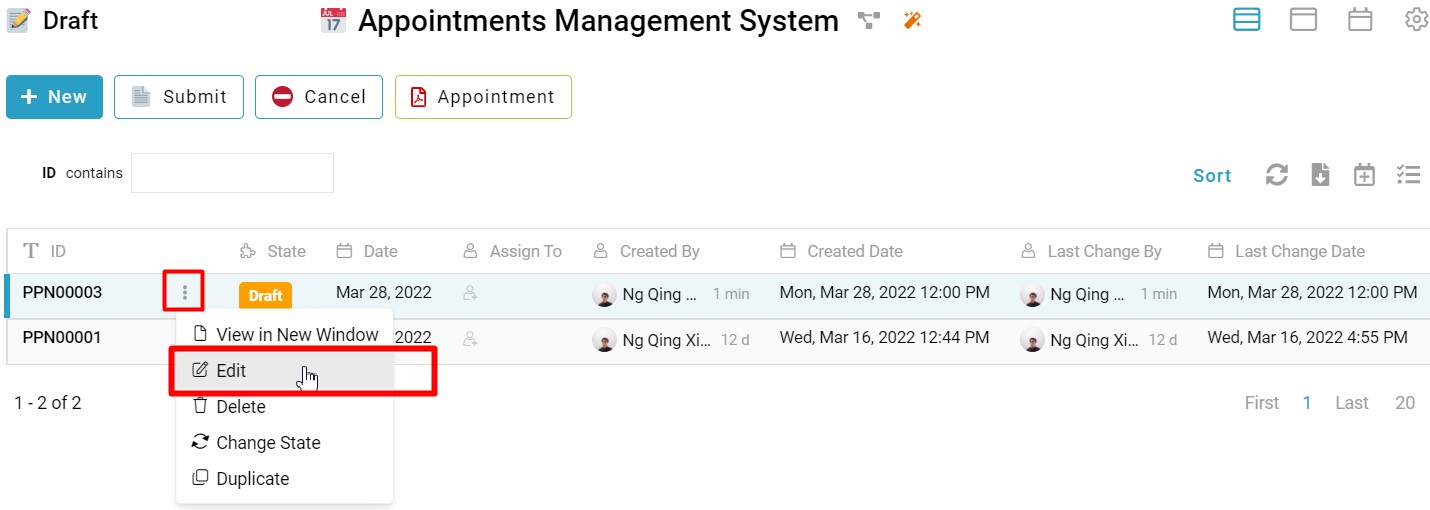
- User can edit the appointment details at any state by selecting the entry and performing standard activity ’Edit’ (Refer Picture 5).
- If the draft is ready to be submitted, the user can click ‘Submit’ activity to fill in the form and click ‘DONE’, then the state will be changed to ‘Submitted’. Besides, the appointment can be cancelled by performing the ‘Cancel’ activity, the state will be changed to ‘Cancelled’ (Refer Picture 6 & Picture 7).

- The user can approve the appointment by clicking the ‘Approve’ activity, the state will be changed to ‘Approved’ (Refer Picture 7 & Picture 8).

- The user can reject the appointment by clicking the ‘Reject’ activity, the state will be changed to ‘Rejected’ (Refer Picture 7 & Picture 9).
- The user can cancel the appointment by clicking the ‘Cancel’ activity, the state will be changed to ‘Cancelled’ (Refer Picture 7 & Picture 10).
For more templates:
Try inistate for FREE now.
Sign up at https://inistate.com/
Related topic
Configuration Tutorial - Appointments Management System