Use this customer requirements management system to manage wide variety of customer requirements base on the requirement level.
Problem
Difficult to manage all the requirements
-Hard to arrange the priority of the customer requirements if flooded by too many customer requirements at once.
Objective
Convenient
Admin can easily manage the customer requirements base on the priority.
Step by step (Configuration)
Information
Recognize and configure all the Information name and type required to create a new entry in Customer Requirements management system. (Refer Picture 1):
- Name: Customer ID, Information Type: Text
- Name: Customer Name, Information Type: Text
- Name: Issue Type, Information Type: Select
- Product
- Service
- Name: Requirement Level, Information Type: Select
- High
- Medium
- Low
- Name: Description, Information Type: Multiline Text
- Name: Attachment, Information Type: Files
- Name: Confirmation, Information Type: YesNo

Activity
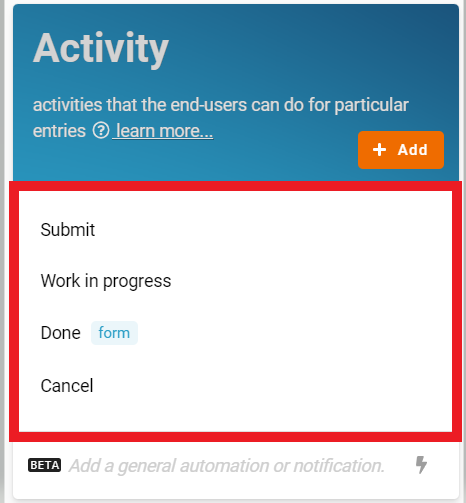
Recognize and configure all the Activity able to perform to change State (Refer Picture 2):
- Submit
- Work in progress
- Done
- Cancel
Drag & drop to design form that consists of the respective Information for the Activity created (Refer Picture 3):
- Done
- Confirmation
- Confirmation

State
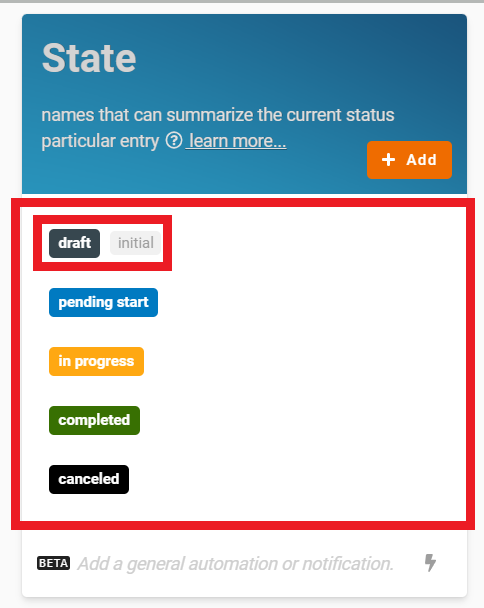
Recognize and configure all the State in the whole Customer Requirements management system (Refer Picture 4):
- draft(make sure there is ‘initial’ grey box beside it, by clicking this state to open the state designer, toggle ‘Initial’, and make sure only one of the states is ‘Initial’.)
- pending start
- in progress
- completed
- canceled
Flow
Configure Flow by determines a state can flow to which state through specific activity and form a reasonable workflow diagram in whole progress (‘From State’ → ‘Activity’ → ‘To State’)
– (Refer Picture 5):
- (any state) → (no activity) → draft
- draft → Submit → Pending start
- pending start → Working in progress → in progress
- in progress → Done → completed
- (any state) → Cancel → canceled

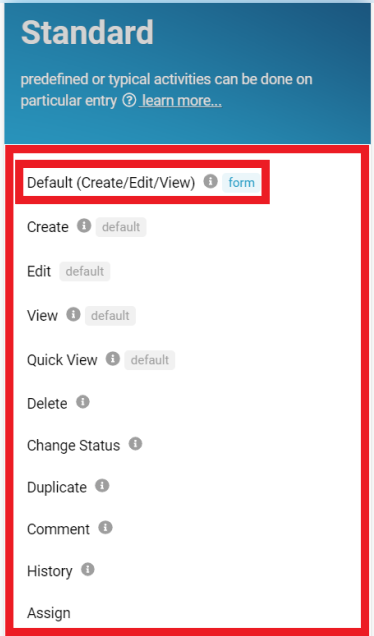
Standard
Based on the selected Standard Activity, design the form with the Information below (Refer Picture 6 & Picture 7):
-
Default(Create/Edit/View)
- Click ‘Default (Create/Edit/View) under Standard.
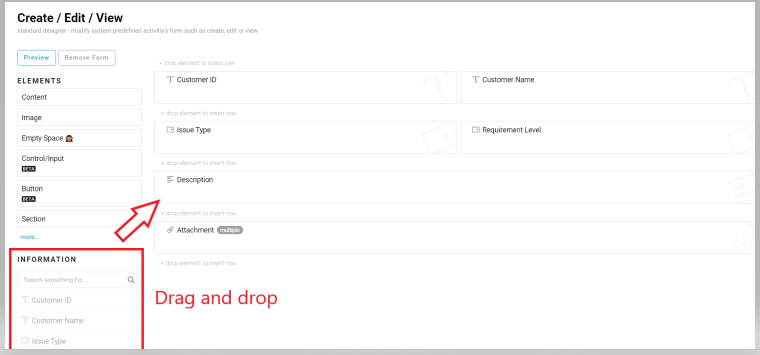
- Click the grey box area with the message: ‘Wish to have a classification form? Click to customize your form.’.
- Drag the information boxes listed in ‘INFORMATION’ and drop into the form design area.
- Arrange the information boxes according to your preferences.
- Click the ‘SAVE’ button after done and click ‘OK’ to close the form.
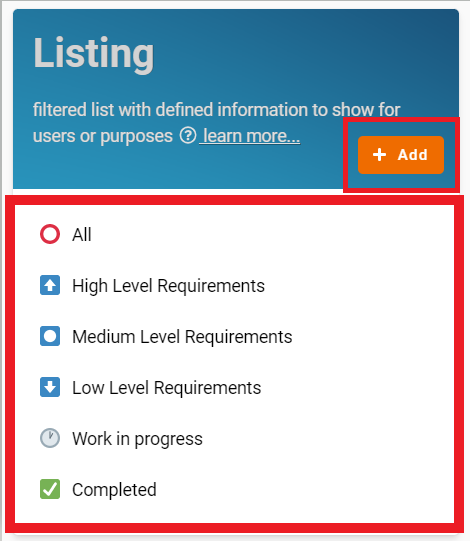
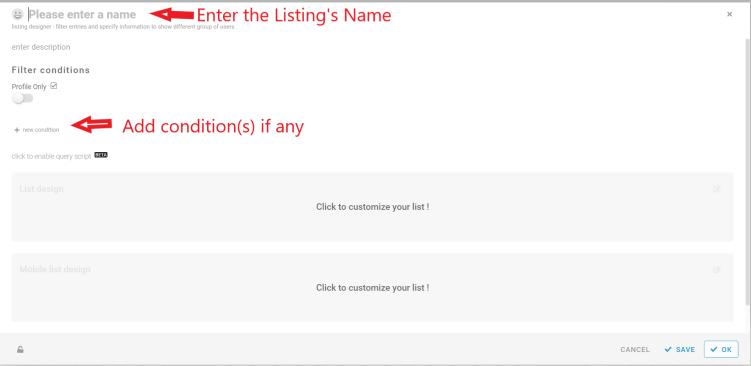
Listing
Create all the Listing with filter condition, you may add and edit information to be displayed in the list of the entry using List design (Refer Picture 8 & Picture 9 & Picture 10):
- All
- High Level Requirements (Condition : Requirement Level is High)
- Medium Level Requirements (Condition : Requirement Level is Medium)
- Low Level Requirements (Condition : Requirement Level is Low)
- Work in progress (Condition : State is in progress)
- Completed (Condition : State is completed)

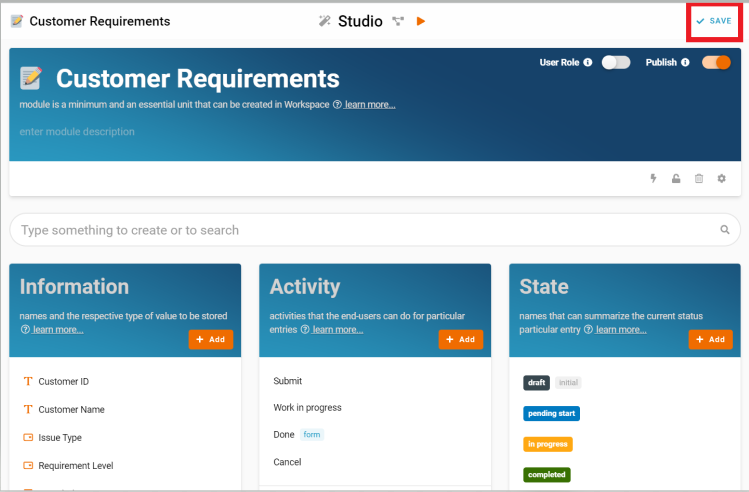
Save
Click SAVE button at the top right to save all the configuration (Refer Picture 11).
Congratulations!!!![]()
![]() You have successfully created Customer Requirements management system.
You have successfully created Customer Requirements management system.
For more templates:
Try inistate for FREE now.
Sign up at https://inistate.com/
Related topic
Tutorial - Customer Requirements