Hi, this post will show you step-by-step how to configure a Damage Registration management in FETIAS.
Problem
Hard to report the damage - The people need a system to manage the damage of things which record and simplify the process of reporting it to relevant aspect.
Objective
Convenient - Let the user report damage of things with convenient and recorded, also can trace the progress to fix it.
Step of Configuration
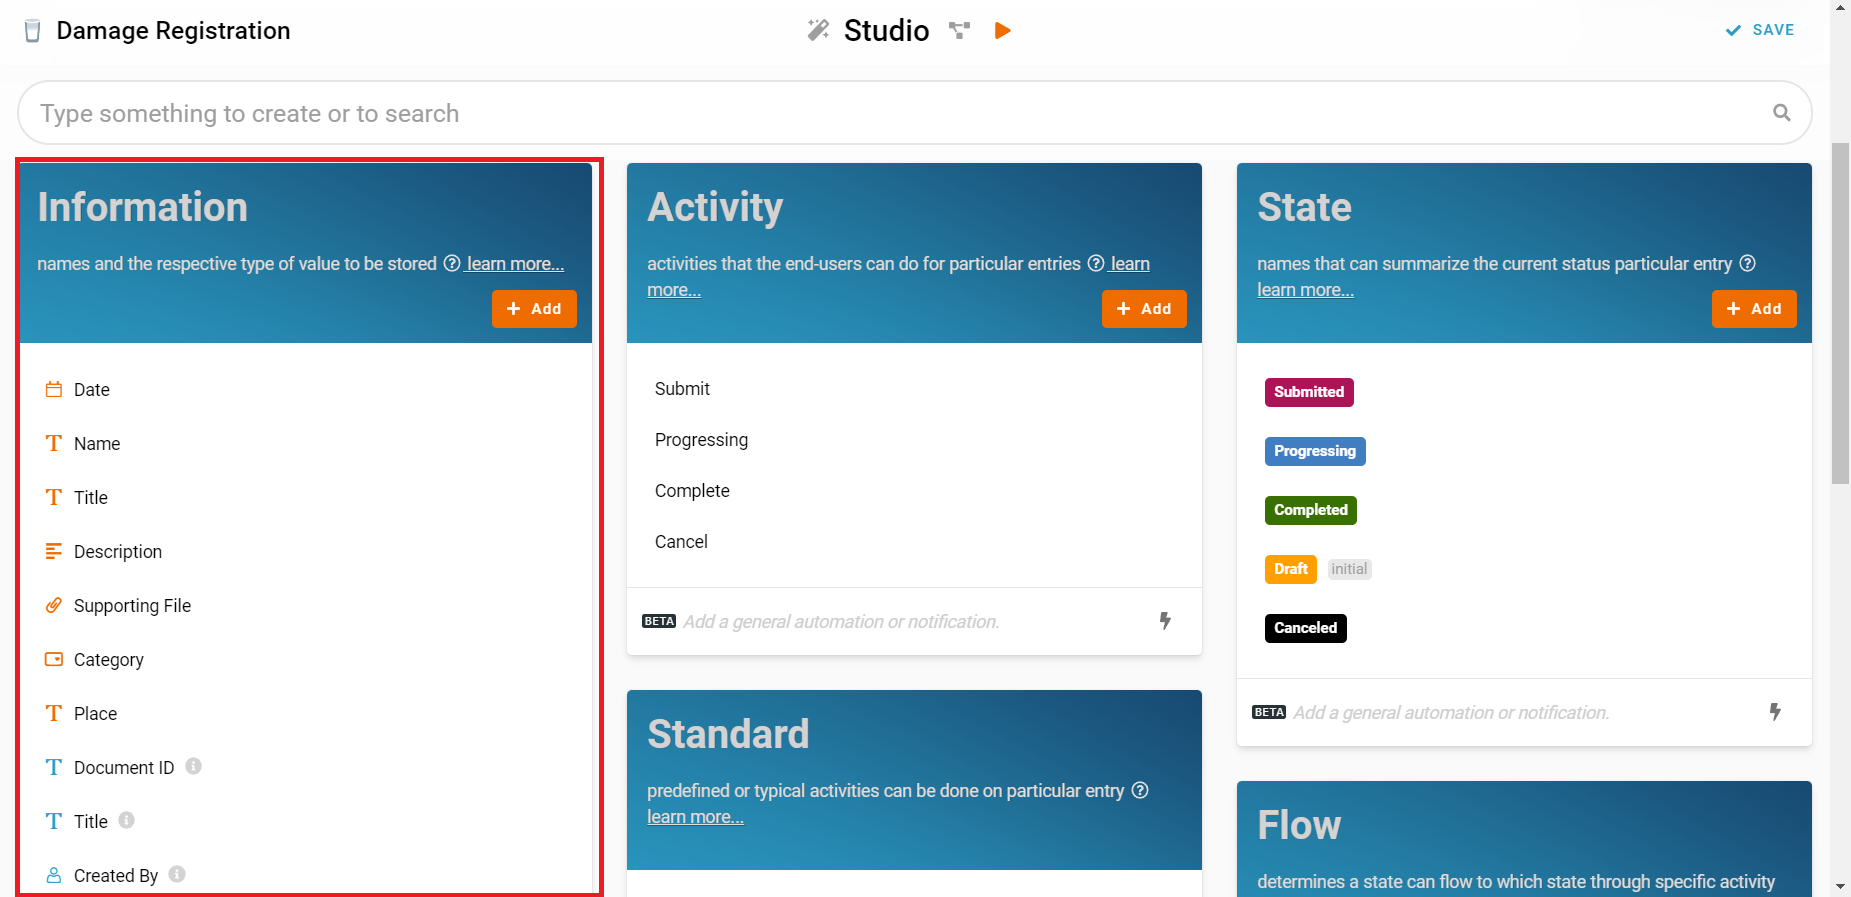
1. Recognize and configure all the Information name and type required to create a new entry in Damage Registration. (Refer Picture 1)
- Name: Date, Type: Date
- Name: Name, Type: Text
- Name: Title, Type: Text
- Name: Description, Type: Multiline Text
- Name: Supporting File, Type: Files
- Name: Category, Type: Select
- Fan
- Light
- Switch
- Ceiling
- Others
- Name: Place, Type: Text
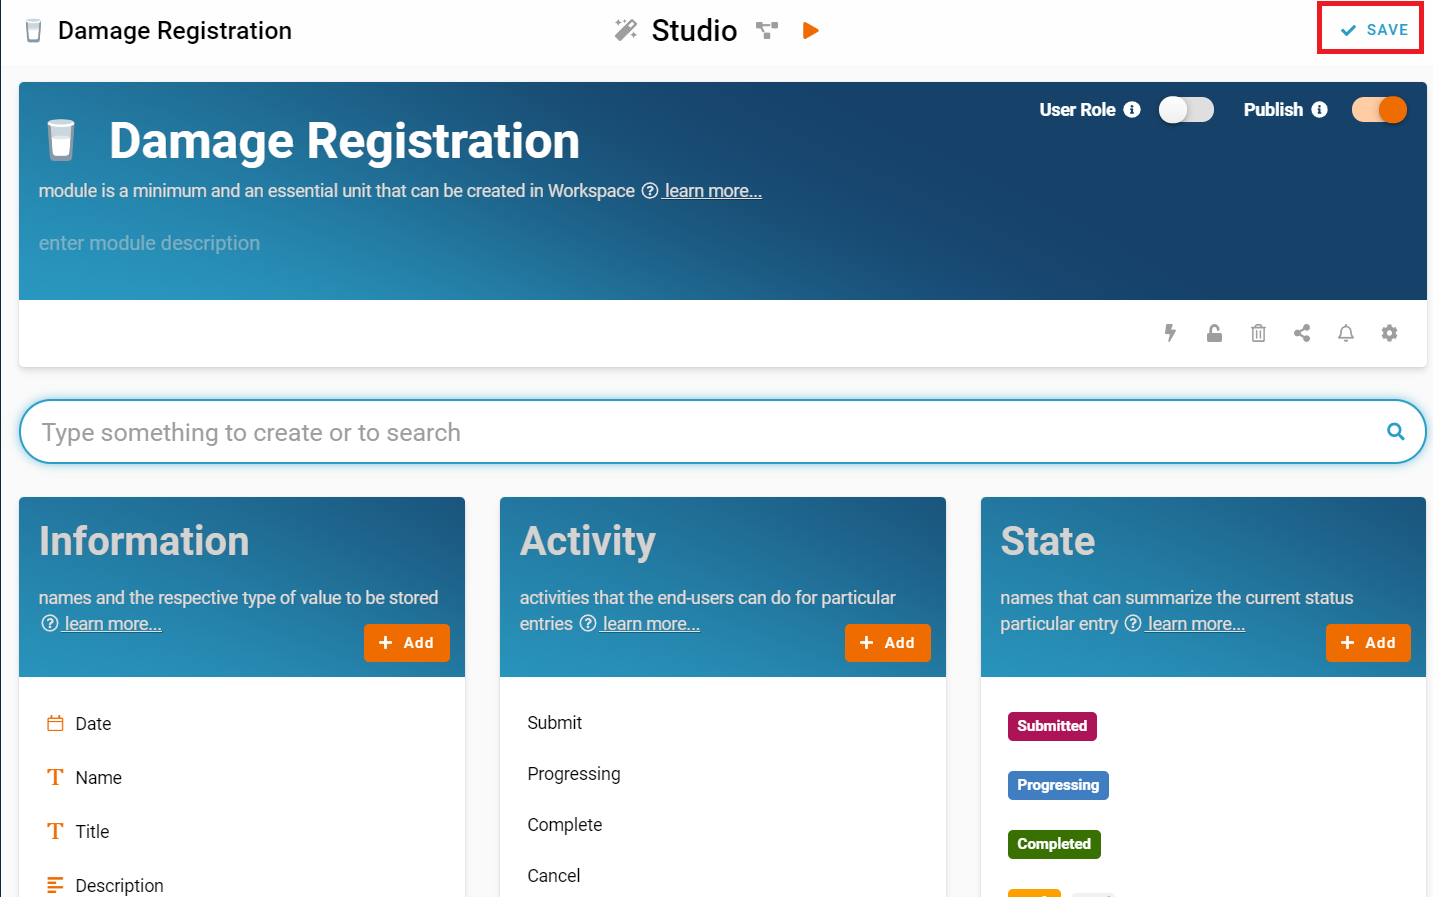
2. Recognize and configure all the Activity able to perform to change State (Refer Picture 2)
- Submit
- Progressing
- Complete
- Cancel

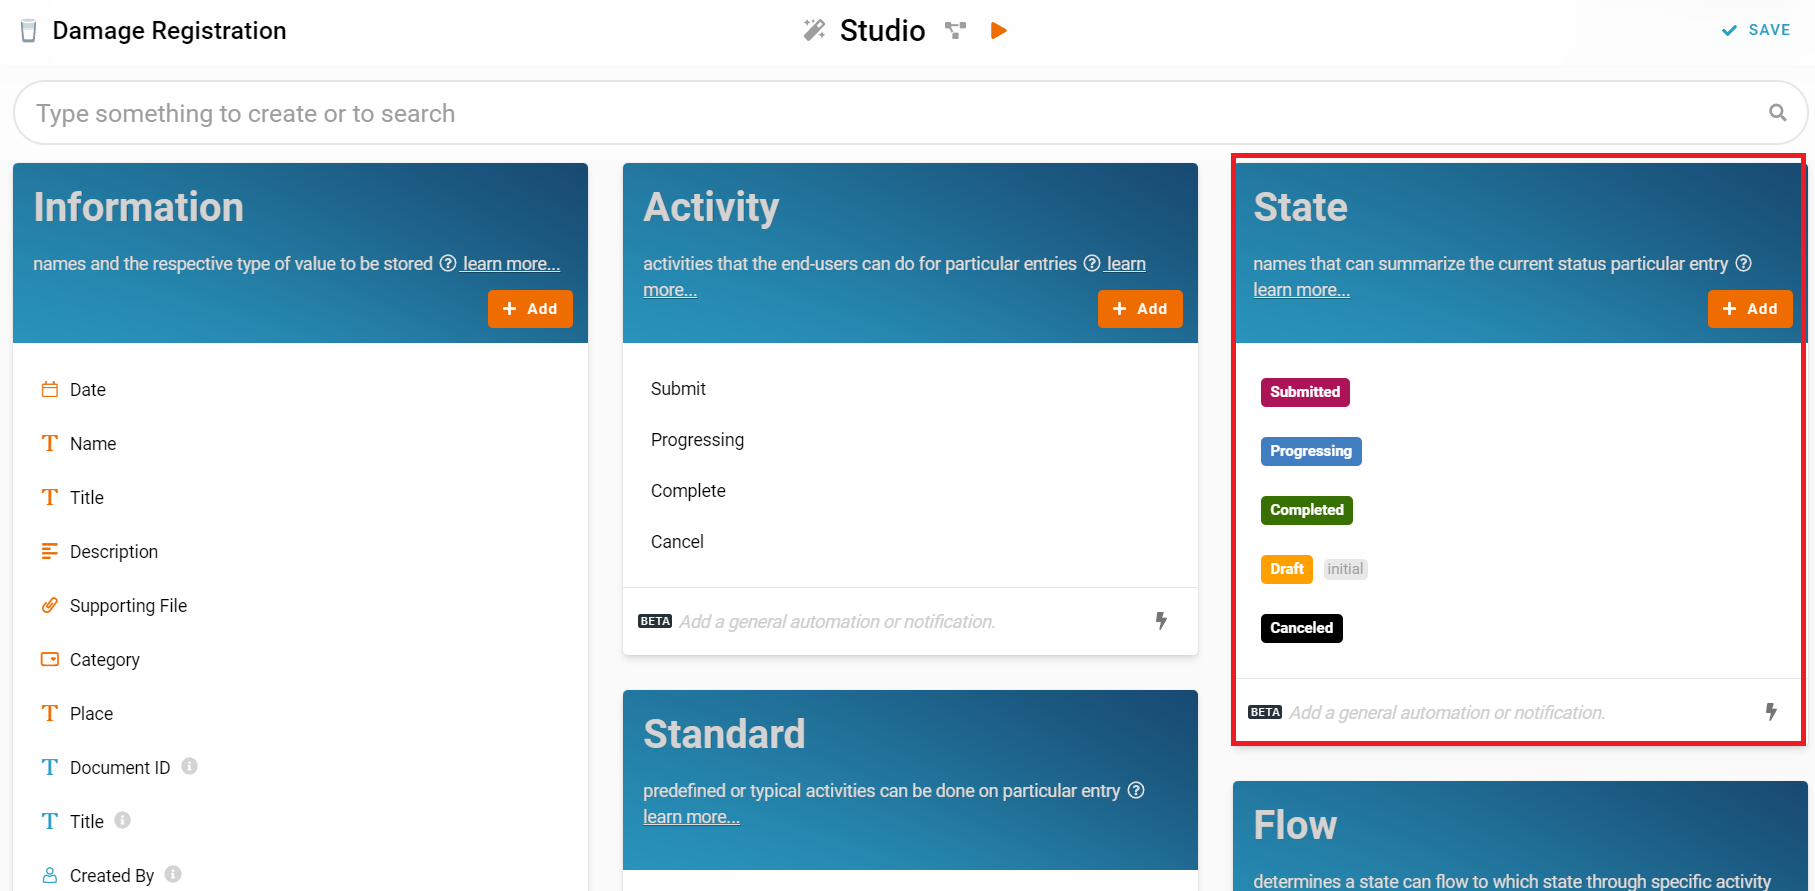
3. Recognize and configure all the State in the whole Damage Registration. (Refer Picture 3)
- Draft (set this state as Initial)
- Submitted
- Progressing
- Completed
- Canceled
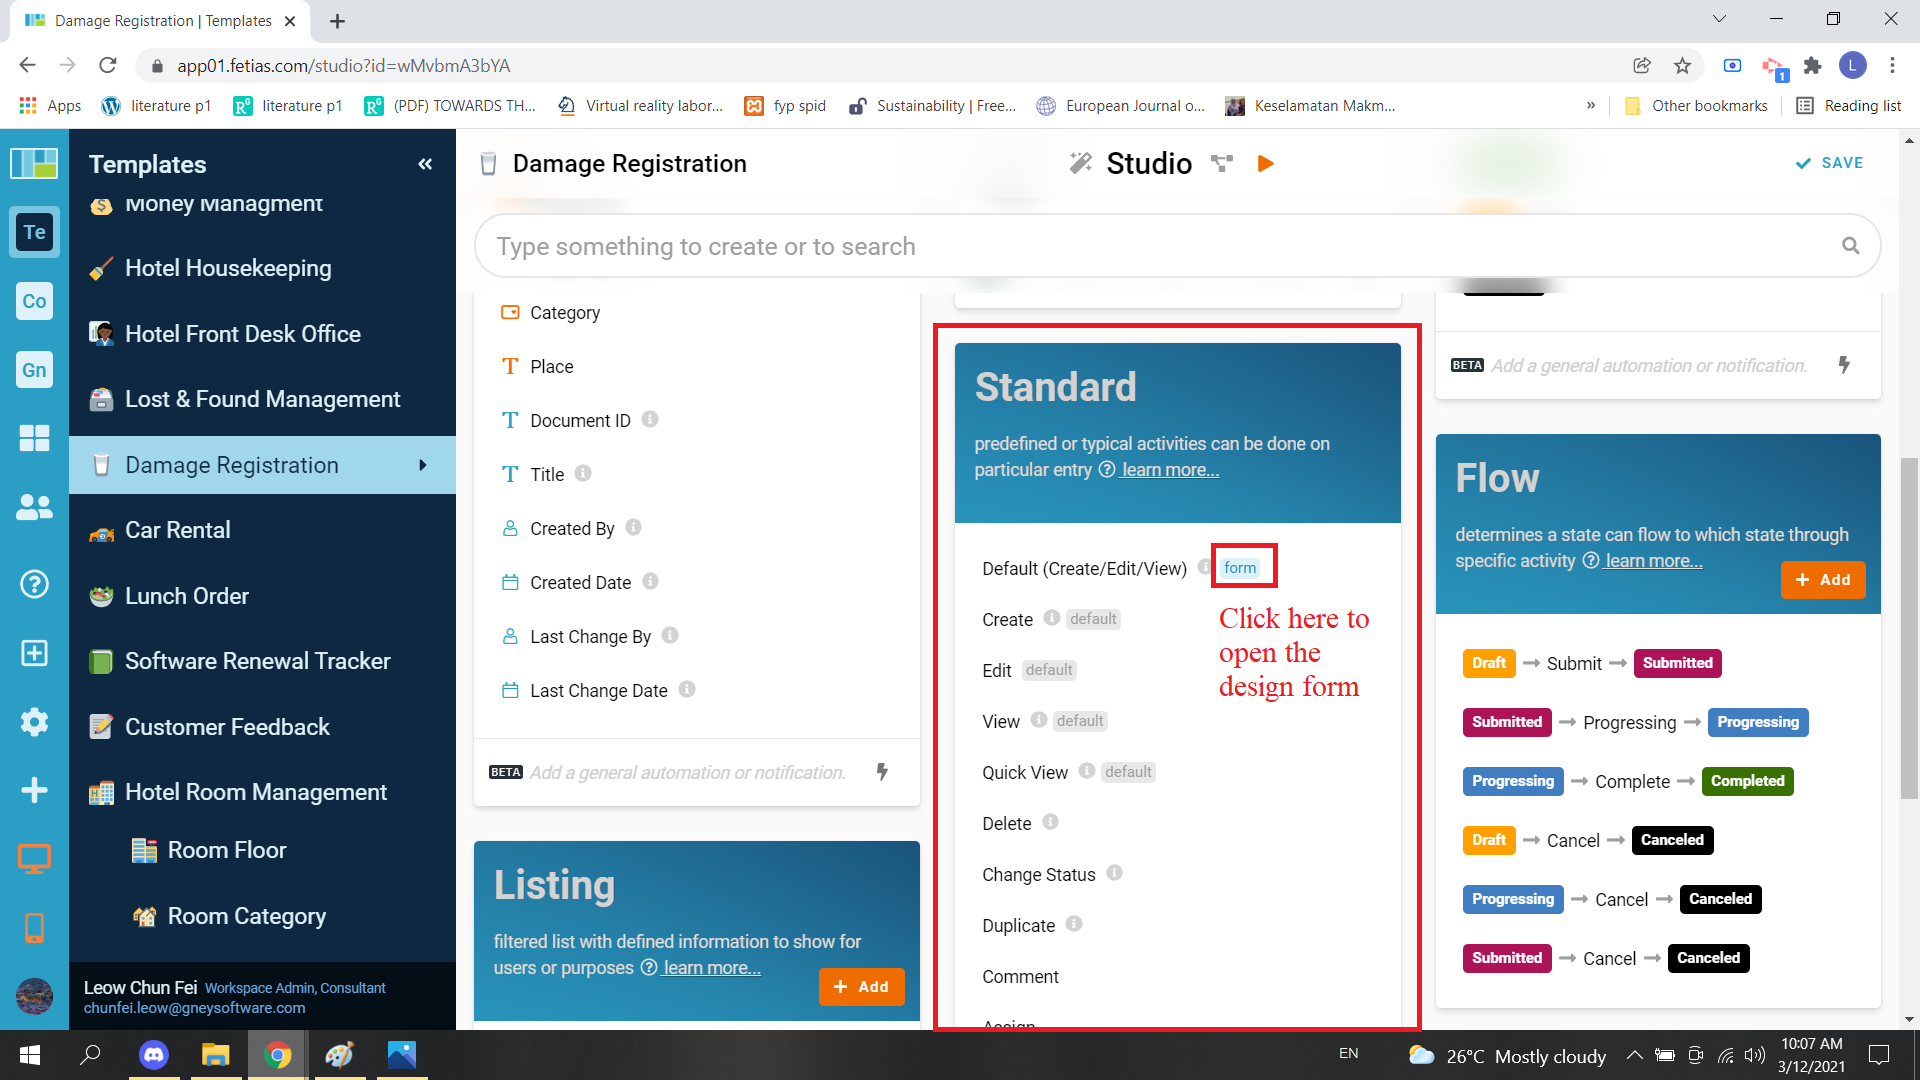
4. Configure Flow by determines a state can flow to which state through specific activity and form a reasonable workflow diagram in whole progress. (Refer Picture 4)
Example: State ----> Activity ----> State
- Draft ----> Submit ----> Submitted
- Submitted ----> Progressing ----> Progressing
- Progressing ----> Complete ----> Completed
- Draft ----> Cancel ----> Canceled
- Progressing ----> Cancel ----> Canceled
- Submitted ----> Cancel ----> Canceled

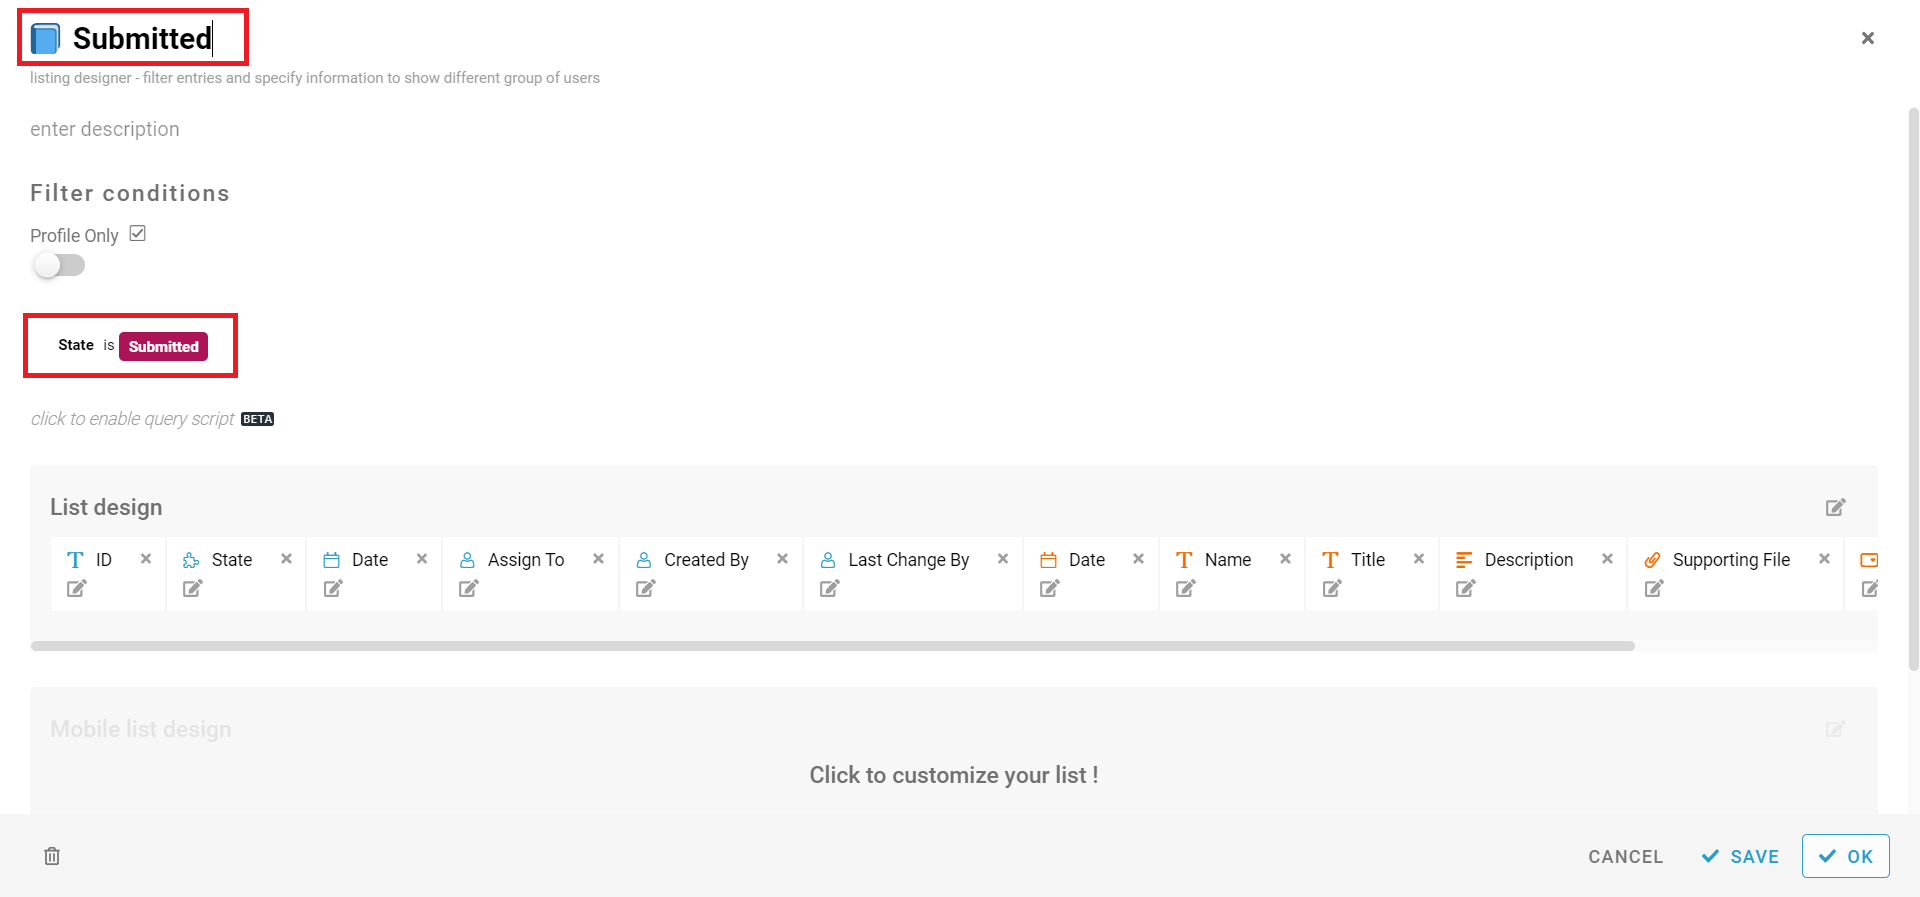
5. Configure and Recognize Listing to category the state of entries and filtered list with defined information to show for users or purposes. (Refer Picture 5)
- All
- Submitted
- Progressing
- Completed
- Canceled
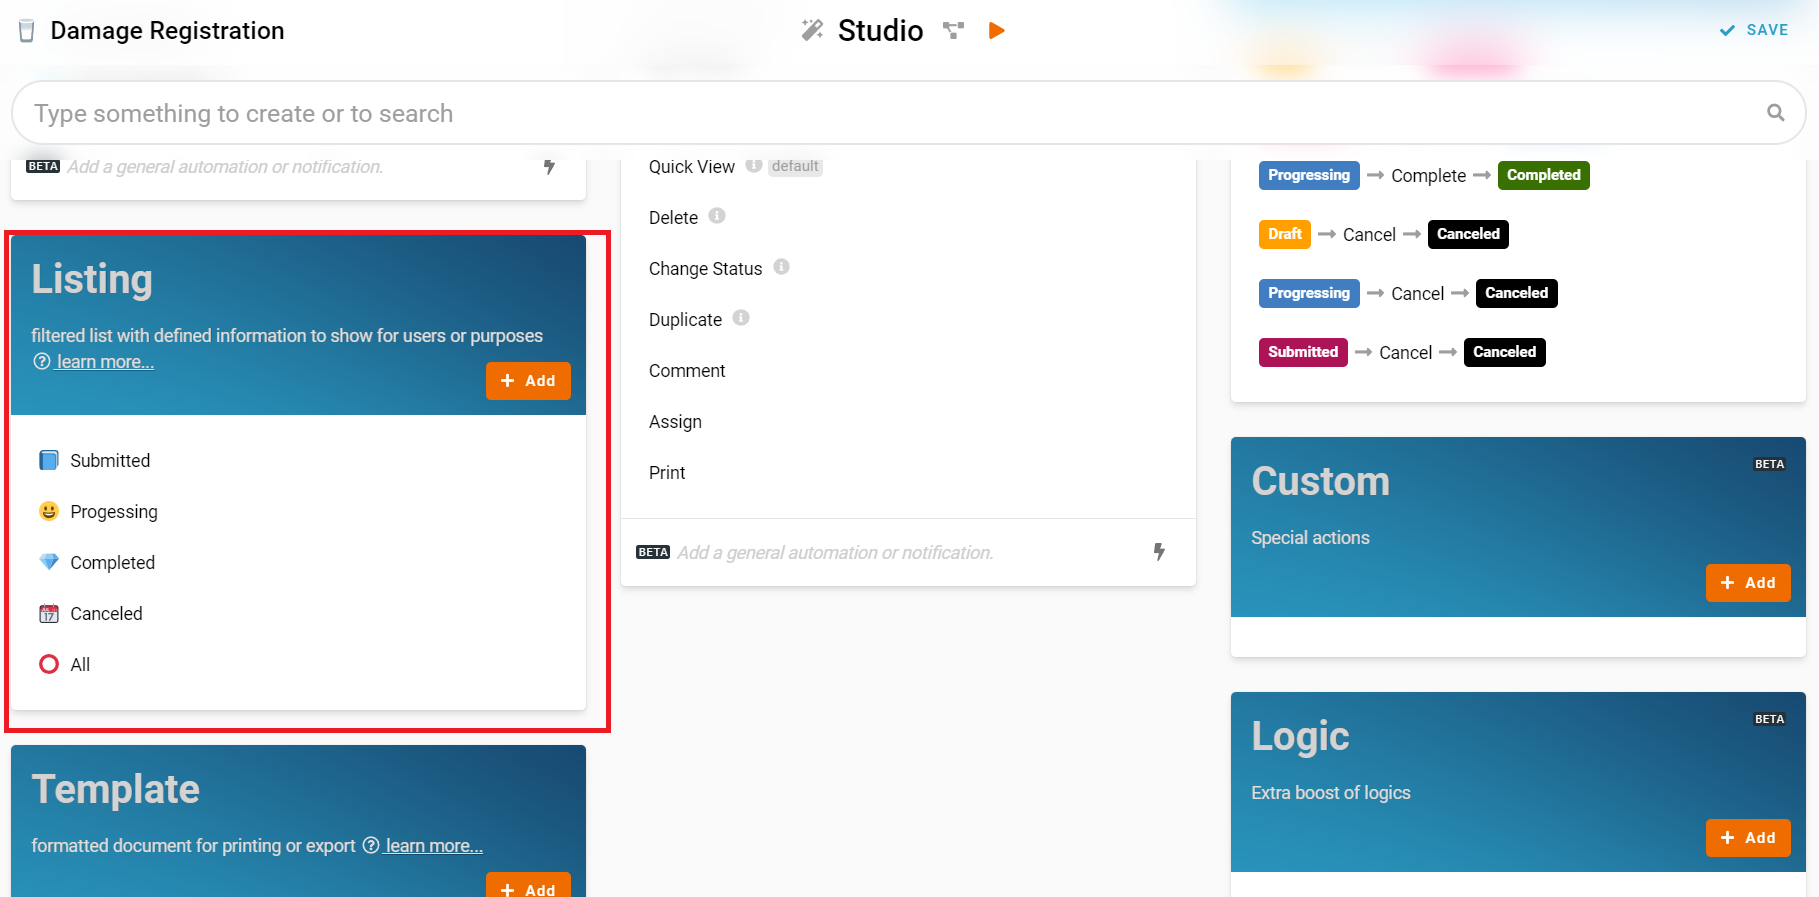
6. Step to produce the Listing (Refer Picture 5 to 9)
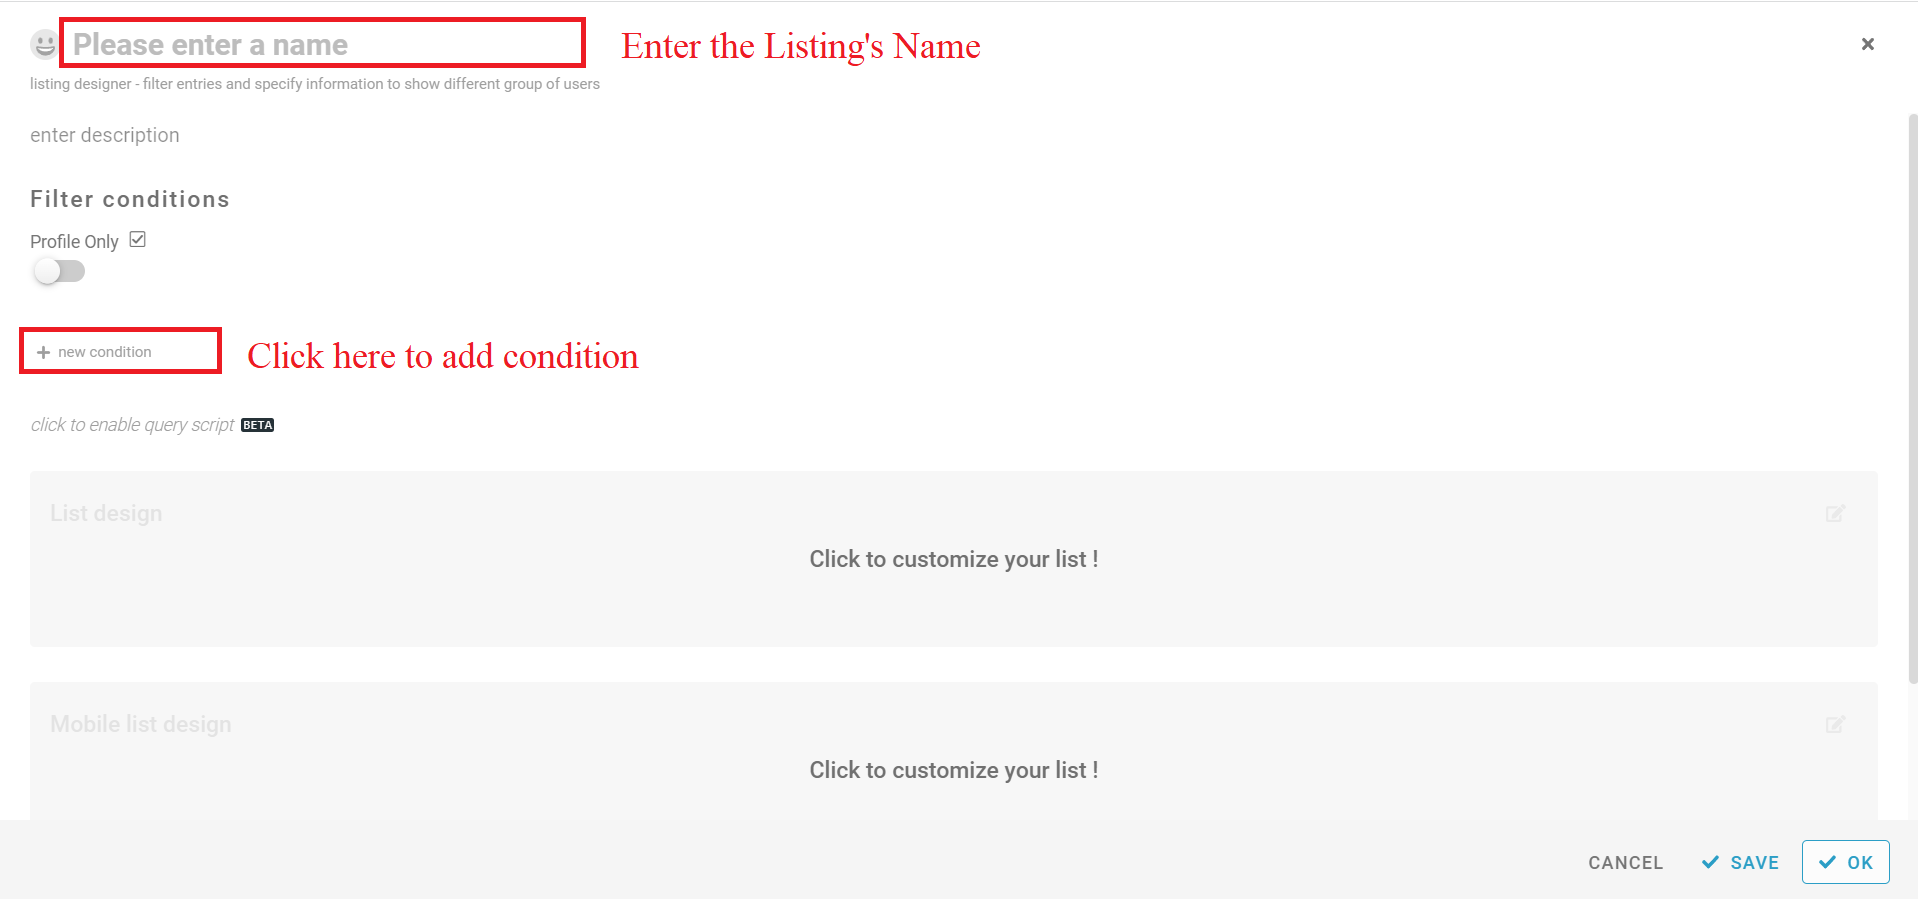
- Click “+ Add” at the Listing card
- Enter the name of Listing in the empty space at the top left of the screen
- Click the “+ new condition” at the left side of screen to add the condition
- Select “State” and select the the state you want put in this Listing in the condition
- In the picture 7, select “State” and select “Submitted” in condition, it will show all the entry which is state “Submitted”, the name of this list is “Submitted”
- Can add the new List by click “+ Add” again at the Listing card
- This List’s name is “All”, leave the condition blank to show all the entries in this list
- Click the gray part of “List Design” to open the “Column Selection”
- “Column Selection” can customize the column that want to show in this List
- Can tick all, tick or untick the column to able or disable show the column in this List
- Click “OK” after done in “Column Selection”
- Remember to click “SAVE” after done
- Add another three list, Progressing, Completed and Canceled according the state


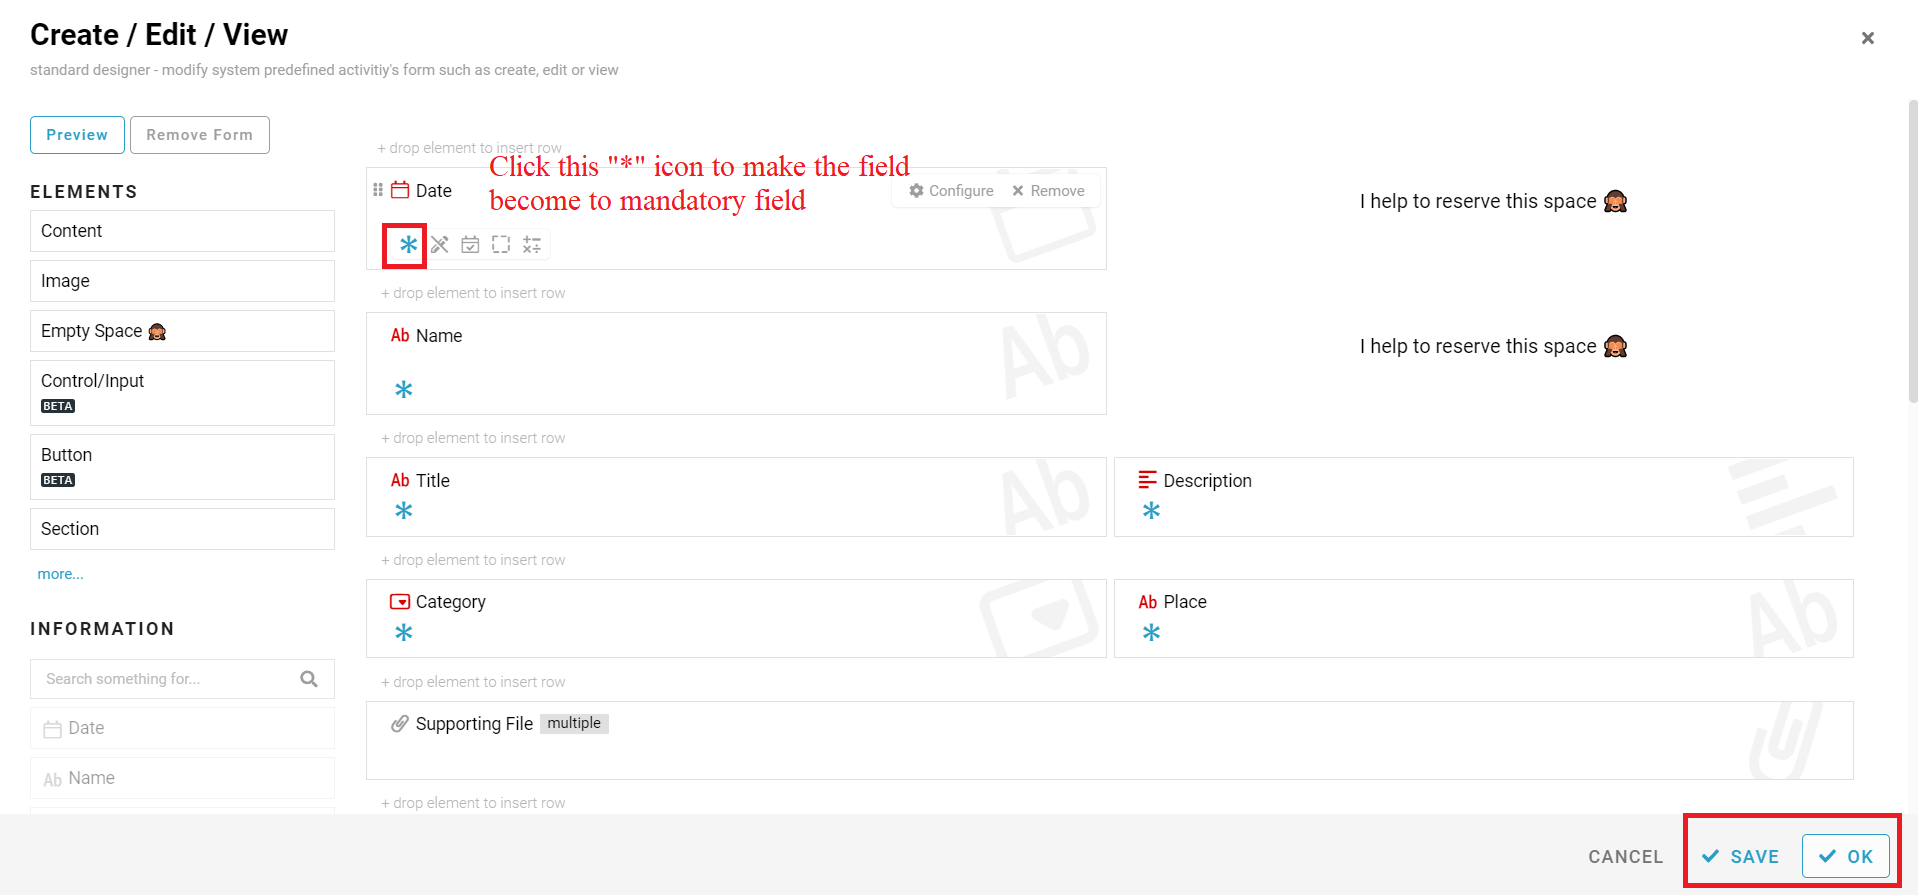
7. Step to arrange the information according your preference in Standard (Refer Picture 10 and 11)
- Click gray box beside the “Default(Create/Edit/View)” at the Standard card to open the design form
- Drag the box from “INFORMATION” panel at left side of screen, drop to the empty place that you want to place
- Click the “*” icon to make the field to mandatory field
- Make all the field become mandatory except field “Supporting File”
- Click the “SAVE” button after done and click “OK” to close the design form
8. Click “SAVE” button at top right of screen after make changes (Refer Picture 12)
For more templates:
Try FETIAS for FREE now.
Sign up at https://fetias.com
Related topic
Tutorial - Damage Registration