Manage your new employee’s onboarding process with this template to ensure everything is good to go from the first day of your new join.
Problem
Difficult to manage and record - It is hard to record and manage the new employee’s onboarding process.
Objective
Convenient to manage and record - This template useful for new employee’s onboarding process to ensure to keep the information safety.
Step
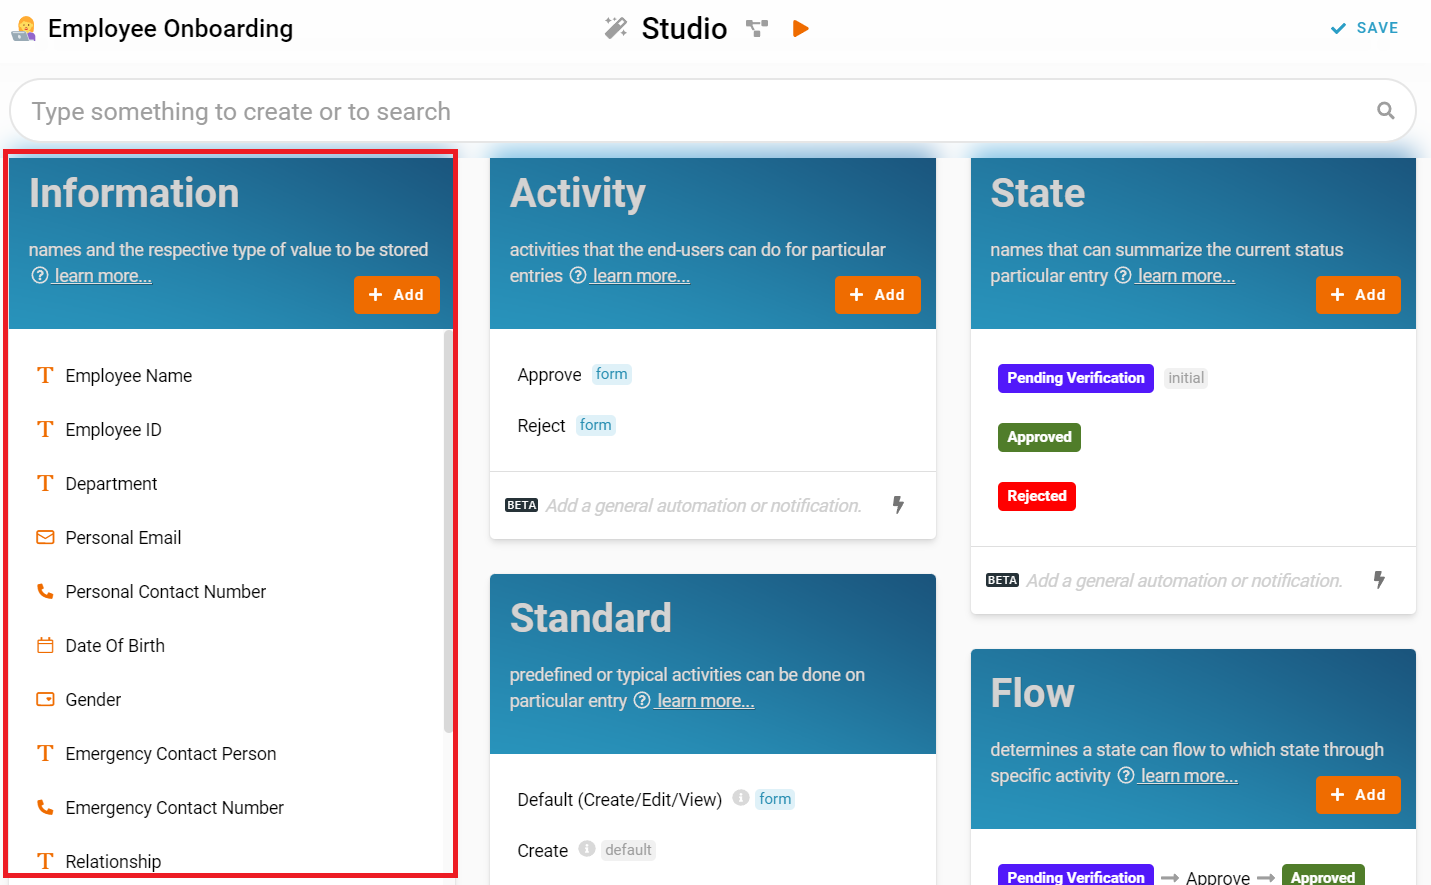
1. Recognize and configure all the Information name and type required to create a new entry in Employee Onboarding. (Refer Picture 1)
- Name: Employee Name, Type: Text
- Name: Employee ID, Type: Text
- Name: Department, Type: Text
- Name: Personal Email, Type: Email
- Name: Personal Contact Number, Type: Phone Number
- Name: Date Of Birth, Type: Date
- Name: Gender, Type: Select
- Male
- Female
- Name: Emergency Contact Person, Type: Text
- Name: Emergency Contact Number, Type: Phone Number
- Name: Relationship, Type: Text
- Name: Address, Type: Multiline Text
- Name: Bank Name, Type: Text
- Name: Account Number, Type: Text
- Name: Certificates, Type: Files
- Name: Date Of Joining, Type: Date
- Name: IT Asset Required, Type: YesNo
- Name: Remarks, Type: Multiline Text
- Name: Computer Specification, Type: Multiline Text
- Name: Reason, Type: Multiline Text
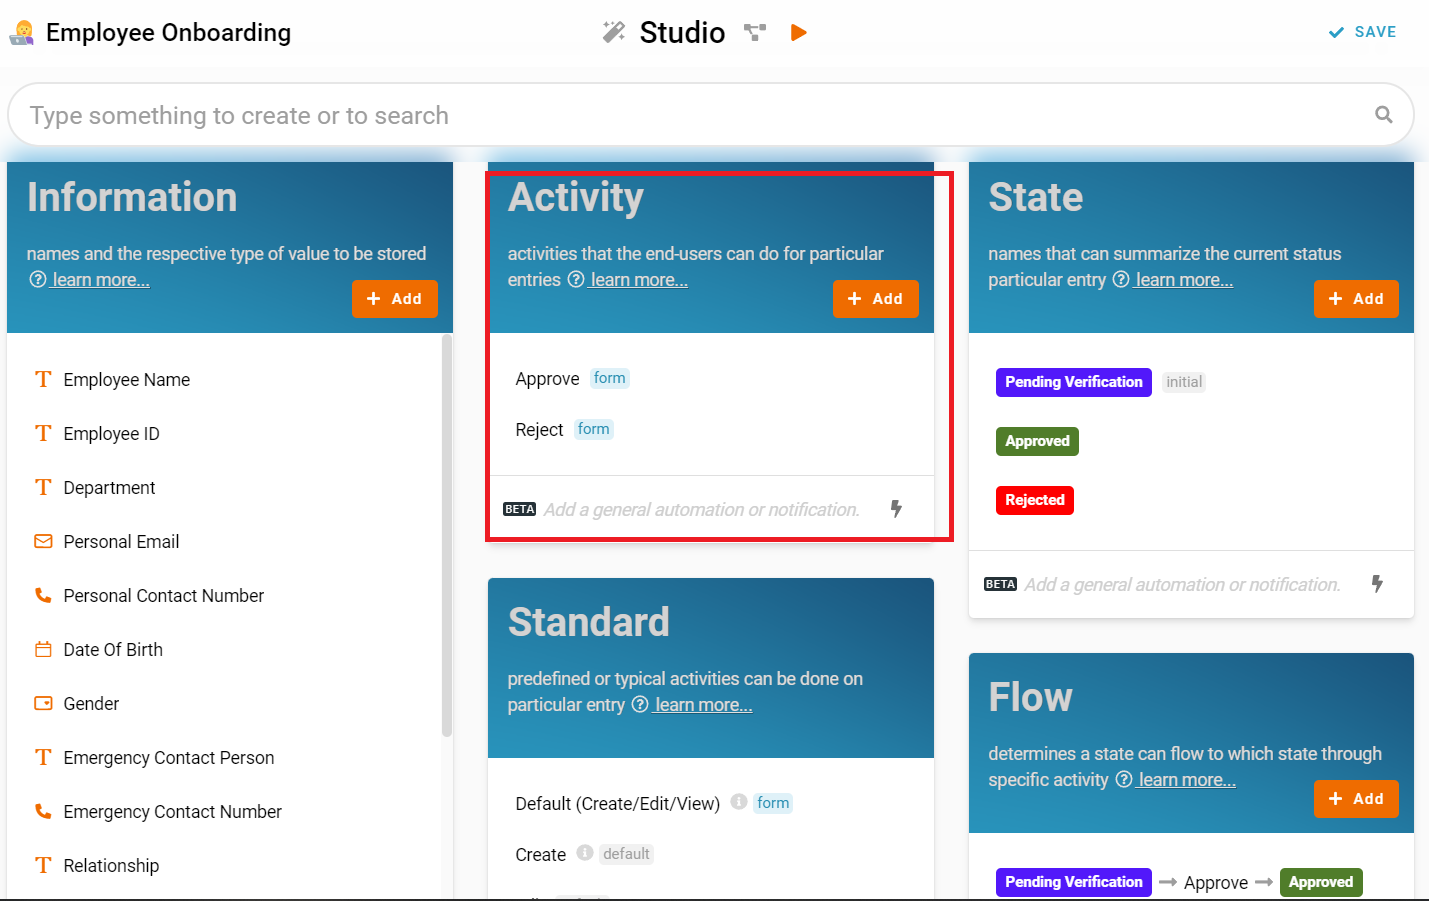
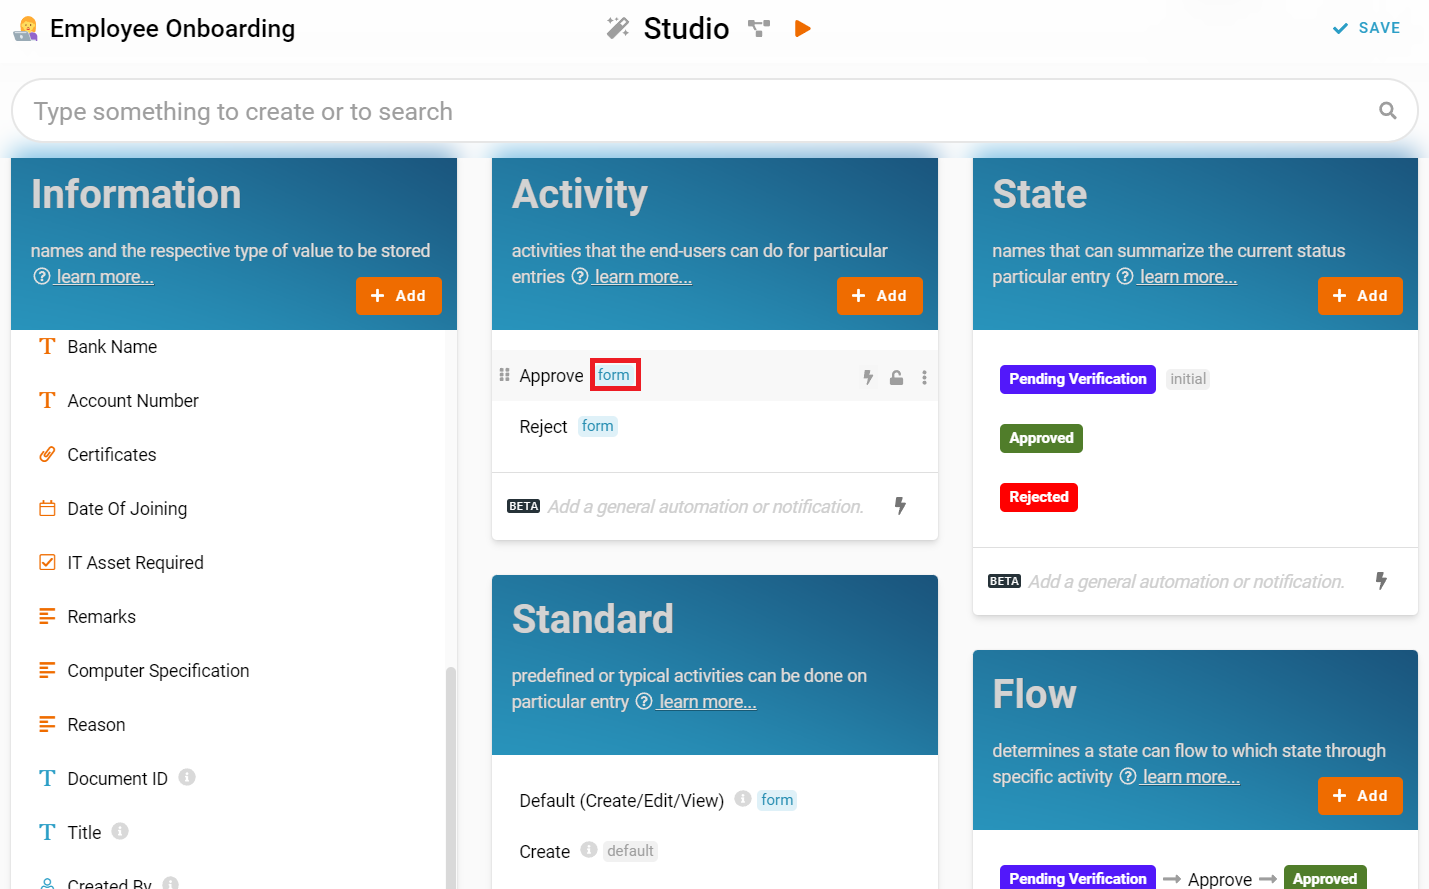
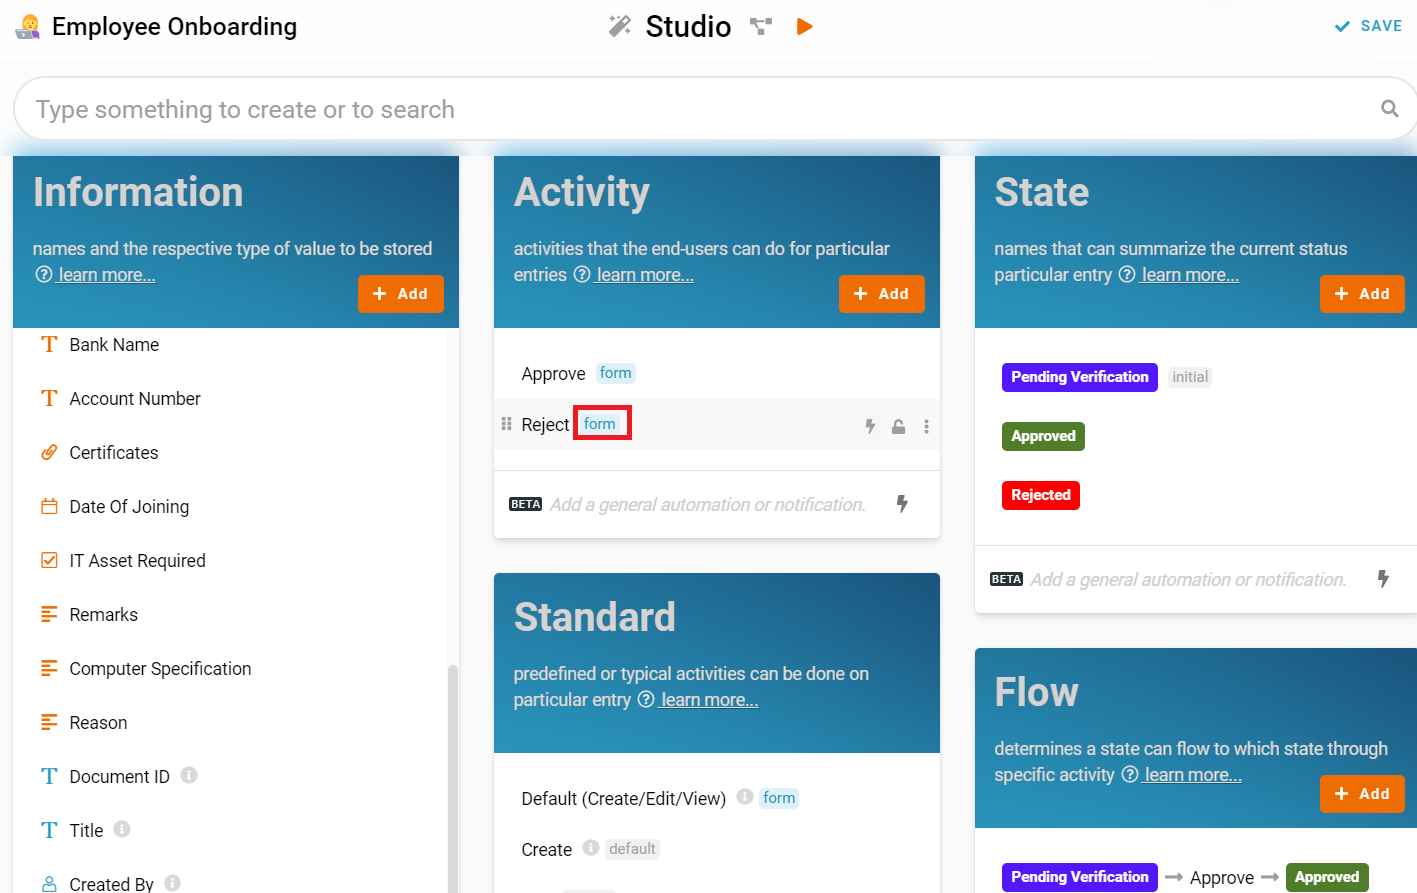
2. Recognize and configure all the Activity able to perform to change State (Refer Picture 2)
- Approve
- Reject
3. Recognize and configure all the State in the whole Court Reservation. (Refer Picture 3)
- Pending Verification (set this state as Initial)
- Approved
- Rejected

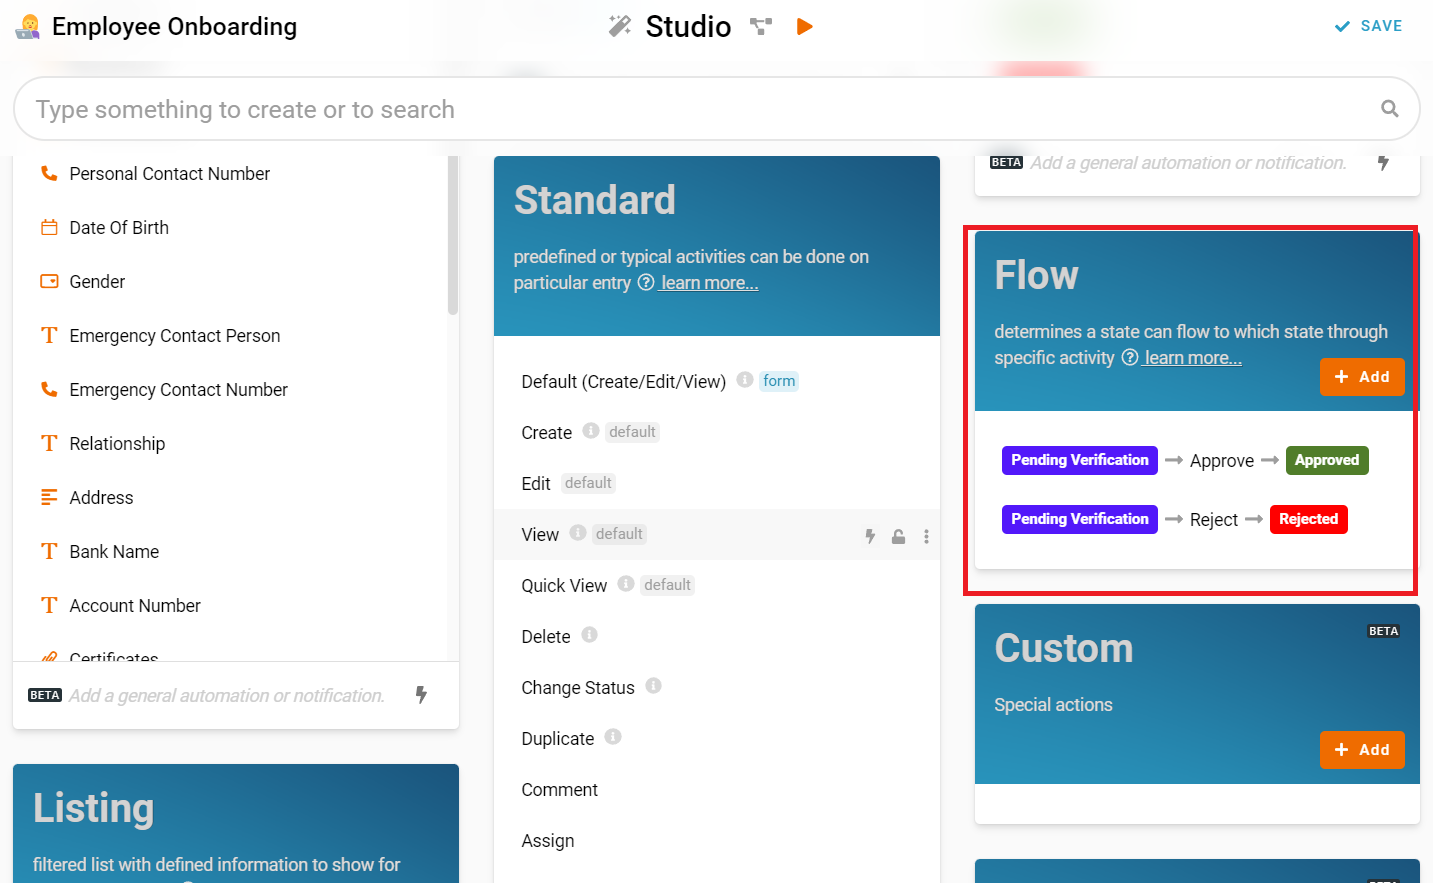
4. Configure Flow by determines a state can flow to which state through specific activity and form a reasonable workflow diagram in whole progress. (Refer Picture 4)
-
Example: State ----> Activity ----> State
-
Pending Verification ----> Approve ----> Approved
-
Pending Verification ----> Reject ----> Rejected
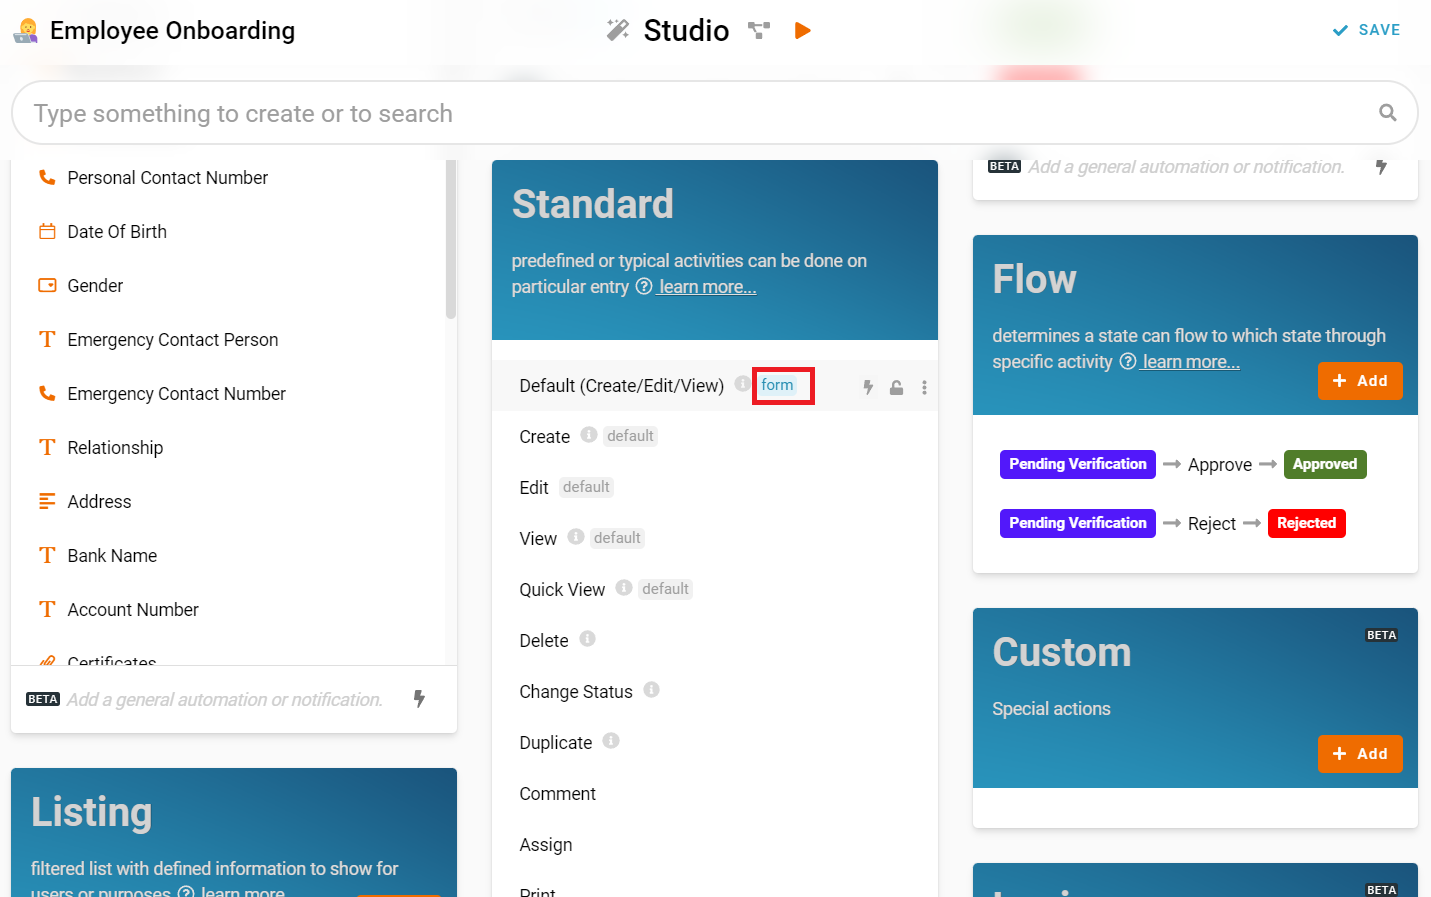
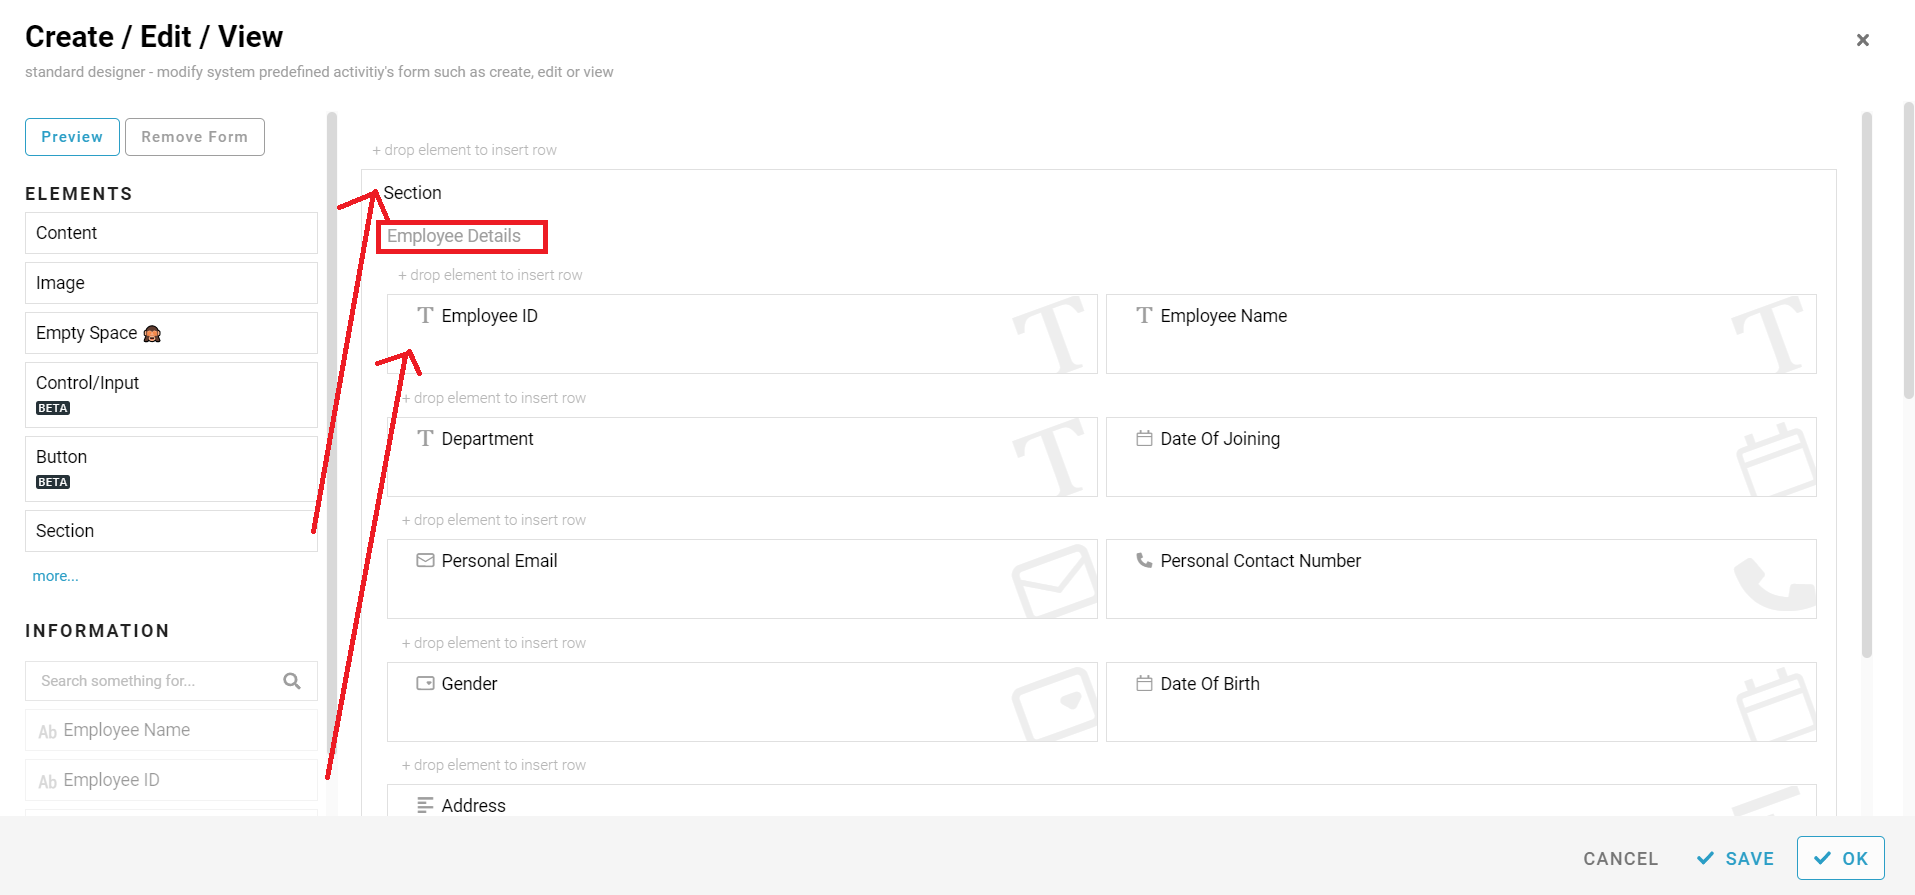
5. Step to arrange the information according your preference in Standard (Refer Picture 5 to 7)
-
Click gray box beside the “Default(Create/Edit/View)” at the Standard card to open the design form
-
Drag the “Section” box from “ELEMENTS” panel at left side of screen, drop to right side
-
Drag the information boxes from “INFORMATION” panel at left side of screen, drop inside the “Section” box accordingly, except “IT Asset Required”, “Remarks”, “Computer Specification” and “Reason”
-
“Employee ID”, “Employee Name”, “Department”, “Date of Joining”, “Personal Email”, “Personal Contact Number”, “Gender”, “Date Of Birth”, “Address” and “Certificates” belongs to Employee Details Section
-
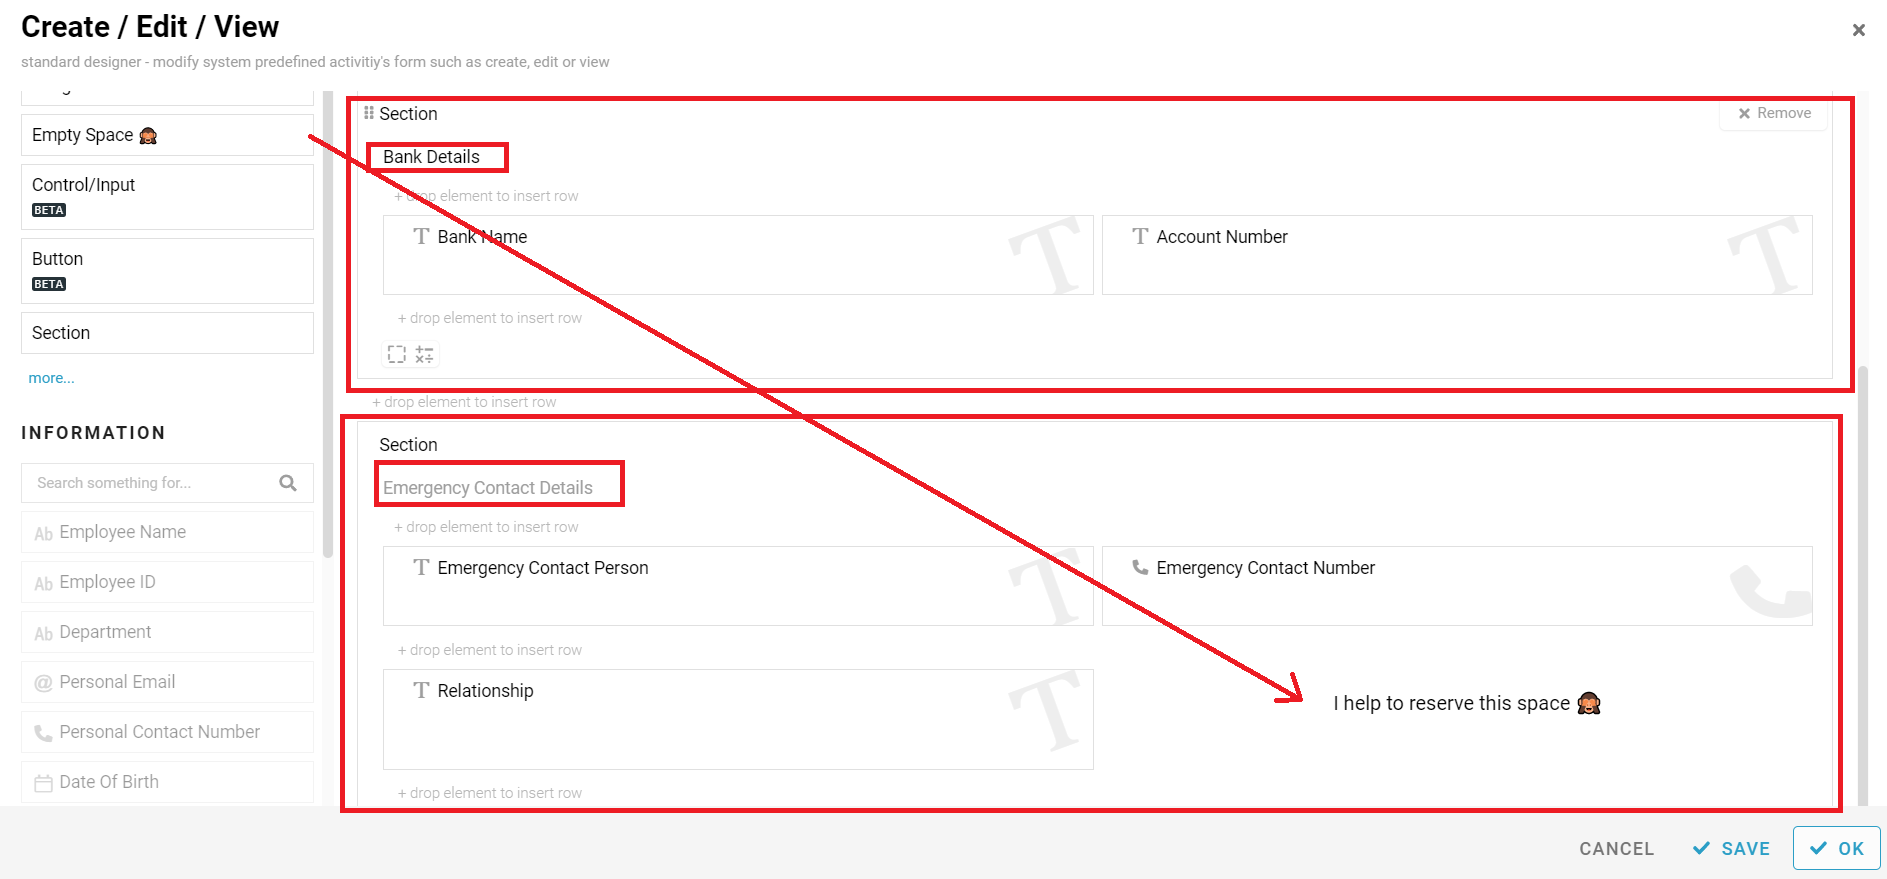
“Bank Name” and “Account Number” belongs to Bank Details Section
-
“Emergency Contact Person”, “Emergency Contact Number” and “Relationship” belongs to Emergency Contact Details Section
-
Also can drag the “Empty Space” box from “ELEMENTS” panel at left side of screen, drop to the place that you want to place to create a empty space
-
Click the “SAVE” button after done and click “OK” to close the design form
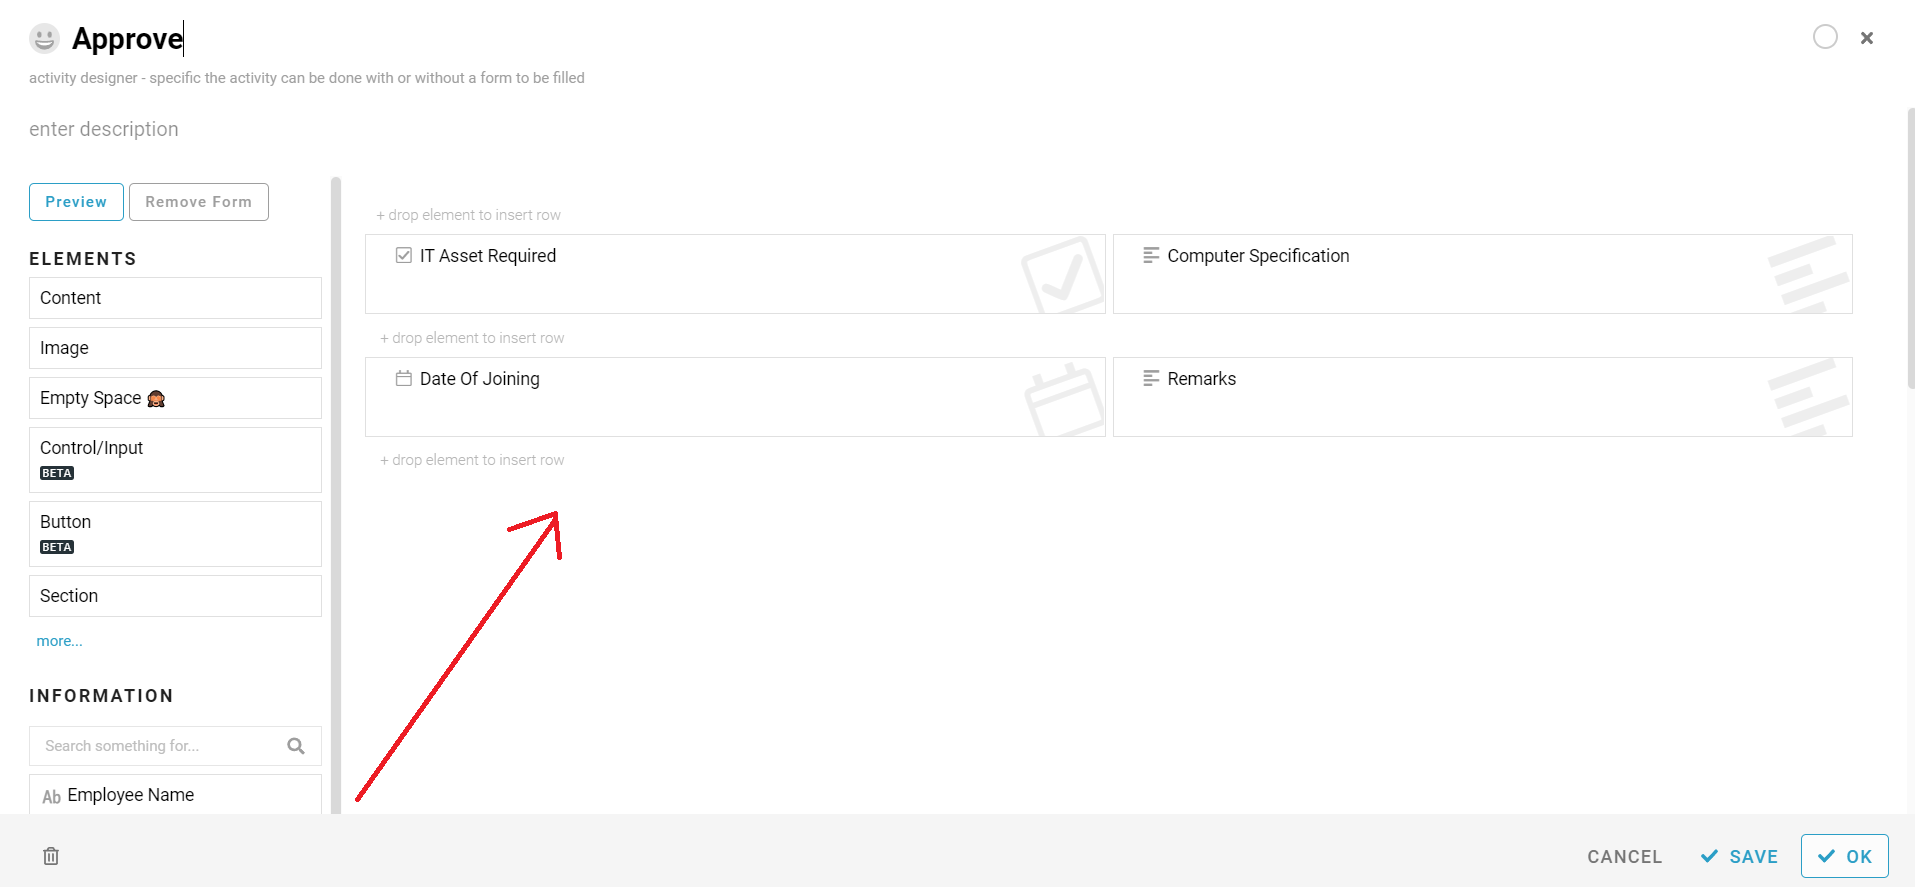
6. Step to pop up form when you perform the Activity (Refer Picture 8 to 11)
-
Click gray box beside the “Approve” at the Activity card to open the design form
-
Drag the “IT Asset Required”, “Remarks”, “Computer Specification” and “Date Of Joining” boxes from “INFORMATION” panel at left side of screen, drop to the empty place.
-
Click the “SAVE” button after done and click “OK” to close the design form
-
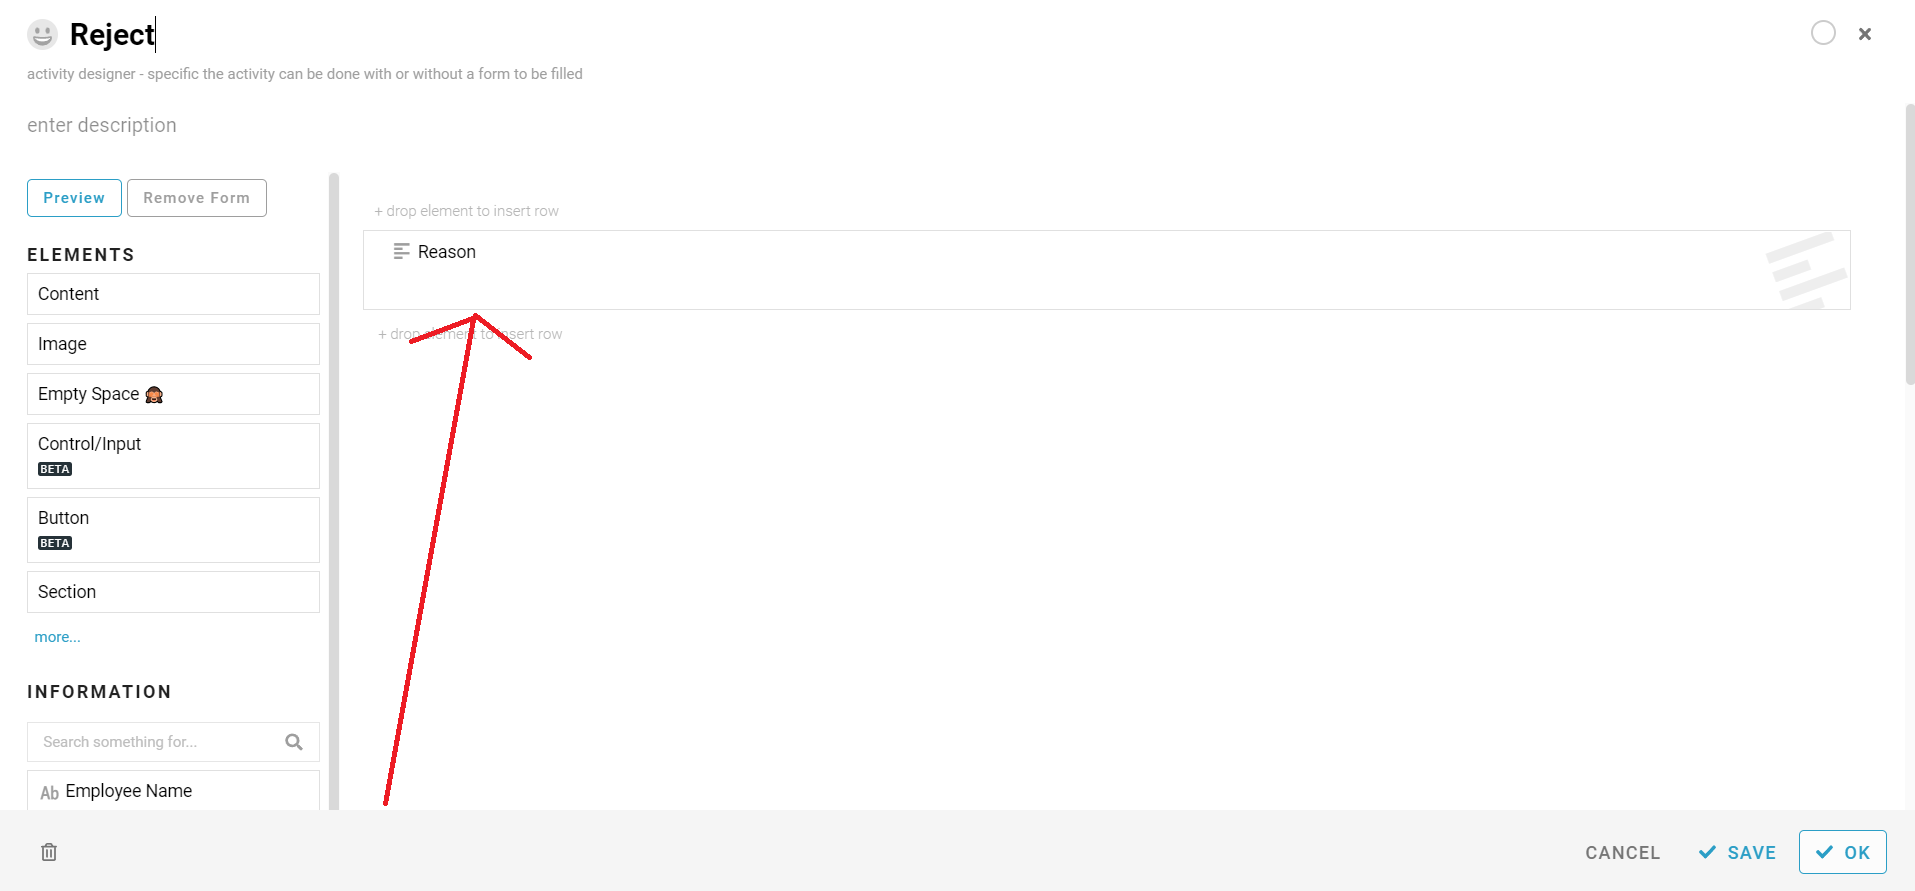
Click gray box beside the “Reject” at the Activity card to open the design form
-
Drag the “Reason” boxes from “INFORMATION” panel at left side of screen, drop to the empty place.
-
Click the “SAVE” button after done and click “OK” to close the design form
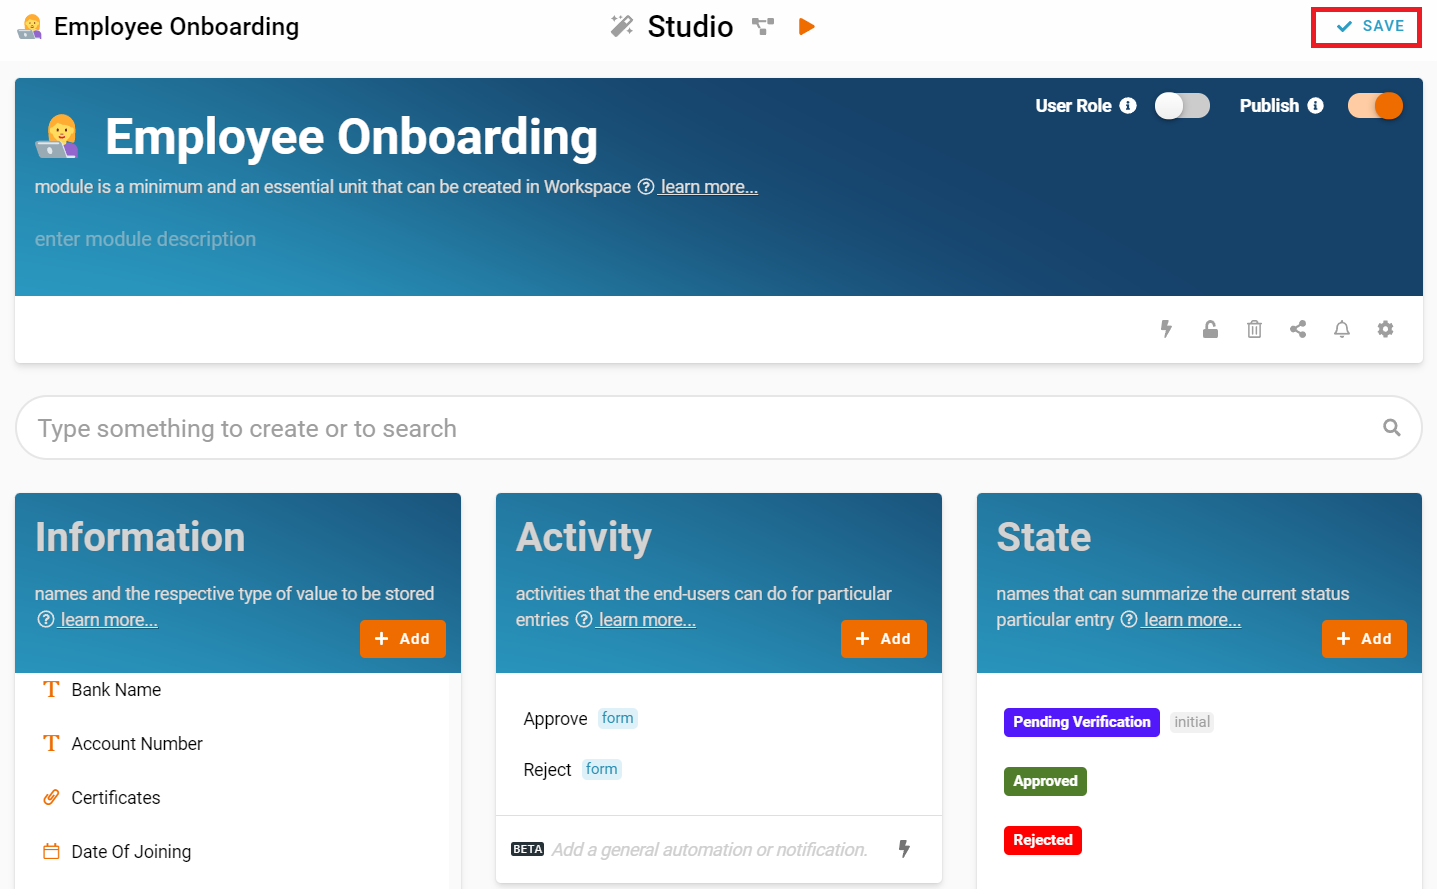
7. Click “SAVE” button at top right of screen after make changes (Refer Picture 12)
For more templates:
Try FETIAS for FREE now.
Sign up at https://fetias.com
Related topic
Tutorial - Employee Onboarding