Manage your new employee’s onboarding process with this template to ensure everything is good to go from the first day of your new join.
Problem
Difficult to manage and record - It is hard to record and manage the new employee’s onboarding process.
Objective
Convenient to manage and record - This template useful for new employee’s onboarding process to ensure to keep the information safety.
Process Flow
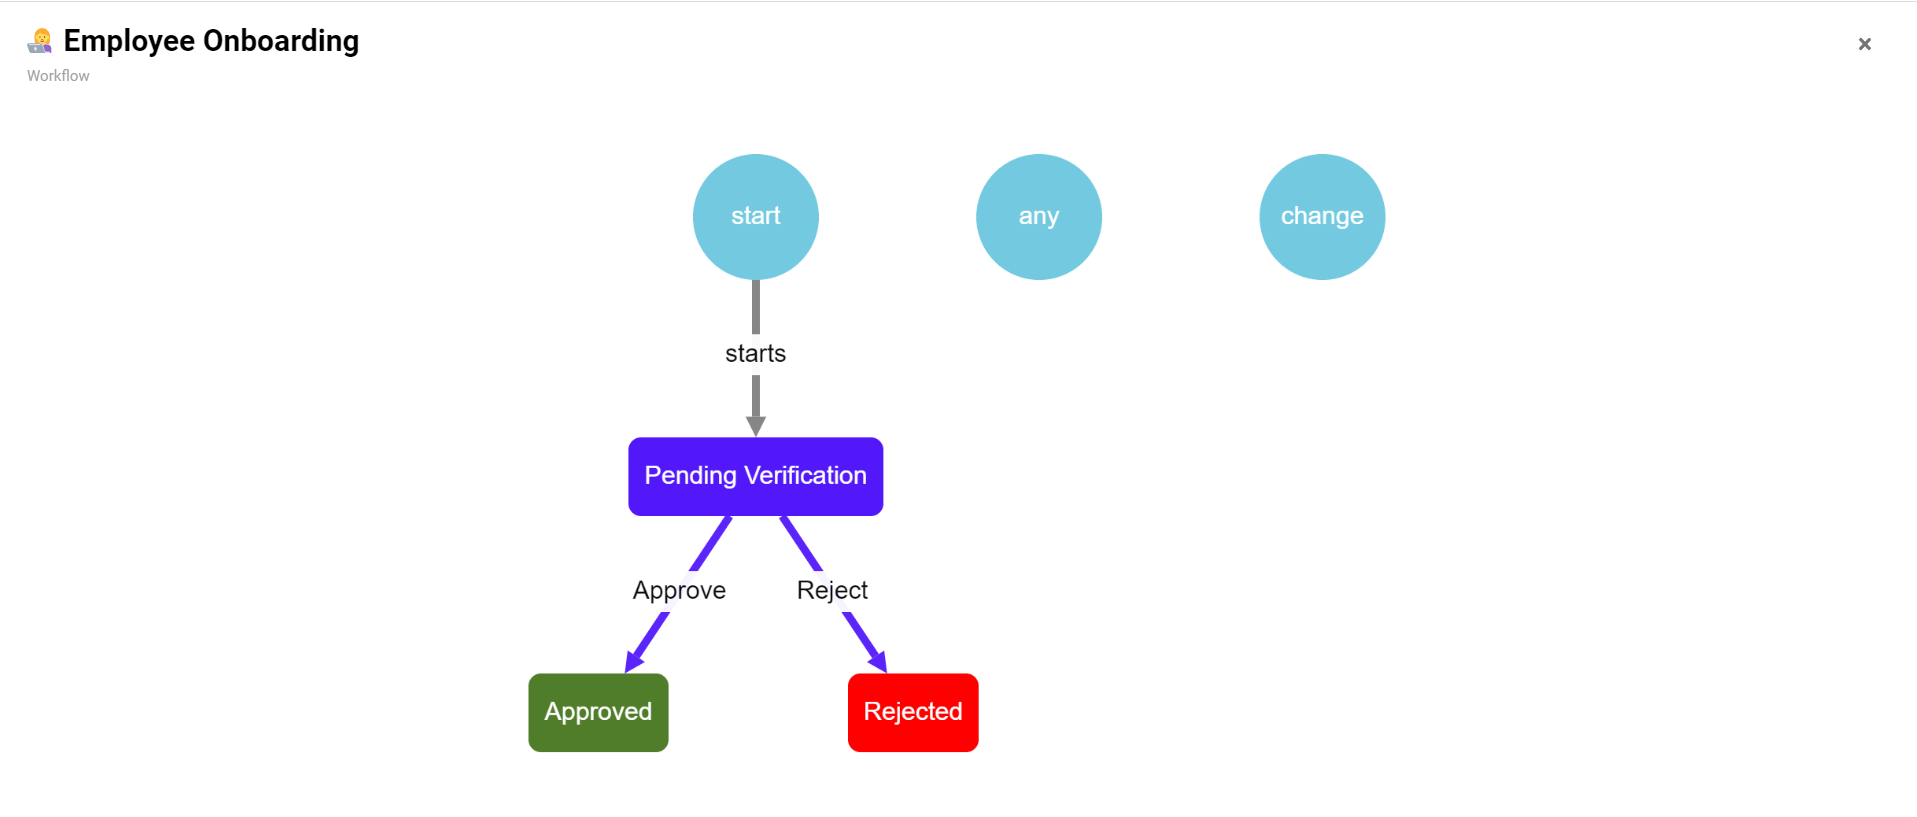
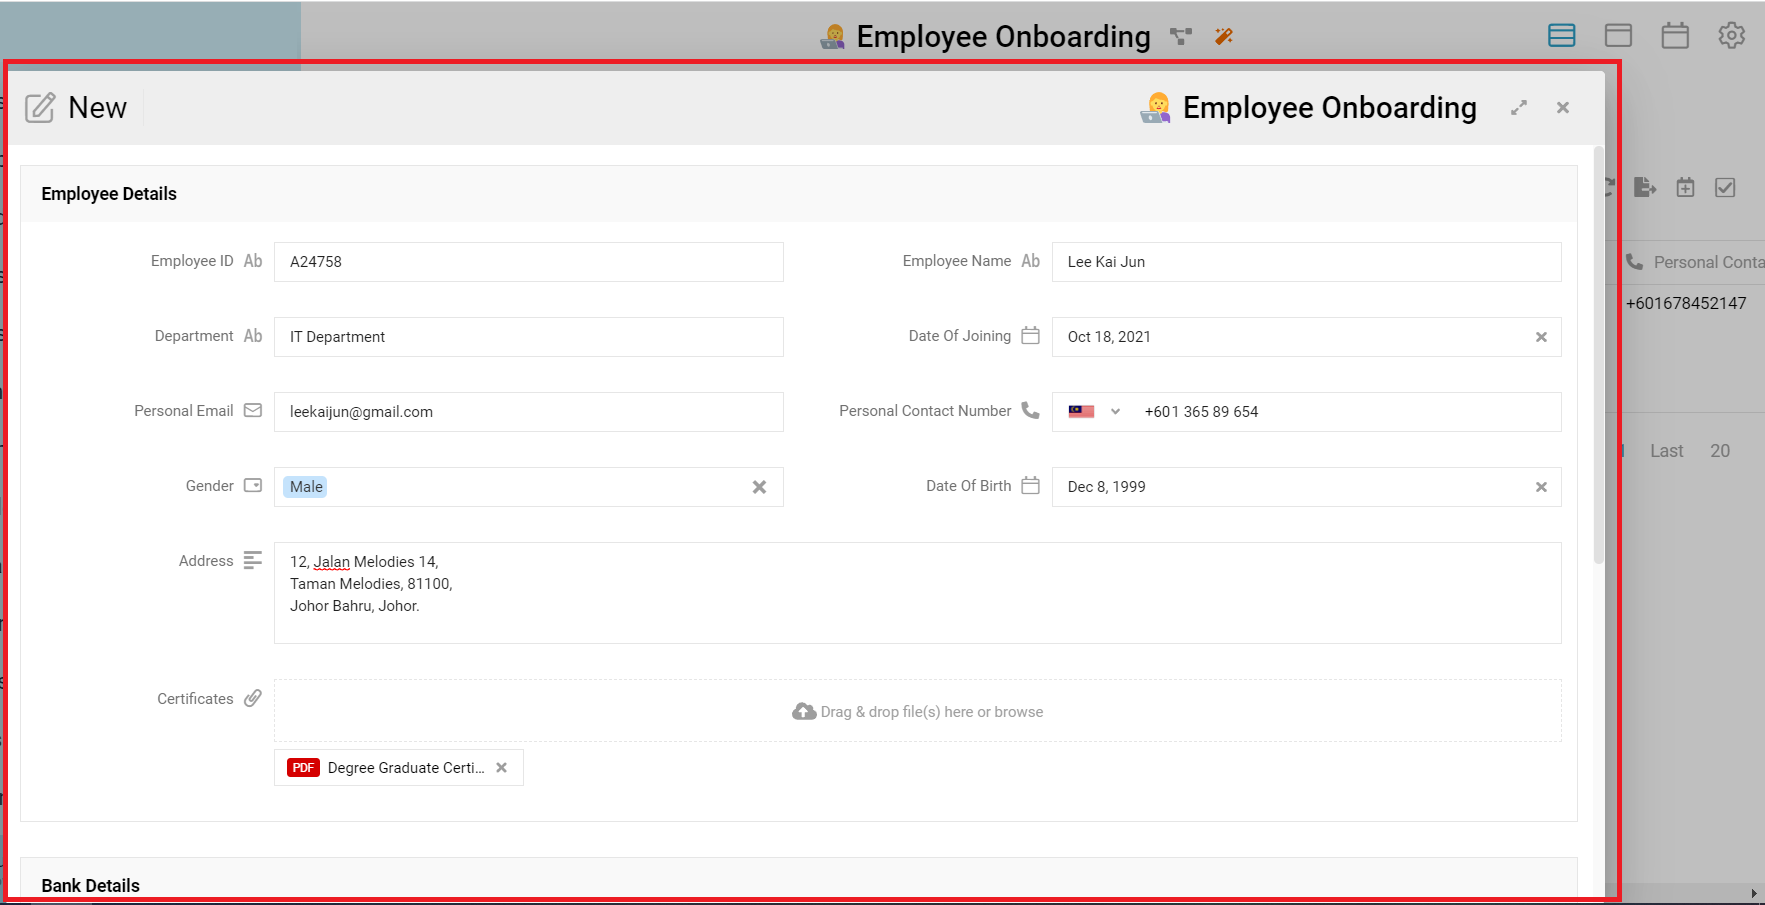
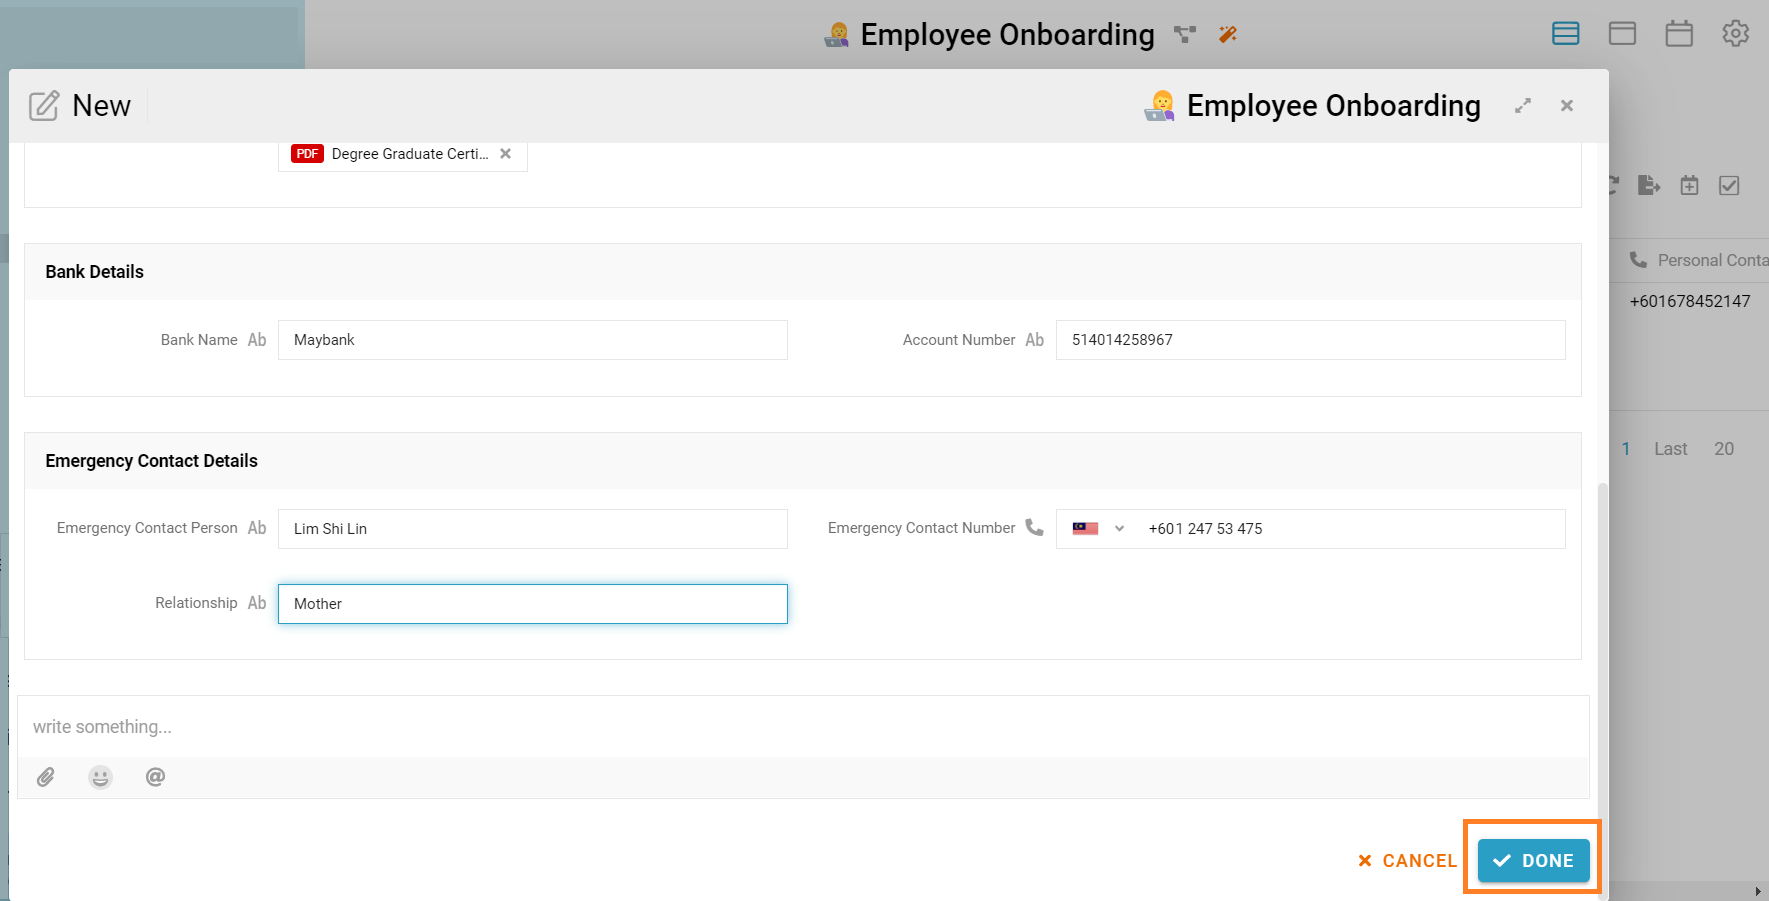
User click “New” button to create new entry. User fill up all the fields and click “Done” to submit the entry. “Employee ID” field fill with user’s employee ID, “Employee Name” field fill with user’s employee name, “Department” field fill with user’s department, “Date Of Joining” field fill with user’s date of joining this company, “Personal Email” field fill with user’s personal email, “Personal Contact Number” field fill with user’s personal contact number, “Gender” field fill with user’s gender, “Date Of Birth” field fill with user’s date of birth, “Address” field fill with user’s home address, “Certificates” field attach with user’s education certificates, “Bank Name” field fill with user’s bank name, “Account Number” field fill with user’s bank account number, “Emergency Contact Person” field fill with user’s emergency contact person, “Emergency Contact Number” field fill with user’s emergency contact person’s contact number and “Relationship” field fill with the relationship between user and user’s emergency contact person.
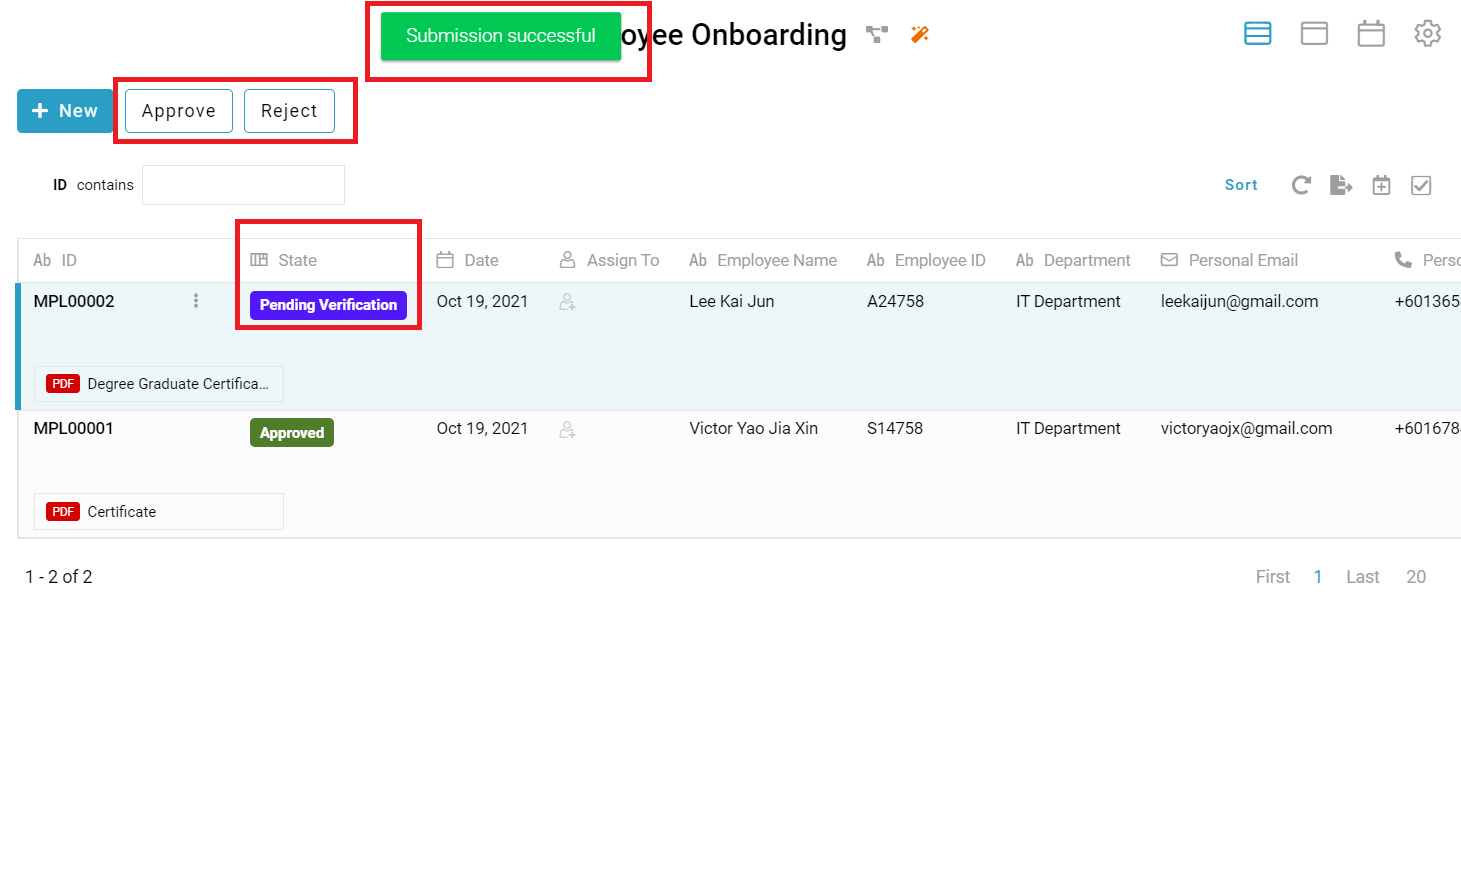
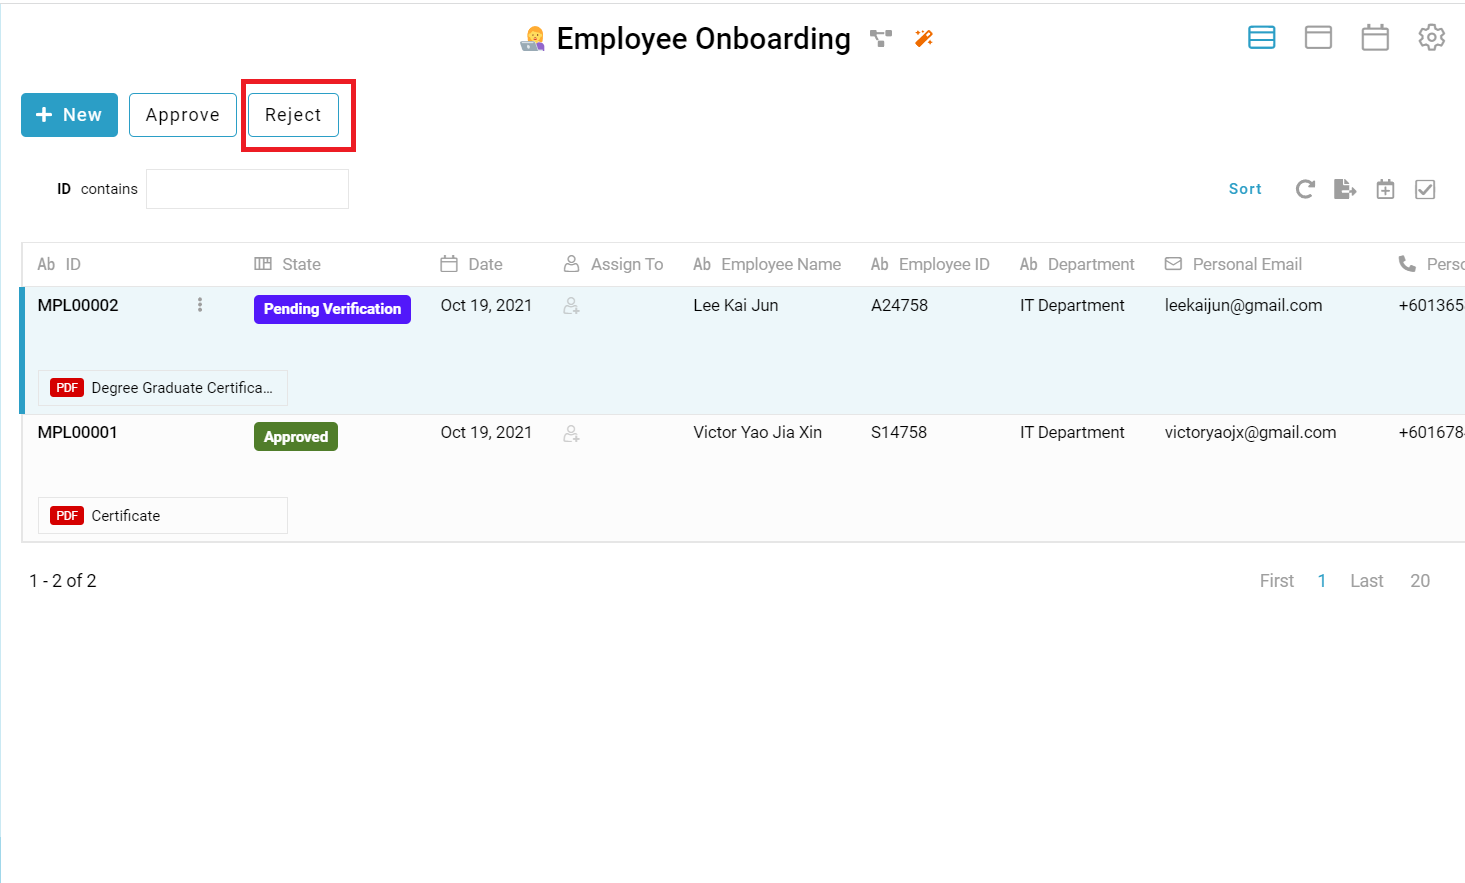
The initial state of the new created entry is “Pending Verification”. This entry will be approve when the relevant department click “Approve” button or reject when the relevant department click “Reject” button.
Step
-
User click the “New” button to create new entry
-
User fill in all the fields with correct information
-
After ensure all the information filled in correctly, user click the “Done” button
-
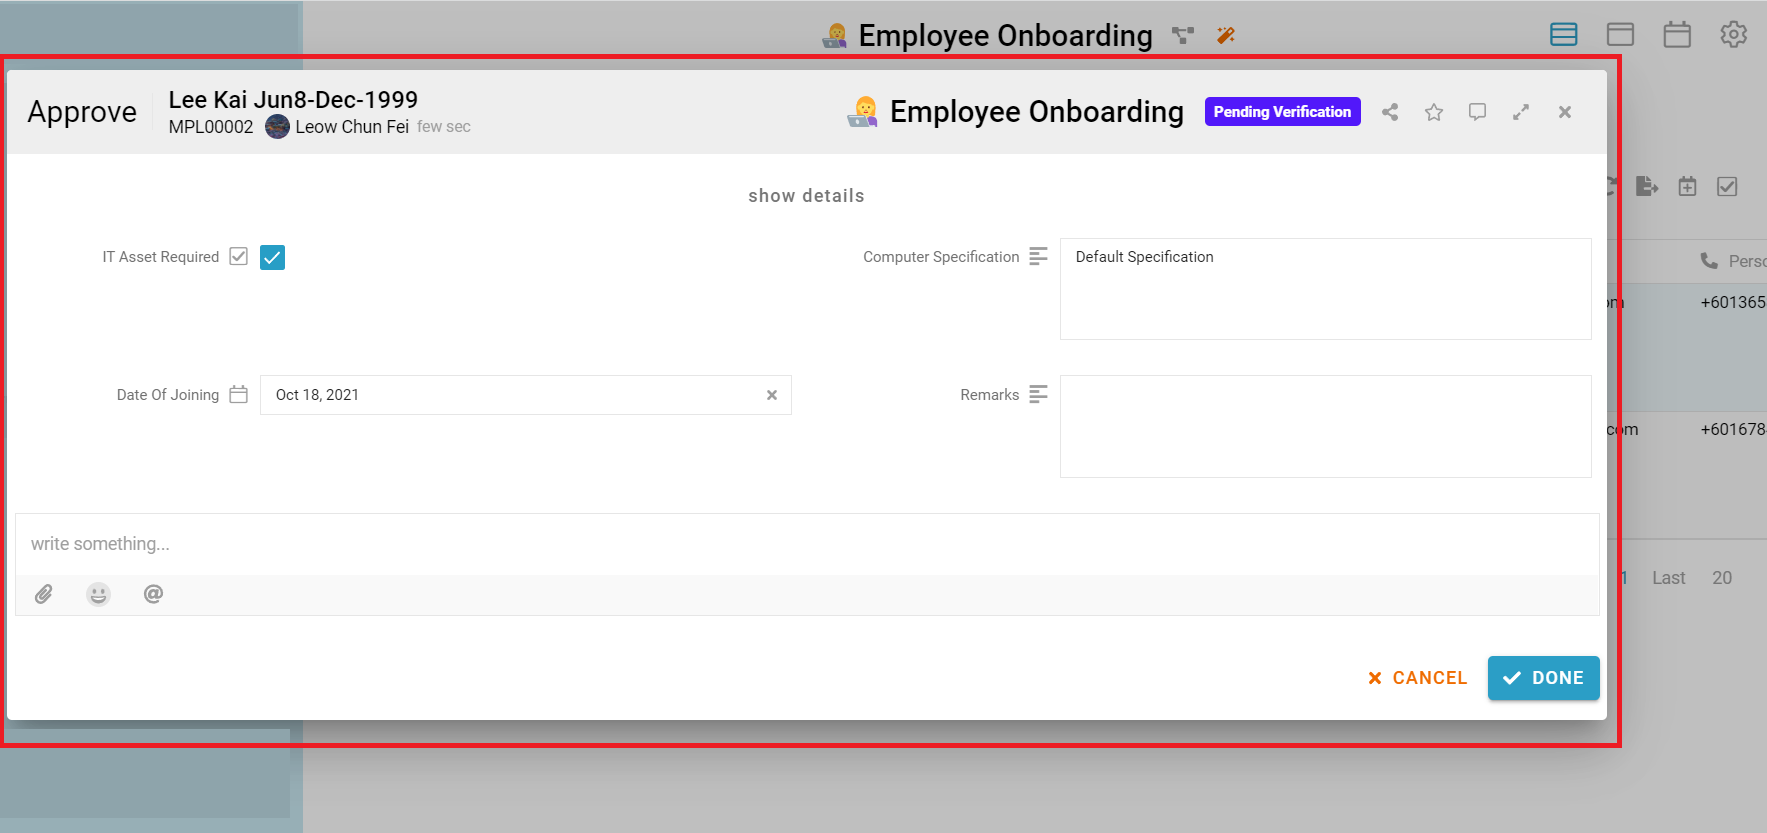
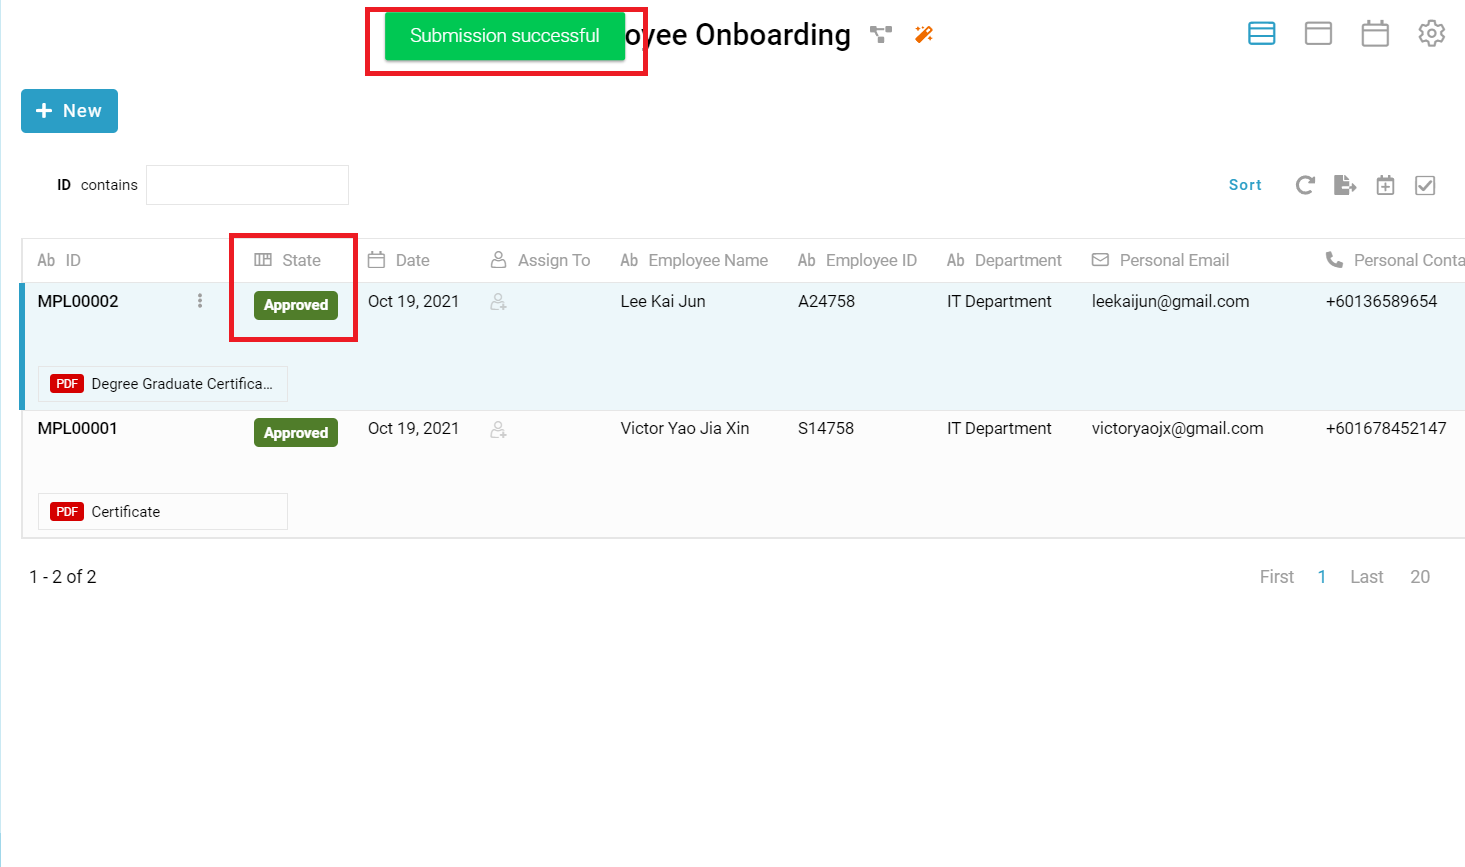
A message “Submission successful” showed, and the initial state of the new created entry is “Pending Verification”. Relevant department can click “Approve” button or “Reject” button to approve or reject the entry. If the relevant department click the “Approve” button, a new window name “Approve” showed
-
Relevant department fill in fields and click “Done” button to approve this entry
-
A message “Submission successful” showed, and the state of the entry change to “Approved”
-
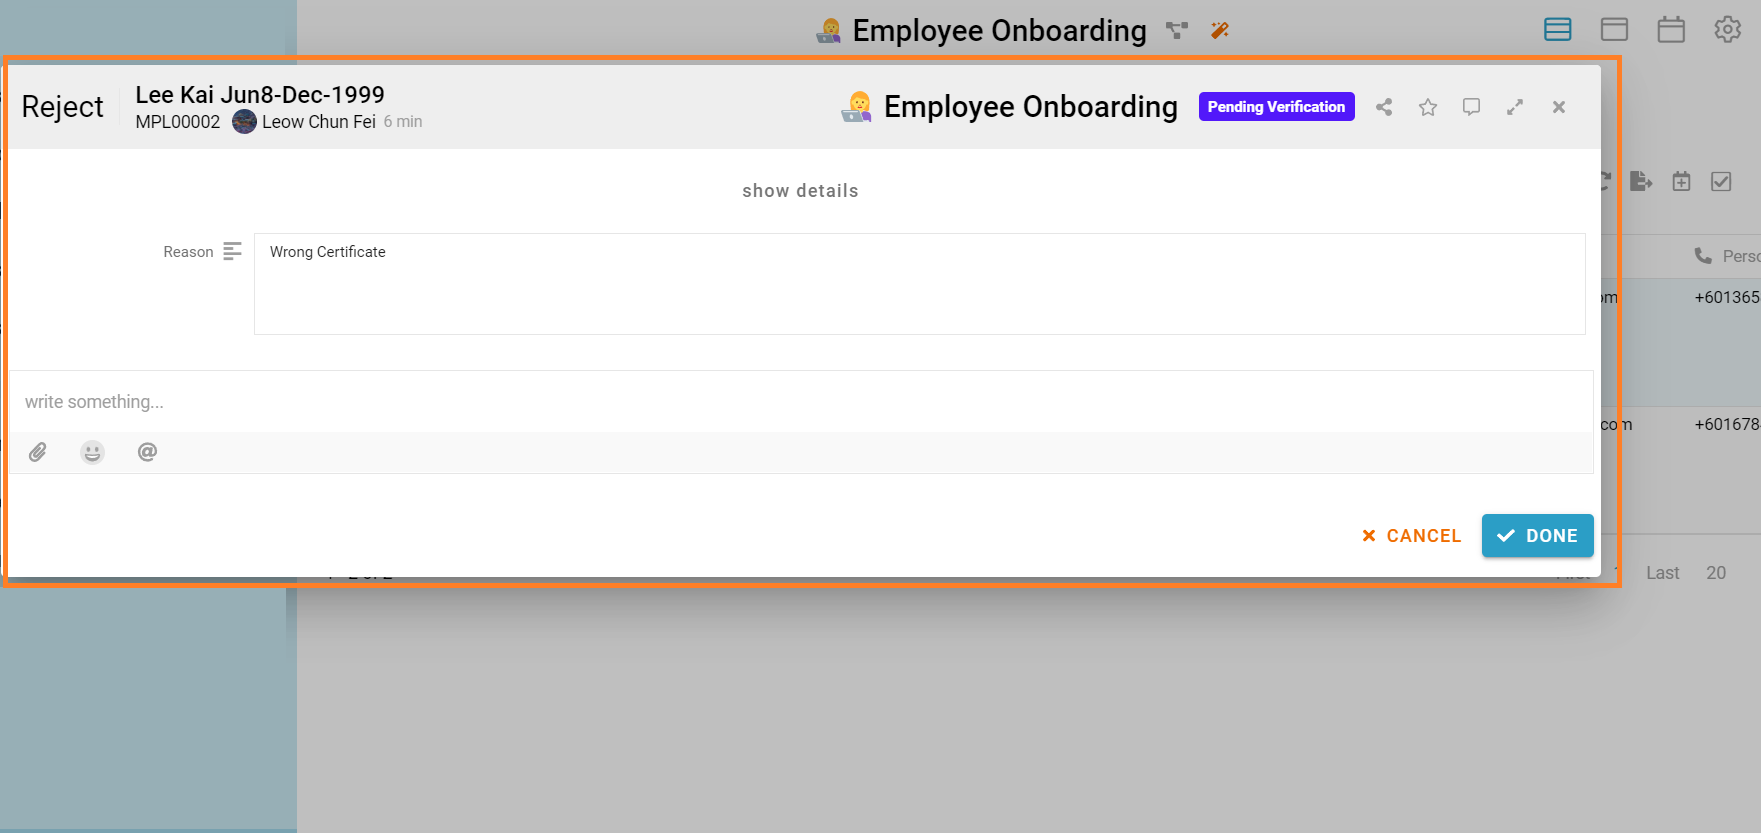
If relevant department click “Reject” button because information not correct or lack, a new window name “Reject” showed
-
The relevant department fill in the “Reason” field and click the “Done” button
-
A message “Submission successful” showed, and the state of the entry change to “Rejected”


For more templates:
Try FETIAS for FREE now.
Sign up at https://fetias.com