Hi, this post will show you step-by-step on how to configure a Hotel Front Desk System module. This module use for performing front desk activities such as check in or check out guest.
Problem
Low efficiency - Difficult to track the information for each of the guest after check in or check out.
Objective
Increase efficiency - Easily to track the information for each of the guest after check in or check out.
Step
- Recognize and configure all the Information name and type required to create new entry in Hotel Front Desk System.
- First Name - Text
- Last Name - Text
- Email - Email
- Contact Number - Phone Number
- Street Address - Multiline Text
- City - Text
- State - Text
- Postal Code - Text
- Check In Date - Date Time
- Check Out Date - Date Time
- Adult - Integer
- Children - Integer
- Room Select - Table
- Room Number - Module (Choose your rooms module)
- Room Category - Text
- Occupancy - Integer
- Price - Money
- Total Price - Money


- Recognize and configure all the Activity able to perform to change State.
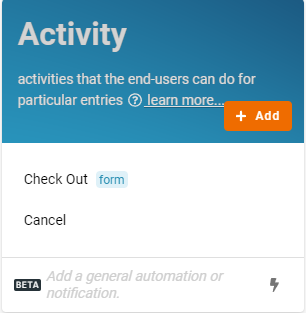
- Check Out
- Check Out Date - Formula: “DateTime.Now”
- Check Out Date - Formula: “DateTime.Now”
- Cancel

- Recognize and configure all the State in the whole Hotel Front Desk System.
- Checked In (initial)
- Checked Out
- Cancelled

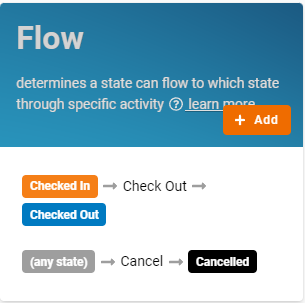
- Configure Flow by determines a state can flow to which state through specific activity and form a reasonable workflow diagram in whole progress.
- Checked In → Check Out → Checked Out
- (any state) → Cancel → Cancelled
- Based on the selected Standard Activity, design the form with following Information below:
- Default
- Check In Date - Formula: “DateTime.Now”
- Room Category - Formula: “column(‘Room Number’).field(‘Category’)” (Get category from your rooms module)
- Occupancy - Formula: “column(‘Room Number’).field(‘Occupancy’)” (Get occupancy from your rooms module)
- Price - Formula: “column(‘Room Number’).field(‘Category’).field(‘Price’)” (Get price from your rooms module. If your price is set inside rooms module, then formula will be “column(‘Room Number’).field(‘Price’)”)
- Total Price - Formula: “summ(column(‘Price’), field(‘Room Select’))”

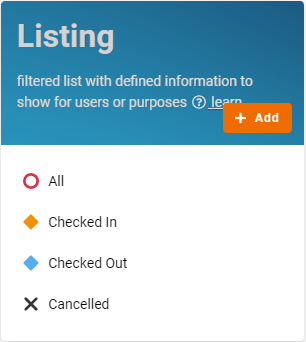
- Create all the Lists with filter condition to allow specific information to be viewed by users.
- All
- Checked In - Condition: State is Checked In
- Checked Out - Condition: State is Checked Out
- Cancelled - Condition: State is Cancelled
- Finally, click the “Save” button at top right screen after you done the configuration and enjoy the system.
Try FETIAS for FREE to build your own workspace without code.
Register a workspace: https://fetias.com
Related topic
Tutorial - Hotel Front Desk System