Hi ![]()
Today, I would like to share with you how to configure a order deliveries module in INISTATE.
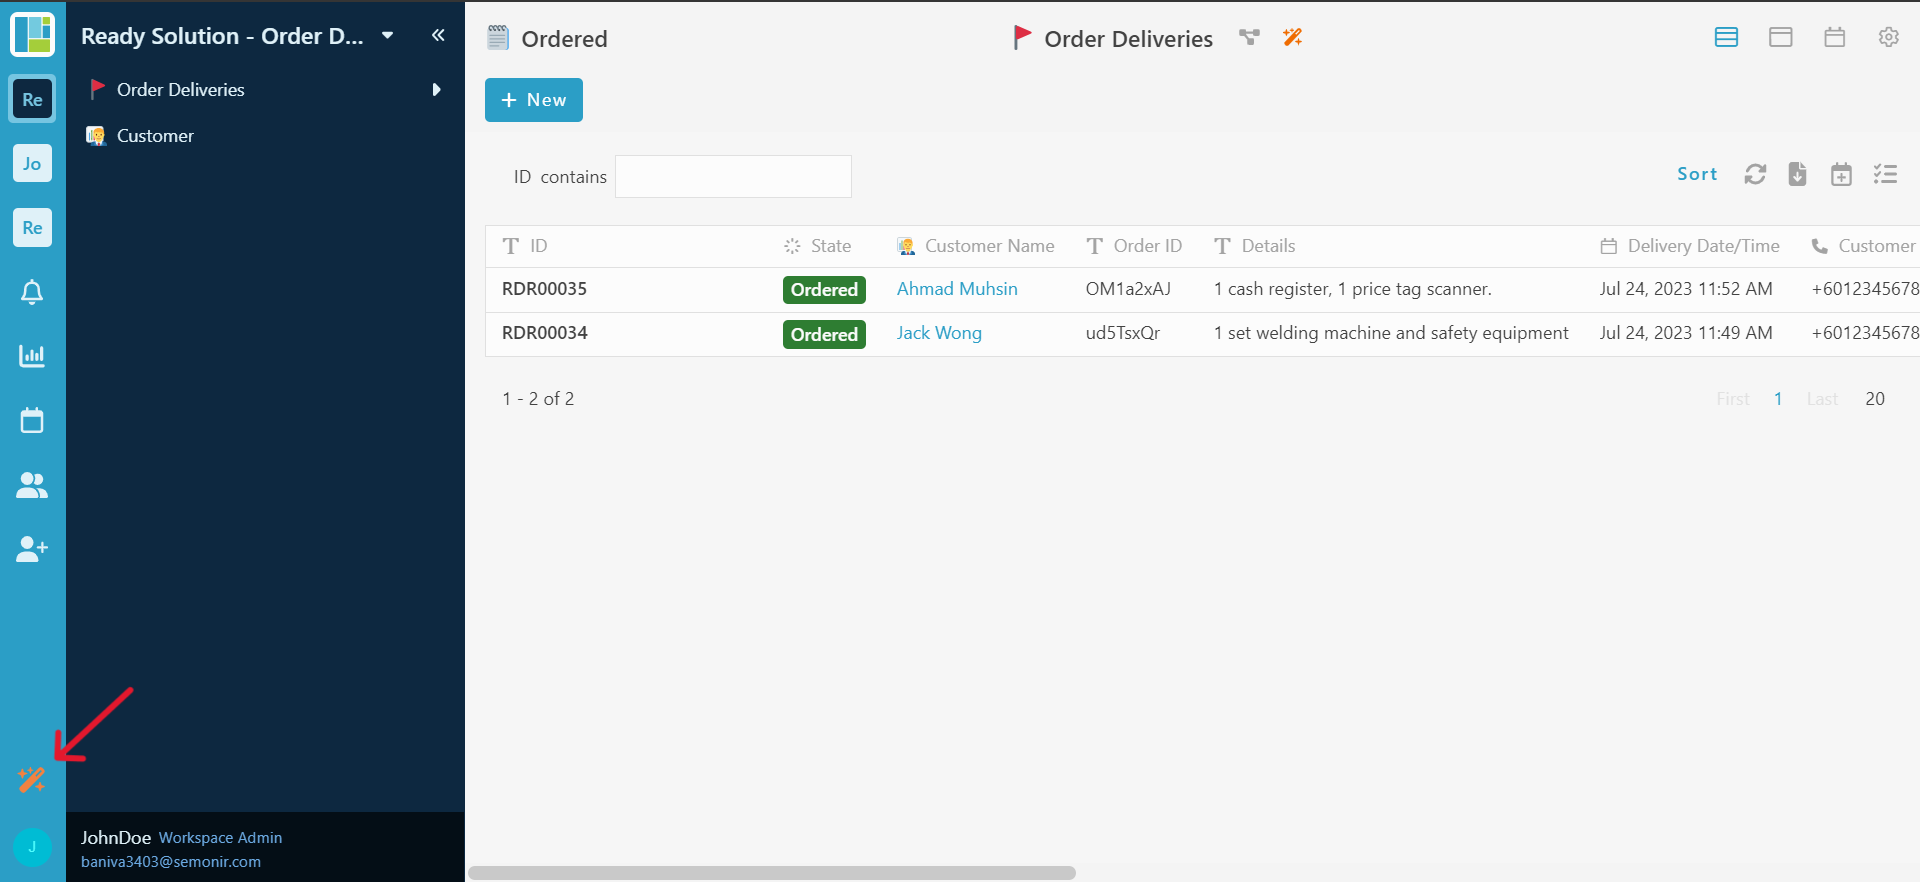
The order deliveries module allows you to optimize delivery logistics, track orders status, and improve customer satisfaction with efficient delivery management.
Problem
Inefficient Order Tracking - Manual methods, such as spreadsheets and email communication, to update and monitor order progress. This inefficient process leads to delays in order fulfillment, increases the risk of errors, and hampers ability to provide accurate order updates to customers.
Objective
Efficient - allowing you to optimize delivery logistics, track orders status, and improve customer satisfaction efficiently.
Step and configuration
-
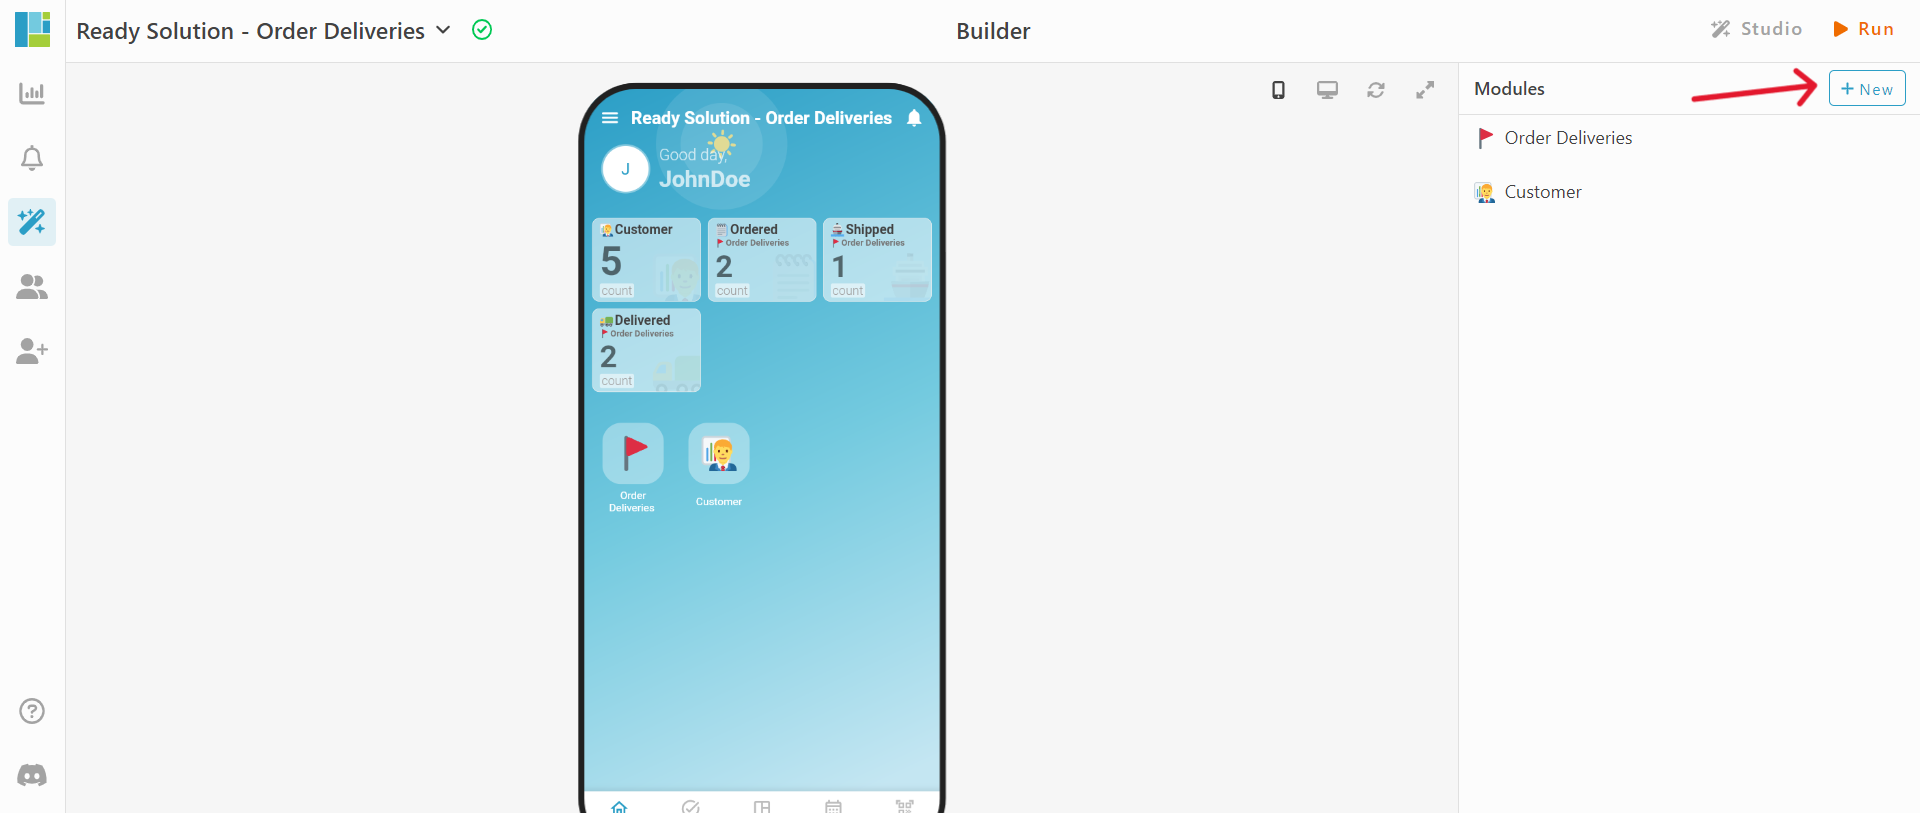
Access Your workspace builder
-
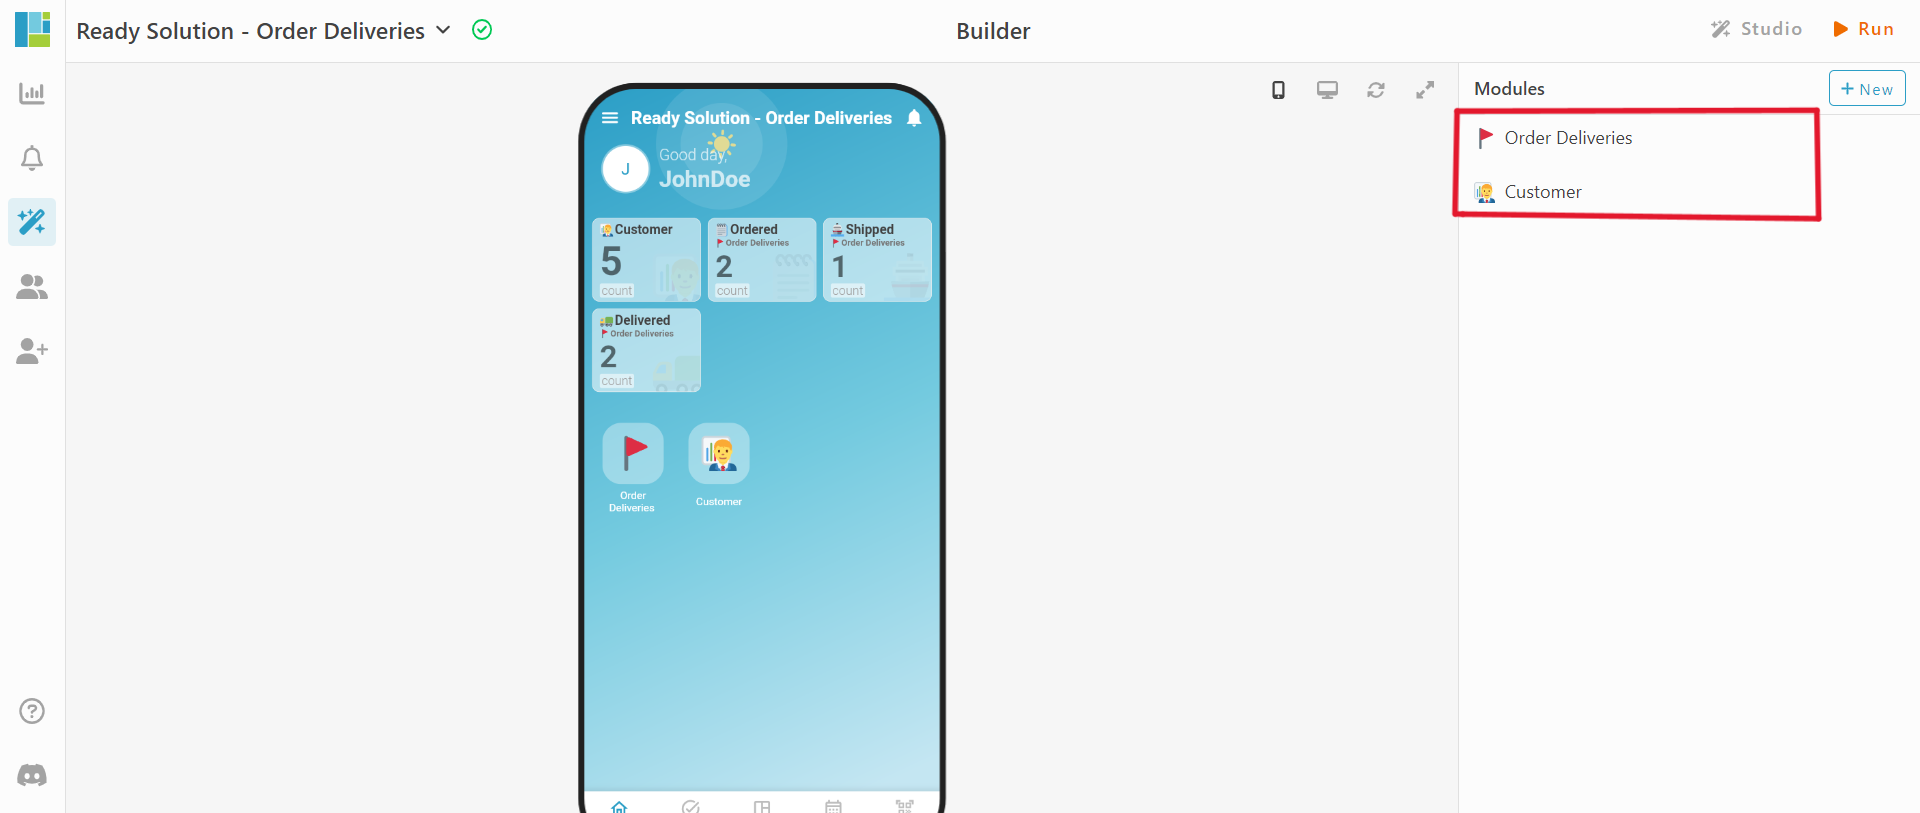
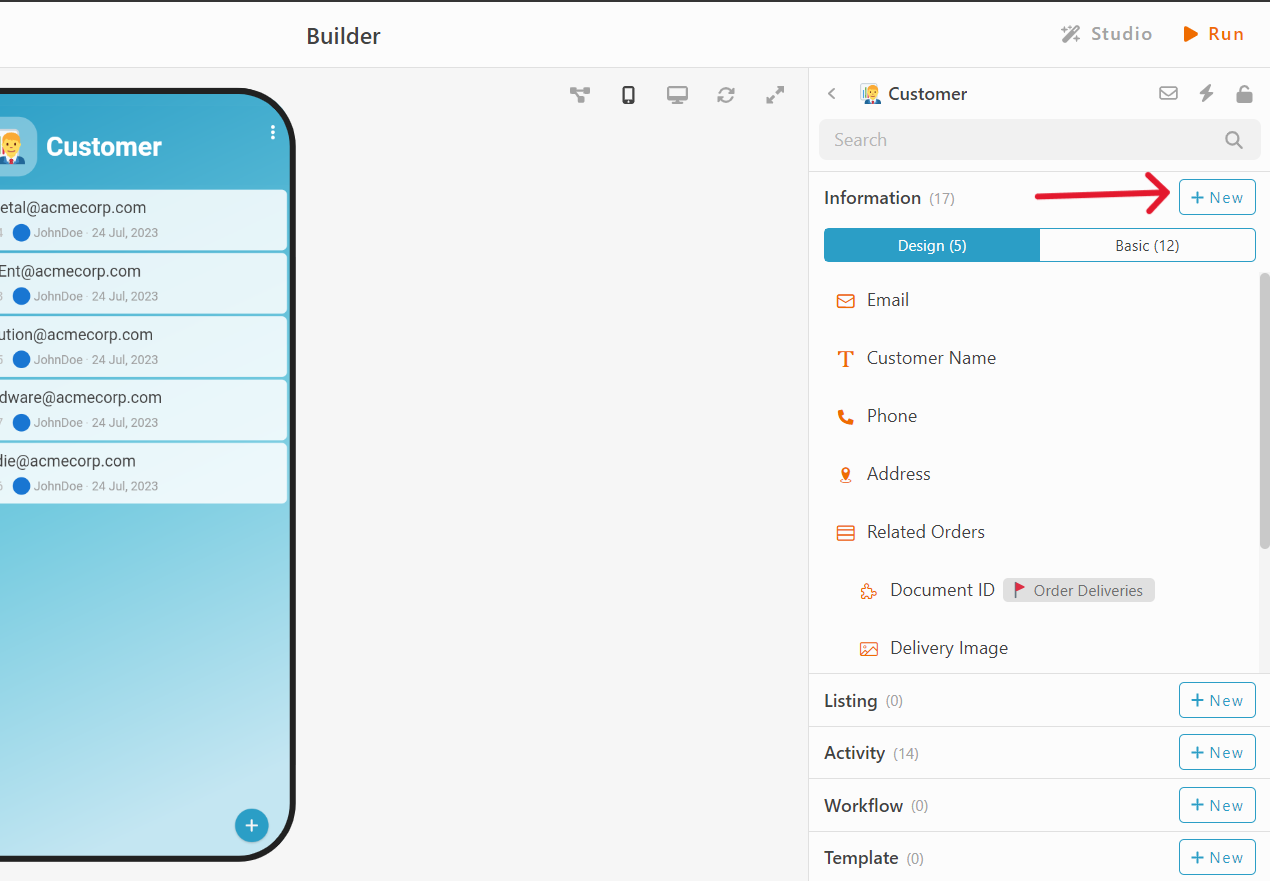
In builder, create 2 modules by click “+ New” locate at the top right.
-
Set a name and emoji for your modules. eg : Order Deliveries and Customers.
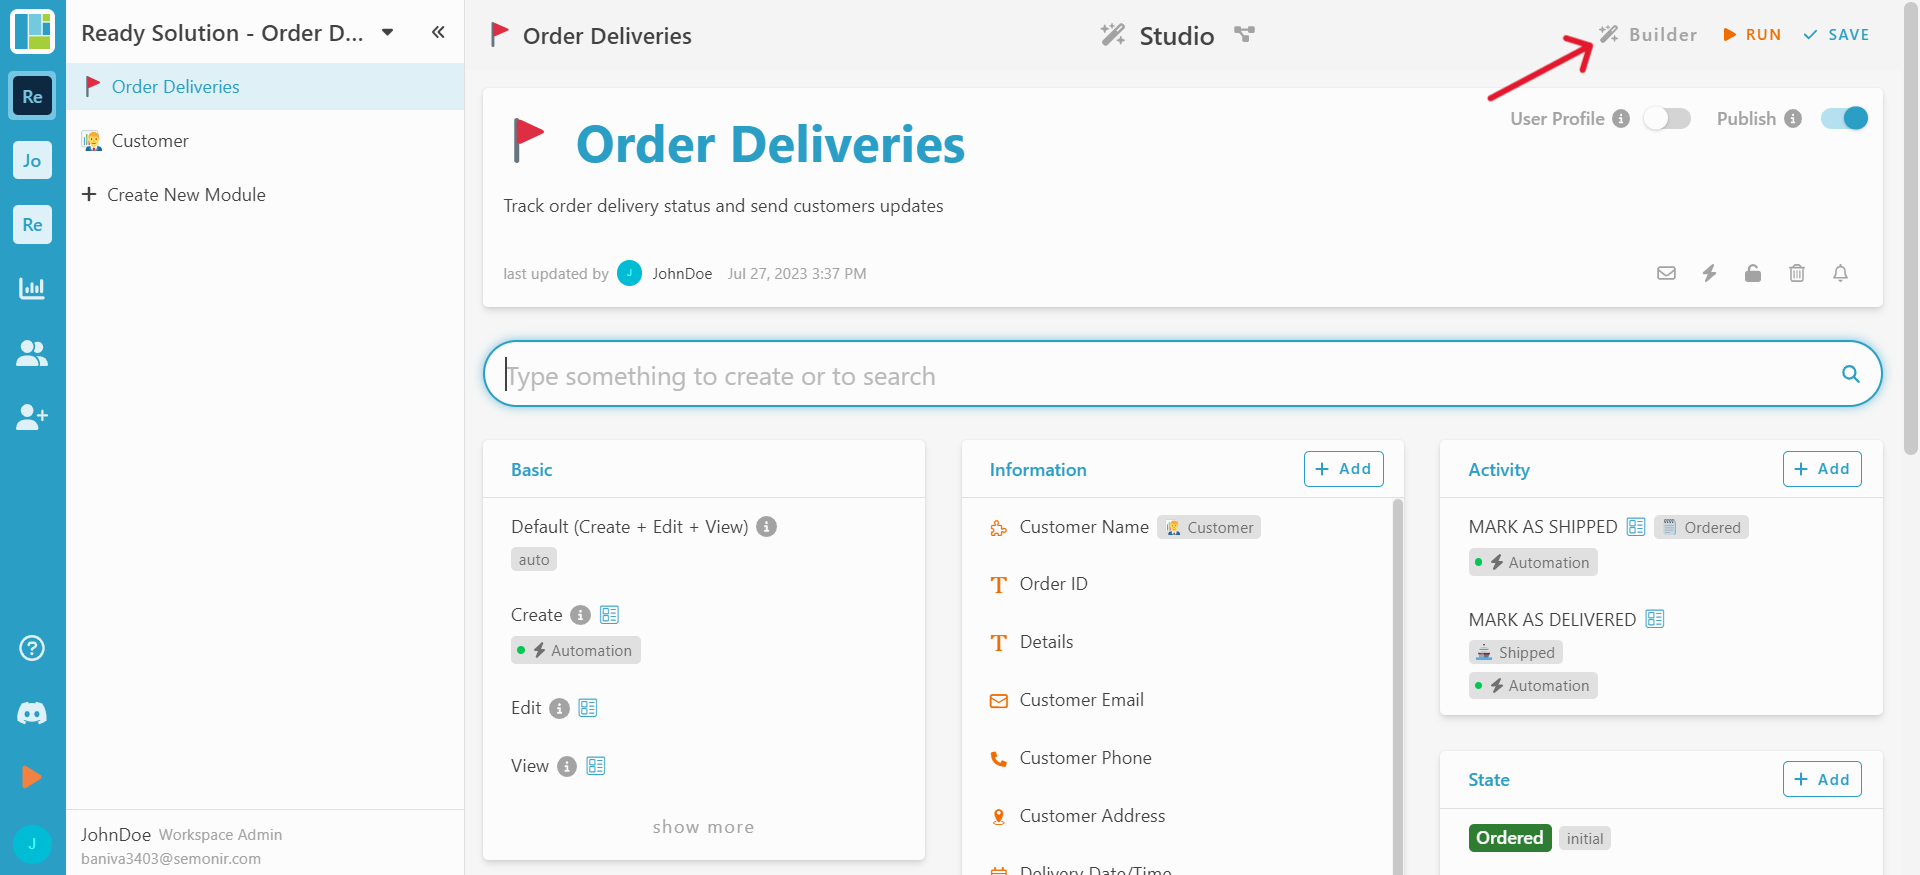
Add Information
Module : Customers
-
Select module Customer
-
Go to Information section
-
Click “+ New”
-
Add information as below :
-
Email - Email
-
Customer Name - Text
-
Phone - Phone Number
-
Address - Location
-
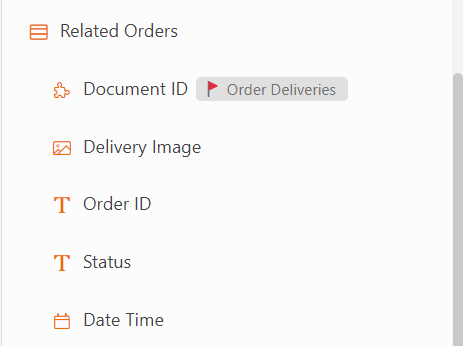
Related Orders - Table
*Document ID - Module (Inspections)
*Delivery Image - Image
*OrderID - Text
*Status - Text
*DateTime - Date Time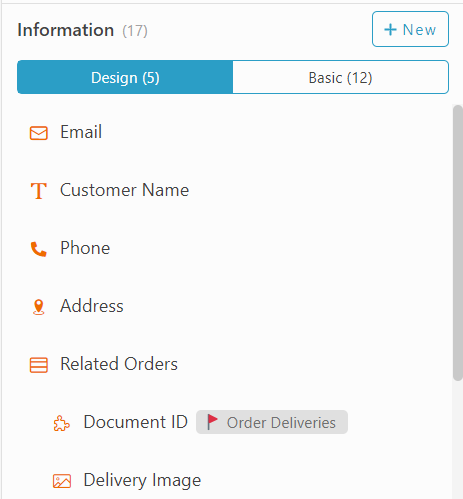
Module : Order Deliveries
-
Select Module Order Deliveries
-
Go to information Section
-
Click “+ New”
-
Add information as below :
-
Customer Name - Module (Customer), Display information ( Customer Name)
-
Details - Text
-
Order ID - Text
-
Customer Email - Email
-
Customer Phone - Phone Number
-
Customer Address - Location
-
Delivery Date/Time - Date Time
-
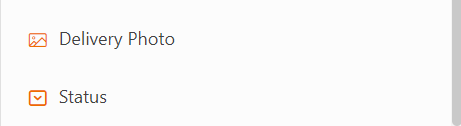
Delivery Photo - Image
-
Status - Select
*Ordered
*Shipped
*Delivered
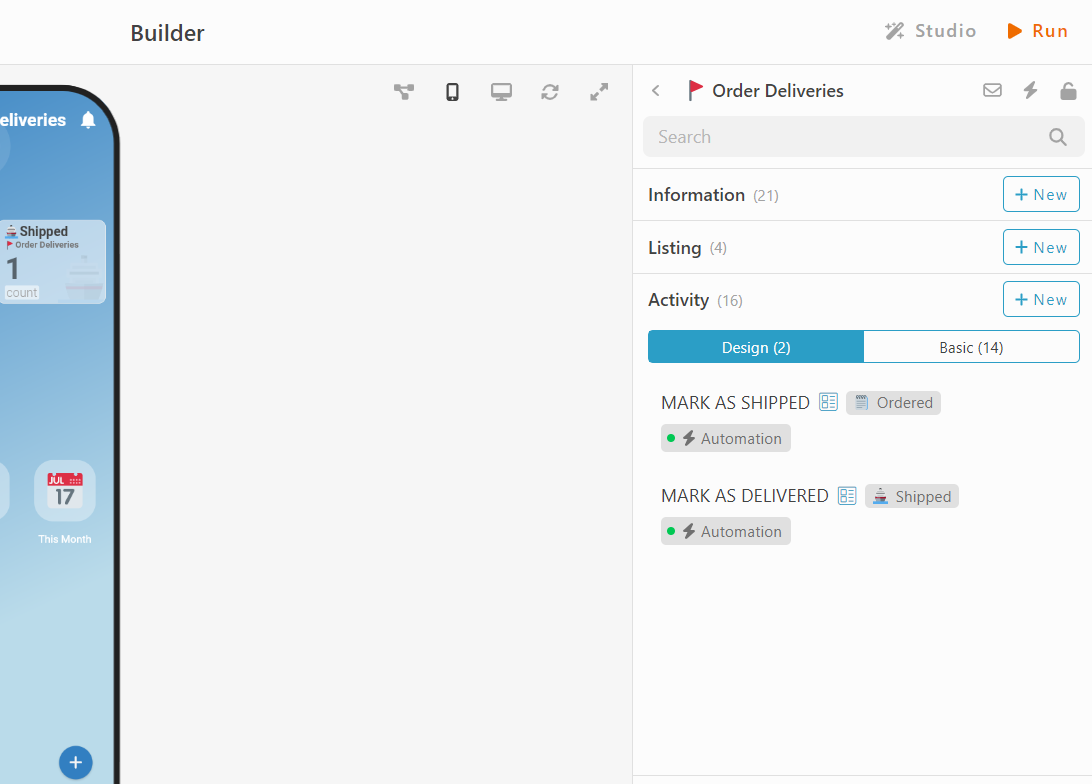
Activity
-
Select Module Order Deliveries
-
Under Section Activity
-
Click “+ New”
-
Set Activity name :
*MARK AS SHIPPED
*MARK AS DELIVERED
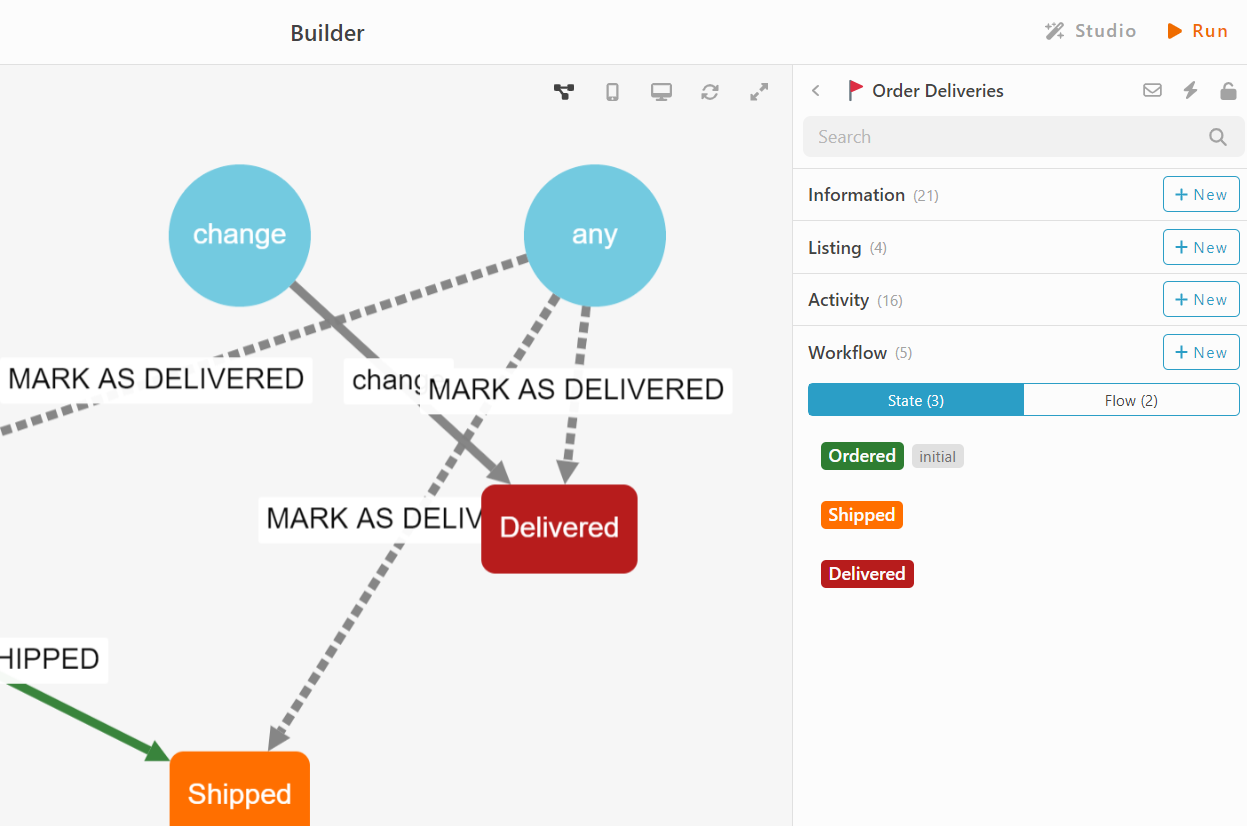
State
-
Select module Order Deliveries.
-
Under section workflow
-
Click “+ New” and “+ State”
-
Set State name, color :
*Ordered
*Shipped
*Delivered
Flow
-
Select Module Order Deliveries
-
Under section workflow
-
Click “+ New” and “+ Flow”
-
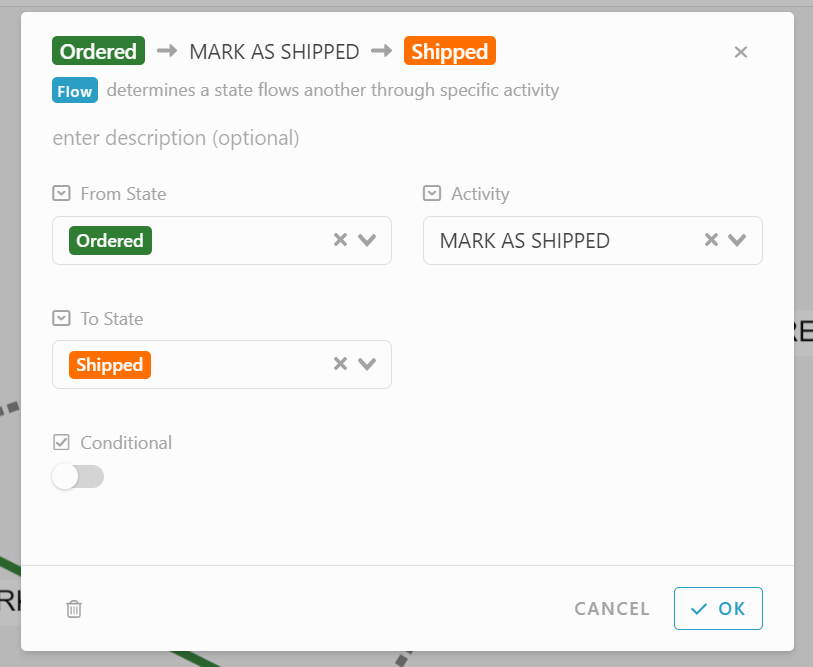
Create 2 Flow :
-
From state : Ordered → Activity : MARK AS SHIPPED → To state : Shipped
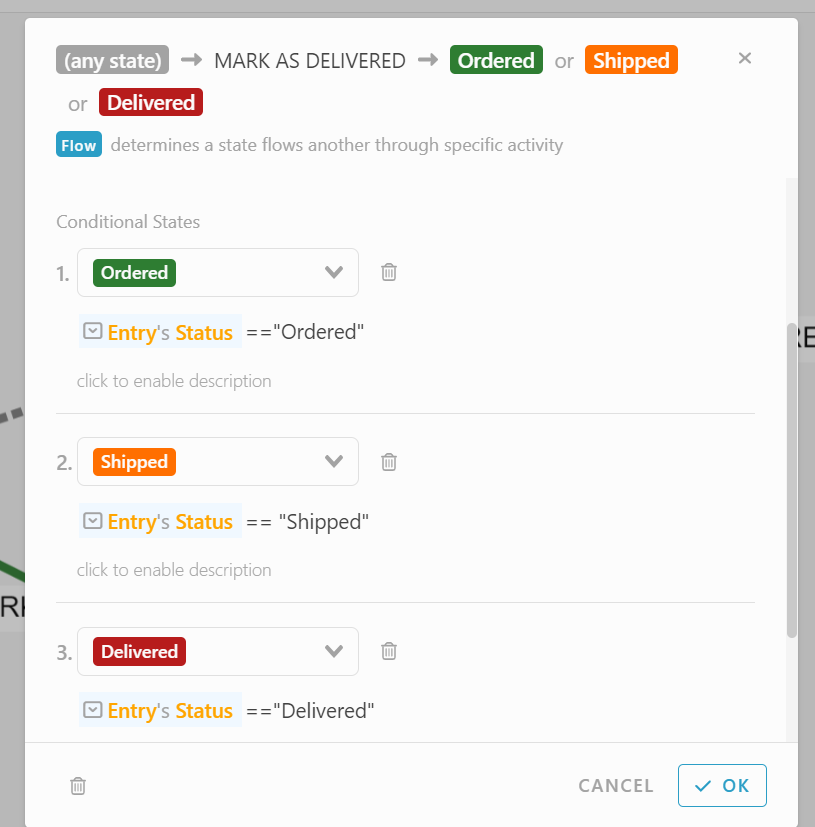
-
From State : Any state → Activity : MARK AS DELIVERED → Enable “Conditional” → 1. State : Ordered Formula : #Entry#Status == “Ordered”, 2. State : Shipped Formula : #Entry#Status == “Shipped”, 3. State : Delivered Formula : #Entry#Status == “Delivered”.
Listing
-
Select Module Order Deliveries
-
Under section Listing
-
Click “+ New”
-
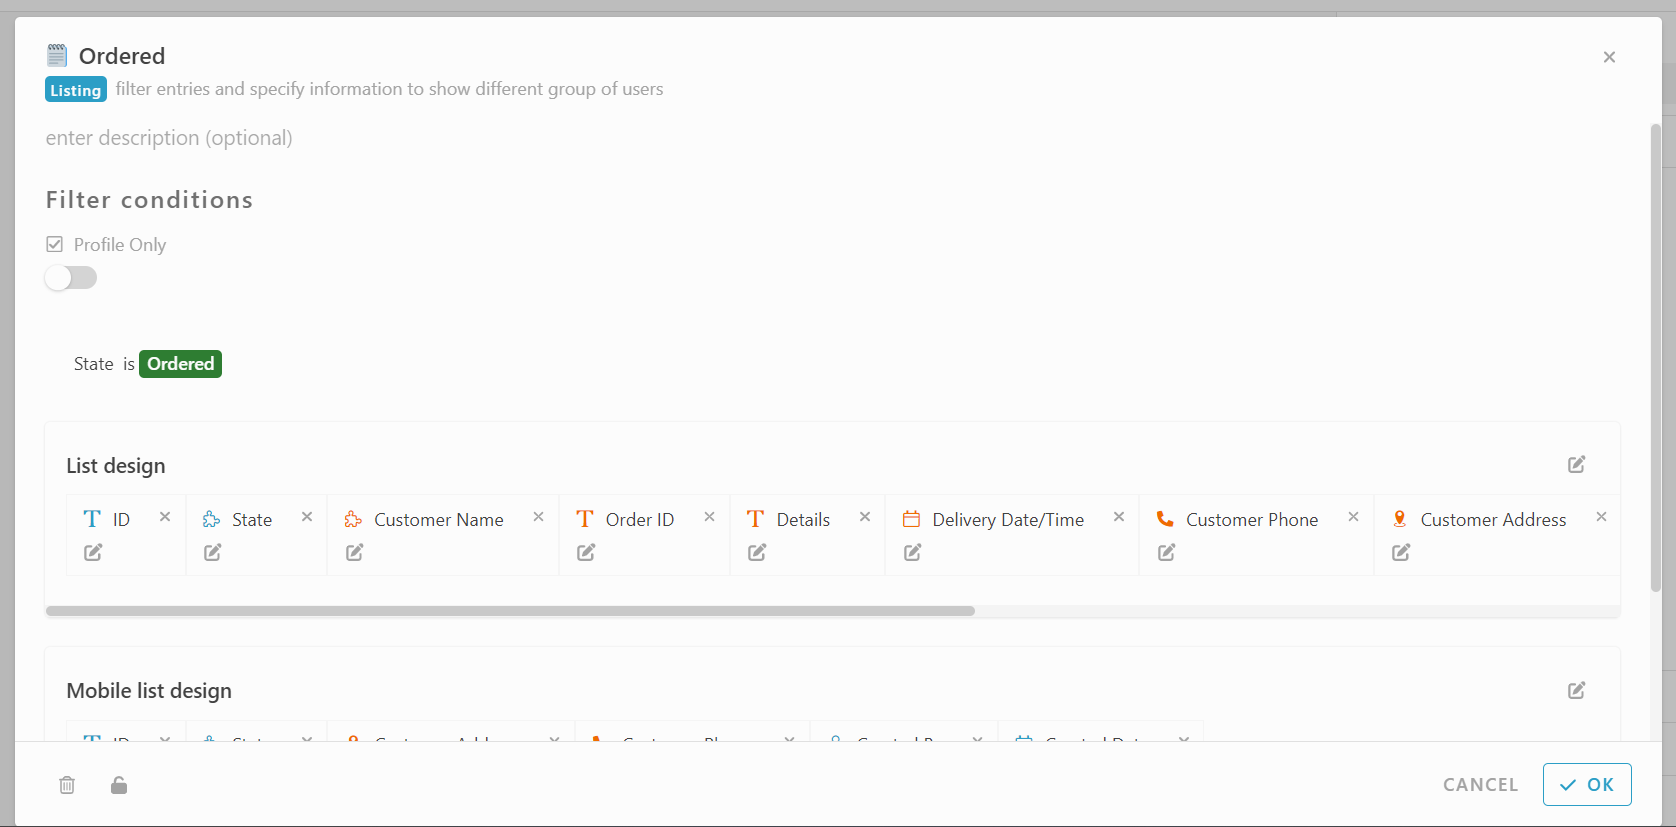
Set a name ,emoji, list design and filter condition. :
-
Name : Ordered , filter condition : State is Ordered
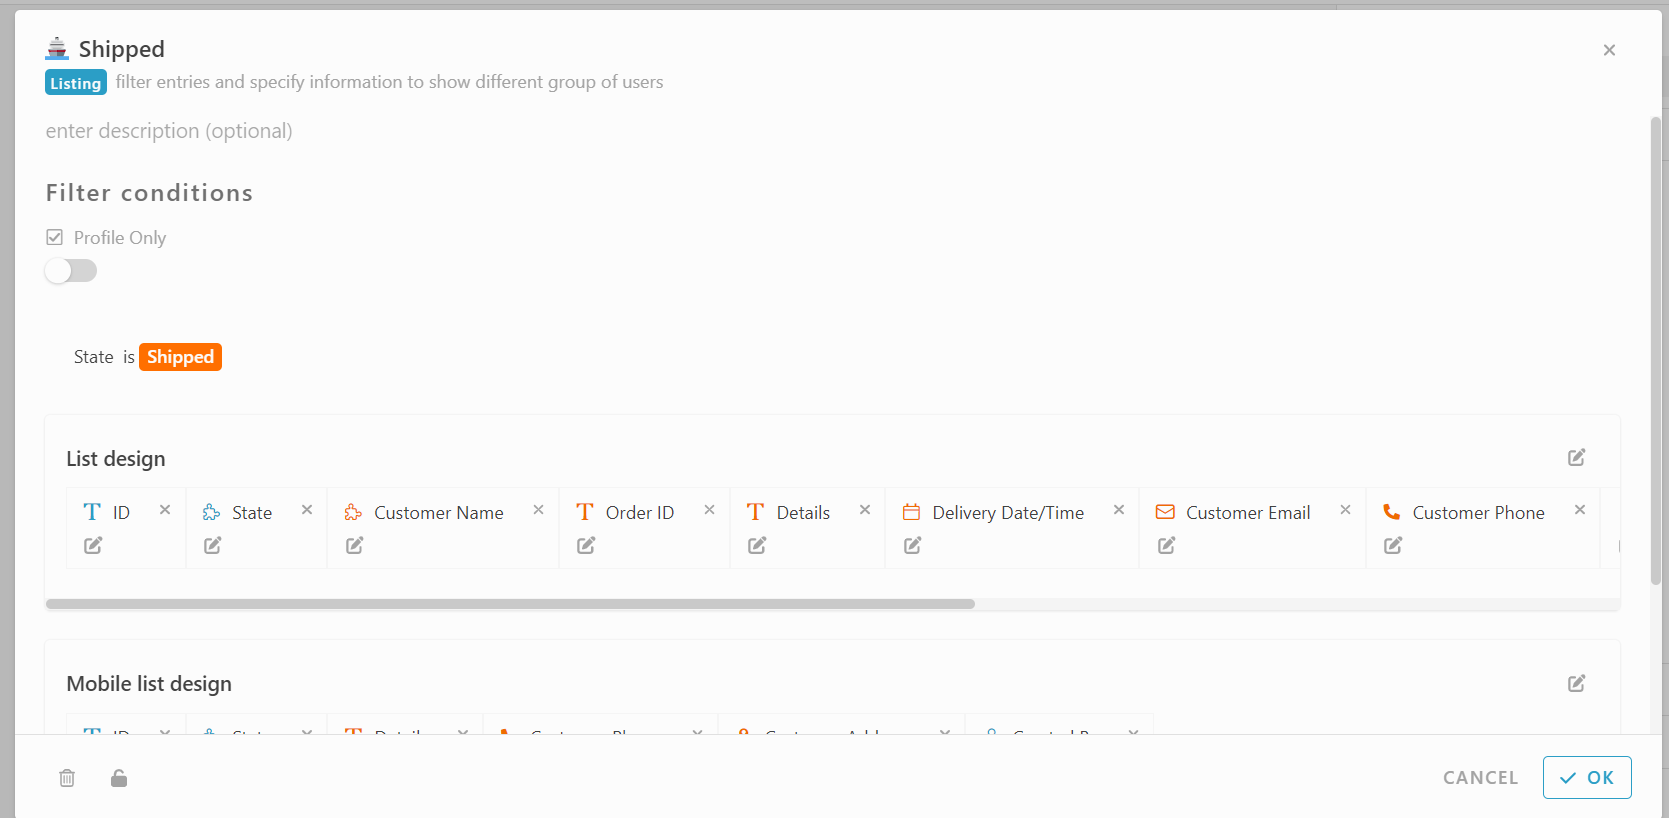
-
Name : Shipped, filter condition : State is Shipped
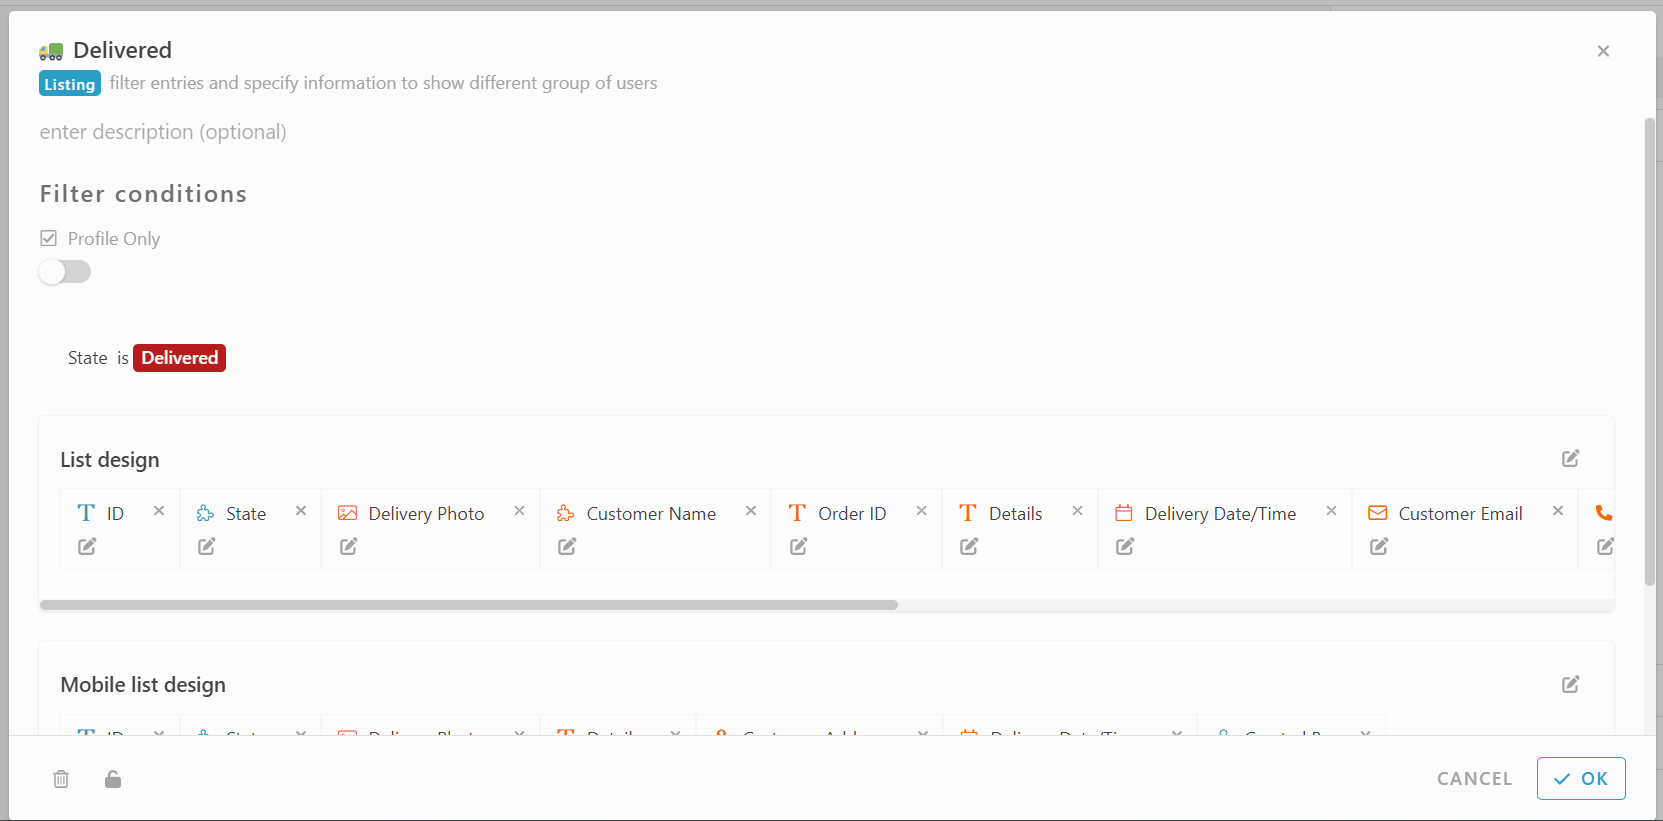
-
Name : Delivered, filter condition : State is Delivered
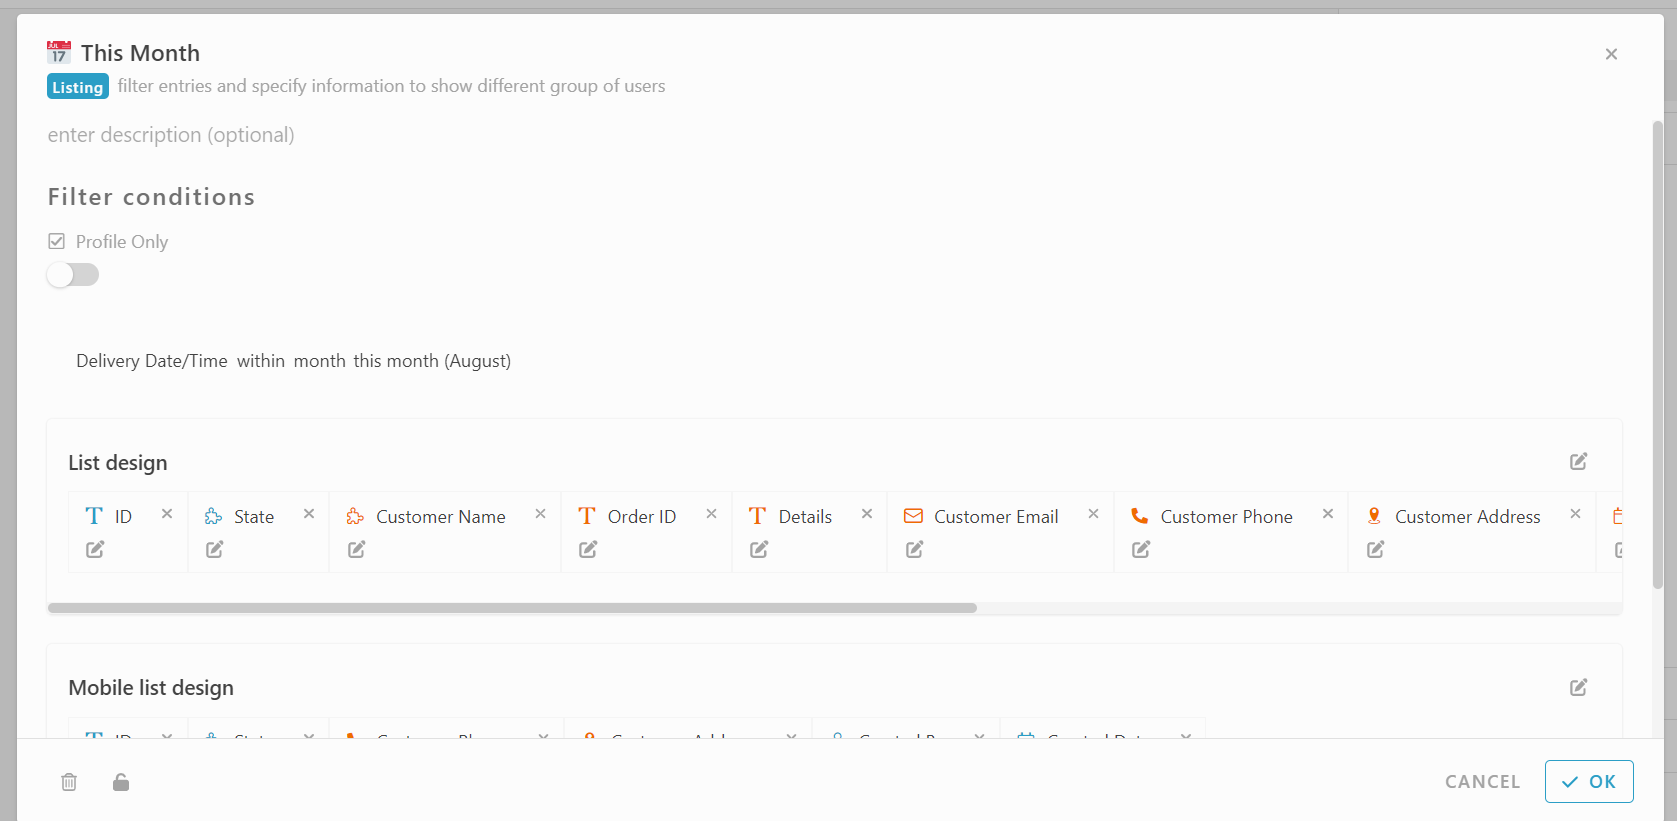
-
Name : This Month, filter condition : Delivery Date/Time within month this month
Form Design and Formula
-
Select Module Order Deliveries
-
Under activity section
-
Click Basic
-
Choose Create
-
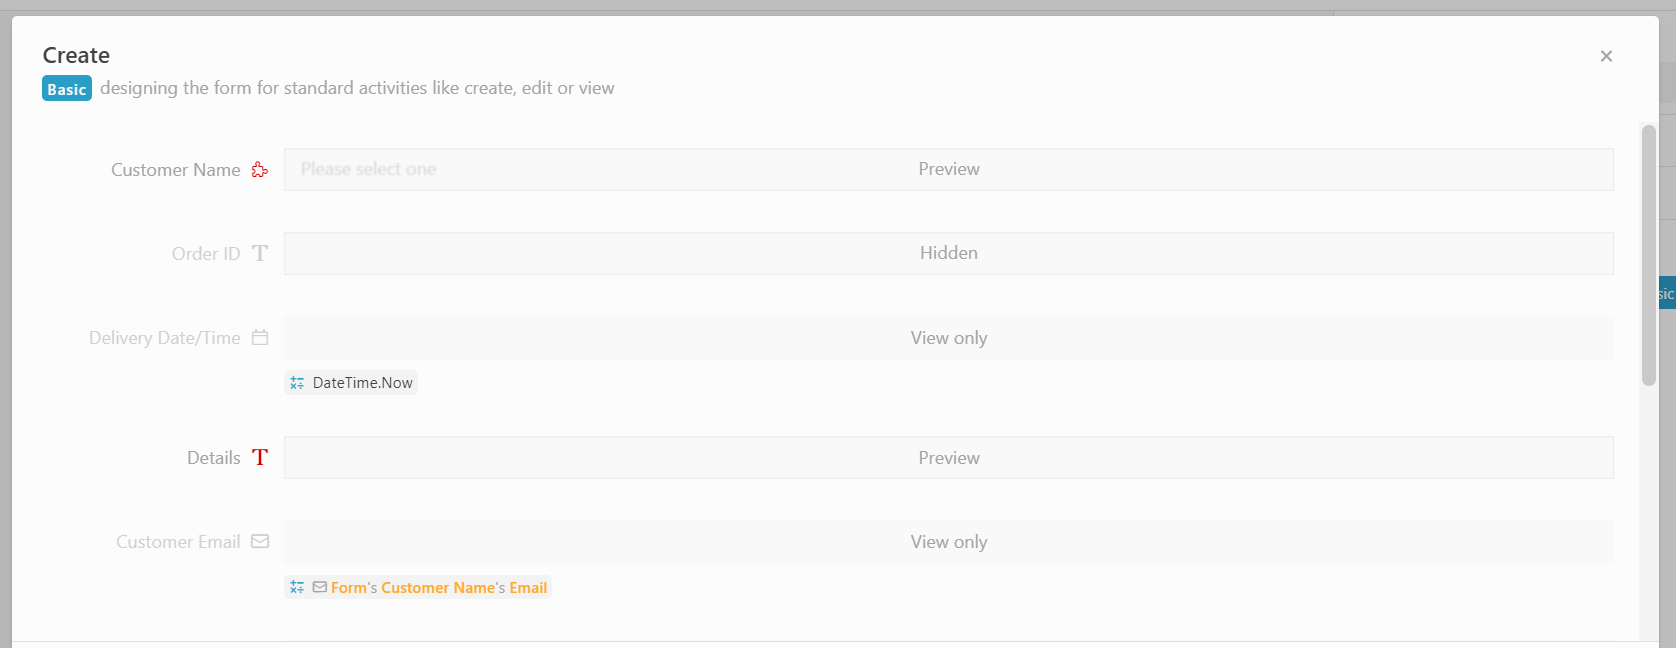
Drag and drop information added as below :
*Customer Name - Module
*Details - Text
*Order ID - Text, enable field visibility
*Delivery Date/Time - Date Time, enable field visibility, formula : DateTime.Now
*Customer Email - Email, enable field visibility, formula : #Form#CustomerName#Email
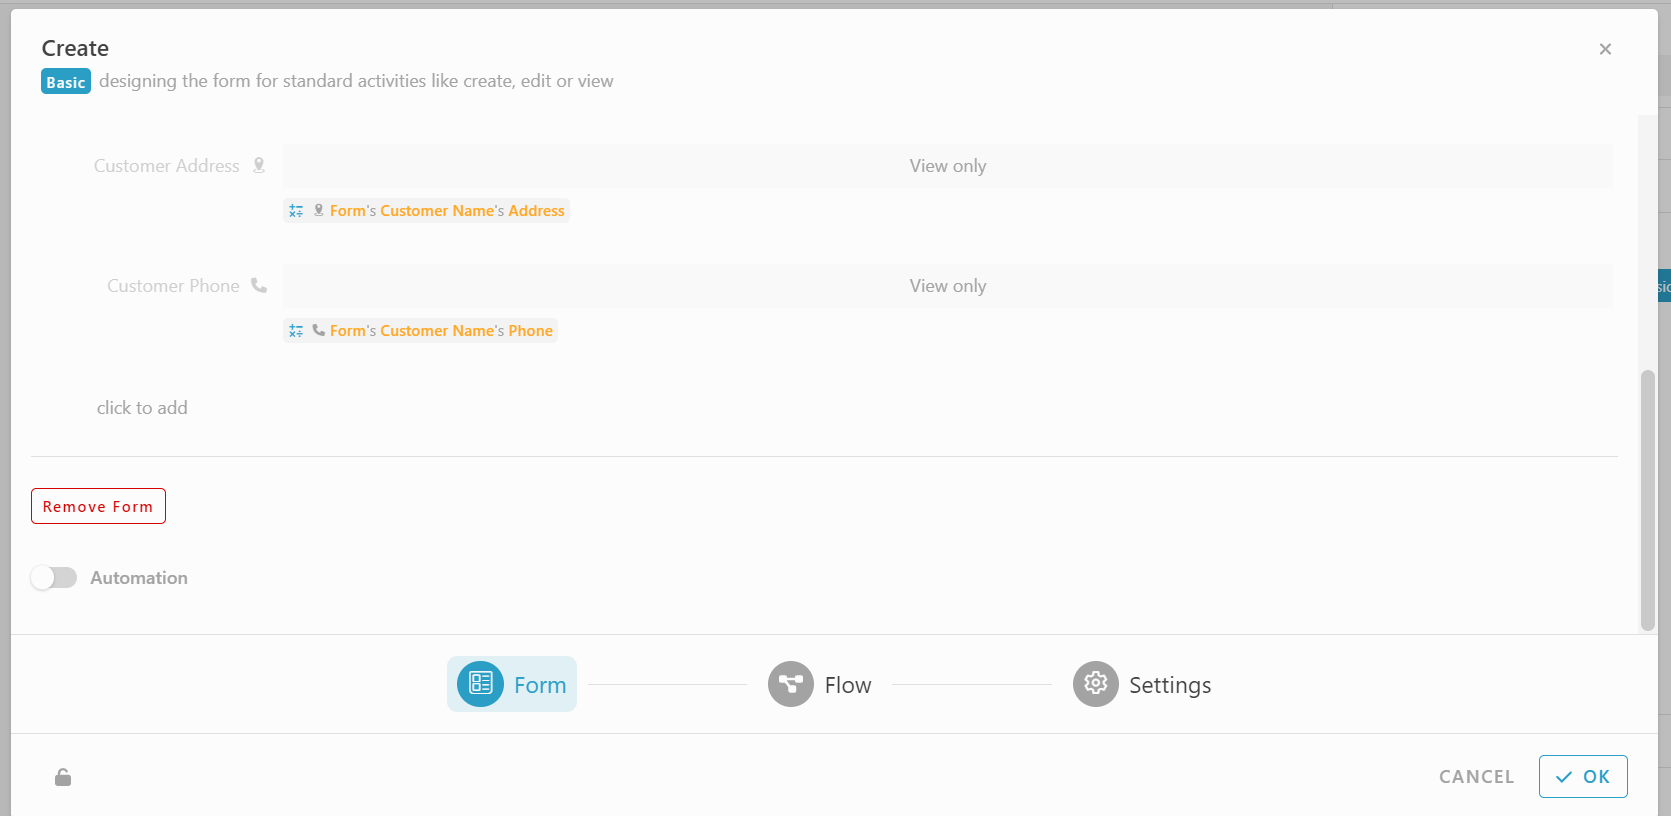
*Customer Address - “Location”, enable field visibility, formula : #Form#CustomerName#Address
*Customer Phone - *Phone Number, enable field visibility, formula - #Form#CustomerName#Phone
-
Click “Design” under Activity Section.
-
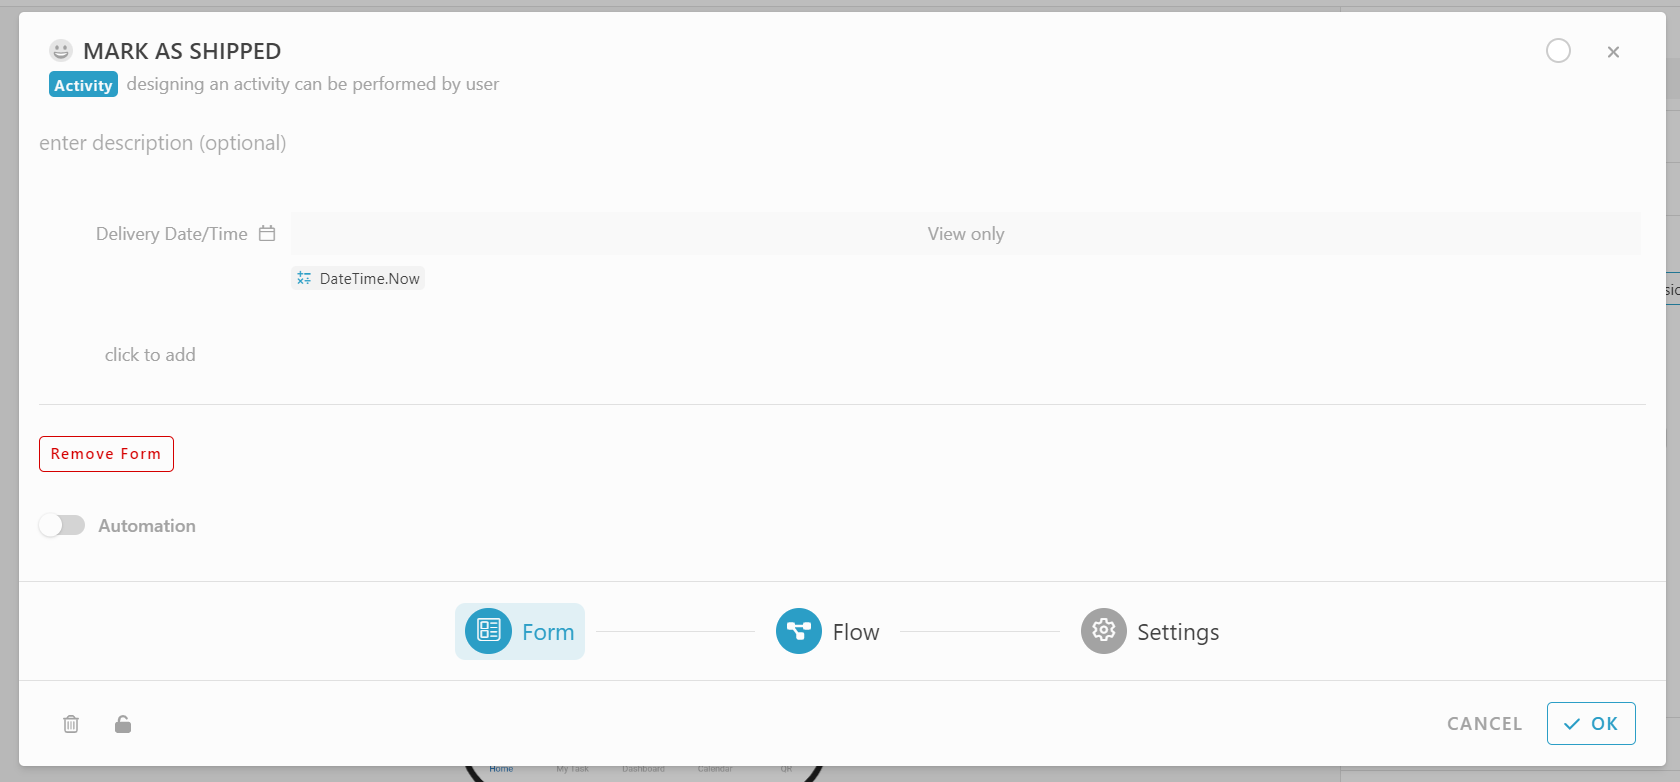
Click activity, MARK AS SHIPPED
-
Click orange “+” icon to add form
-
Drag and drop information as below :
*Delivery Date/Time - Date Time, set formula : DateTime.Now -
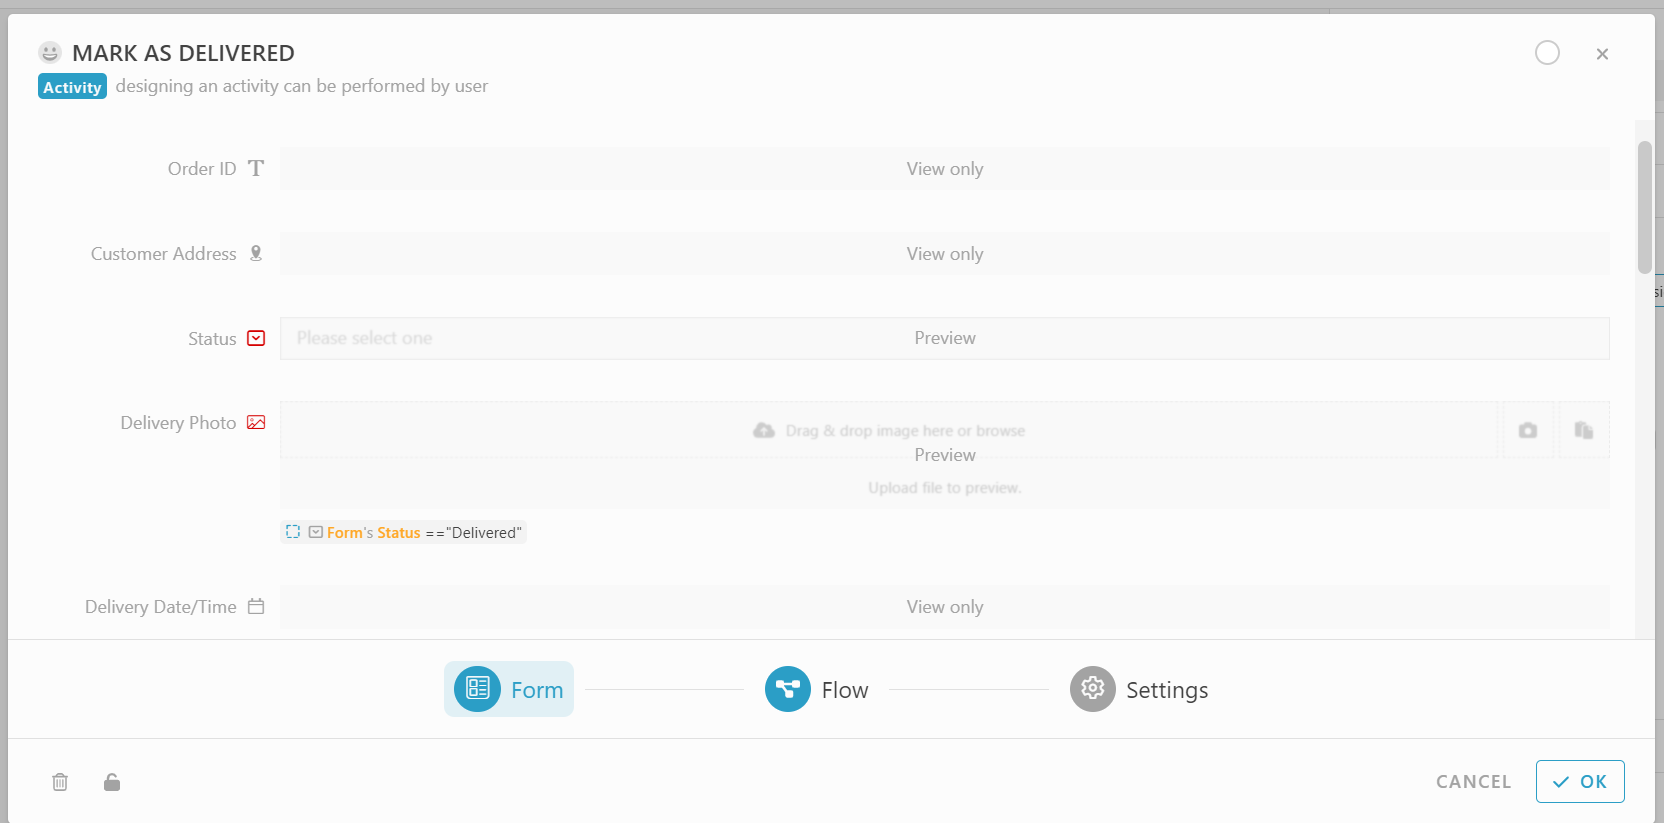
Click activity, MARK AS DELIVERED.
-
Click orange “+” icon to add form.
-
Drag and drop information as below. :
*Order ID - Text
*Customer address - Location
*Status - Select
*Delivery Photo - Image, Set formula on visibility column : #Form#Status == “Delivered”
*Delivery Date/Time - Date Time, set formula : DateTime.Now
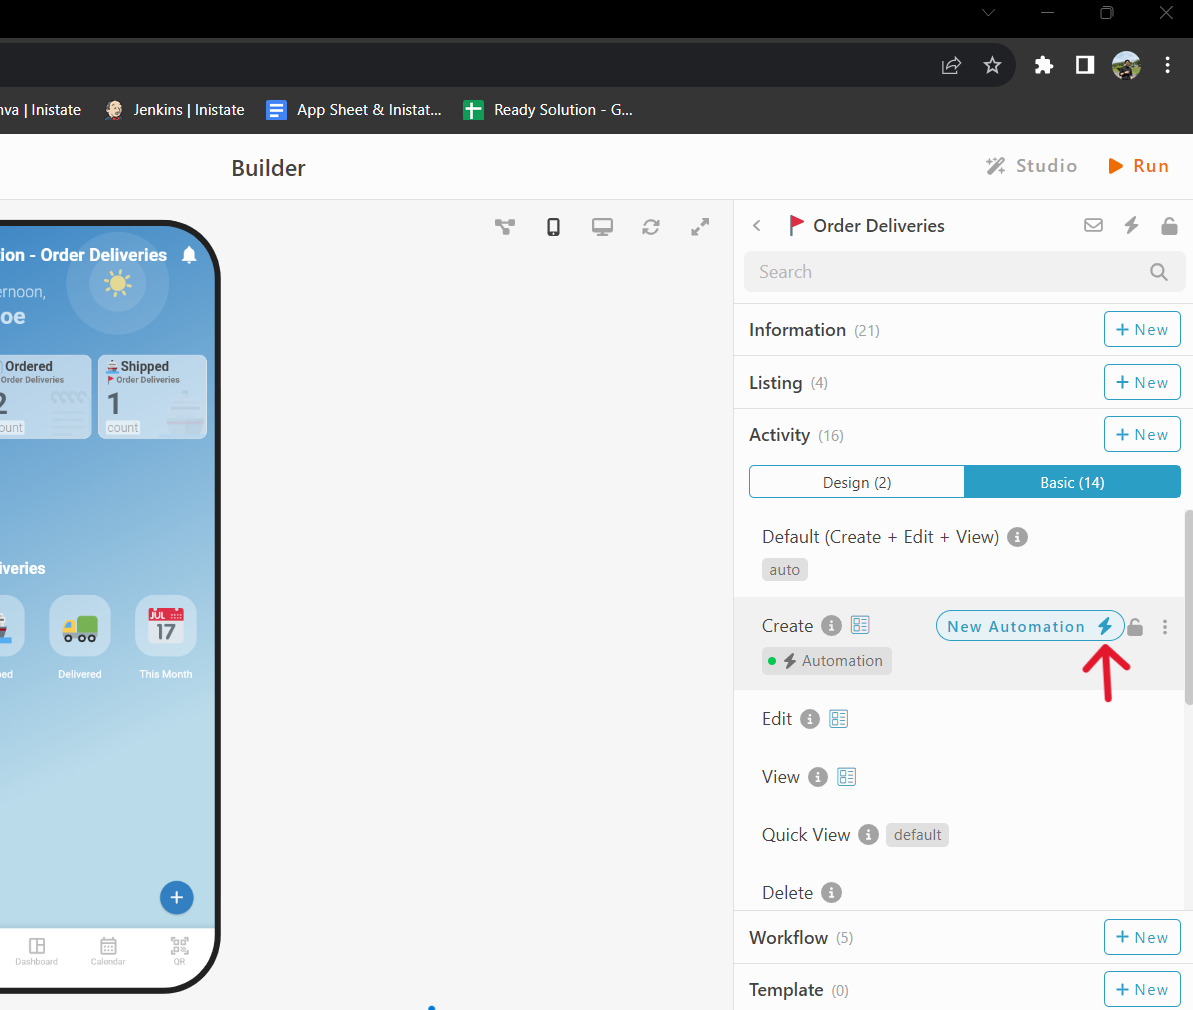
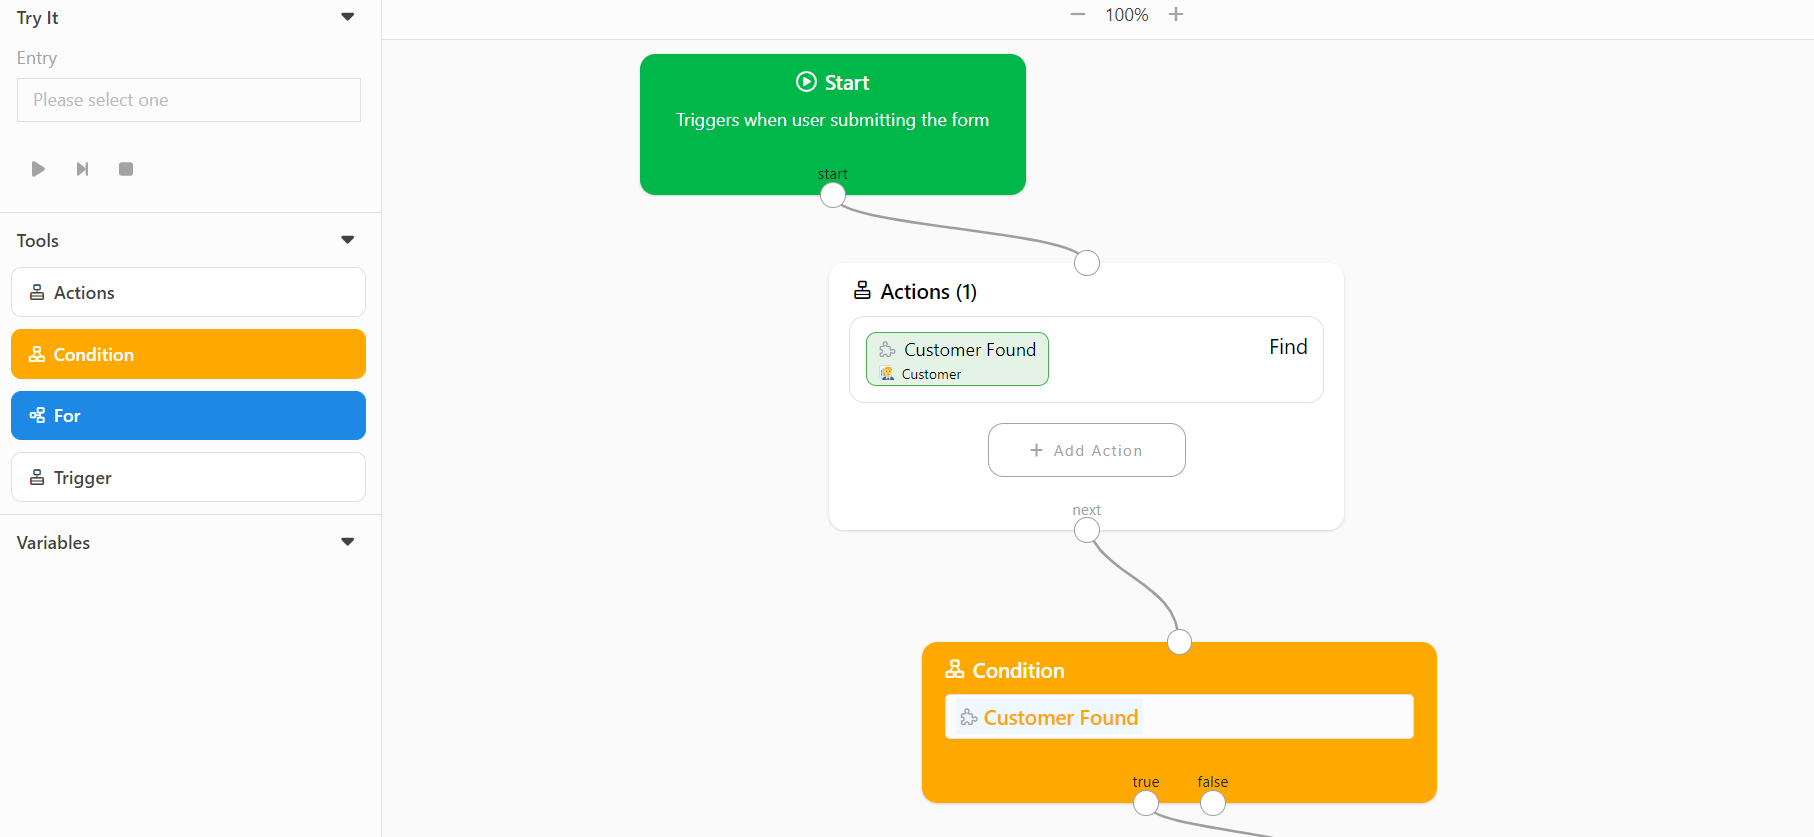
Automation (Make sure to connect every block)
Condition - To pass information from Module Order Deliveries to Table Related Orders In Module Customer based on customer name
-
Select Module Order Deliveries
-
Go to Activity Section.
-
Click Basic
-
Add new automation by click the “
 new automation”.
 -
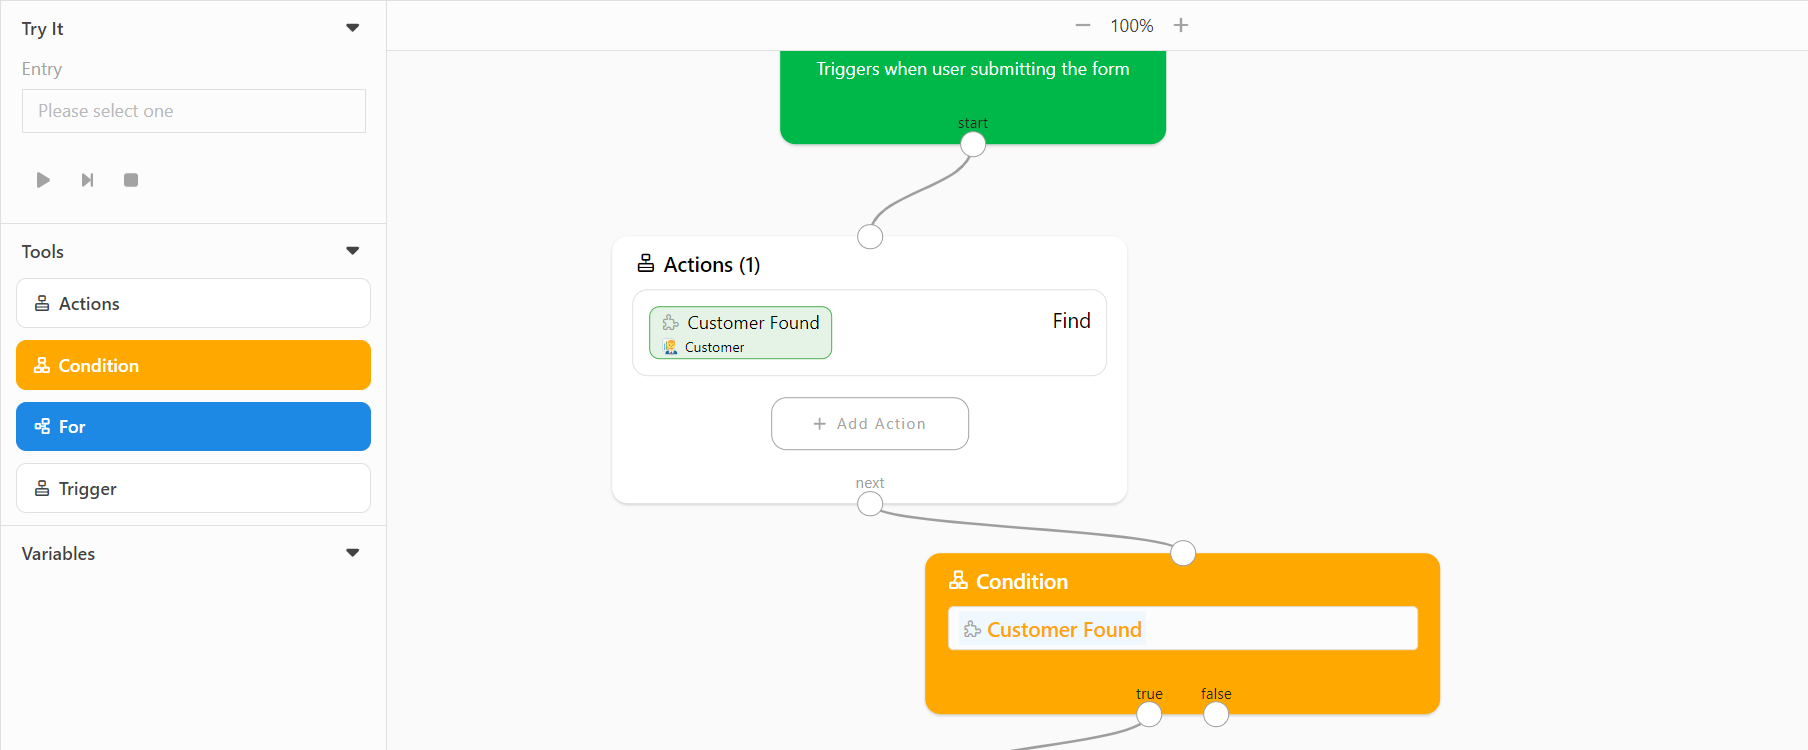
Click “Do After”
-
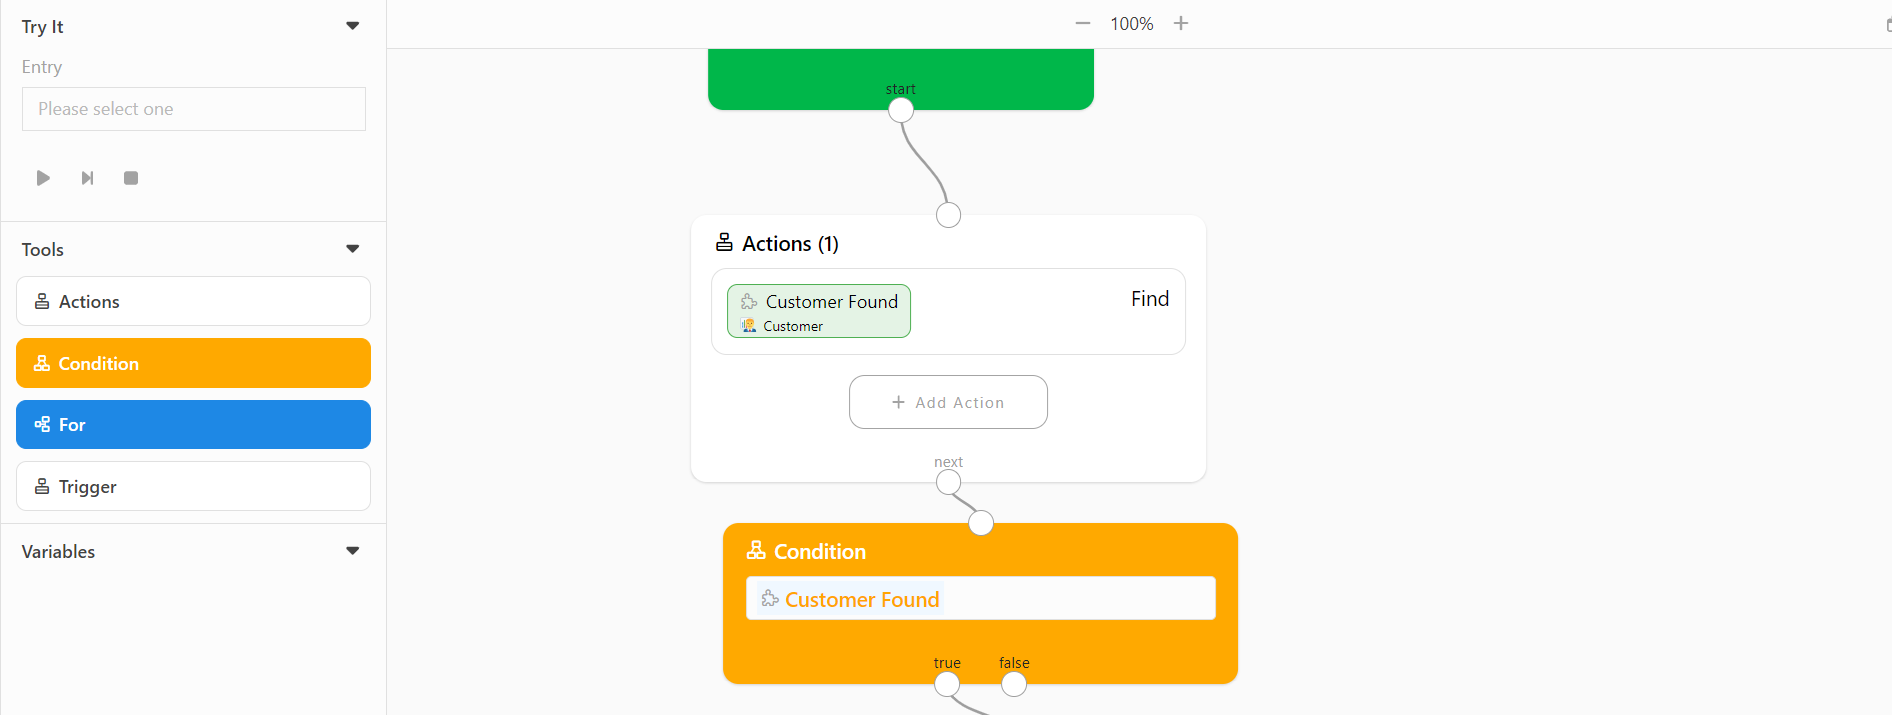
Drag Action block
-
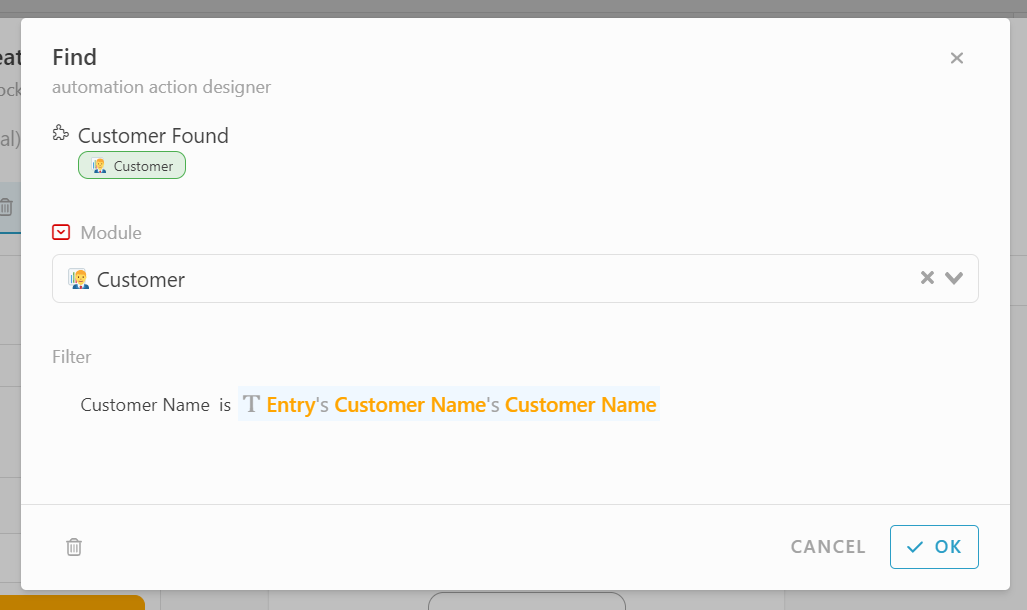
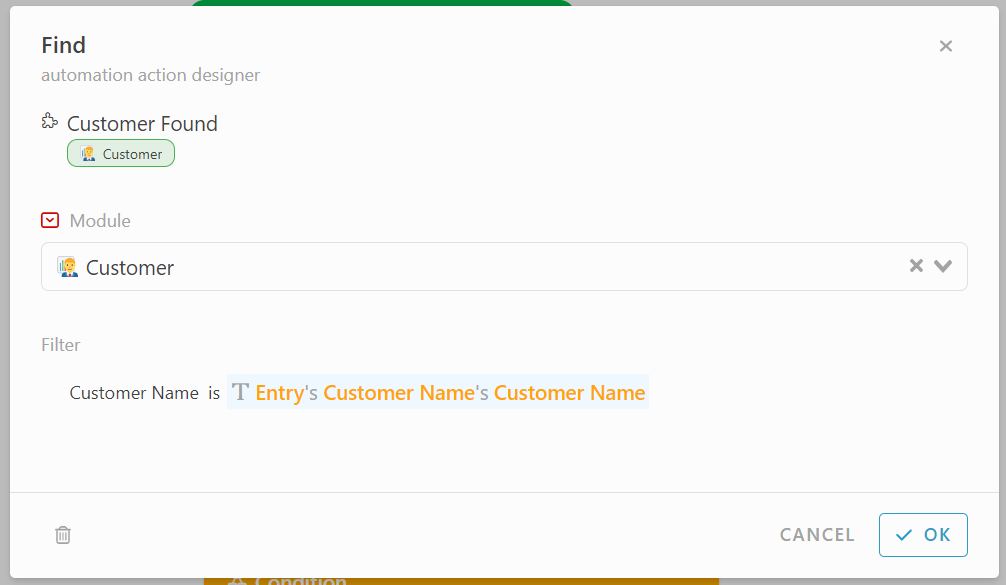
Add action, Find
*Module : Customer
*Filter : Customer Name is #Entry#CustomerName#CustomerName -
Drag Condition block
-
Set condition : #CustomerFound
-
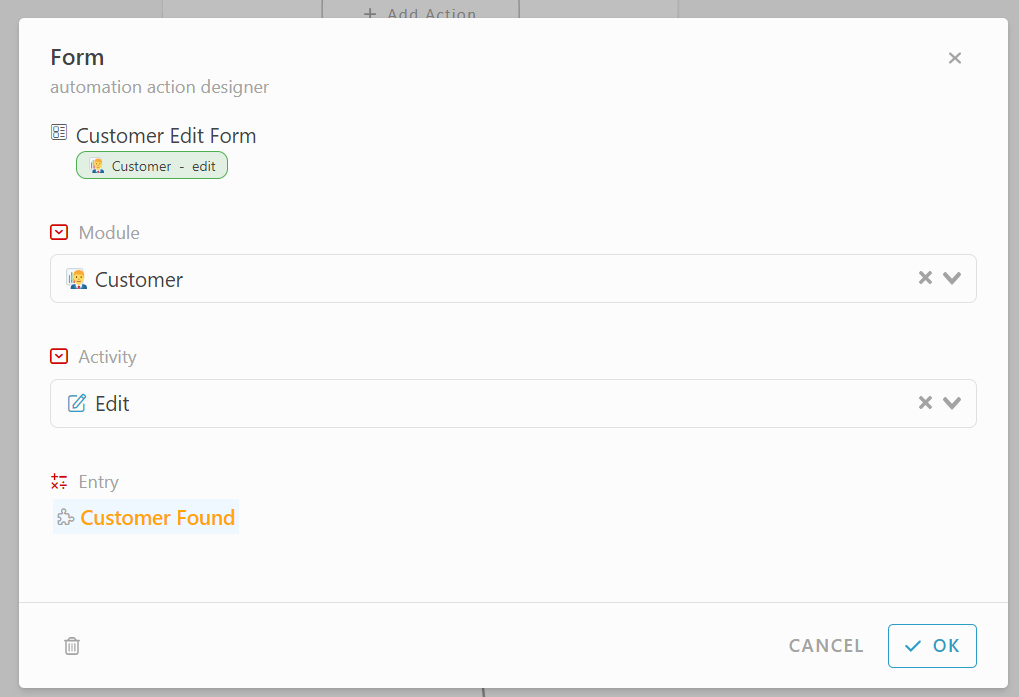
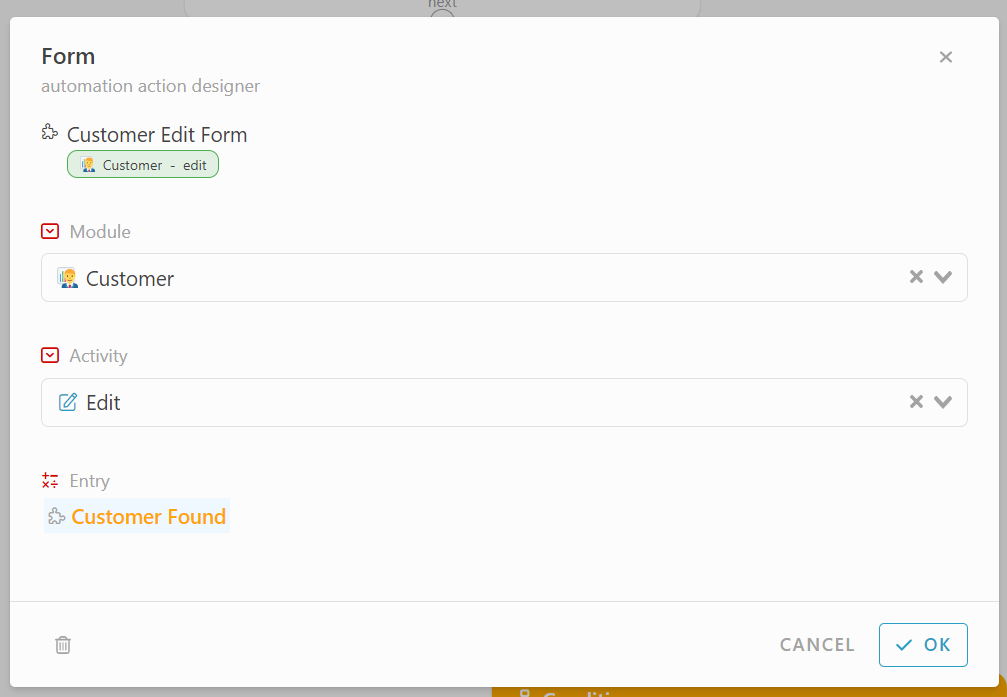
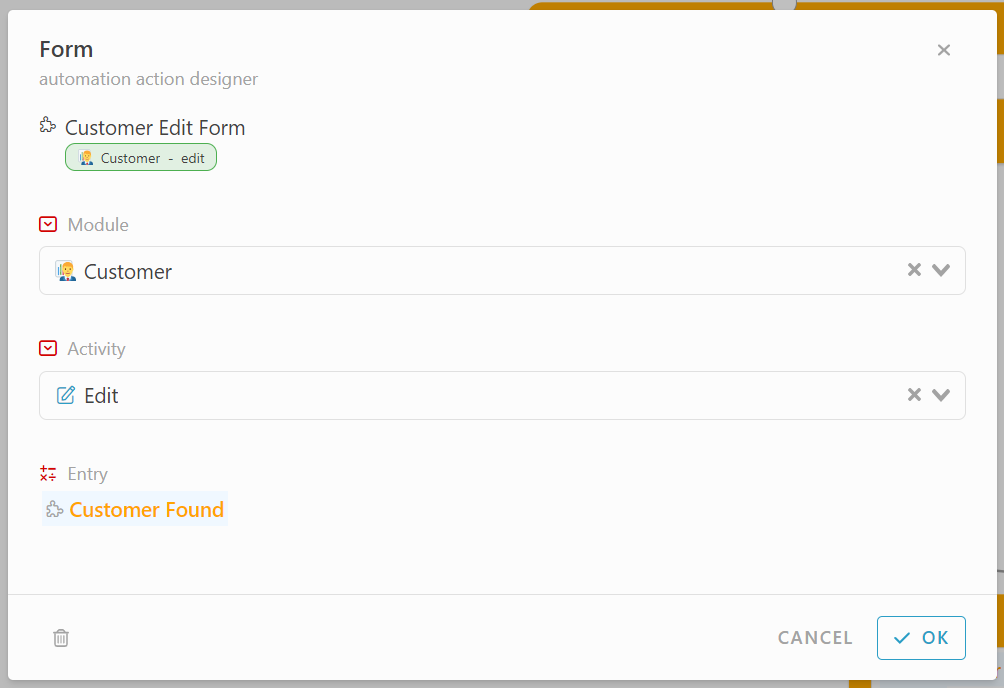
Drag Action Block
-
Add Action, Form
*Module : Customer
*Activity : Edit
*Entry : #CustomerFound -
Drag Action Block
-
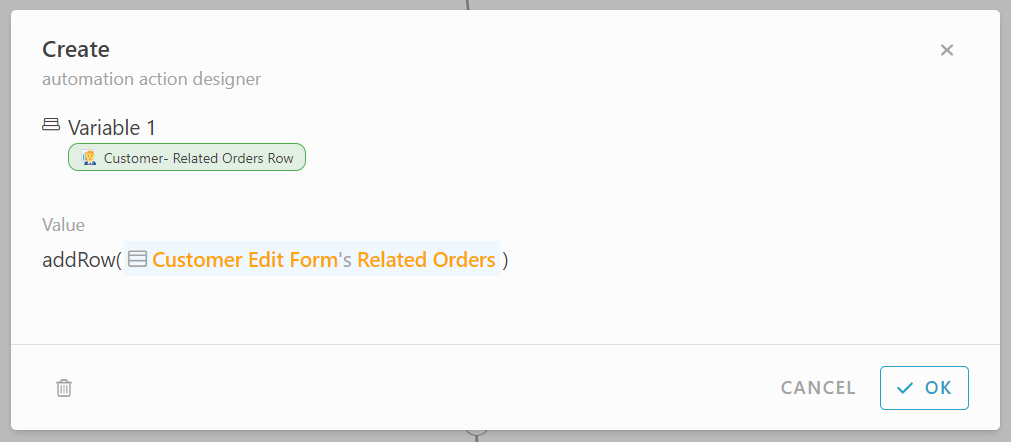
Add Action, Create
-
Set Value : AddRow(#CustomerEditFrom#RelatedOrders)
-
Drag Action Block
-
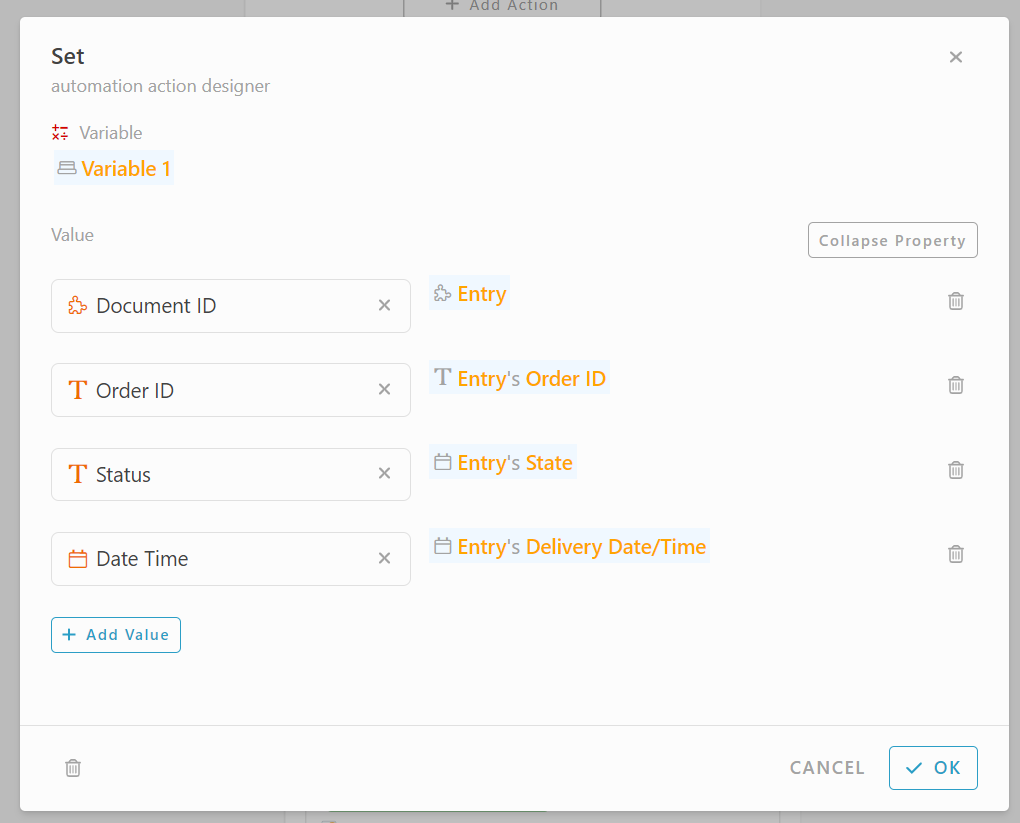
Add Action, Set
-
Set Variable and Value
*Variable : #Variable1
*Expand Value
*DocumentId - #Entry
*OrderID - #Entry#OrderID
*Status - #Entry#State
*Date Time - #Entry#DeliveryDate/Time -
Drag Action Block
-
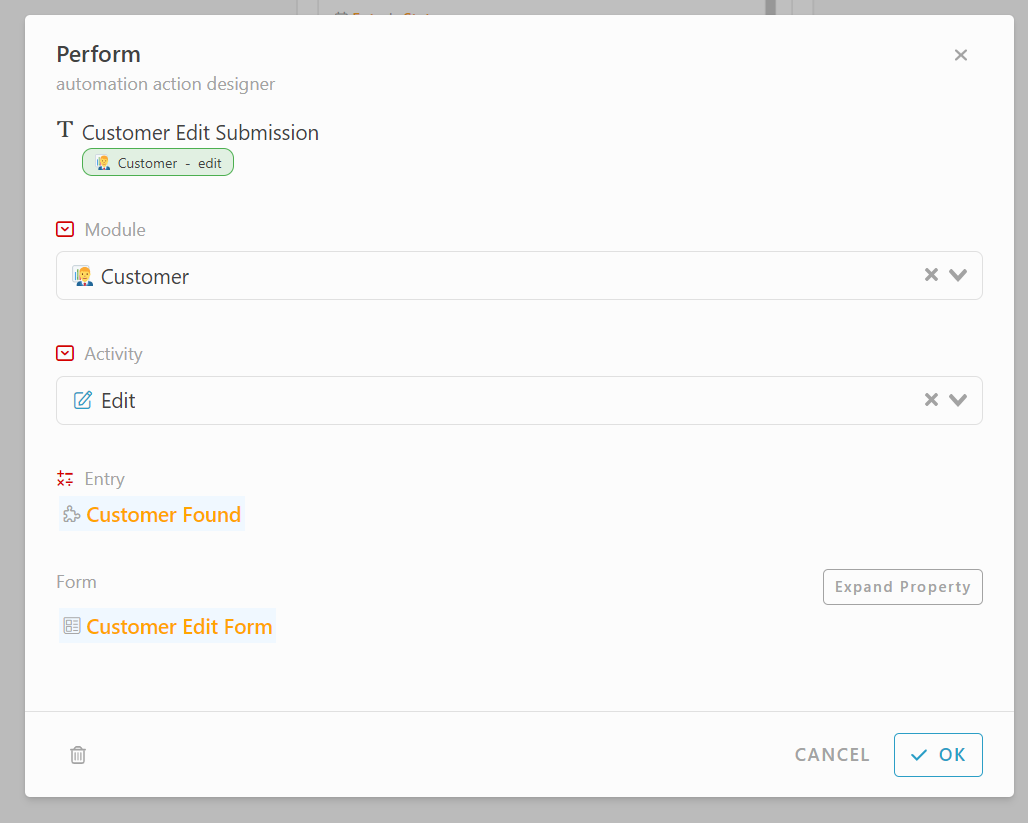
Add Action, Perform
-
Set Module, Activity, Entry and Form
*Module : Customer
*Activity : Edit
*Entry : #CustomerFound
*Form : #customerEditForm
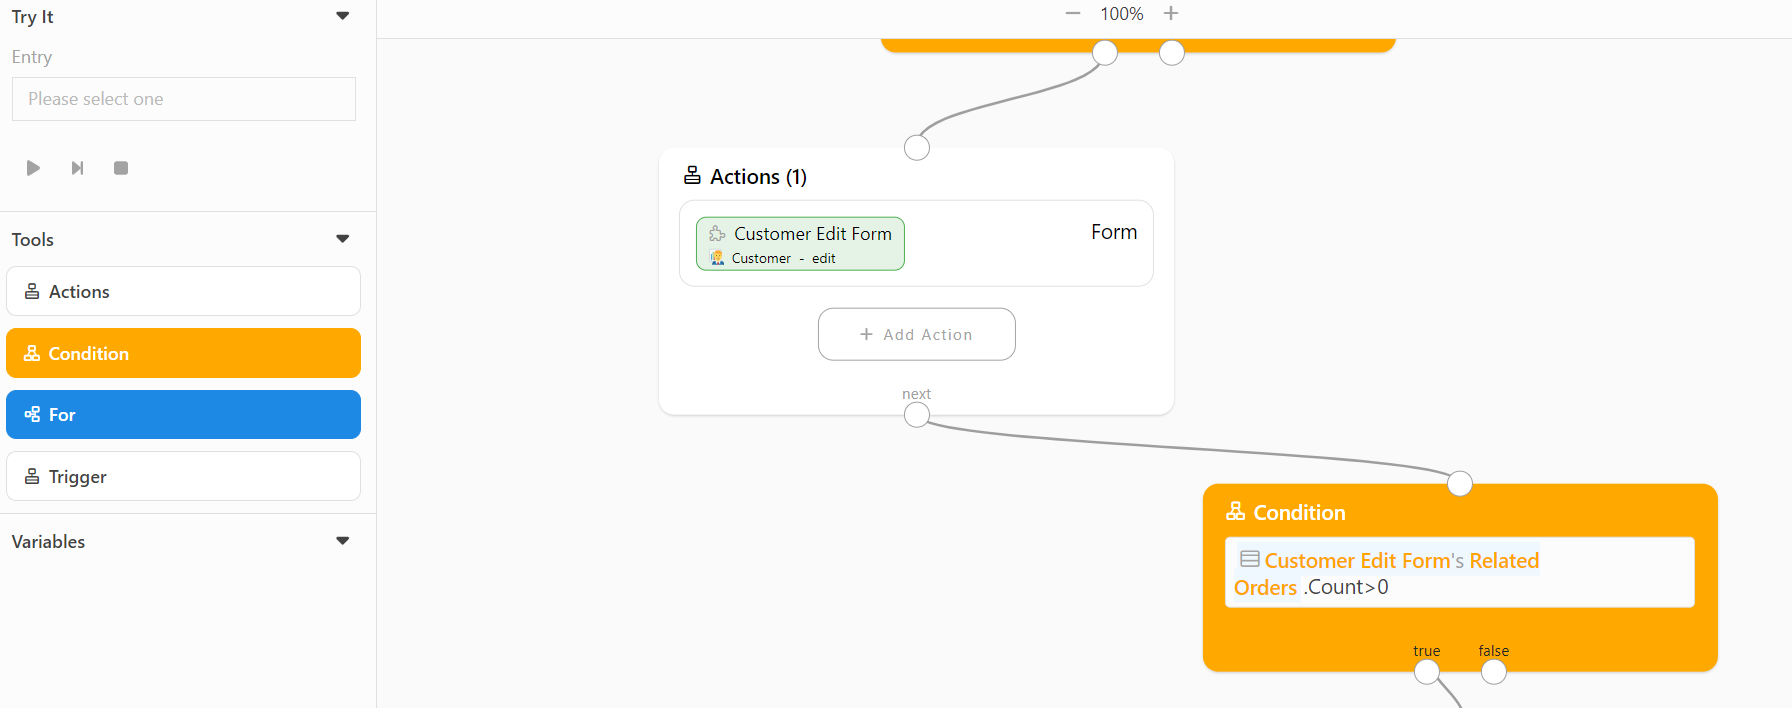
Condition - To update new Date and State from "Delivery Date/Time in activity MARK AS SHIPPED to the “Date Time” and “Status” in Table “Related Orders” in Module Customer after activity executed
-
Select Module Order Deliveries
-
Under section Activity
-
Click Design
-
Create new Automation in Activity MARK AS SHIPPED
-
Click “Do After”
-
Drag Action Block
-
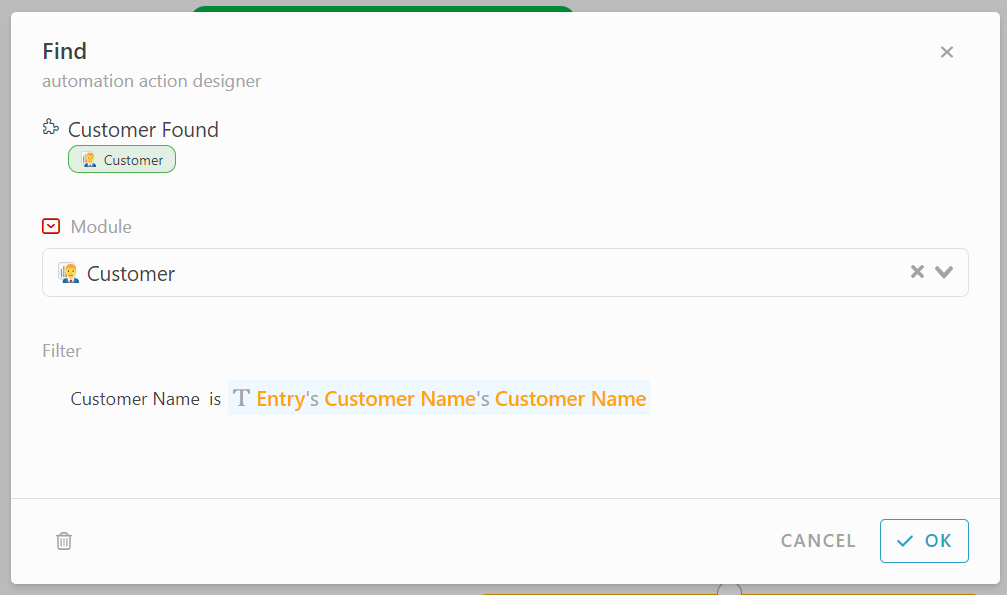
Add Action, Find
-
Set Module and Filter :
*Module - Customer
*Filter - Customer Name is #Entry#CustomerName#CustomerName. -
Drag Condition block.
-
Set Value : #CustomerFound
-
Drag Action block
-
Add Action, Form
-
Set Module, Activity and Entry :
*Module : Customer
*Activity : Edit
*Entry : #CustomerFound -
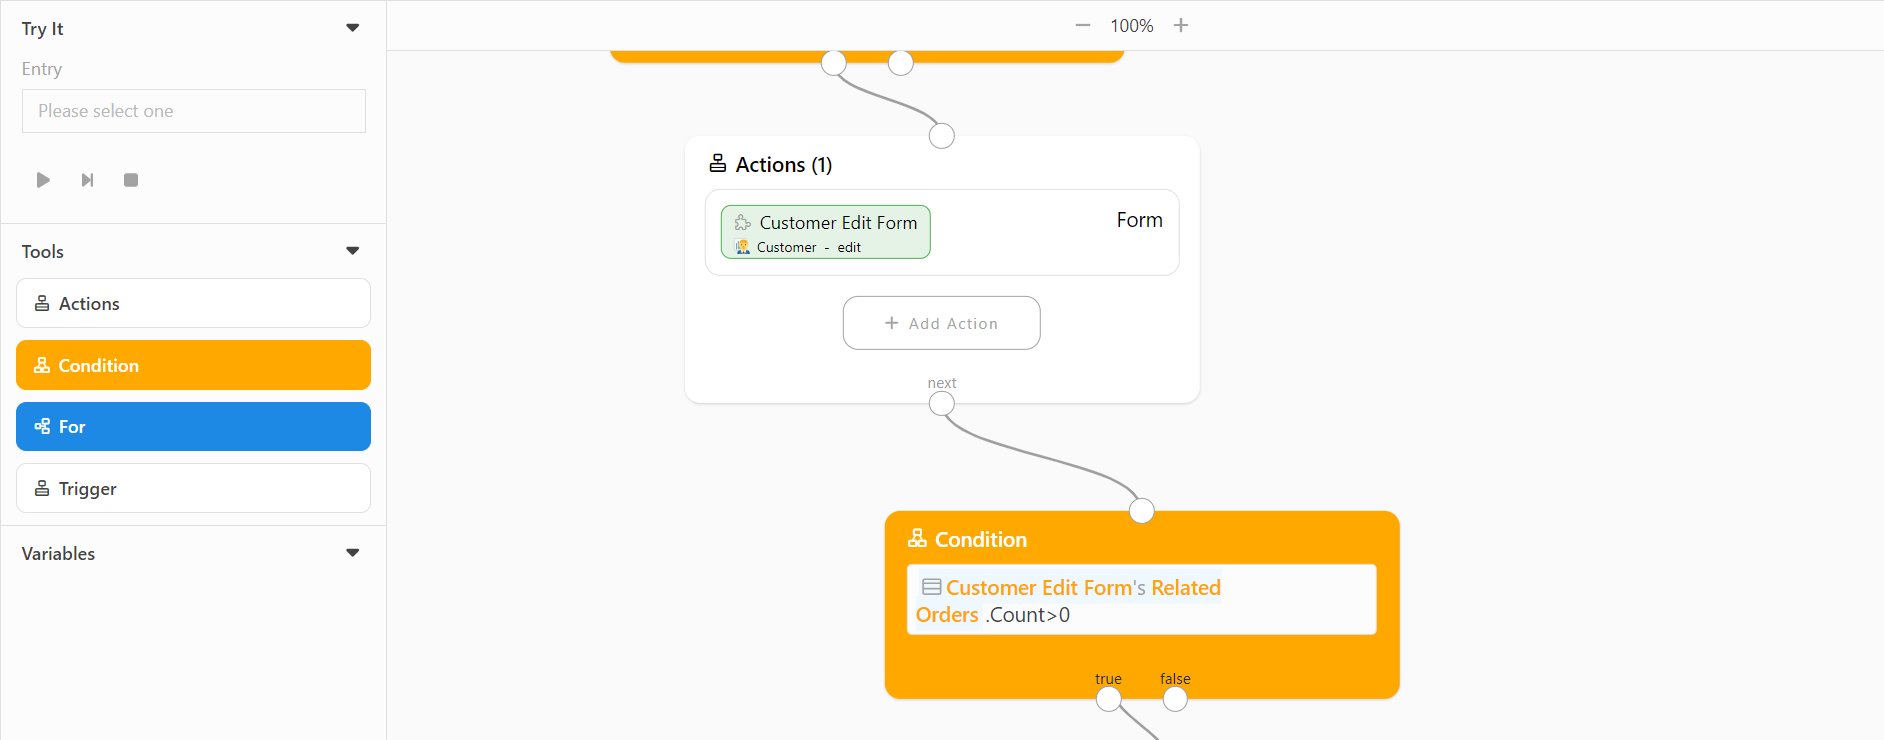
Drag Condition block
-
Set Value : #CustomerEditForm#RelatedOrders.Count>0
-
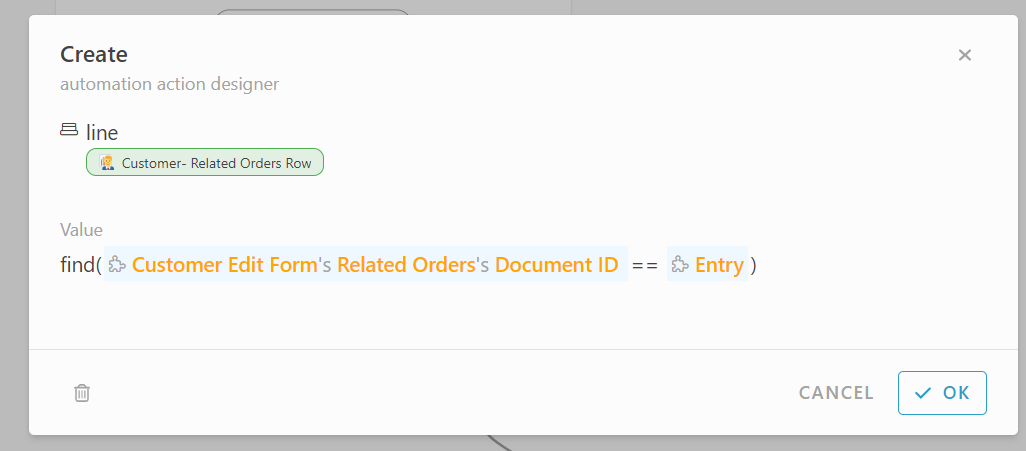
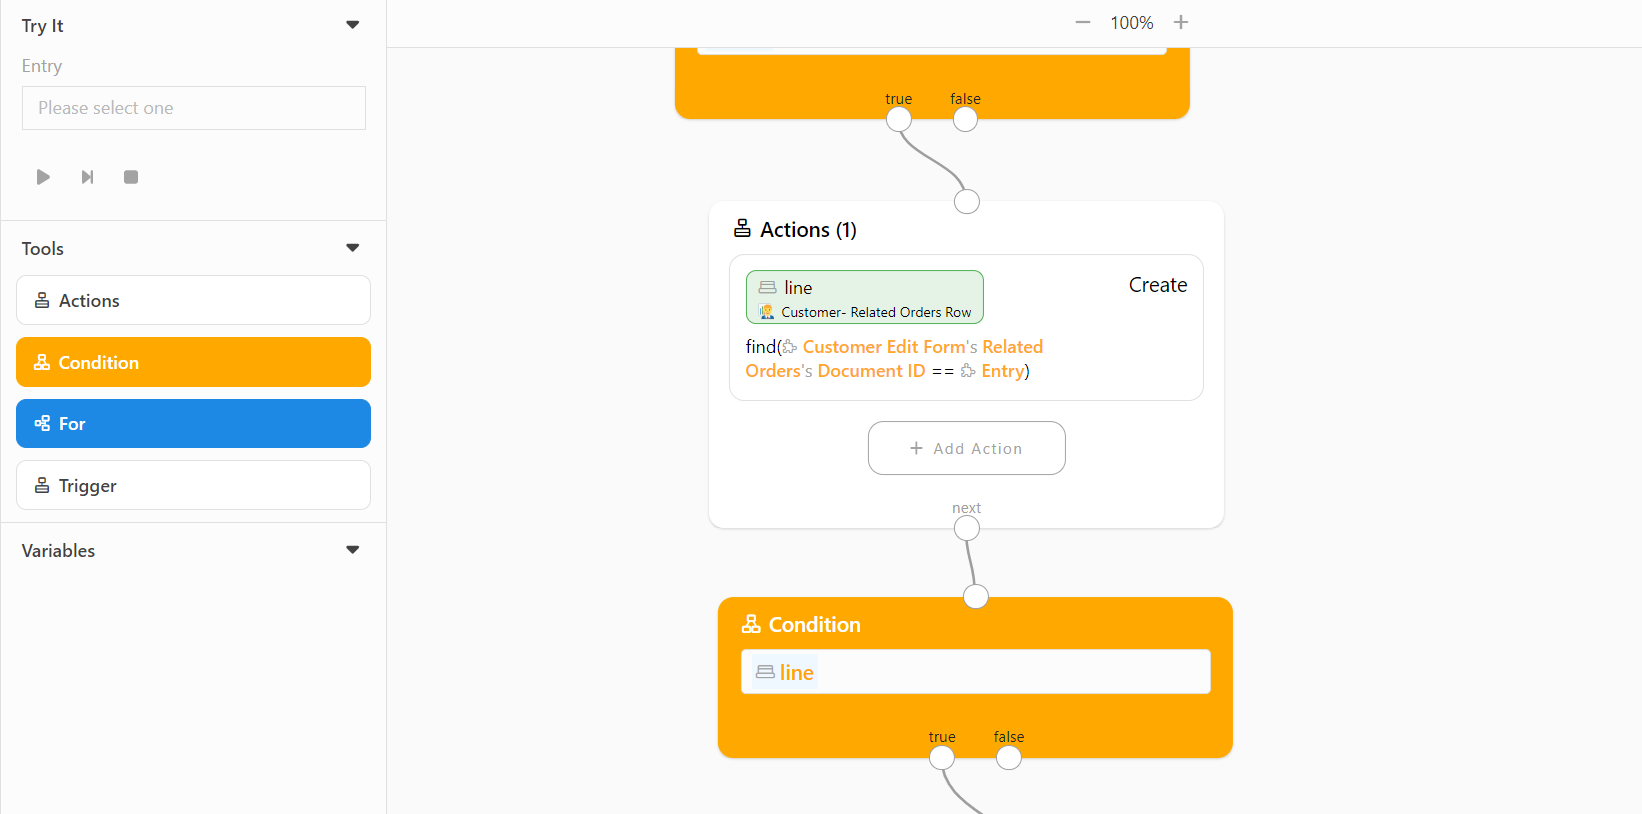
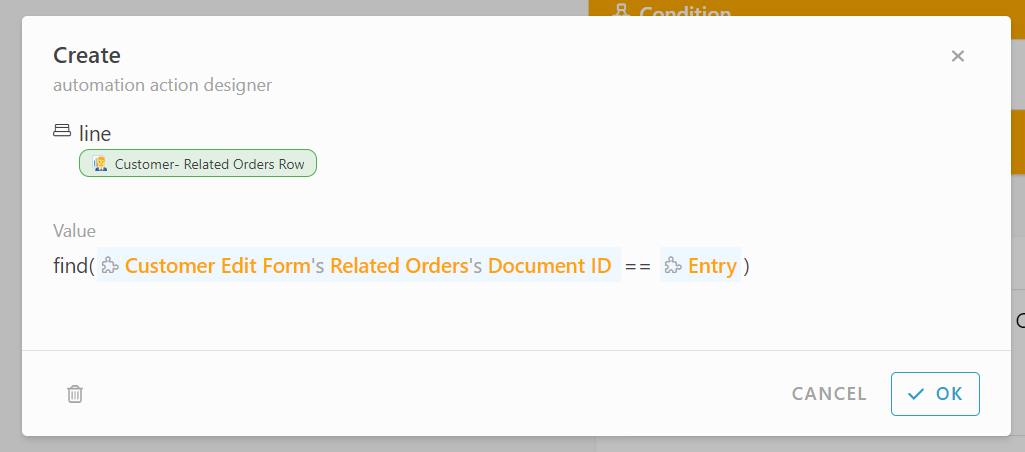
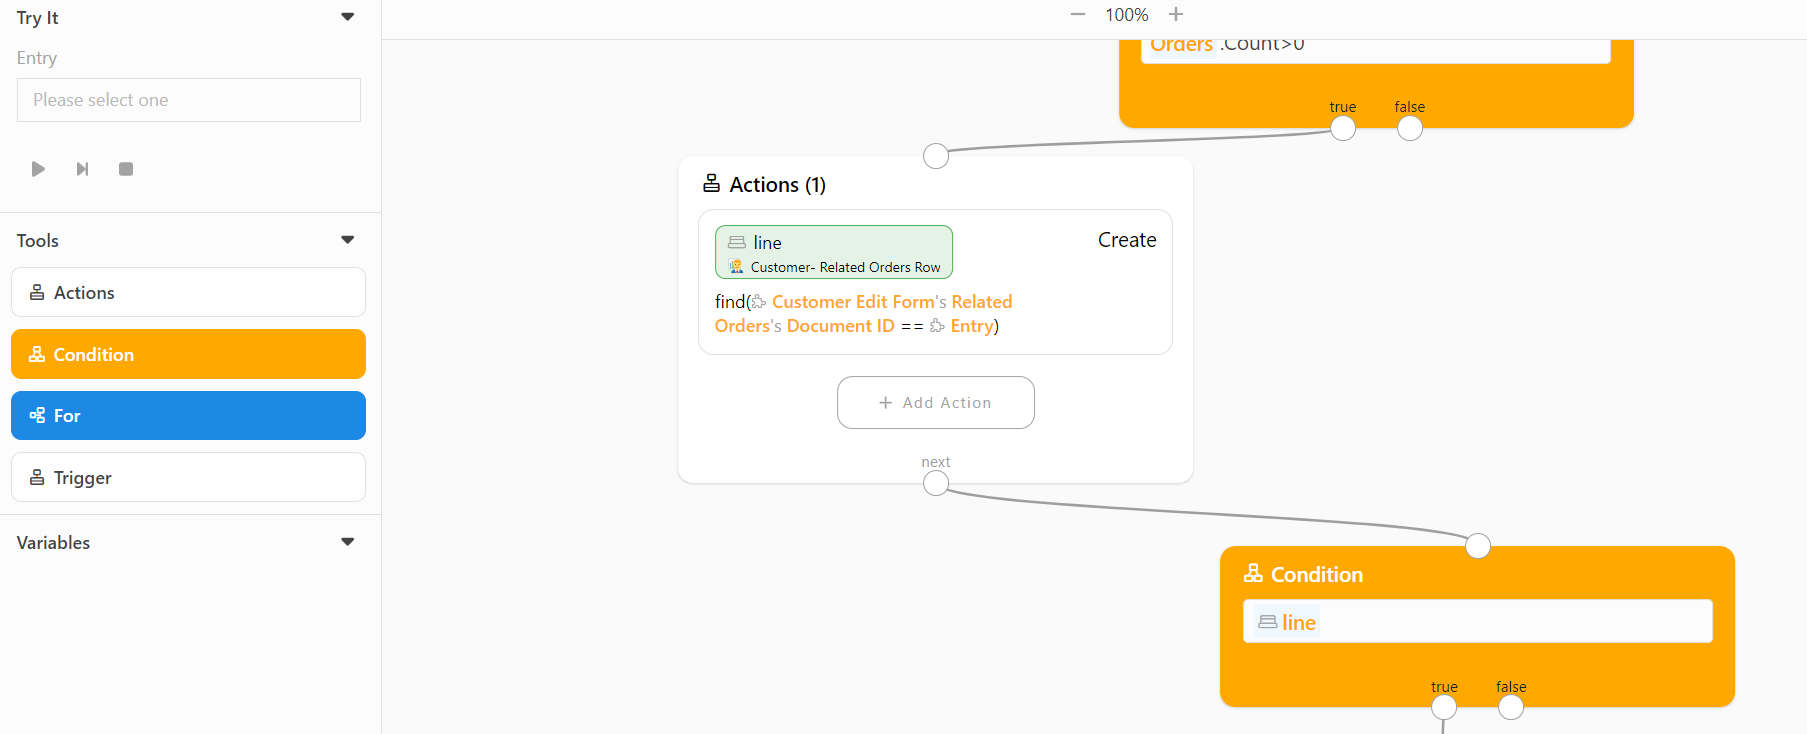
Drag Action block
-
Add Action, Create
-
Set Variable Name(Optional) and Value :
*Name - line
*Value - find(#CustomerEditForm#RelatedOrders#DocumentID == #Entry) -
Drag Condition Block
-
Set Value : #line
-
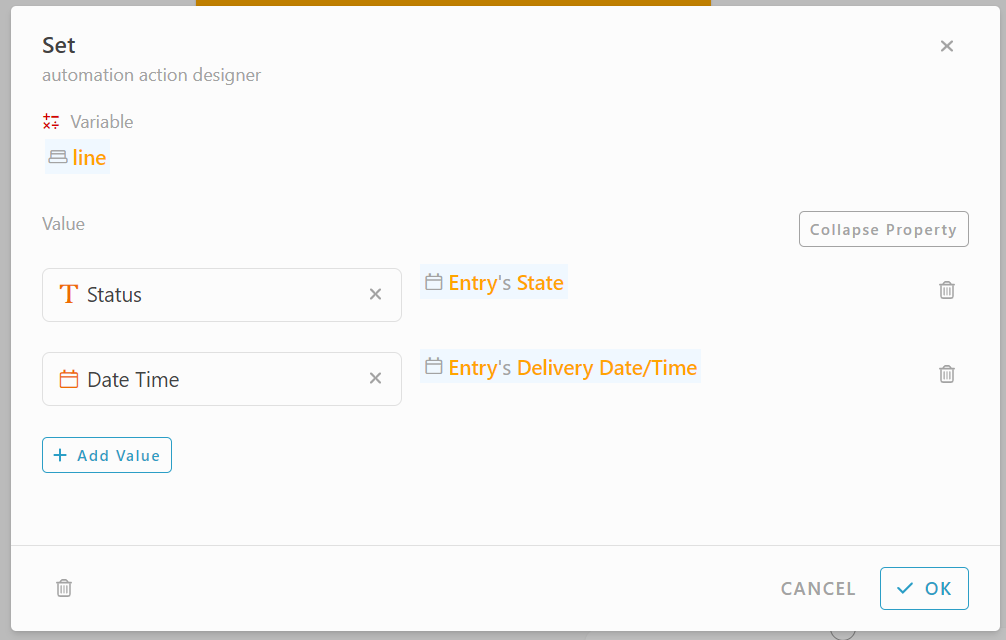
Drag Action block
-
Add Action, Set
-
Set Variable and Value :
*Variable - #line
*Expand Property :
*Status - #EntryState
*Date Time - #Entry#DeliveryDate/Time -
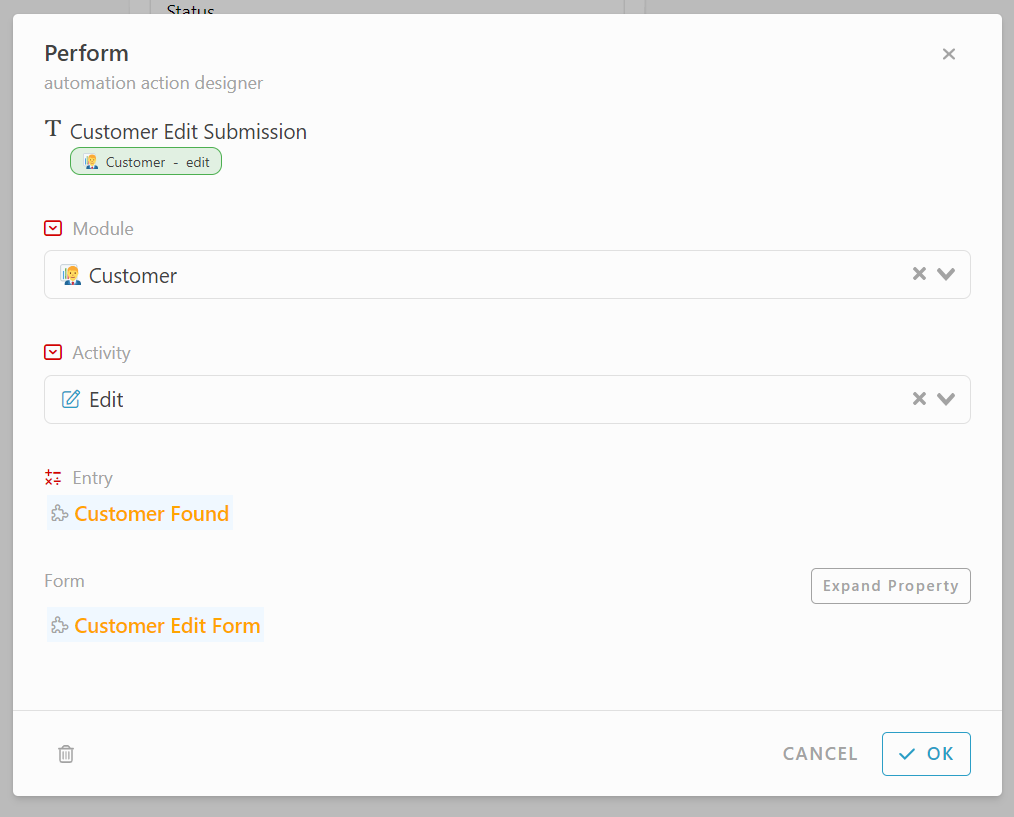
Drag Action block
-
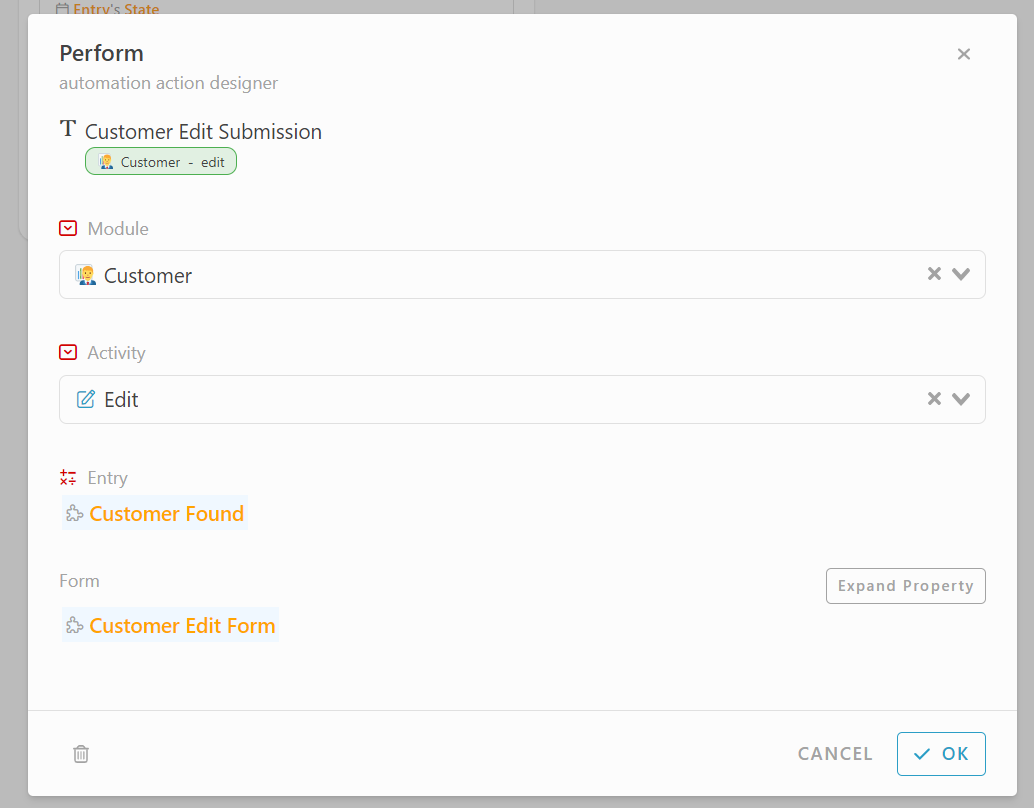
Add Action, Perform
-
Set Module, Activity, Entry and Form:
*Module : Customer
*Activity : Edit
*Entry : #CustomerFound
*Form : #CustomerEditForm
Condition - To update Delivery image, State, and Delivery Date/Time from Activity MARK AS DELIVERED to the Delivery Image, Status and Date Time in “Related Orders” Tables in module Customer.
-
Select Module Order Deliveries
-
Under Section Activity
-
Click Design
-
Add new automation for Activity MARK AS DELIVERED
-
Click “Do After”
-
Drag Action Block
-
Add Action, Find
-
Module and Filter :
*Module : Customer
*Filter : Customer Name is #Entry#CustomerName#CustomerName -
Drag Condition block
-
Set Value : #CustomerFound
-
Drag Action block
-
Add new action, Form
-
Set Module, Activity and Entry :
*Module : Customer
*Activity : Edit
*Entry : #CustomerFound -
Drag condition block
-
Set Value : #CustomerEditForm#RelatedOrders.Count>0
-
Drag Action block
-
Add Action, Create
-
Set Variable name (optional) and value :
*Variable name : line
*Value : #find(#CustomerEditForm#RelatedOrders#DocumentID == #Entry) -
Drag condition block
-
Set value : #line
-
Drag Action block.
-
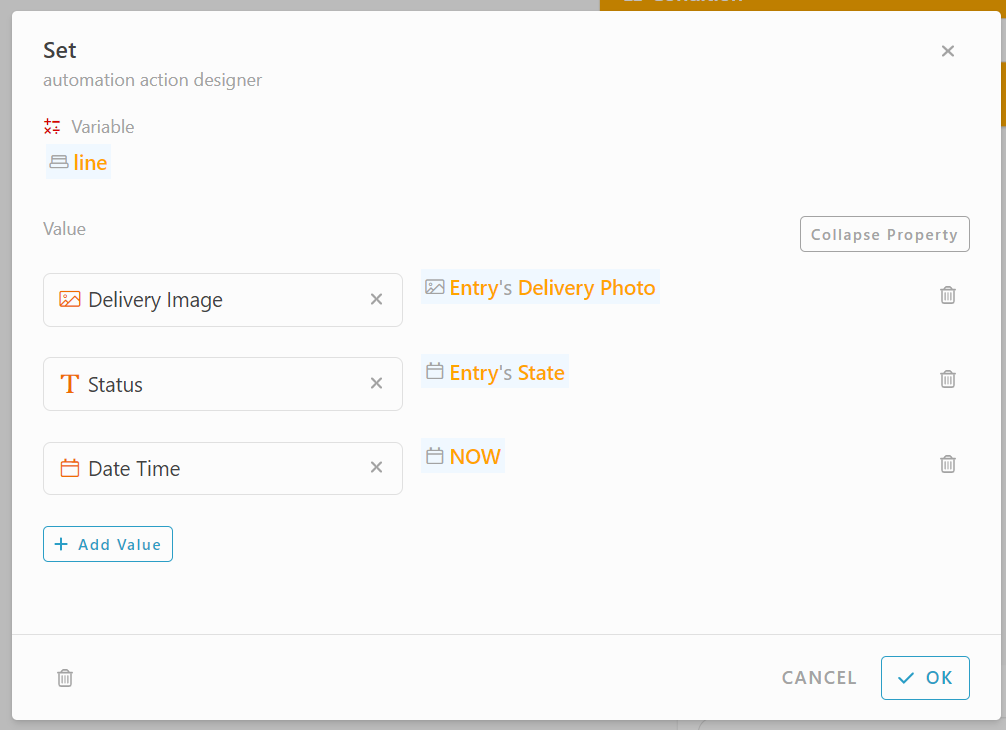
Add Action, Set
-
Set Variable and Value :
*Variable : #line
*Value : Expand property
*Delivery image : #Entry#DeliveryPhoto
*Status : #Entry#State
*Date Time : #NOW -
Drag Action block
-
Add Action, Perform
-
Set Module, Activity, Entry and Form :
*Module : Customer
*Activity : Edit
*Entry : #CustomerFound
*Form : #CustomerEditForm
Congratulations!!!![]()
![]() You have successfully created a Order Deliveries module.
You have successfully created a Order Deliveries module.
For more template and ready solution.
Try INISTATE for FREE now.
Sign up at https://inistate.com
Related topic :