Hi, this post will show you step-by-step how to configure a Patient Registration management in FETIAS.
Problem
Progress Slow when Registration - Some clinic had procedure of cumbersome on patient registration.
Objective
Save Time - Use this template to help manage registration of patient with faster time.
Step of Configuration
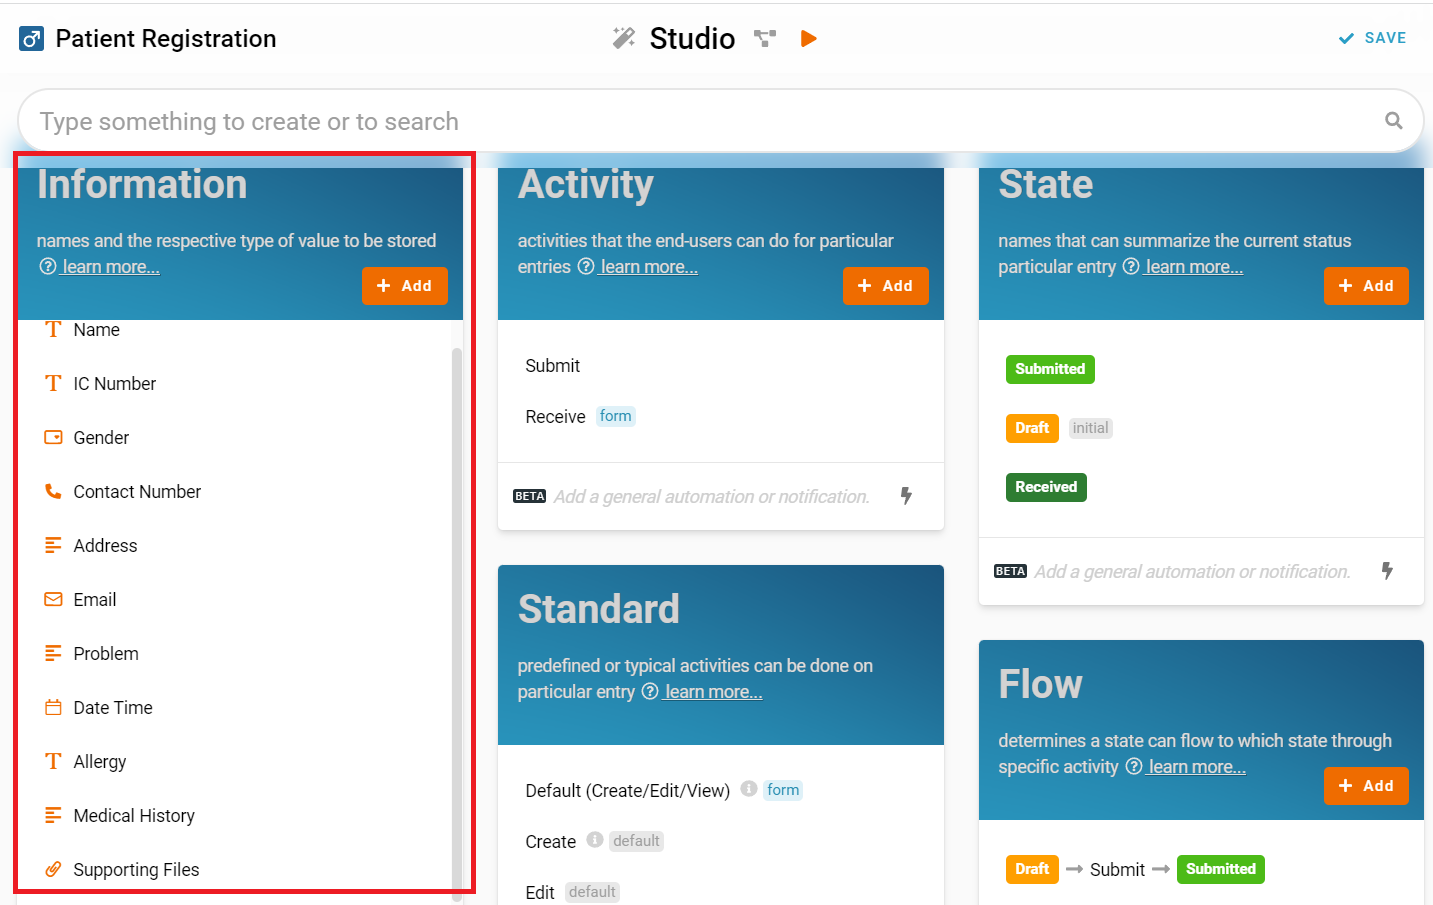
1. Recognize and configure all the Information name and type required to create a new entry in Patient Registration. (Refer Picture 1)
- Name: Name, Type: Text
- Name: IC Number, Type: Text
- Name: Gender, Type: Select
-Male
-Female - Name: Contact Number, Type: Phone Number
- Name: Address, Type: Multiline Test
- Name: Email, Type: Email
- Name: Problem, Type: Multiline Text
- Name: Date Time, Type: Date Time
- Name: Allergy, Type: Text
- Name: Medical History, Type: Multiline Text
- Name: Supporting Files, Type: Files
- Name: Date Time to Receive, Type: Date Time
2. Recognize and configure all the Activity able to perform to change State (Refer Picture 2)
- Receive
- Submit

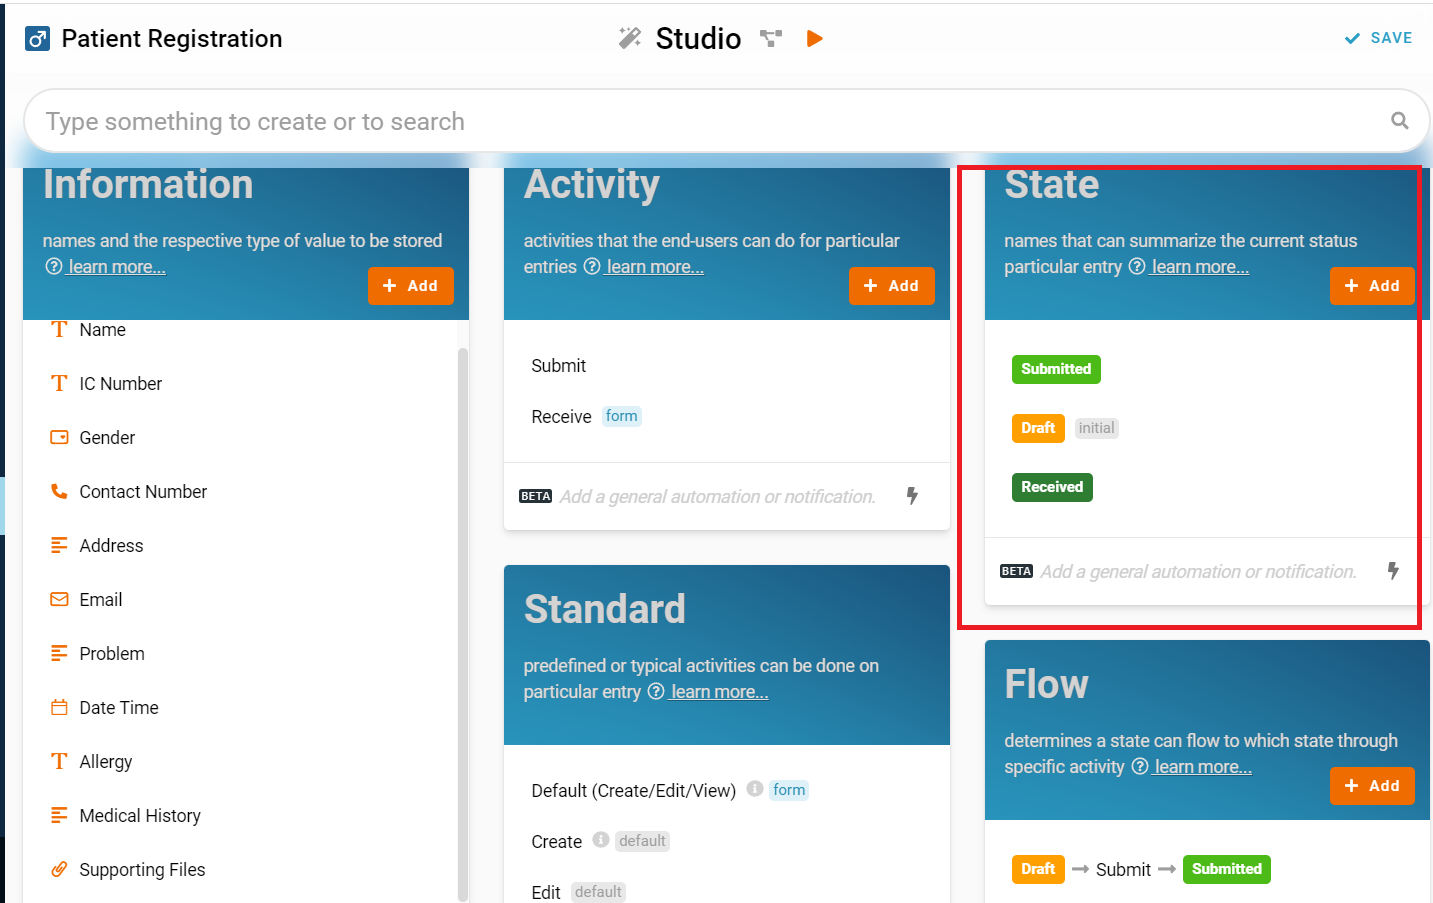
3. Recognize and configure all the State in the whole Patient Registration. (Refer Picture 3)
- Draft (set this state as Initial with enable the “Initial” radio button)
- Submitted
- Received
4. Configure Flow by determines a state can flow to which state through specific activity and form a reasonable workflow diagram in whole progress. (Refer Picture 4)
Example: State ----> Activity ----> State
- Draft ----> Submit ----> Submitted
-
Submitted ----> Receive----> Received

5. Configure and Recognize Listing to category the state of entries and filtered list with defined information to show for users or purposes. (Refer Picture 5)
- All
- Submitted
- Received

6. Step to produce the Listing (Refer Picture 5 to 9)
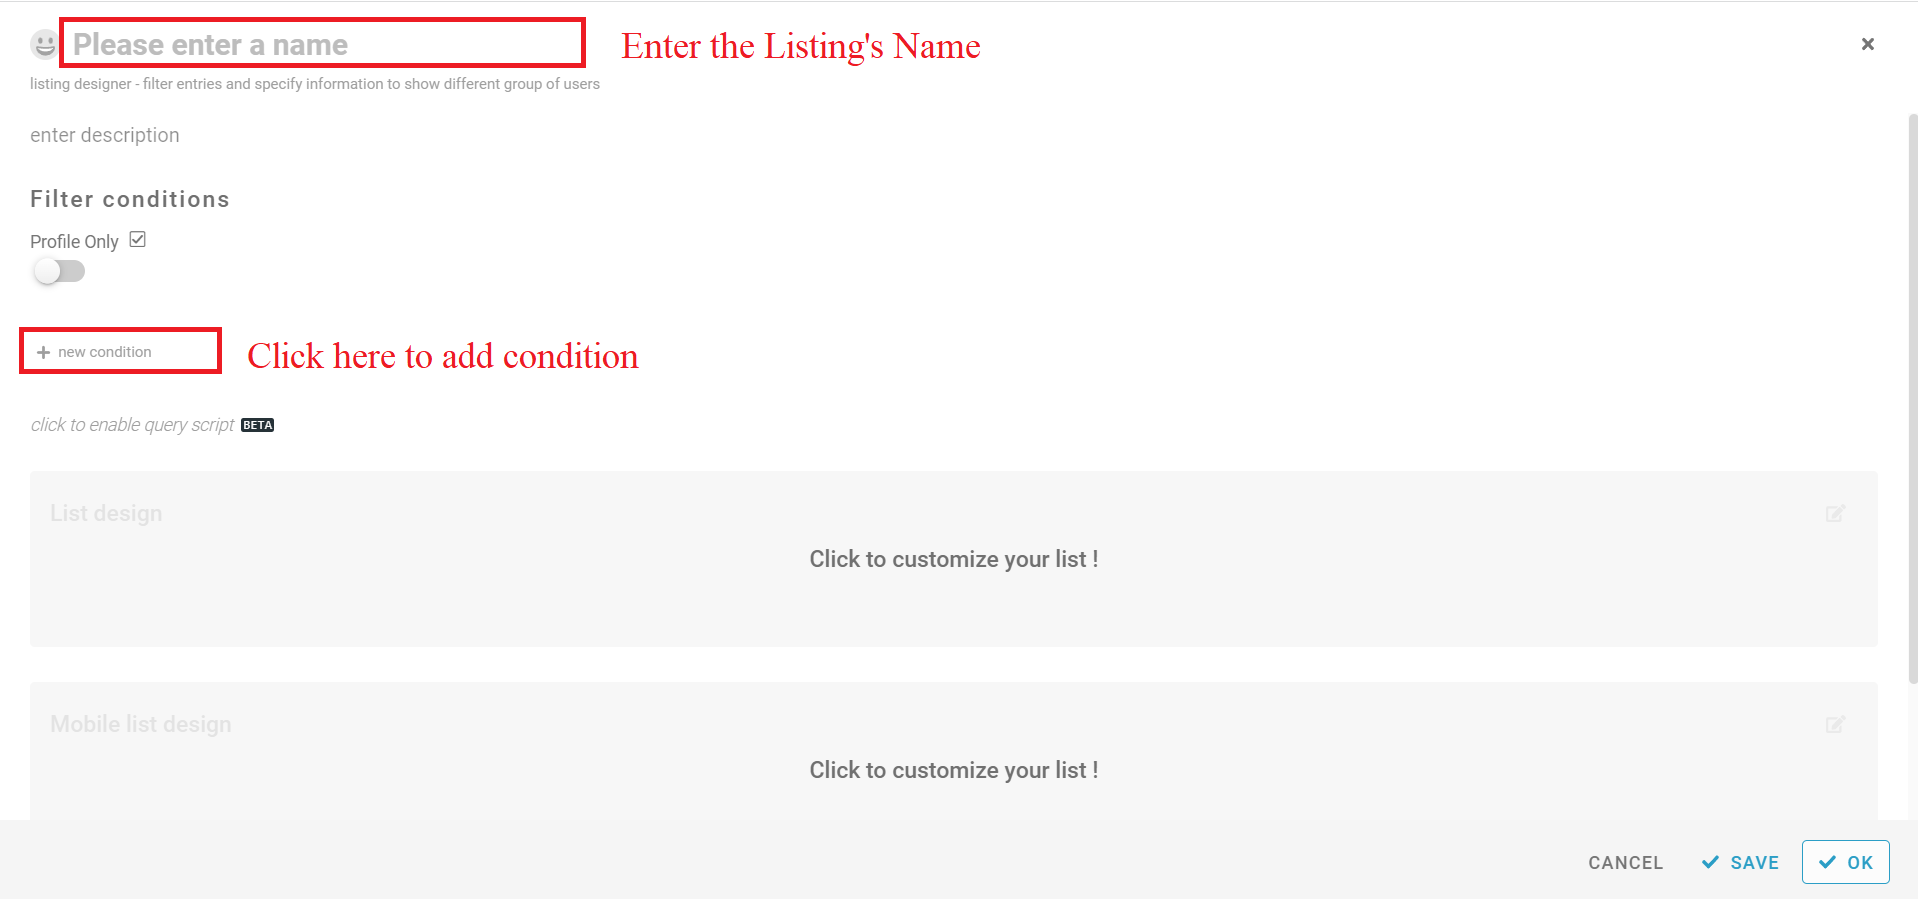
- Click “+ Add” at the Listing card
- Enter the name of Listing in the empty space at the top left of the screen, can change the emoji you preferred
- Click the “+ new condition” at the left side of screen to add the condition
- Select “State” and select the the state you want put in this Listing in the condition
- In the picture 7, select “State” and select “Submitted” in condition, it will show all the entry which is state “Submitted”, the name of this list is “Submitted”
- Can add the new List by click “+ Add” again at the Listing card
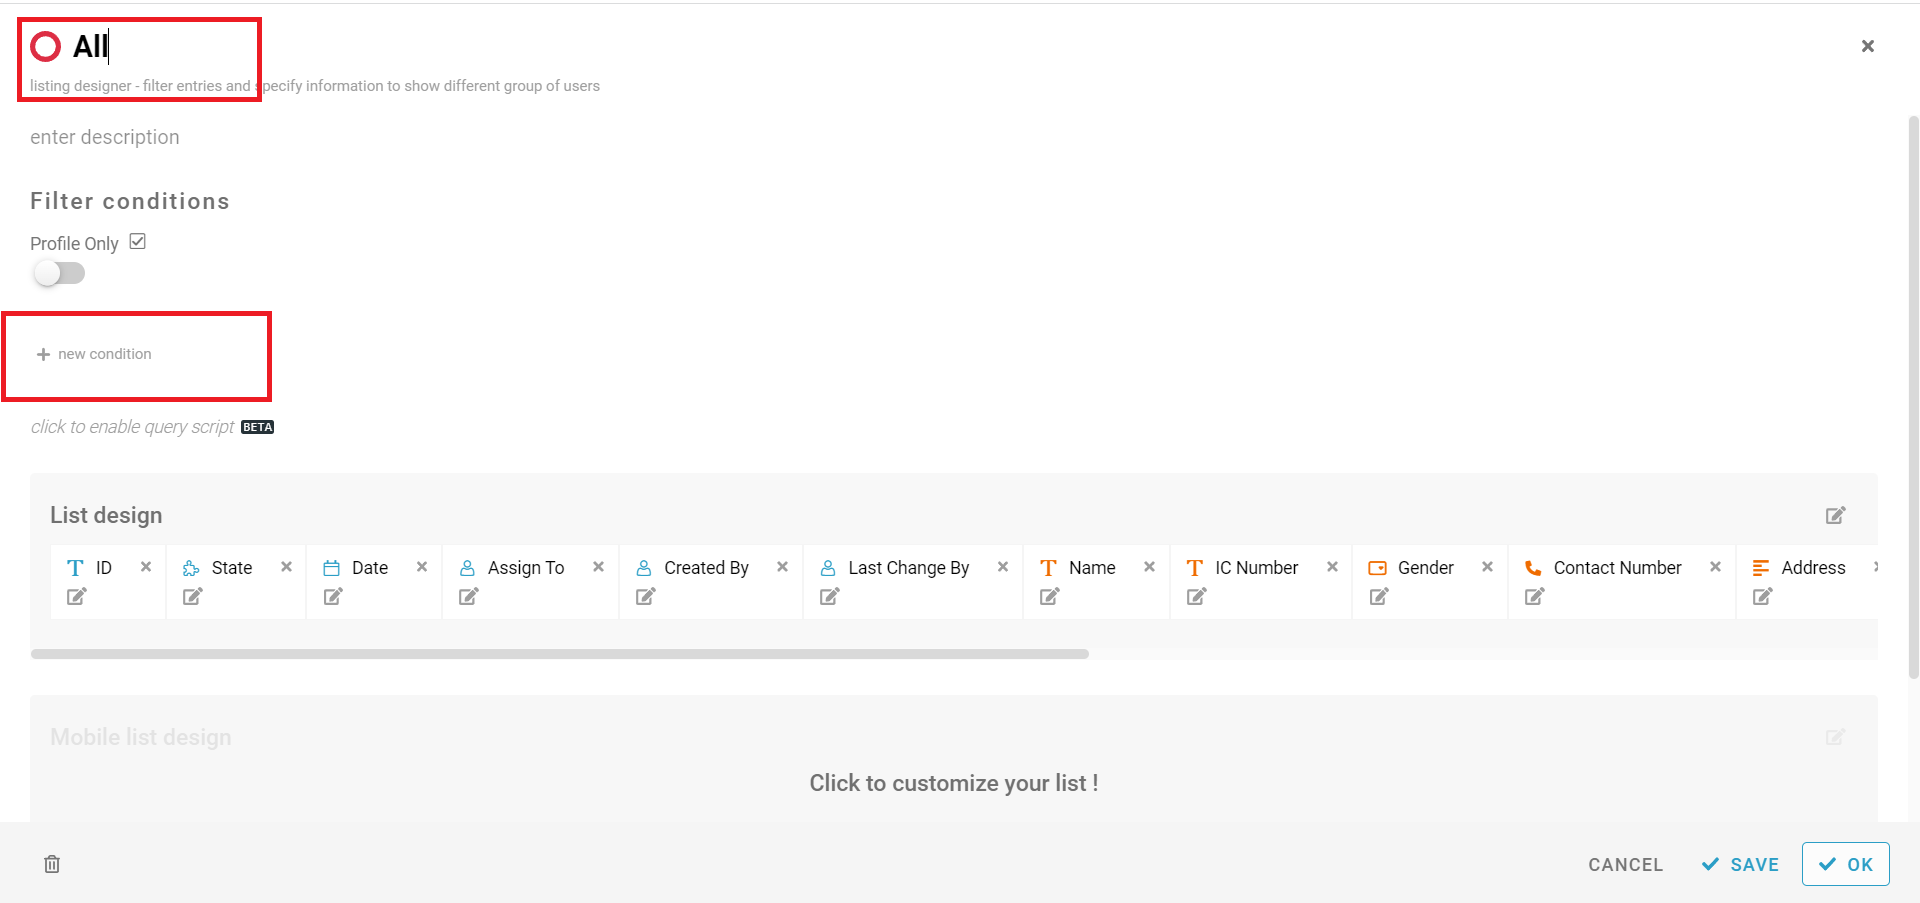
- This List’s name is “All”, leave the condition blank to show all the entries in this list
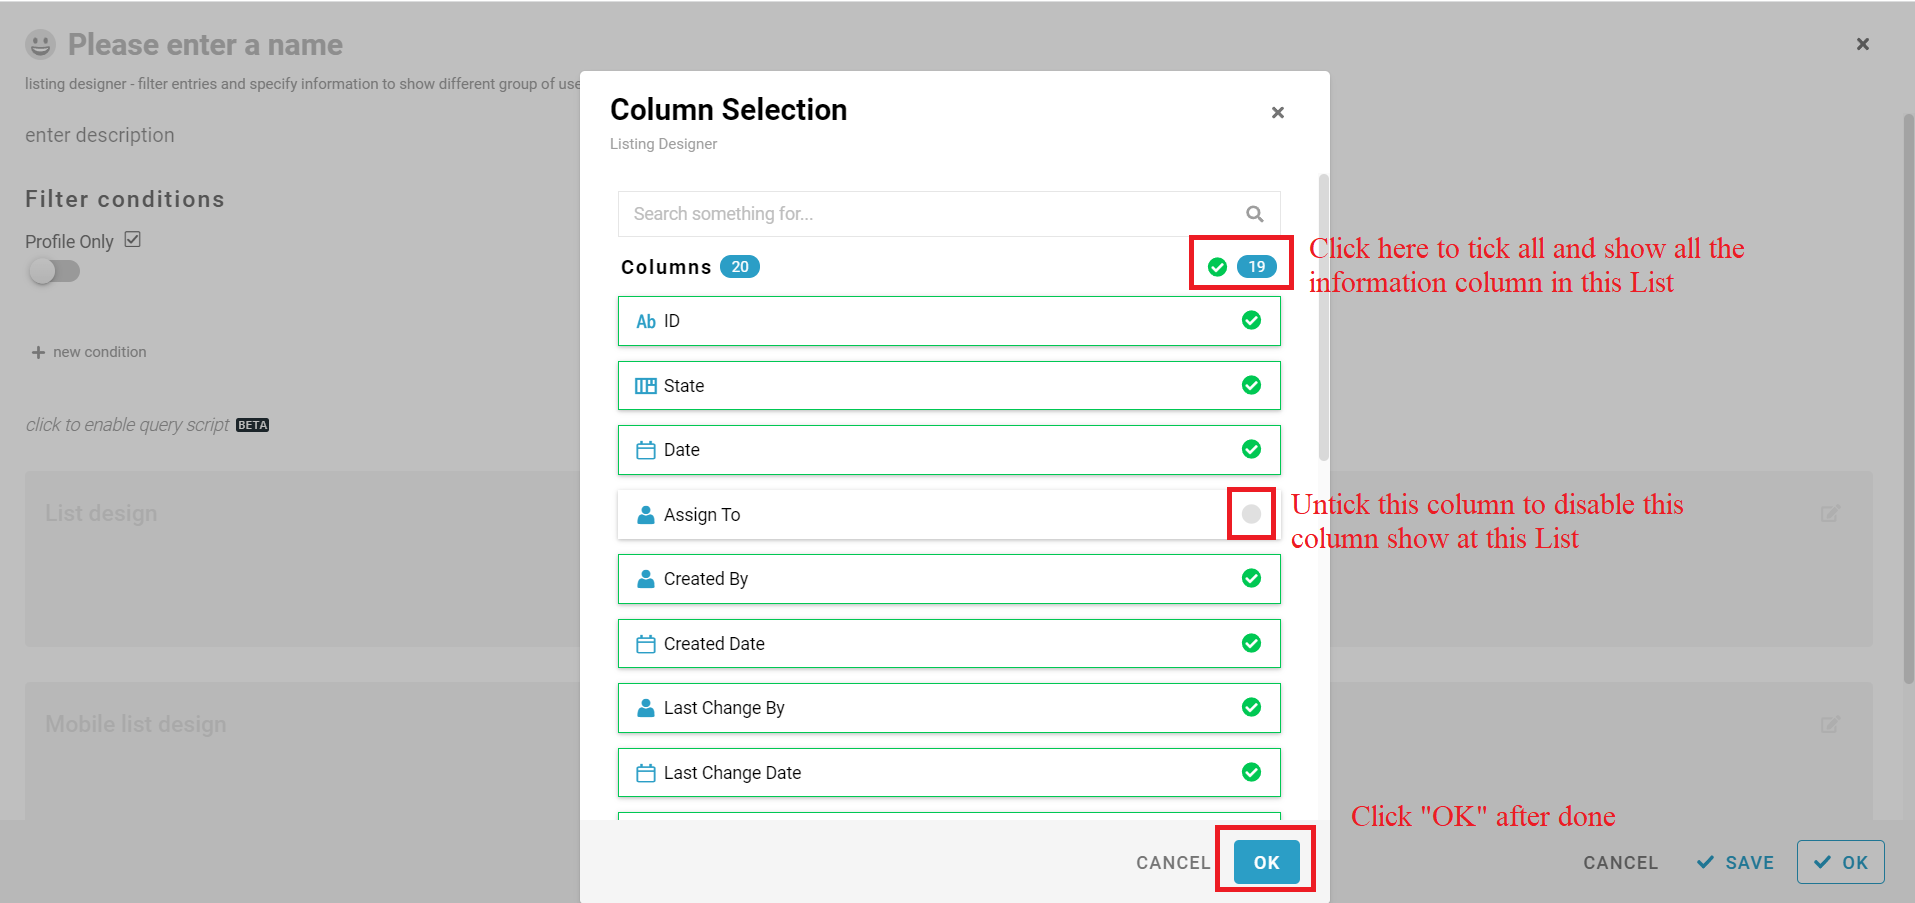
- Click the gray part of “List Design” to open the “Column Selection”
- “Column Selection” can customize the column that want to show in this List
- Can tick all, tick or untick the column to able or disable show the column in this List
- Click “OK” after done in “Column Selection”
- Remember to click “SAVE” after done
- Add another List call Received, the condition is “State is Received”

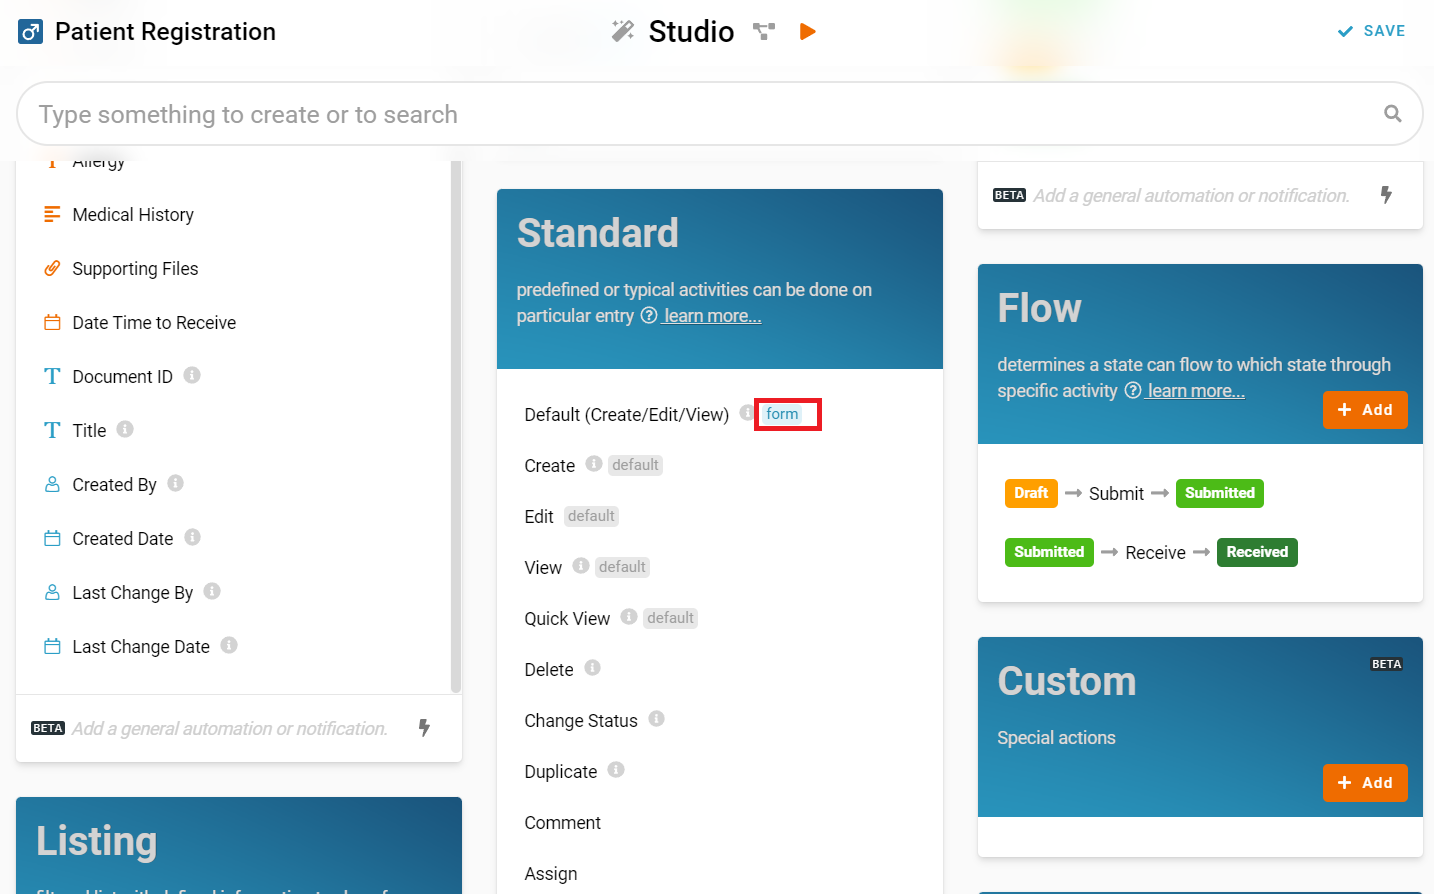
7. Step to arrange the information according your preference in Standard (Refer Picture 10 and 11)
- Click gray box beside the “Default(Create/Edit/View)” at the Standard card to open the design form
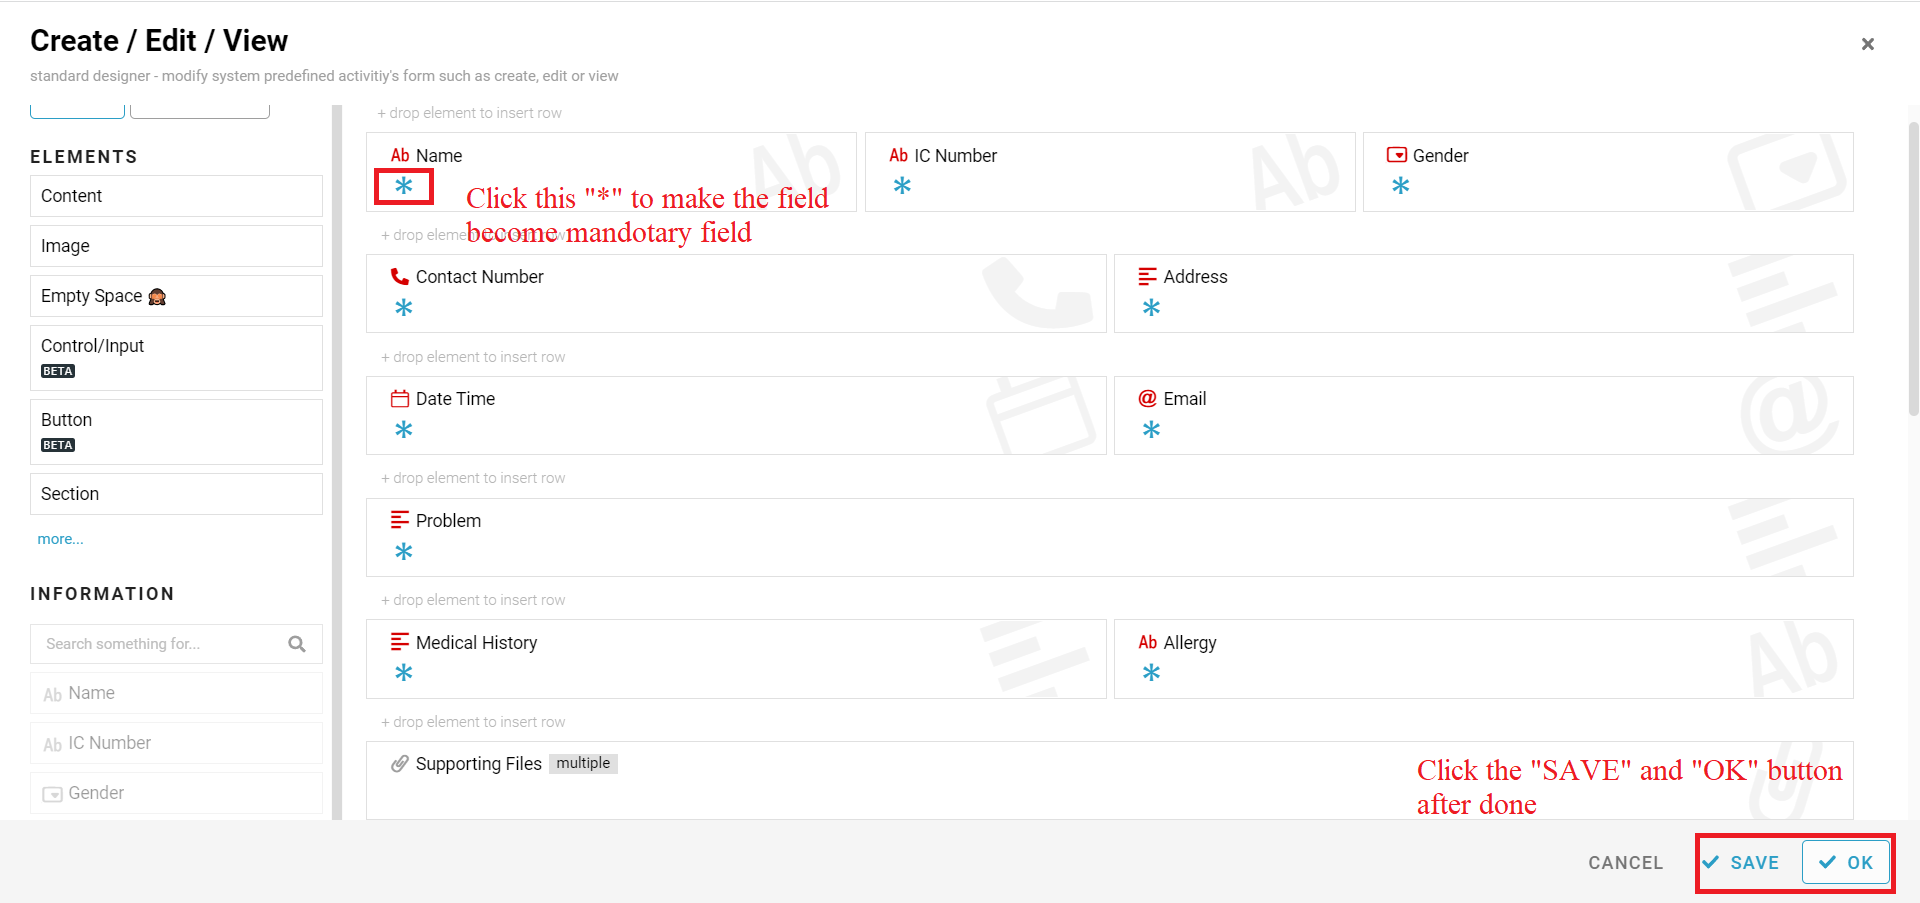
- Drag the box from “INFORMATION” panel at left side of screen, drop to the empty place that you want to place
- Drag and Drop all the information boxes from “INFORMATION” panel to empty place except “Date Time to Receive”
- Click the “*” icon to make the field to mandatory field
- Make all the field become mandatory except field “Supporting Files”
- Click the “SAVE” button after done and click “OK” to close the design form
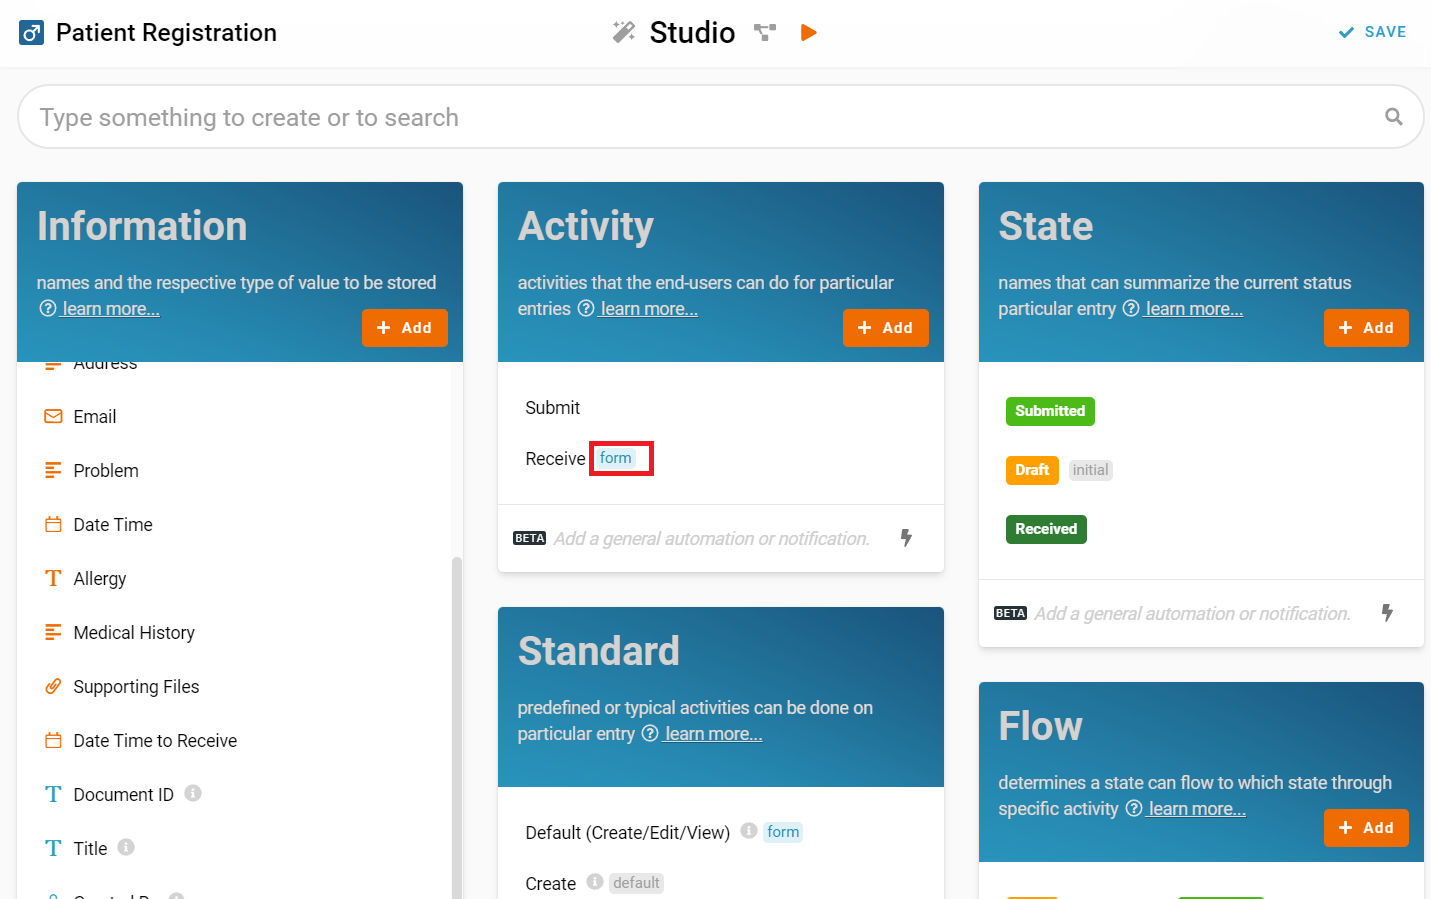
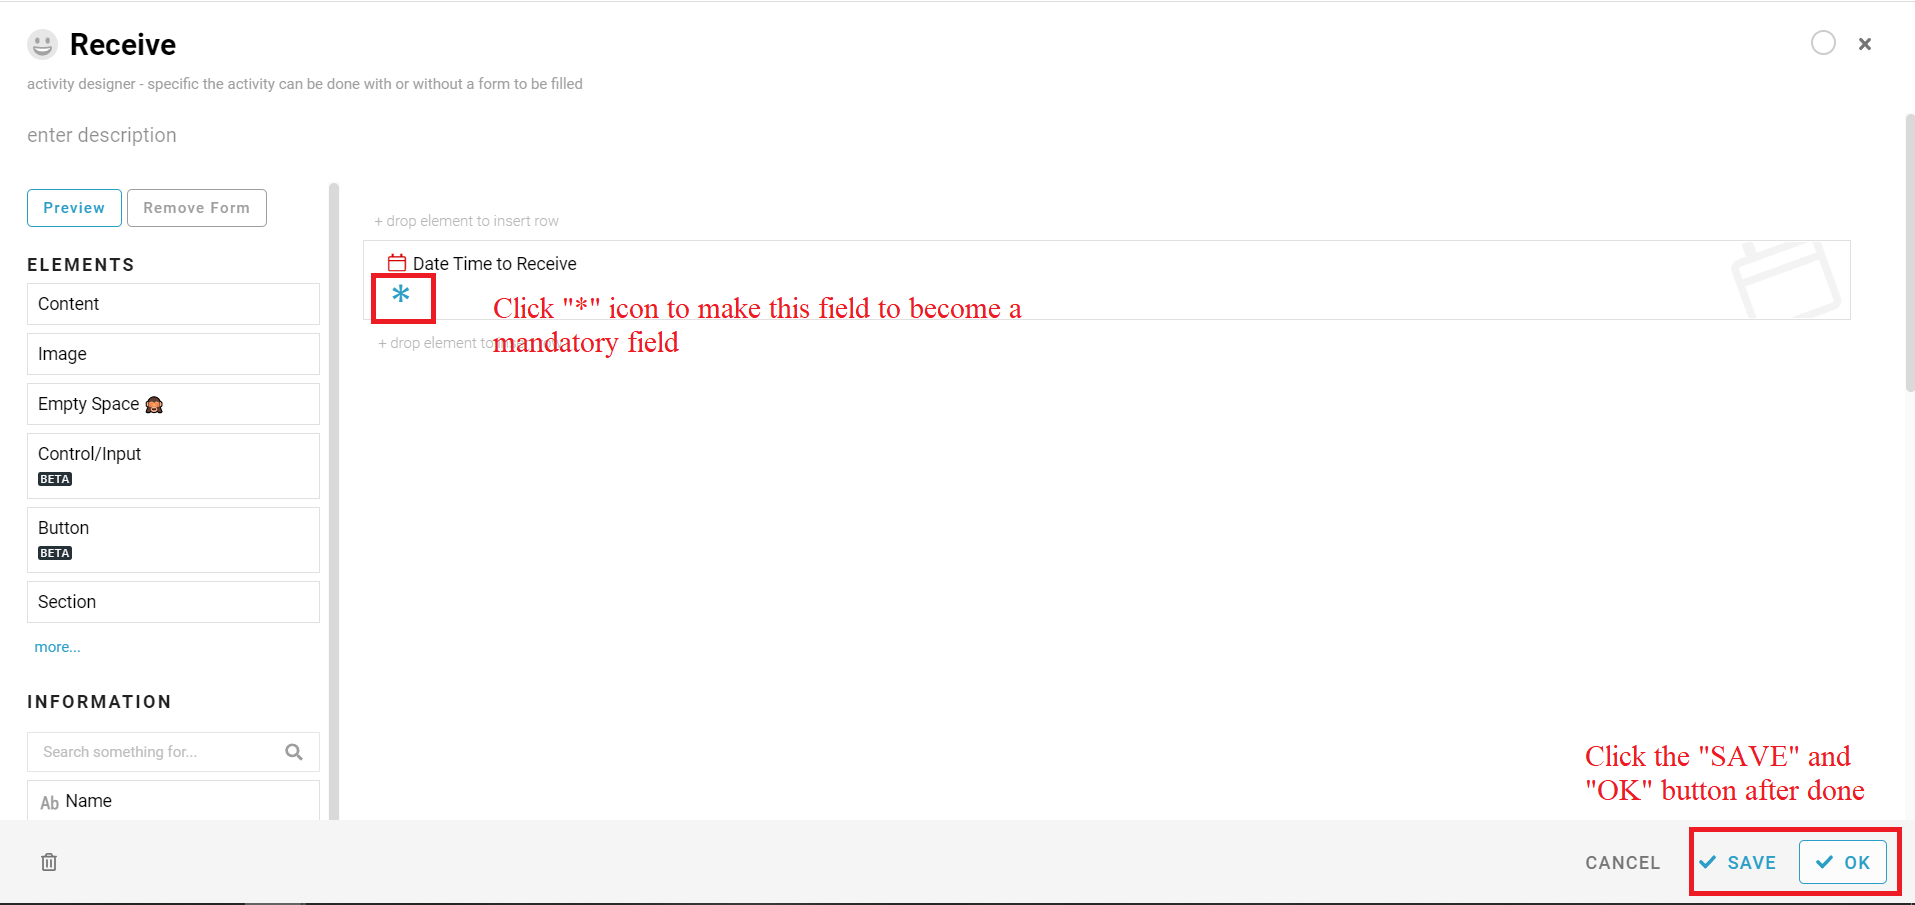
8. Step to pop up form when you perform the Activity (Refer Picture 12 and 13)
- Click gray box beside the “Receive” at the Activity card to open the design form
- Drag the “Date Time to Receive” box from “INFORMATION” panel at left side of screen, drop to the empty place.
- Click the “*” icon to make the field to mandatory field in the “Date Time to Receive” box
- Click the “SAVE” button after done and click “OK” to close the design form
9. Click “SAVE” button at top right of screen after make changes
For more templates:
Try FETIAS for FREE now.
Sign up at https://fetias.com
Related topic
Tutorial - Patient Registration