Hi ![]()
Today, I would like to share with you how to configure a project tracker module in INISTATE.
The project tracker module allows you to breaking down complex projects into smaller tasks, assigning them to team members, and tracking their completion. This enhances overall project efficiency.
Problem
- Project Tracking * *-Managing the project schedule manually is very challenging because it is time consuming and difficult to track the every status of the project.
Objective
Ensure handle project schedule easy- To break down projects into smaller tasks and assign them to team members.This enables better time management, resource allocation, and tracking of progress on individual tasks.
Real-time Progress Tracking To monitor the progress of various tasks in real-time. This visibility allows you to identify potential bottlenecks, address issues early on, and ensure projects stay on schedule.
Step & Configuration
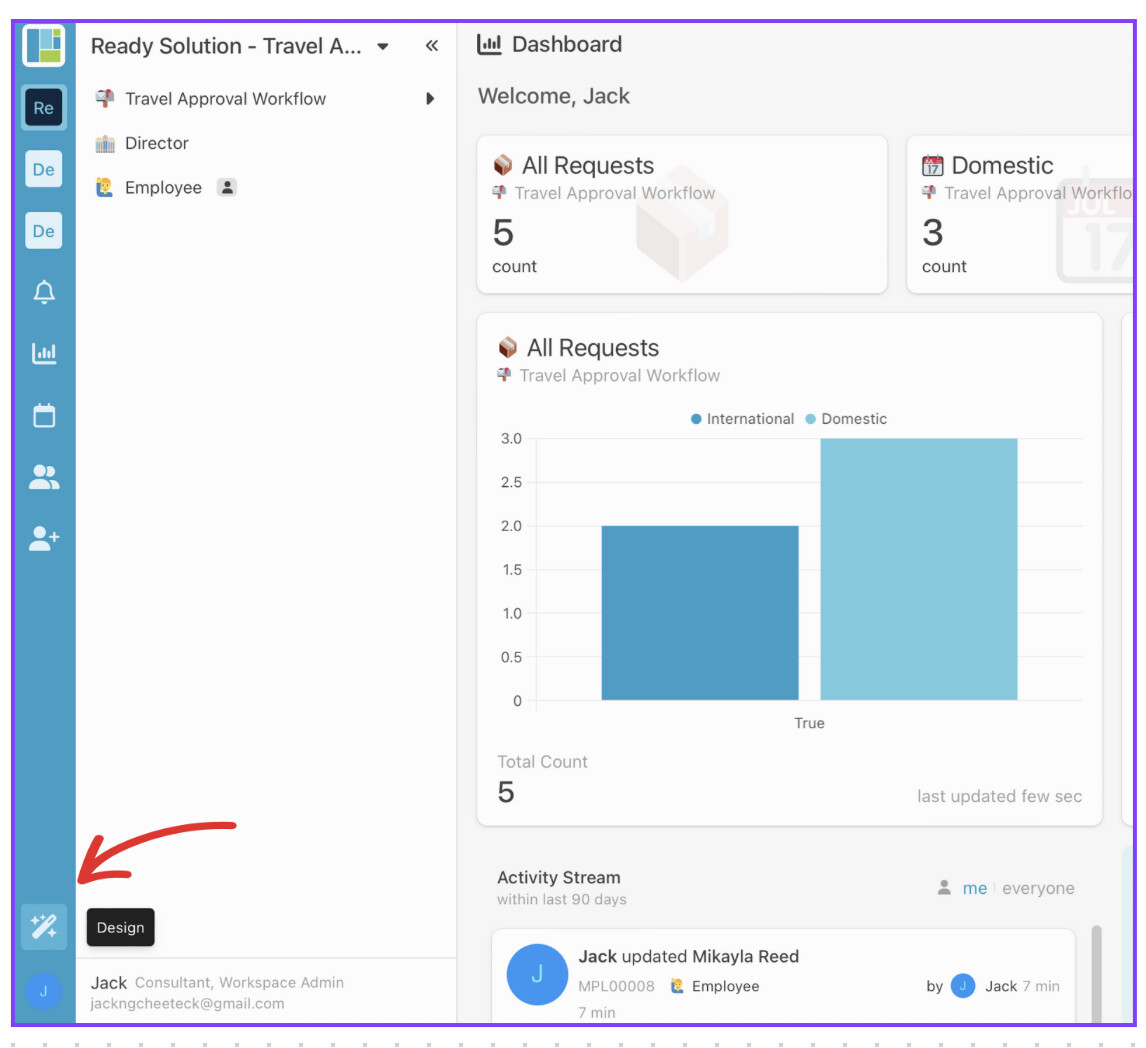
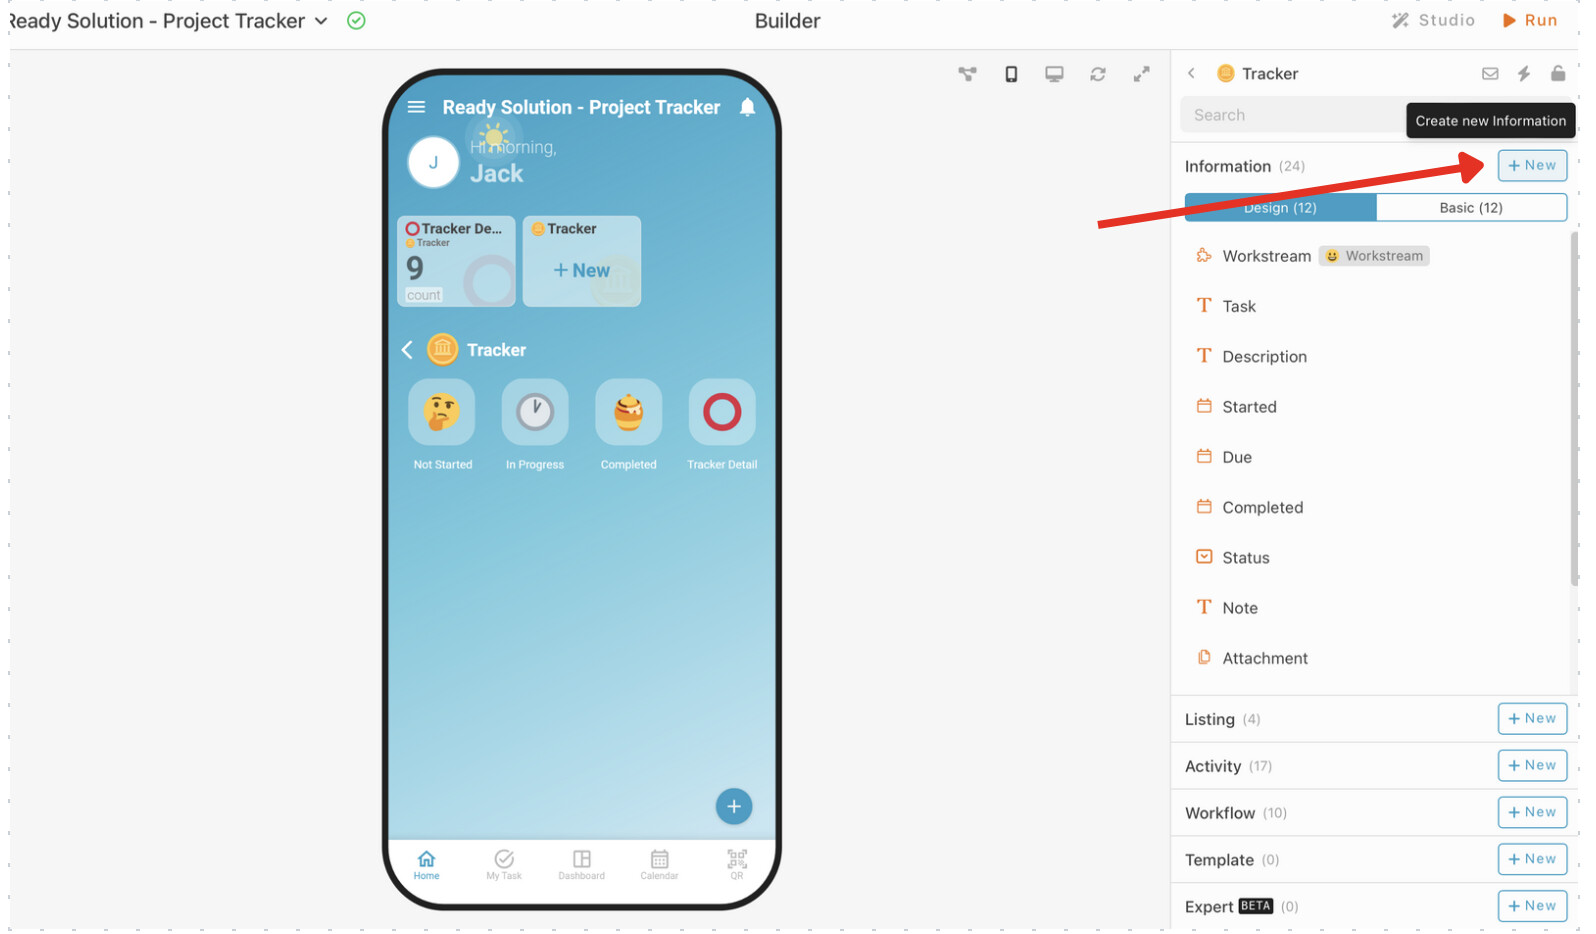
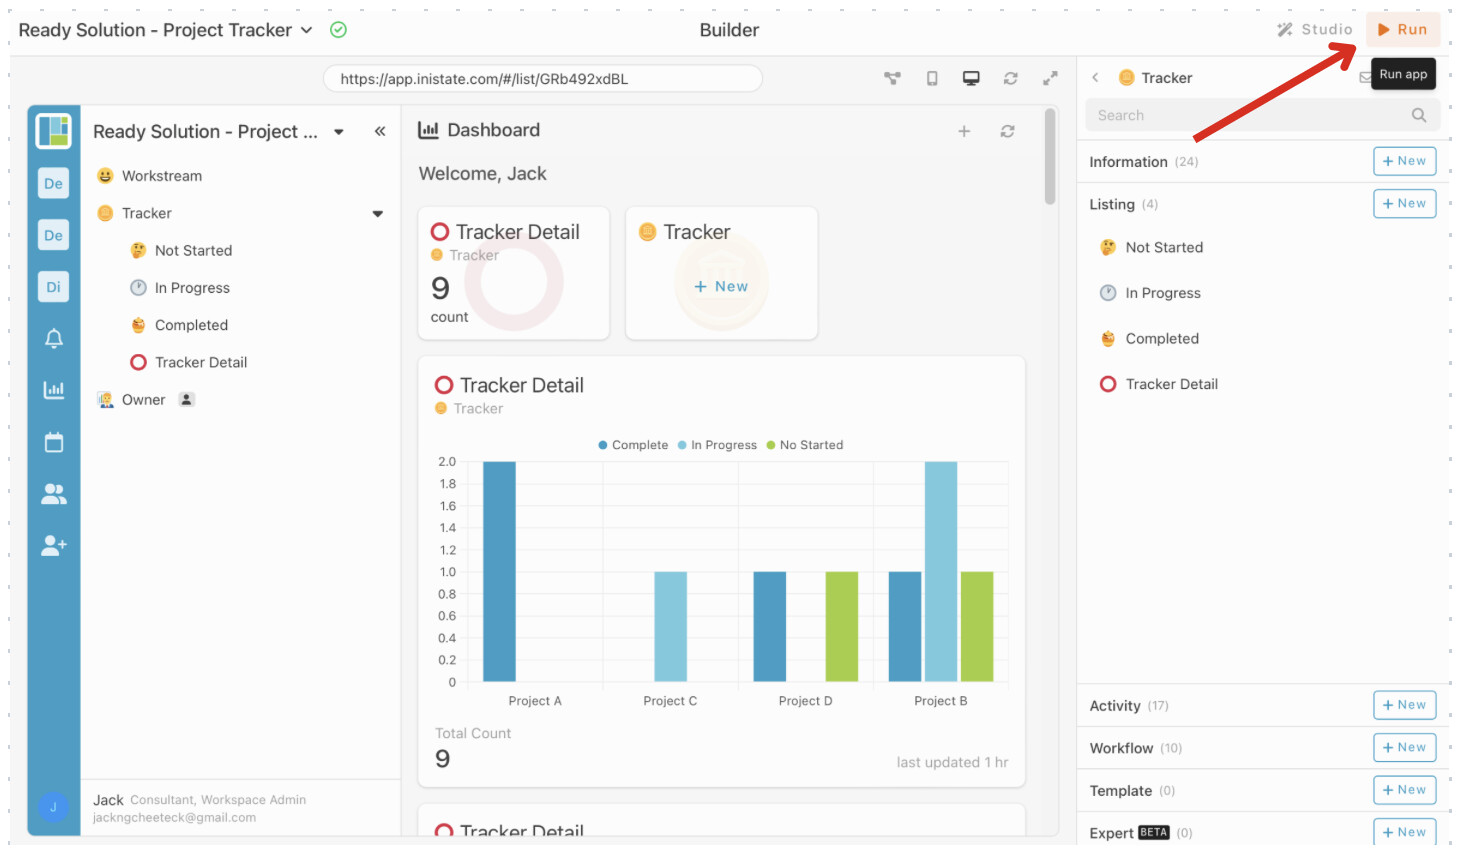
1.Access your workspace builder.
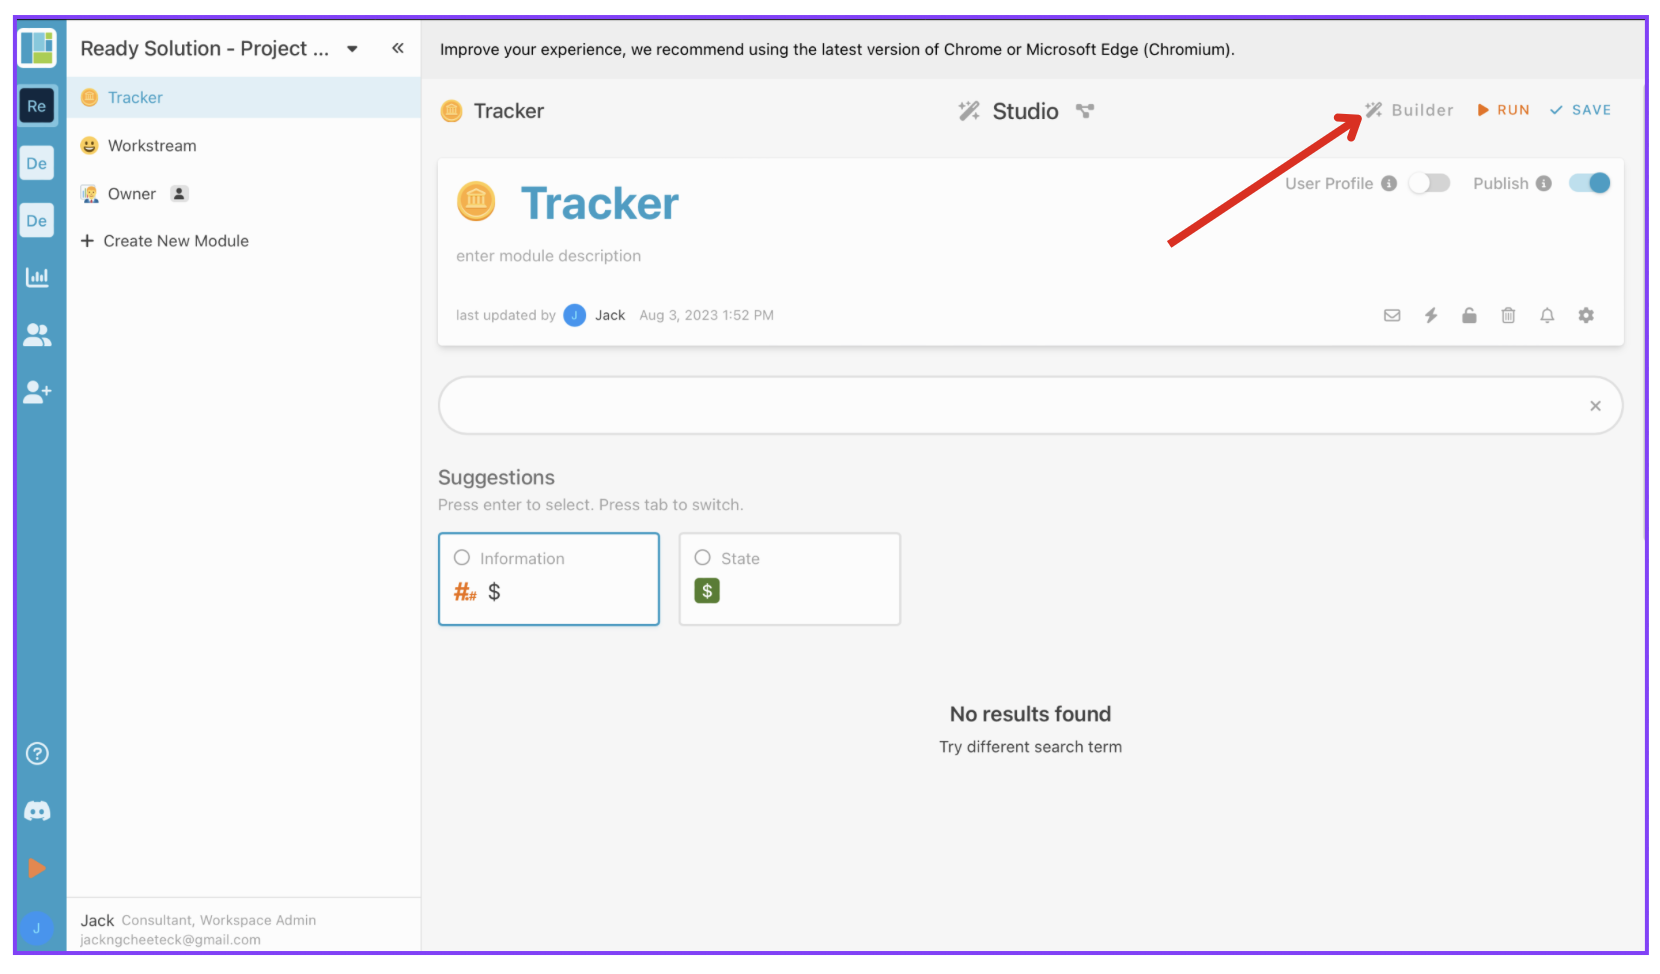
2.In builder, create 3 new module by click the “+ New” on the top right.
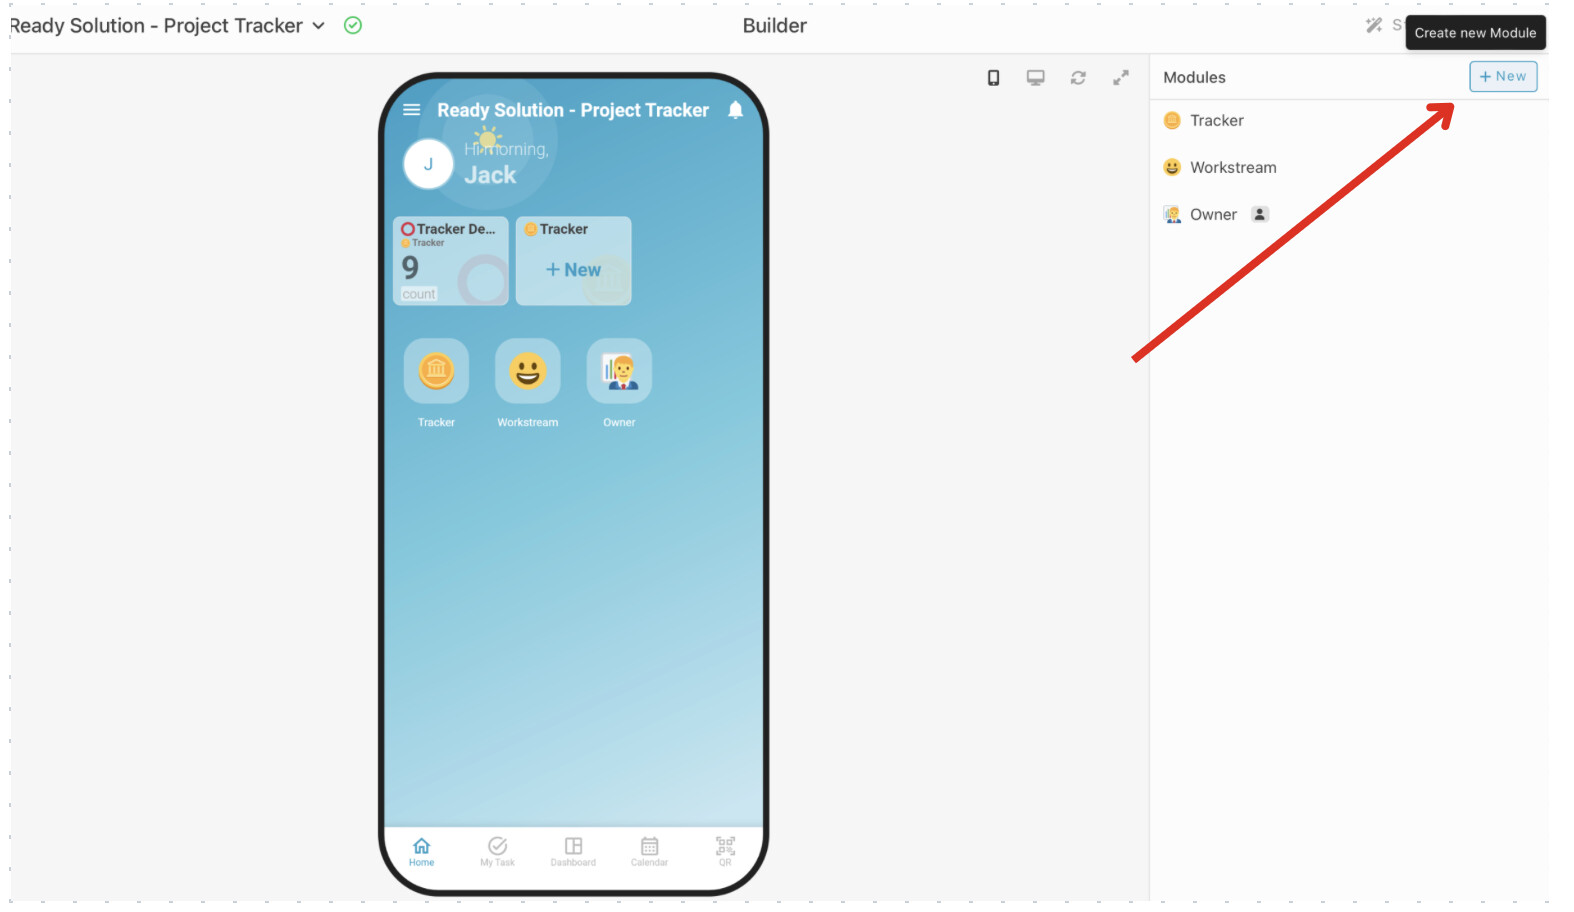
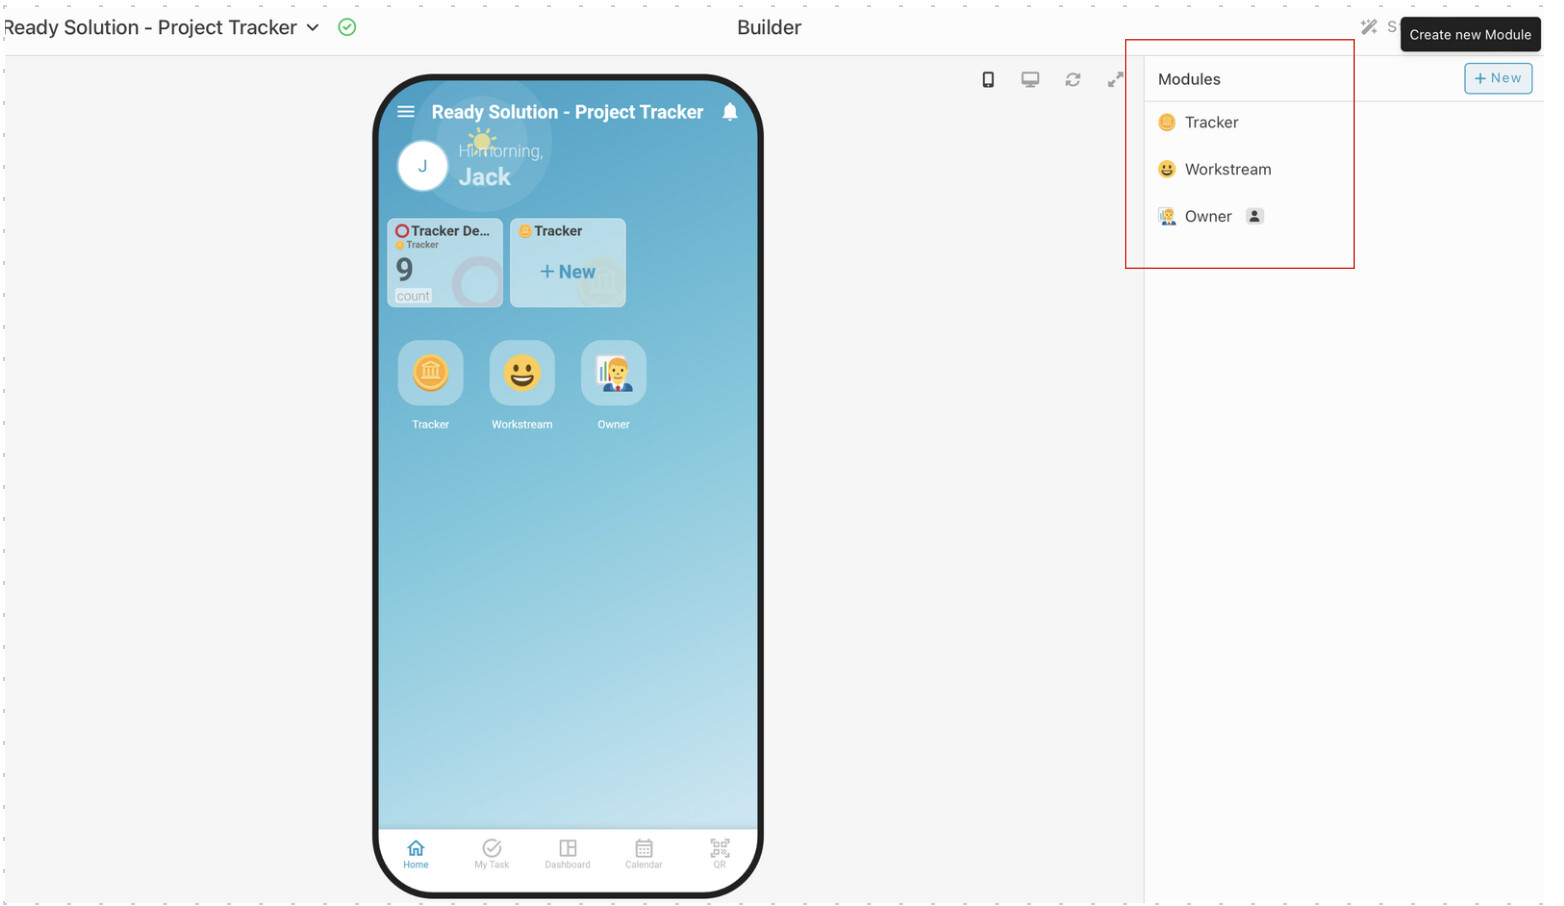
3.Set a name and emoji for the modules. eg : Tracker, Workstream and owner
- Add Information
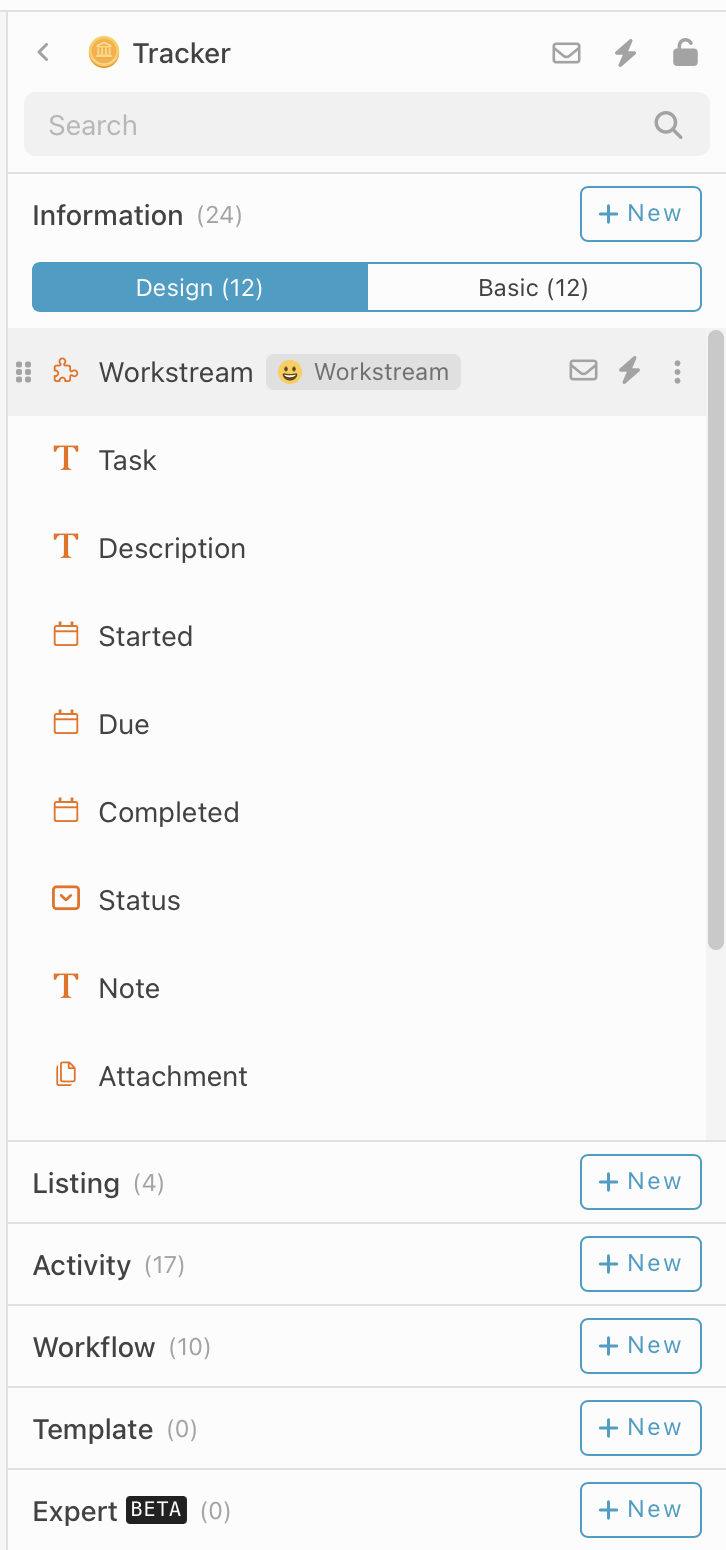
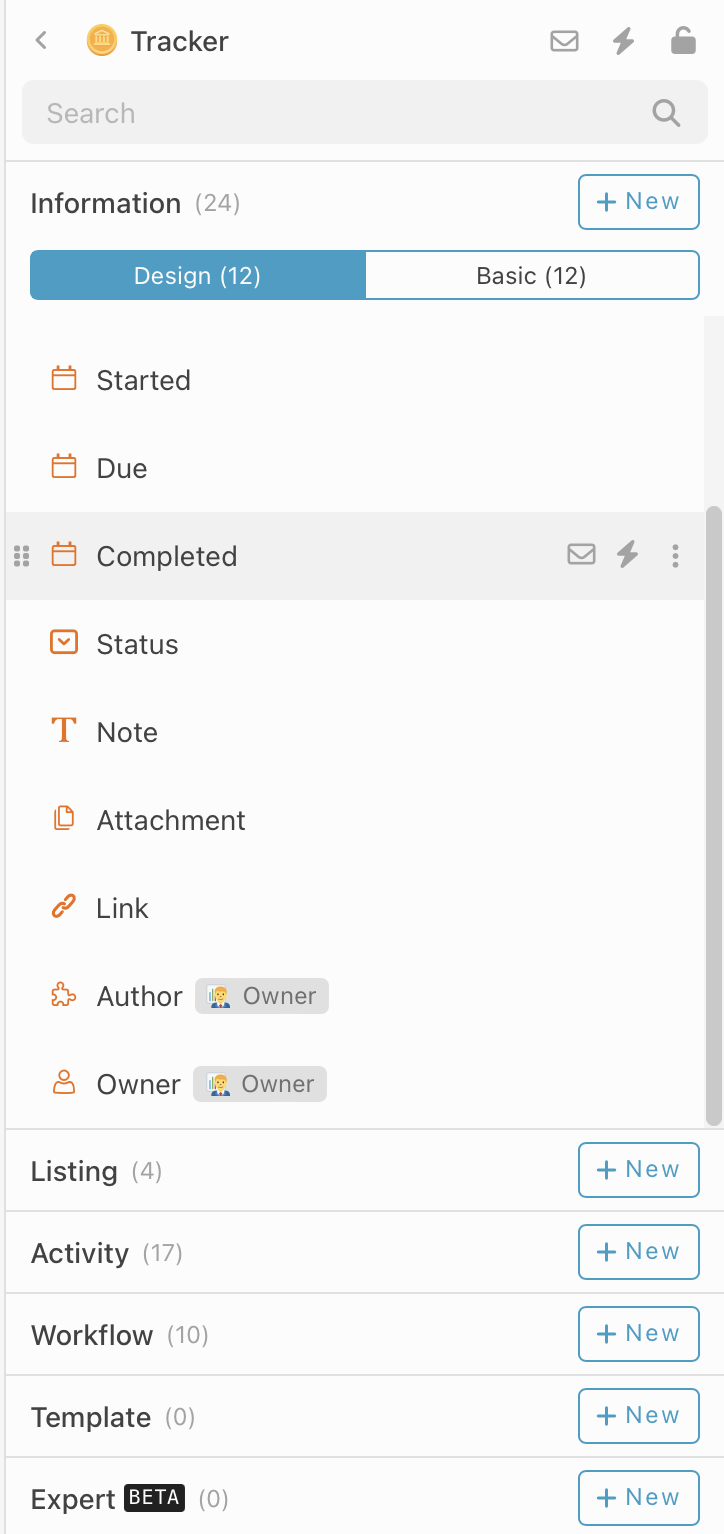
Module :Tracker
Add a few information :
- Task - Text
- Description - Text
- Started - Date
- Due - Date
- Completed - Date
- Status - Select
*Not Started
*In Progress
*Complete
*Noted - Text - Attachment - Files
- Link - URL
*Module :Owner
*Display Information : Name
*Module :Workstream
*Display Information : Workstream
4.1 Add Information
Module :Workstream
- Under modules ‘ Workstream’, select information section.
- Click “+ New” to add new information.
- Add a few information.
- Colour - Select
*Red
*Blue
*Yellow
*Green - Workstream:Text
- Description - Text
- Details - Table
*Tracker - Module
*Tracker: Document ID
*Task- Text
*Due- Date
*Description- Text
*Status- Text

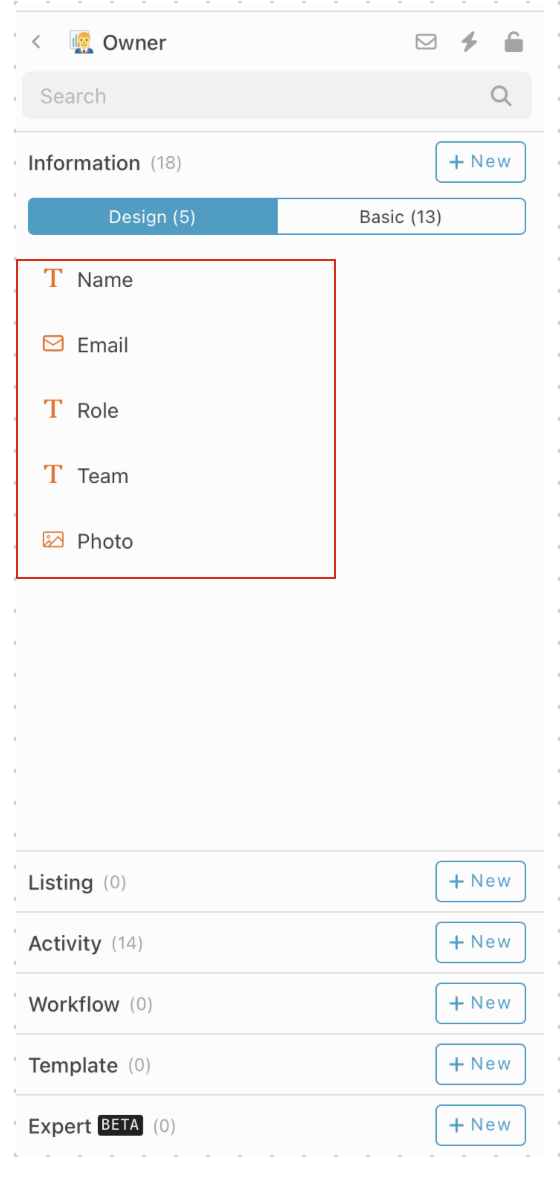
Module :Owner
- Under modules ‘ Owner’, select information section.
- Click “+ New” to add new information.
- Add a few information.
- Name:Text
- Email - Email
- Details - Table
*Role- Text
*Team: Text
*Photo- Image
Set Formula
Module : Tracker
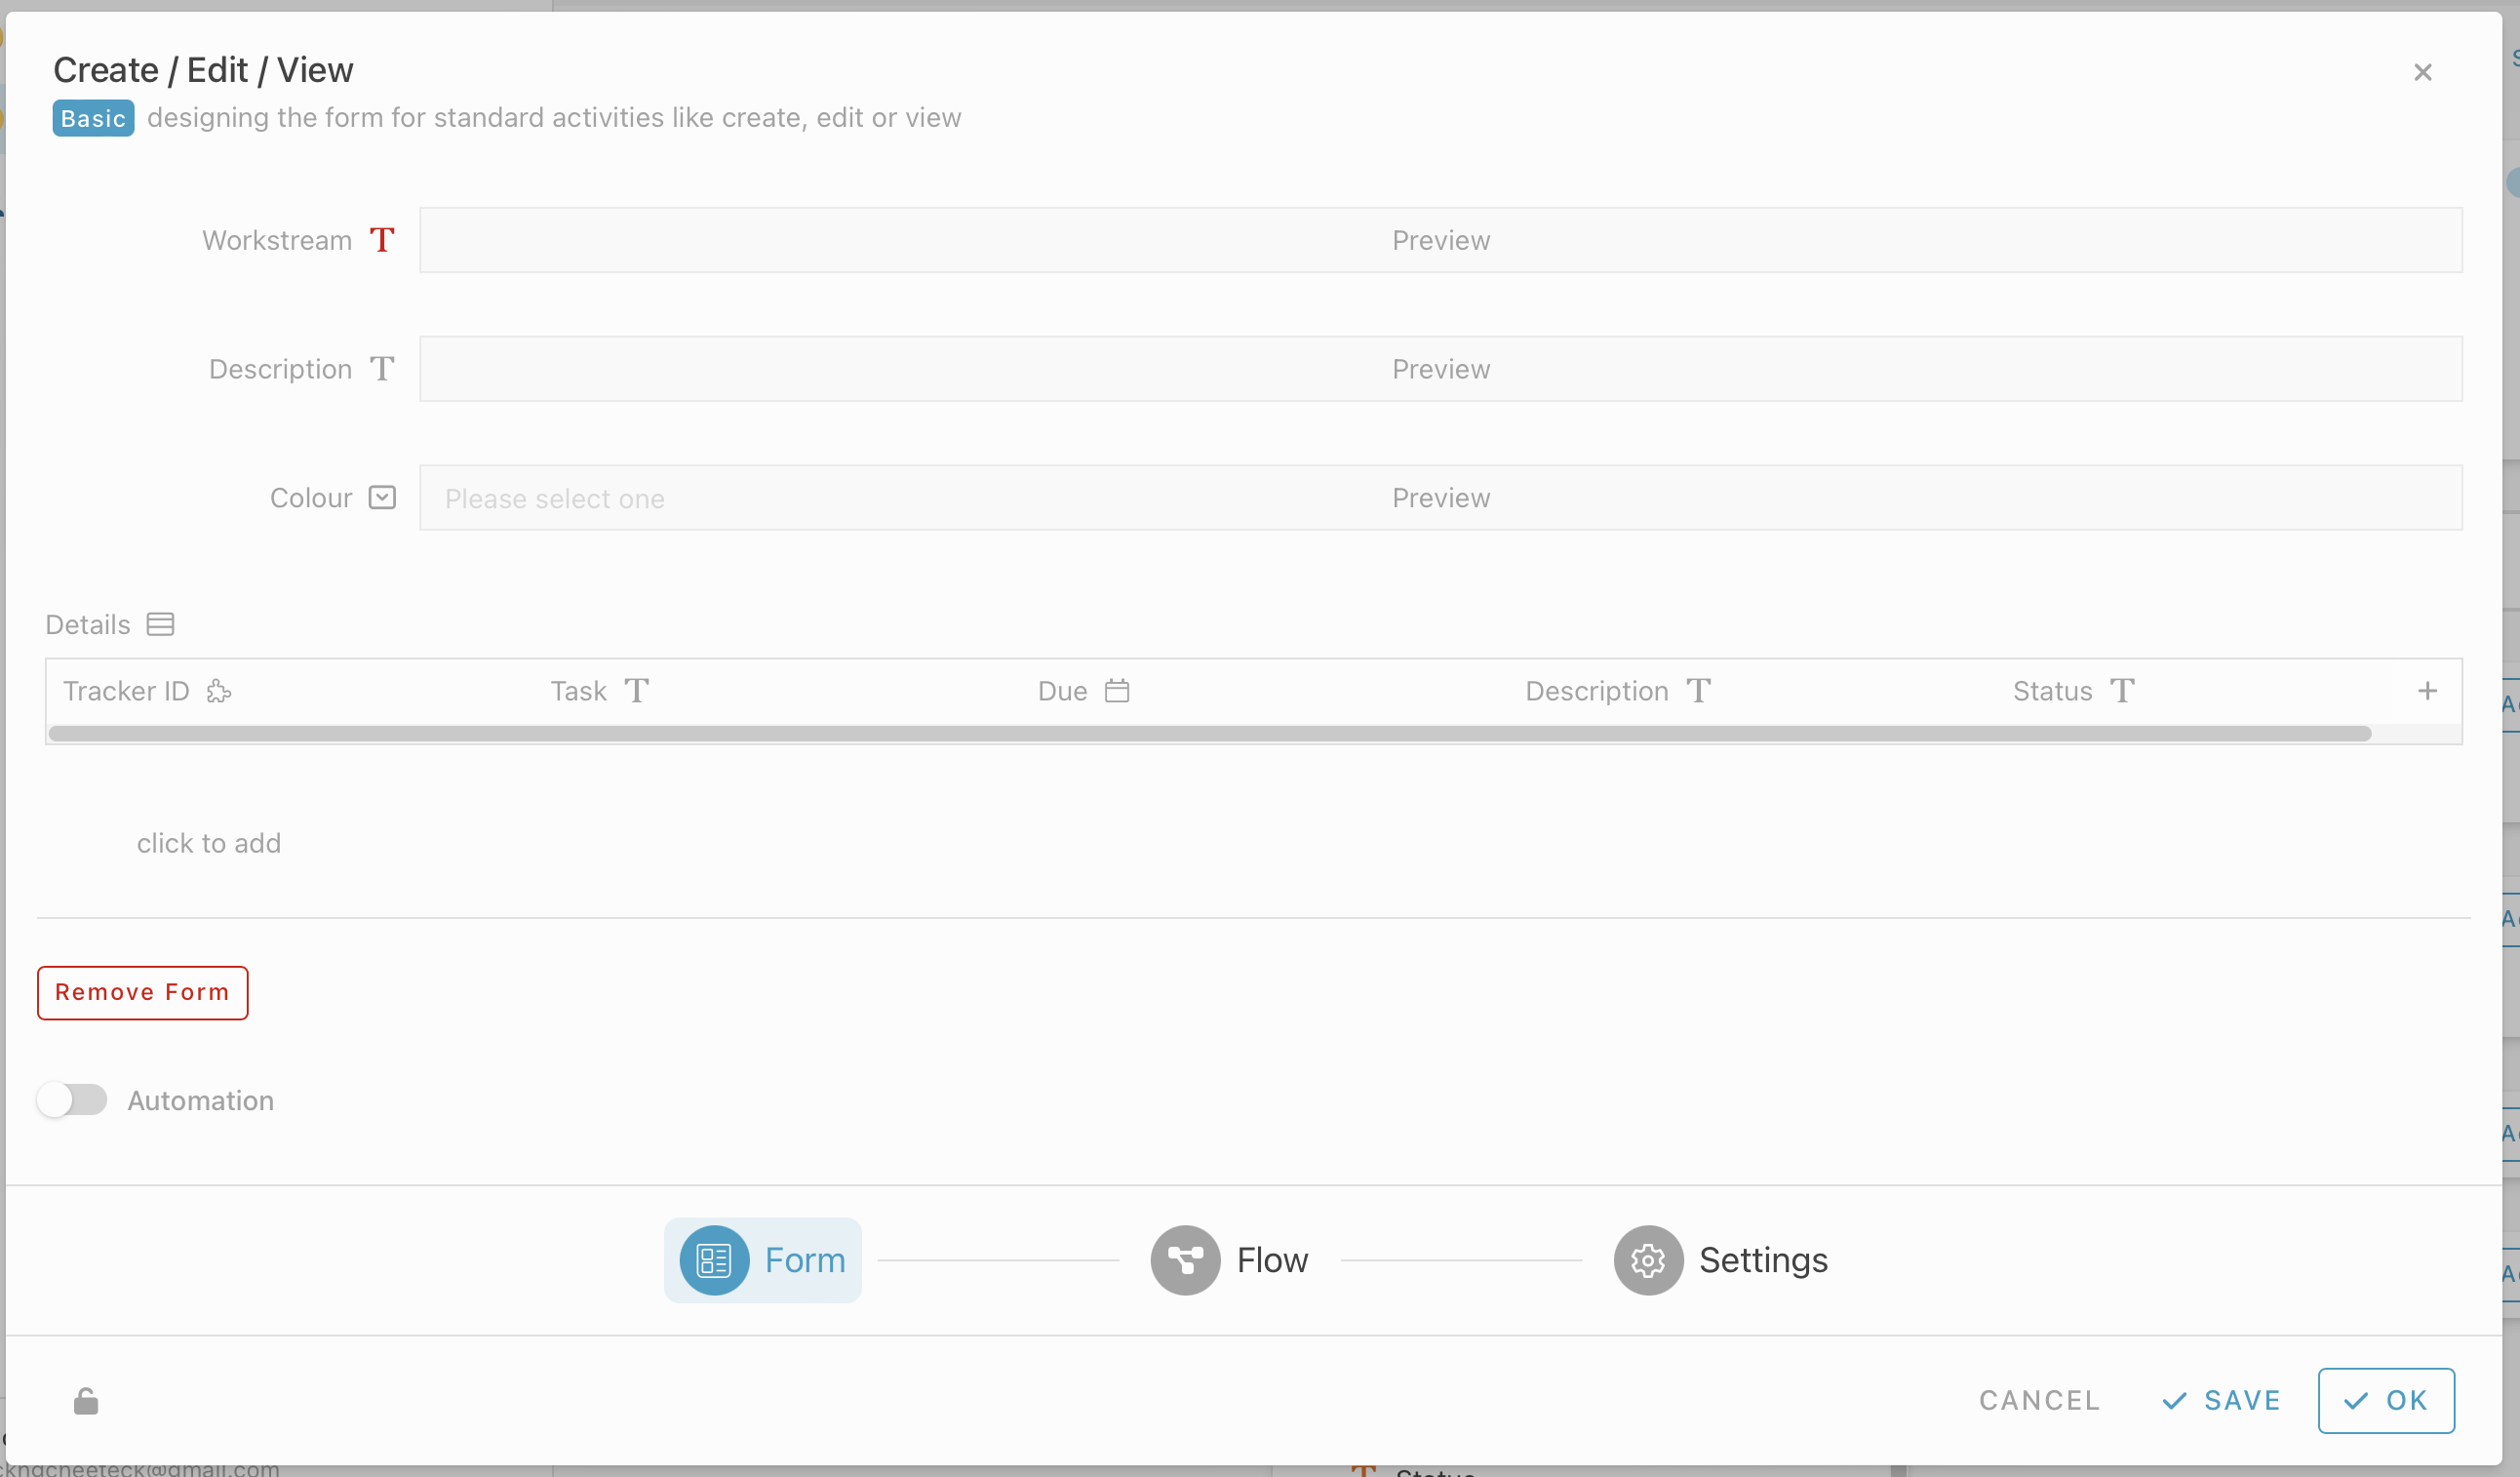
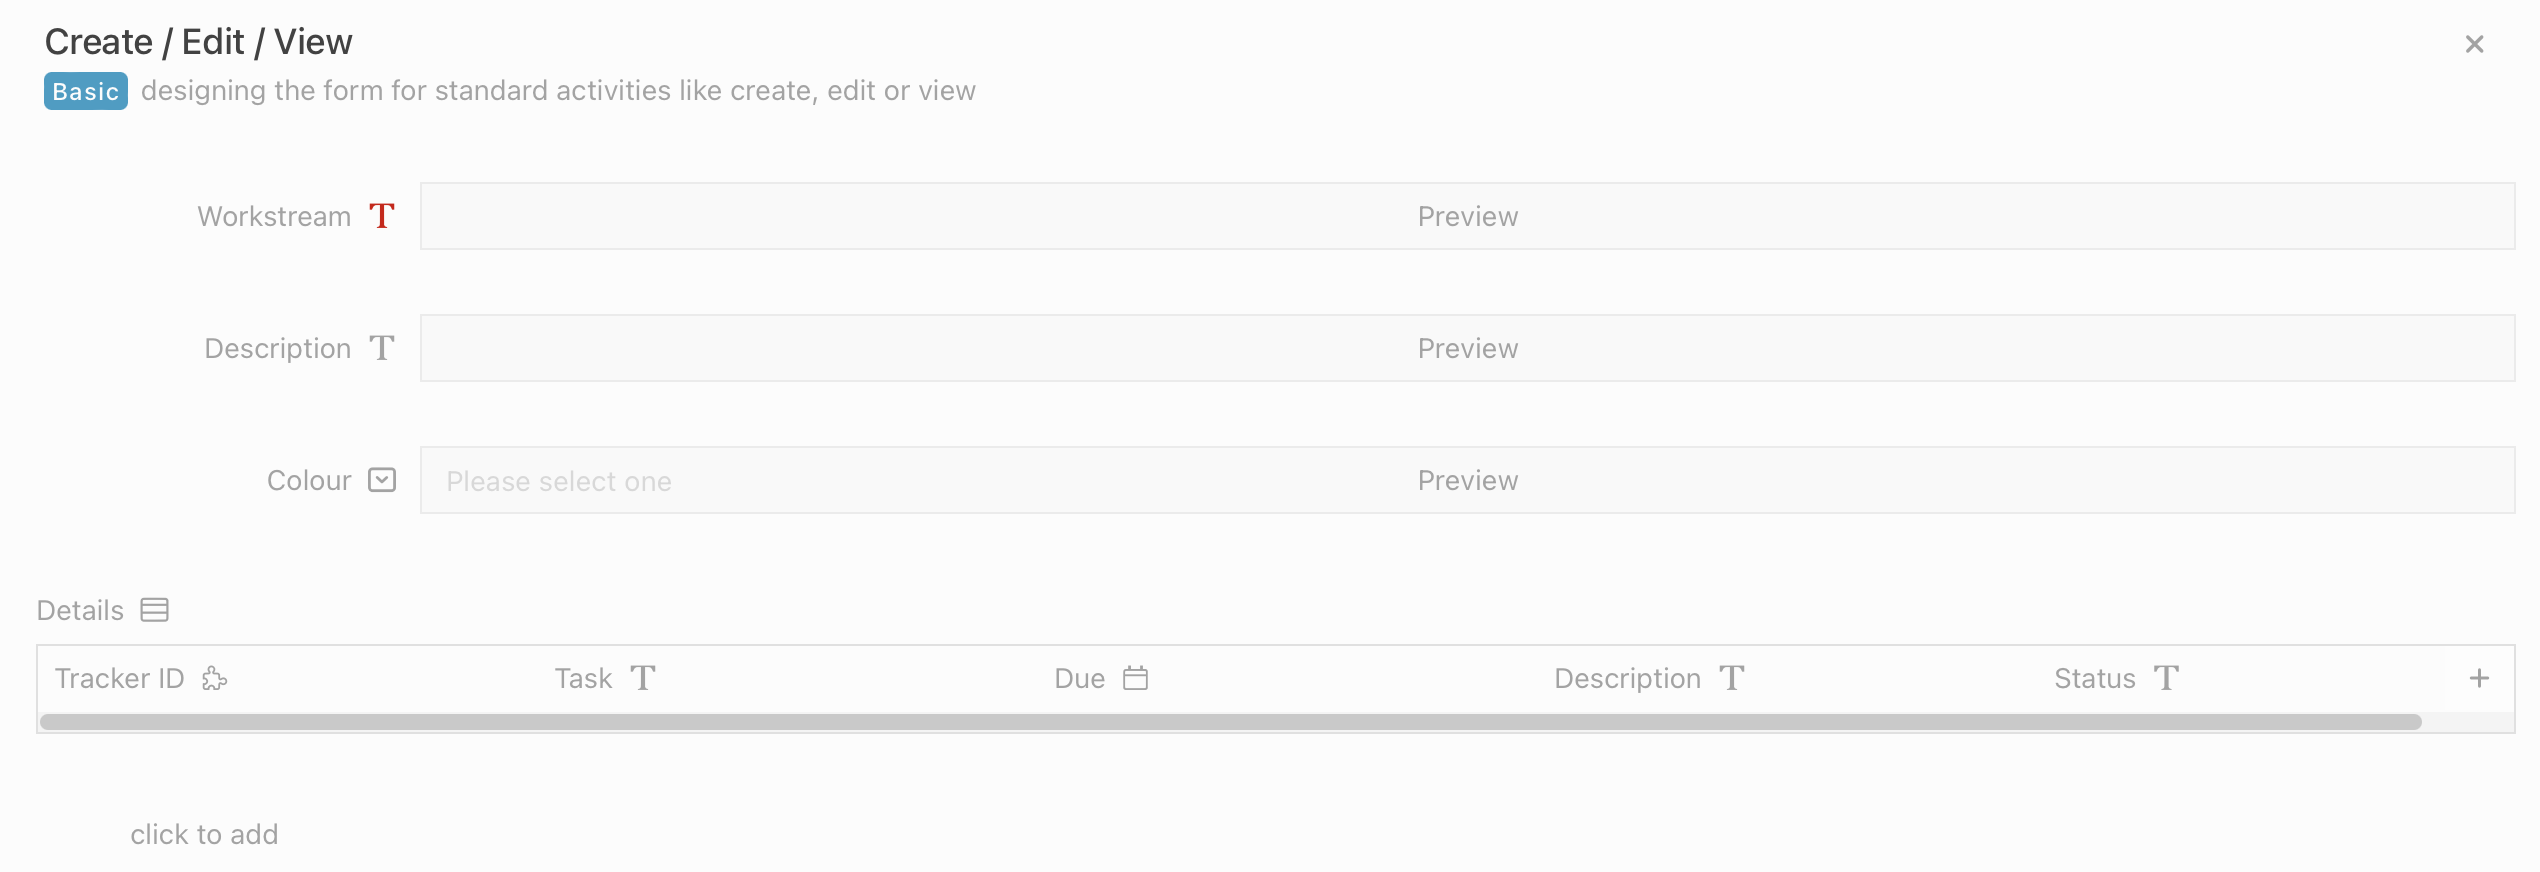
- Under module , go to Activity section, click “Basic” Tab and click “Create” to view form.
- Customize the form by drag and drop all the information added.
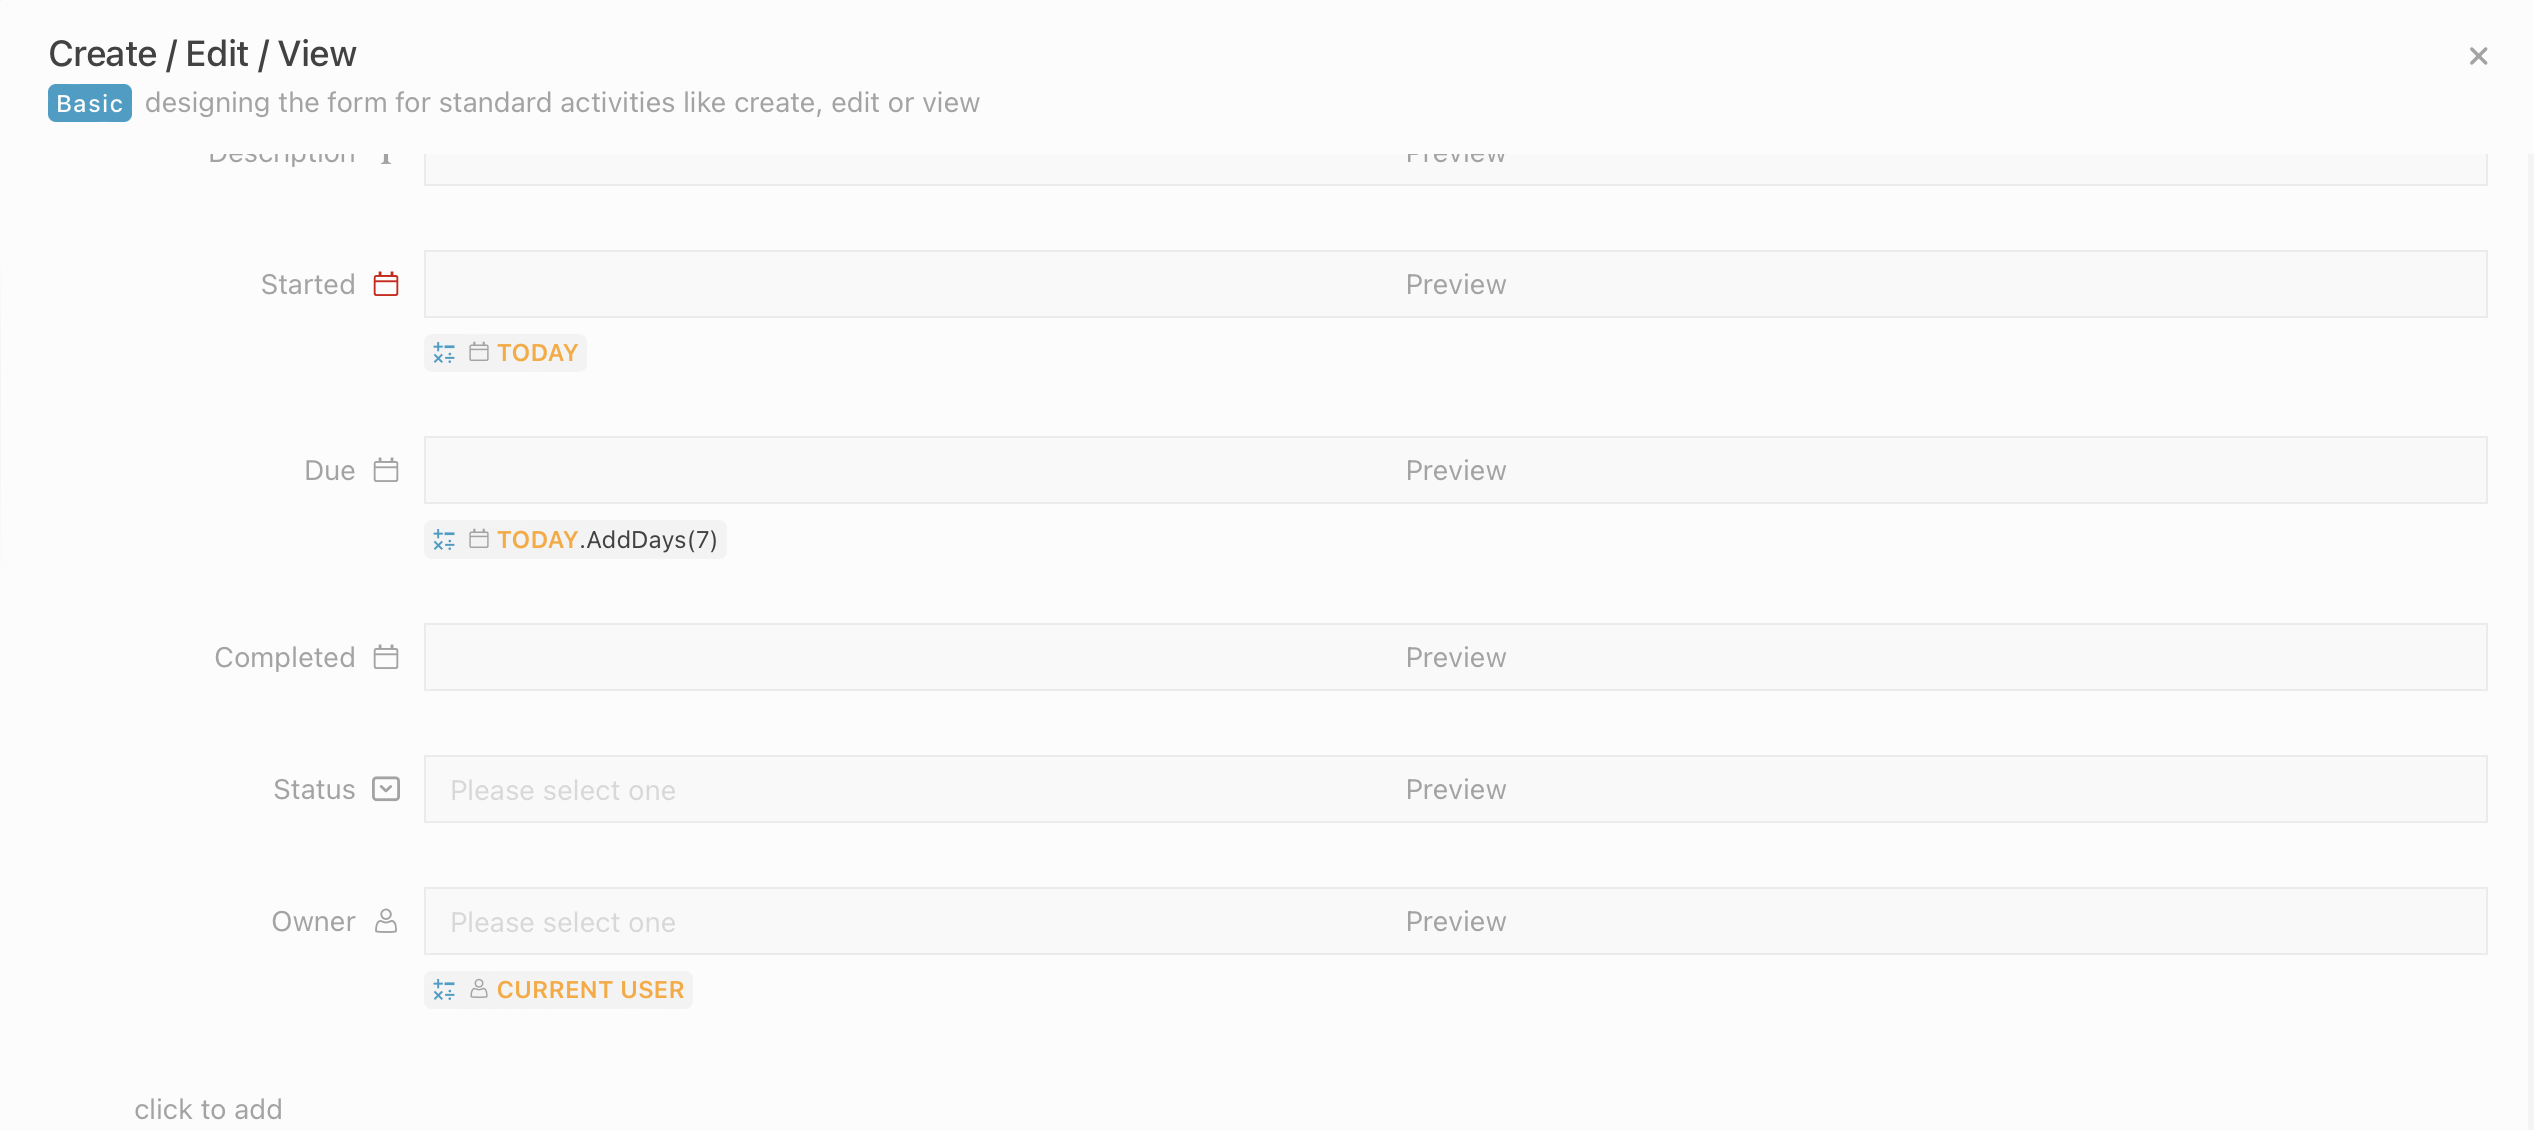
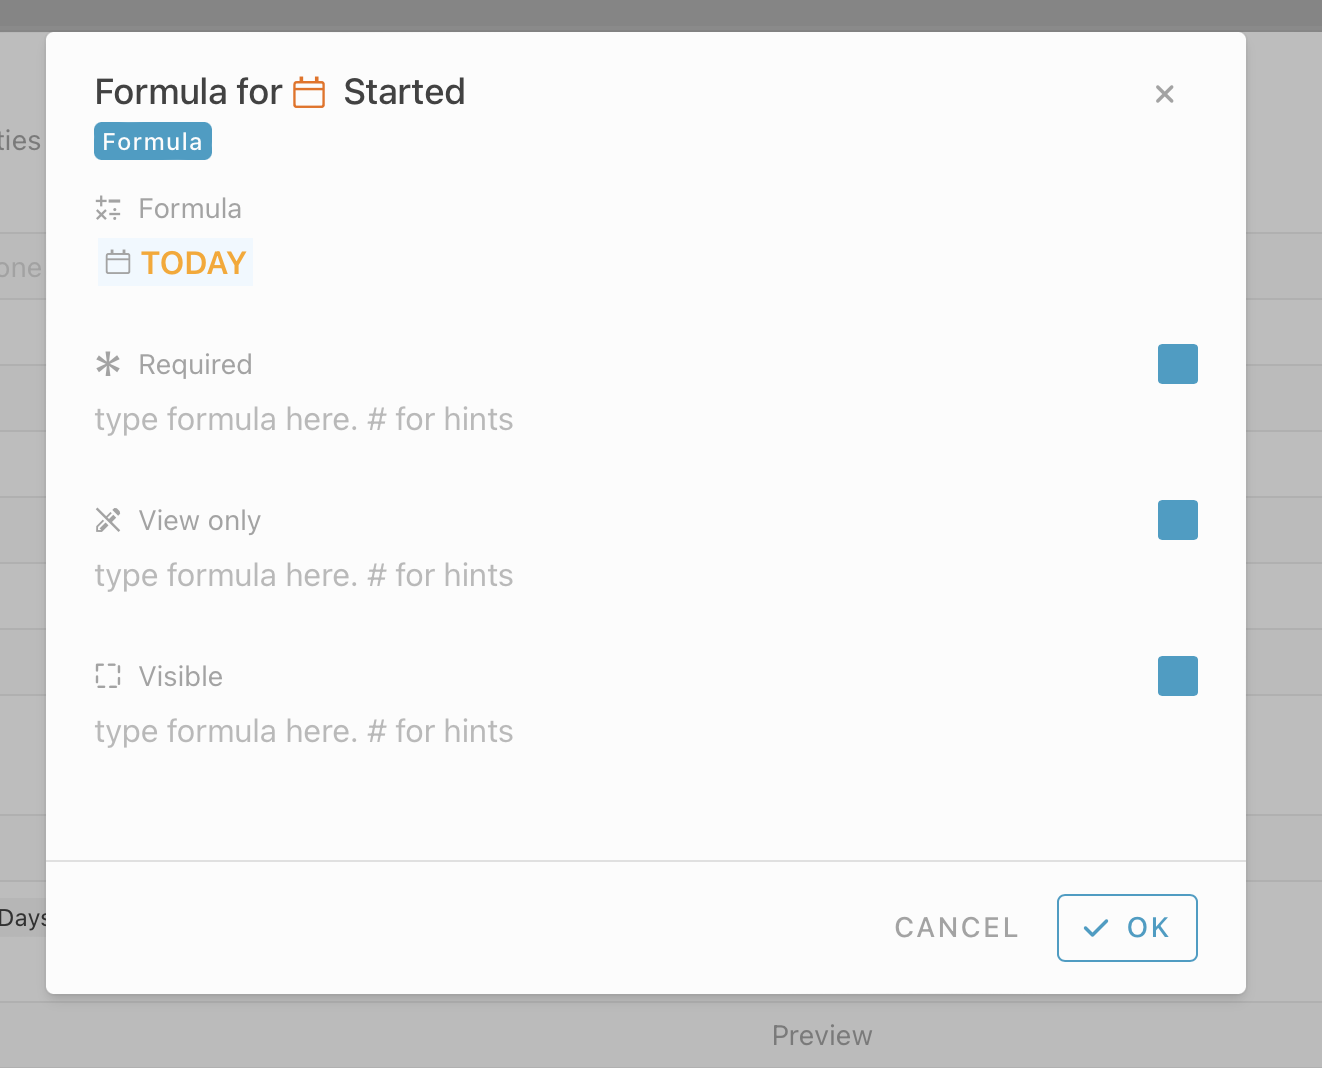
Hover on the information ‘Started’, click “Operations” icon to set formula.

In formula column, insert : #Today
Set the field as requires for the “Started” information type and important details by click the “star” icon.
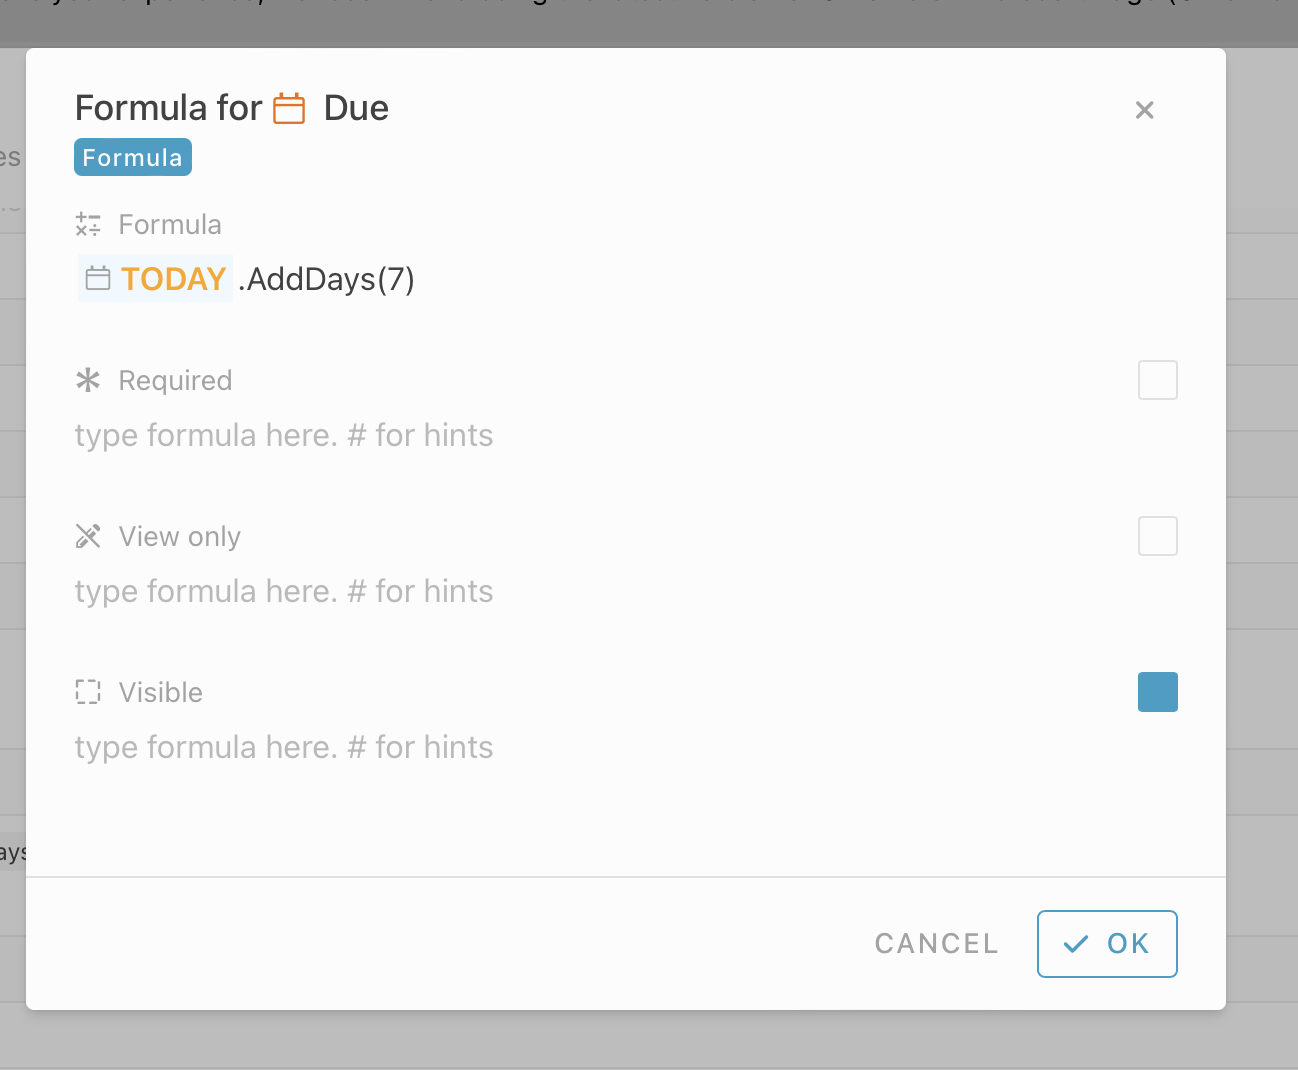
Hover on the information ‘Due’, click “Operations” icon to set formula.
In formula column, insert : #Today.AddDays(7)
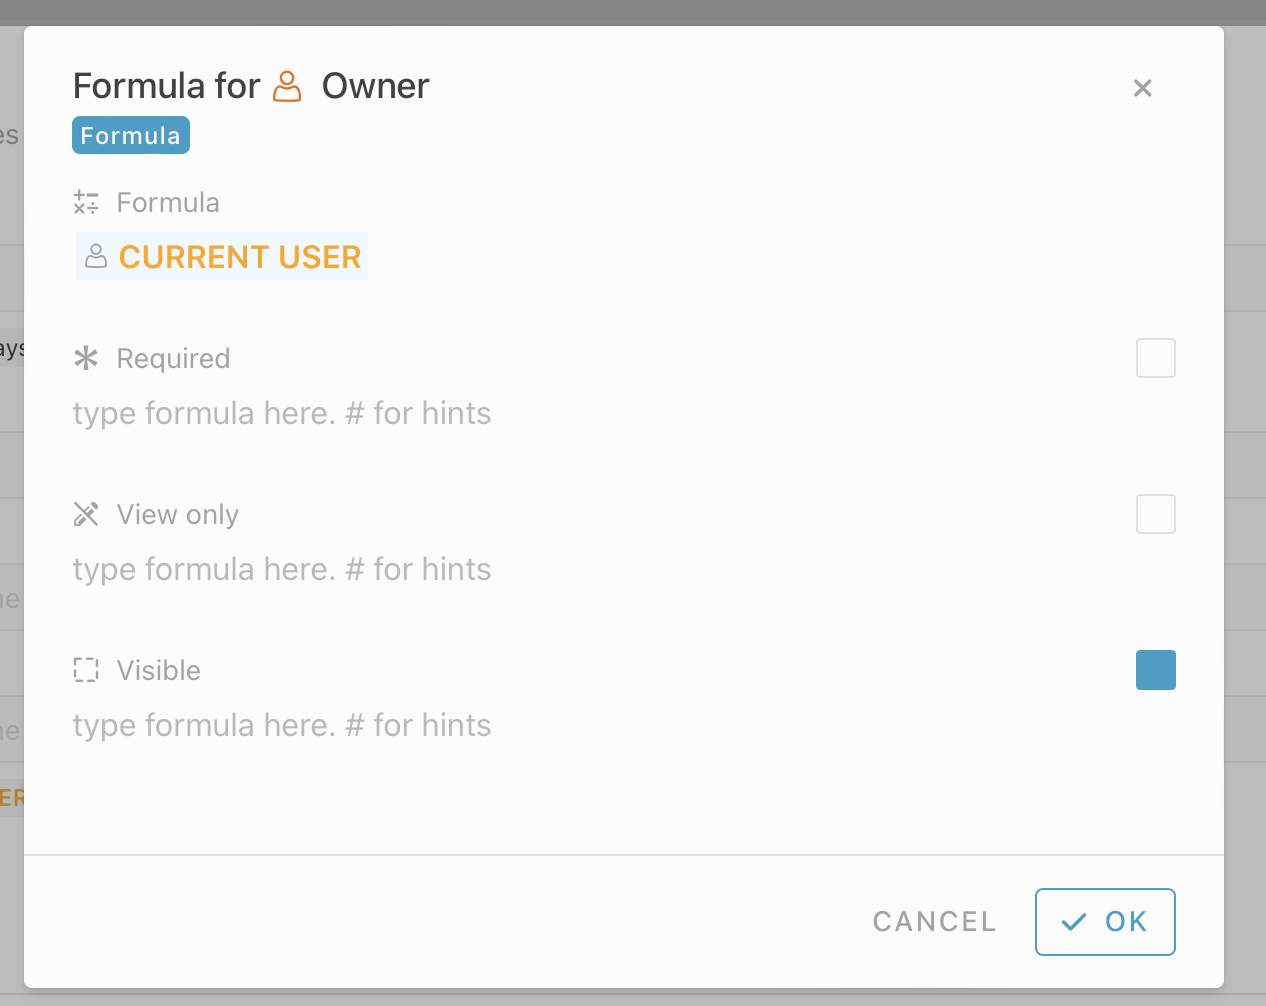
Hover on the information ‘Owner’, click “Operations” icon to set formula.
In formula column, insert : #CURRENTUSER
Set requires filed
Module :Workstream
Set the field as requires for the “Workstream” information type and important details by click the “star” icon.
Module :Workstream
Set the field as requires for the “Name”, “Email” information type and important details by click the “star” icon.

- Activity
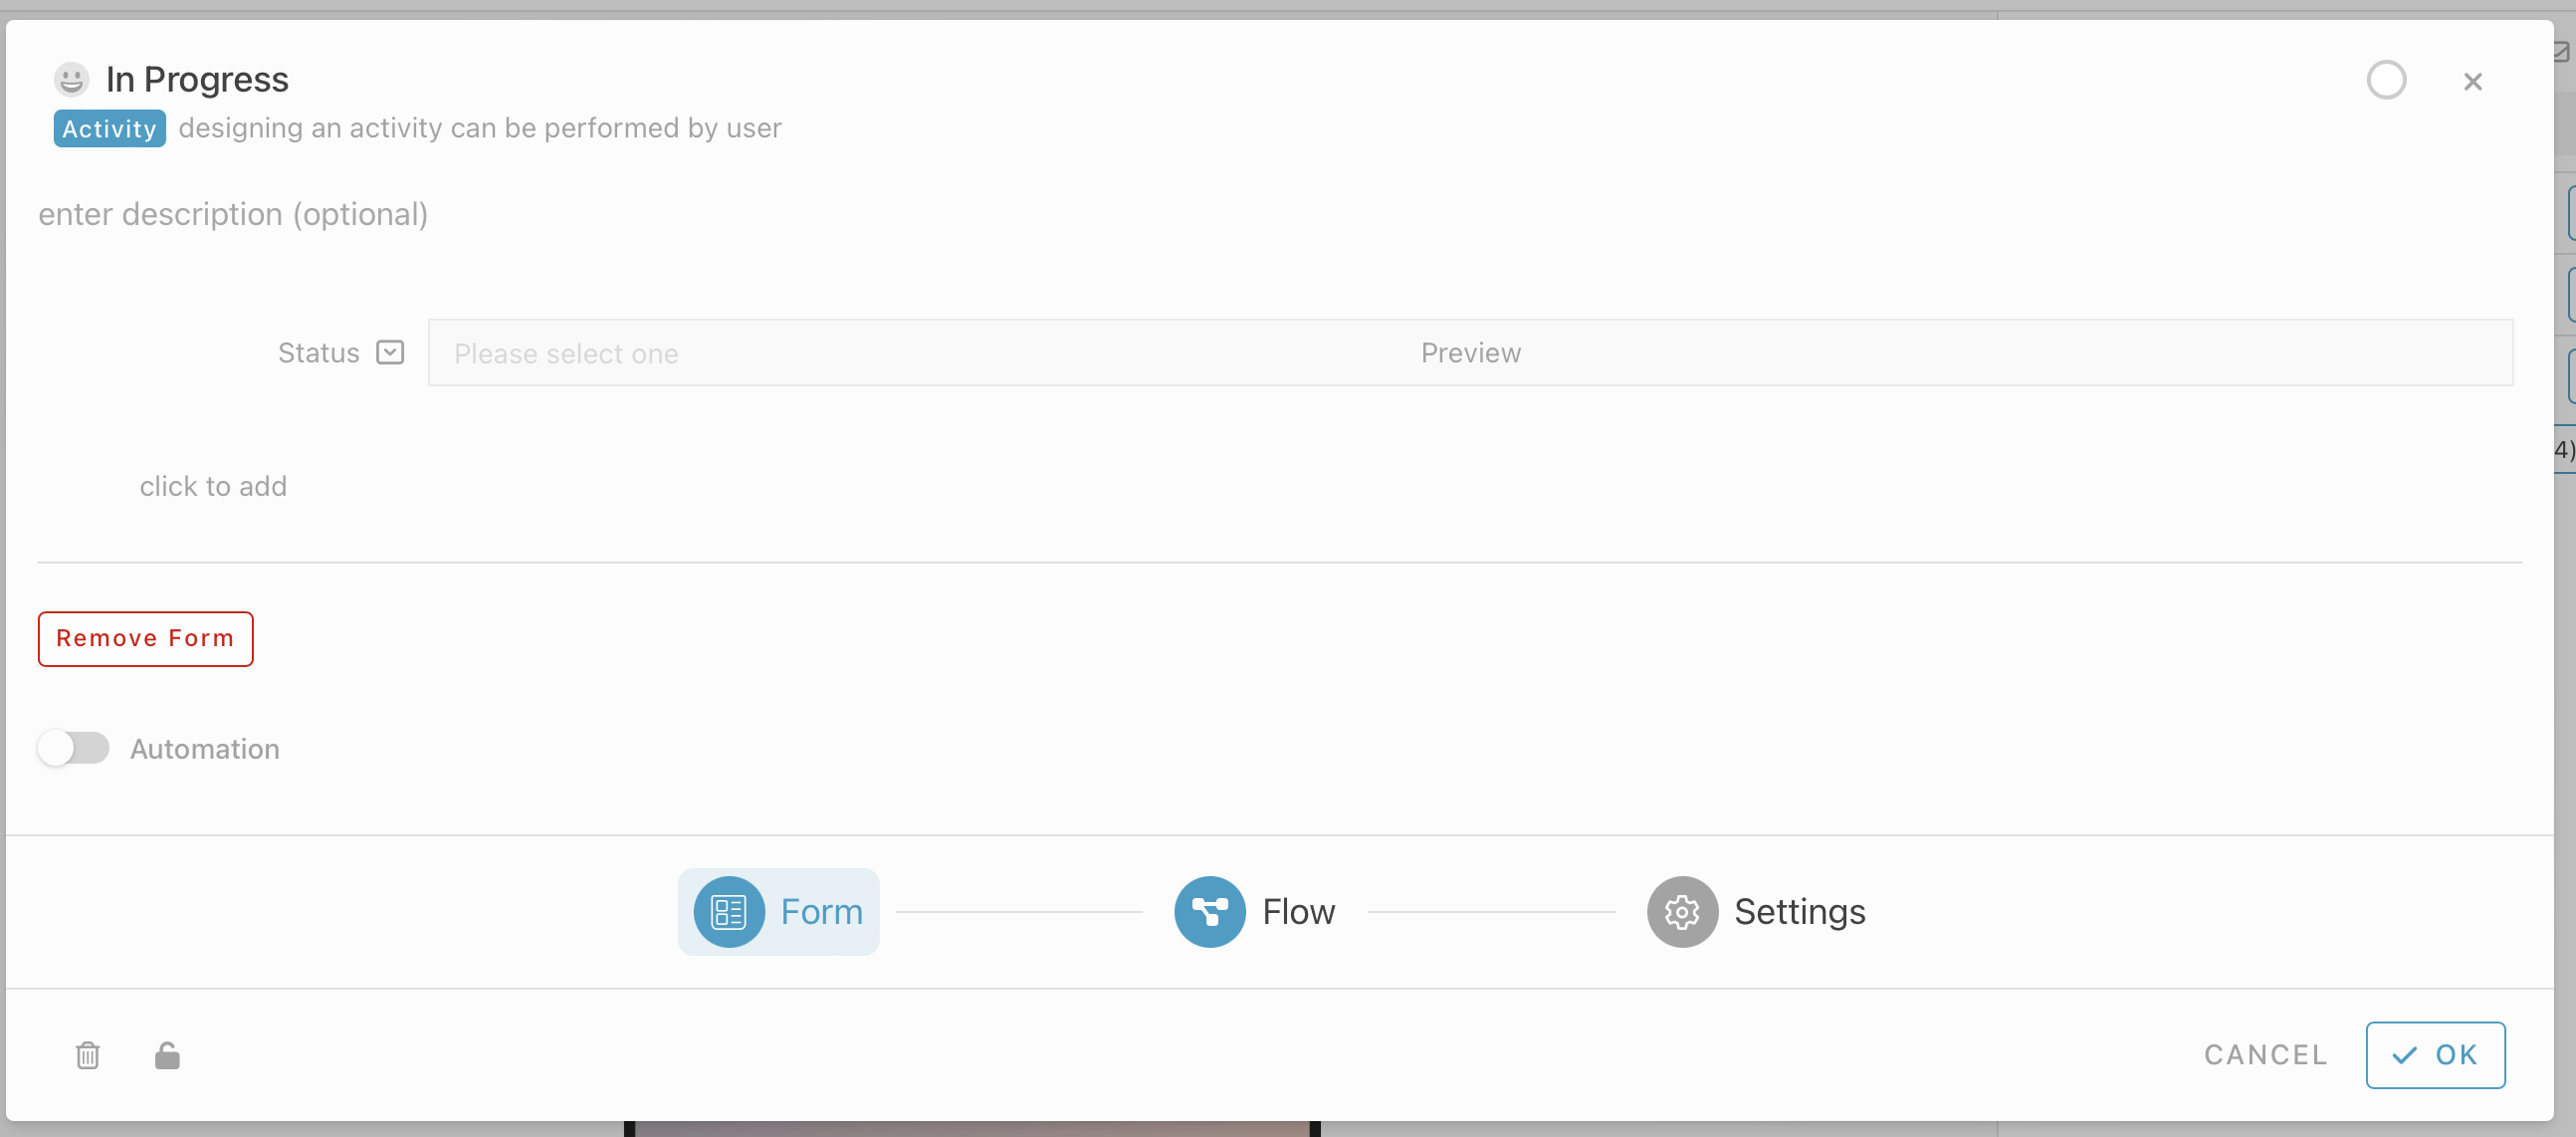
Go to module “Tracker”, choose Activity tab and click “+ New” to add new activity.
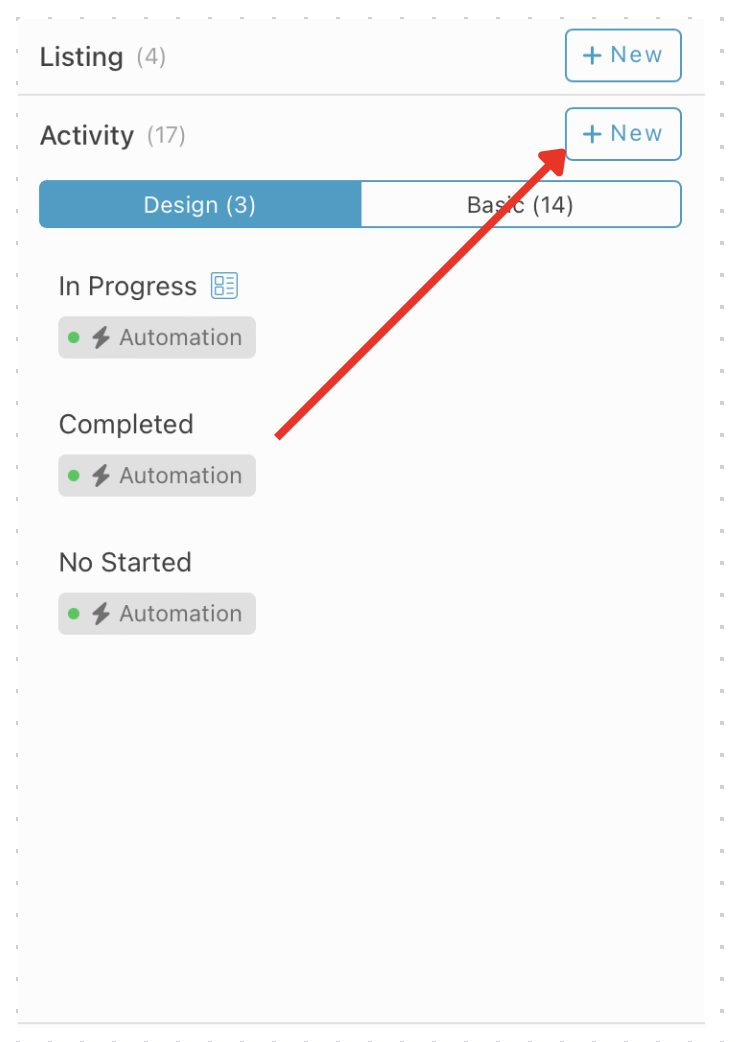
Give a name for the activity. eg :In Progress,Completed,Not Started (emoji is optional)
In Tracker module, select workflow tab, click “+ New” and choose “+ State” to add state.
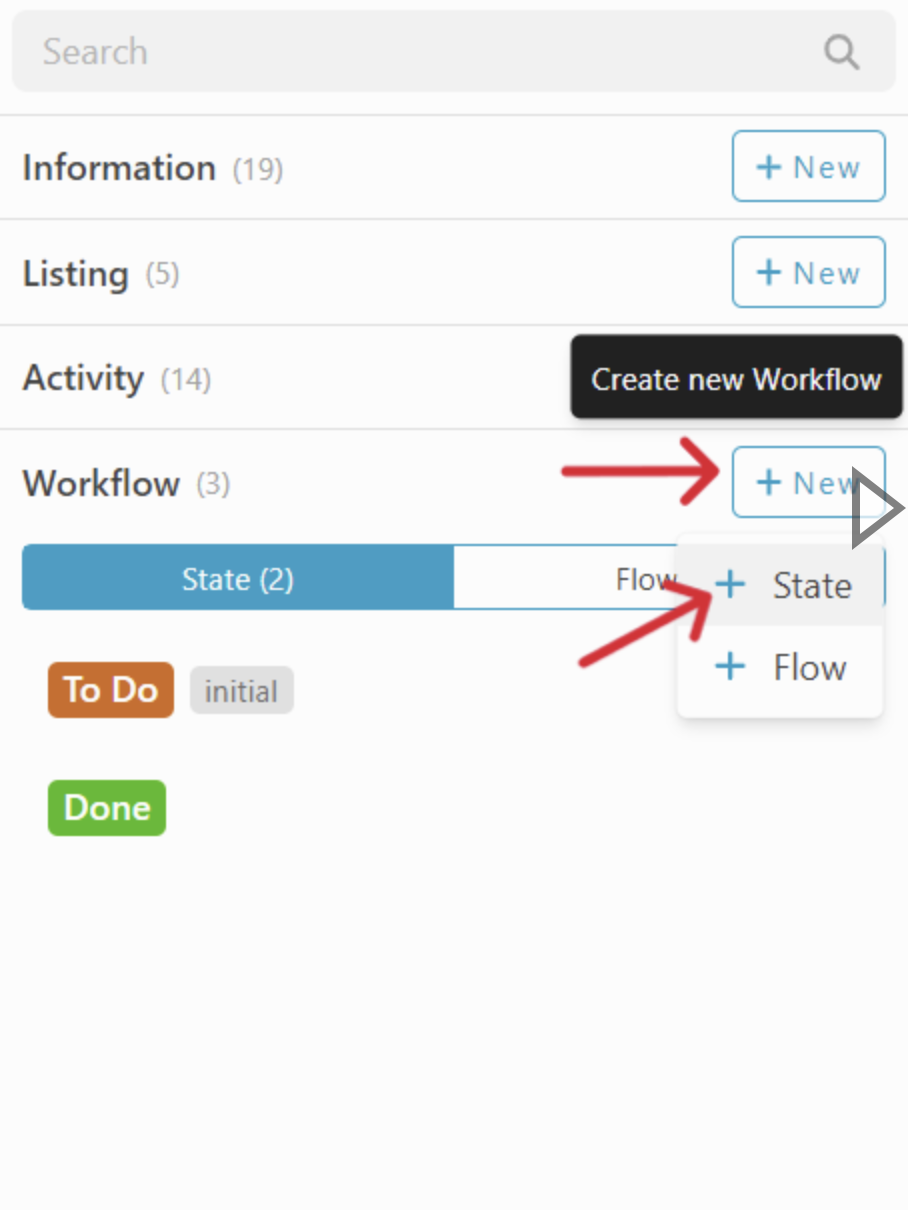
-
Create 2 state, give each state a name, and color.
eg : In Progress,Completed,Not Started -
In Tracker module, select workflow tab, click “+ new” and choose “+ Flow” to add flow.
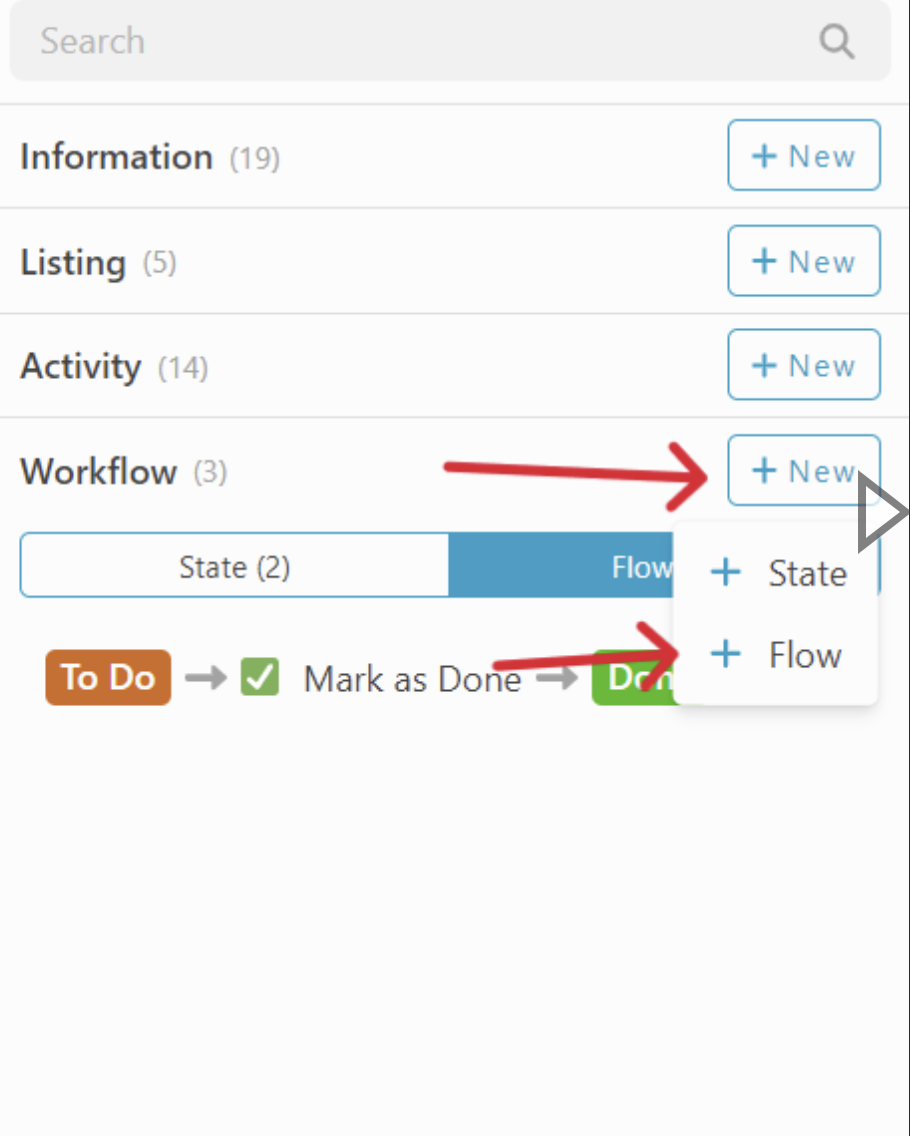
Set your flow ![]()
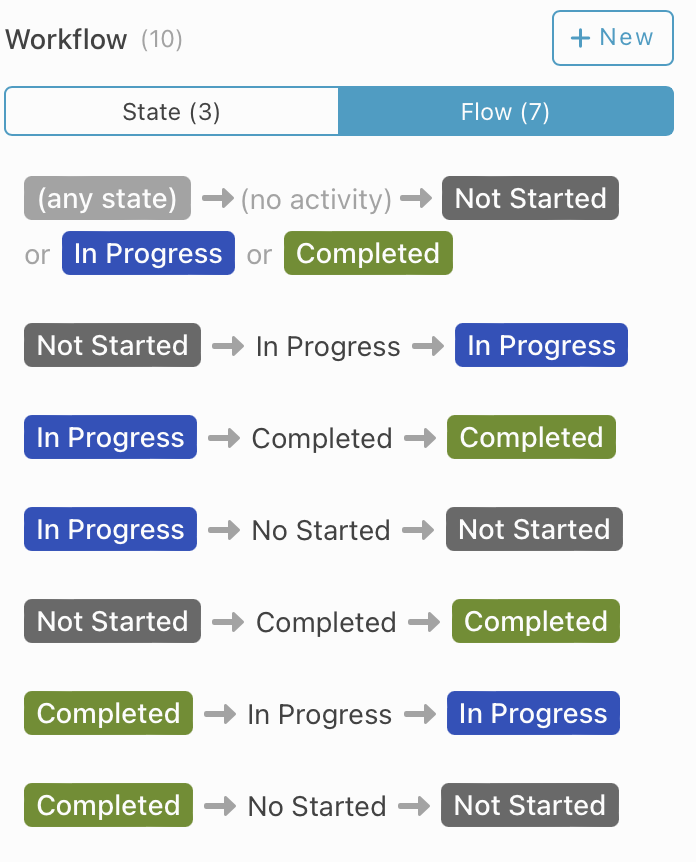
-
From state - any state
-
Activity - Not Started
-
To Conditional State - In Progress
#Entry#Status == “In Progress” -
To Conditional State - Completed
#Entry#Status == “Completed" -
From state - Not Started
-
Activity - In Progress
-
To State - In Progress
-
From state - In Progress
-
Activity - Completed
-
To State - Completed
-
From state - In Progress
-
Activity - No Started
-
To State - No Started
-
From state - No Started
-
Activity - Completed
-
To State - Completed
-
From state - Completed
-
Activity - In Progress
-
To State - In Progress
-
From state - Completed
-
Activity - No Started
-
To State - *No Starte
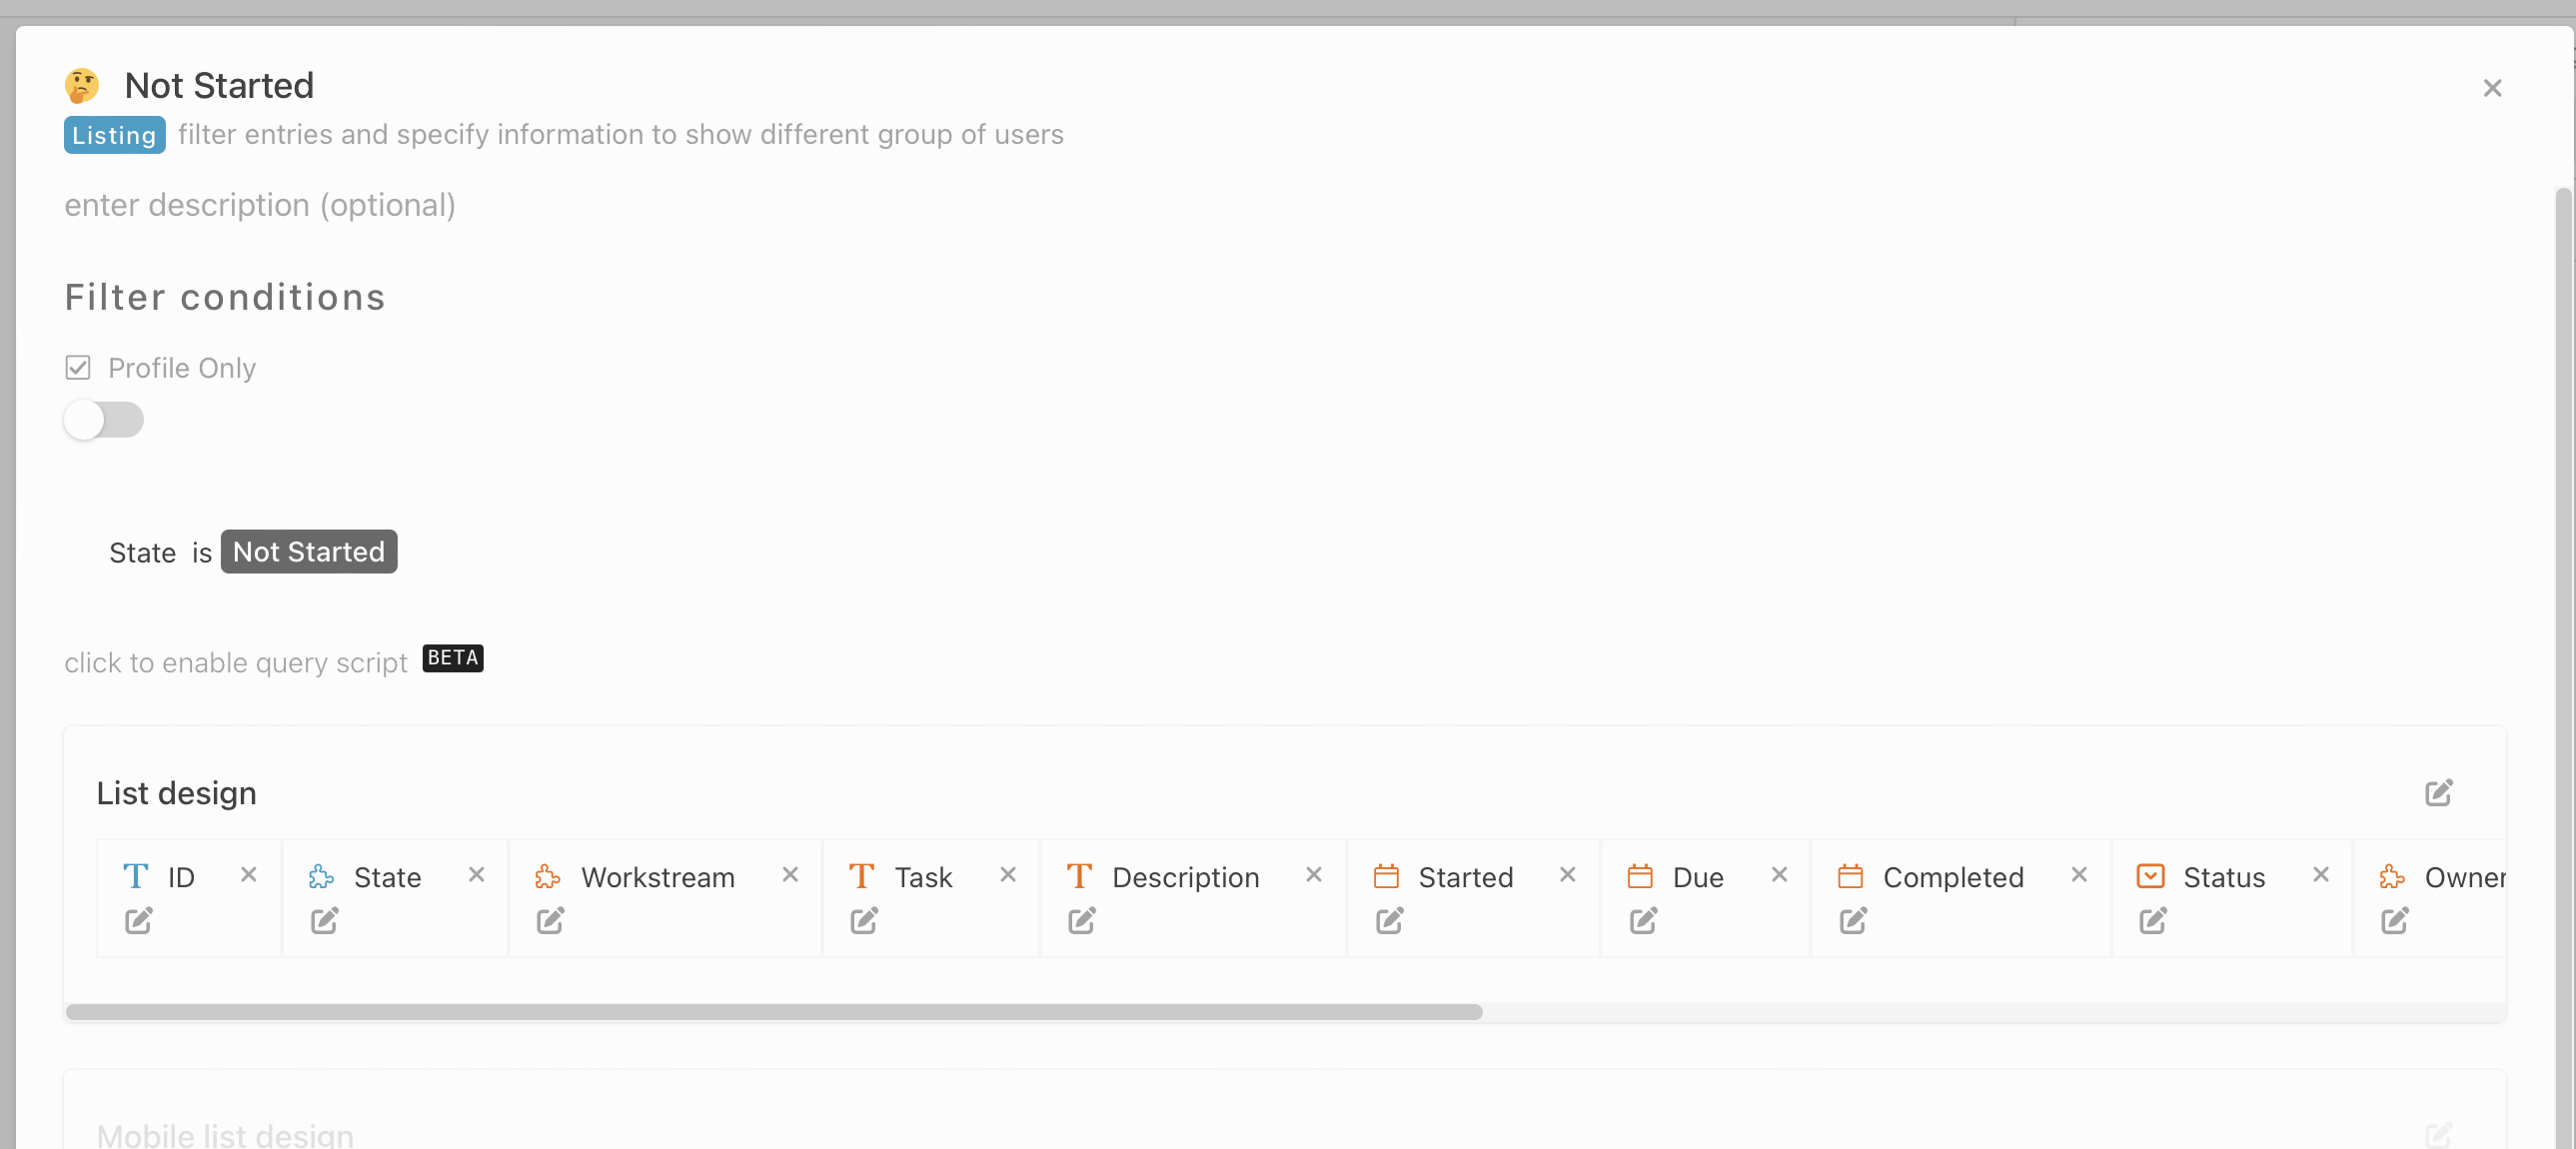
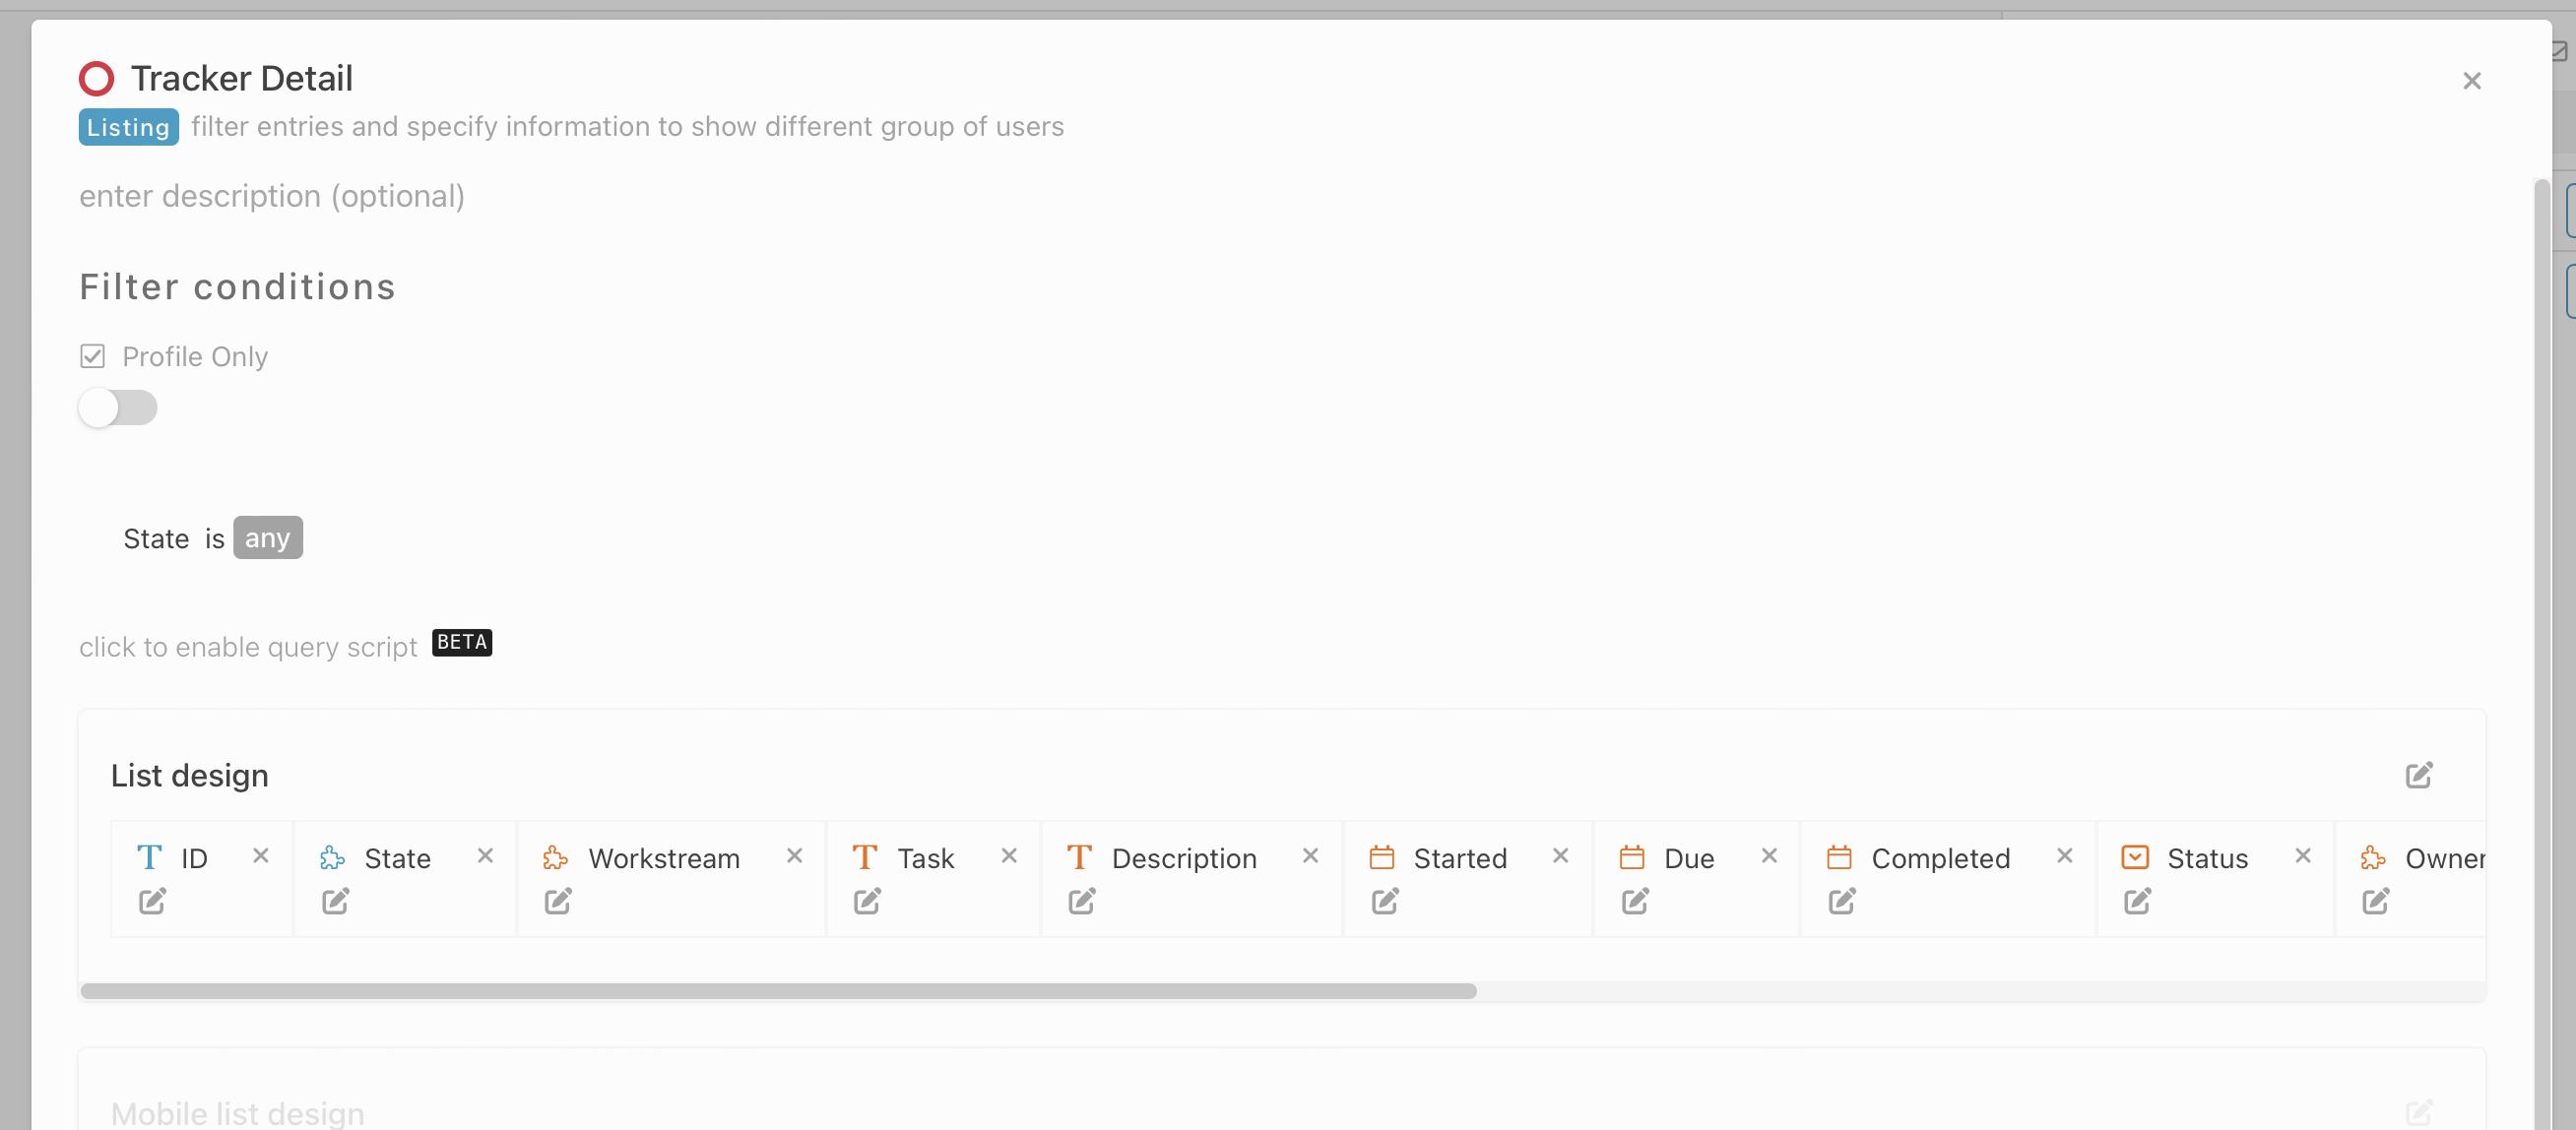
- Create a few listing, give your listing a name and customize the list design and filter condition.
State - To filter state is Not Started
State - *To filter state is In Progress"
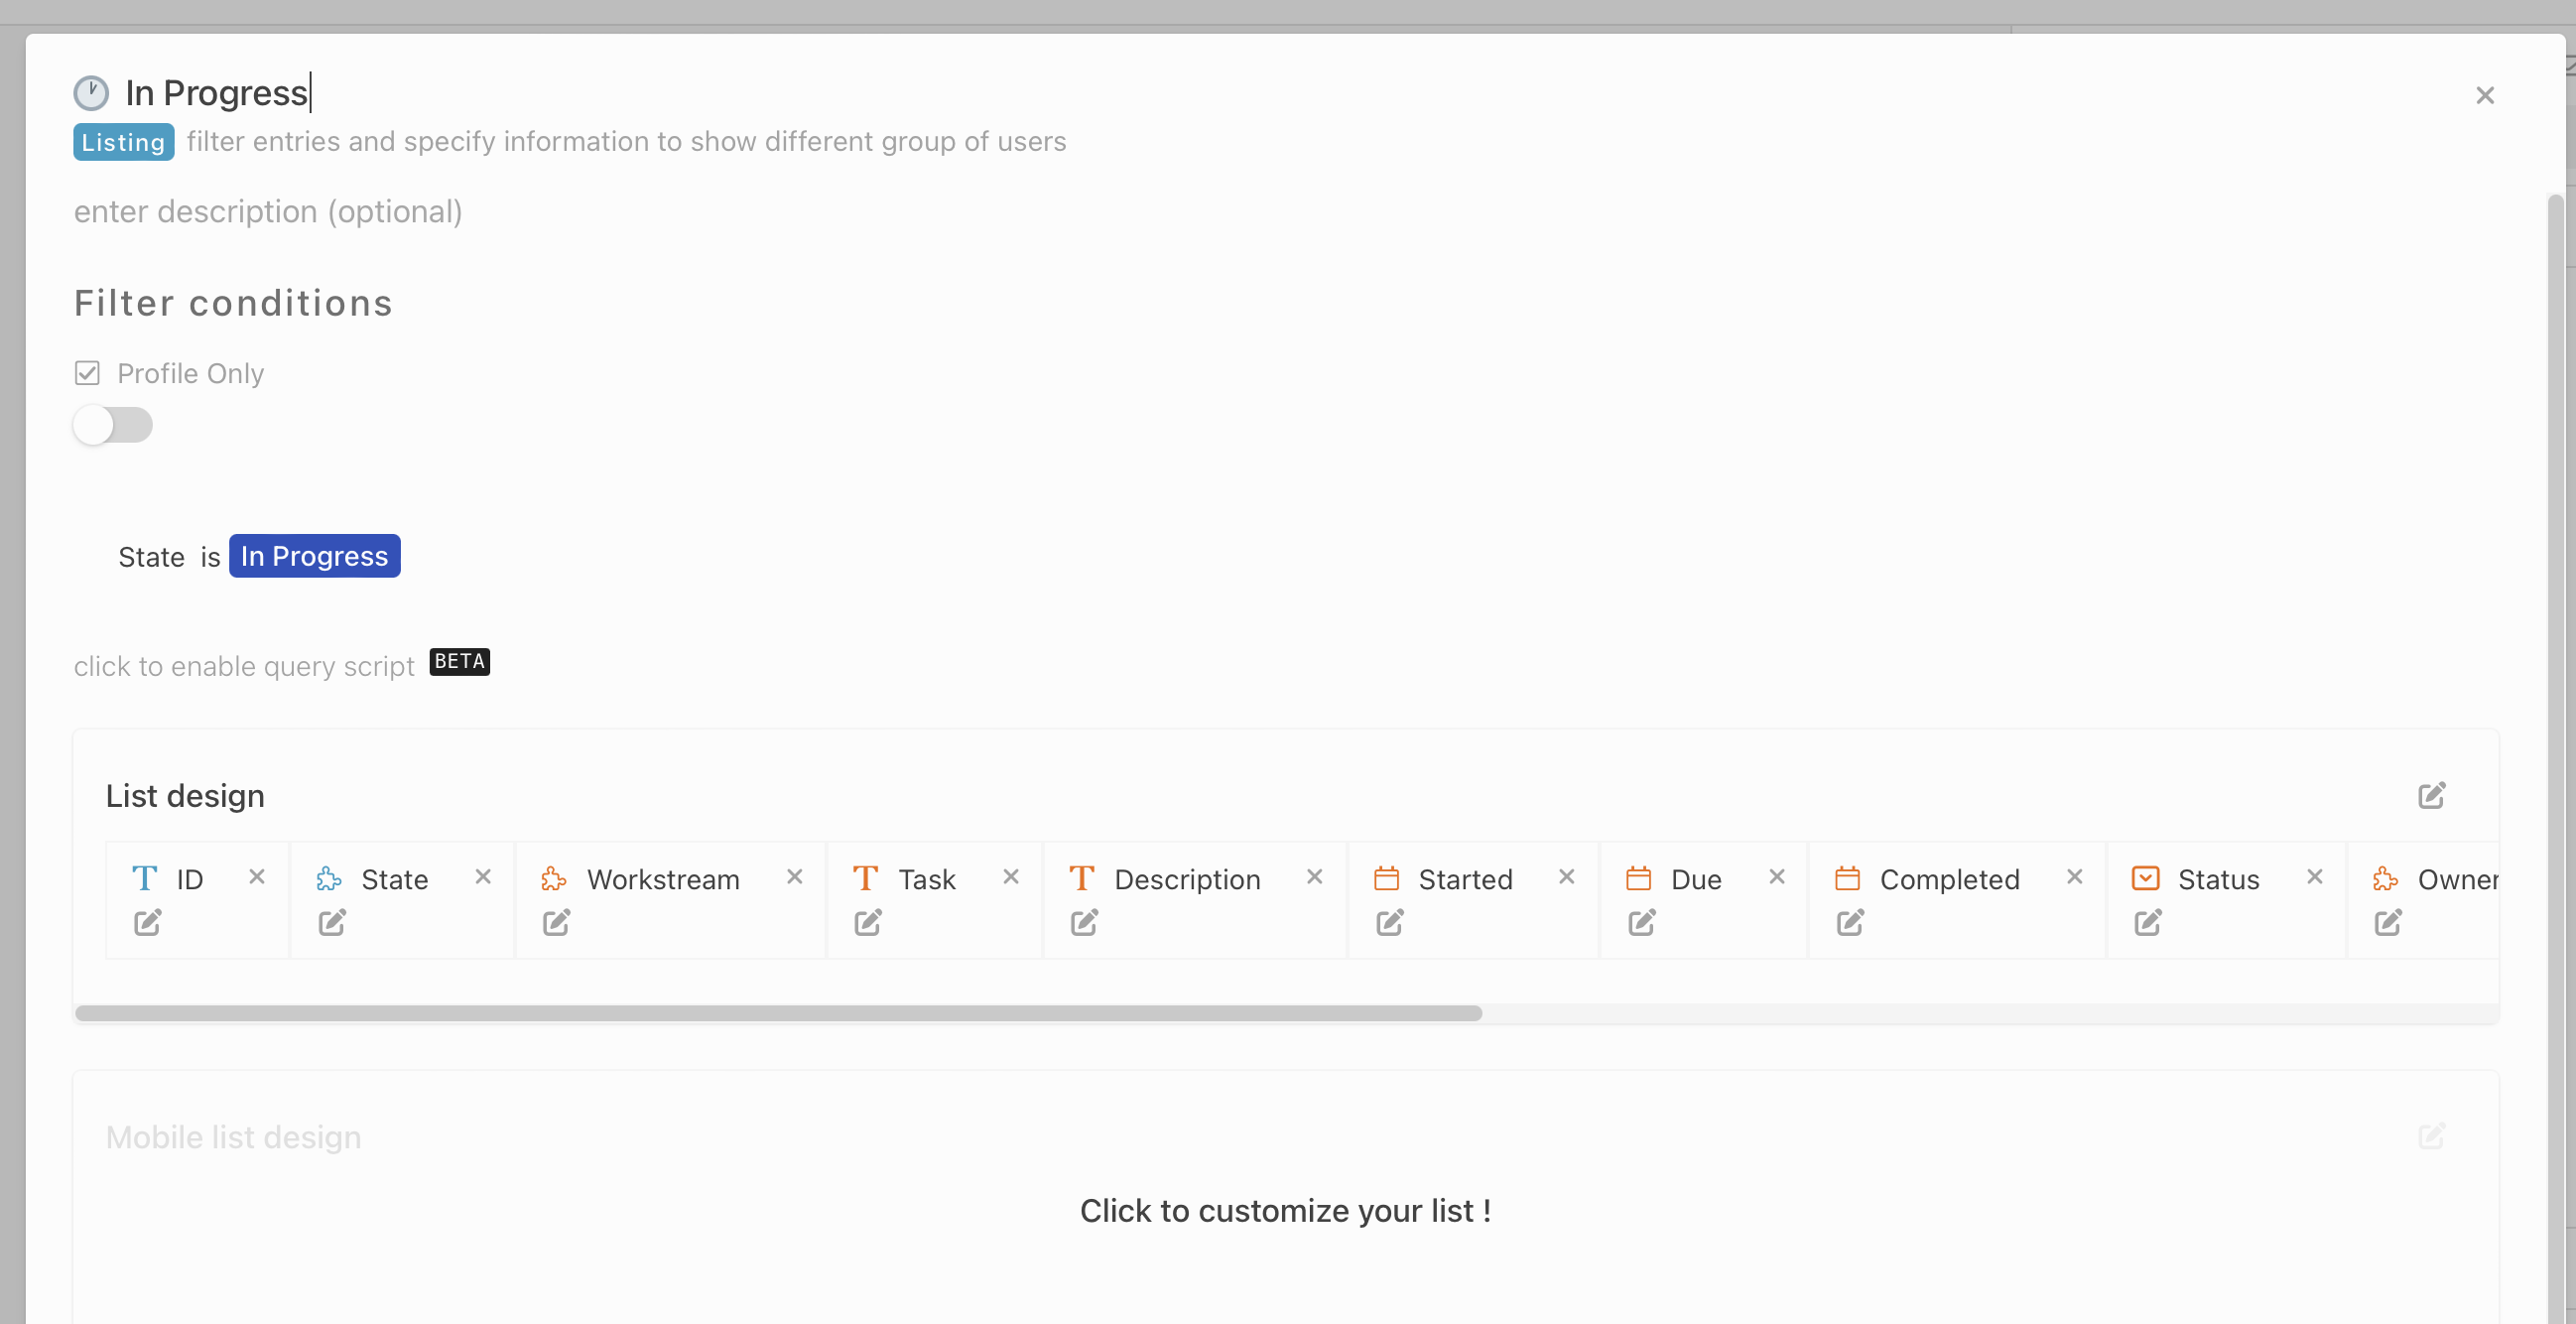
State - *To filter state is Completed"

All - Include all condition for entry
9)Automation
Condition : To set a fix data or detail inside the table “Details” like below :
- On activity section, click “Basic” tab, click “Create” to view form
- Scroll down the form and enable the Automation.
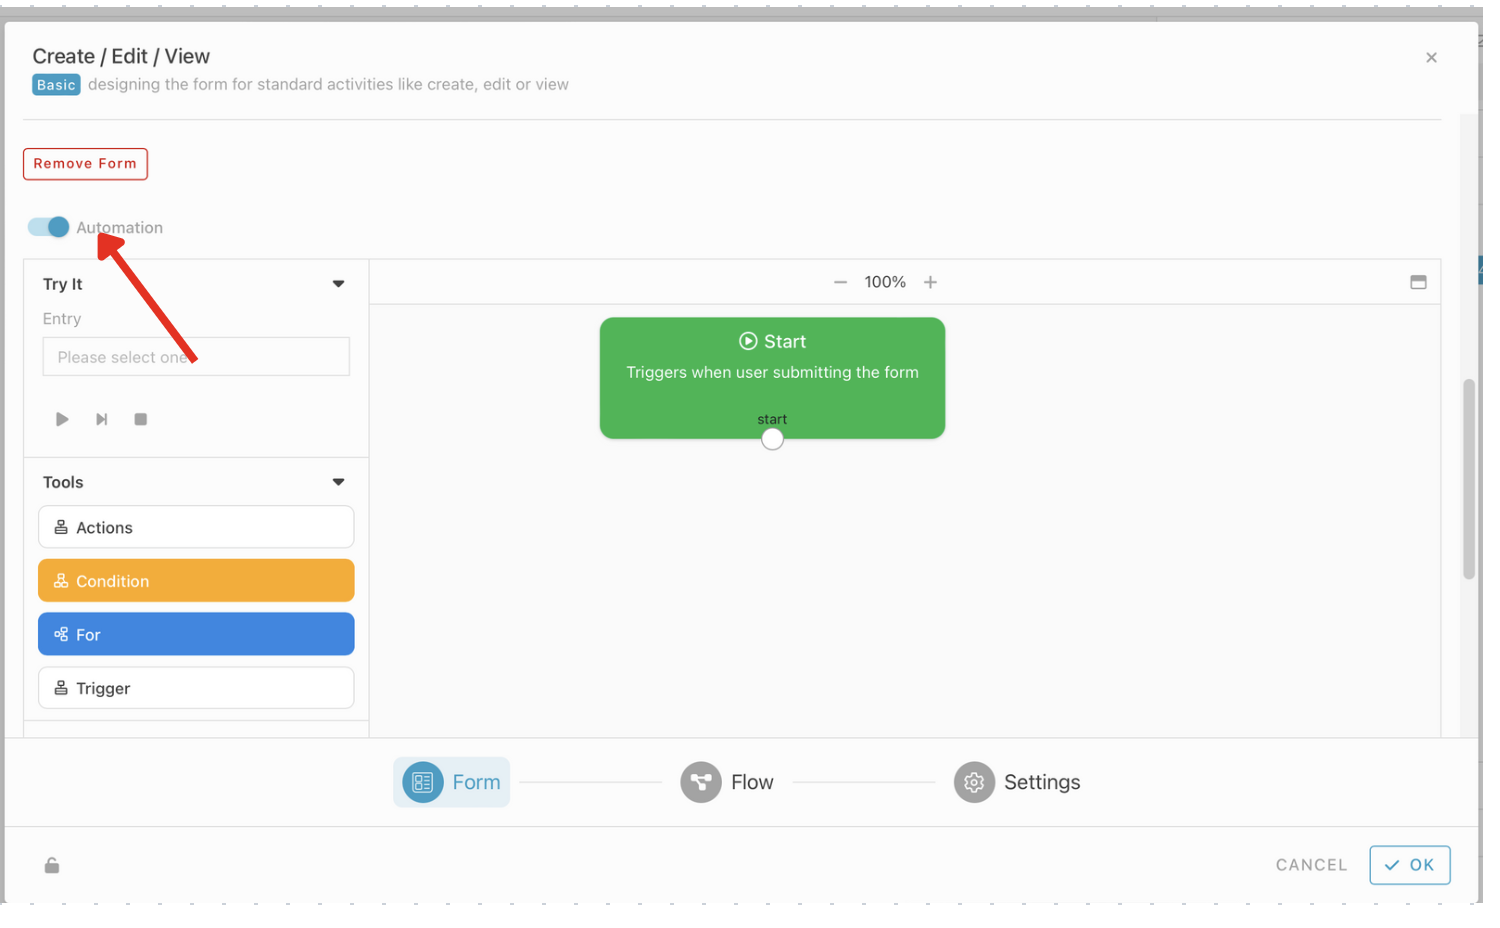
- Drag and drop ‘Action’ block.
- Add Action, Select ‘Find’.
- Put Module “Workstream”
- Filter - Workstream is #entry#workstream#workstream
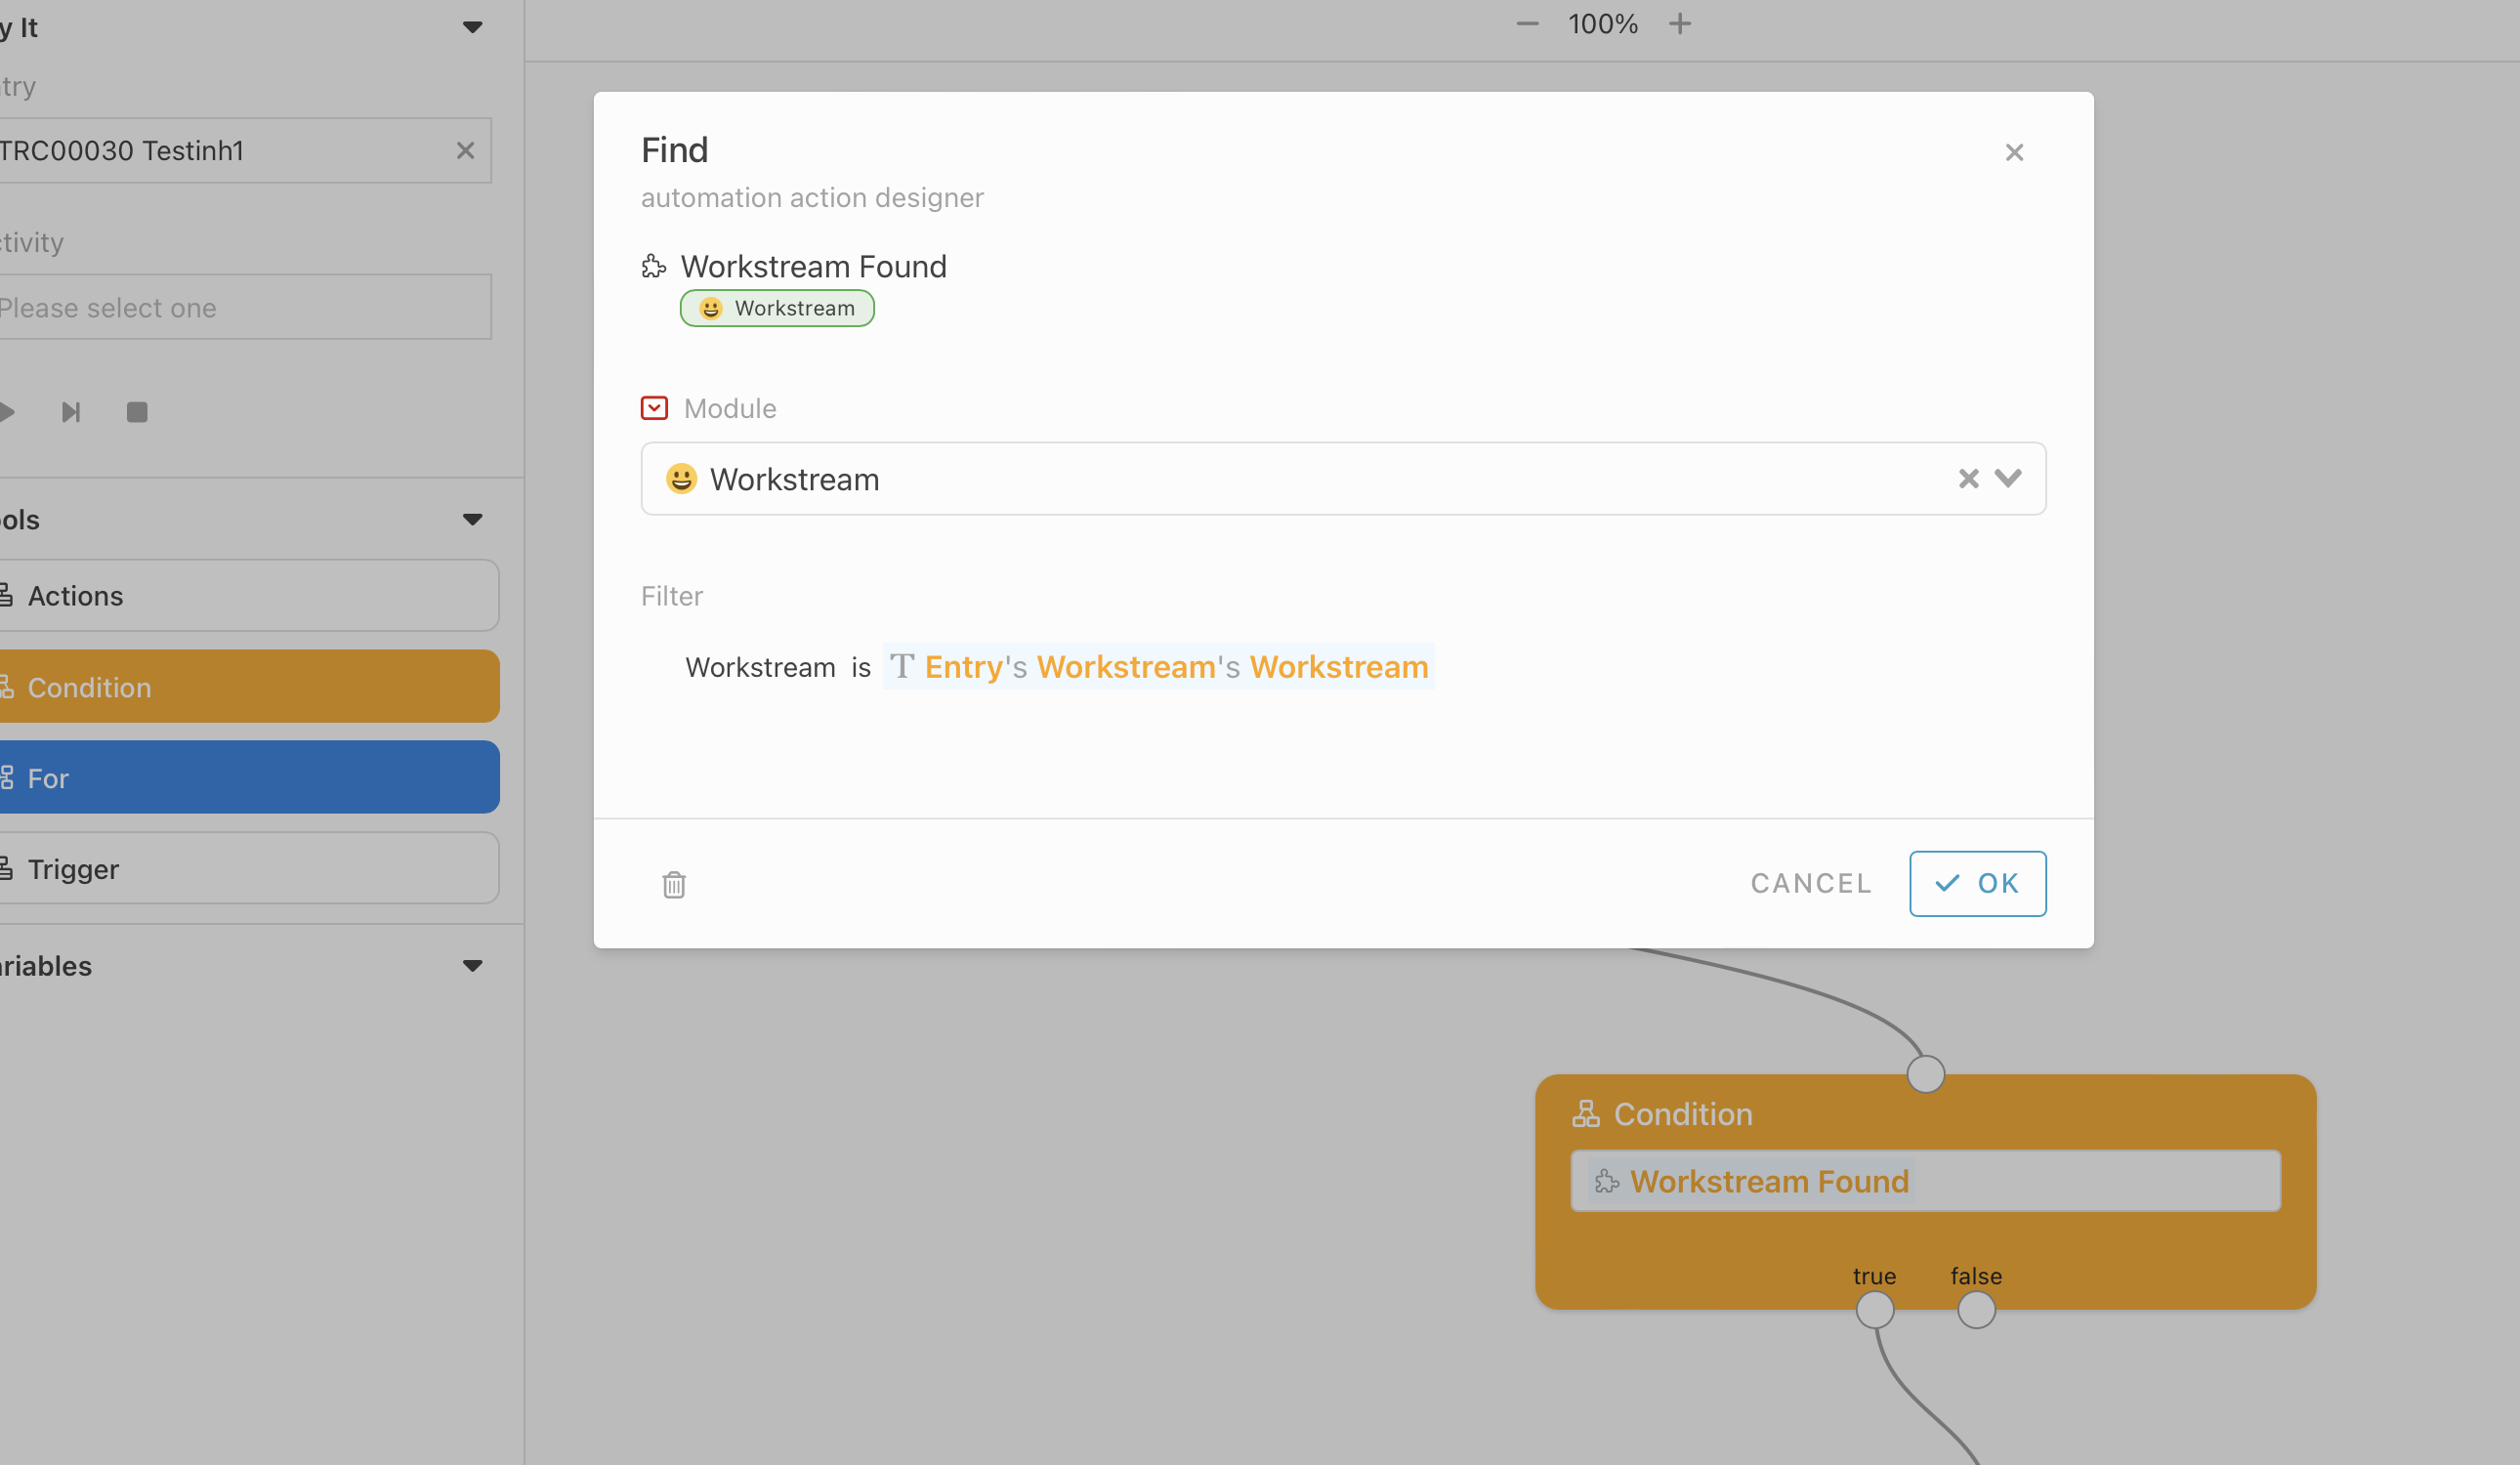
- Drag and drop ‘Condition’ block.
- Insert formula : #WorkstreamFound
- Drag and drop ‘Actions’ block.
10.Select action “Form”
Module - Workstream
Activity -Edit
Entry- #WorkstreamFound
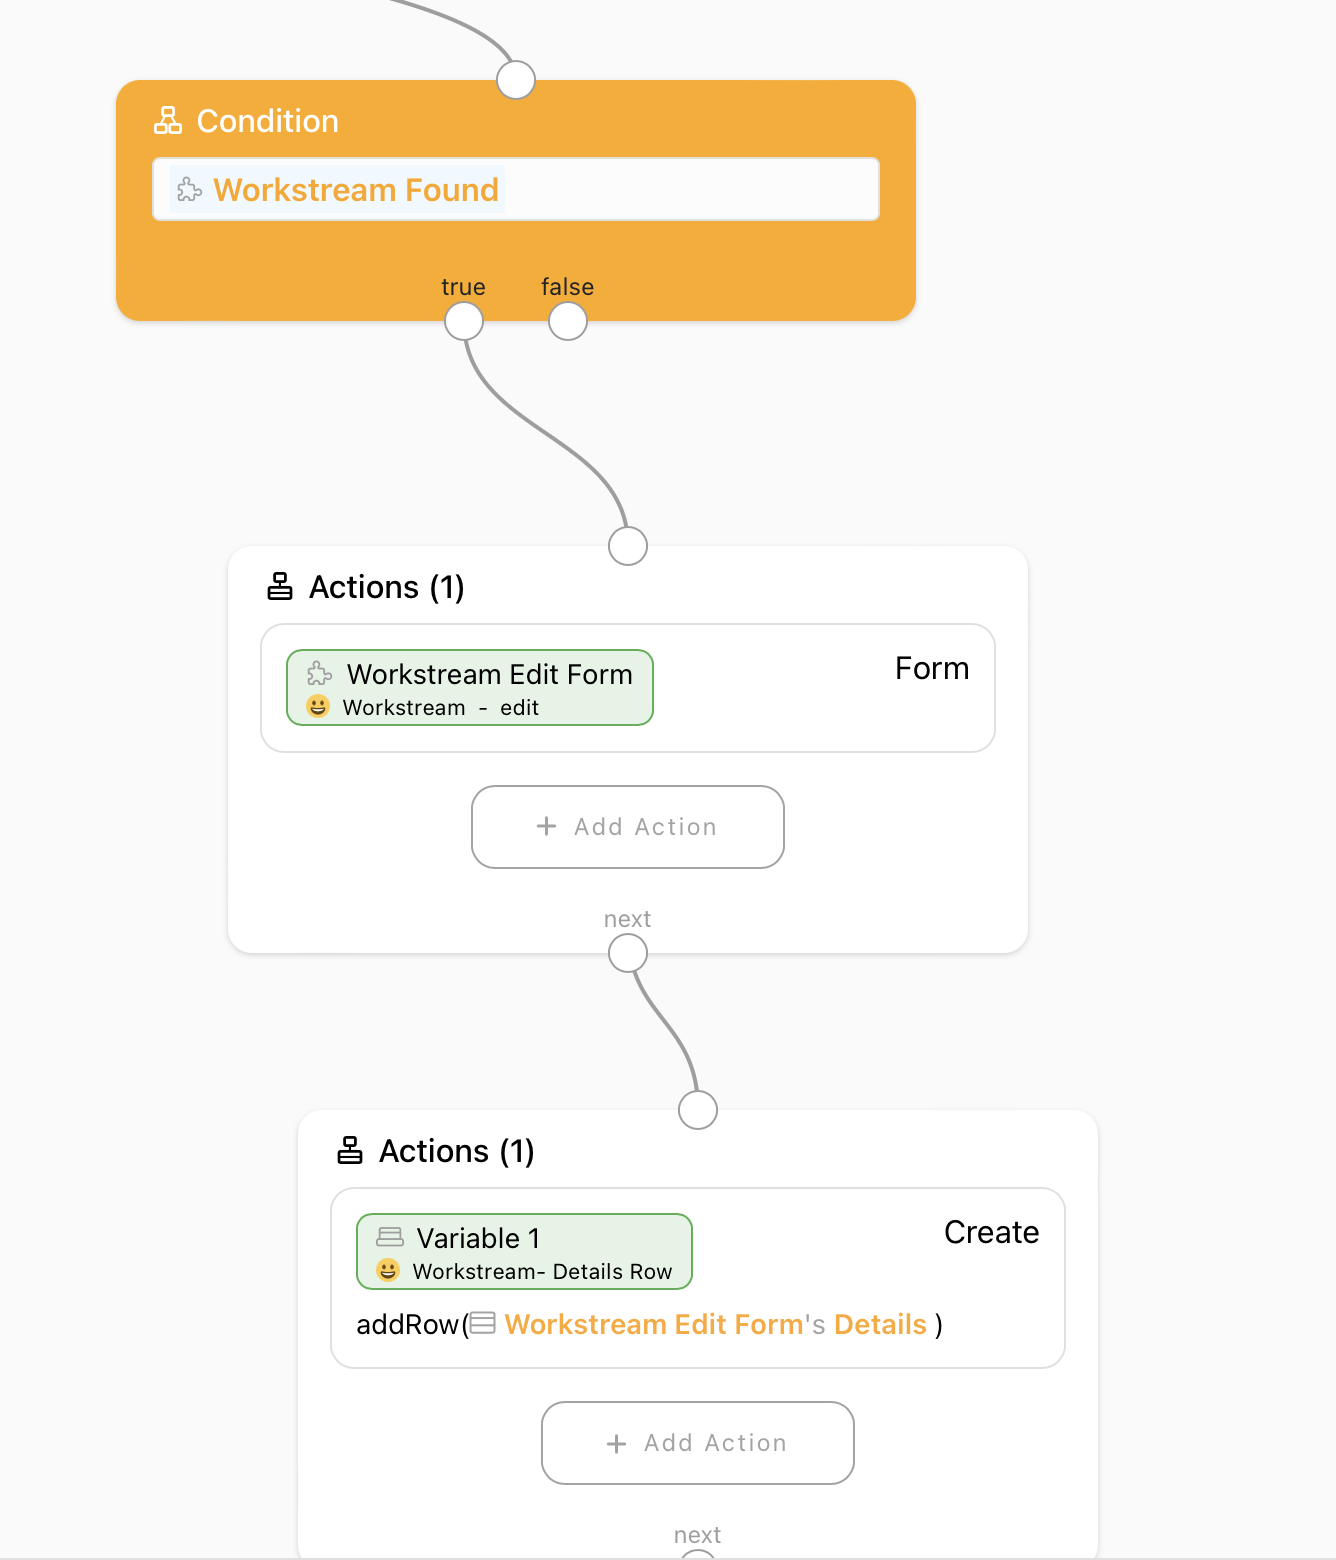

- Drag and drop ‘Actions’ block.
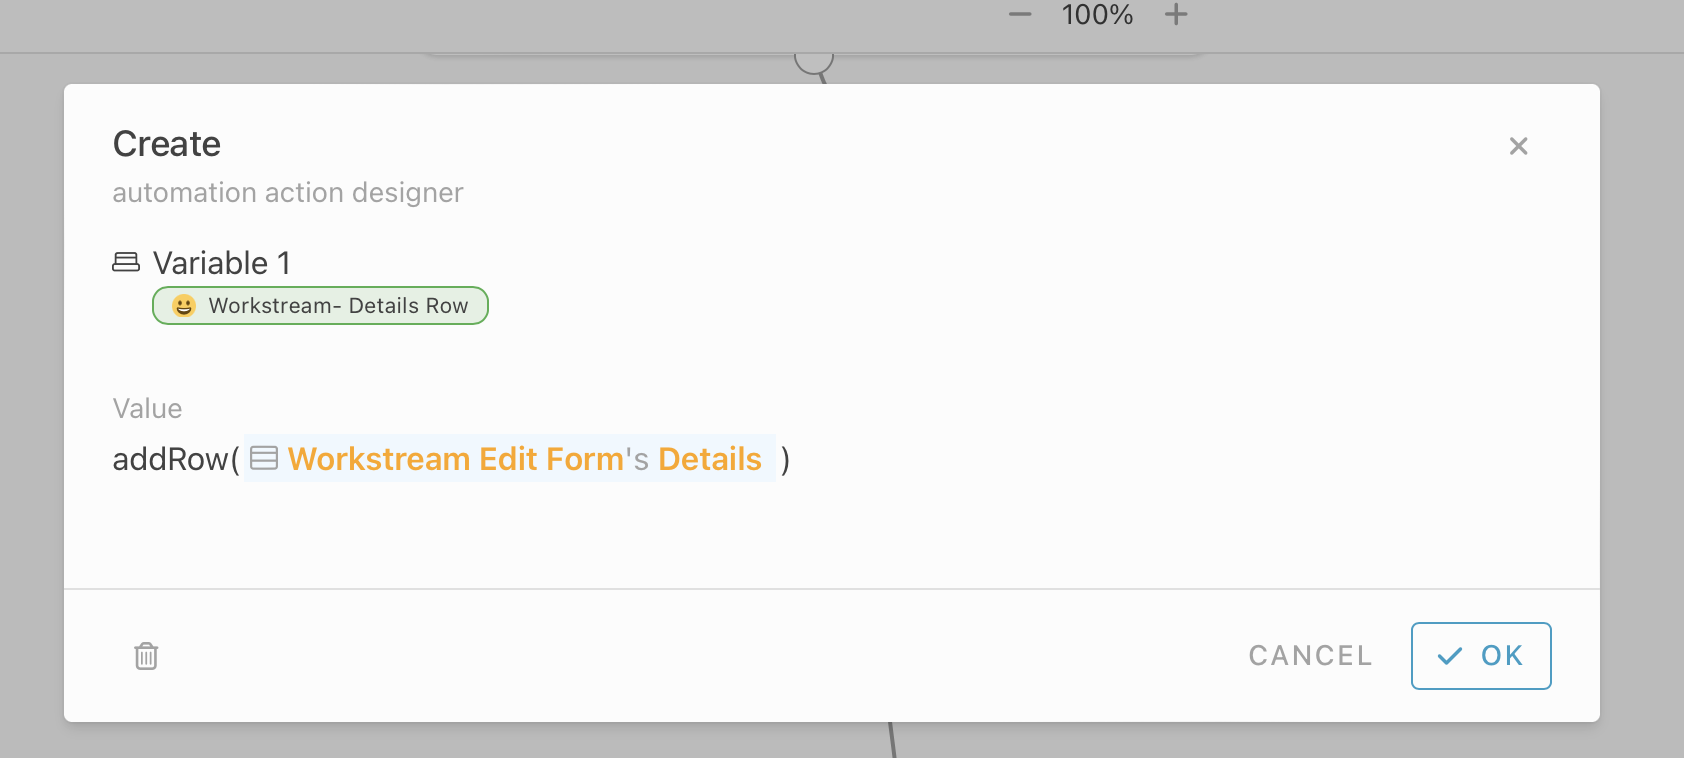
- Select action “Create”
Value - addRow (#WorkstreamEditForm’s Details)
-
Drag and drop ‘Actions’ block.
Insert "Variable, #Variable2, Expand property select value, “Description” and enter formula #x
-
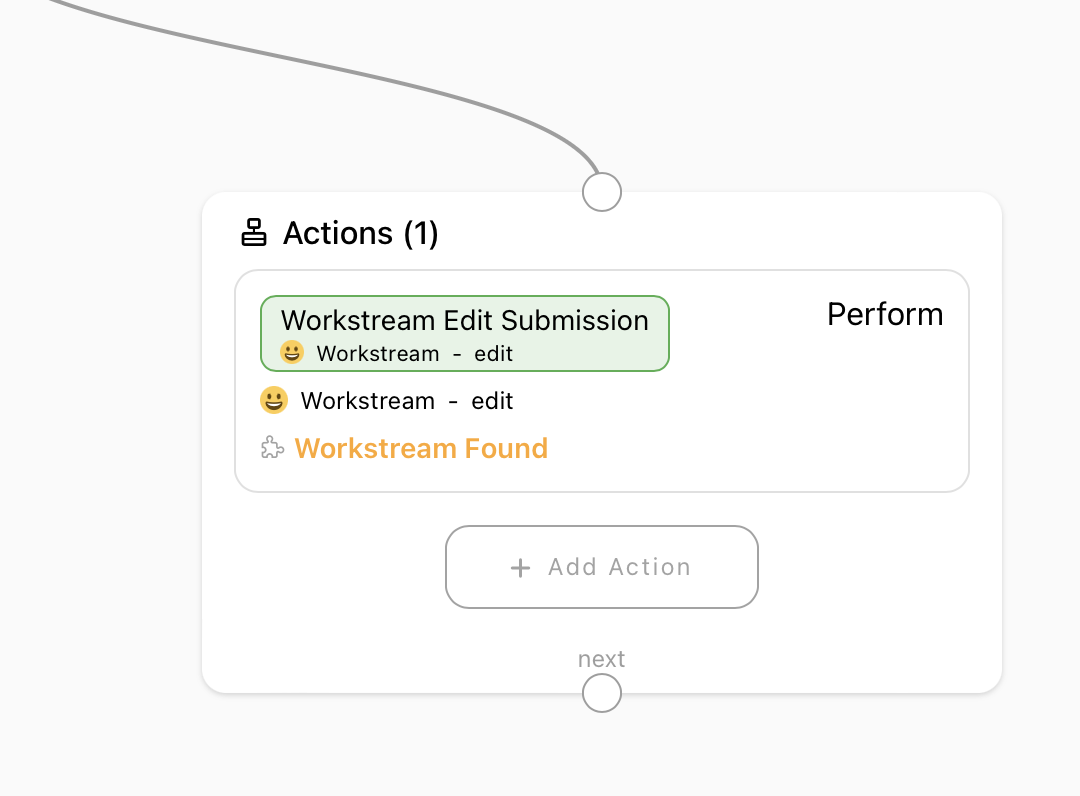
Drag and drop ‘Actions’ block.
Select action “Perform”
Module - Workstream
Activity - Edit
Entry - #WorkstreamFound
Form - #WorkstreamEditForm
**Condition : To create table with information (Tracker ID,Task,Due,Description and status) in Workstream module’s Details table
Second automation
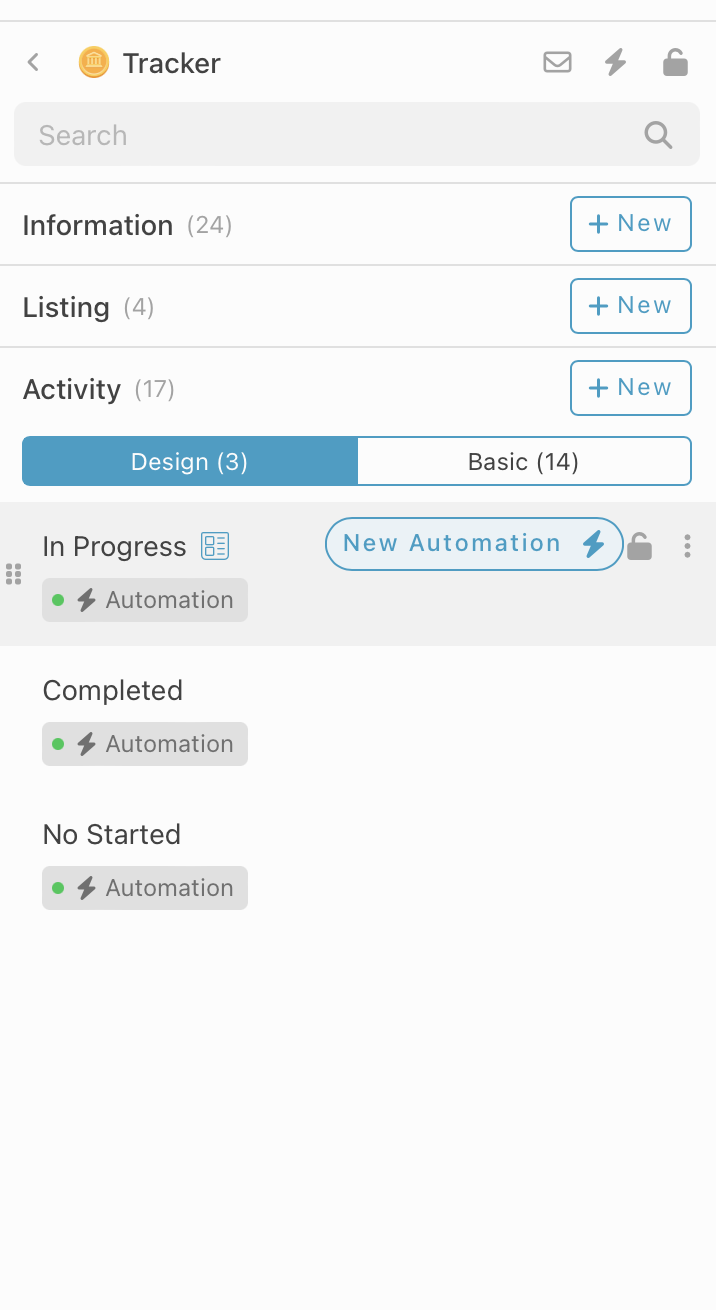
- On activity section, click “Design” tab
- Scroll to the right In Progress tag, and click the New Automation.
- Drag and drop ‘Action’ block.
- Add Action, Select ‘Find’.
- Put Module “Workstream”
- Filter - Workstream is #entry#workstream#workstream
- Drag and drop ‘Condition’ block.
- Insert formula : #WorkstreamFound
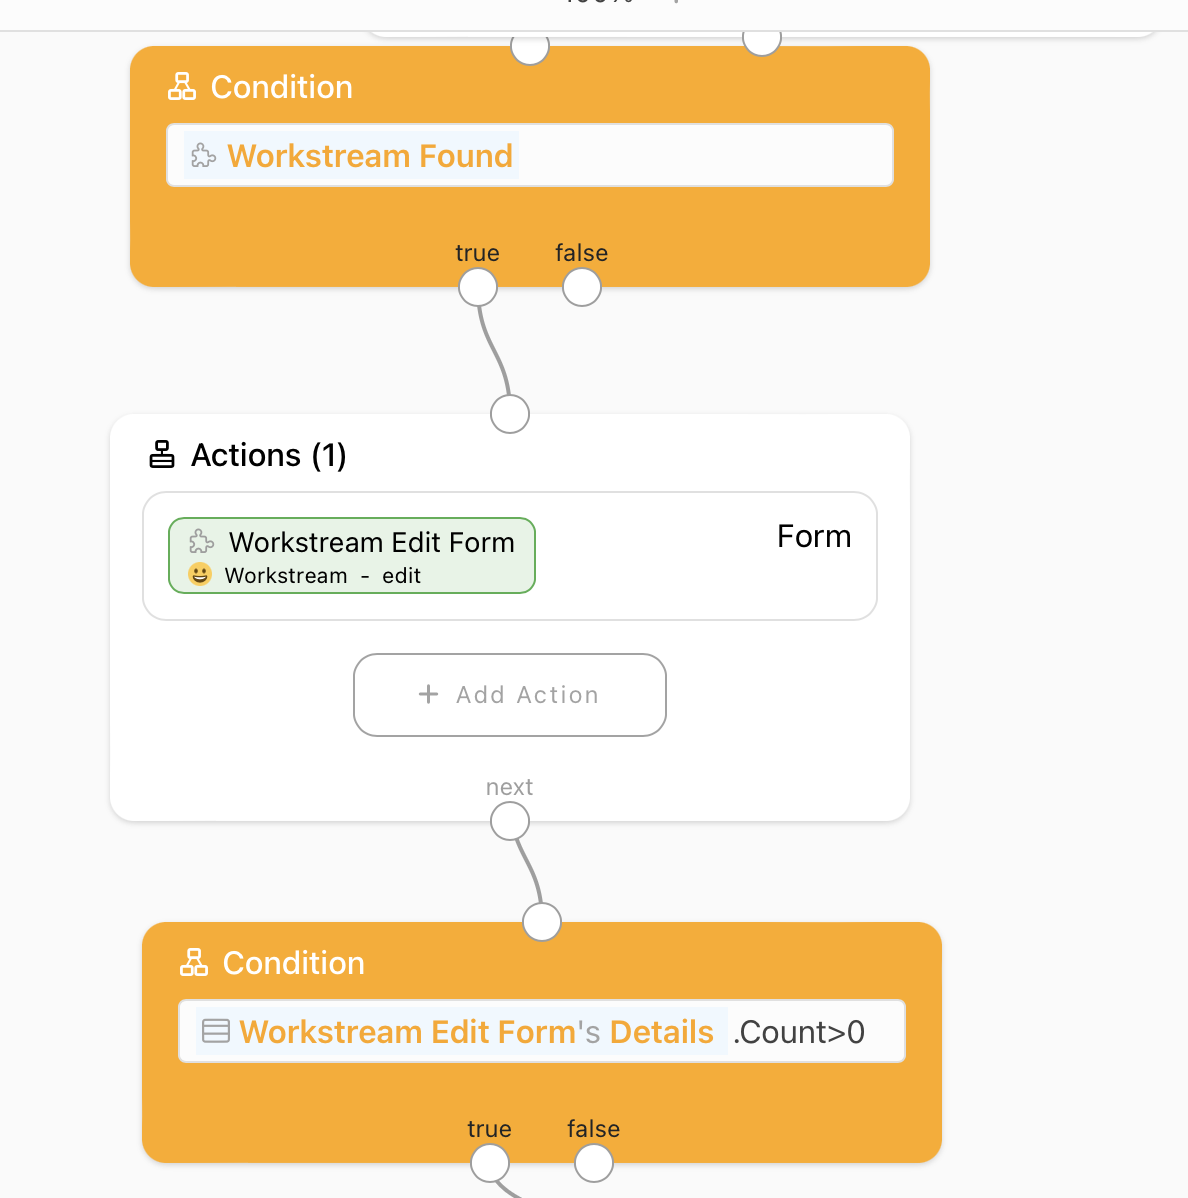
- Drag and drop ‘Actions’ block.
10.Select action “Form”
Module - Workstream
Activity -Edit
Entry- #WorkstreamFound
- Drag and drop ‘Condition’ block.
- Insert formula : #WorkstreamEditForm’sDetails.Count>0
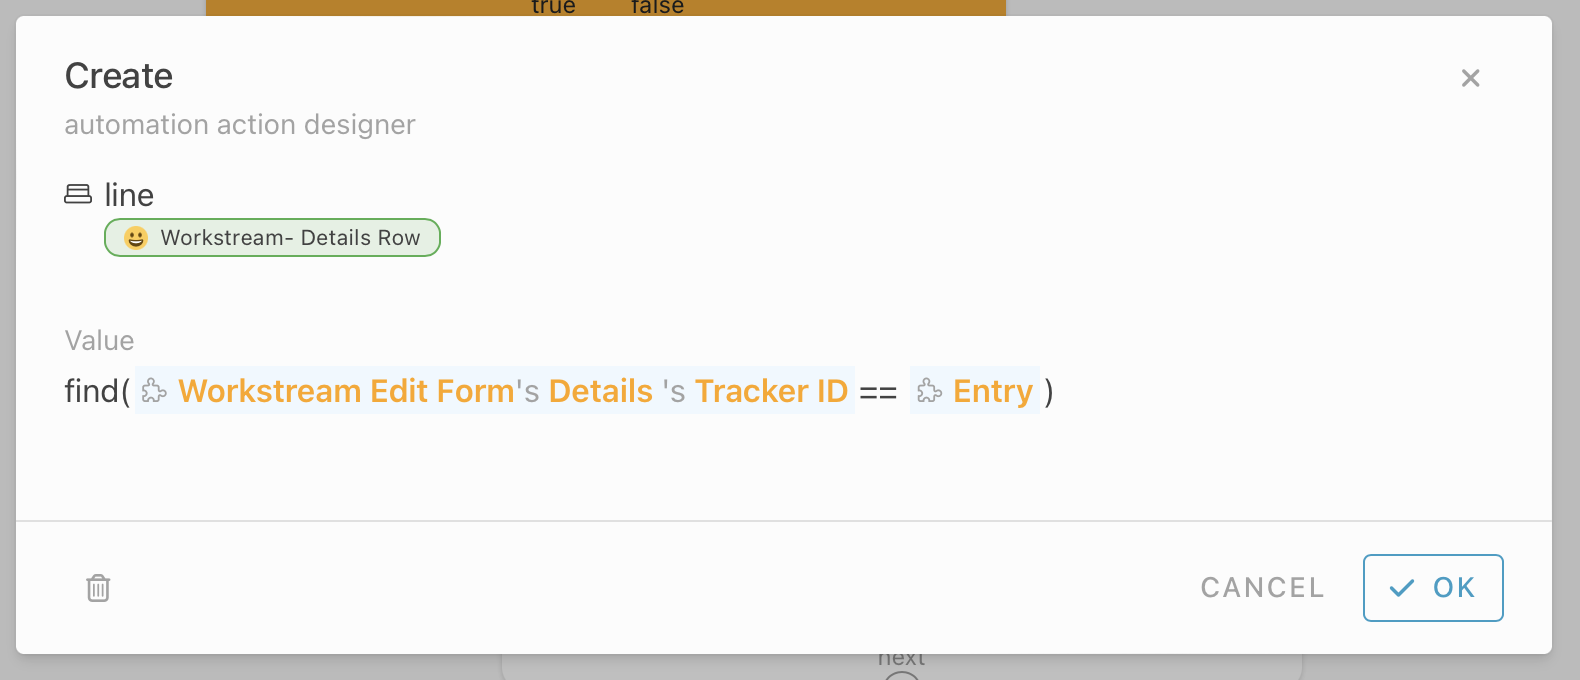
- Drag and drop ‘Action’ block.
- Add Action, Select ‘Create’.
find( #WorkstreamEditForm’sDetails 's Tracker ID== Entry)
-
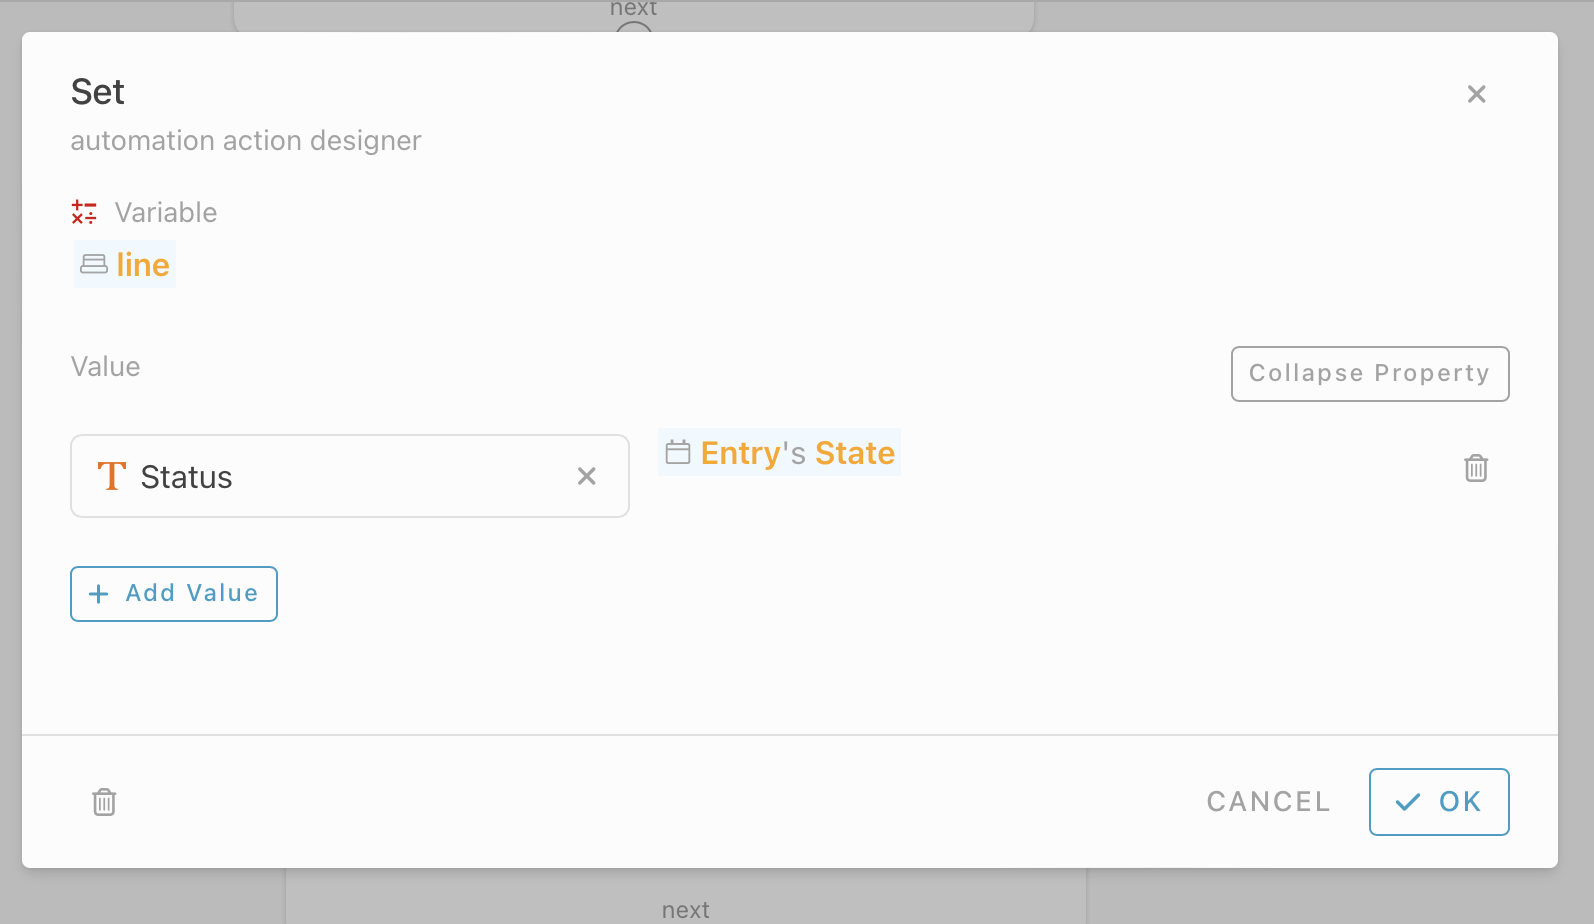
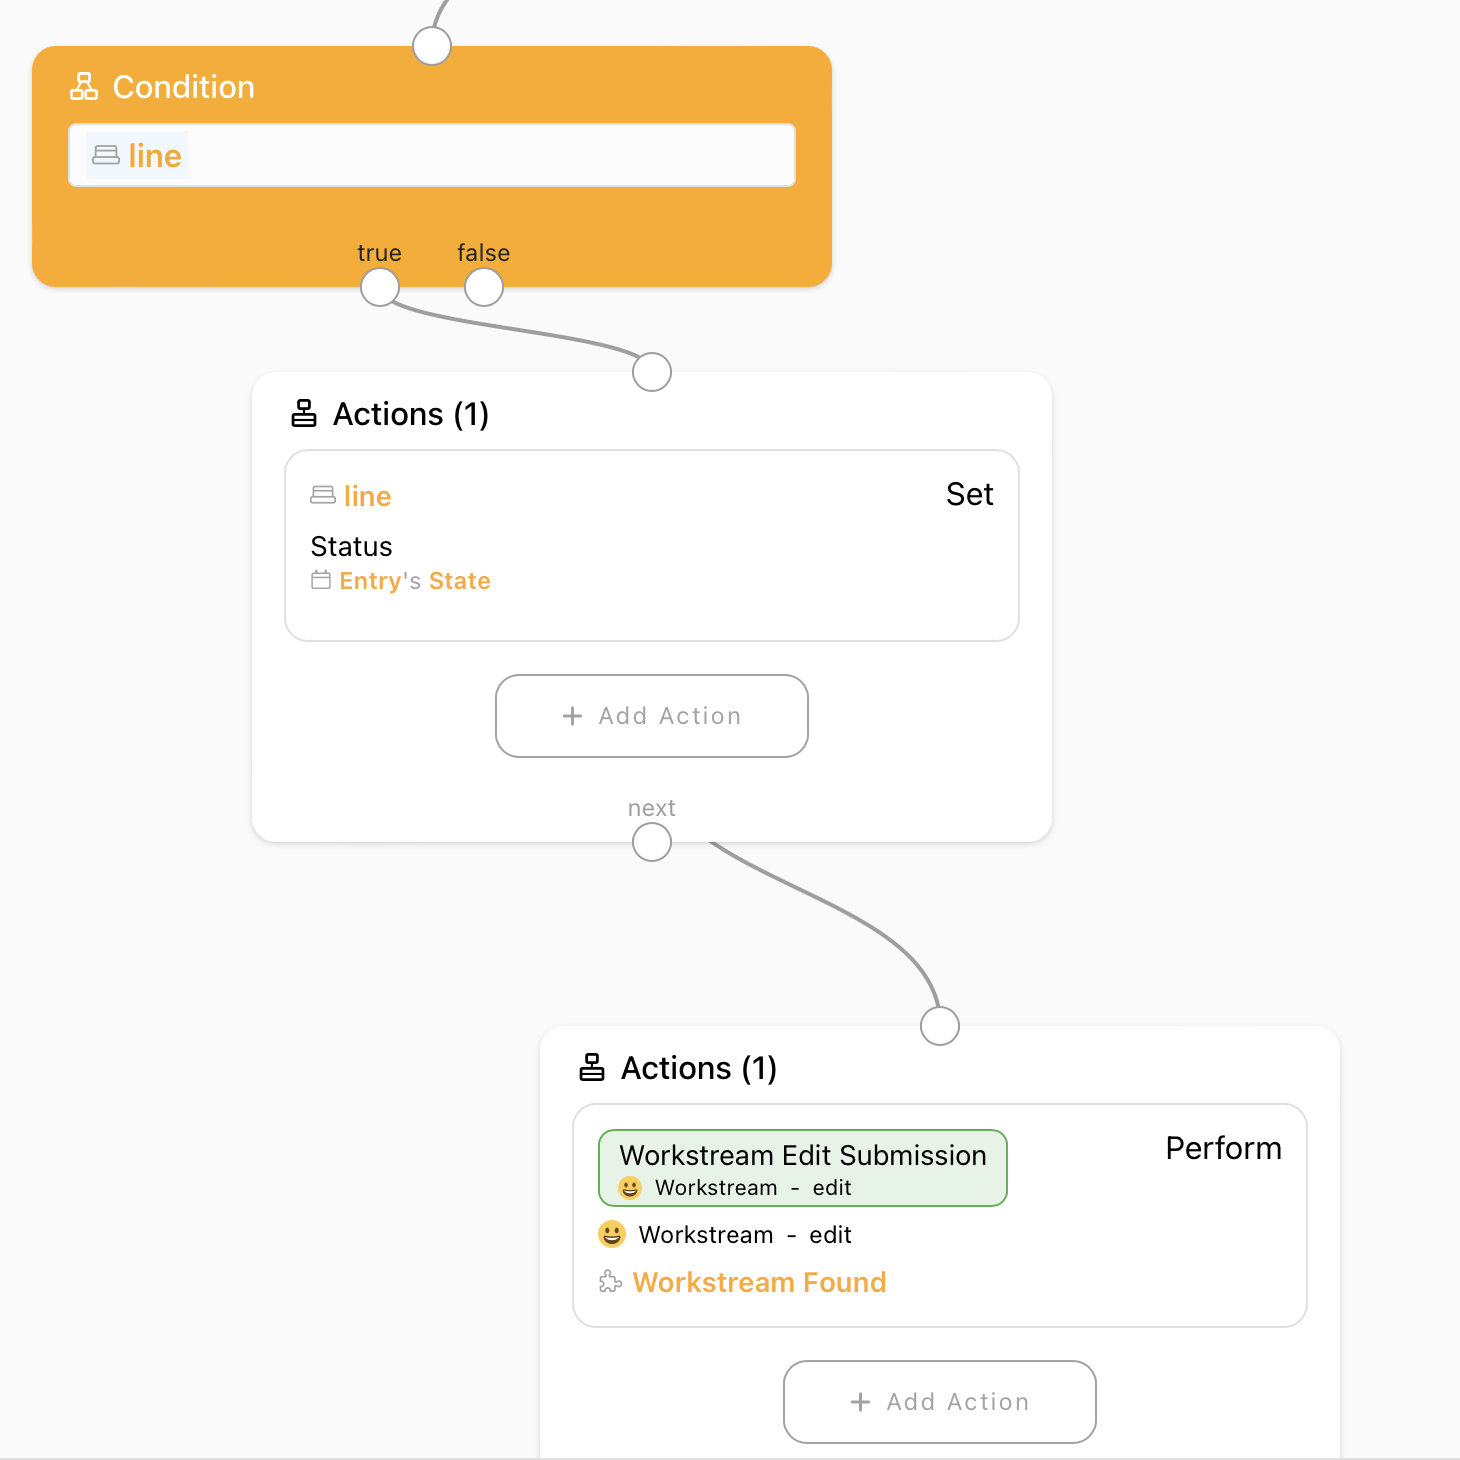
Drag and drop ‘Condition’ block.
Insert formula : #line -
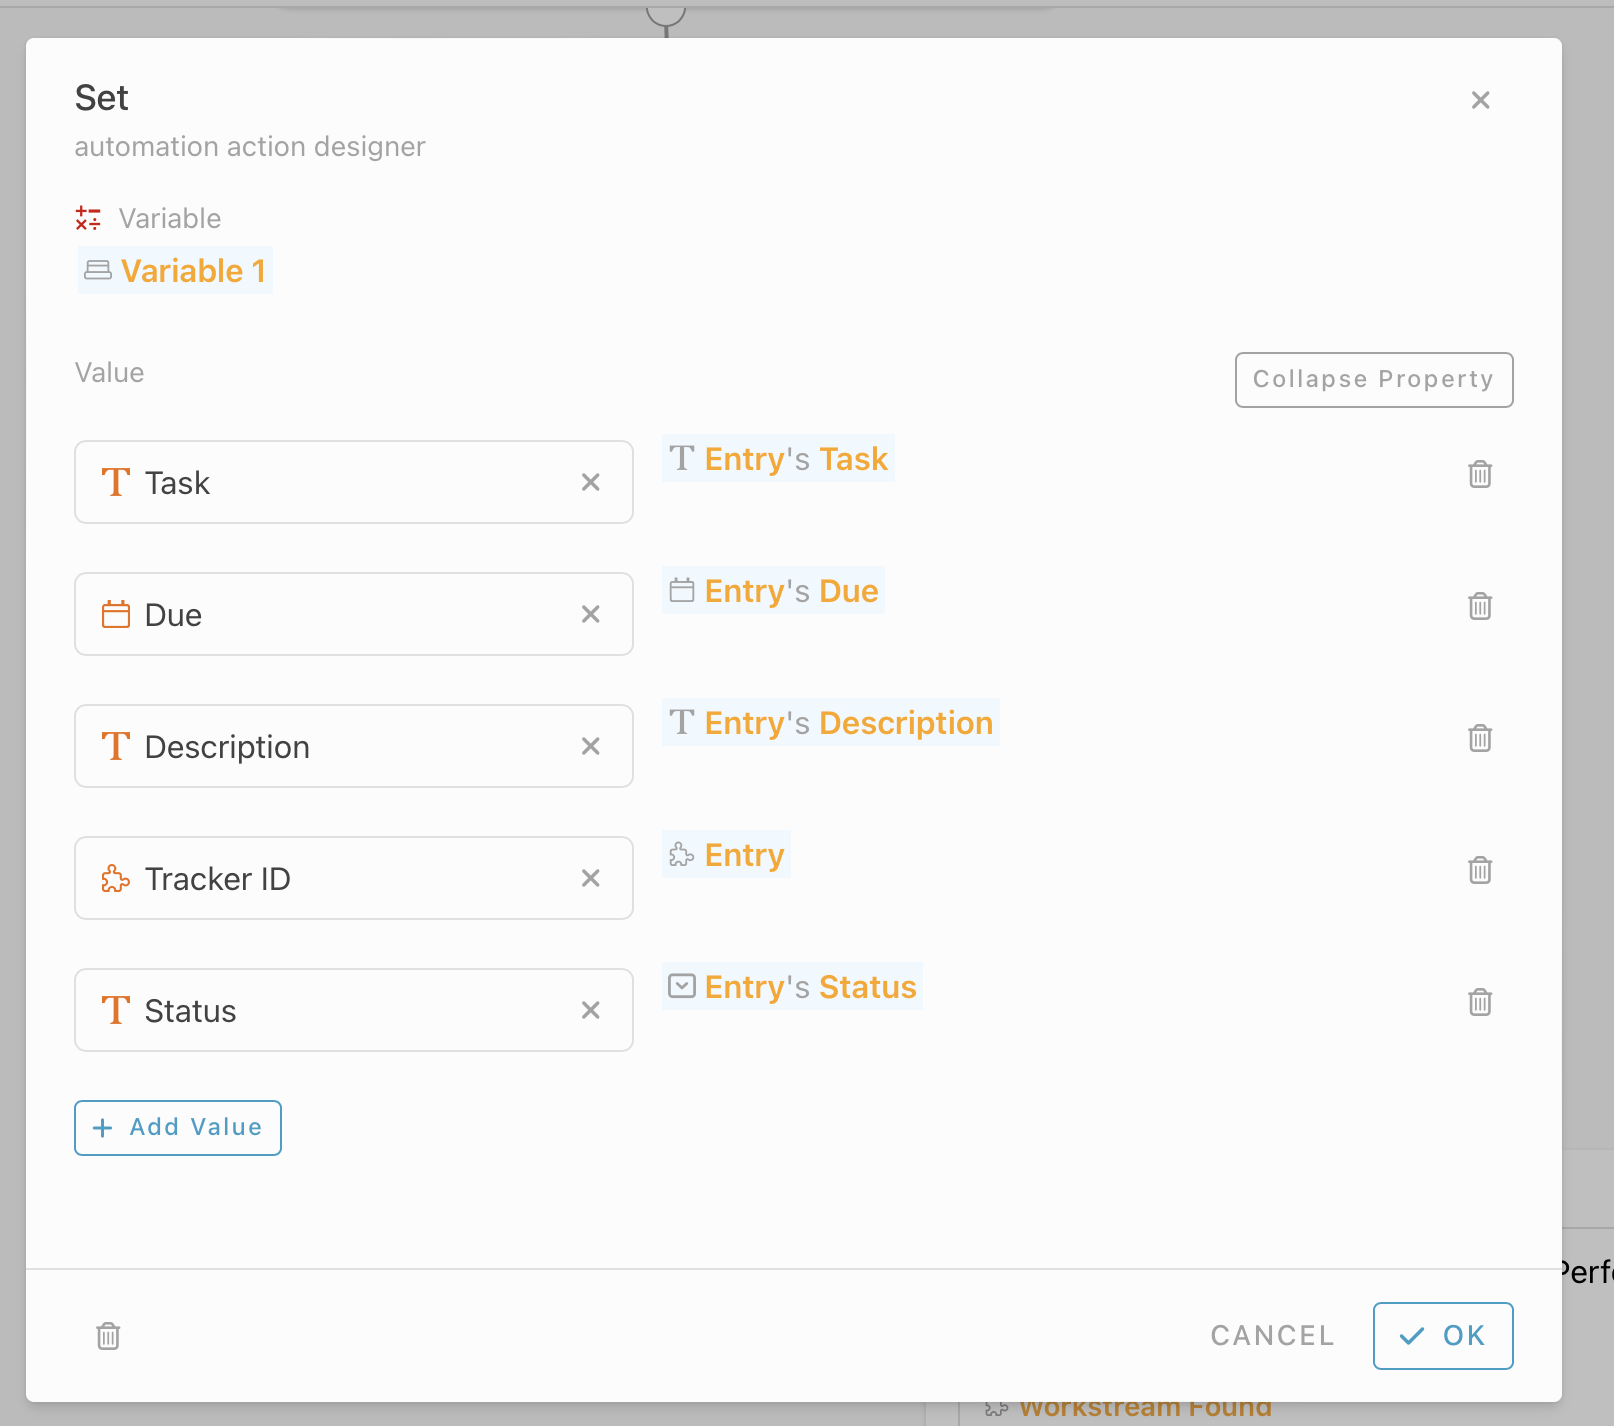
Add Action, Select ‘Set’.
Insert "Variable, #Variable2, Expand property select value, “Description” and enter formula #
-
Add ‘Actions’ block.
Select action “Perform”
Module - Workstream
Activity - Edit
Entry - #WorkstreamFound
Form - #WorkstreamEditForm
**Condition : To edit module (Workstream) table with information -Status
Third automation, Four automation
- On activity section, click “Design” tab
- Scroll to the right In complete or activity tag, and click the New Automation.
Configure follows the same process as second automation.
Done with the configuration, click “Run” to use your Project Tracker app.
Congratulations!!!![]()
![]() You have successfully created a IT ticketing module.
You have successfully created a IT ticketing module.
For more template and ready solution.
Try INISTATE for FREE now.
Sign up at https://inistate.com