Hi ![]()
Today, I would like to share with you how to configure a PTO tracker module in INISTATE.
The PTO tracker module allows you to Stay organized and on top of your Paid Time Off , easily monitor and manage your time off, ensuring a well-deserved work-life balance.
Problem
Difficulty to manage PTO - Managing Paid Time Off (PTO) manually can be challenging and time-consuming, especially for organizations with a large number of employees
Objective
Efficient - allowing you to manage your employee or organization PTO easily and efficient.
Step and configuration
-
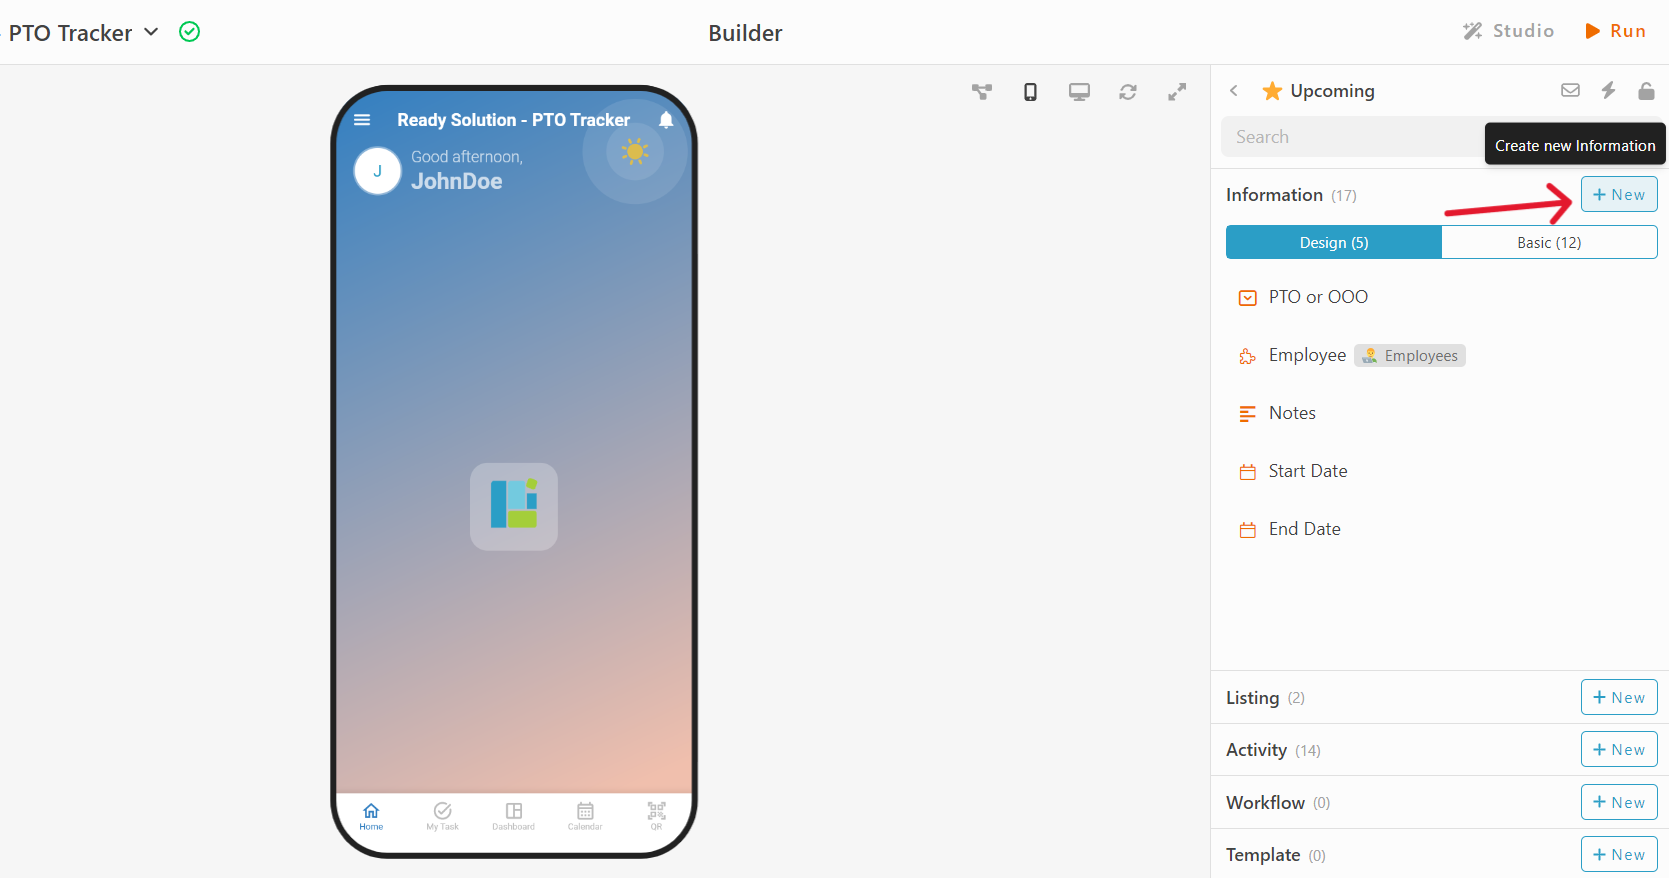
Access your workspace builder.
-
In Builder, create 2 modules by click “+ New” on the top right.
-
Set a name and emoji for both modules. eg : Upcoming and Employee.
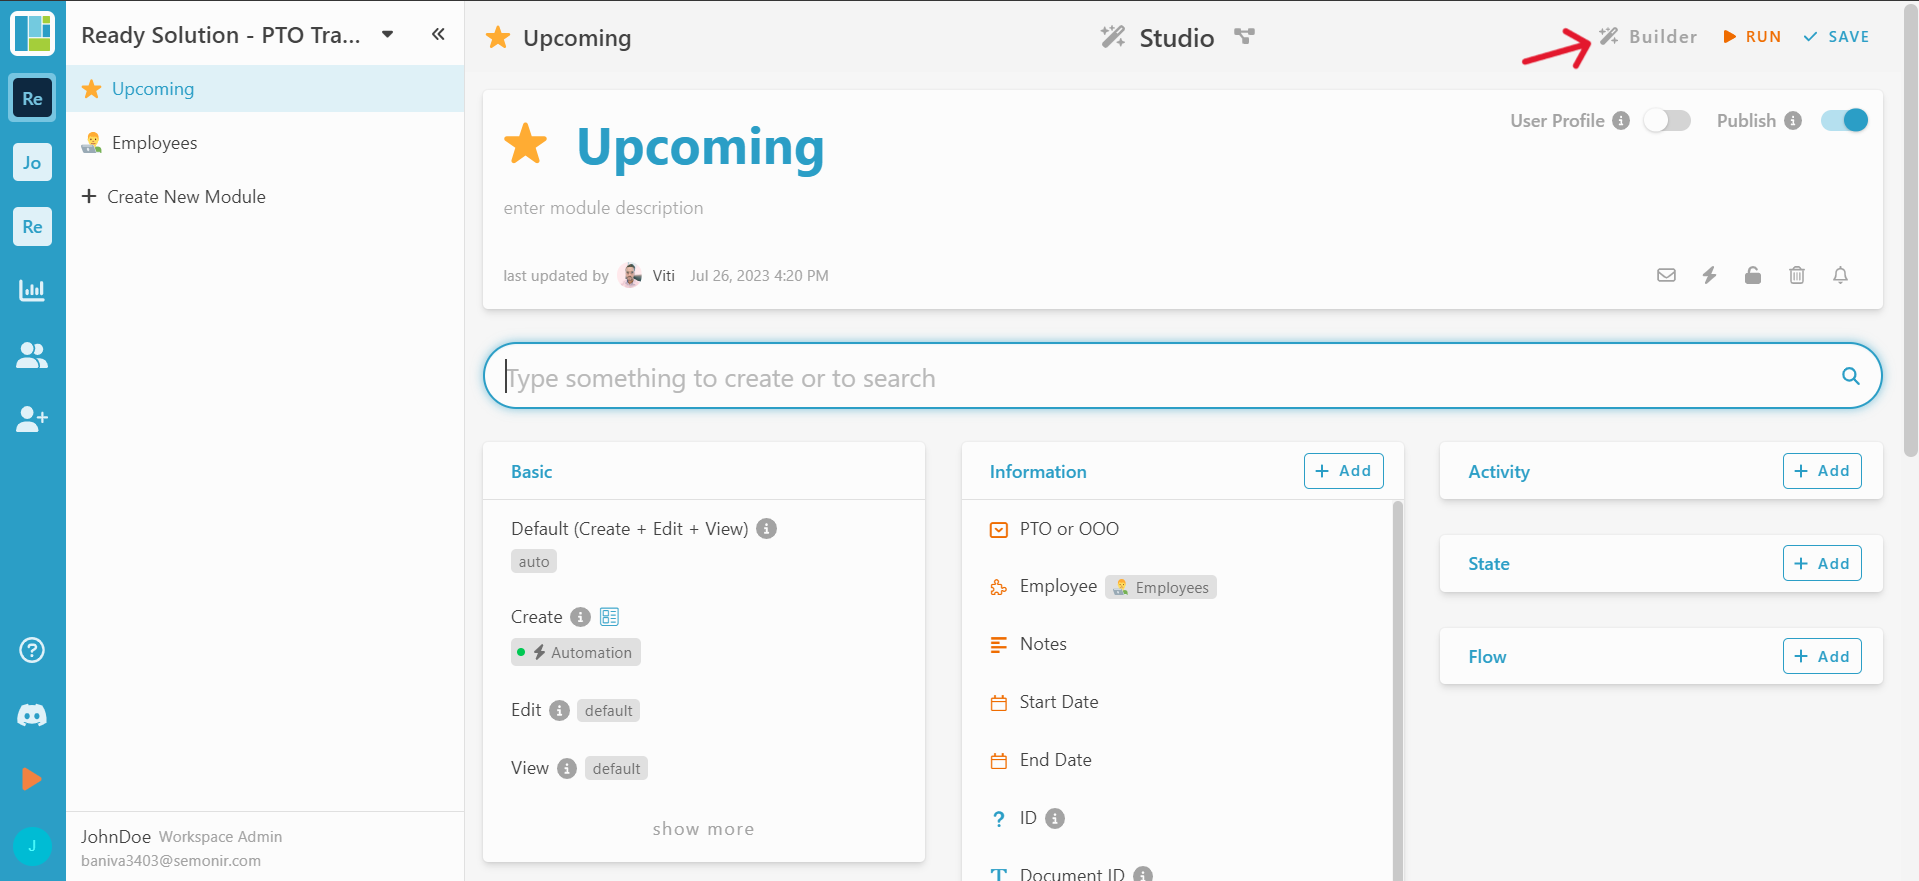


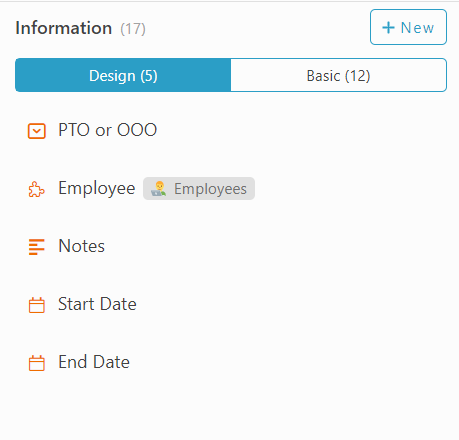
Add Information
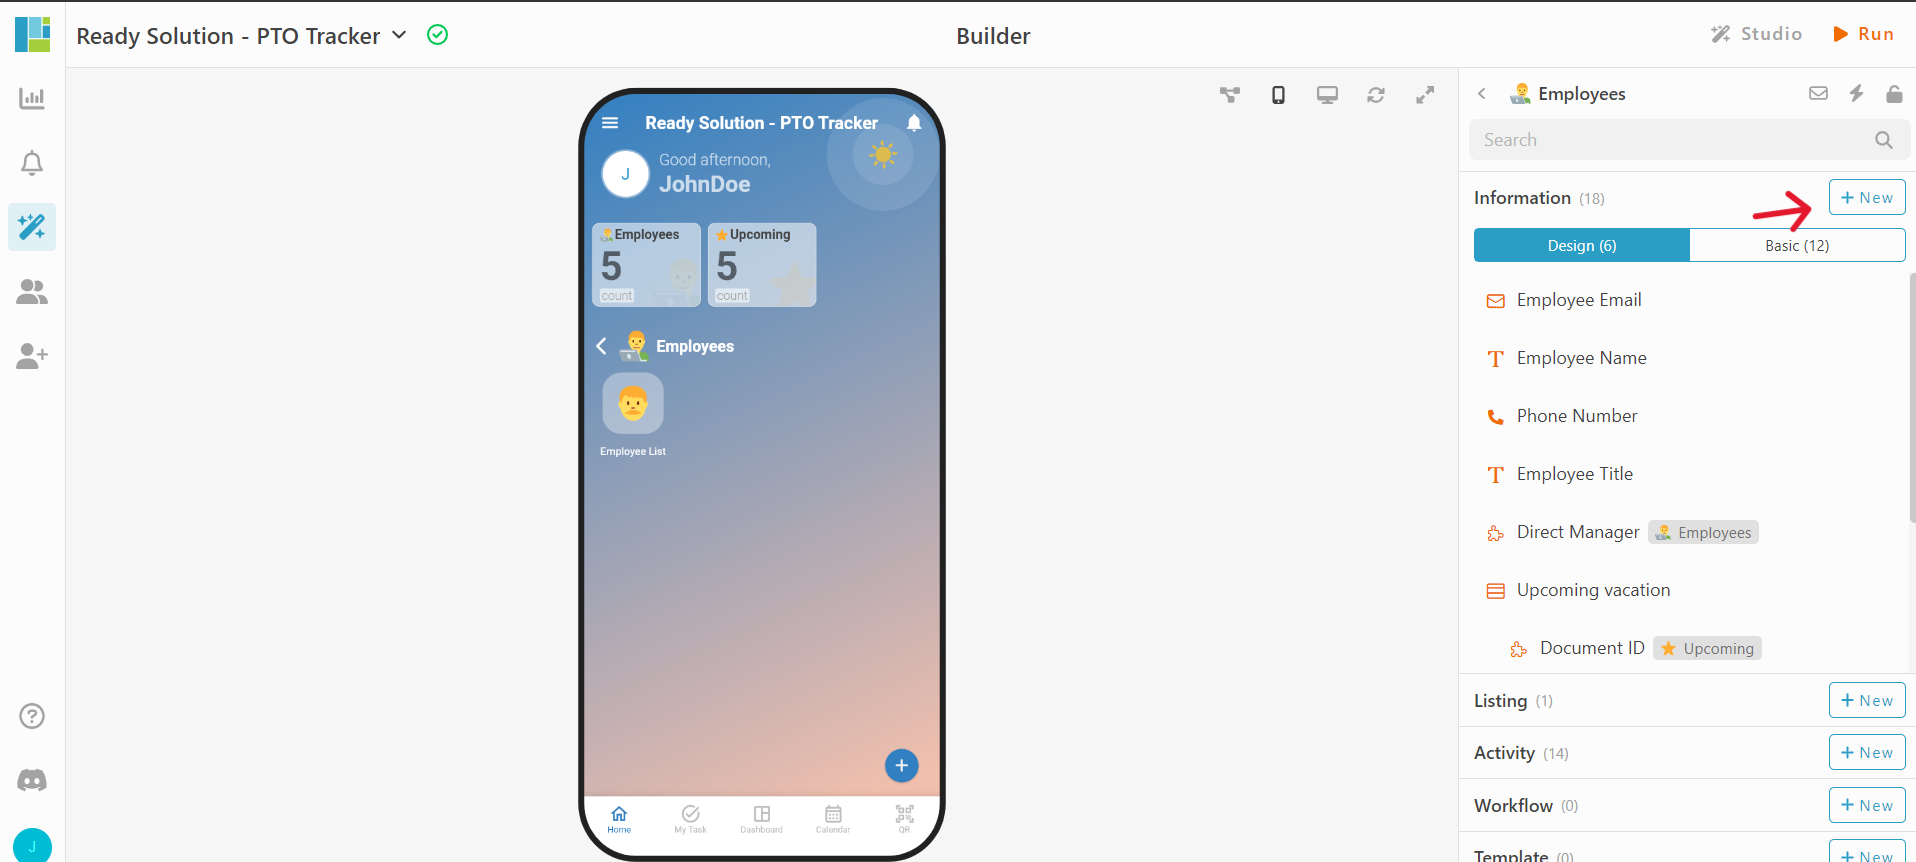
Module : Employee
-
Select module ‘Employee’
-
Select Information section.
-
Click “+ New”
-
Add information as below :
-
Employee Email - Email
-
Employee Name -Text
-
Phone Number - Phone Number
-
Employee Tittle - Text
-
Direct Manager - Module
*Module : Employee
*Display Information : Name -
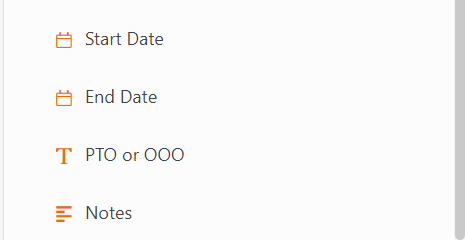
Upcoming vacation - Table
*Document ID - Module (Module - Upcoming, Display Information - Document ID)
*Start Date - Date
*End Date - Date
*PTO or OOO - Text
*Notes - Multiline Text
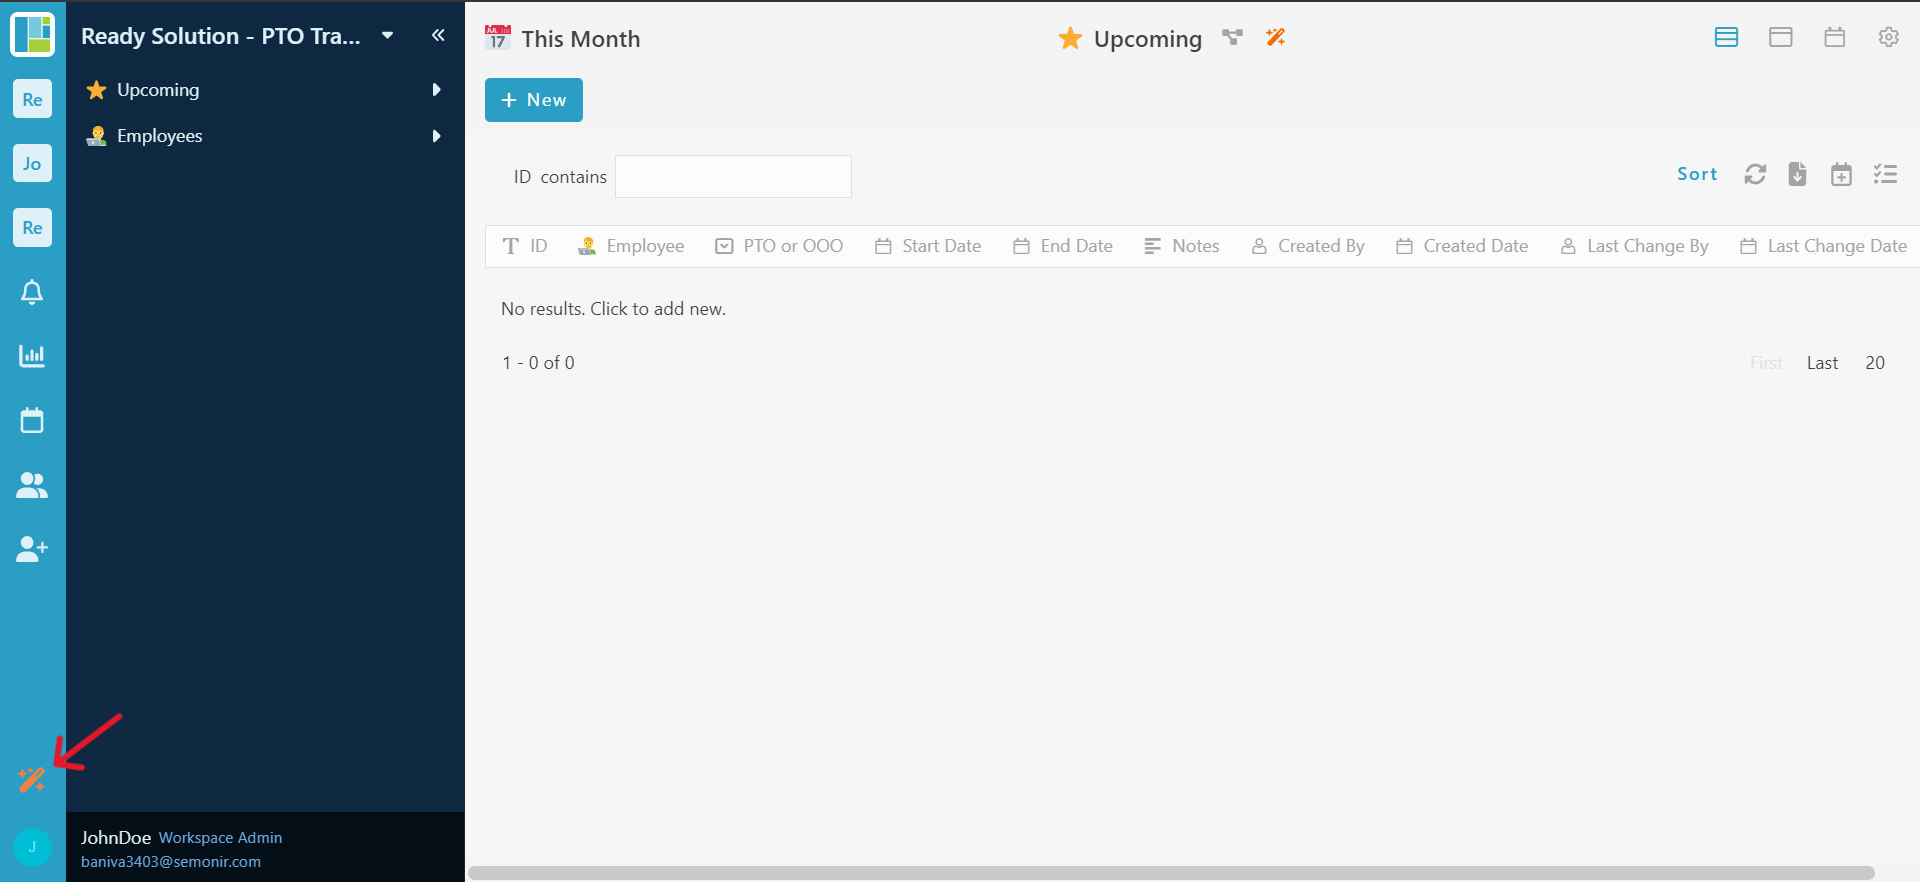
Module : Upcoming
-
Select module ‘Upcoming’
-
Select Information section.
-
Click “+ New”
-
As Information as below :
-
PTO or OOO - Select
*PTO
*OOO -
Employee - Module
*Module : Employee
*Display Information : Name -
Notes - Multiline Text
-
Start Date - Date
-
End Date - Date
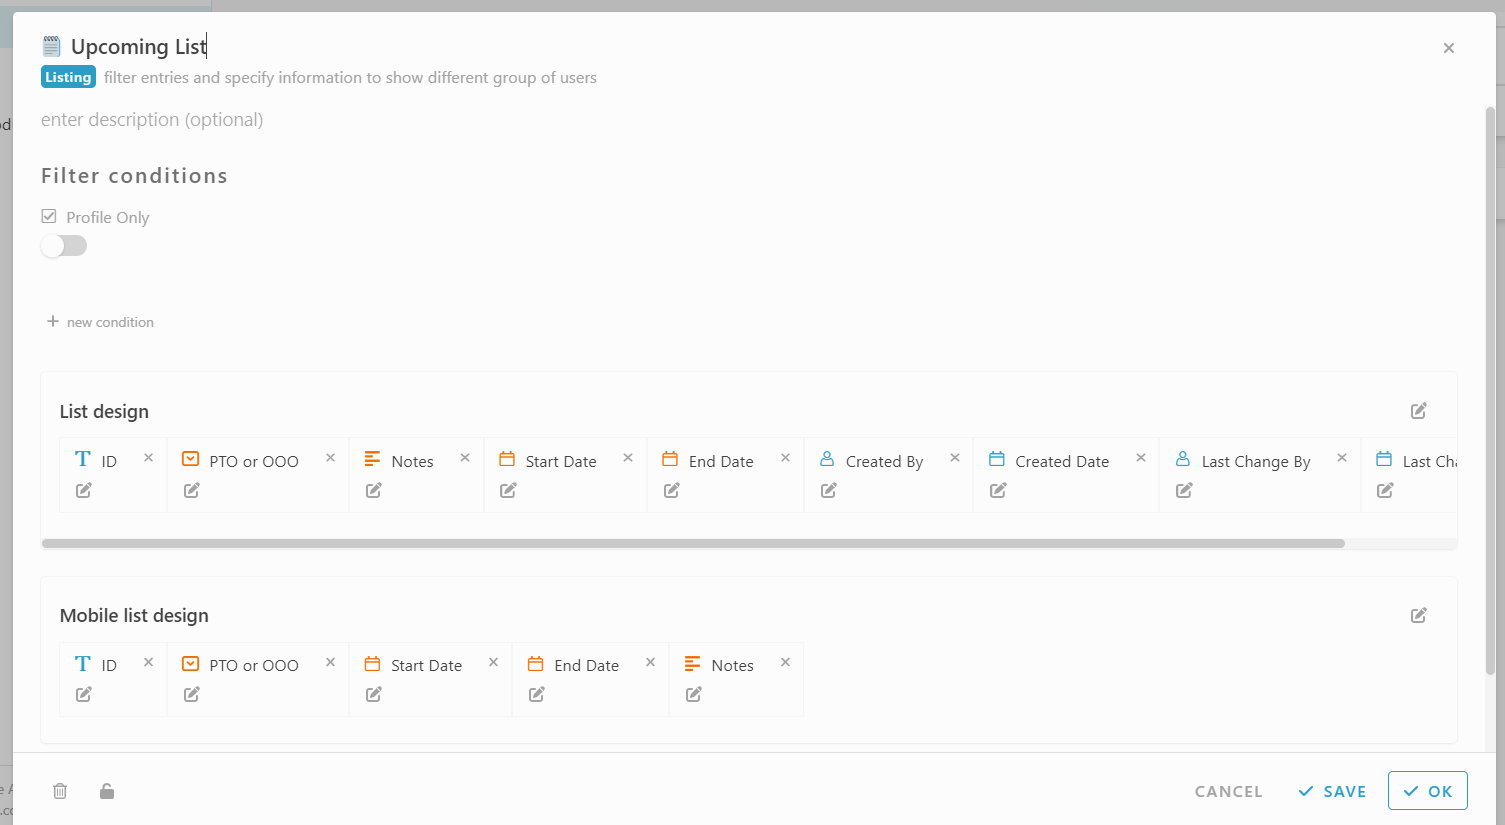
Listing
Module : Upcoming
-
Select Module Upcoming
-
Click Listing section.
-
Click “+ New”.
-
Create 2 listing
-
Set a name, emoji, list design and filter condition (optional). eg : This Month & Upcoming List.
-
“This Month” listing : Filter condition : Start date within month and this month.

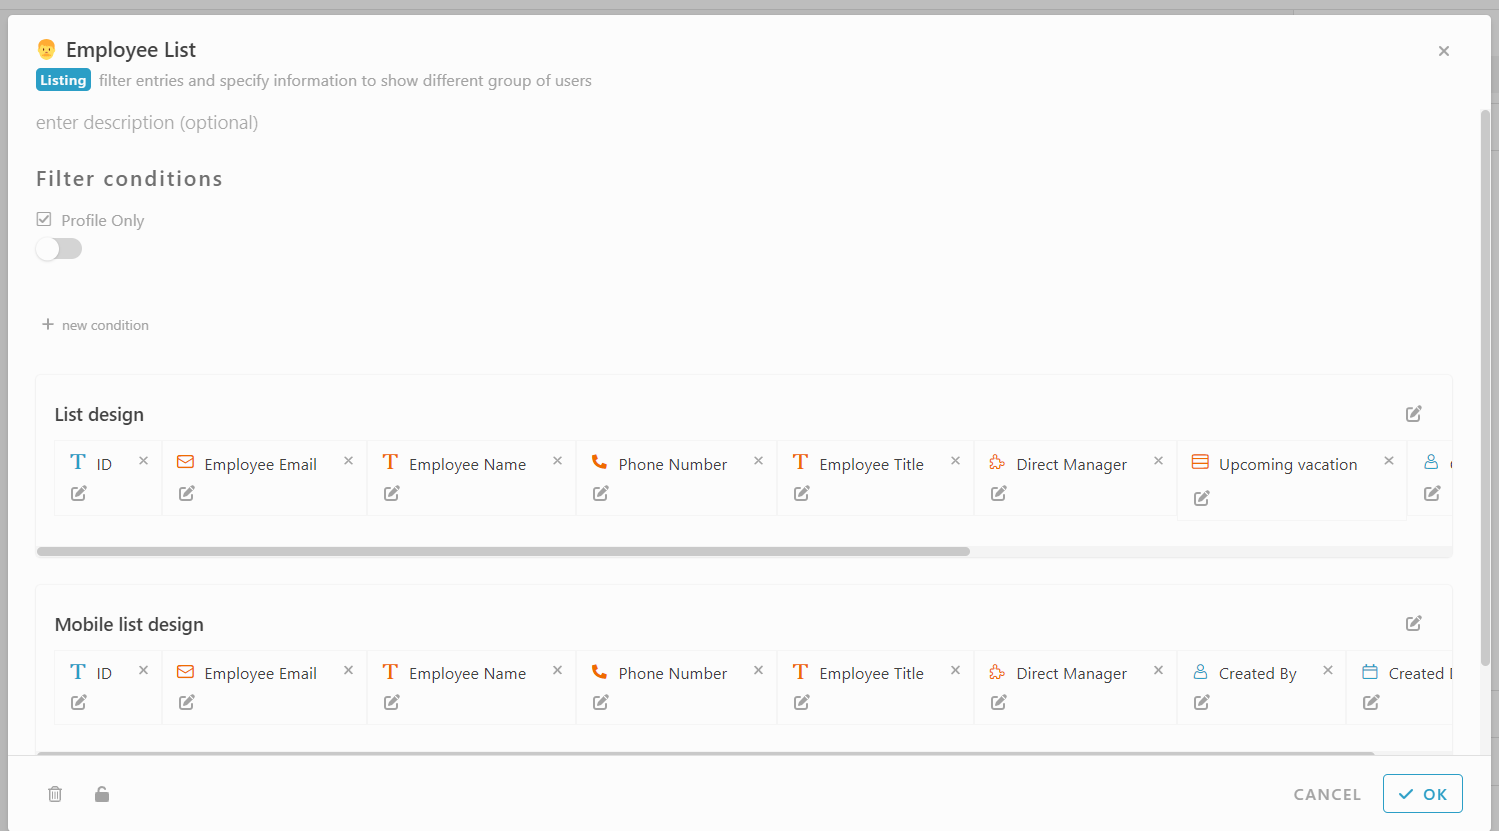
Module : Employees
-
Select module employees
-
Click “Listing” section.
-
Click “+ New”
-
Create 1 listing.
-
Set a name, emoji, list design and filter condition. eg : Employee List
Automation
Condition - To pass details from module Upcoming to "Upcoming Vacation table in module employee
-
Select Module Upcoming
-
Select Activity Section
-
Click Basic
-
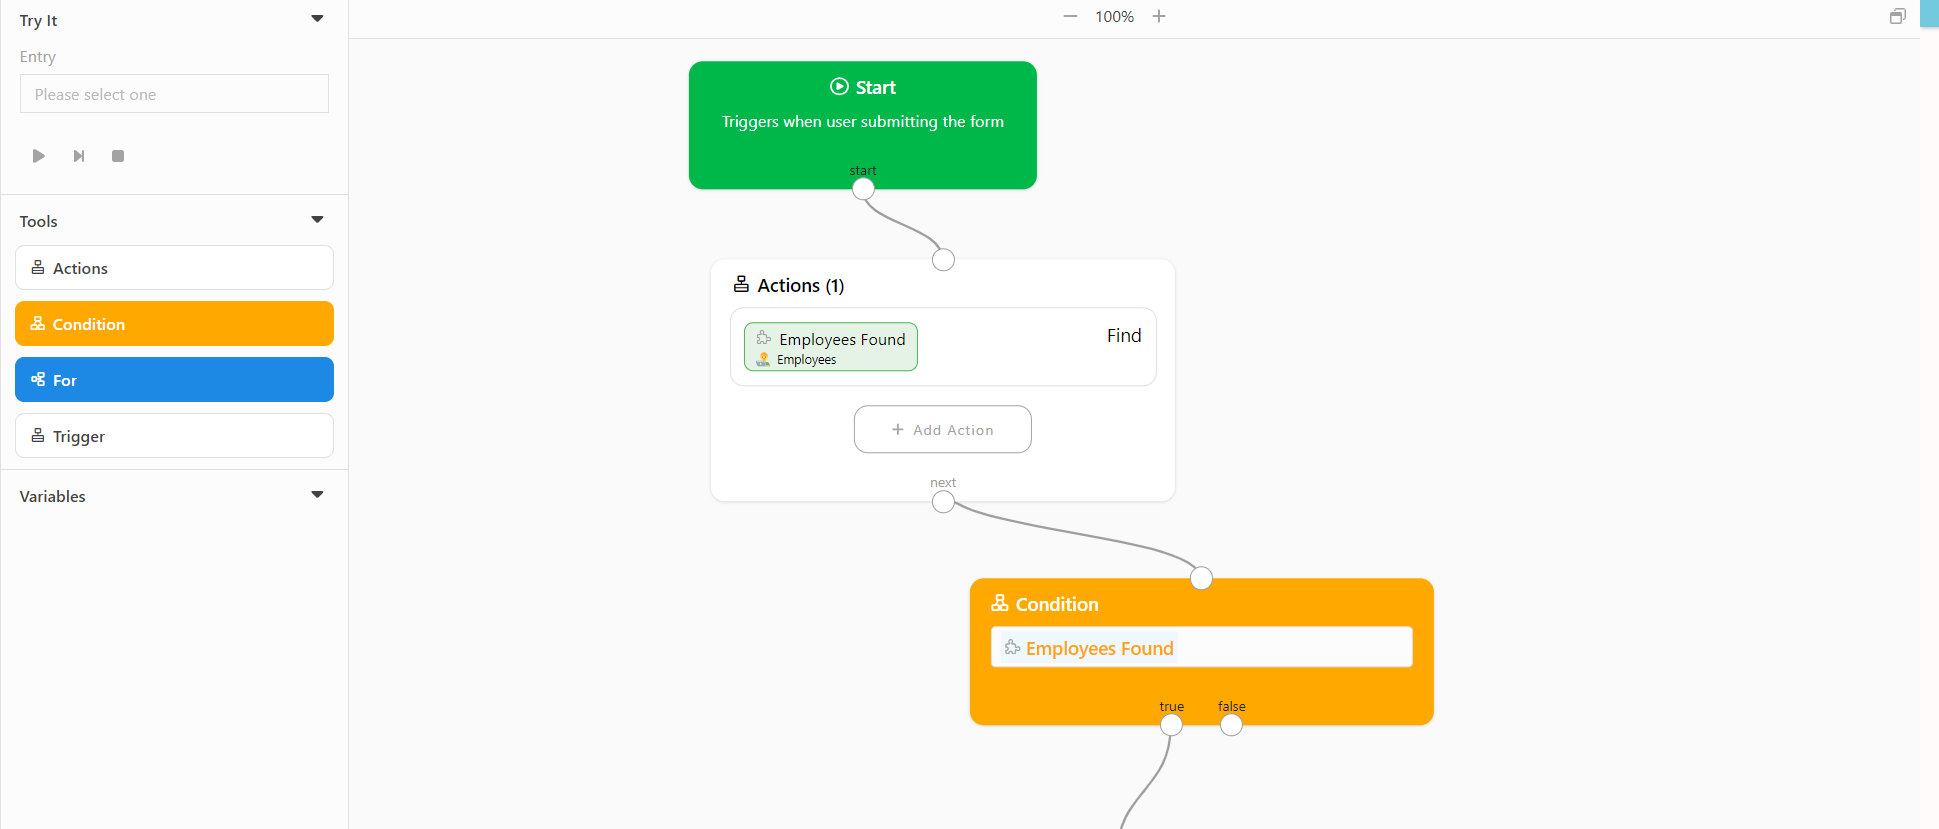
Add new Automation at Create activity, by clicking “+ New Automation”
-
Click “Do After”
-
Drag action block
-
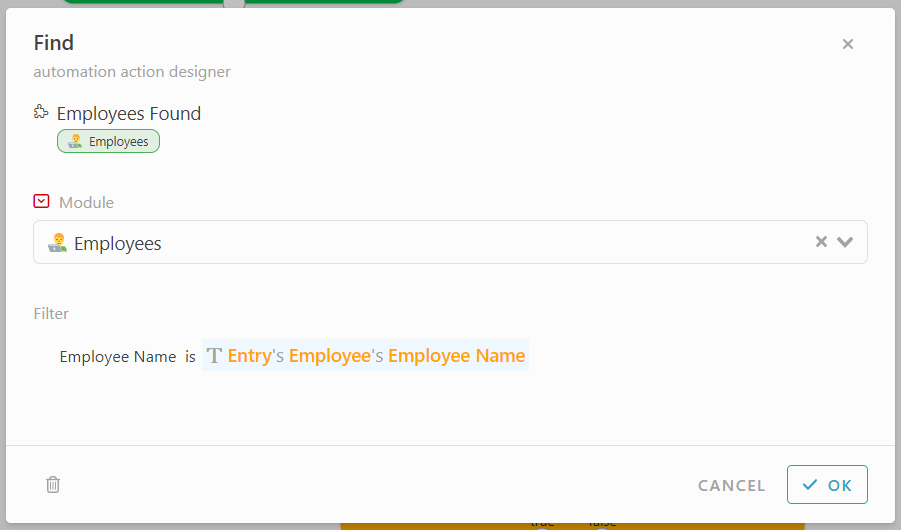
Add action, Find
*Module : Employee
*Filter : Employee Name is #Entry#Employee#EmployeeName -
Drag Condition block
-
Insert value : #EmployeeFound
-
Drag Action block
-
Add Action, Form
*Module : Employees
*Activity : Edit
*Entry : #EmployeesFound -
Drag action block
-
Add action, Create
*Value : #AddRow(#EmployeesEditForm#Upcomingvacation) -
Drag Action block
-
Add Action, Set.
*Variable : #Variable1
*Value : Expand Value
*Document ID - #Entry
*Start Date - #Entry#StartDate
*End Date - #Entry#EndDate
*PTO or OOO - #Entry#PTO or OOO
*Notes : #Entry#Notes -
Drag Action block
-
Add Action, Perform
*Module : Employees
*Activity : Edit
*Entry : #Employees Found
*Form : #EmployeesEditForm


End Of Configuration - Congrats on creating your PTO Tracker ![]() , You may run & try your PTO Tracker now, or try it via ready solution in our INISTATE.
, You may run & try your PTO Tracker now, or try it via ready solution in our INISTATE.