Here, we’ll show you step-by-step how to build a Recruitment and Staffing management in FETIAS.
Problem
Difficult to manage the application - Recruiters (Human Resources Department) hard to manage large amounts of job placement requests by record manually due to received requests from different platforms.
Objective
Record apply details - improve the efficiency of recruiters (Human Resources Department) in choosing and identifying applicants who best meet the job requirements.
- Recognize and configure all the Information name and type required to create a new entry in Recruitment & Staffing.
- Candidate Name Text
- Email Email
- Contact Number Phone Number
- Resume/CV Files
- Application Source Select
- Referral
- Website
- JobStreet
- Others
- Position Title Text
- Gender Select
- Male
- Female
- Interview Date Date
- Interviewer Text
- Interview Comments Multiline Text
- Interview Mode Select
- Online
- Face-to-Face
- Online Session Details Multiline Text

-
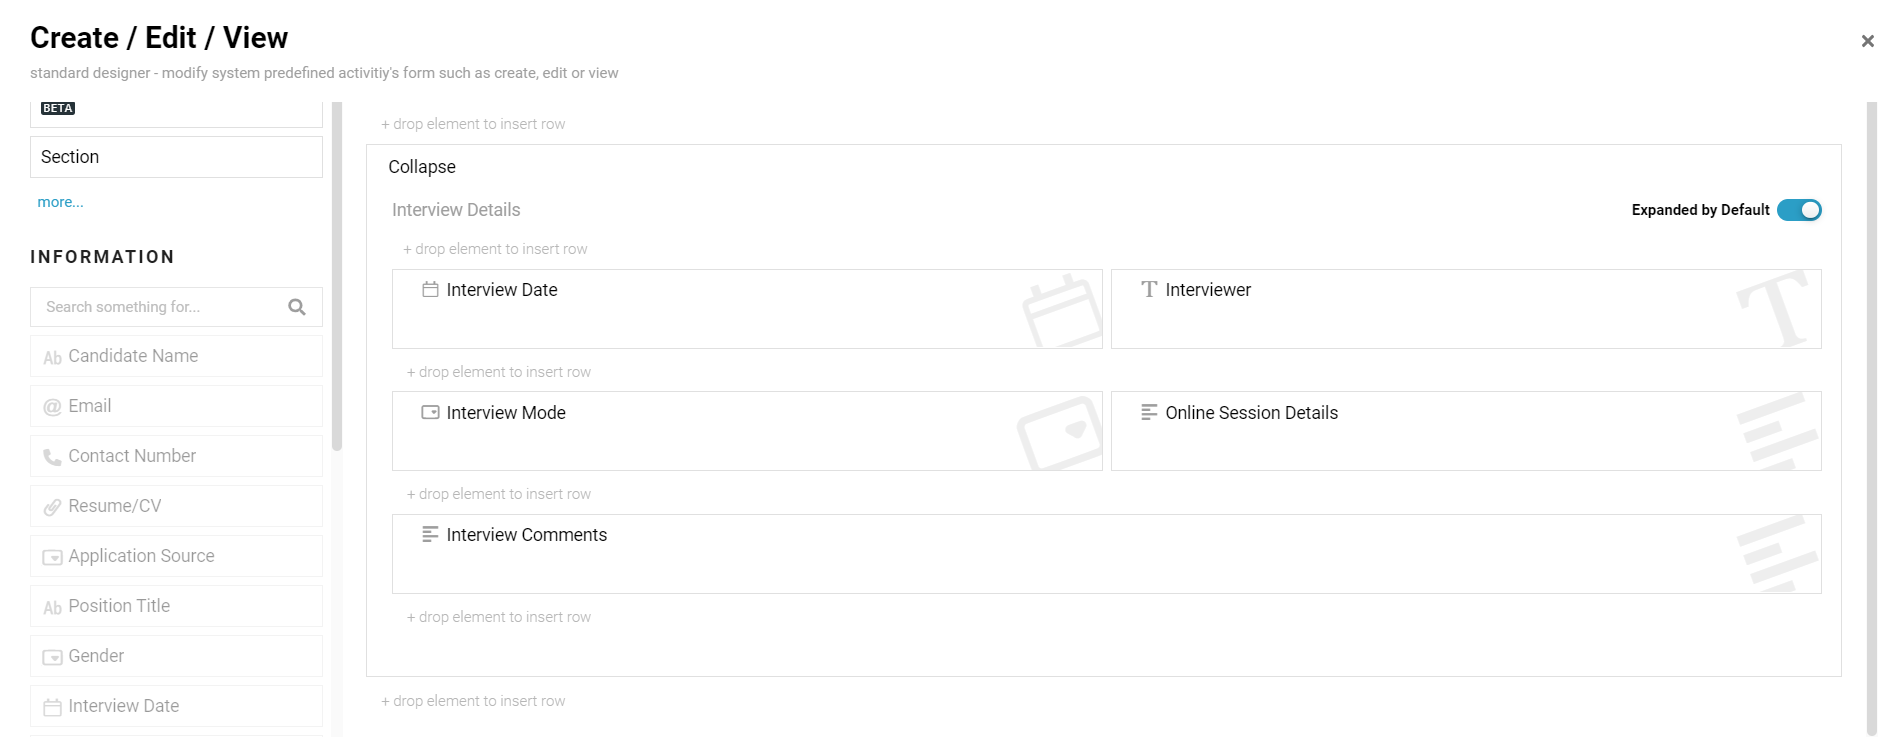
Click Standard - Create / Edit / View, drag a Section element name it as Application Details and drag all the relevant fields into it (Application Source, Position Title, Candidate Name, Email, Contact Number, Gender, Resume/CV) and arrange it accordingly.
-
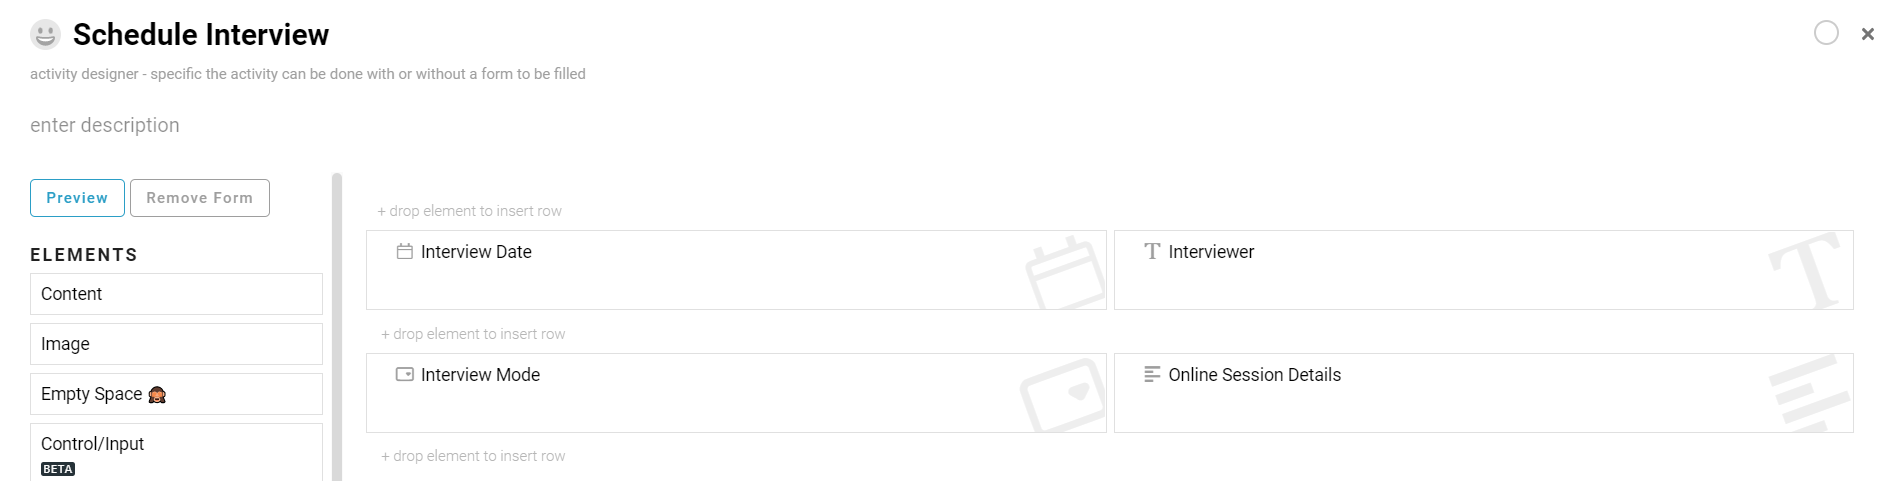
Drag all another Section element and change to Collapse, and drag all the relevant fields into it (Interview Date, Interviewer, Interview Mode, Online Session Details, Interview Comments) and arrange it accordingly.
-
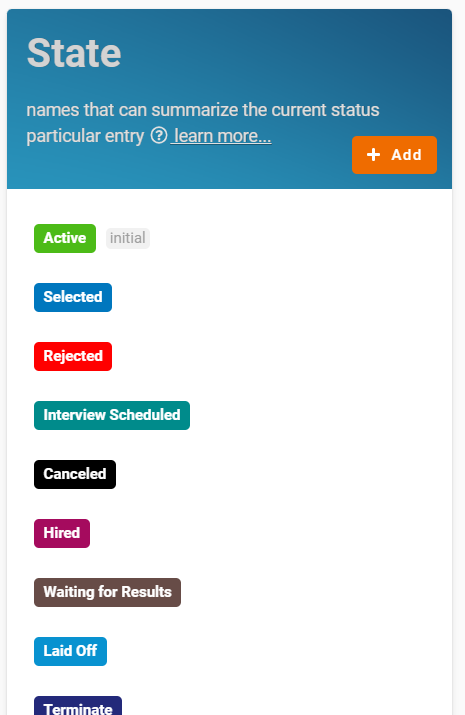
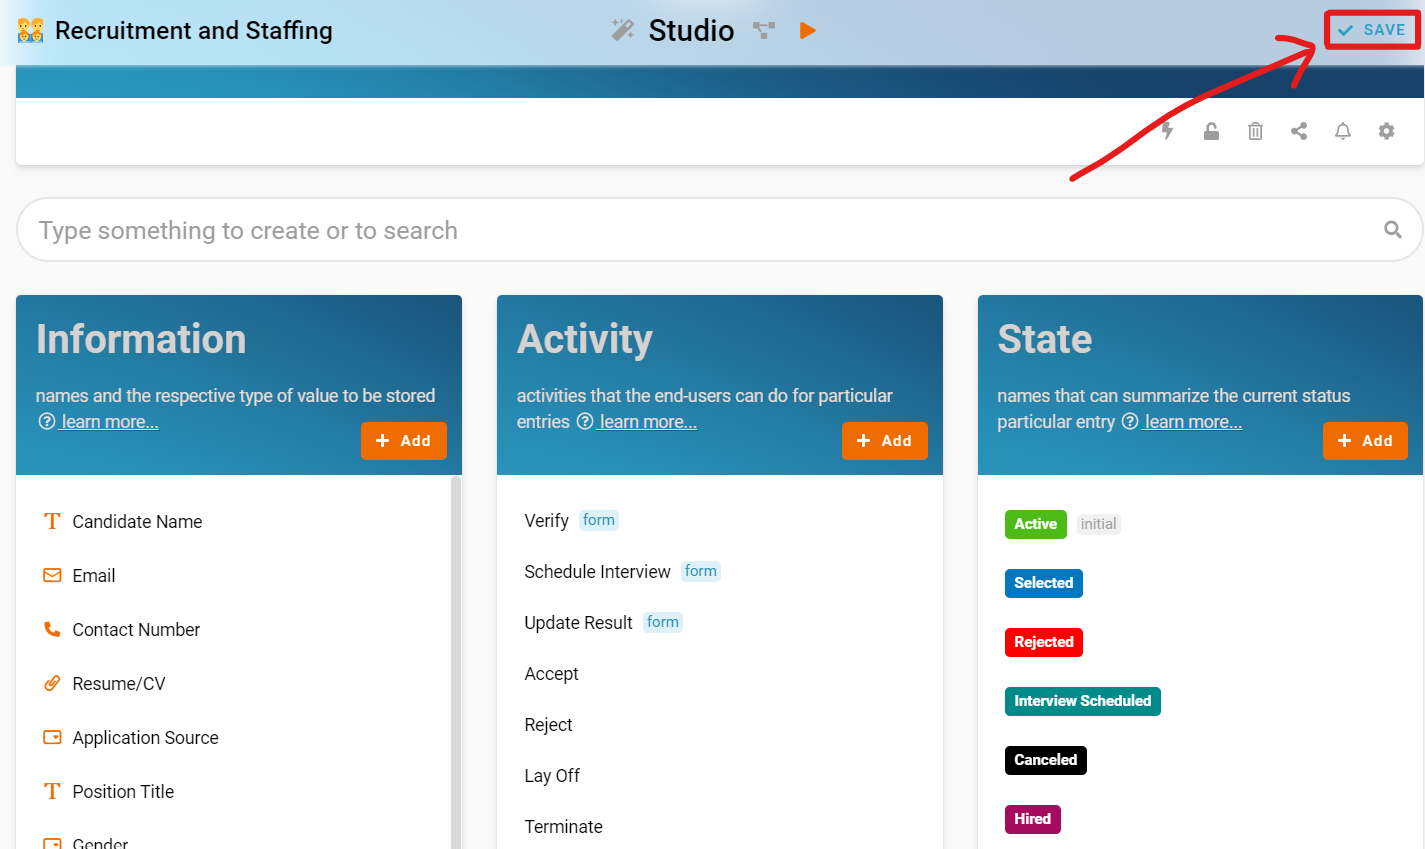
Recognize and configure all the State in the whole Recruitment and Staffing process.

- Active
- Selected
- Rejected
- Interview Scheduled
- Waiting for Results
- In Progress
- Hired
- Offer Rejected
- Terminate
- Laid Off
-
Canceled
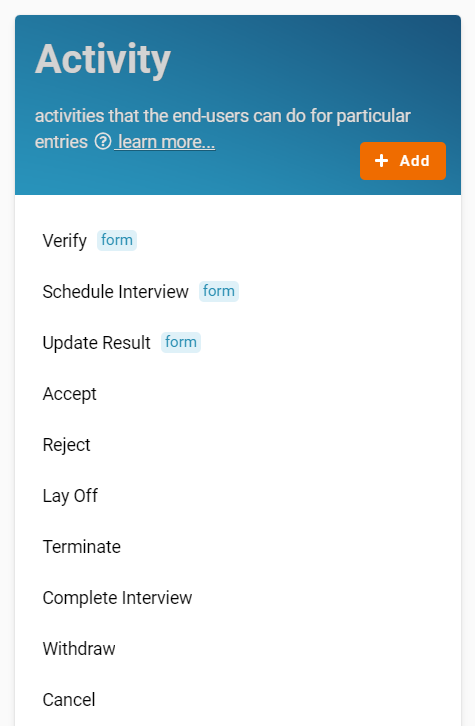
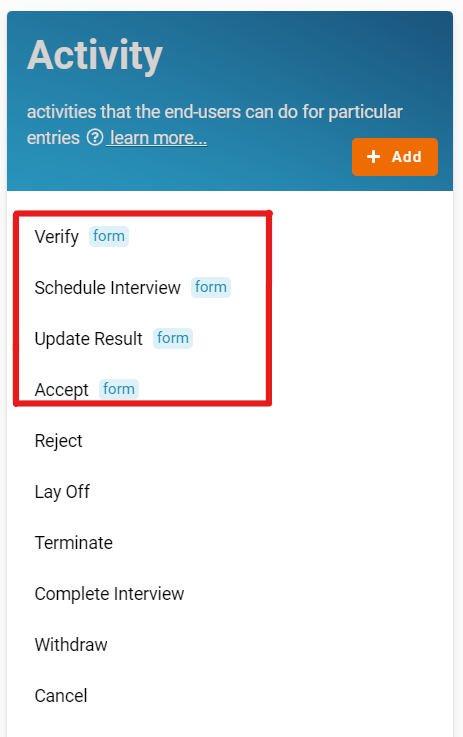
- Recognize and configure all the Activity able to perform to change State (Refer Picture 5)
- Verify
- Schedule Interview
- Complete Interview
- Update Result
- Reject
- Accept
- Withdraw
- Terminate
- Lay Off
-
Cancel
- Configure Flow by determines a state can flow to which state through specific activity and form a reasonable workflow diagram in whole progress.
- (any state) > Cancel > Canceled
- Active > Verify [condition: field(‘Suitable’==True)]> Selected
- Active > Verify > Rejected
- Selected > Schedule Interview > Interview Scheduled
- Interview Scheduled > Complete Interview > Waiting for Results
- Waiting for Results > Update Result > In Progress
- In Progress > Accept > Hired
- In Progress > Reject > Rejected
- Hired > Offer Rejected > Withdraw
- Hired > Terminate > Terminate
-
Hired > Laid Off > Lay Off

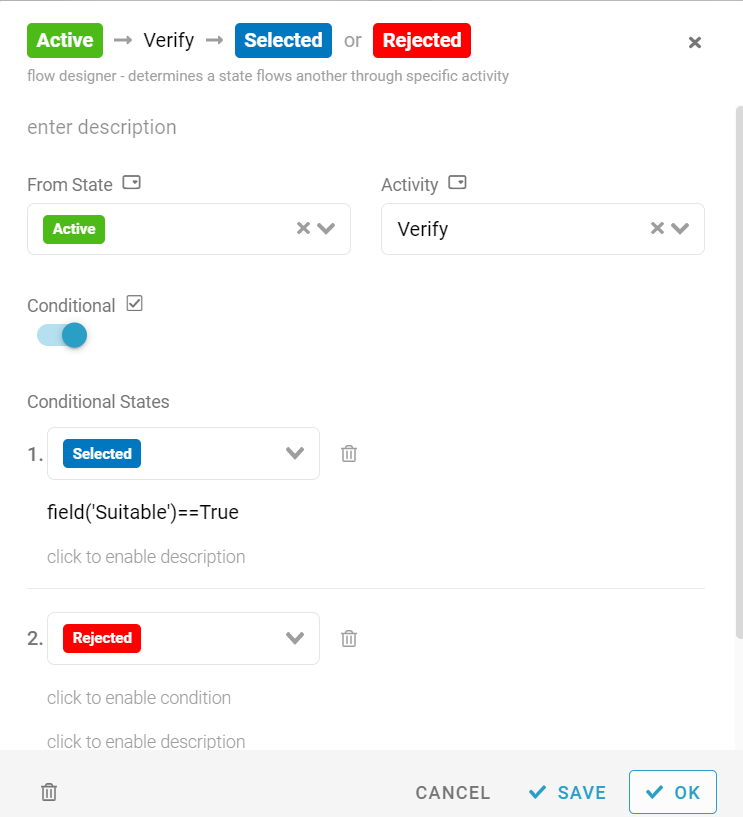
- Recognize and Configure all the Information name and type required to update information when each perform each activity.
Activity: Verify
- Suitable YesNo
Activity: Accept
- Department Text
- Joining Date Date
- HOD/Manager Text
-
Click each Activity and build a form by drag all the related fields and arrange it accordingly to let user view or update information if necessarily.
-
Click SAVE button at the top right to save all the configuration.
Congratulations!!! You have successfully created a Recruitment Management System.
For more templates:
Try FETIAS for FREE now.
Sign up at https://fetias.com
Related topic
Tutorial - Recruitment & Staffing