Track your job openings and applicants in one place with relevant contact information. Easily manage the entire recruitment and hiring process.
Here, we’ll show you step-by-step how to build a Recruitment and Staffing management in FETIAS.
Problem
Difficult to manage the application - Recruiters (Human Resources Department) hard to manage large amounts of job placement requests by record manually due to received requests from different platforms.
Objective
Record apply details - improve the efficiency of recruiters (Human Resources Department) in choosing and identifying applicants who best meet the job requirements.
Process Flow
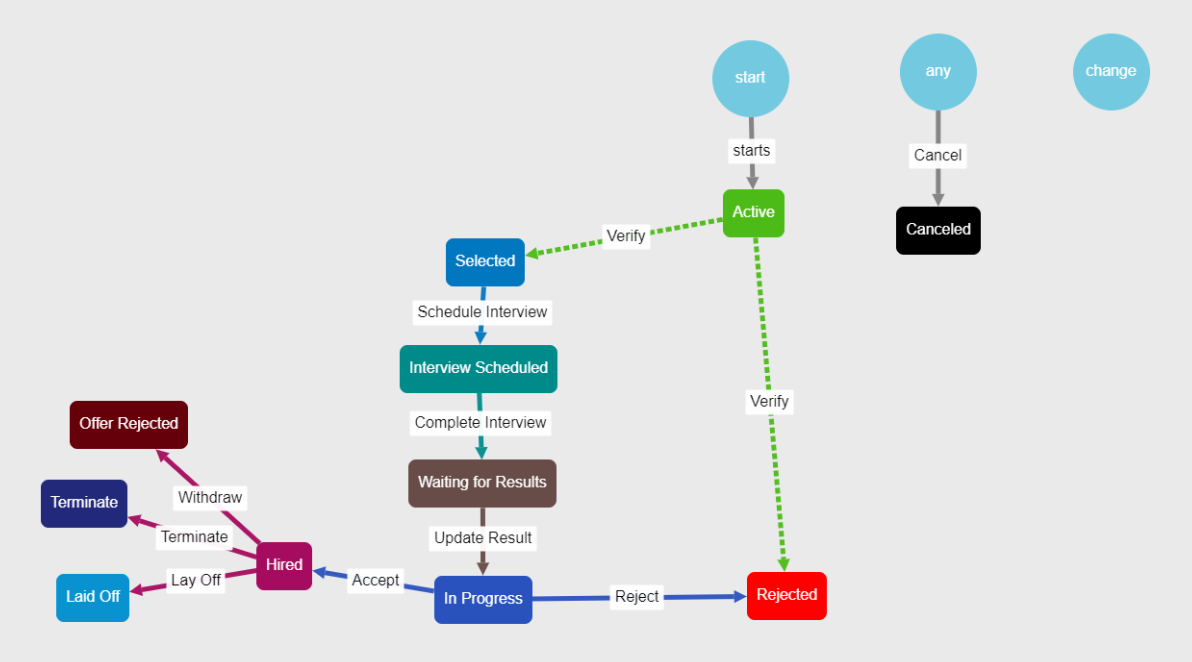
When a job application is created, staff need to fill in the relevant details of the applicant, its initial state is “Active”. Next, staff can check the applicant fulfill the job requirement or not, by click on the Verify button, if the applicant fulfill the job requirement, tick the Suitable and submit then the state will change to “Selected”, if the applicant not fulfill the job requirement, left the Suitable untick and submit then the state will change to “Rejected”. After that, staff can schedule an interview session for the applicant being selected by pressing the Schedule Interview button, fill in the relevant details and submit, the state will change to “Interview Scheduled”. After conducting the interview session, the staff can press the Complete Interview button and the state will change to “Waiting for Results”. Staff can press the Update Result button and put all the comments observed from the interview session for references and review and the state will change to “In Progress”. After the relevant management staff review, you can make a decision by pressing the Accept button and filling in the relevant details, state will change to “Hired”, press Reject button, state will change to “Rejected”. If the employee no longer work for the company or reject the offer, the staff can perform 3 activities based on different situation which are Withdraw, the system would change the state to “Offer Rejected”, Terminate and the system would change the state to “Terminate”, Lay off and the system would change the state to “Laid Off”.
Step
-
Staff clicks the “+ New” button, the system will display a form to input applicant details (Application Source, Position Title, Candidate Name, Email, Contact Number, Gender, Resume/CV) in the first section.
-
Staff also can input the interview details if the interview session is already conducted as shown in the second section.
-
After completing the form, the user can click the “Done” button.
-
New entry is created successfully, and the state is initialized as “Active”.
-
Staff can check the applicant fulfill the job requirement or not, by click on the Verify button, if the applicant fulfill the job requirement, tick the Suitable and submit then the State will change to “Selected”.
-
If the applicant does not fulfill the job requirement, leave the Suitable untick and submit then the state will change to “Rejected”.
-
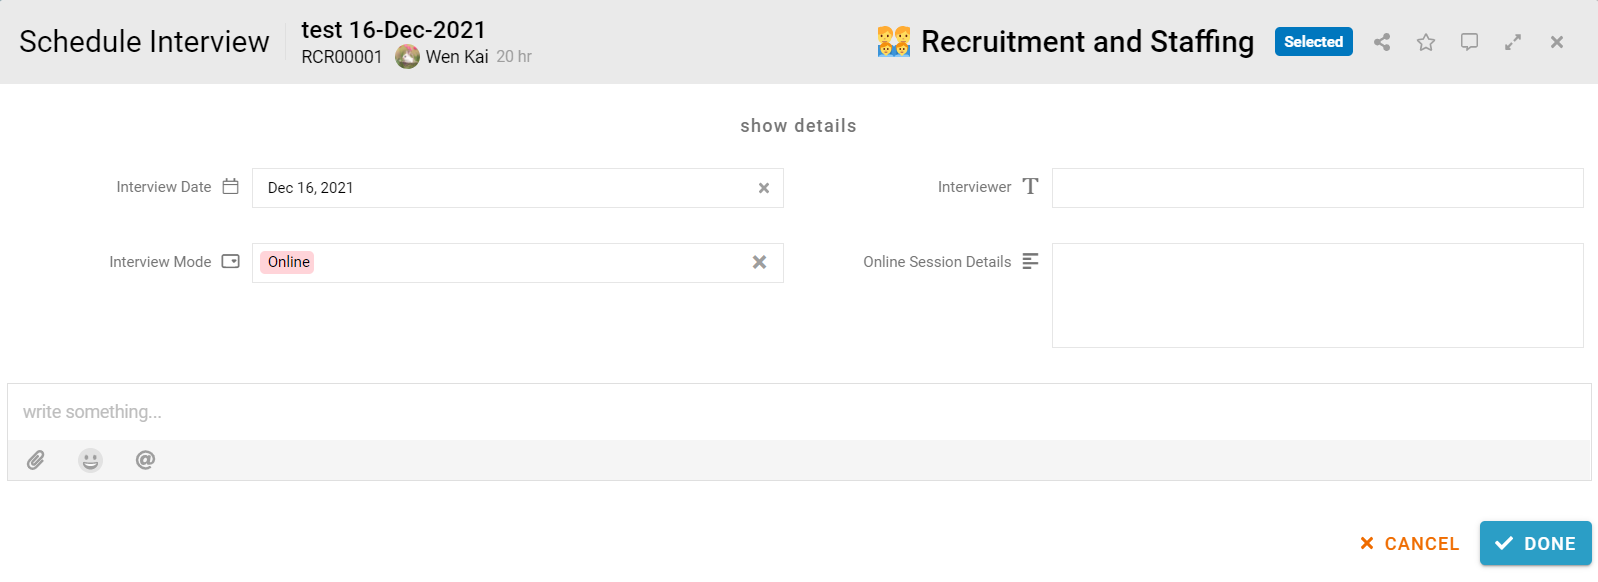
After the interview session is scheduled, pressing the Schedule Interview button, fill in the relevant details (Interview Date, Interviewer, Interview Mode, Online Session Details) and submit, the state will change to “Interview Scheduled”.
-
After conducting the interview session, the staff can press the Complete Interview button and the state will change to “Waiting for Results”.
-
Staff can press the Update Result button and put all the comments observed from the interview session for references and review and the state will change to “In Progress”.
-
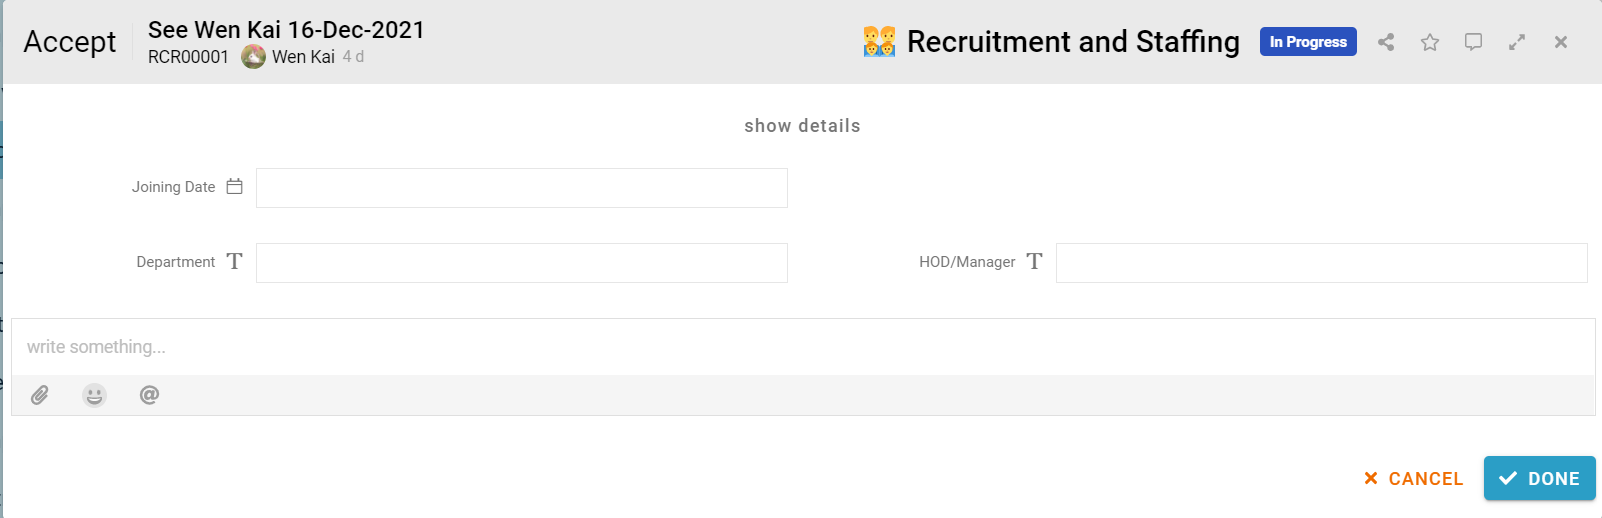
After the relevant management staff review and decide to hire the applicant, pressing the Accept button and fill in the Department, Joining Date, HOD/Manager and submit, State will change to “Hired”.
-
If the relevant management staff refuse to hire the applicant, press the Reject button and submit, the state will change to “Rejected”.
-
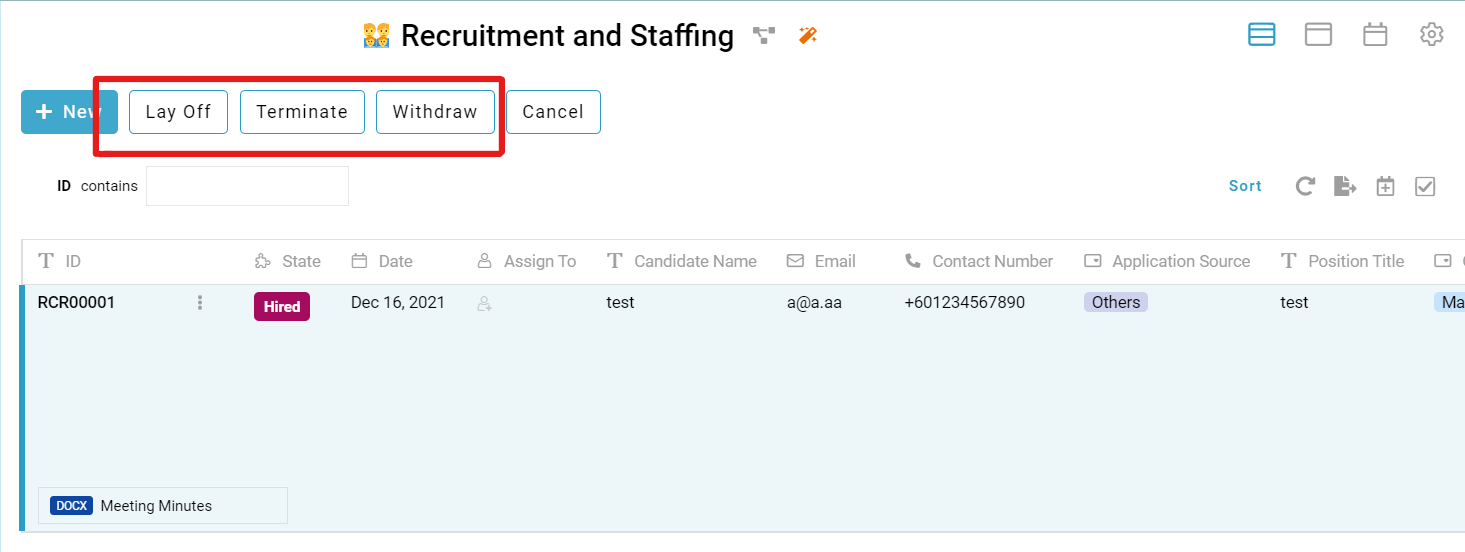
If the applicant rejects the offer, the staff can press the Withdraw button and submit, the system would change the state to “Offer Rejected”.
-
If the employee is no longer employed by your company due to any reason, can press Terminate and the system would change the state to “Terminate”.
-
When the position is no longer needed for reasons other than work performance, can press Lay off and the system would change the state to “Laid Off”.
-
Staff can click the “Cancel” button to cancel the application in any state. If they find anything wrong, the state of the application changes to “Canceled”.


For more templates:
Try FETIAS for FREE now.
Sign up at https://fetias.com
Related topic
Configuration Tutorial - Recruitment & Staffing