Can be used by individual, team or organization to complete tasks efficiently in a more organized way. Help to trace prioritizing related tasks.
Problem
Difficult to record the progress of task - Hard to manage and trace the progress of a task and record the information of task.
Objective
Efficiency - To simplify the step of manage the task and increase the speed of manage the progress of task.
Step of Configuration
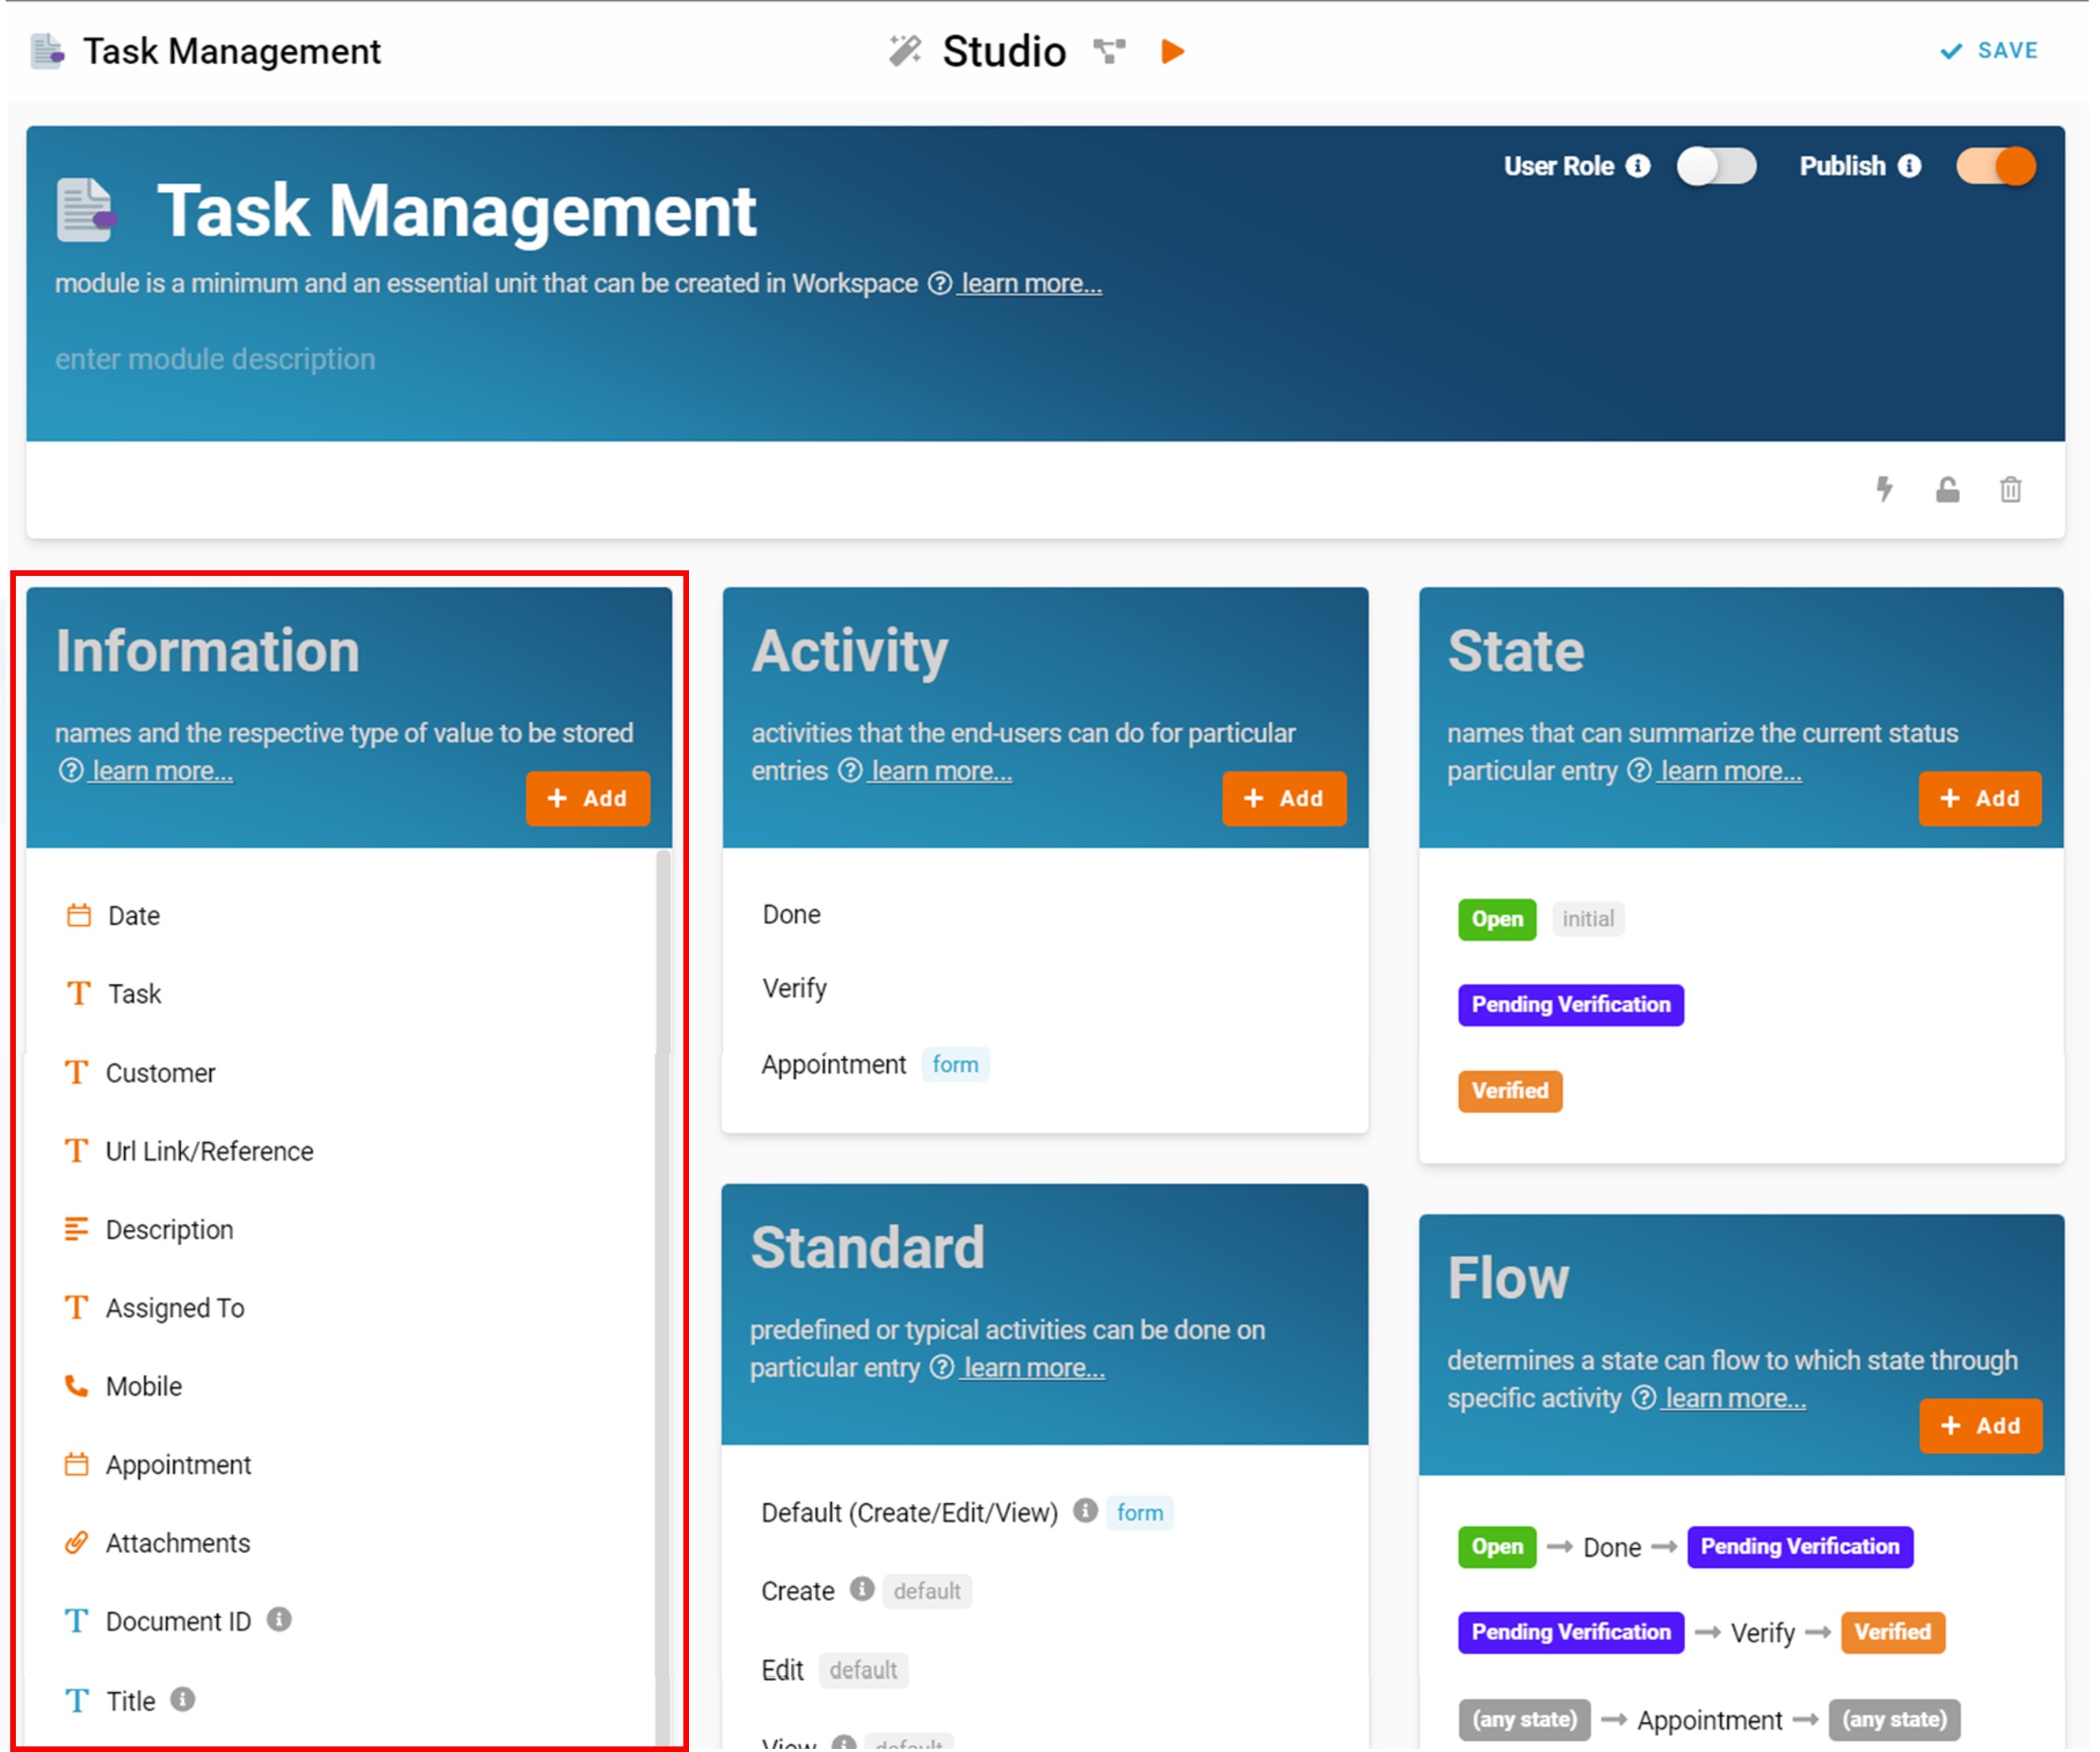
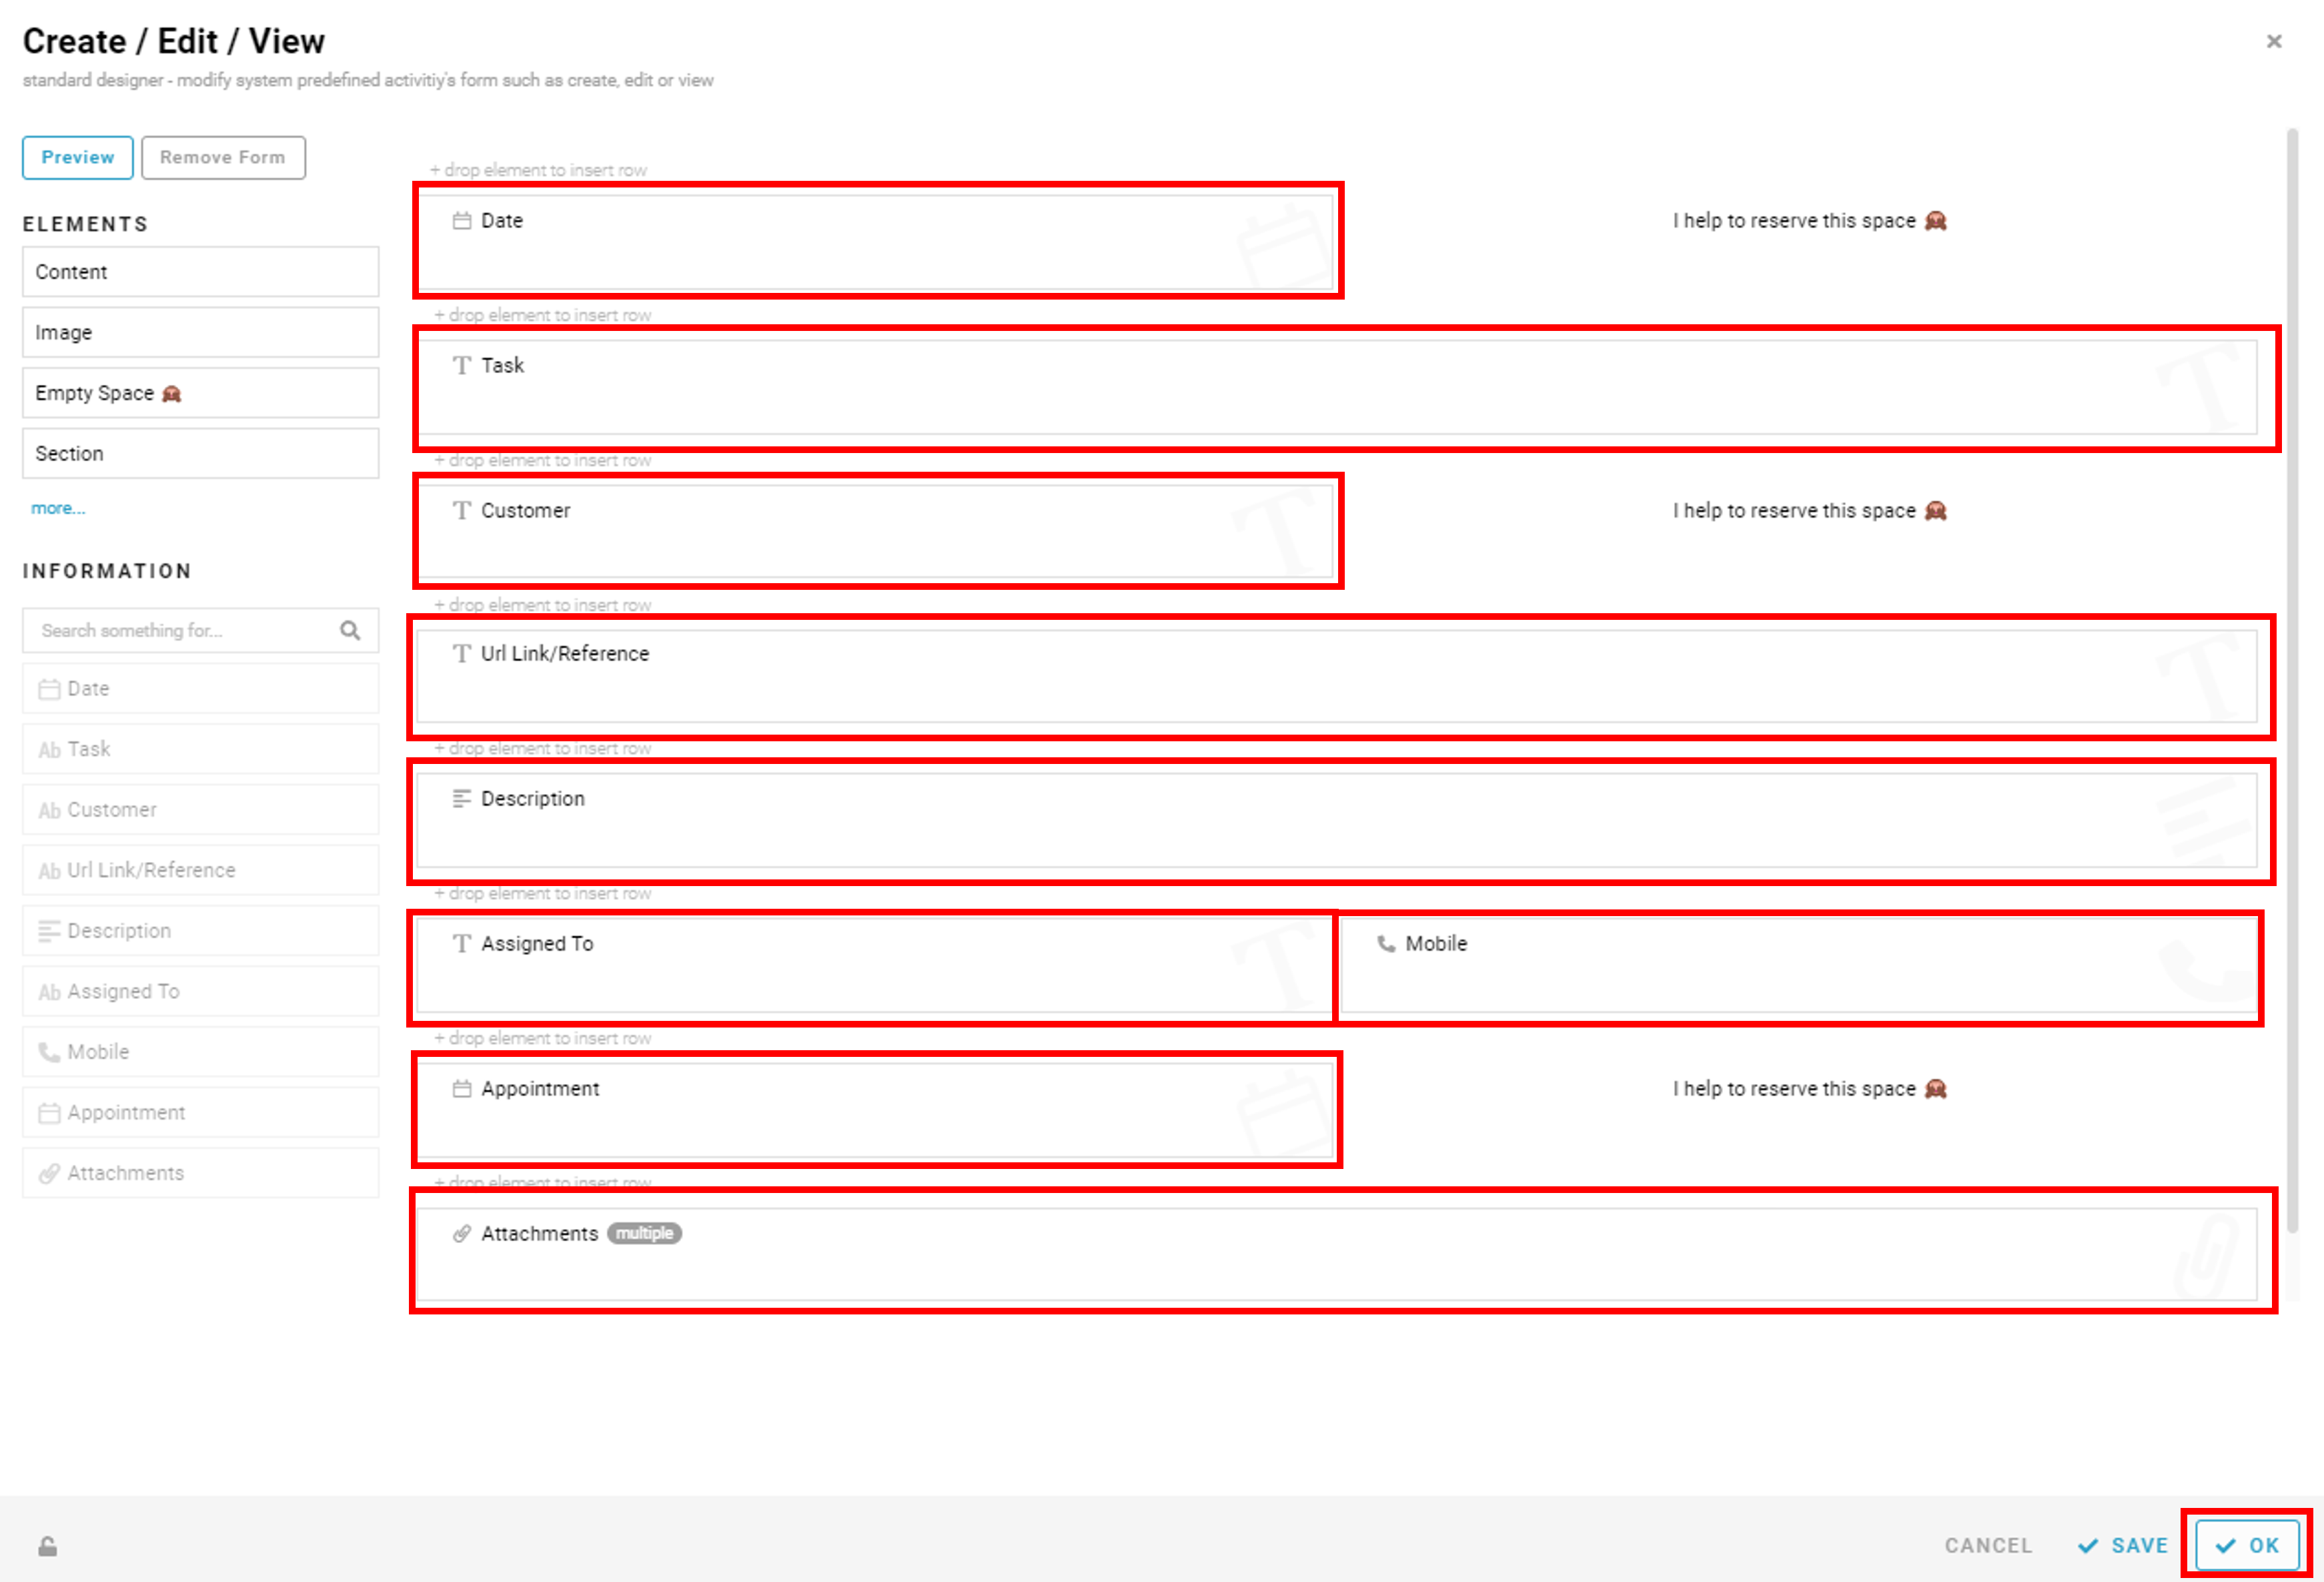
- Recognize and configure all the Information name and type required to create a new entry in Task Management. (Refer Picture 1)
- Name: Date, Type: Date
- Name: Task, Type: Text
- Name: Customer, Type: Text
- Name: Url Link/Reference
- Name: Description, Type: Multiline Text
- Name: Assigned To, Type: Text
- Name: Mobile, Type: Phone Number
- Name: Appointment, Type: Date Time
- Name: Attachments, Type: Files
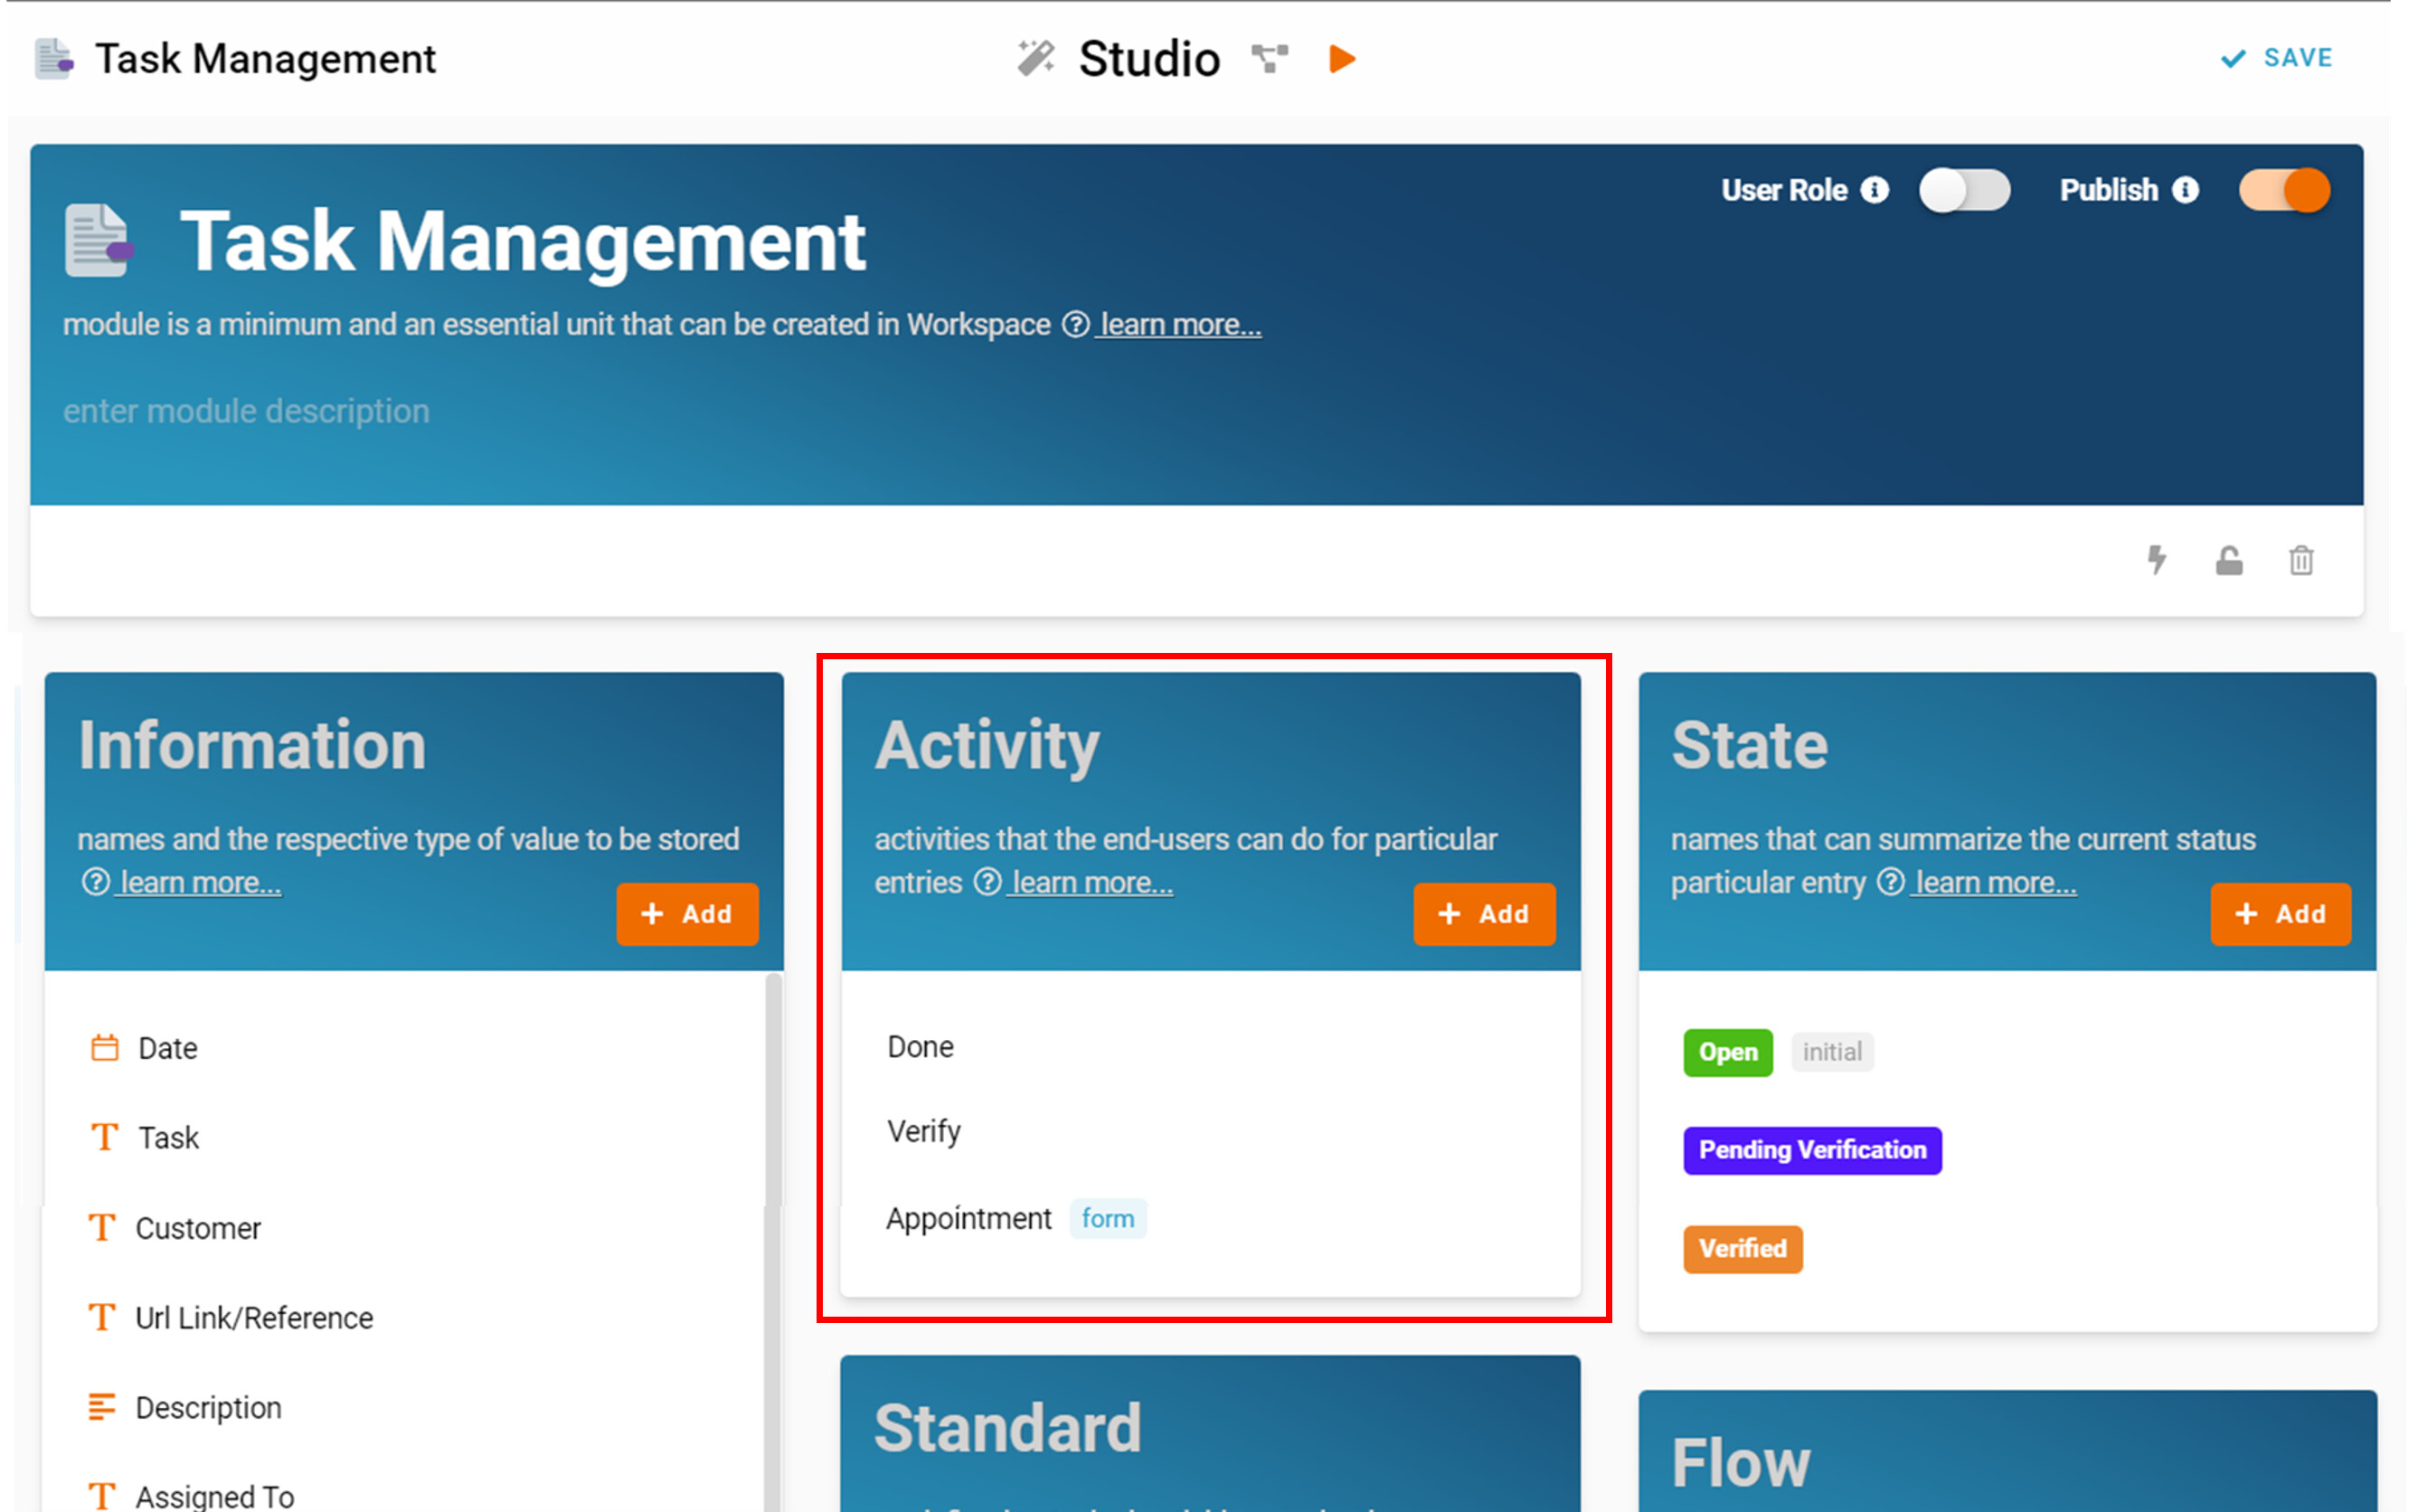
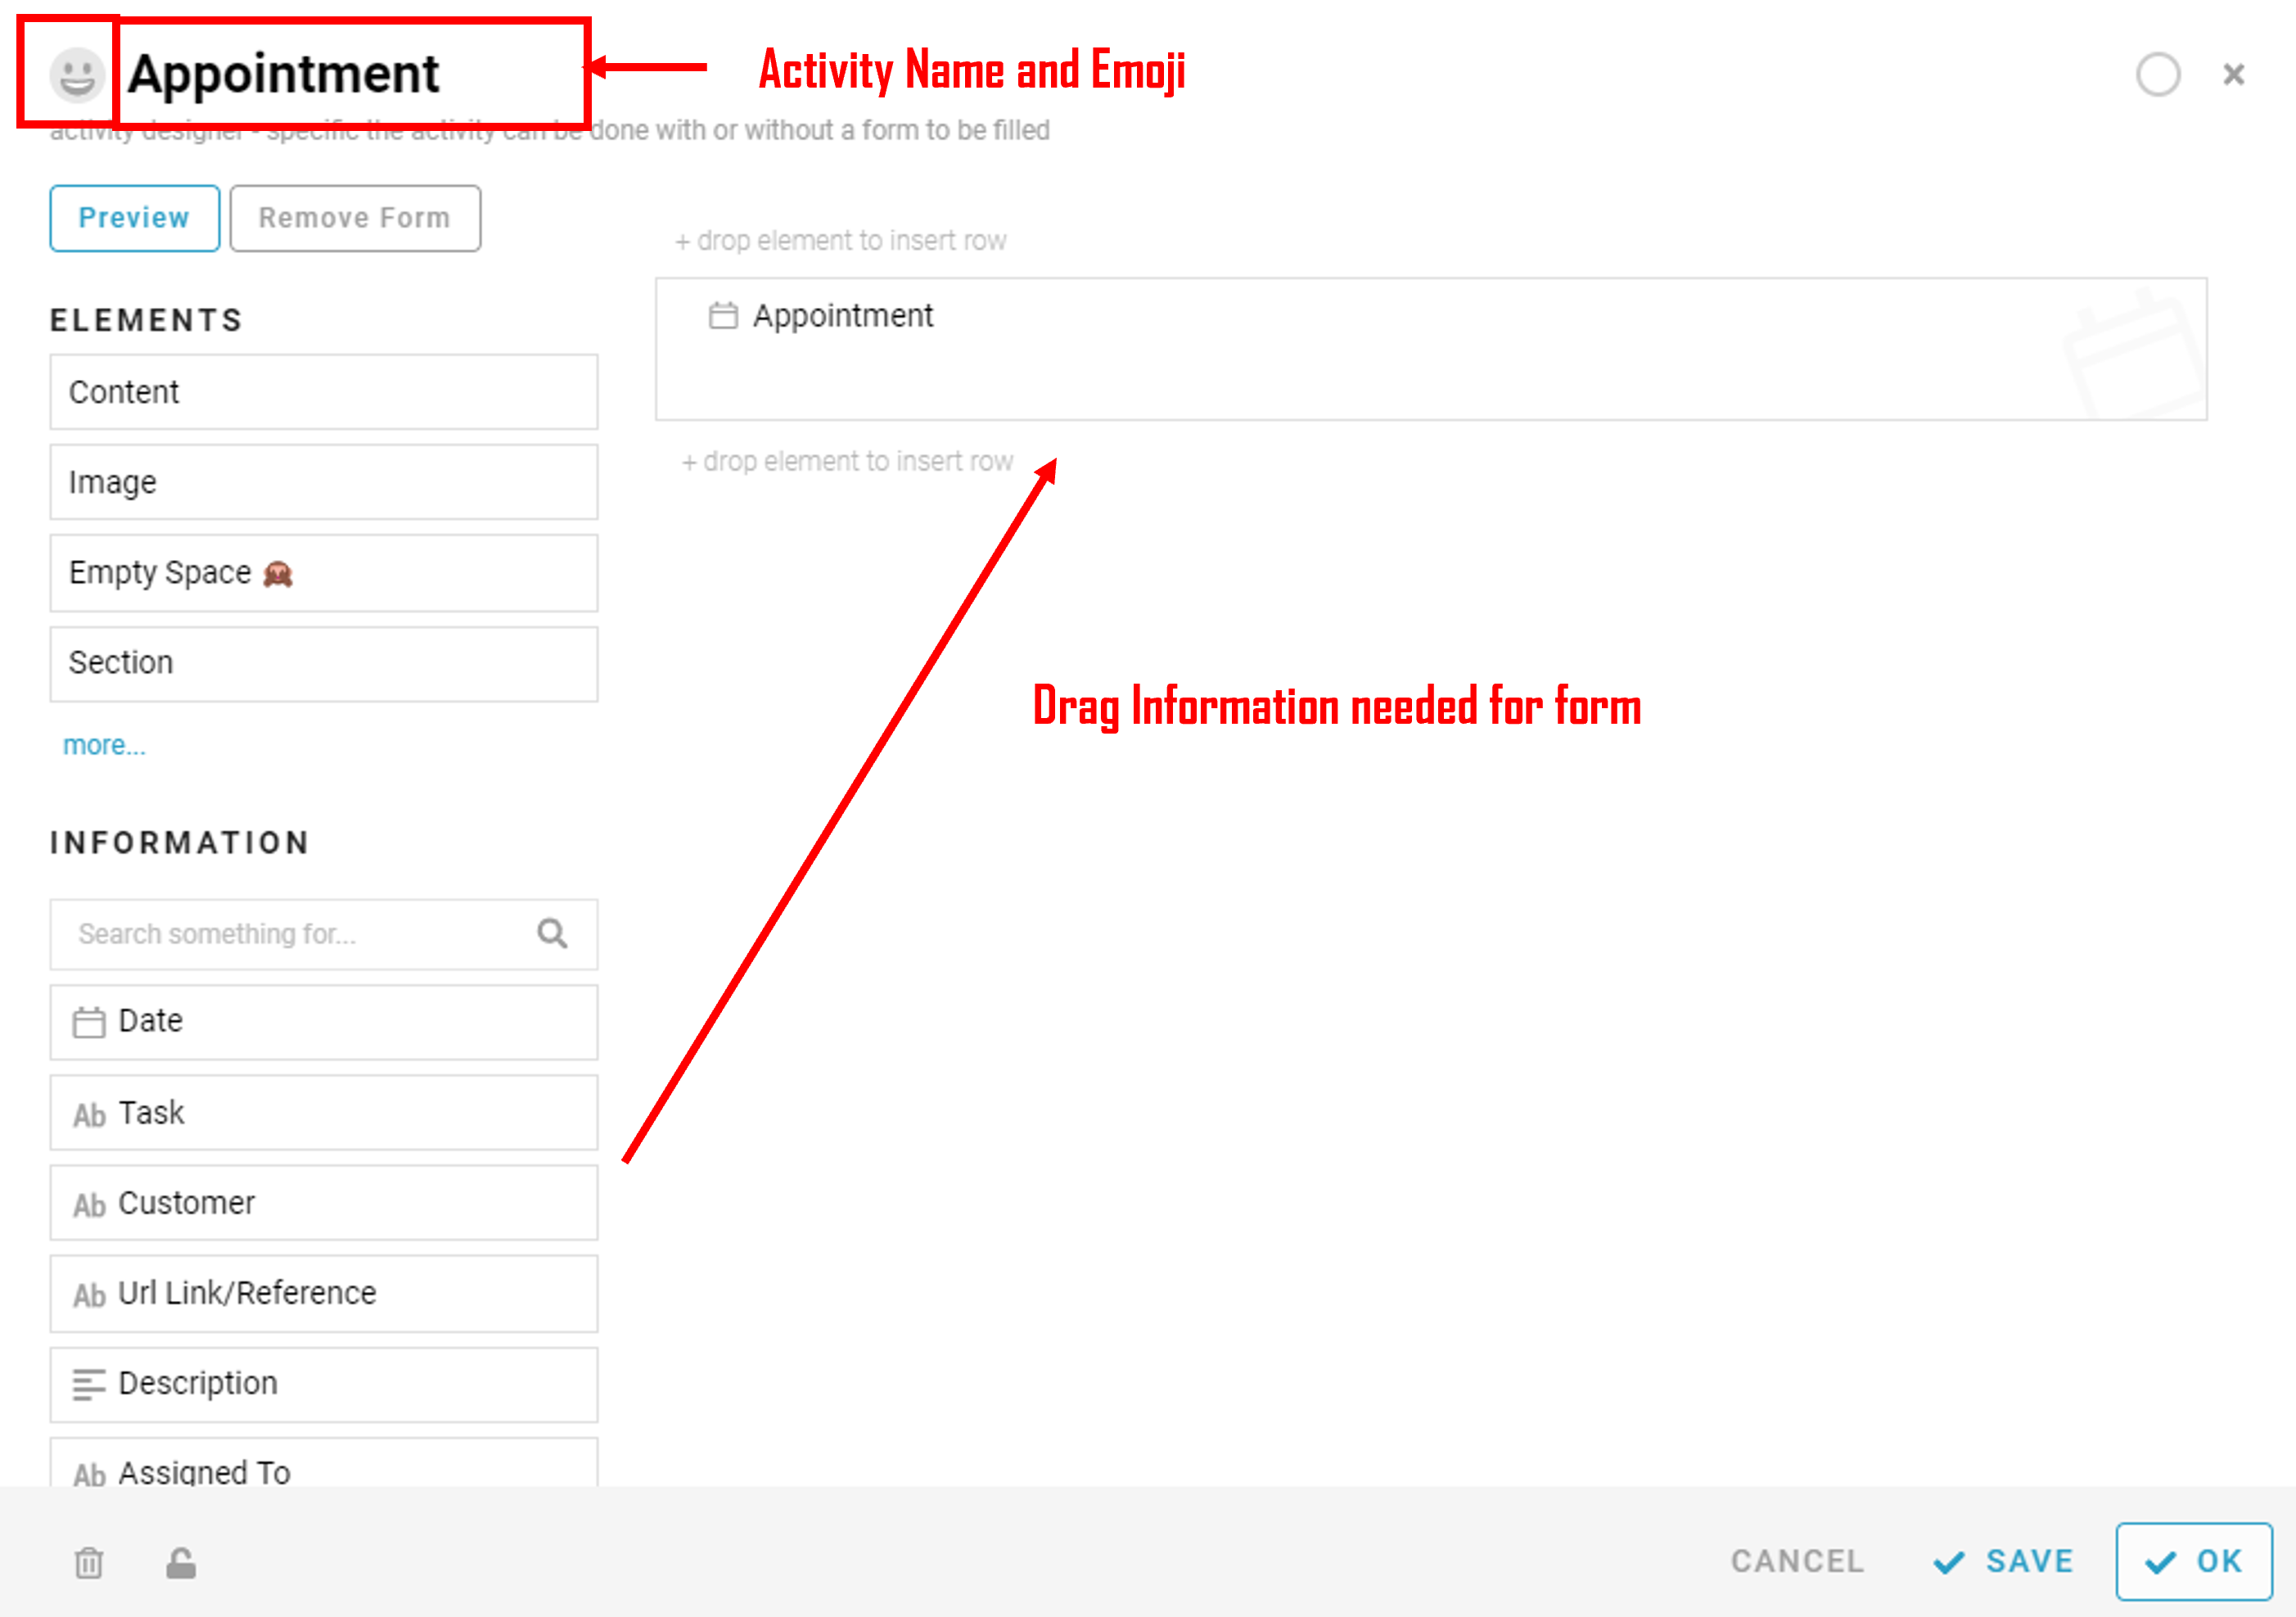
- Recognize and configure all the Activity able to perform to change State (Refer Picture 2 and Picture 3 for Form)
- Done
- Verify
- Appointment (Form)
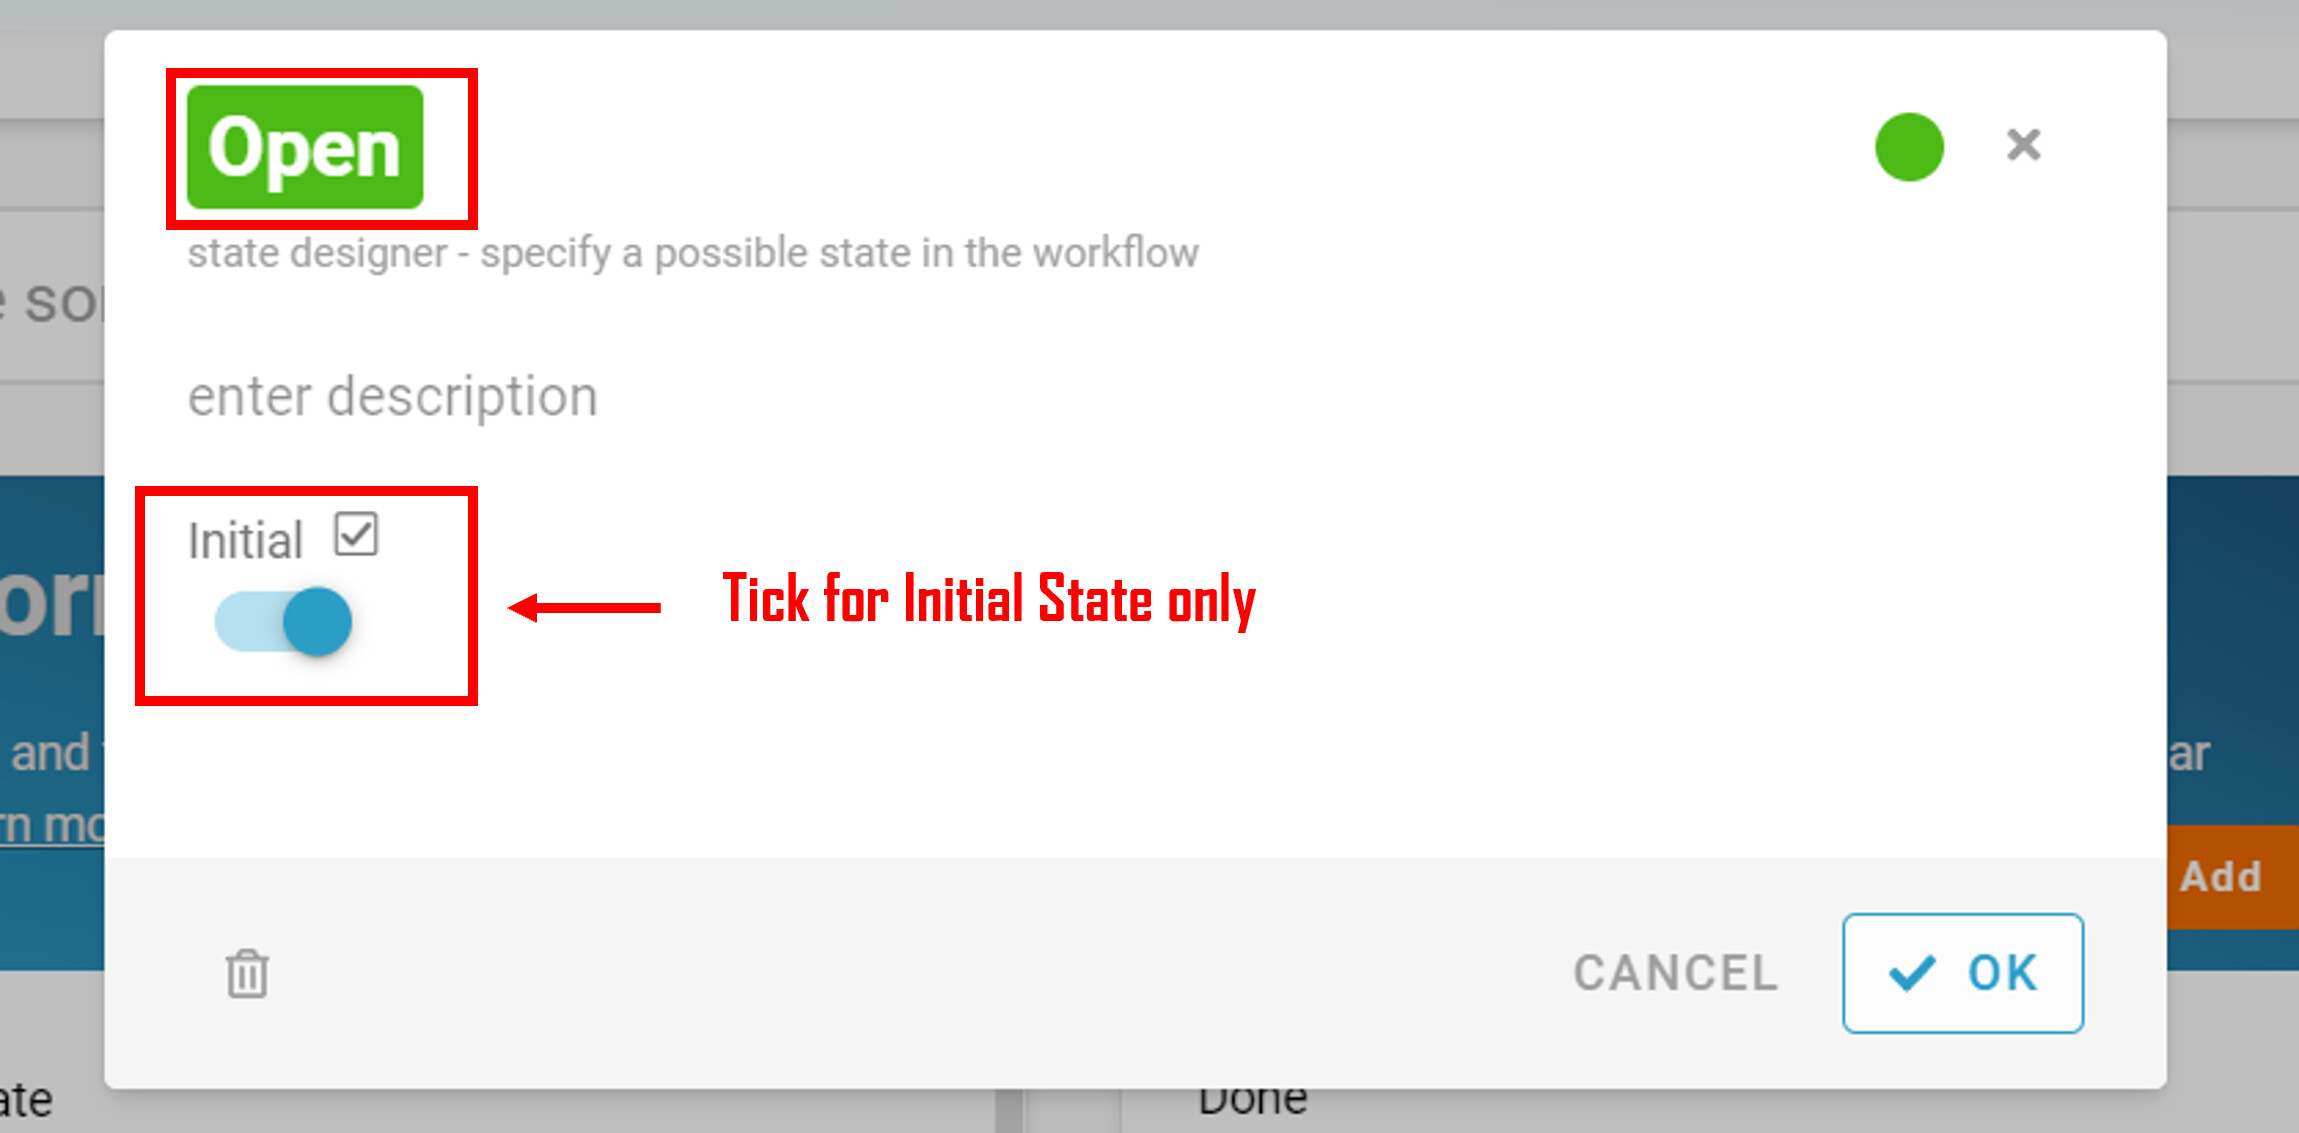
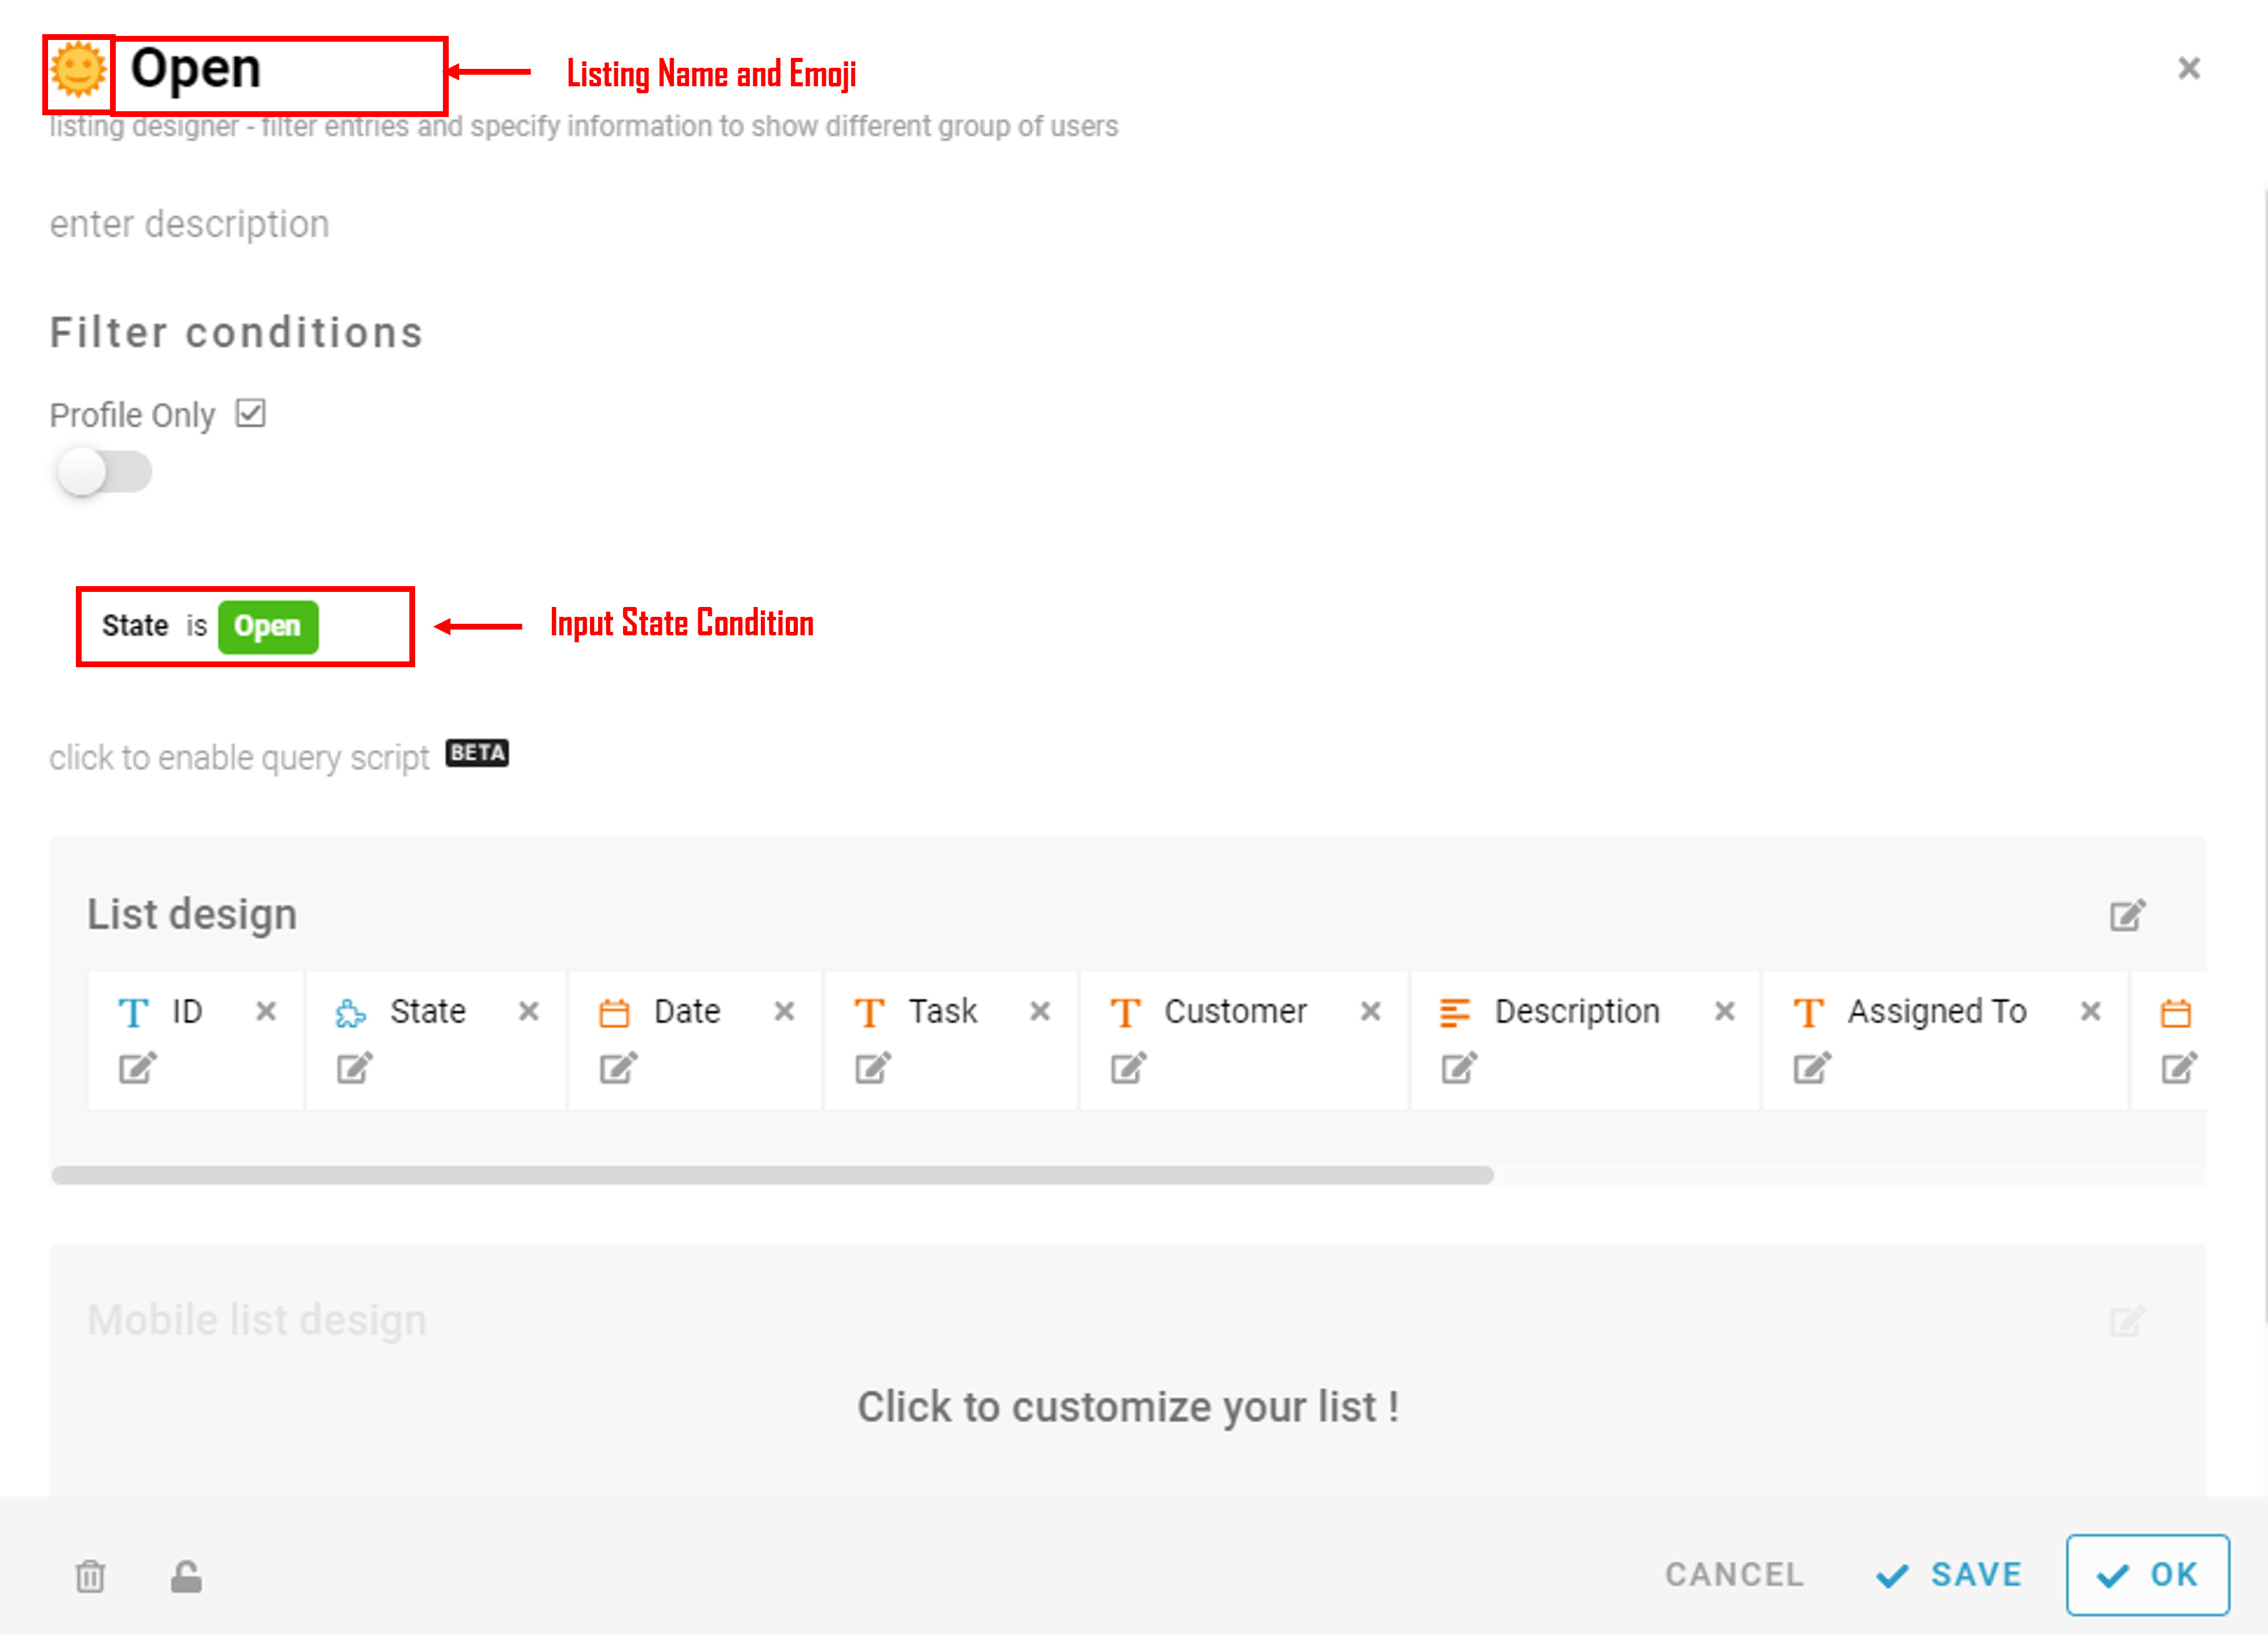
- Recognize and configure all the States in the whole Task Management. (Refer Picture 4 and Picture 5 for Initial State)
- Open (Initial State)
- Pending Verification
- Verified

- Configure Flow by determining a state can flow to which state through specific activity and form a reasonable workflow diagram in whole progress. (Refer Picture 6)
Example: State ----> Activity ----> State
- Open ----> Done ----> Pending Verification
- Pending Verification ----> Verify ----> Verified
- (any state) ----> Appointment ----> (any state)

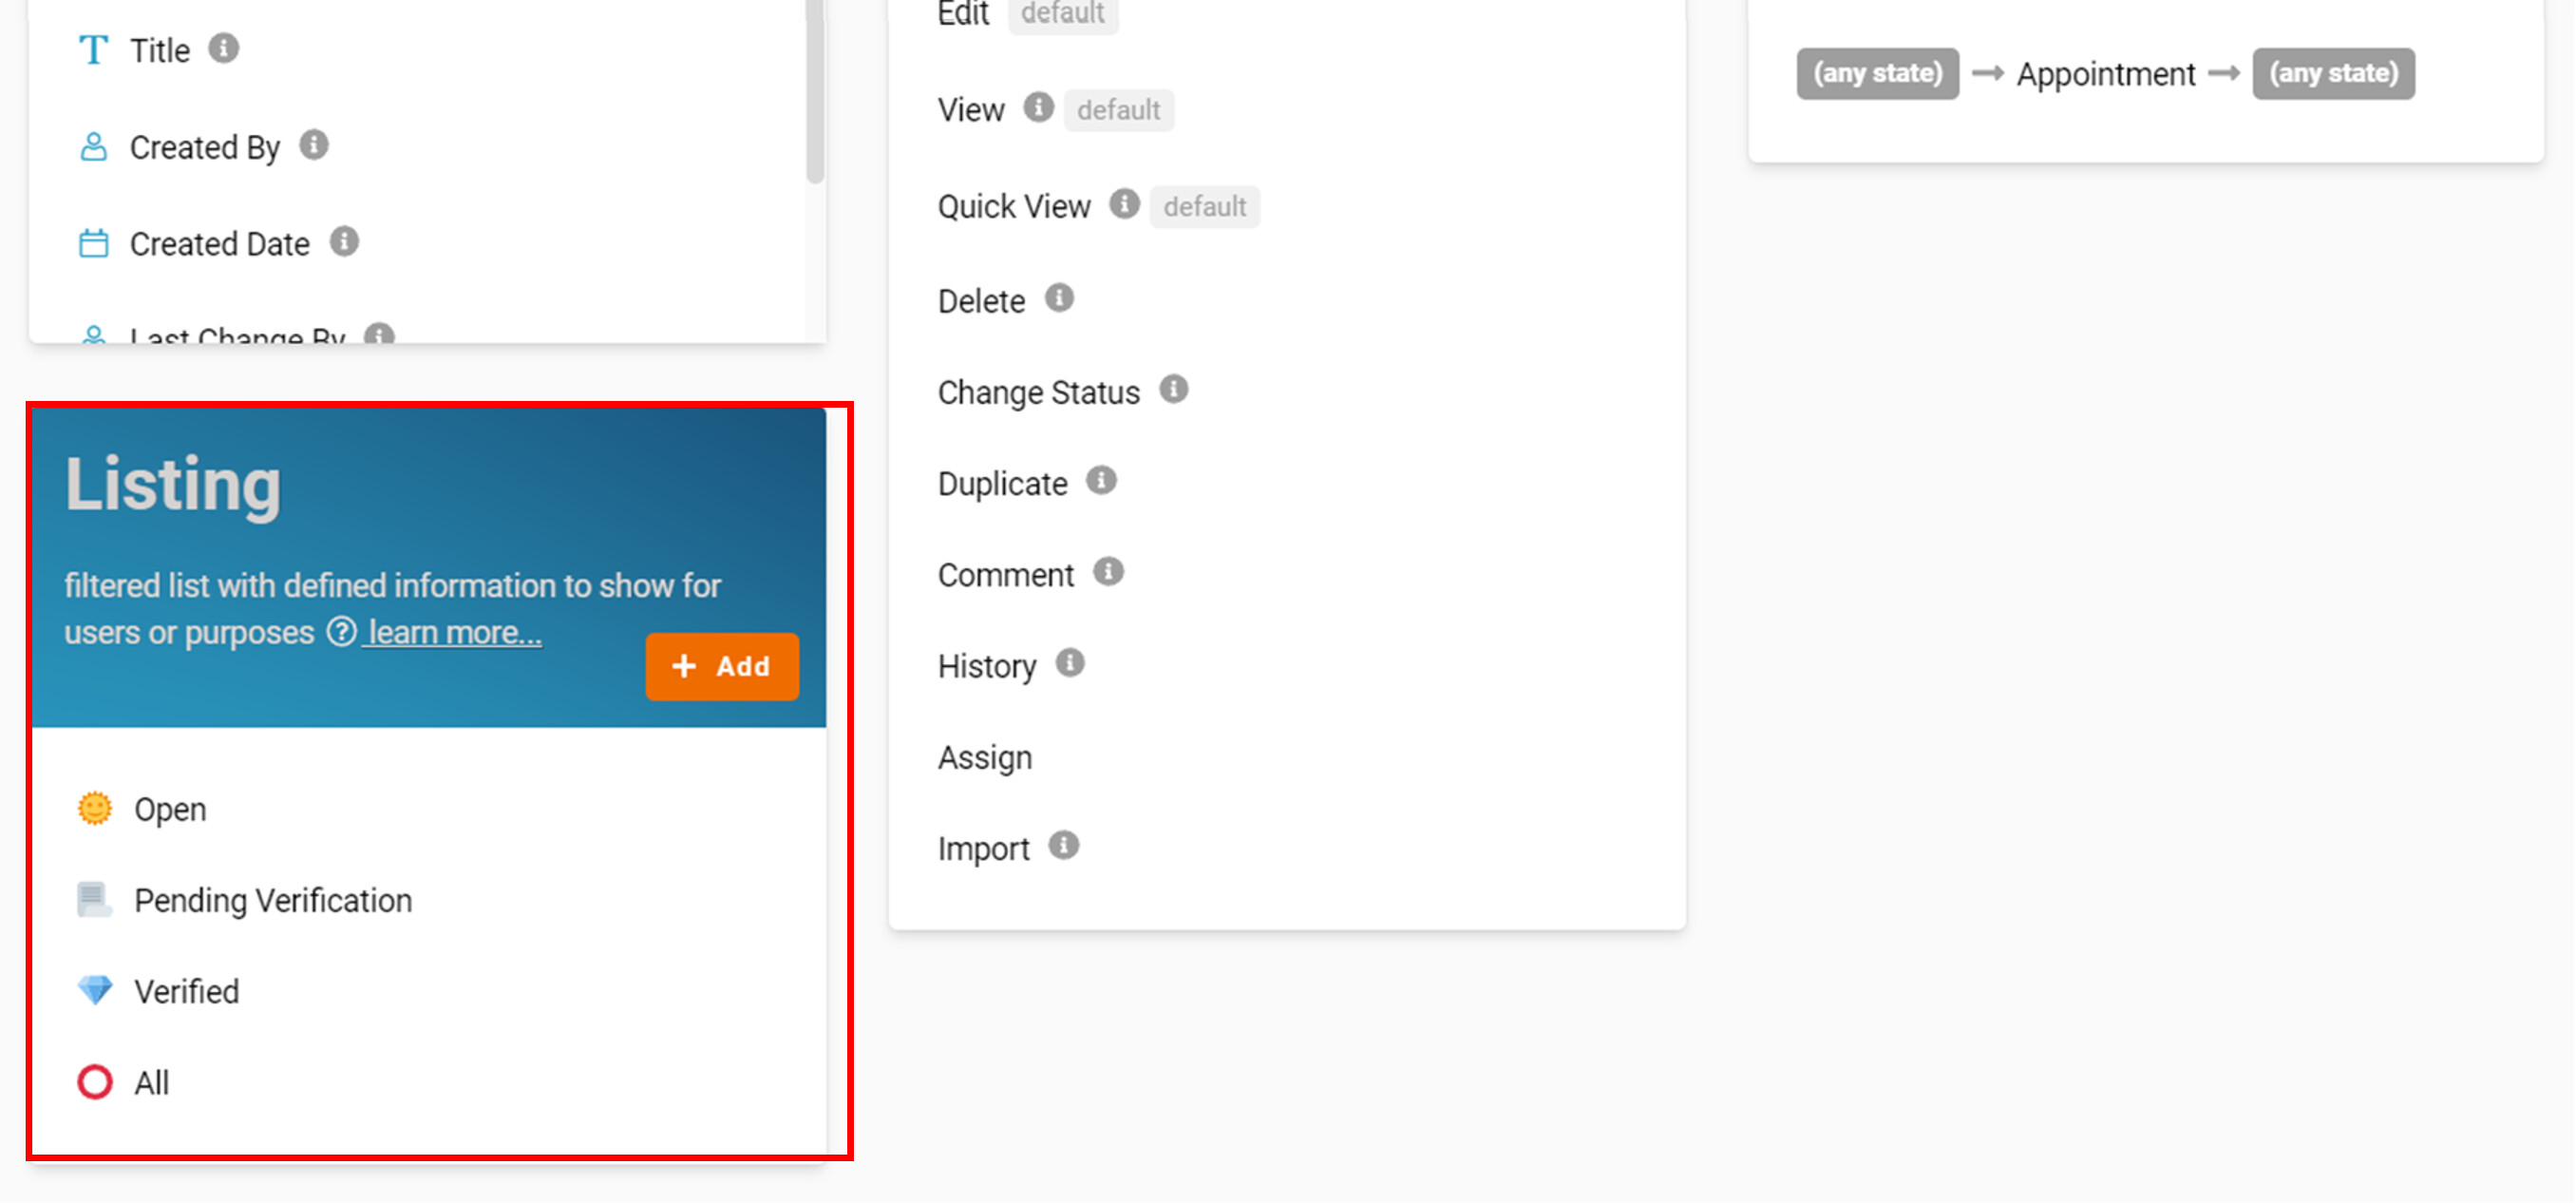
- Configure and Recognize Listing to category the state of entries and filter list with defined information to show for users or purposes. (Refer Picture 7 and Picture 8 for State)
- Open - Condition: State Is “Open”
- Pending Verification - Condition: State is “Pending Verification”
- Verified- Condition: State Is “Verified”
- All
- Step to arrange the information according to your preference in Standard (Refer Picture 9 and Picture 10)
a. Click the gray box beside the “Default(Create/Edit/View)” at the Standard card to open the design form
b. Drag the box from the “INFORMATION” panel on left side of the screen, drop it to the empty place that you want to place
c. Drag and Drop all the information boxes from the “INFORMATION” panel to the empty place at the right side
d. Also can drag the “Empty Space” box from the “ELEMENTS” panel at the left side of the screen, drop it to the place that you want to place to create an empty space
e. Arrange the information boxes according to your preferences
g. Click the “SAVE” button after done and click “OK” to close the design form.
Congratulations!!!
Stay tuned to the FETIAS community for more updates.
Try FETIAS for FREE now.
Sign up at https://fetias.com
Related topic
Tutorial - Task Management