Instructions to import data from Excel in Inistate:
- Firstly, make sure the information names are same as the headers in Excel file.
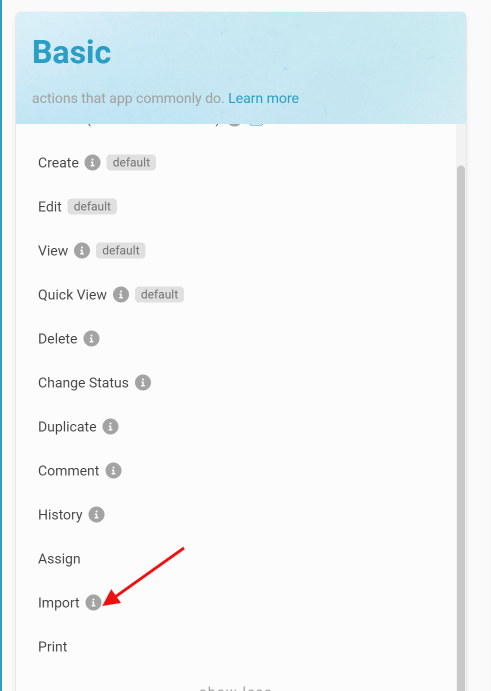
Scroll to the bottom, click import under Basic.
- Enable ‘Preprocess’. If it is the first time you import, recommend enable ‘Test’ checkbox to have the first try. If you want the data to be imported to have an initial state, you may choose an initial state for them. Then, you can drag-and-drop or browse your Excel file to the field as in the picture above.
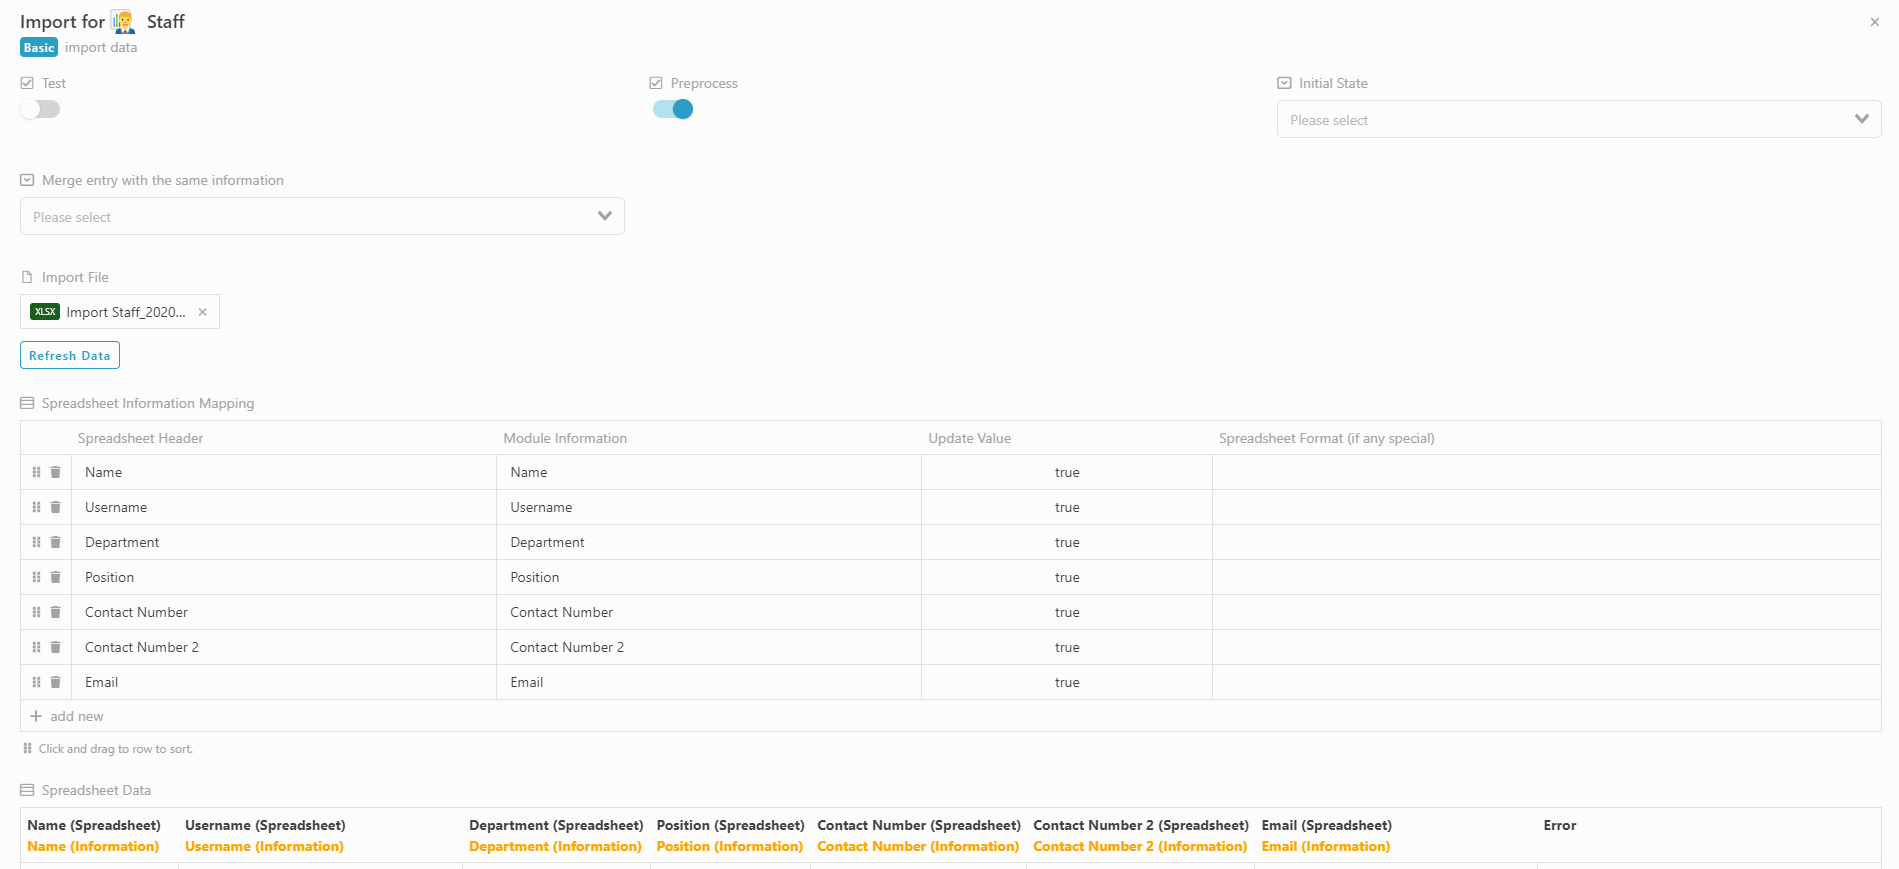
- After attaching your Excel file, you will see the first column which is the header name in your excel file will automatically map with the second column which is the information name in Studio. From here, you may check whether the columns are mapped correctly. You can also see the outcome of your sample data in the table below. (Click refresh data to auto-map)
Tick update value column to update the information.
**Remark :
The ticked icon is to indicate whether the data is correctly entered when the data field is linked from another module type, which means that linked field data has to be existing in another module before importing the data.
-
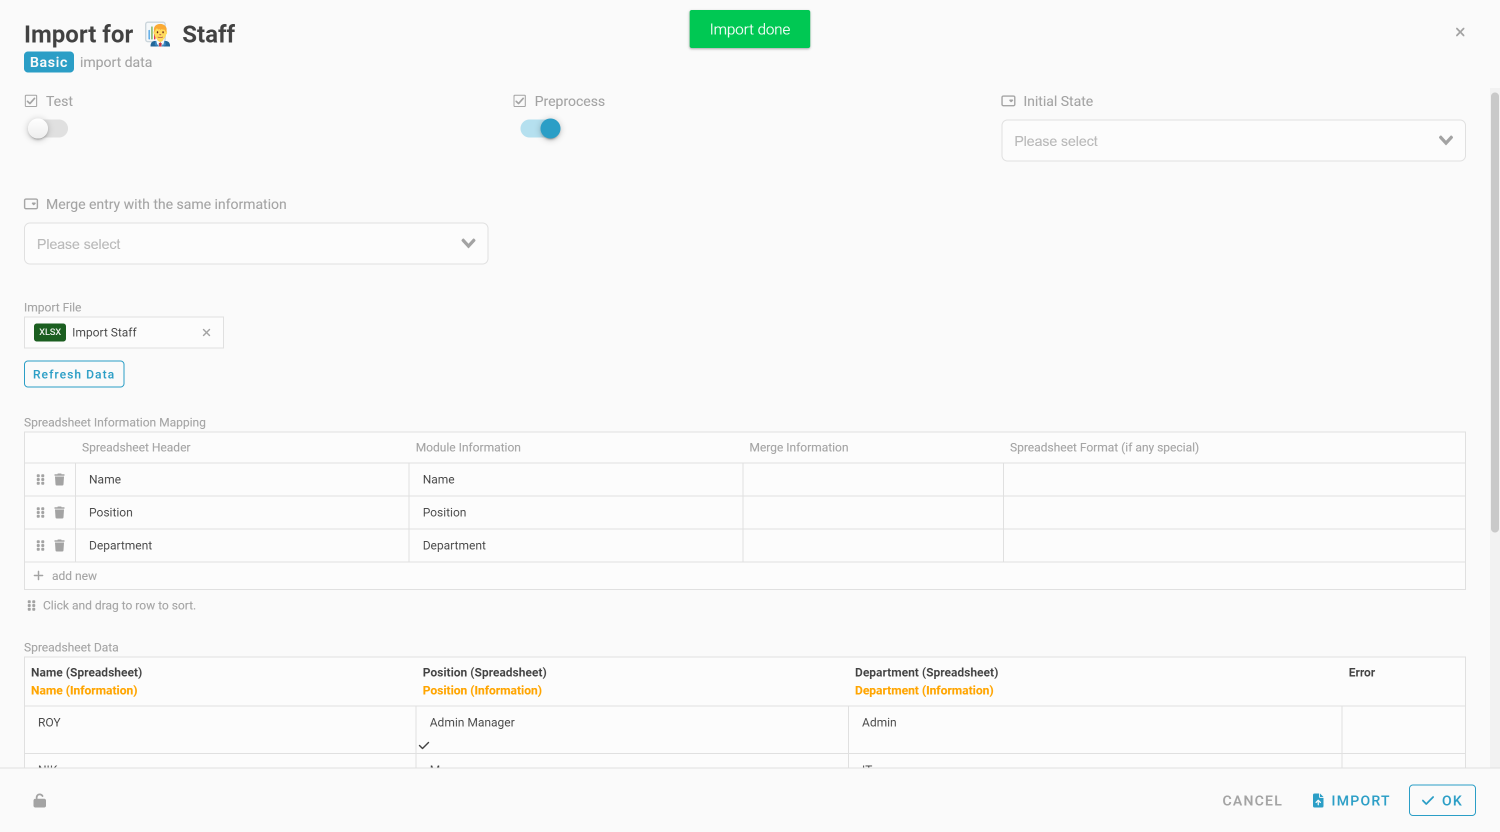
After confirming all details are correct, you may uncheck the ‘Test’ checkbox (if it is checked previously) and click on the ‘Import’ button as in the picture above.
-
Click ‘OK’ then Save the module.
-
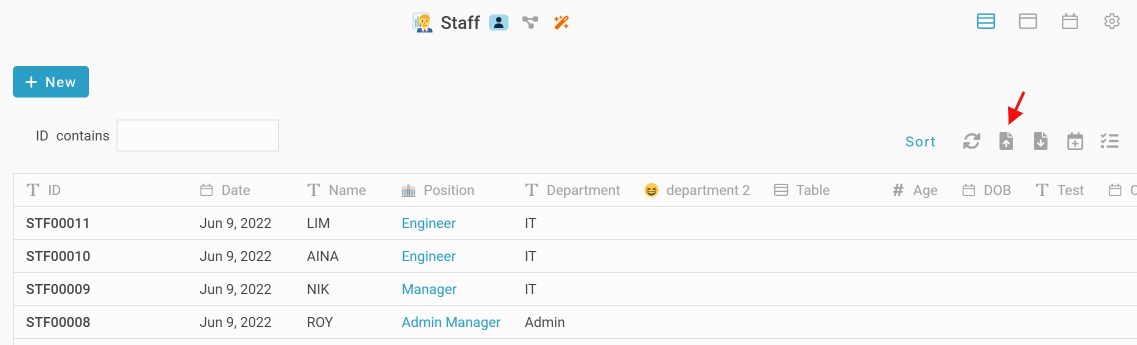
Now you have successfully set up User Import. So, next time you can use user import in the listing view.
With the instructions above, you are able to import the data on your own now.
Thank you! ![]()
Note: Import excel date doesn’t run any automation. This is solely for data importing purposes.
