Use this bug tracker with your team members to easily delegate projects for tracking and troubleshooting. The bug tracking system also comes with a form to easily submit bug reports.
Problem
Difficult to manage - Hard to manage the bug and trace the progress to resolved it.
Objective
Convenient - A useful template to track the bug from stage found initially until stage resolved it.
Process Flow
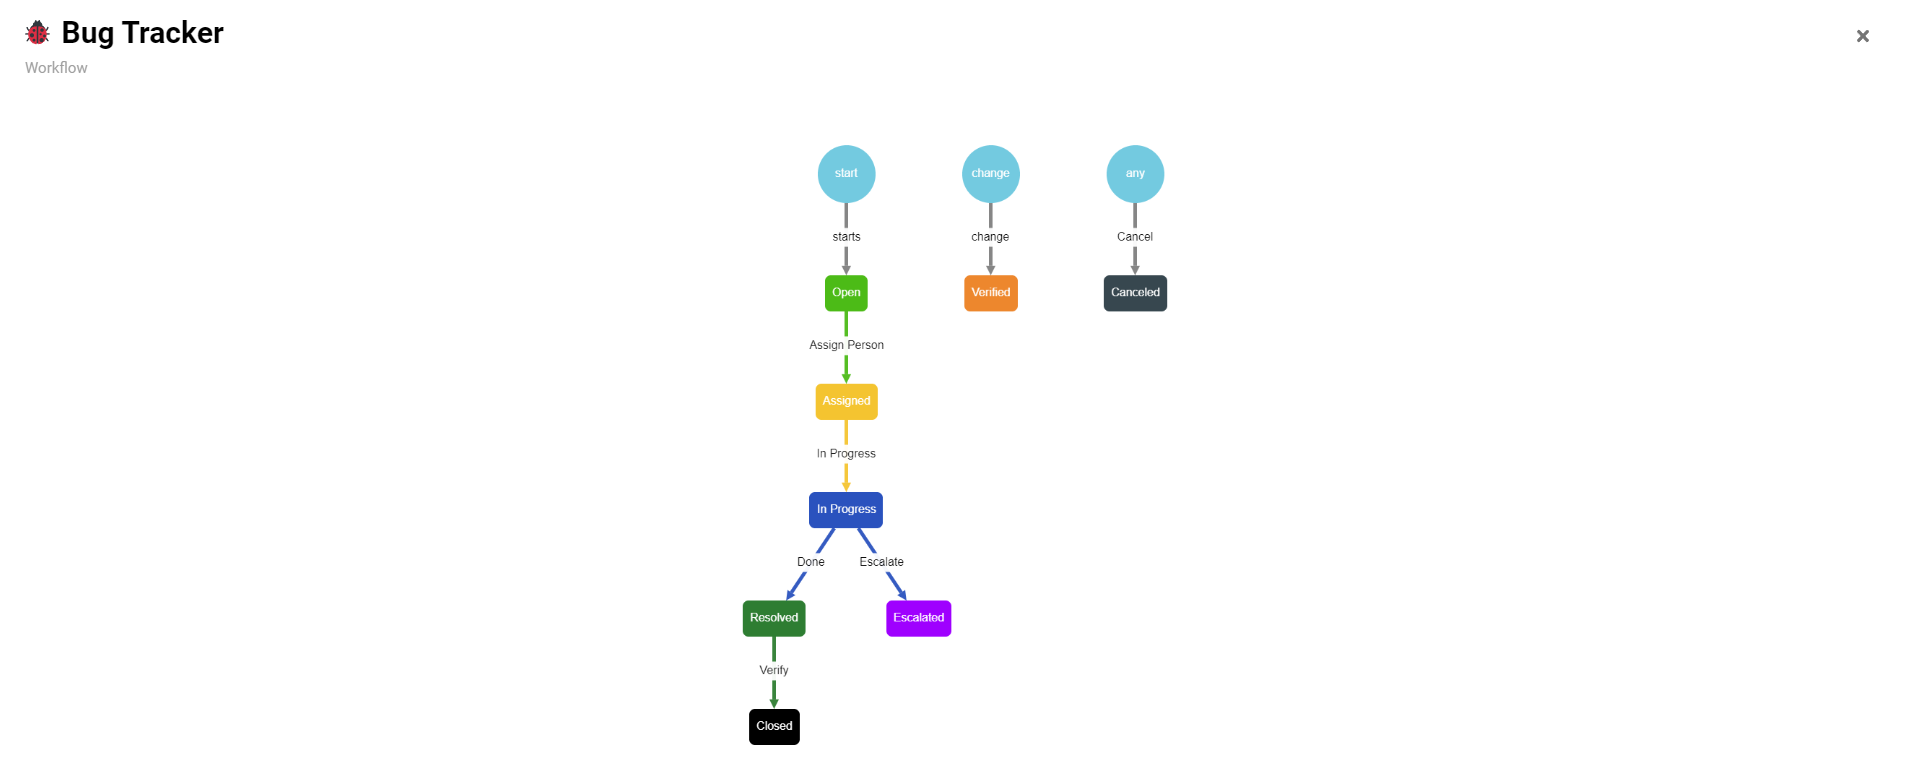
User can create new entry by clicking “New” button. User fill in the fields " Title of the bug", “Description”, “Priority”, “Url” with go to the website found the bug, “Platform” with which platform found the bug, “Browser”, “Files” with any supporting files and “Images” with any supporting image like screenshot of the bug. The initial state of the entry is “Open”. User can click button “Assign Person” to assign this bug to a people by fill in the name of the people in the field “Assigned To” and select the severity from field “Severity”. The state of the entry change to “Assigned”. The people who be assigned can click the button “In Progress” when the person start resolve this bug. When the person done resolve this bug, can click “Done” button and fill in the output in the field “Result”, the state will change to “Resolved”. Relevant department can do verification to this resolve, if done can click the button “Verify”, the state will change to “Closed”. If the person cannot resolve the bug in the state “In Progress”, can click the button “Escalate” to submit this bug to other person who more talent, the state will change to “Escalated”. User can cancel this entry at any state.
Step-by-step
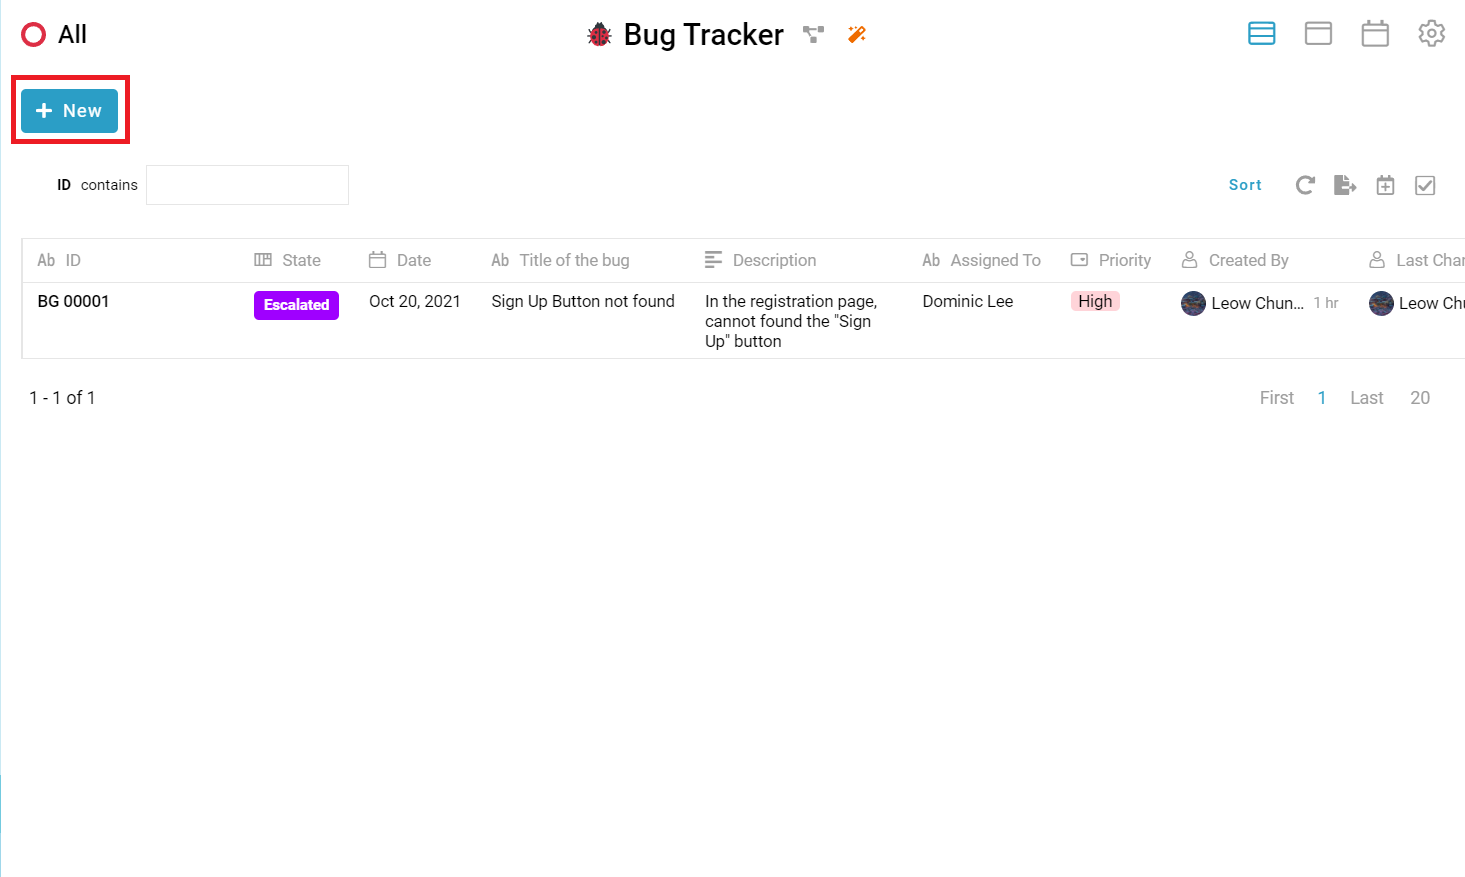
- User can click “New” (Refer Picture 1).
- User fill up all the fields and click “Done” button (Refer Picture 2).

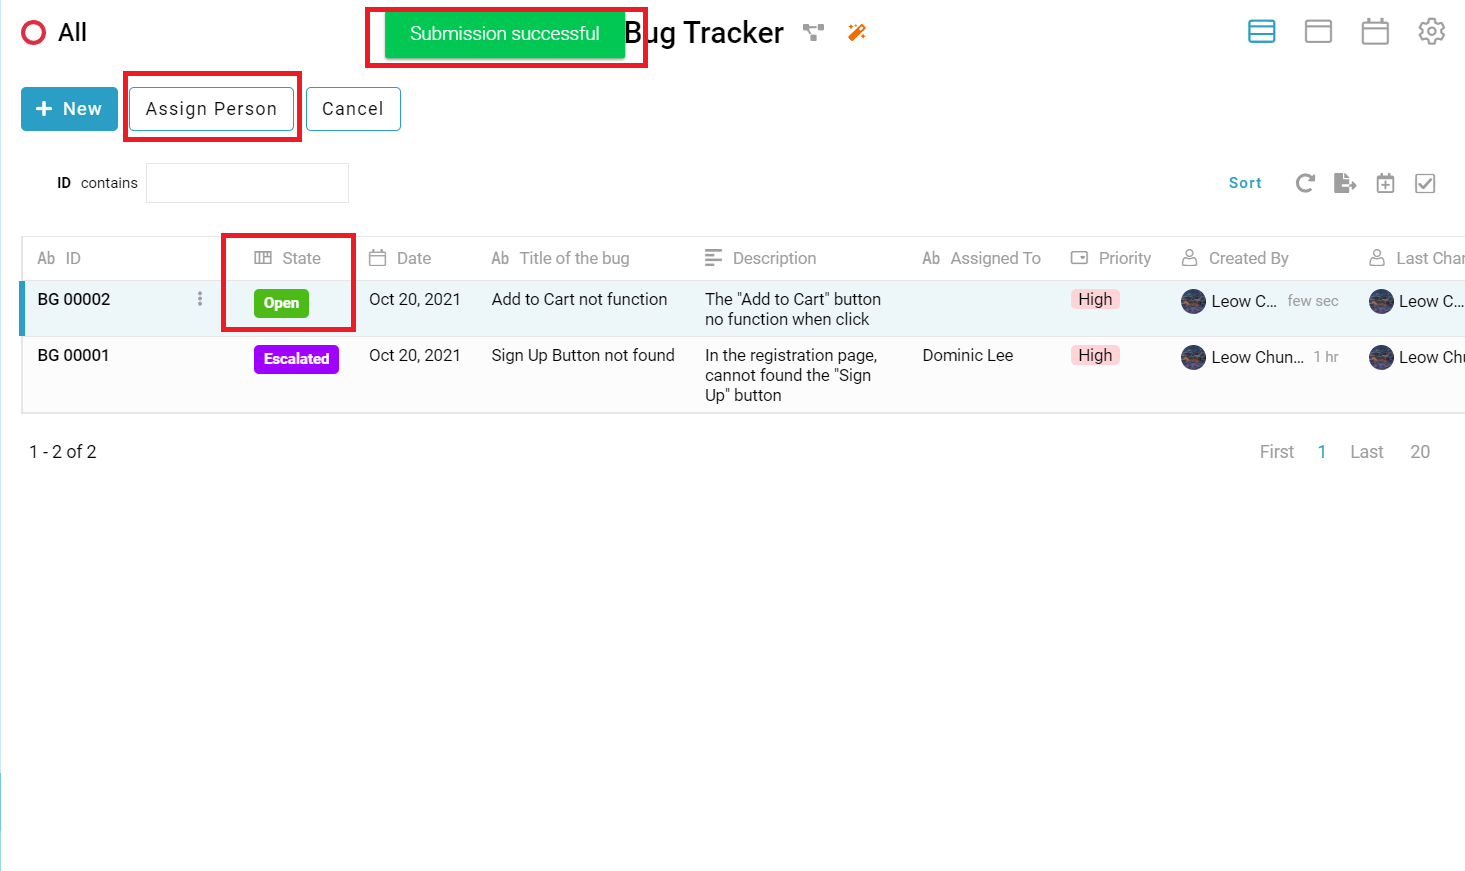
- A message “Submission successful” showed, the initial state of the new created entry is “Open”. User can click the button “Assign Person” to assign this bug to a person who can solve this bug (Refer Picture 3).
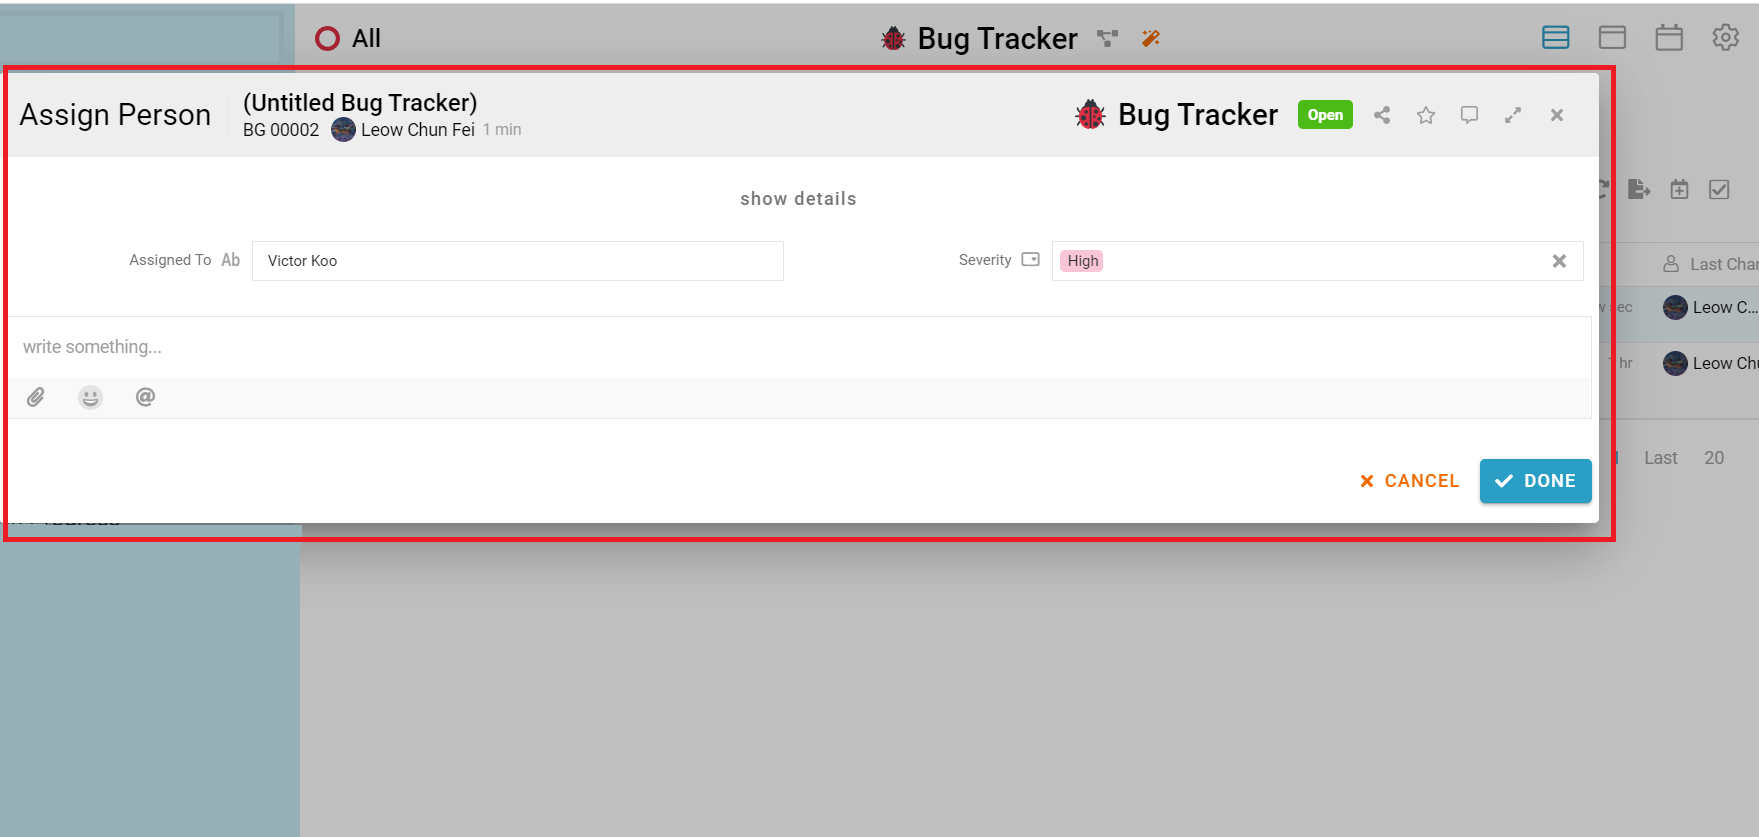
- A new window name “Assign Person”. User fill up the fields and click “Done” button (Refer Picture 4).
- A message “Submission successful” showed, the state of the entry change to “Assigned”. The person be assigned can click button “In Progress” when start to fix the bug (Refer Picture 5).

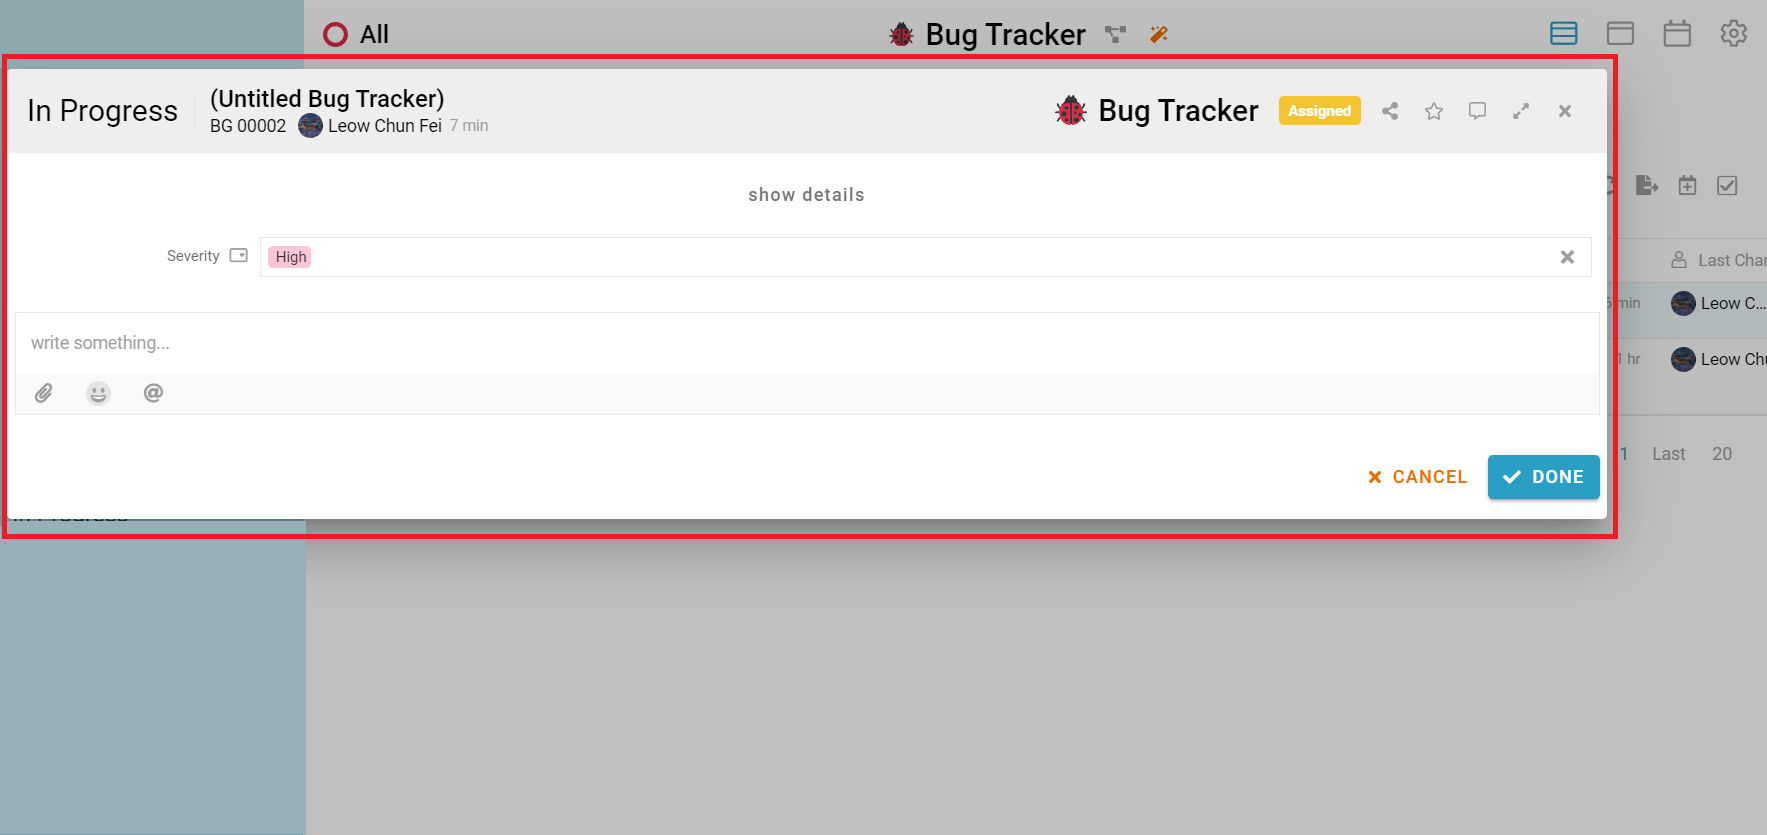
- A new window name “In Progress”. User fill up the fields and click “Done” button (Refer Picture 6).
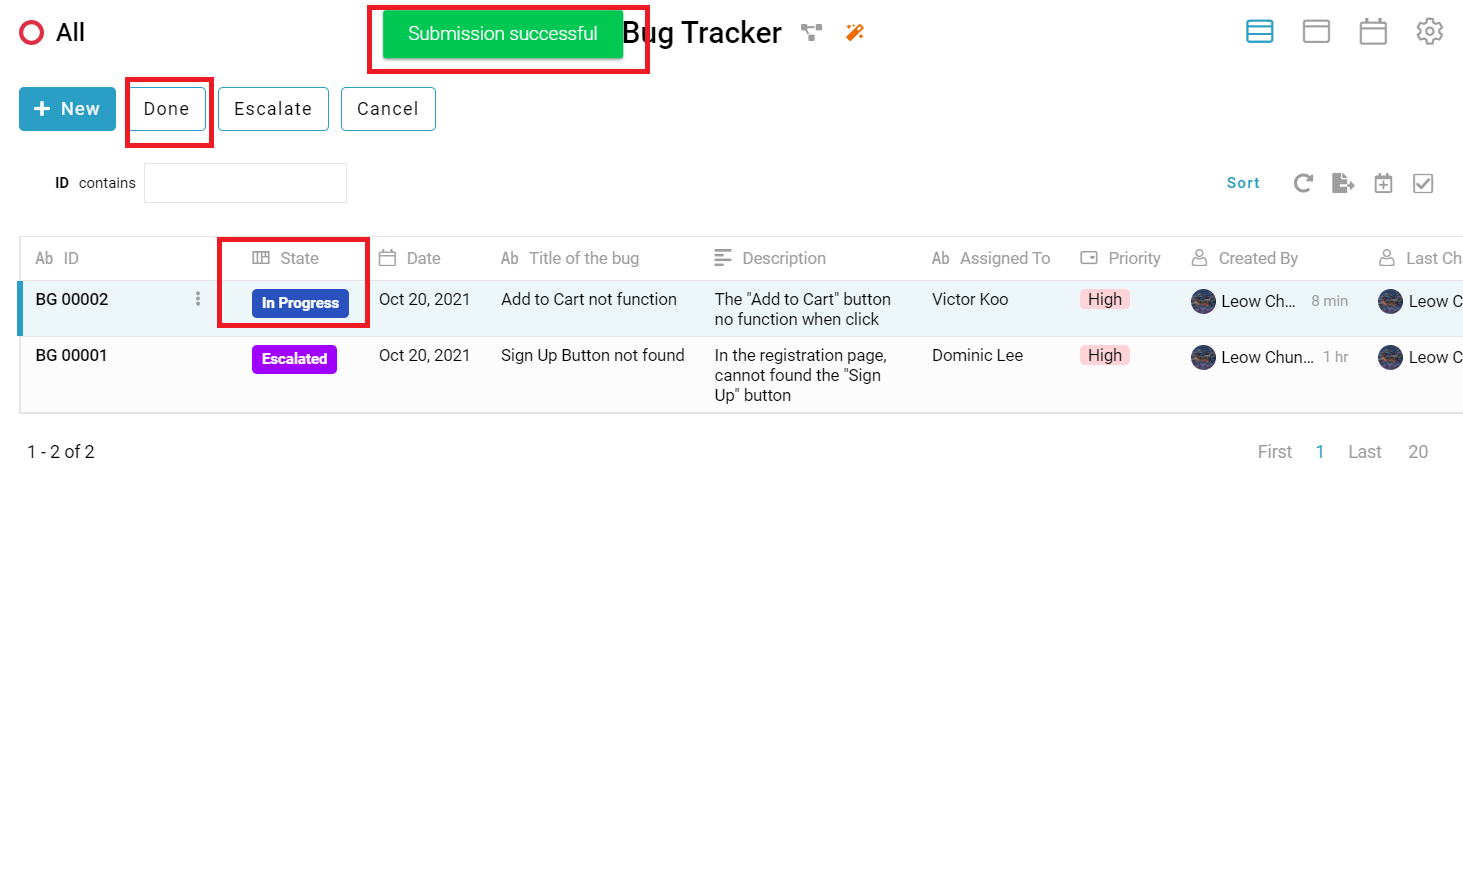
- A message “Submission successful” showed, the state of the entry change to “In Progress”. When the person be assigned done resolve the bug, can click button “Done” (Refer Picture 7).
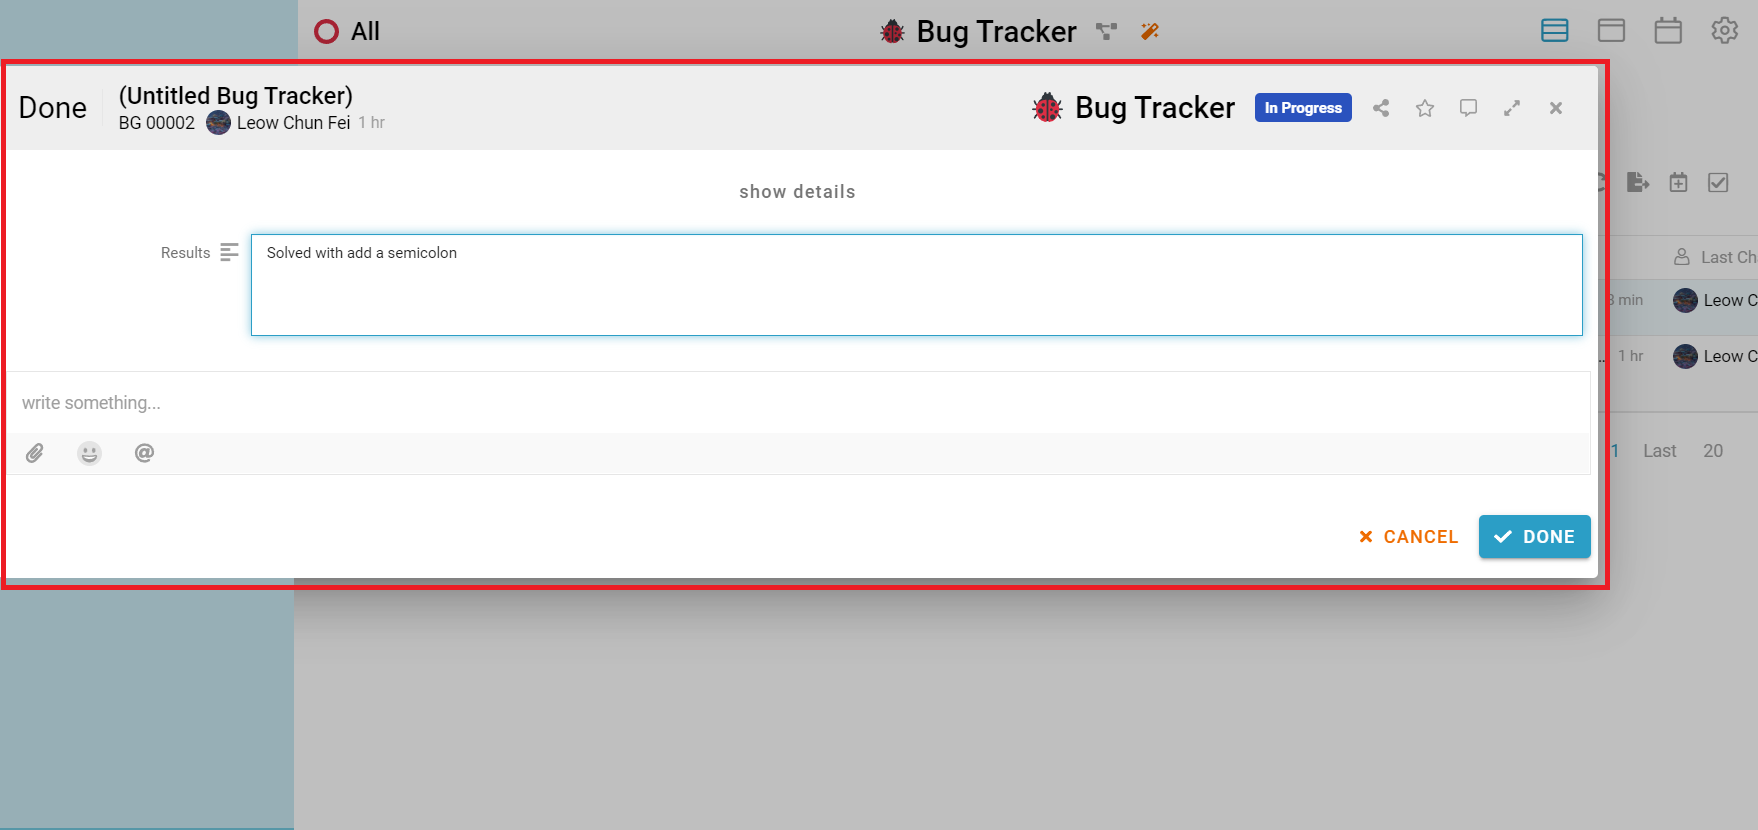
- A new window name “Done”. User fill up the fields and click “Done” button (Refer Picture 8).
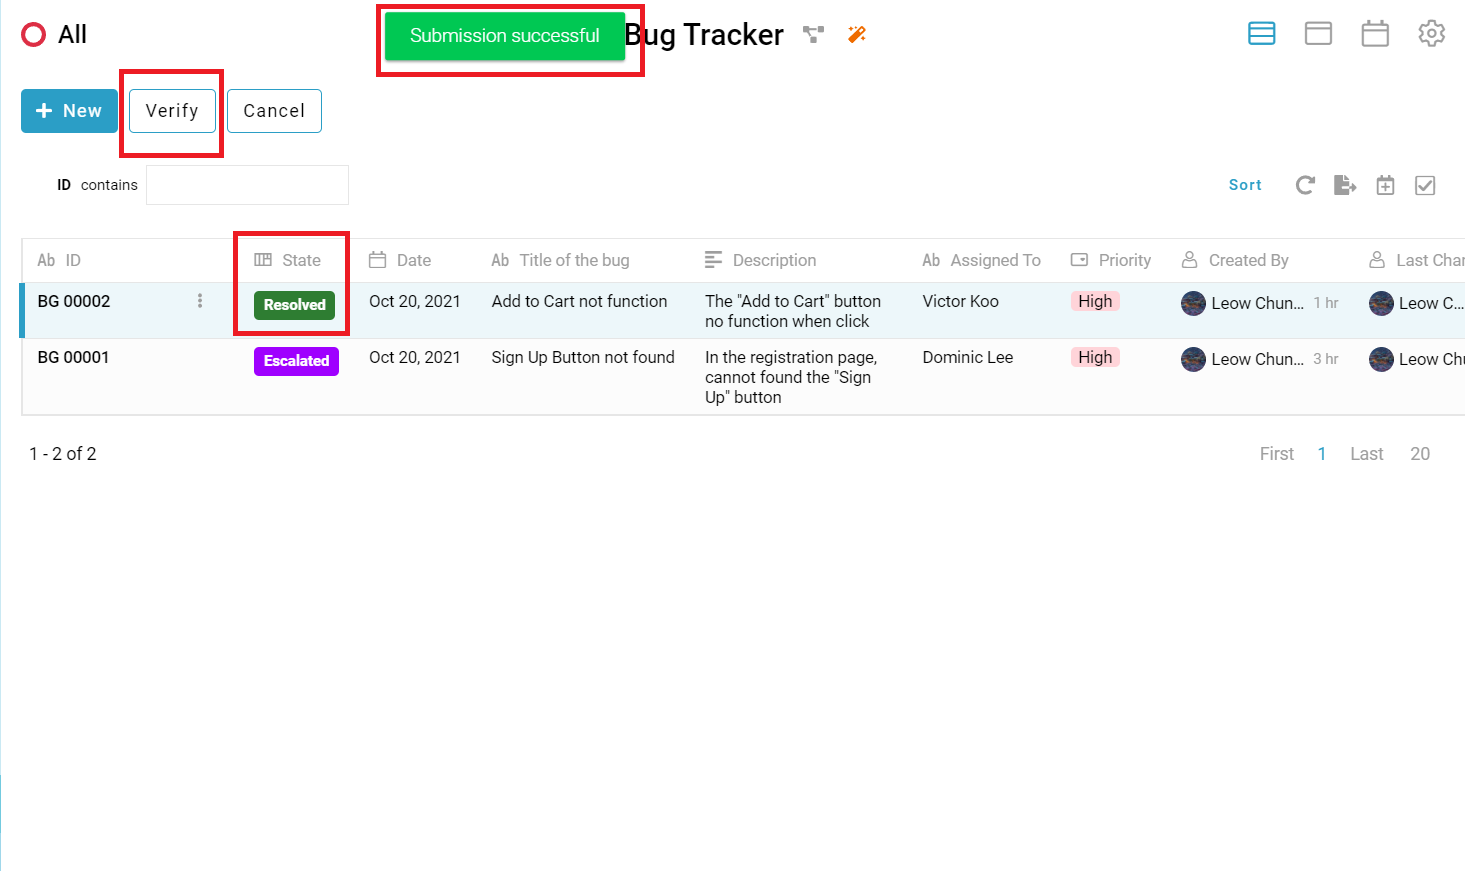
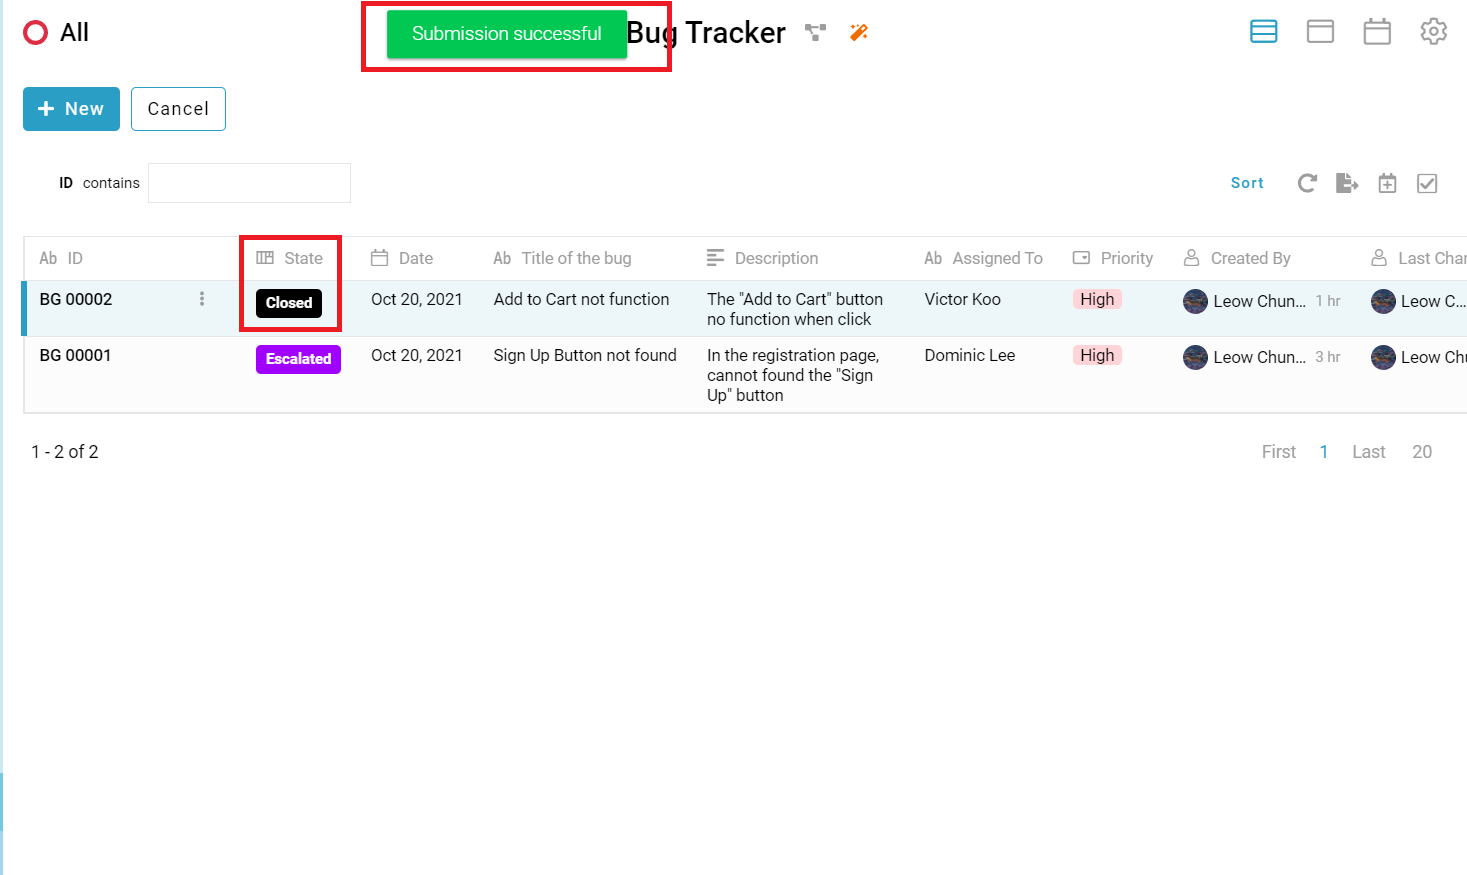
- A message “Submission successful” showed, the state of the entry change to “Resolved”. When the relevant department done the verification to the resolved bug can click button “Verify” (Refer Picture 9).
- A message “Submission successful” showed, the state of the entry change to “Closed” (Refer Picture 10).
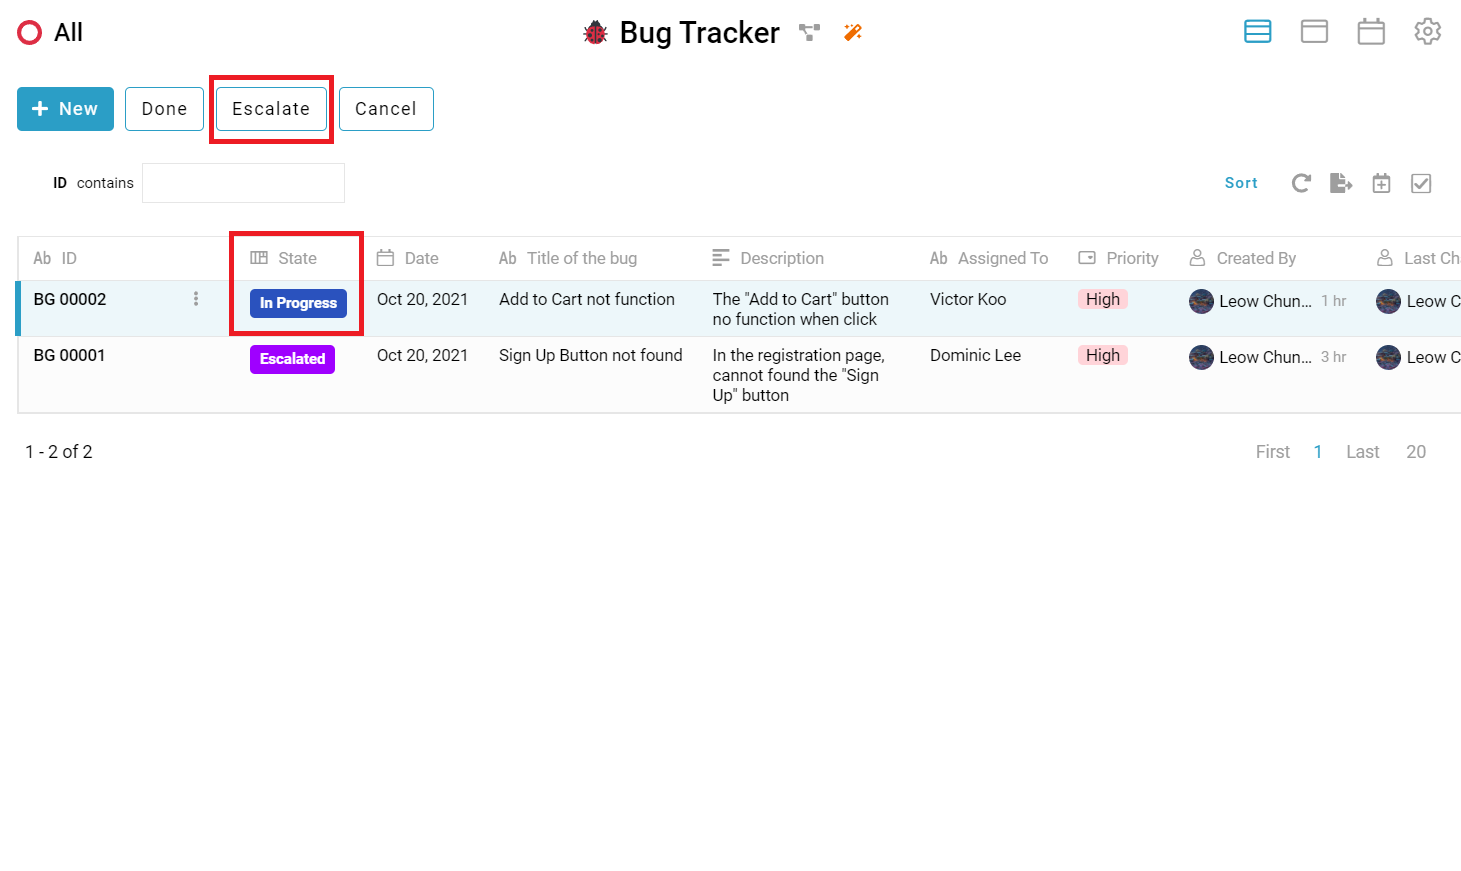
- If the person cannot resolve the bug in the state “In Progress”, can click the button “Escalate” to submit this bug to other person (Refer Picture 11).
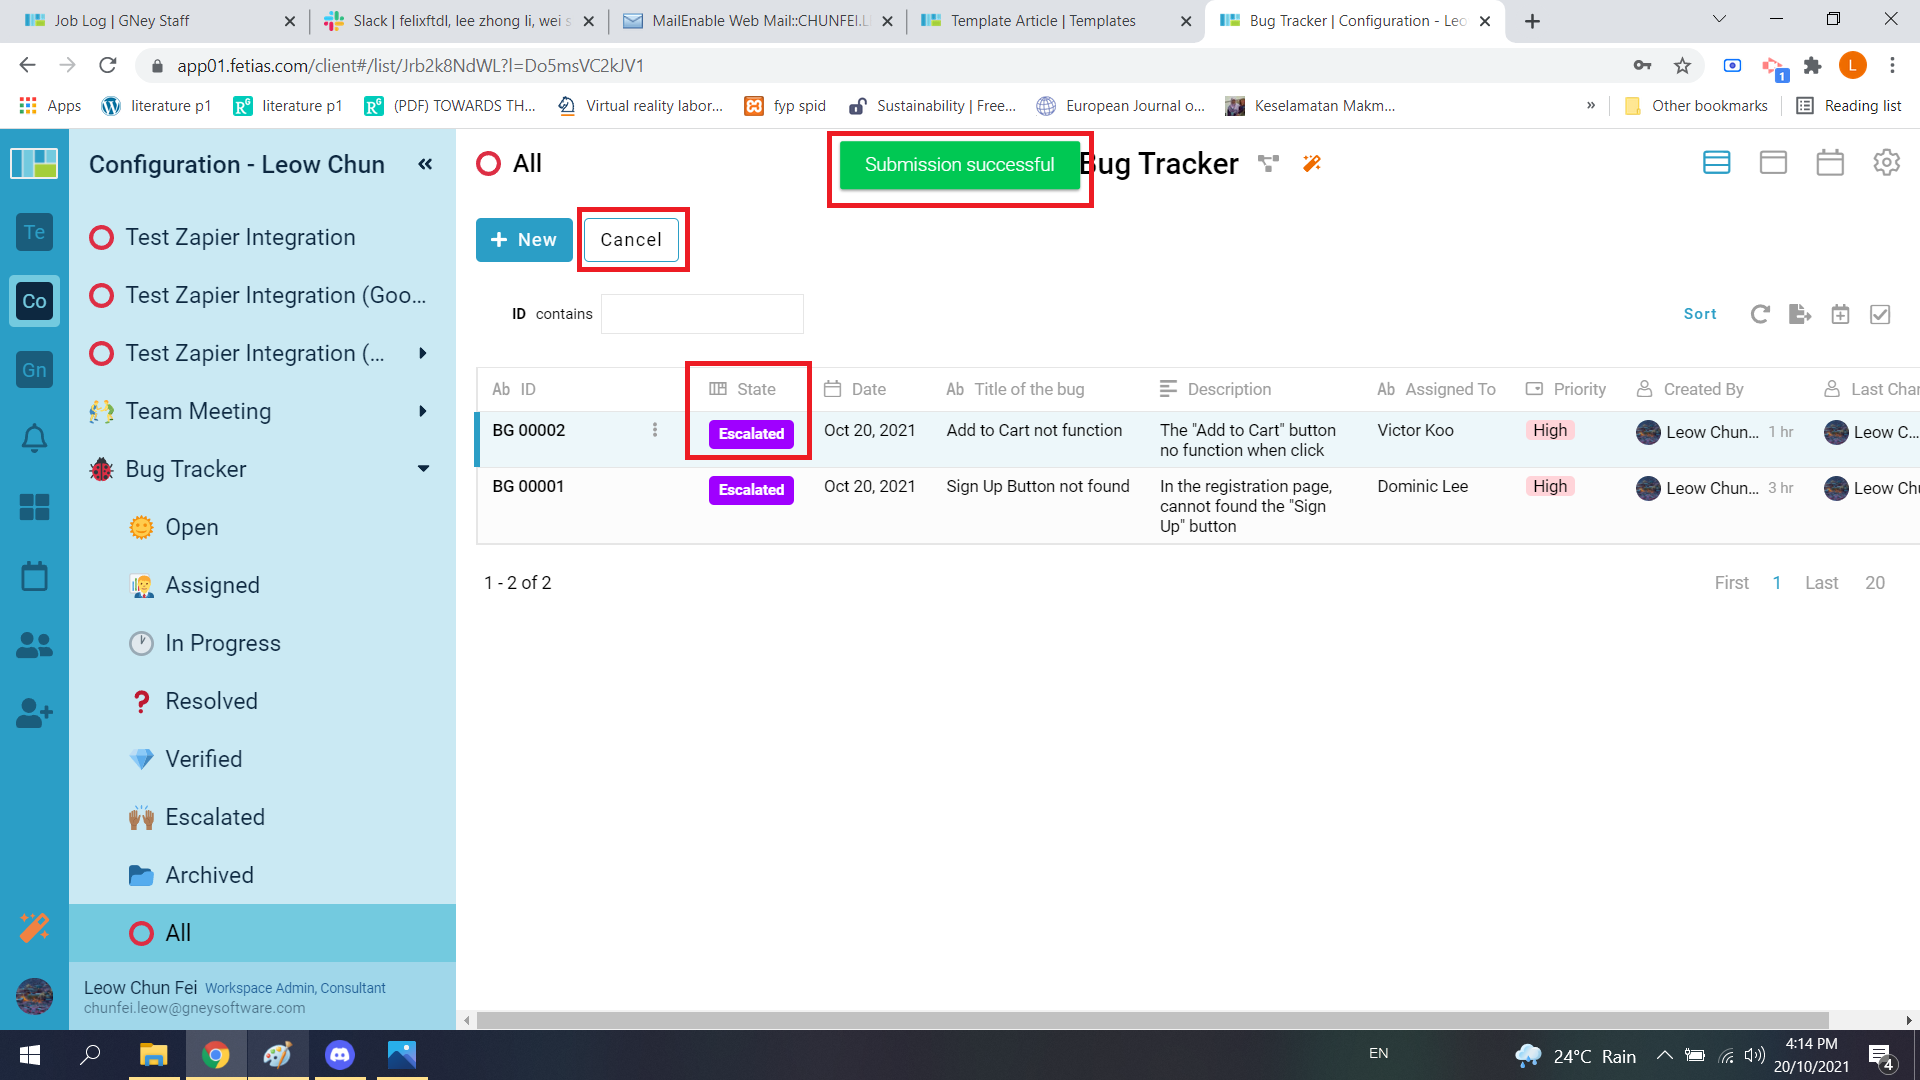
- A message “Submission successful” showed, the state of the entry change to “Escalated” (Refer Picture 12).
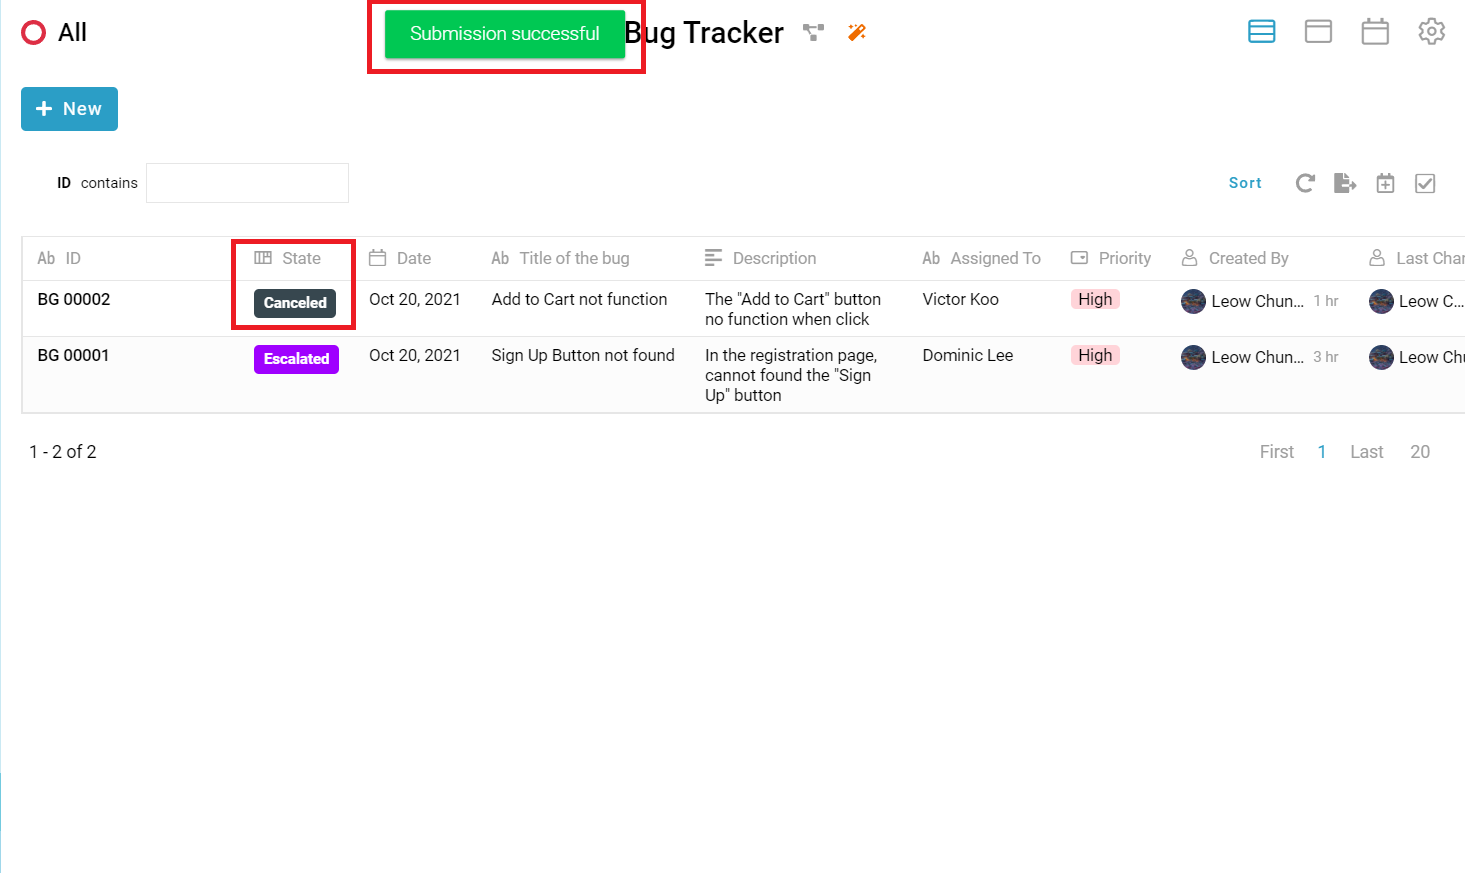
- User can cancel this entry by clicking button “Cancel” at any state which are “Open”, “Assigned”, “In Progress”, “Resolved”, “Closed”, “Escalated” and “Verified” (Refer Picture 13).
For more templates:
Try inistate for FREE now.
Sign up at https://inistate.com/
Related topic
Configuration Tutorial - Bug Tracker