Hi 

Today, I would like to share with you how to configure a customer feedback module in FETIAS.
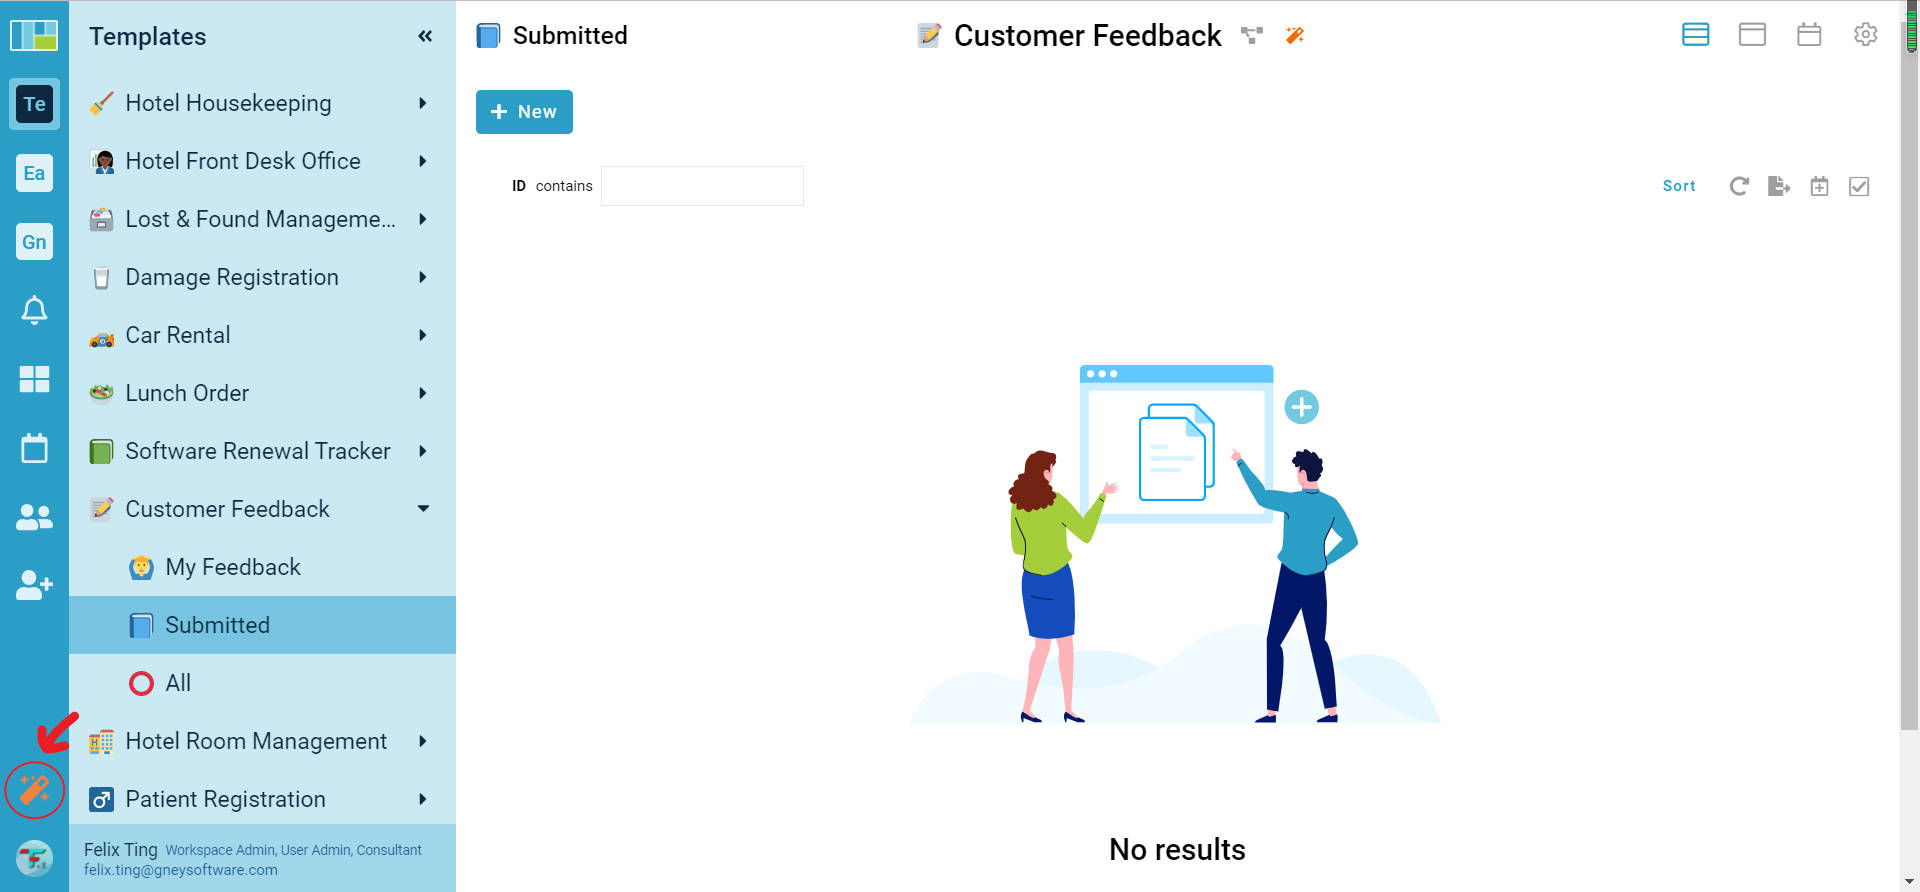
The customer feedback module allows you to collect and record your customer feedback. Use this template to manage your customer feedback with ease.
Problem
Difficulty on manage feedback - Traditional Feedback Box is not effective in collecting and managing customer feedback.
Objective
Convenient - Easily manage the feedback made by customers.
Step of Configuration
-
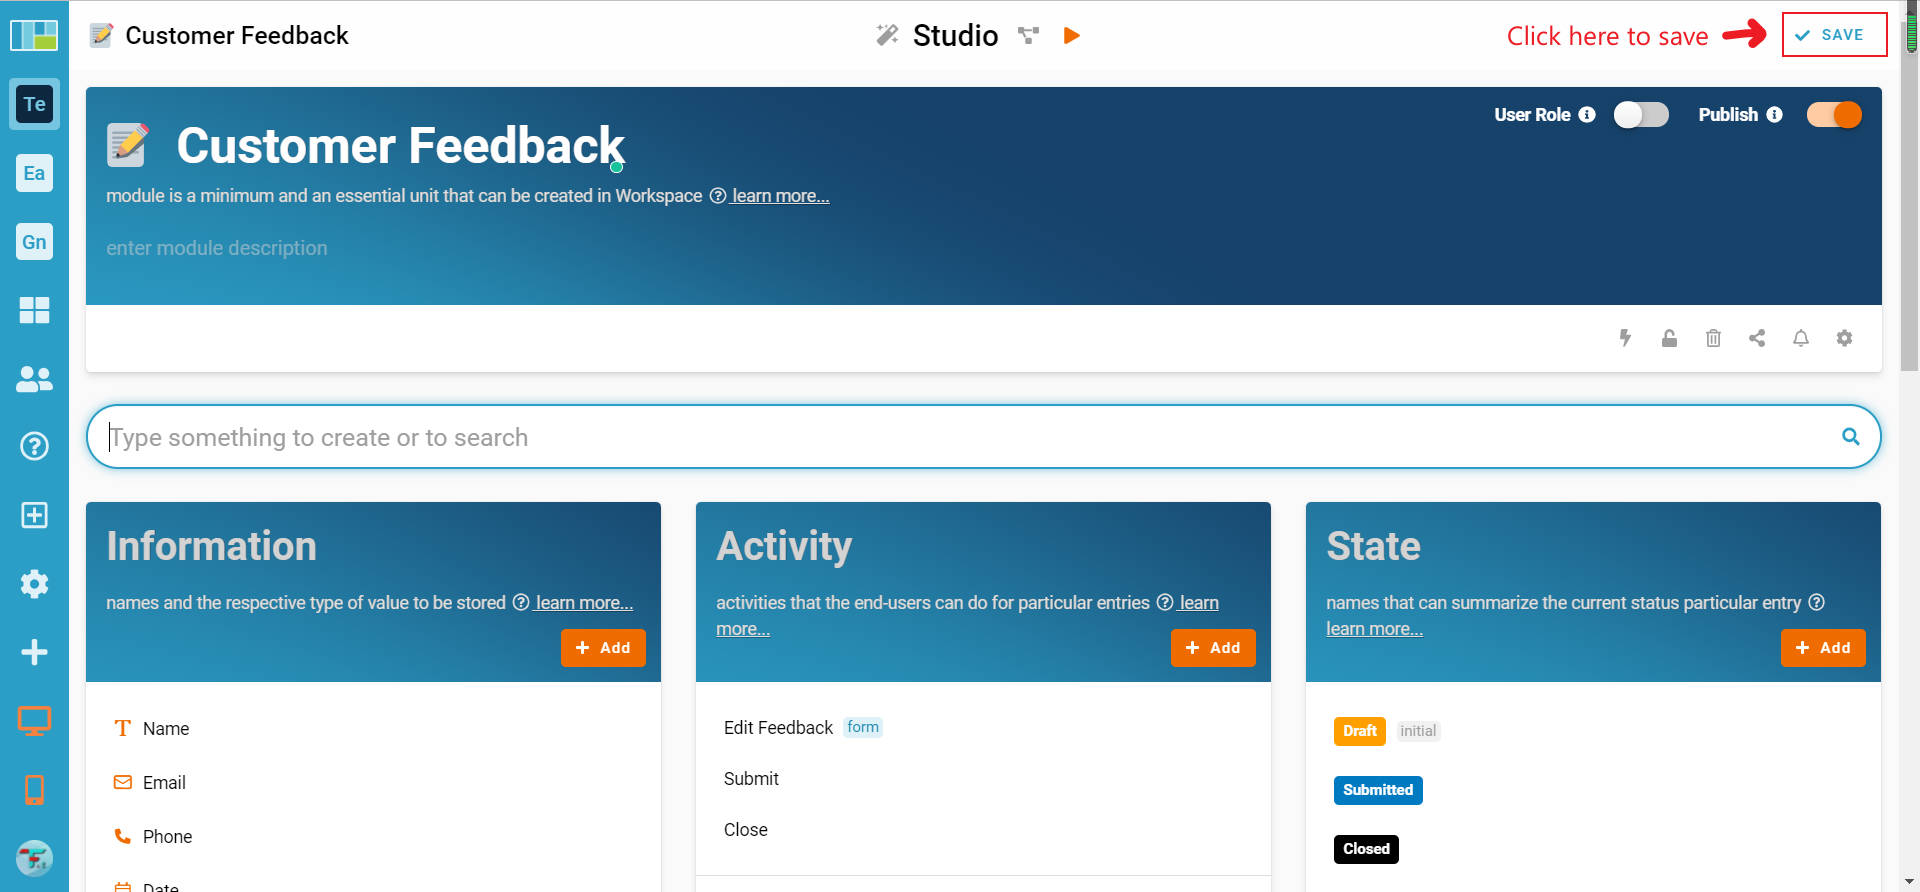
Click on the Studio button to access the studio mode of your workspace.
-
In the Studio mode, find and click on the “+” button to create a new module.
-
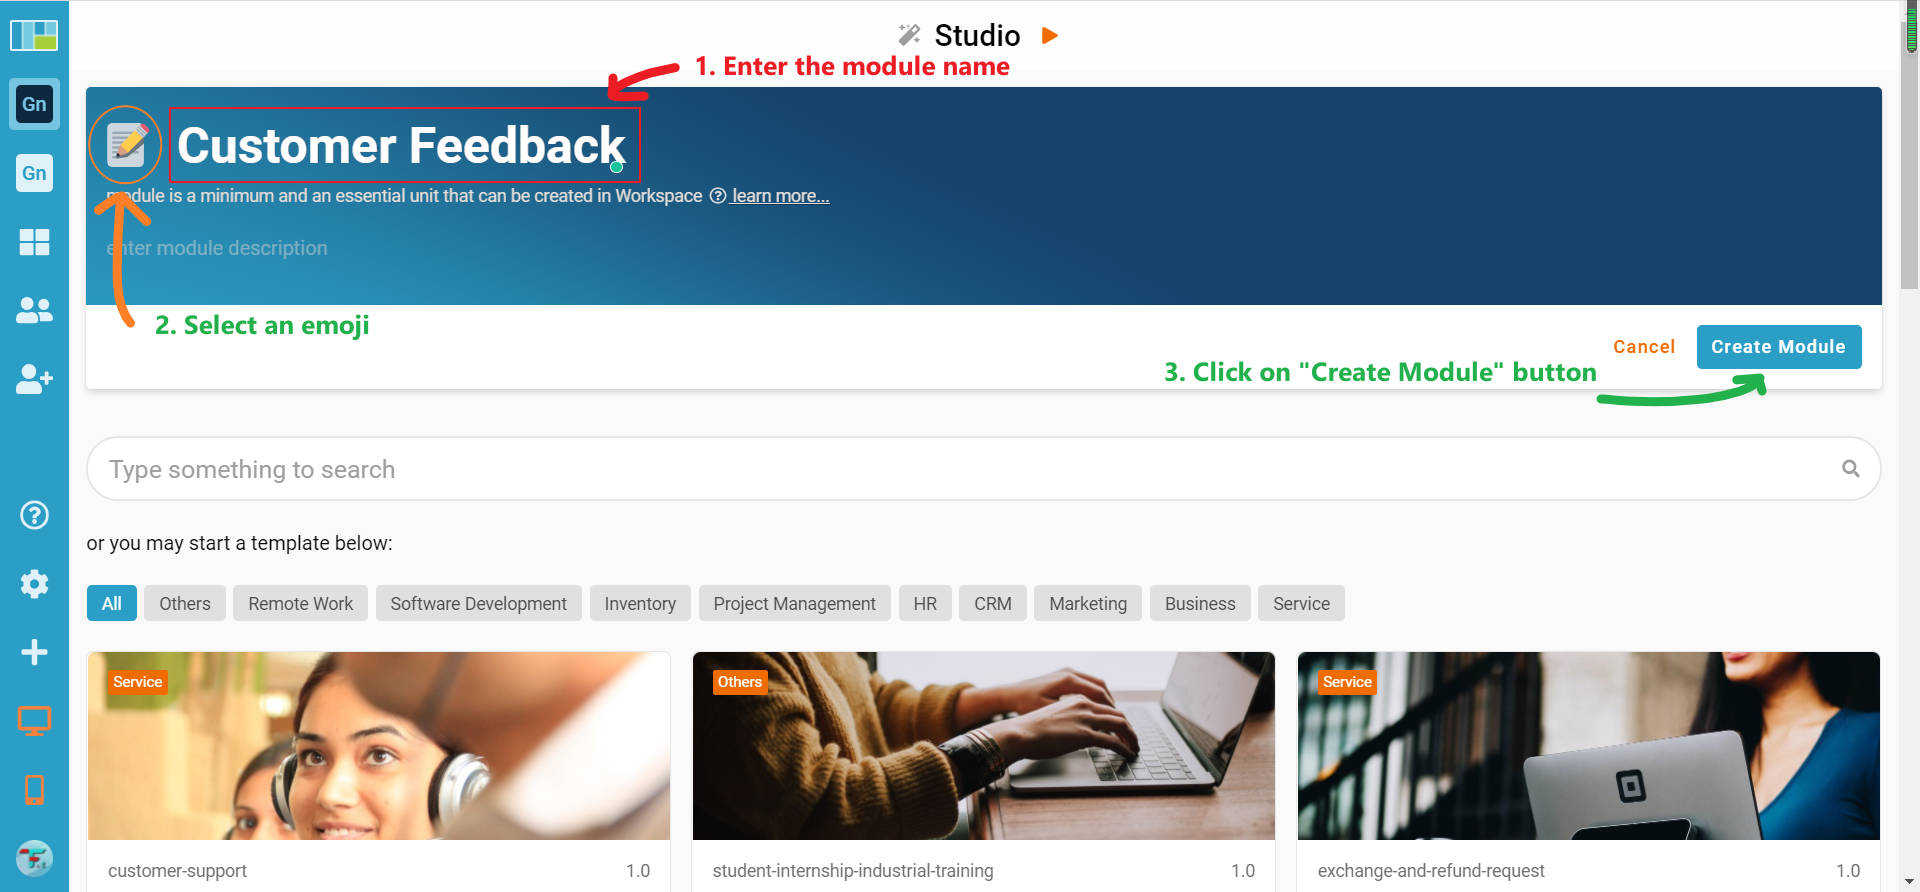
Name the module “Customer Feedback” and choose an emoji you prefer, then, click on the “Create Module” button.
-
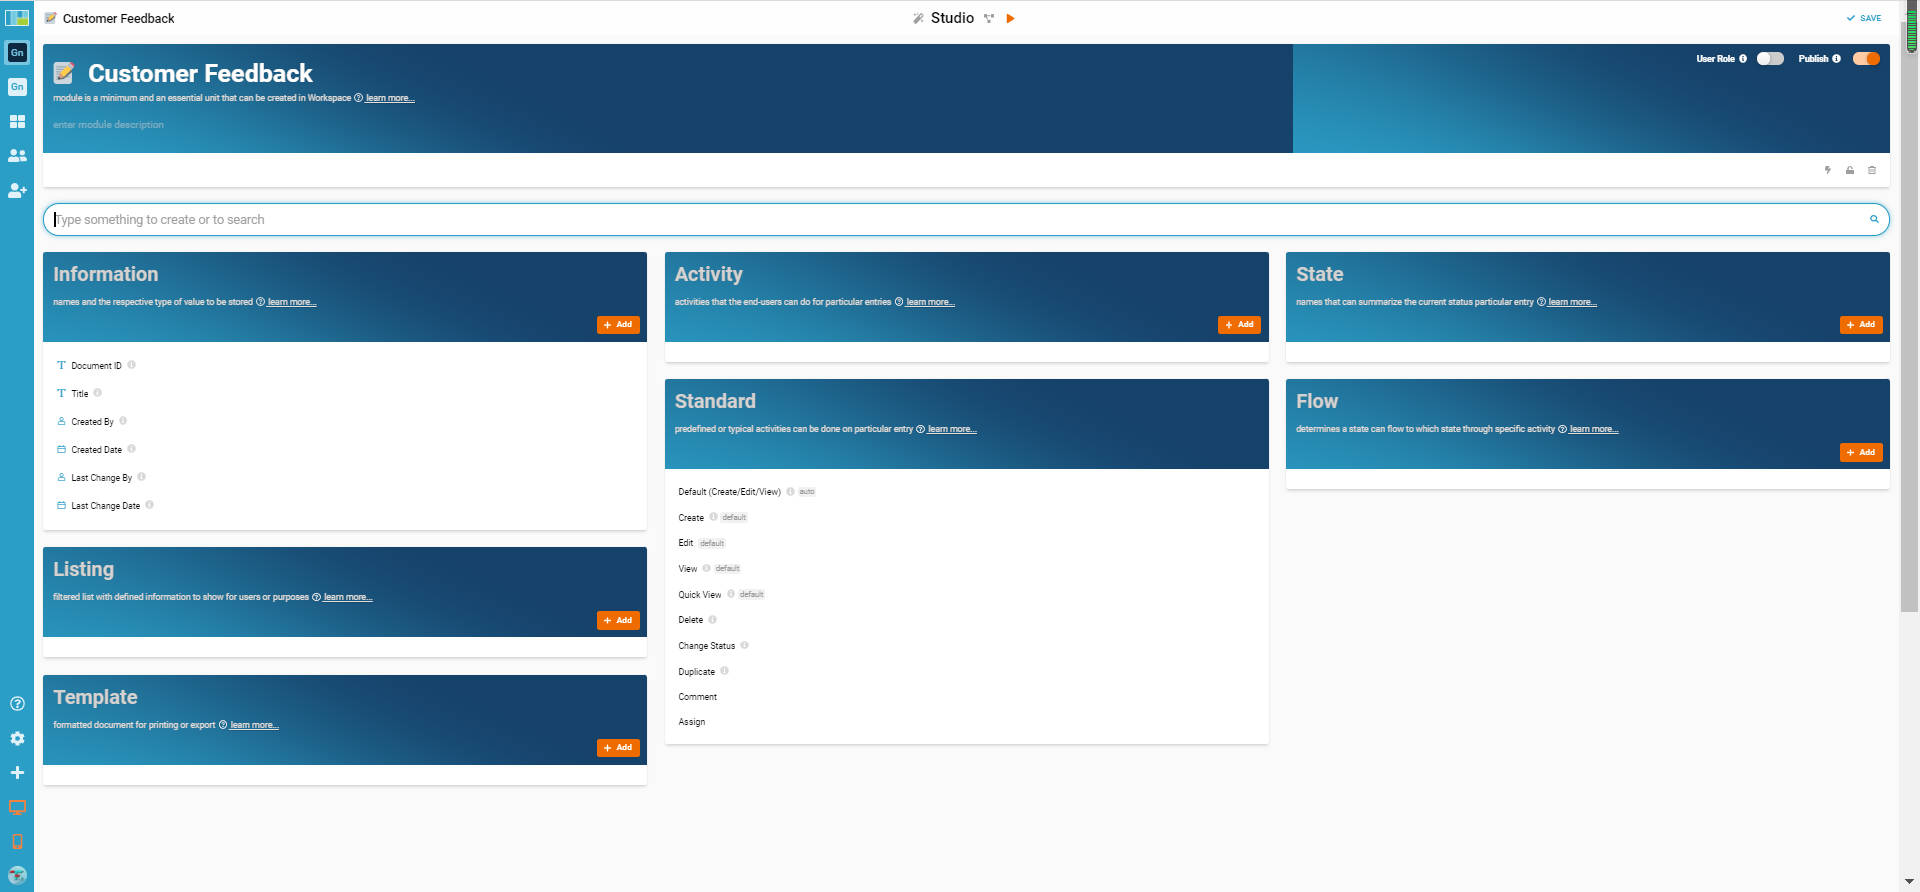
After the module is created, you will see 7 blocks on the screen, where are:
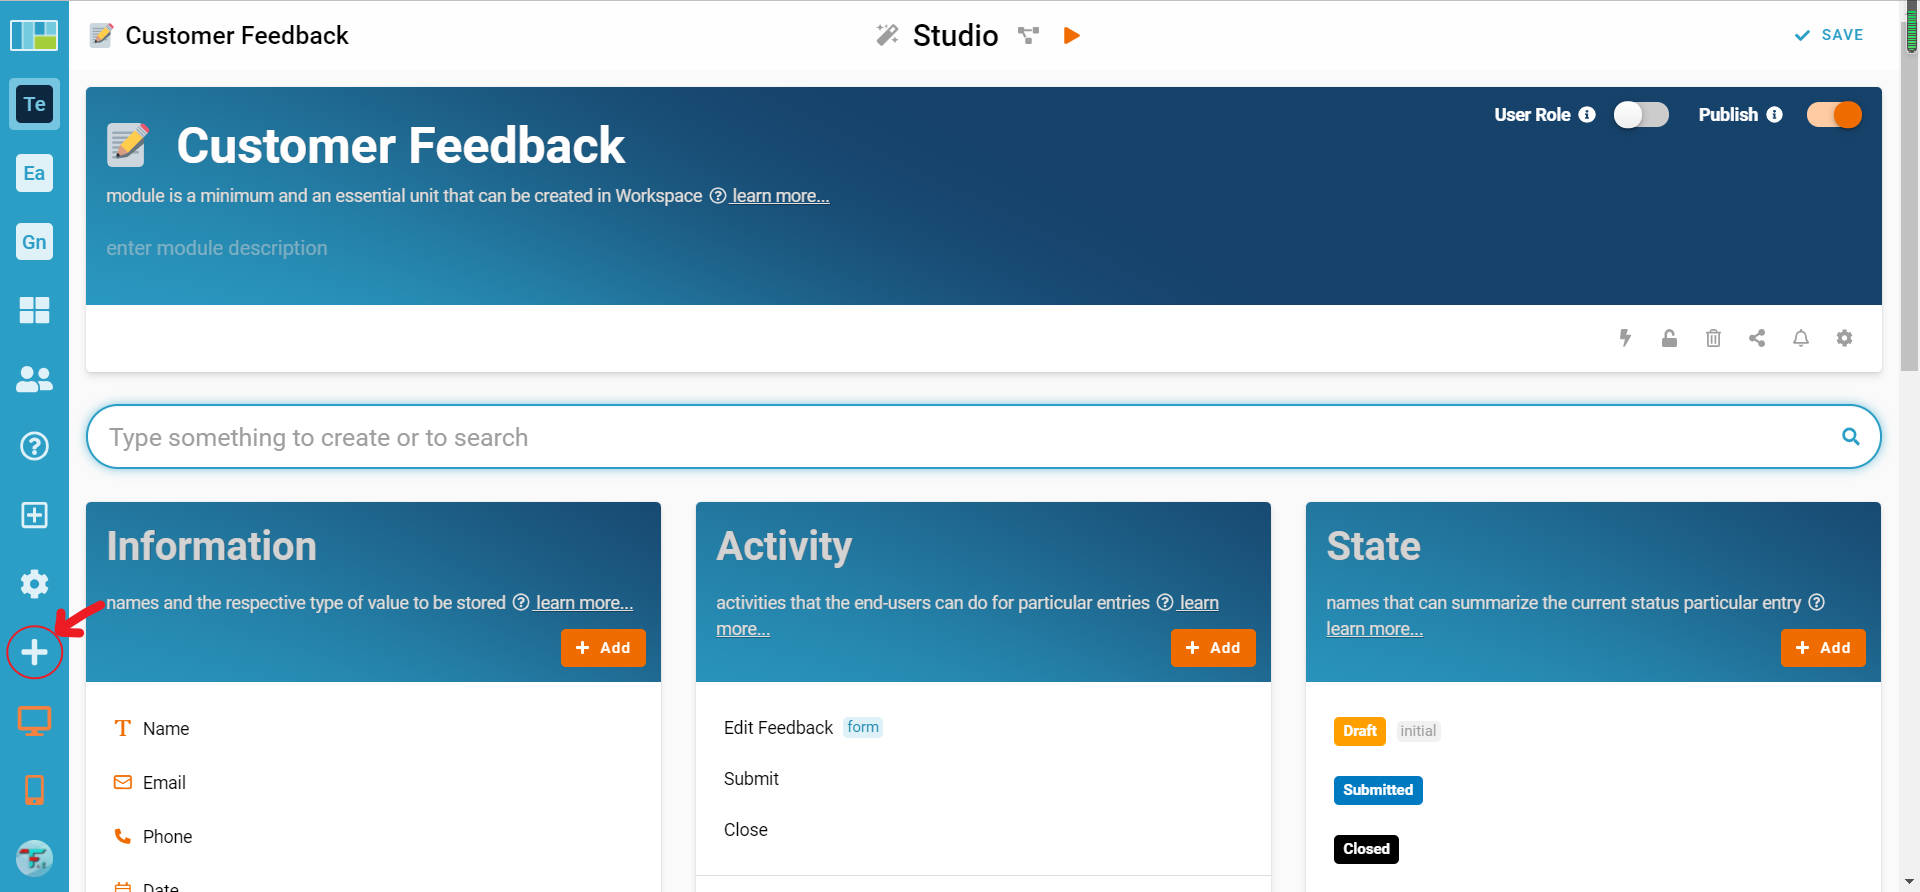
- Information
- Activity
- State
- Standard
- Flow
- Listing
- Template
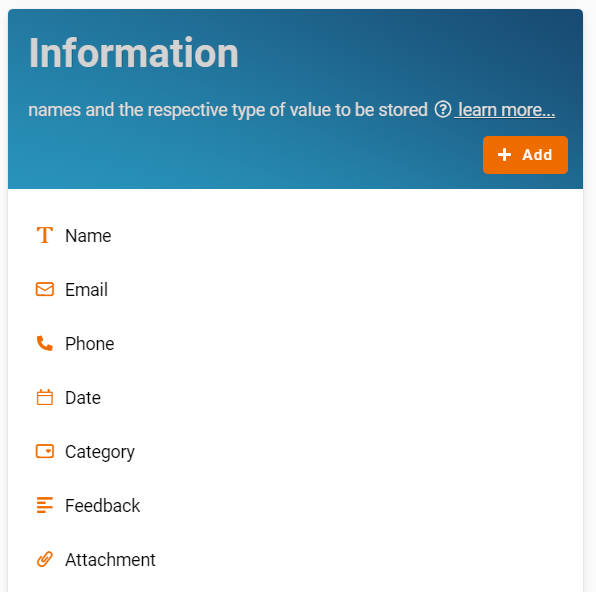
- In the Information block, click on the “+ Add” button to add new information.
- Recognize and configure all the Information names stated below:
** Format: Information Name - Information Type
- Name - Text
- Email - Email
- Phone - Phone Number
- Date - Date.
- Category - Select.
- Complaint
- Improvement
- Praise
- Suggestion
- Feedback - Multiline Text.
- Attachment - Files
-
Click on the “Save” button to save the current configuration.
-
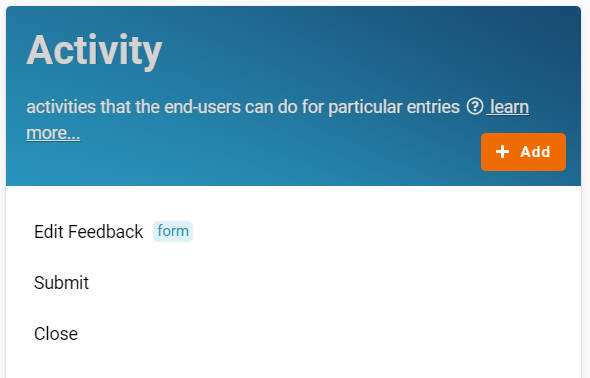
Come to the Activity block, click on the “+ Add” button to add 3 activities (Edit Feedback, Submit, Close).
-
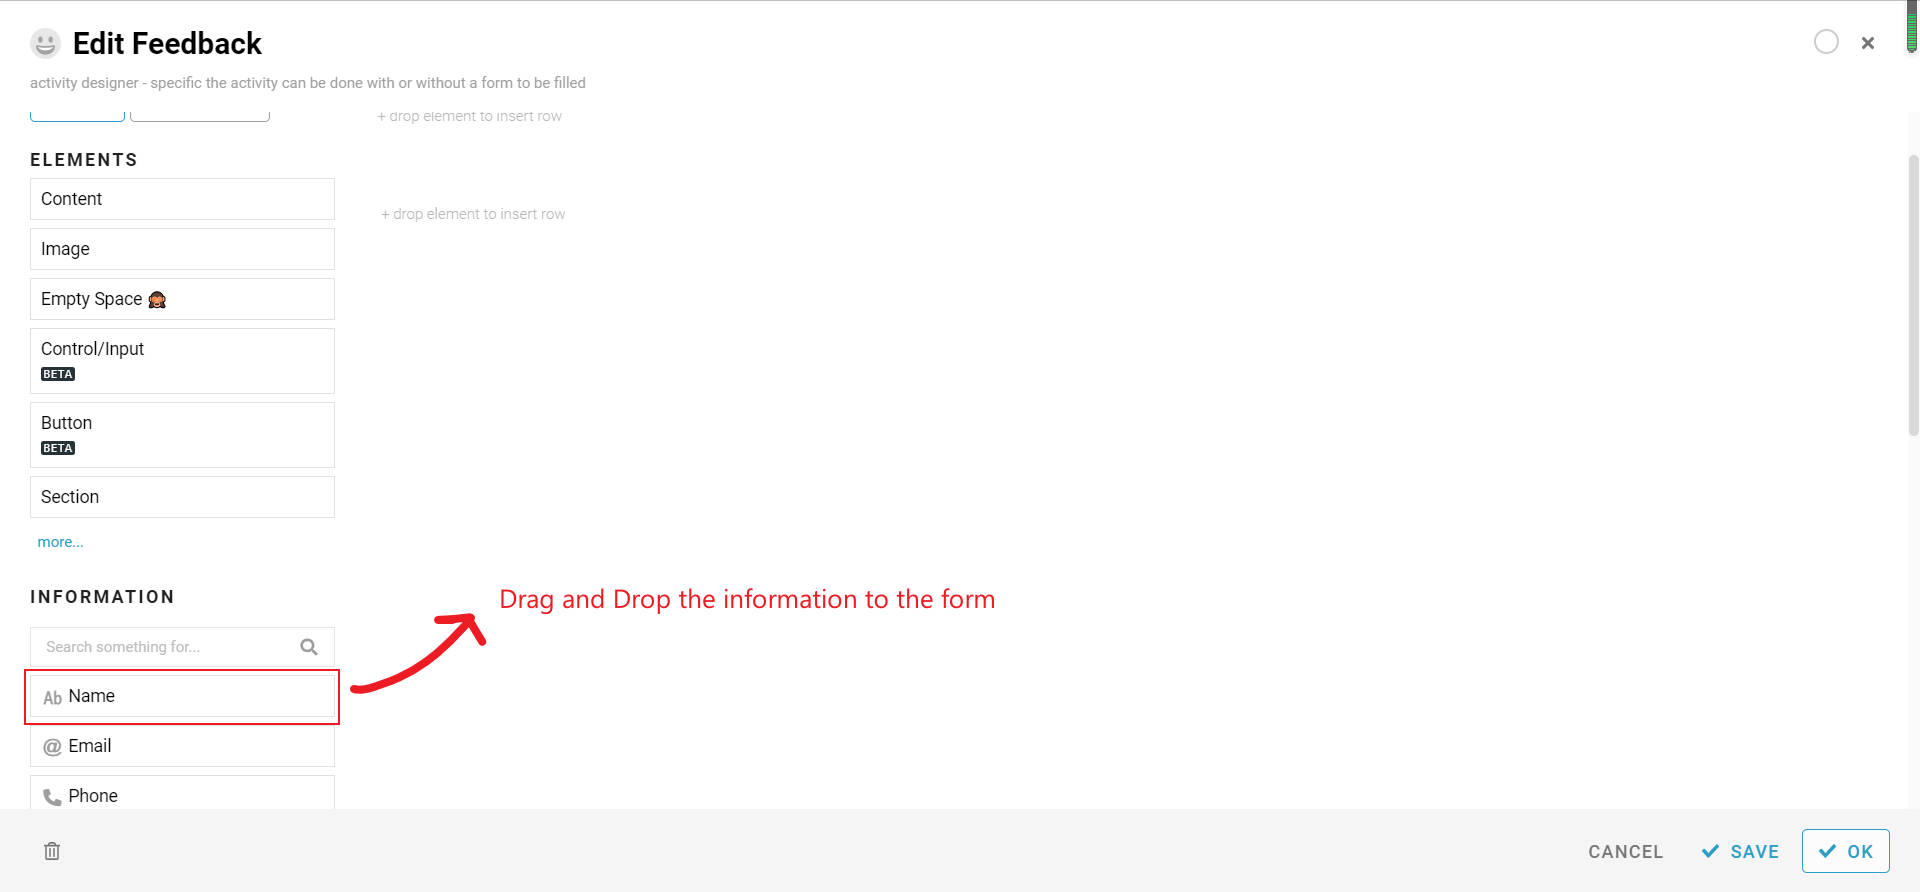
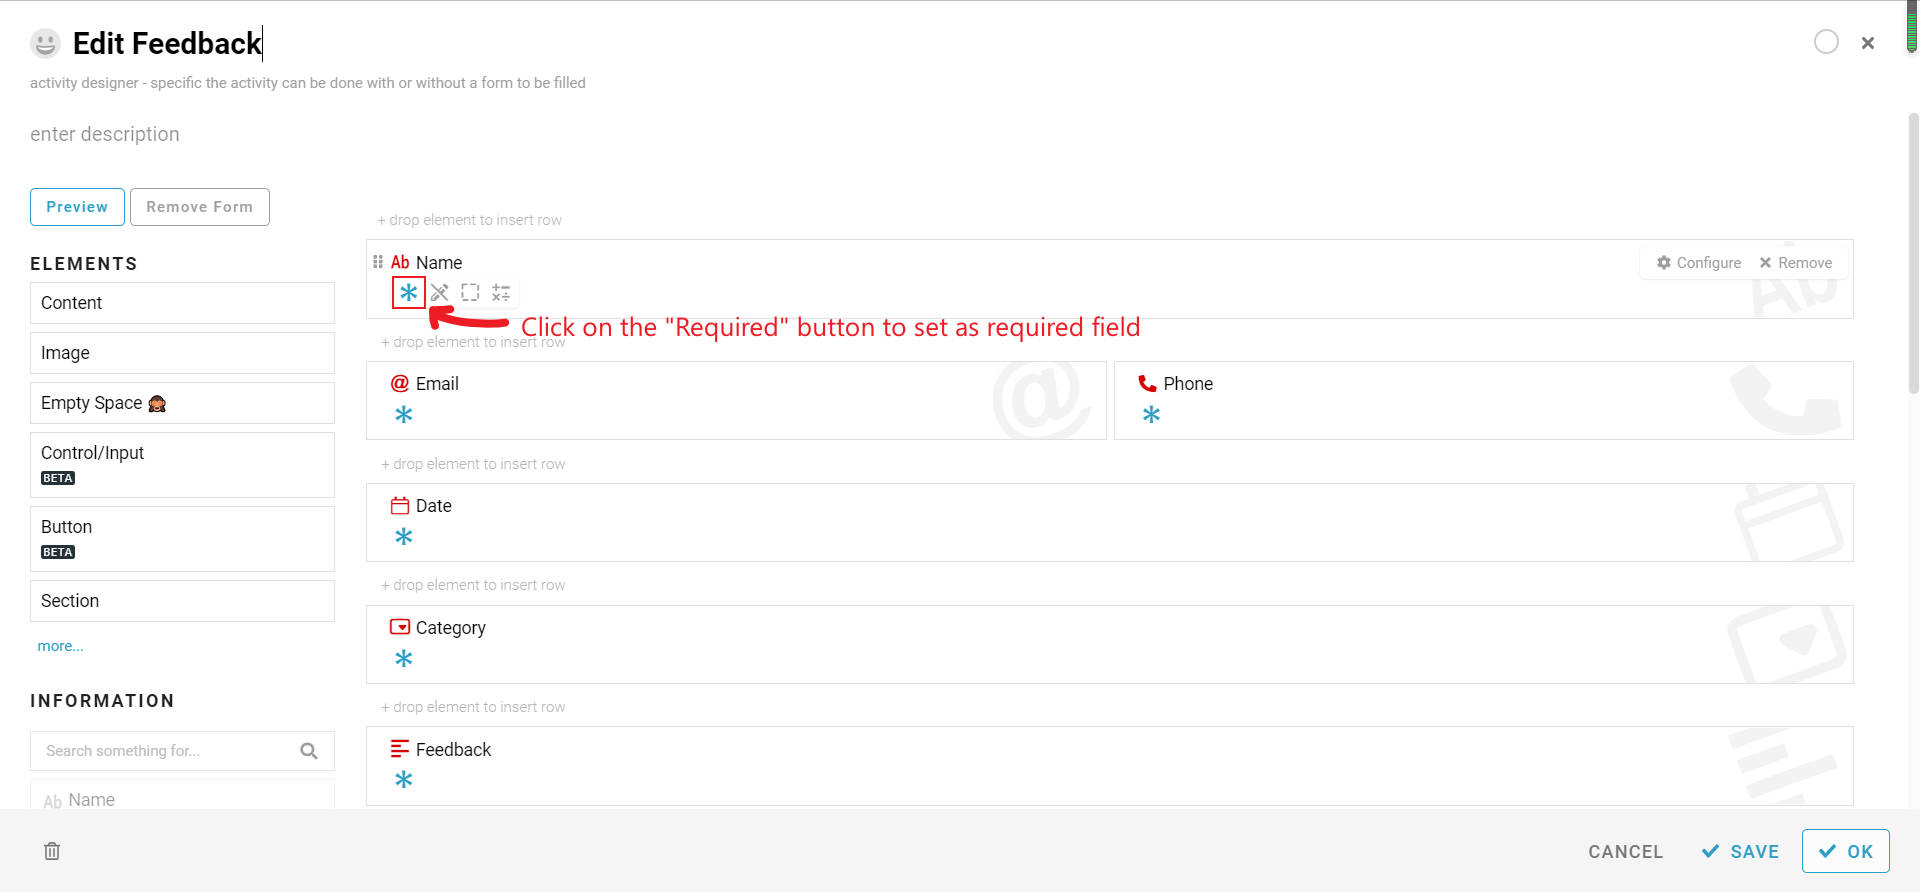
Click the “Edit Feedback” activity and click on the grey area of the form to customize the “Edit Feedback” activity form.
-
Drag and drop all the Information from the left side menu to the form area.
-
Refer to the picture in step 12 and drag the information to rearrange them.
-
Click on the “Required” button to set the following information as a required field:

- Name
- Phone
- Date
- Category
- Feedback
-
Click on the “Save” button and the OK button to save the current configuration.
-
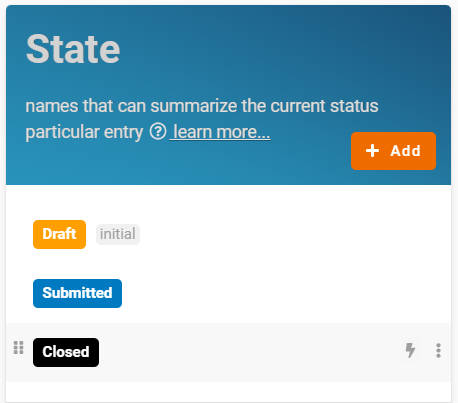
Next, at the State block, click on the “+ Add” button to add 3 states (Draft, Submitted, Close).** The system will auto-assign color to the state created, but you can still choose the color you want.
-
For the “Draft” state, toggle on the Initial to set it as the initial state.
-
Click on the “Save” button to save the current configuration.
-
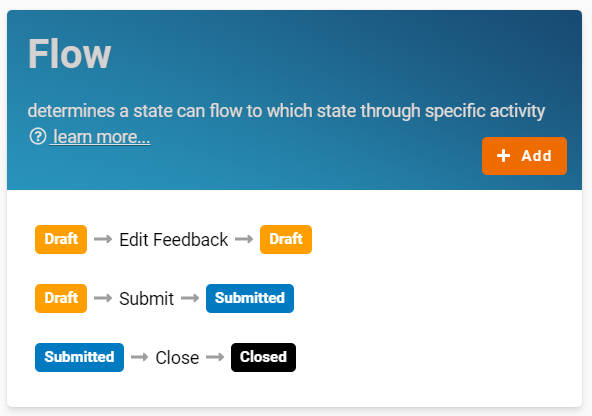
Click on the “+ Add” button in the Flow block to add flows of the process.
-
Three “flows” are required to be configured in this system, which are:
** Formula: “State” → Activity → “State”

- Draft → Edit Feedback → Draft
- Draft → Submit → Submitted
-
Submitted → Close → Closed
-
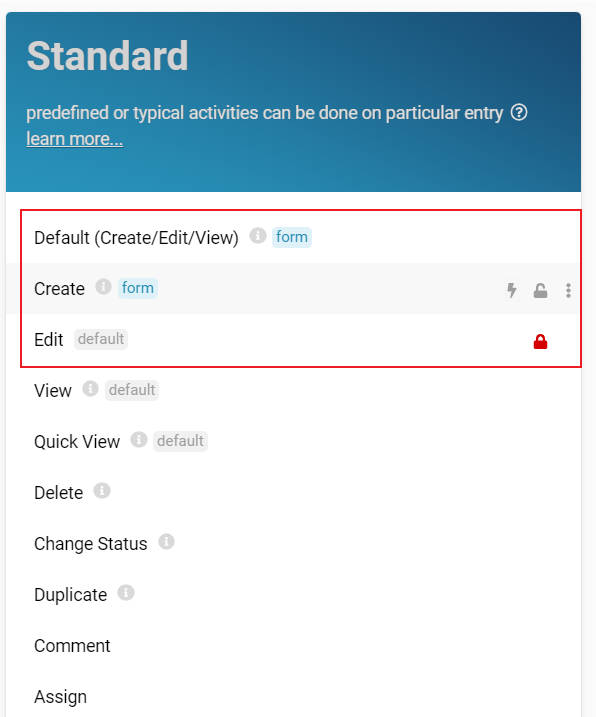
View and find the “Default (Create/Edit/View)” activity, the “Create” activity, and the Edit activity in the Standard block.
-
Click on the “Default (Create/Edit/View)” activity and click on the grey area of the form to customize the “Default (Create/Edit/View)” activity form.
-
Repeat step 10 to step 13 on the “Default (Create/Edit/View)” activity.
-
Click on the “Create” activity and click on the grey area of the form to customize the “Create” activity form.
-
Repeat step 10 to step 12 on the “Create” activity.
-
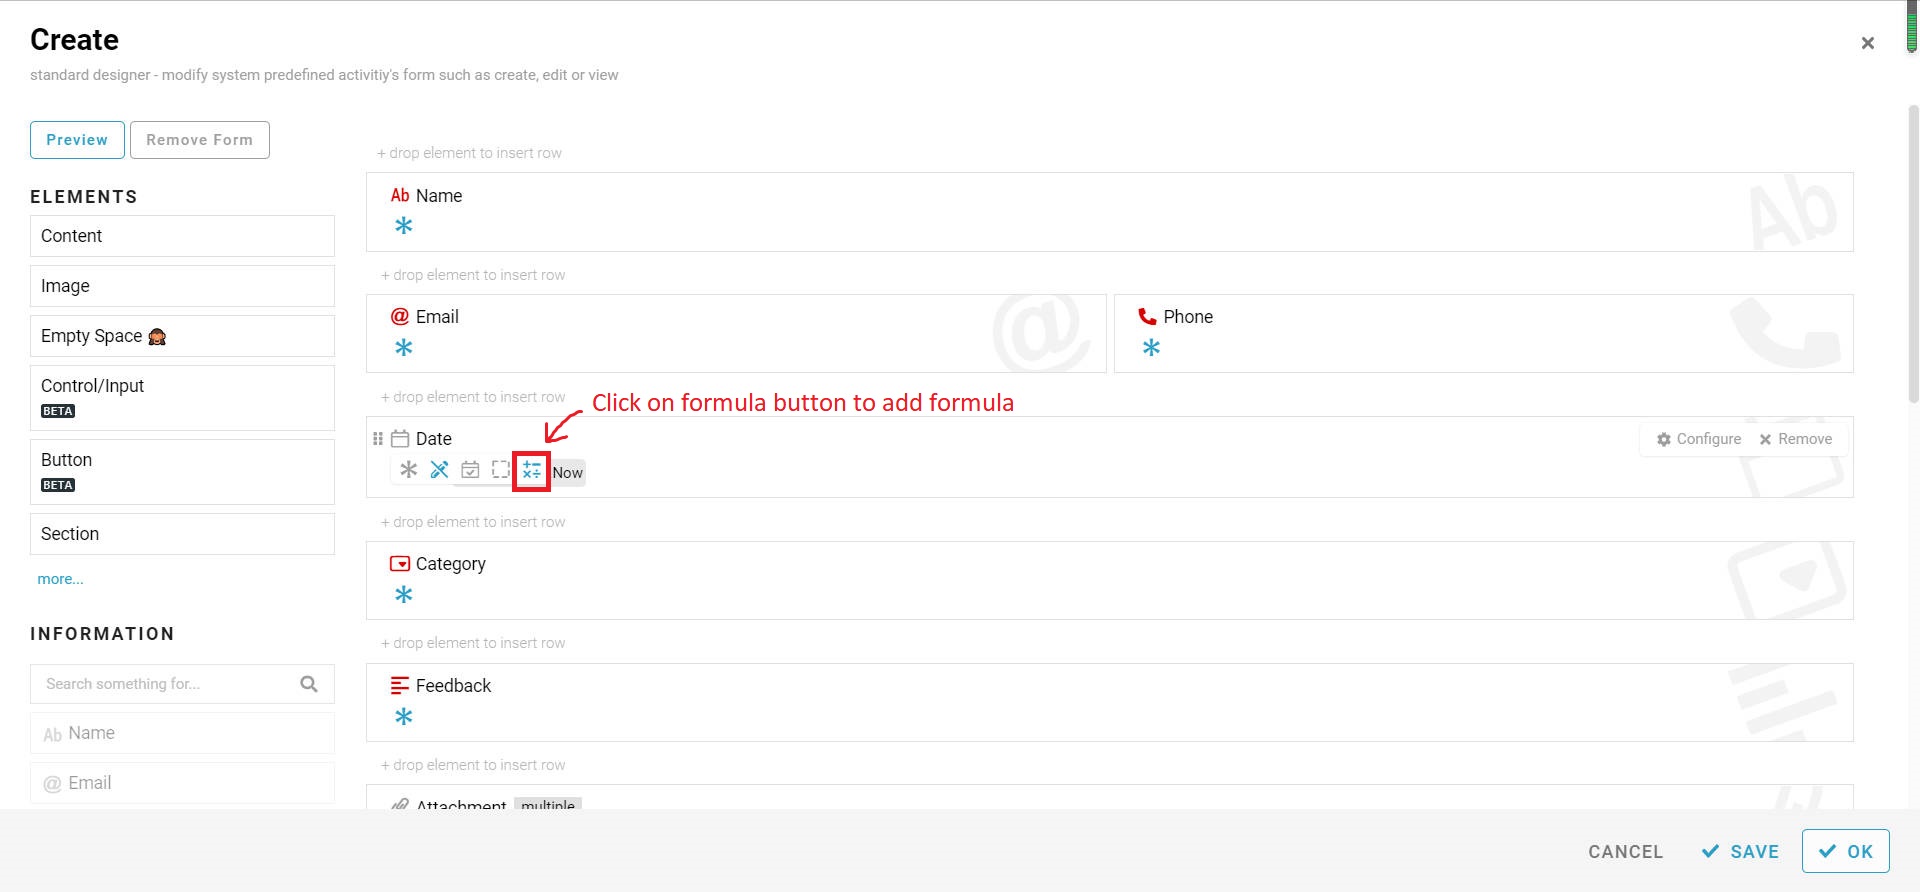
Click on the formula button on the “Date” Information to input the formula.
-
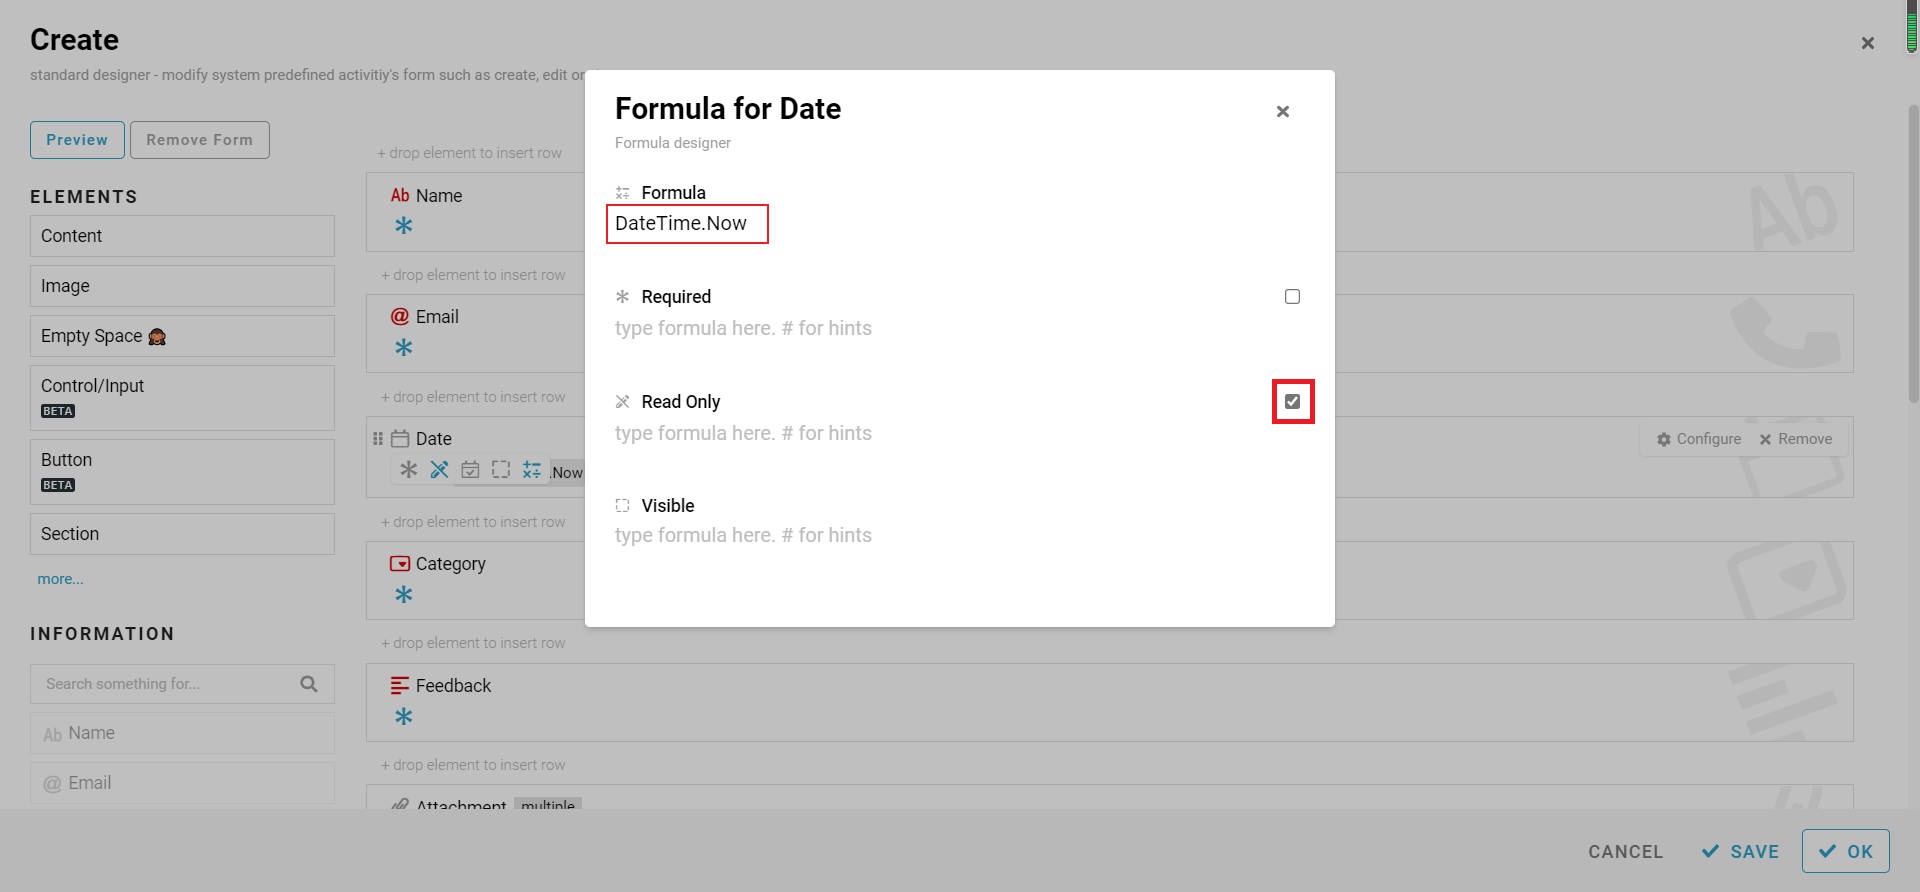
Key in “DateTime.Now” in the Formula and tick the Read Only.
-
Click the “x” button to close the formula box then click on the save and OK button.
-
Click on the “Lock” button on the “Edit” activity.
-
From the drop-down list, select “Everyone” then clicks Done.
-
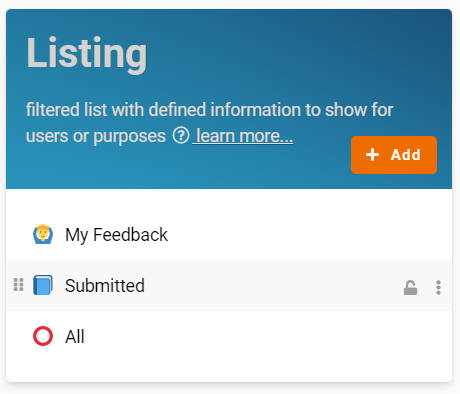
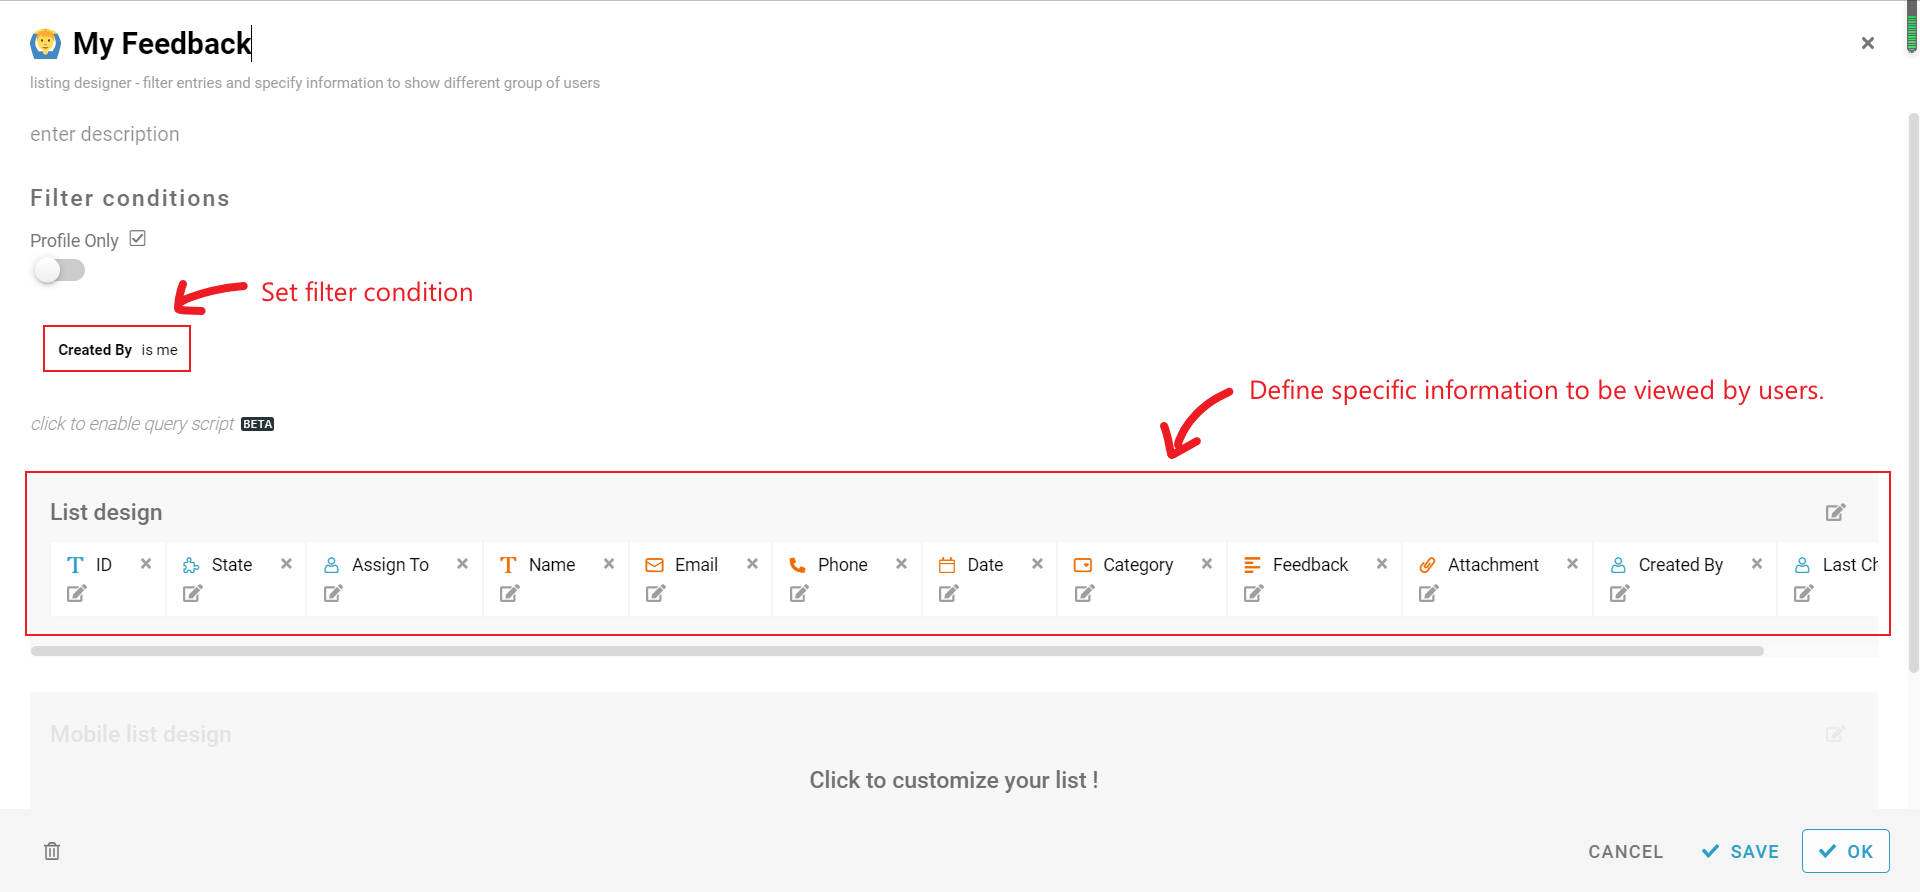
Last, click on the “+ Add” button at the Listing block to create all the Lists with filter conditions to allow specific information to be viewed by users.


- My Feedback - Condition: Created By is “me”
- Submitted - Condition: State is “Submitted”
- All - no condition
- Remember to click on the “Save” button to save the configuration.
Congratulations!!! You have successfully created a Customer Feedback module.
Try FETIAS for FREE now.
Sign up at https://fetias.com
Related topic
Tutorial - Customer Feedback - Support / Tutorial - FETIAS Community
 My customer is asking for a customer experience module and I think this can be incorporated
