Hi 

Today, I would like to share with you how to configure a Software Renewal Tracker module in FETIAS.
The Software Renewal Tracker module allows you to record and track the renewal date of the software. Use this template to manage your subscribed software with ease.
Problem
Forgotten on renewing software - It is difficult and annoying to remember different renewal dates of different software
Objective
Track and Update - Help to manage and track the renewal date of the software subscribed.
Step of Configuration
-
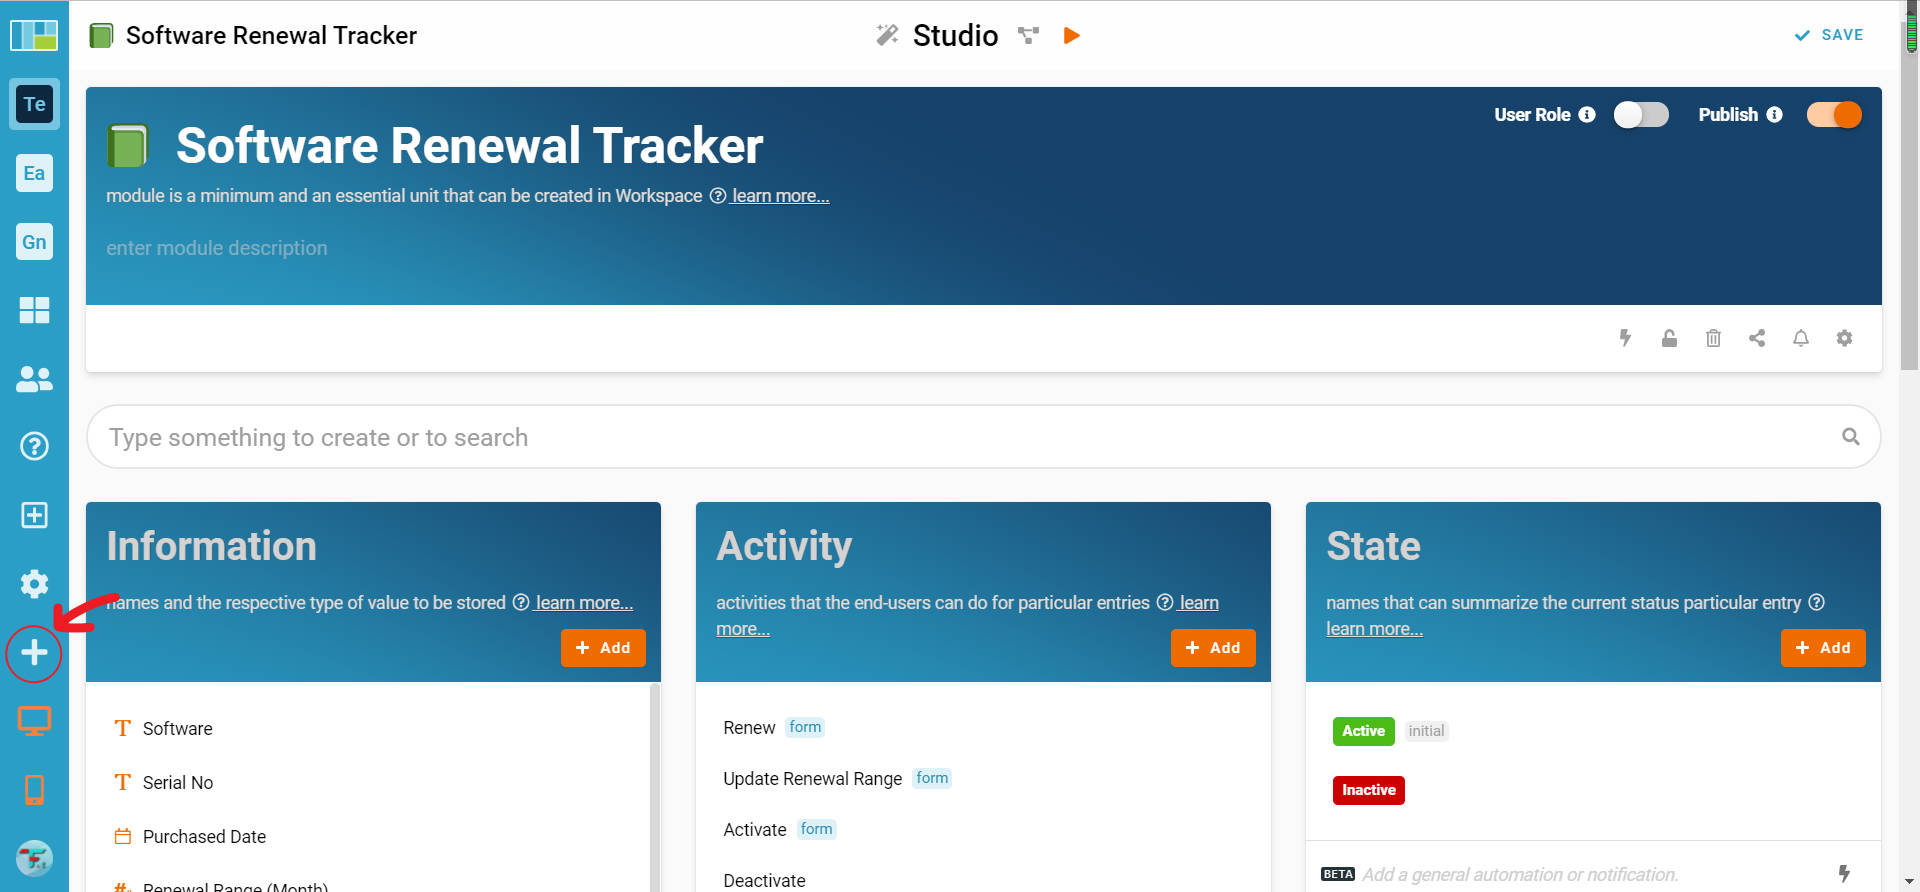
Click on the Studio button to access the studio mode of your workspace.
-
In the Studio mode, find and click on the “+” button to create a new module.
-
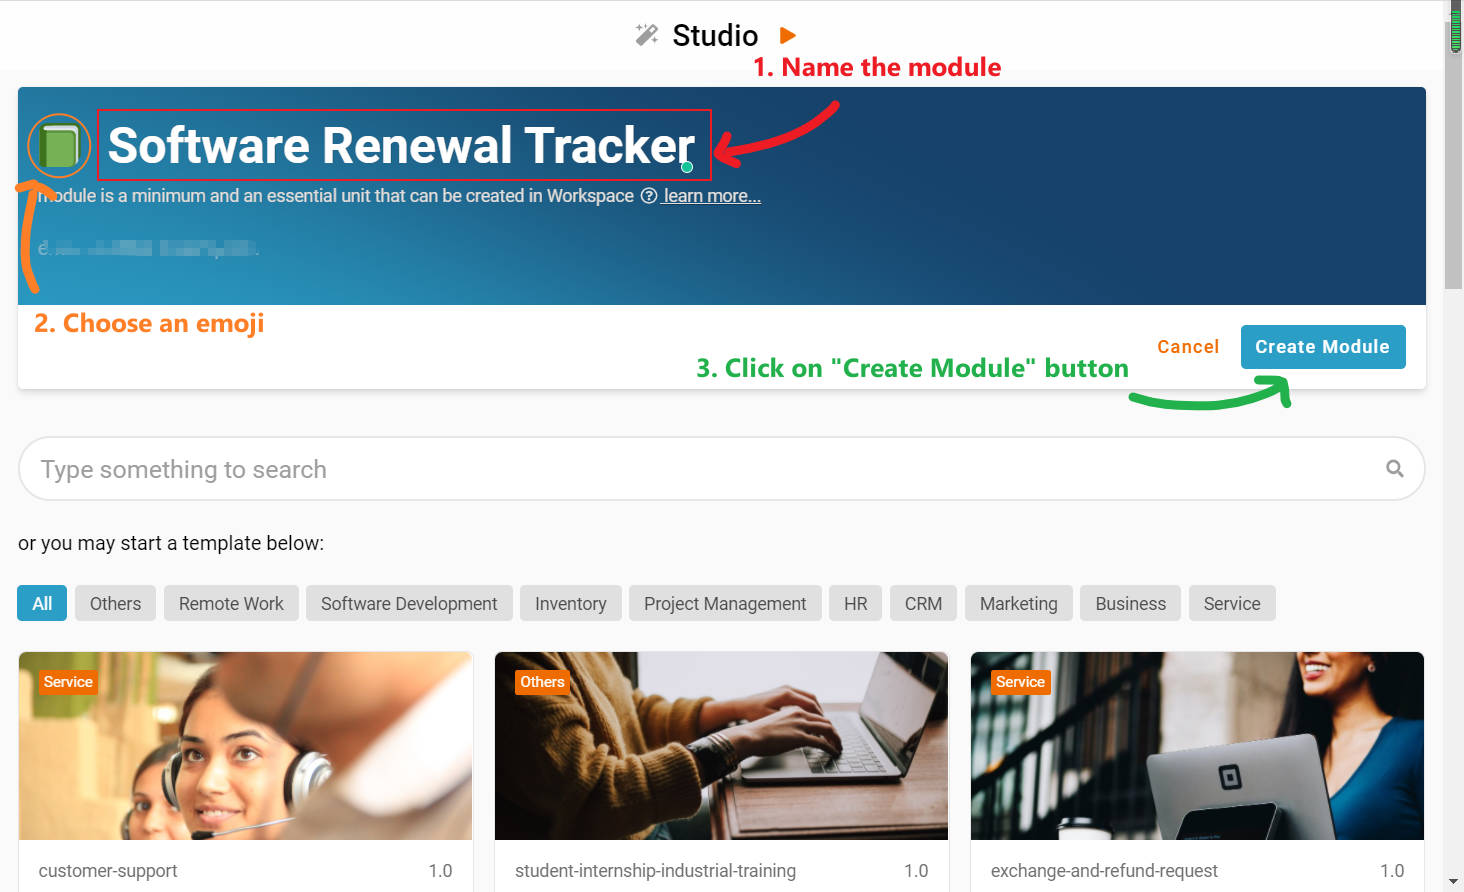
Name the module “Software Renewal Tracker” and choose an emoji you prefer, then, click on the “Create Module” button.
-
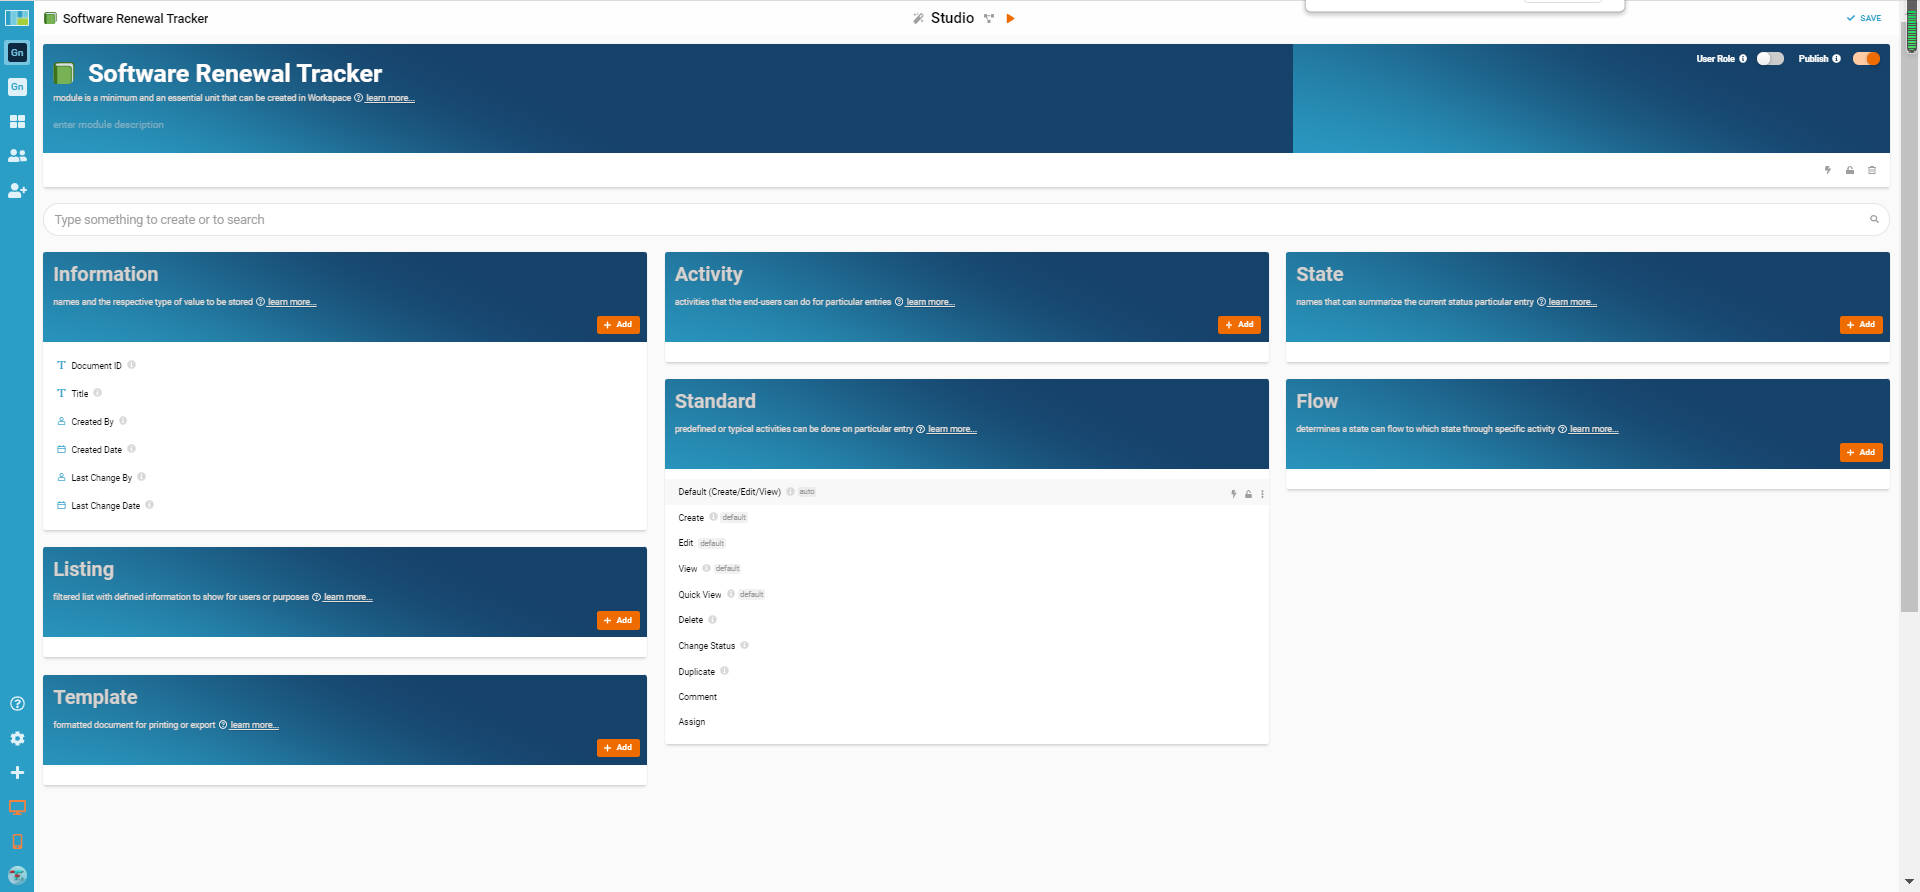
After the module is created, you will see 7 blocks on the screen, where are:

- Information
- Activity
- State
- Standard
- Flow
- Listing
- Template
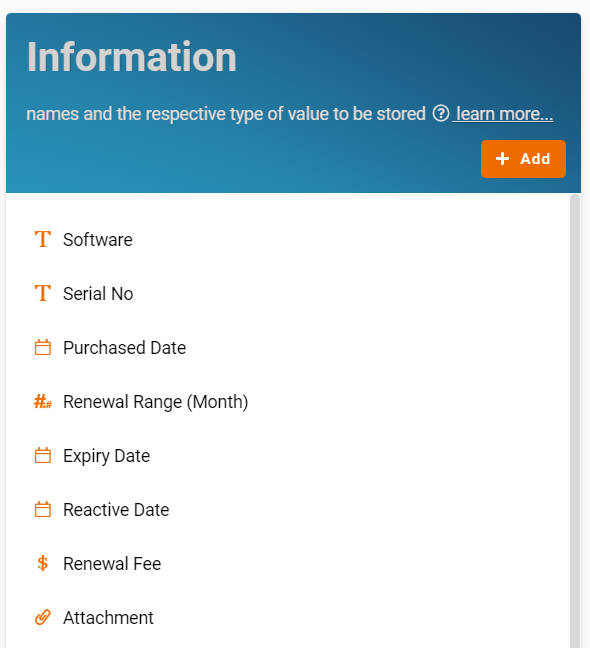
- In the Information block, click on the “+ Add” button to add new information.
- Recognize and configure all the Information names stated below:
** Format: Information Name - Information Type
- Software - Text
- Serial No - Text
- Purchased Date - Date
- Renewal Range (Month) - Number.
- Expiry Date - Date.
- Reactive Date - Date.
- Renewal Fee - Money.
- Attachment - Files.
-
Click on the “Save” button to save the current configuration.
-
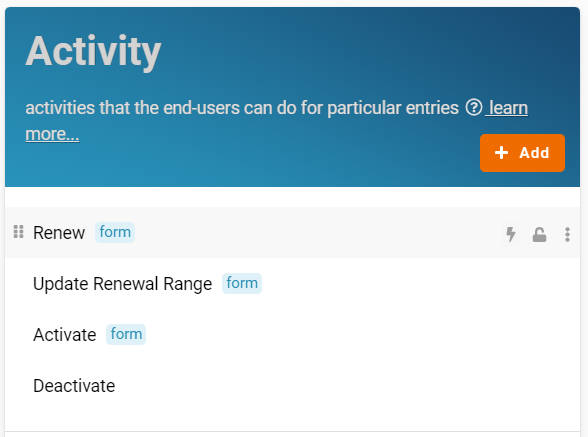
Come to the Activity block, click on the “+ Add” button to add 4 activities (Renew, Update Renewal Range, Activate, Deactivate).
-
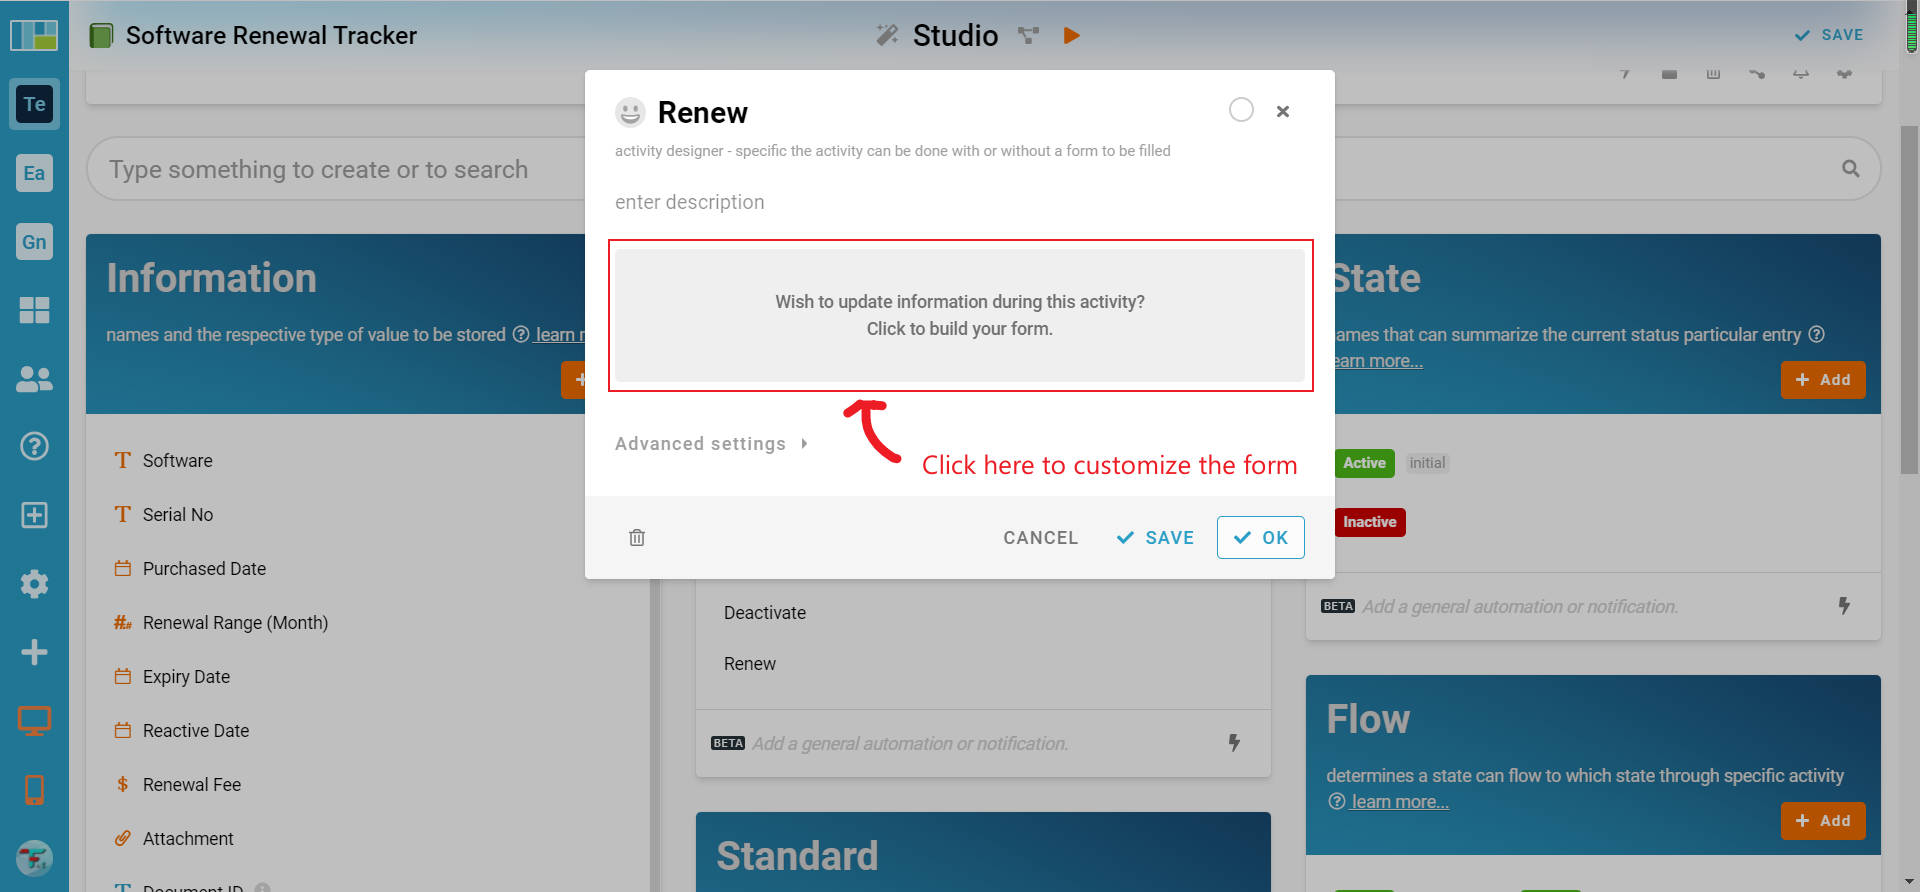
Click the “Renew” activity and click on the grey area of the form to customize the “Renew” activity form.
-
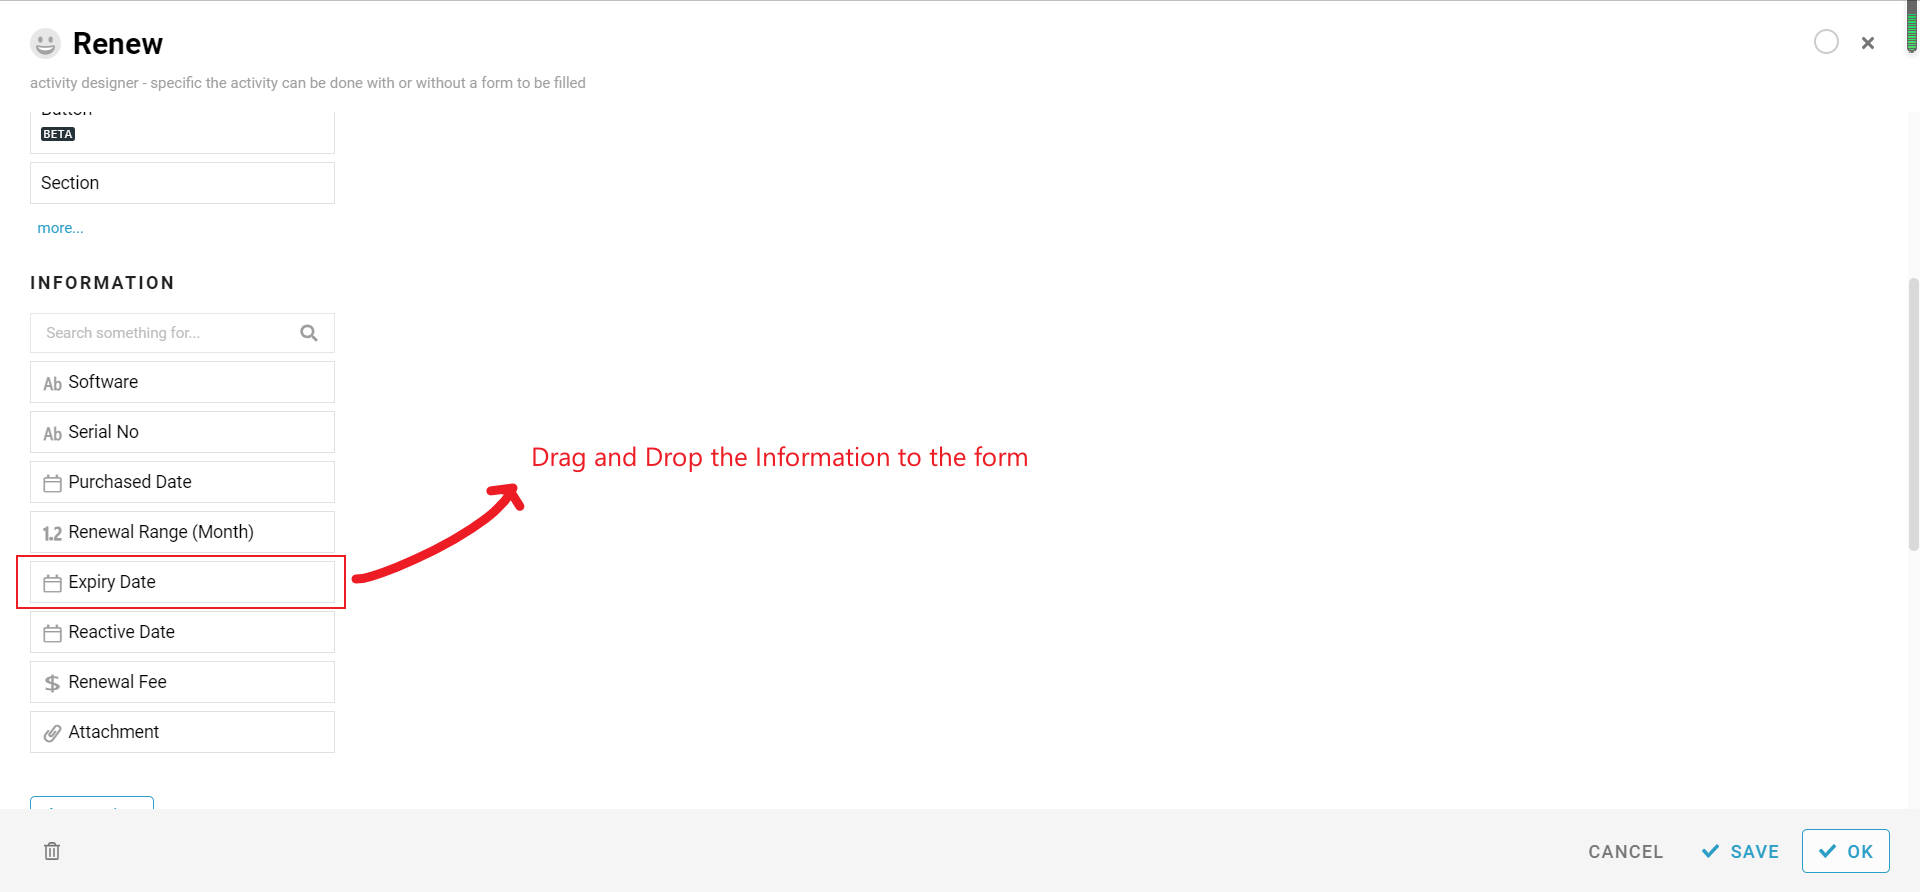
Drag and drop the “Expiry Date” Information, “Renewal Range (Month)” Information, and “Attachment” Information from the left side menu to the form area.
-
Refer to the picture below and drag the information to rearrange them.
-
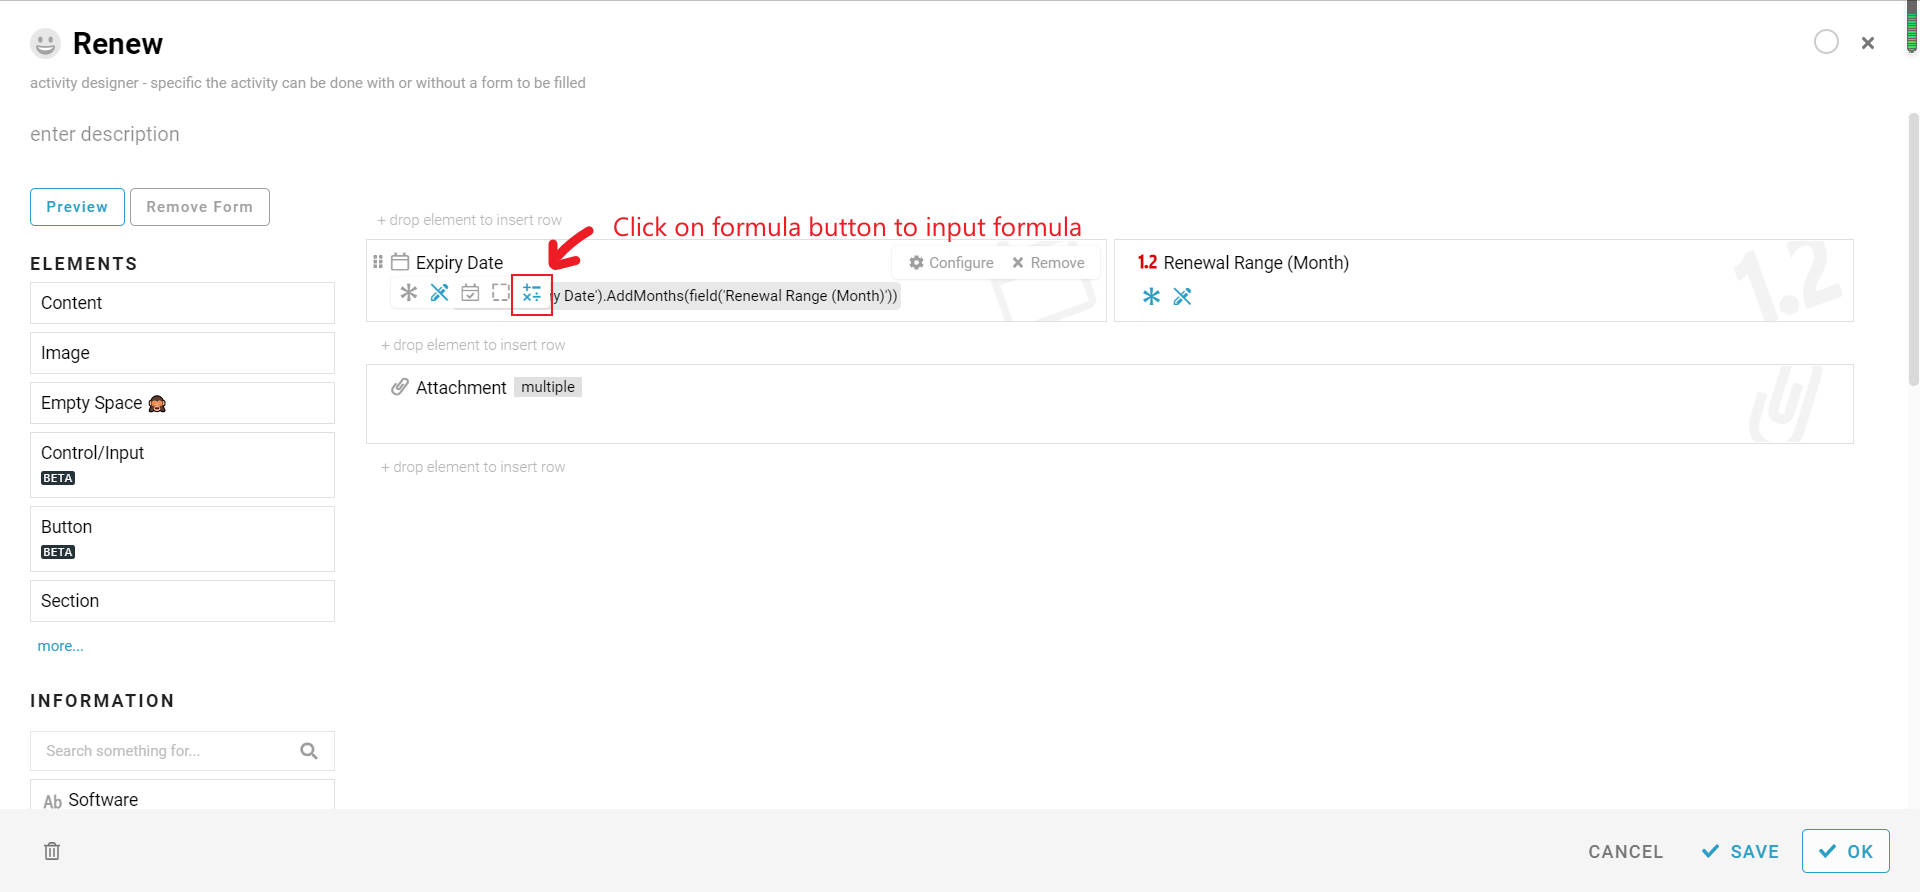
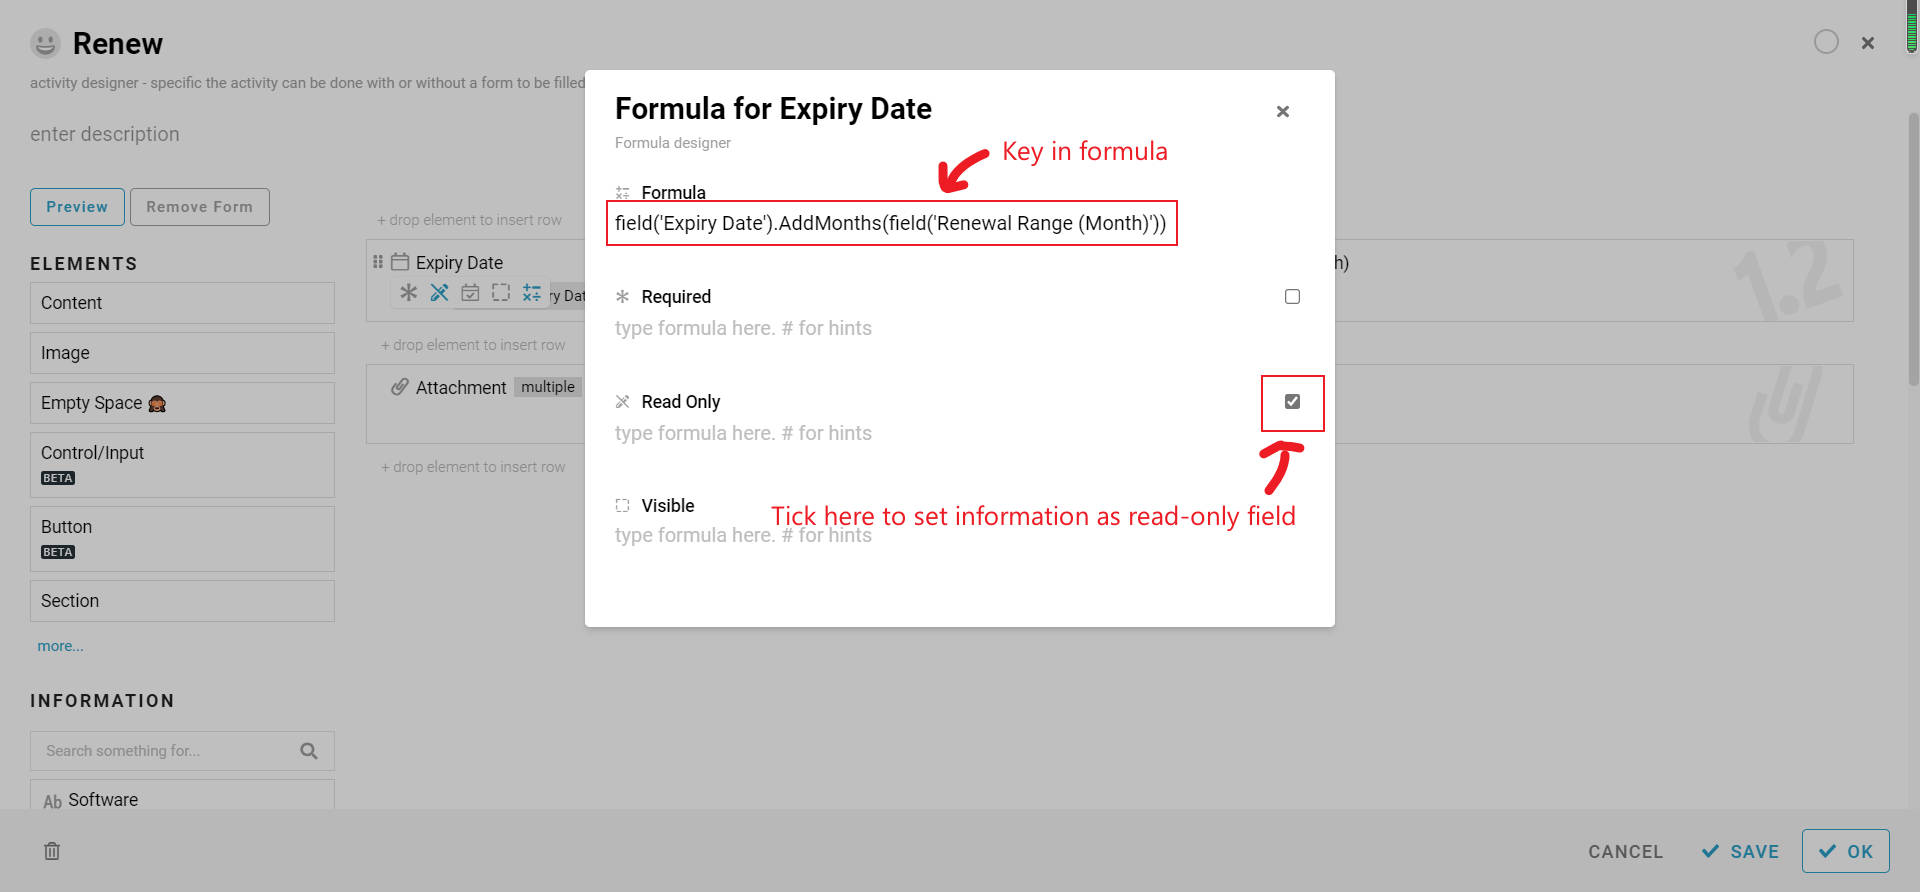
Click on the formula button on the “Expiry Date” Information to input the formula.
-
Key in “field(‘Expiry Date’).AddMonths(field(‘Renewal Range (Month)’))” in the Formula and tick the Read Only.
-
Click on the “Read Only” button to set the “Renewal Range (Month)” Information as a read-only field.
-
Click on the save and OK button.
-
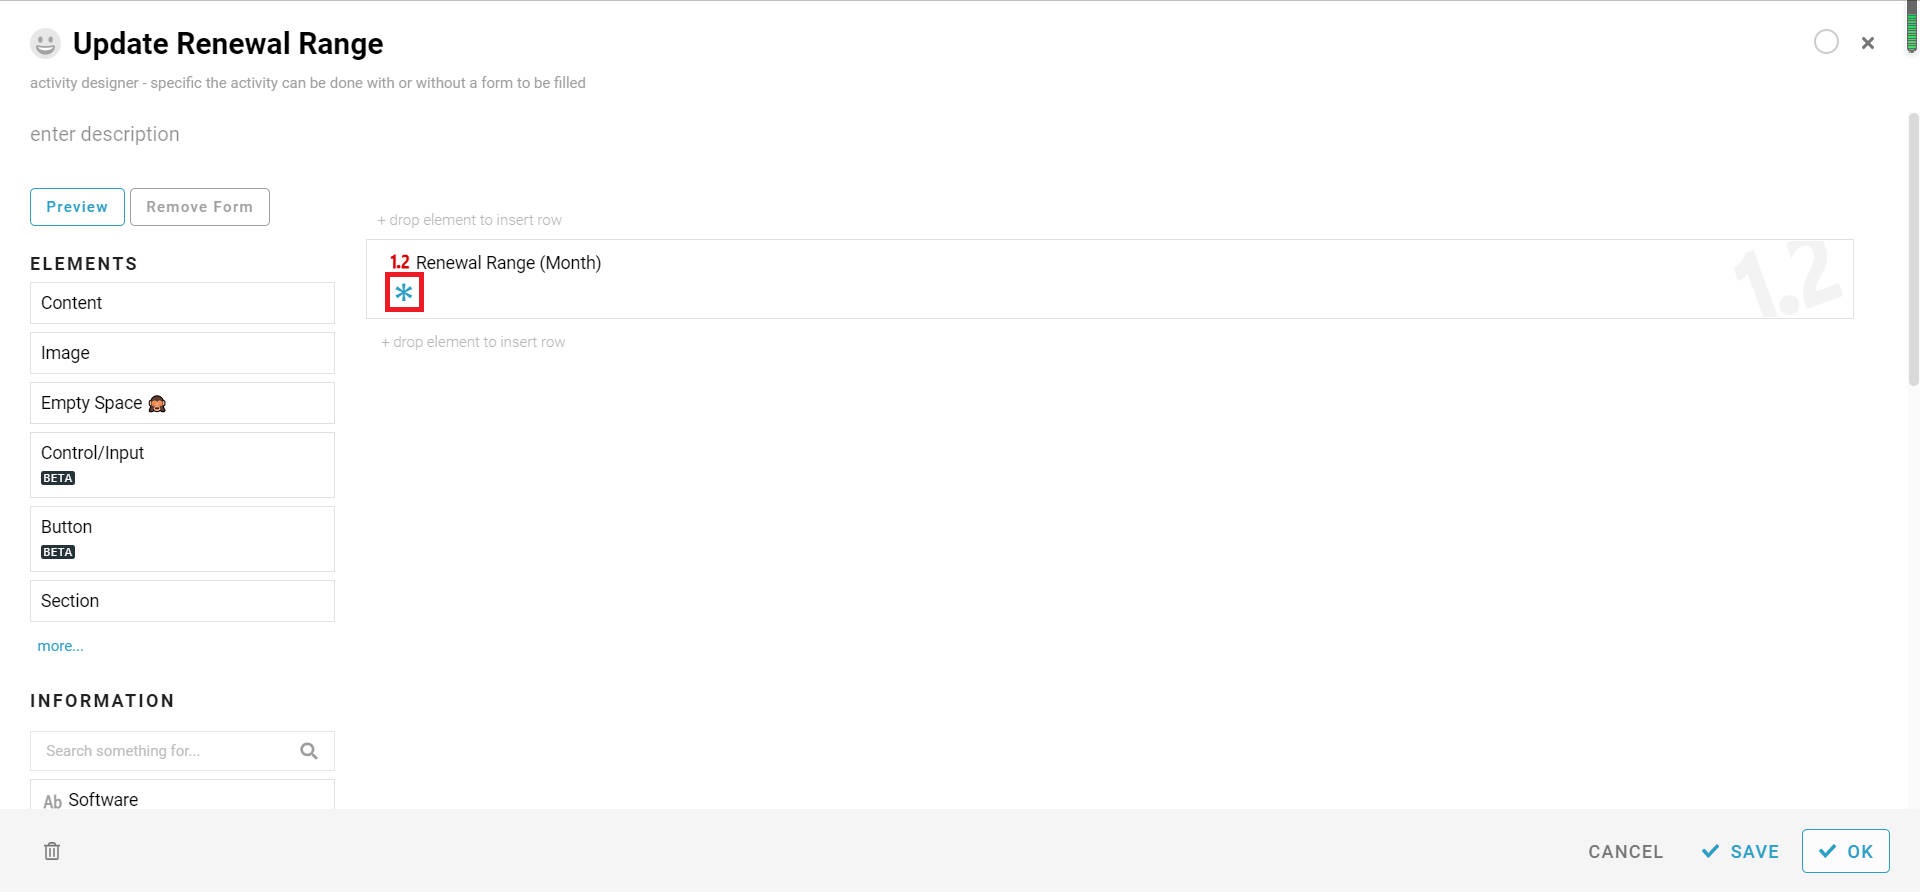
Click the “Update Renewal Range” activity and click on the grey area of the form to customize the “Update Renewal Range” activity form.
-
Drag and drop the “Renewal Range (Month)” Information from the left side menu to the form area and set it as a required field.
-
Click on the save and OK button.
-
Click the “Activate” activity and click on the grey area of the form to customize the “Activate” activity form.
-
Drag and drop all the Information from the left side menu to the form area.
-
Refer to the picture below and drag the information to rearrange them.
-
Click on the “Required” button to set the following information as a required field:

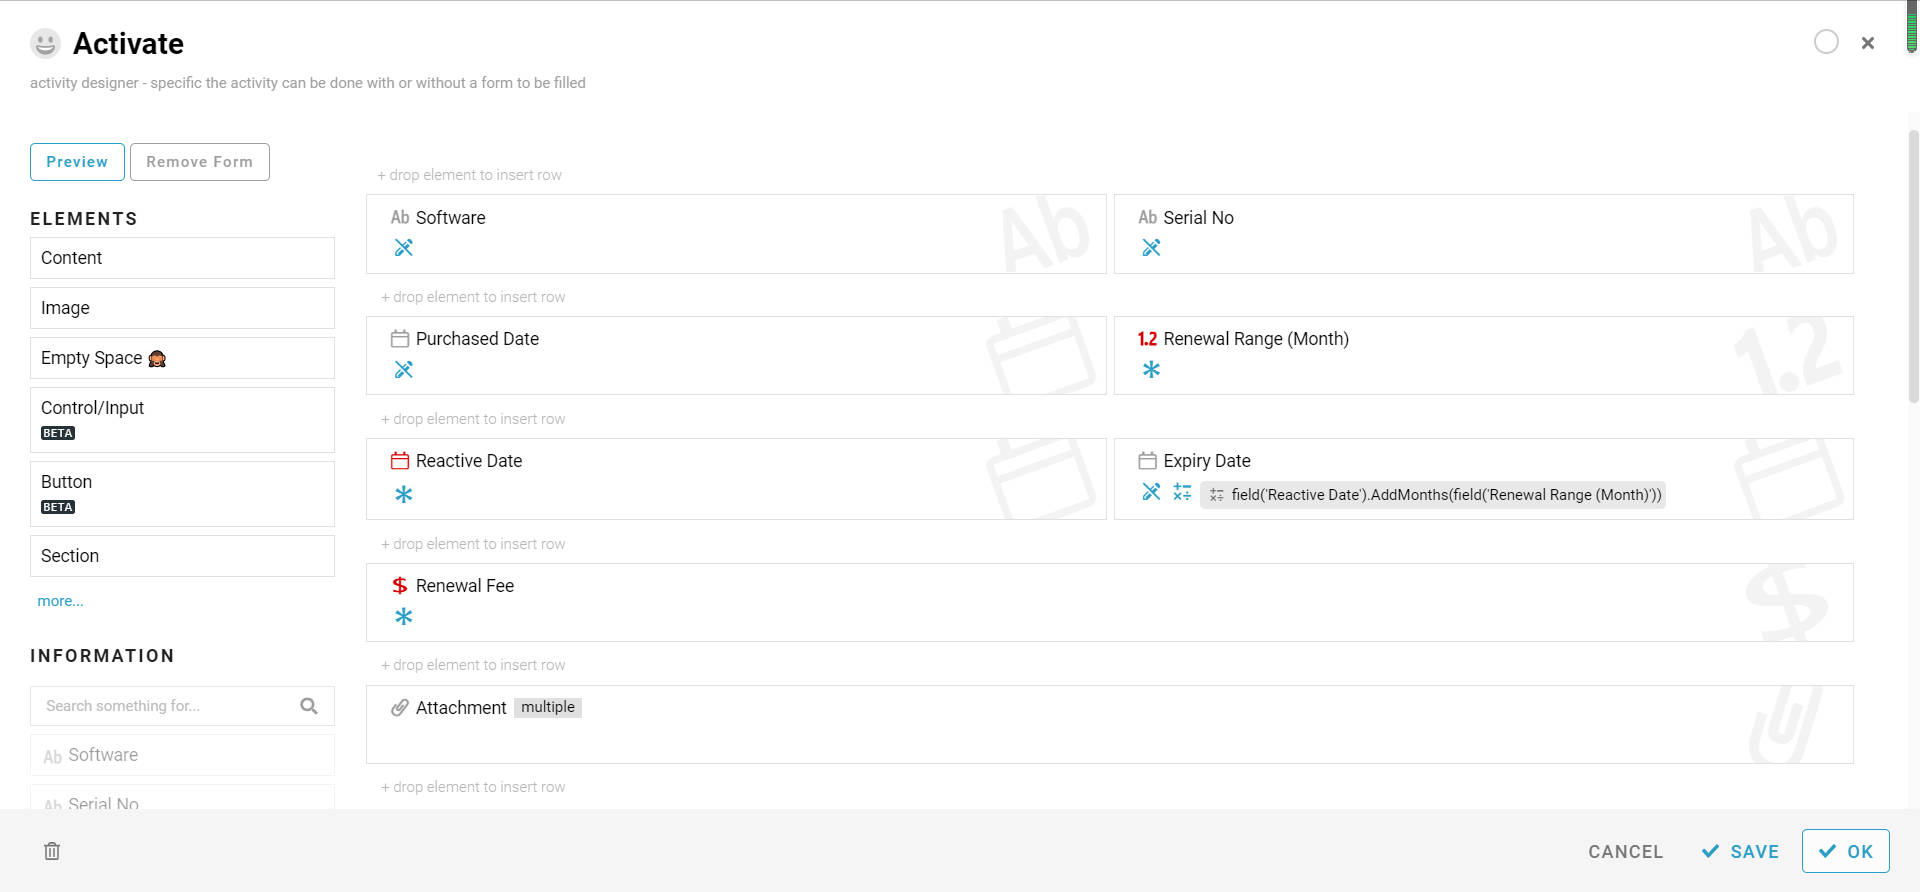
- Renewal Range (Month)
- Reactive Date
- Renewal Fee
- Click on the “Read Only” button to set the following information as a read-only field:
- Software
- Serial No
- Purchased Date
- Expiry Date
-
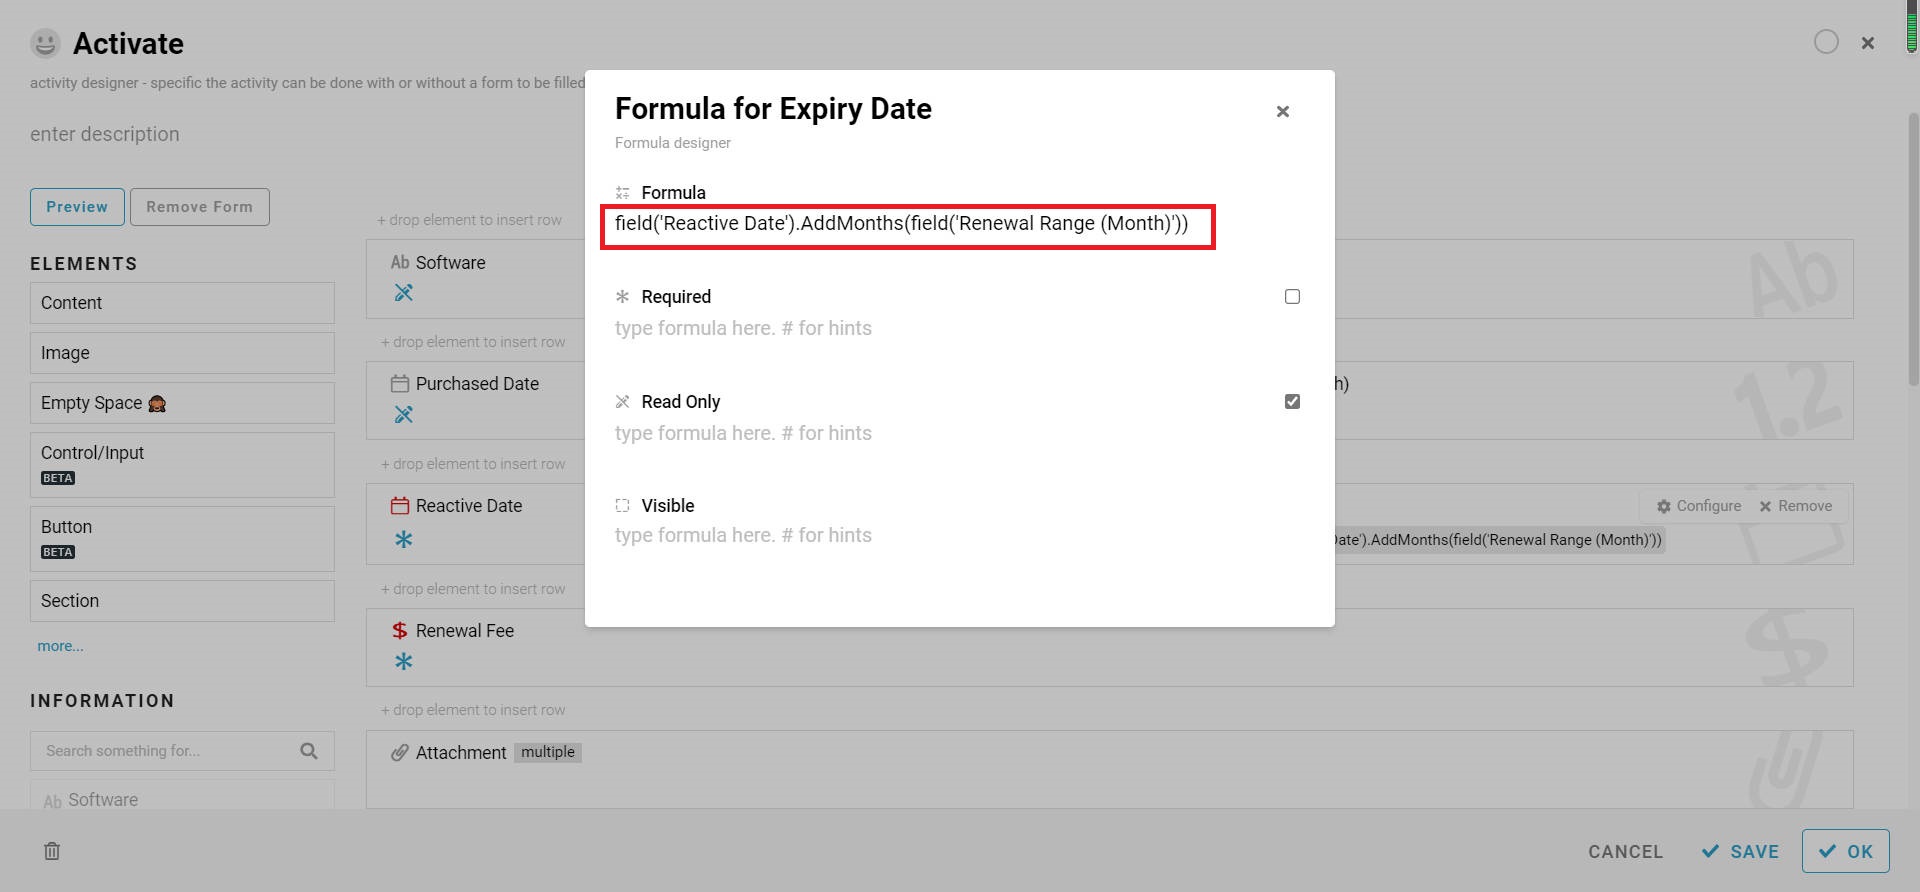
Click on the formula button on the “Expiry Date” Information to input the formula.
-
Key in “field(‘Reactive Date’).AddMonths(field(‘Renewal Range (Month)’))” in the Formula.
-
Click the “x” button to close the formula box then click on the save and OK button.
-
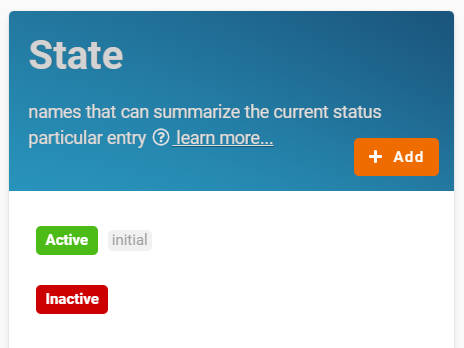
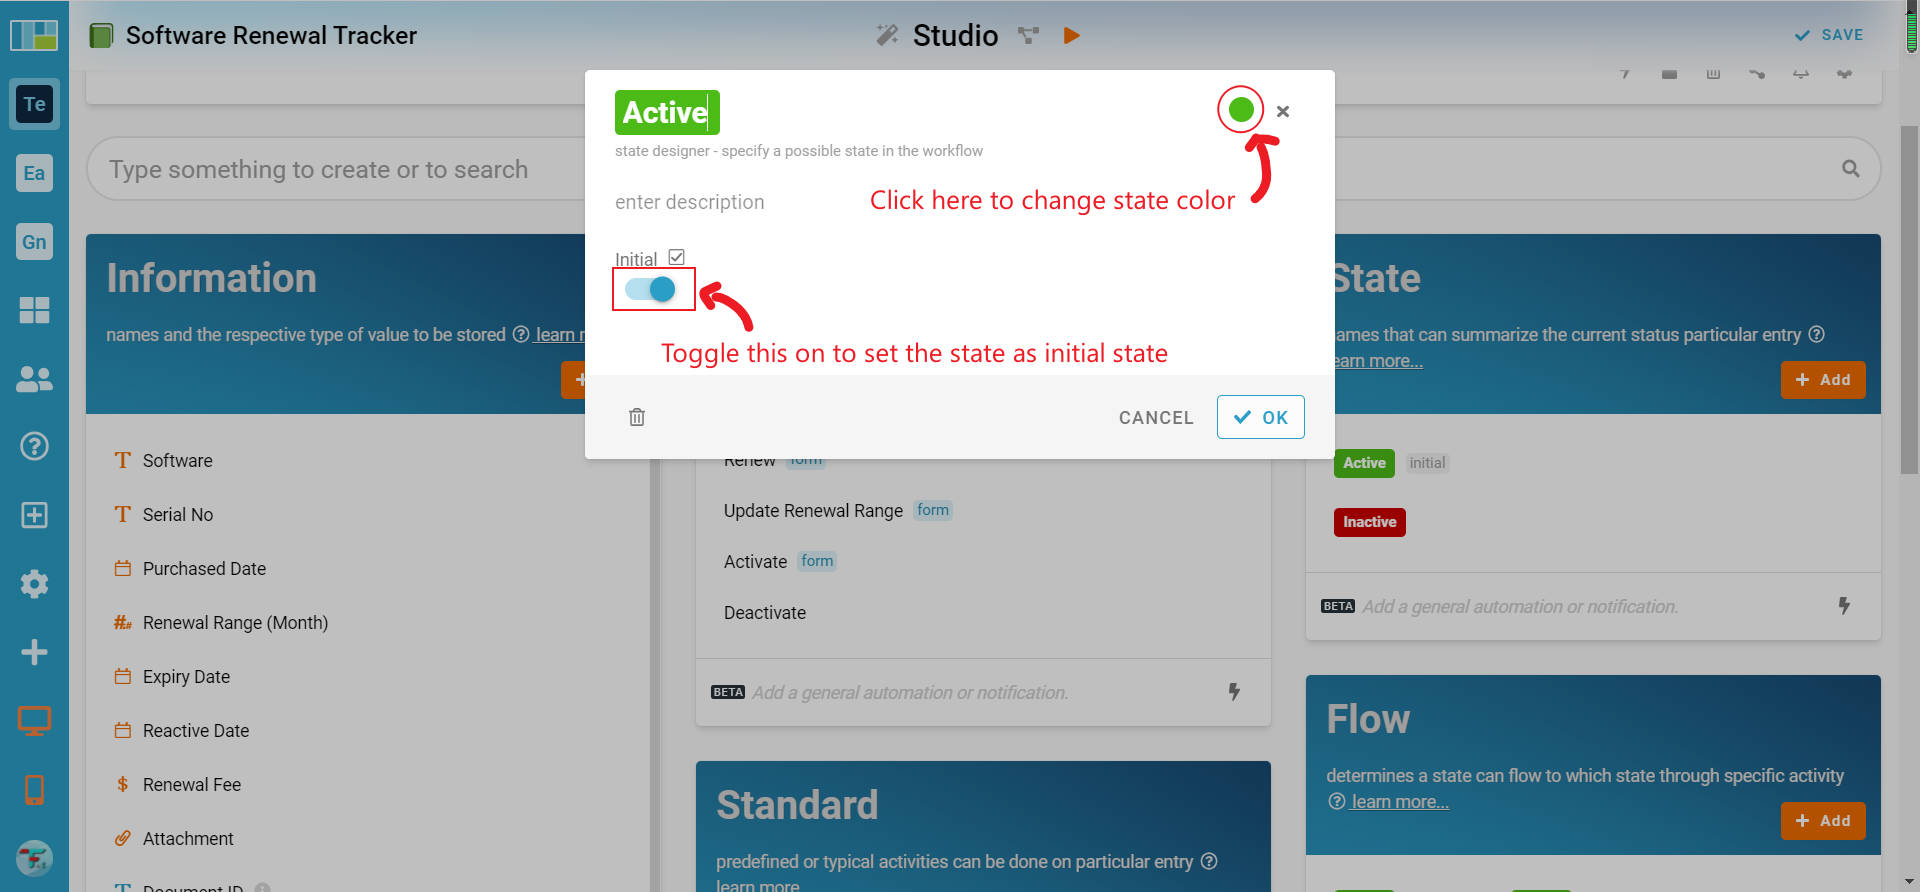
Next, at the State block, click on the “+ Add” button to add 2 states (Active, Inactive).
** The system will auto-assign color to the state created, but you can still choose the color you want.
-
For the “Active” state, toggle on the Initial to set it as the initial state.
-
Click on the “Save” button to save the current configuration.
-
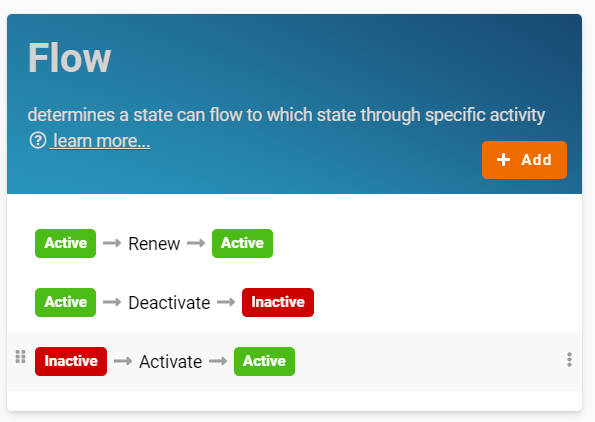
Click on the “+ Add” button in the Flow block to add flows of the process.
-
Three “flows” are required to be configured in this module, which are:
** Format: “State” → Activity → “State”
- Active → Renew → Active
- Active → Deactivate → Inactive
-
Inactive → Activate → Active
-
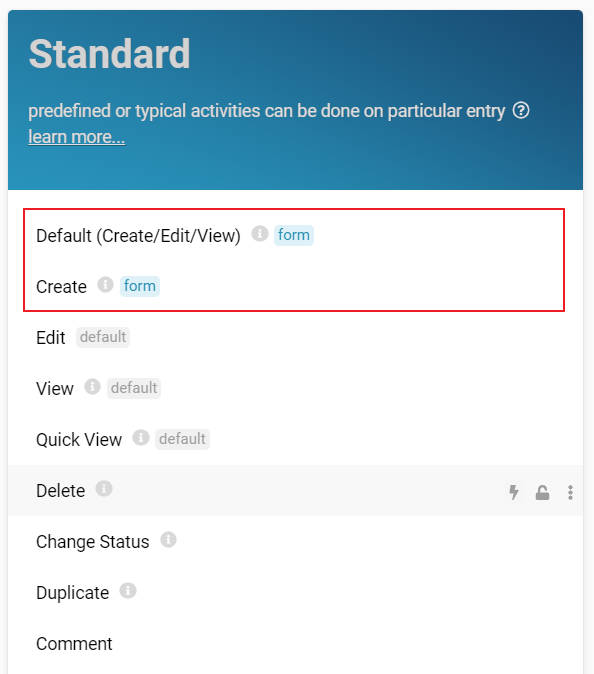
View and find the “Default (Create/Edit/View)” activity and a “Create” activity in the Standard block.
-
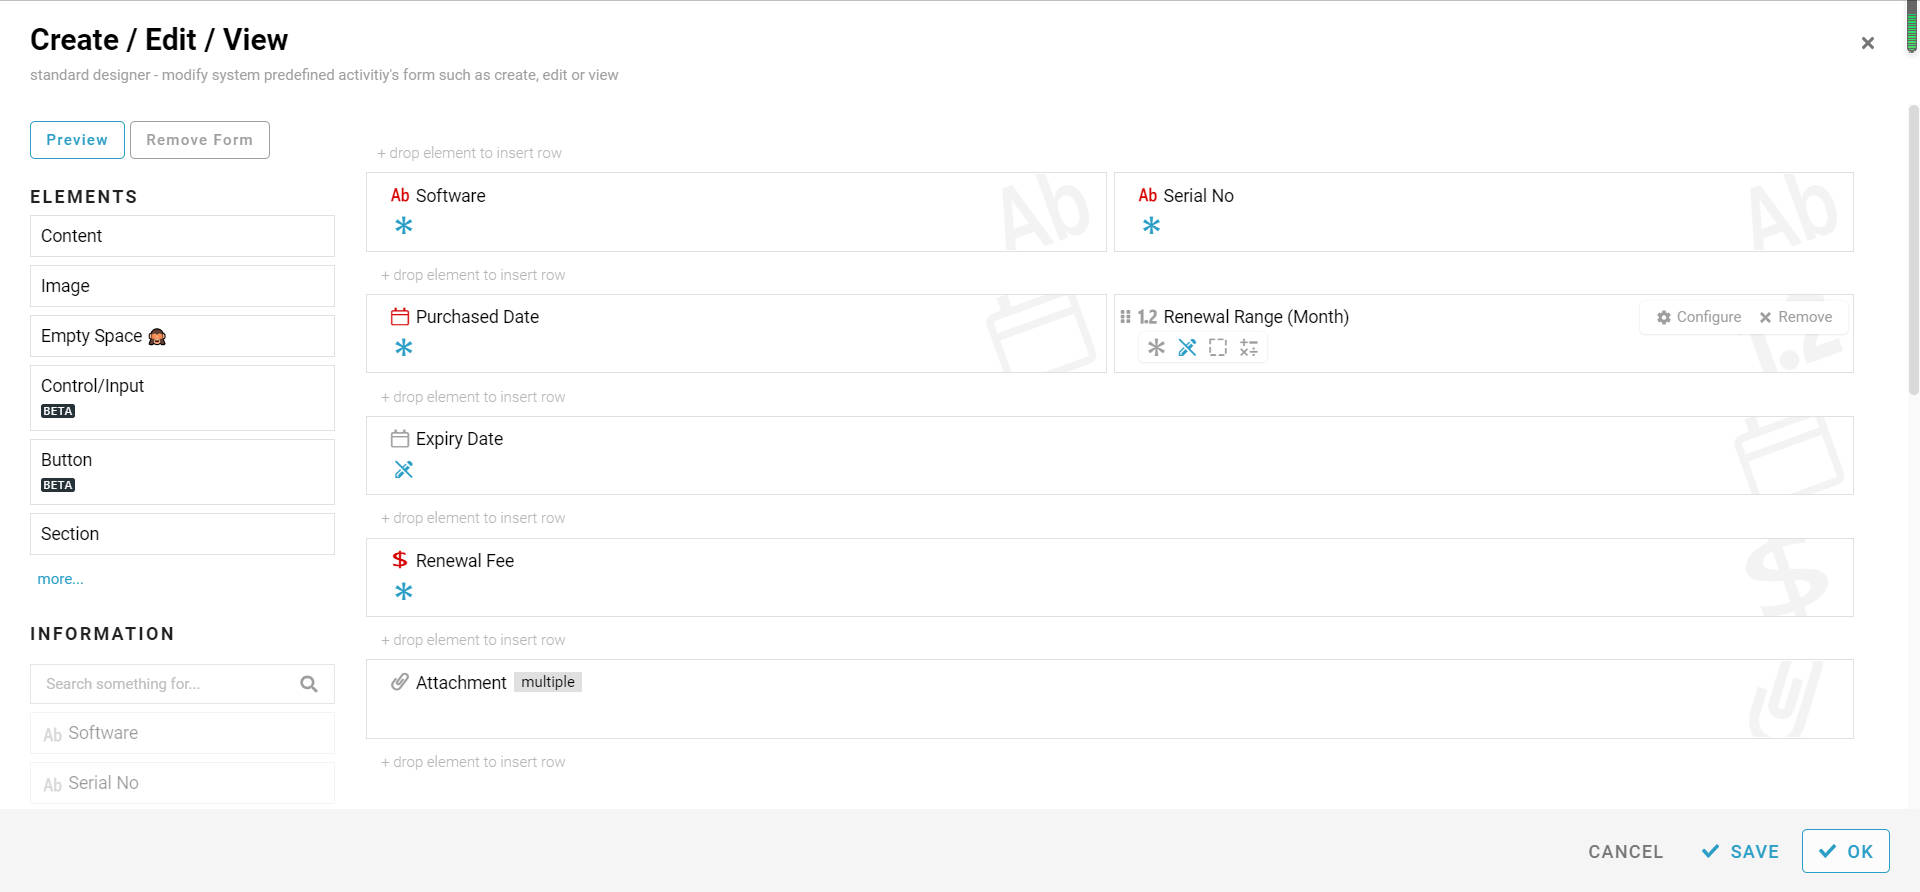
Click on the “Default (Create/Edit/View)” activity and click on the grey area of the form to customize the “Default (Create/Edit/View)” activity form.
-
Drag and drop all the Information except “Reactive Date” from the left side menu to the form area.
-
Refer to the picture below and drag the information to rearrange them.
-
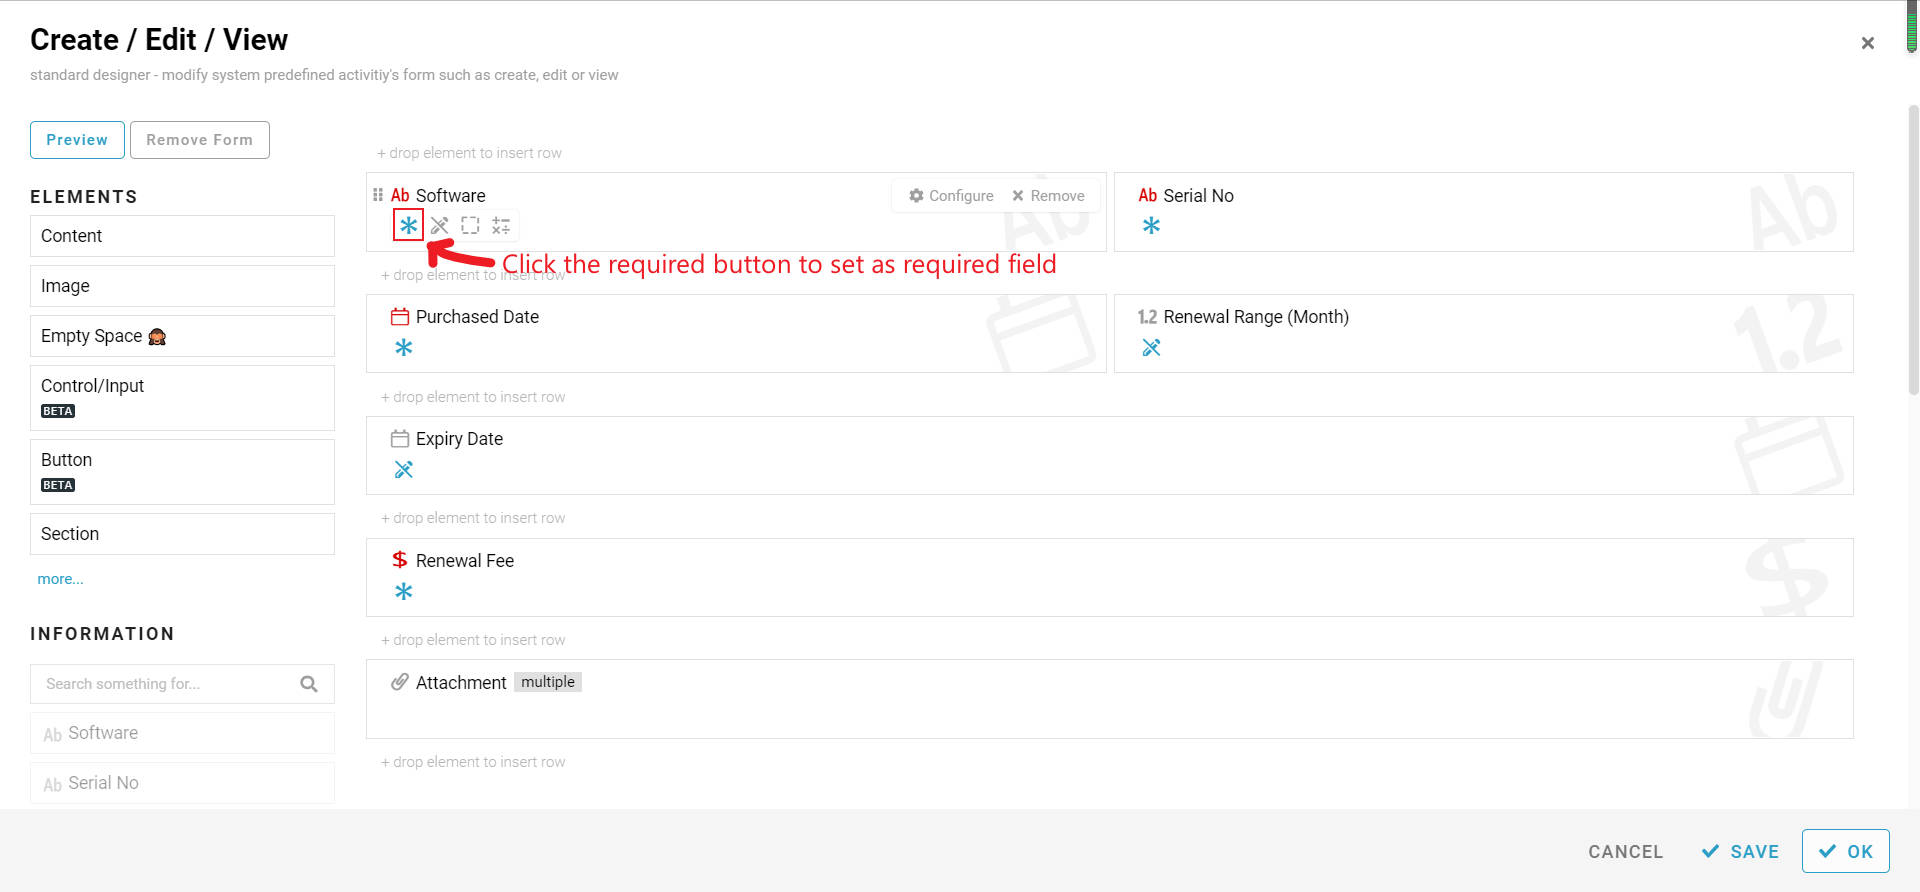
Click on the “Required” button to set the following information as a required field:
- Software
- Serial No
- Purchased Date
- Renewal Fee
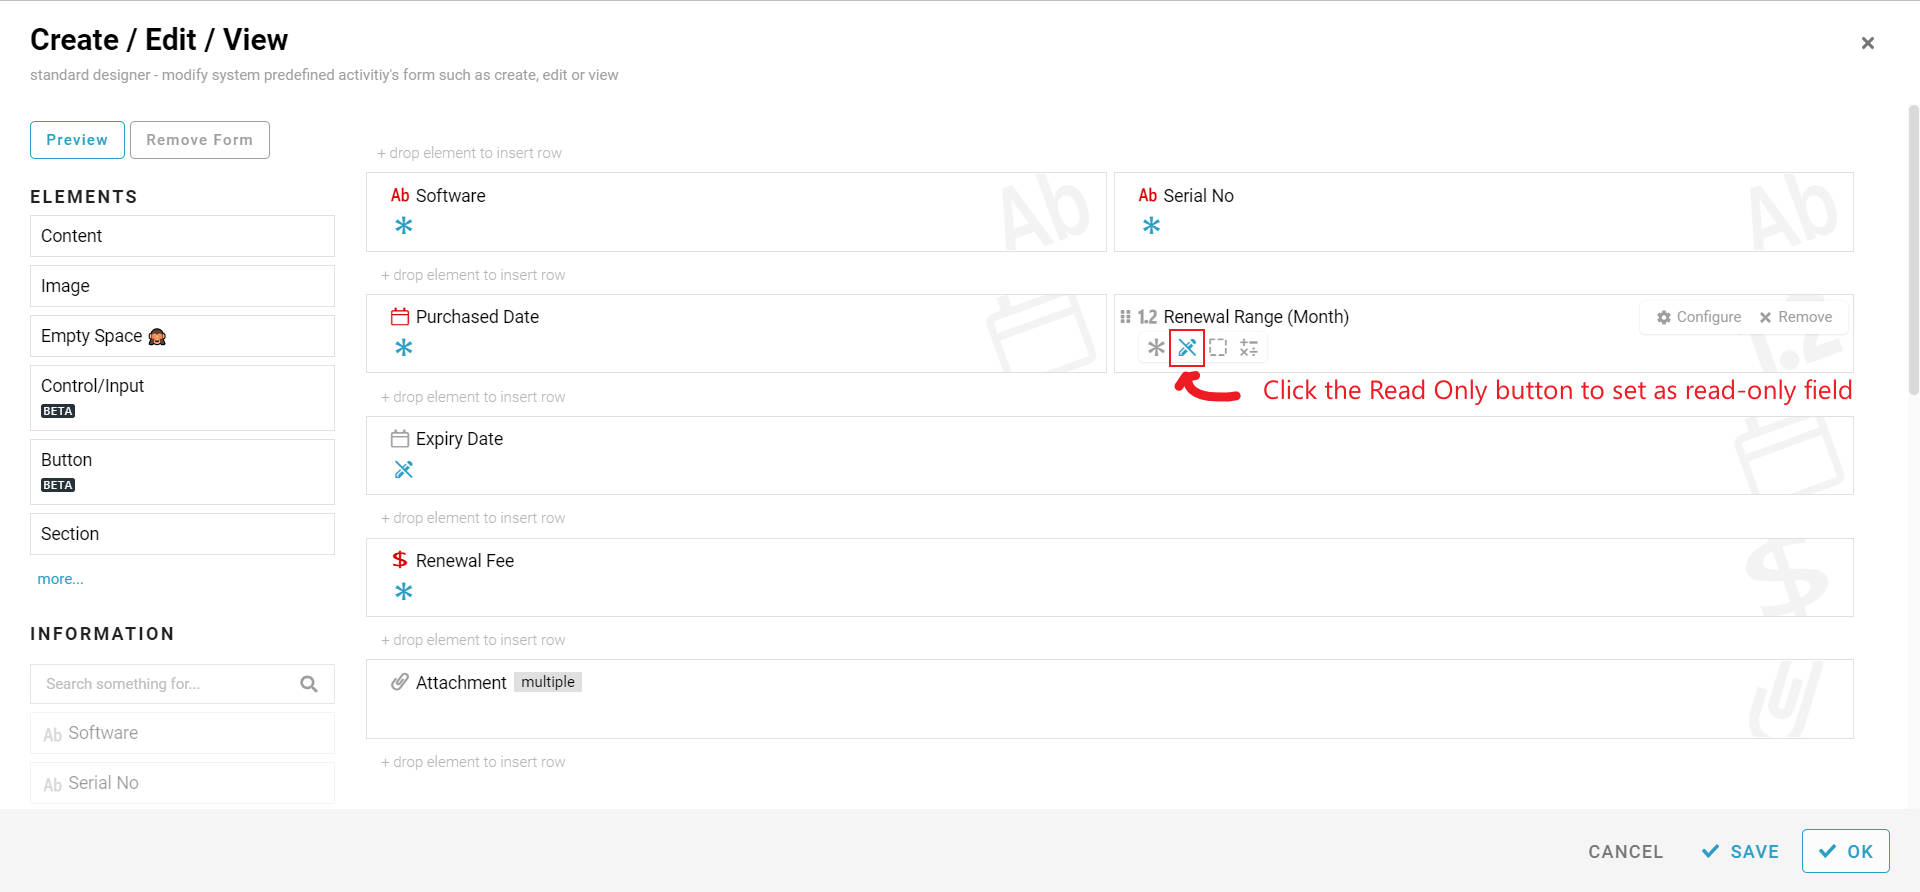
- Click on the “Read Only” button to set the following information as a read-only field:
- Renewal Range (Month)
- Expiry Date
-
Click on the save and OK button to save the configuration.
-
Click on the “Create” activity and click on the grey area of the form to customize the “Create” activity form.
-
Drag and drop all the Information except “Reactive Date” from the left side menu to the form area.
-
Refer to the picture below and drag the information to rearrange them.
-
Click on the “Required” button to set the following information as a required field:
- Software
- Serial No
- Purchased Date
- Renewal Range (Month)
- Renewal Fee
-
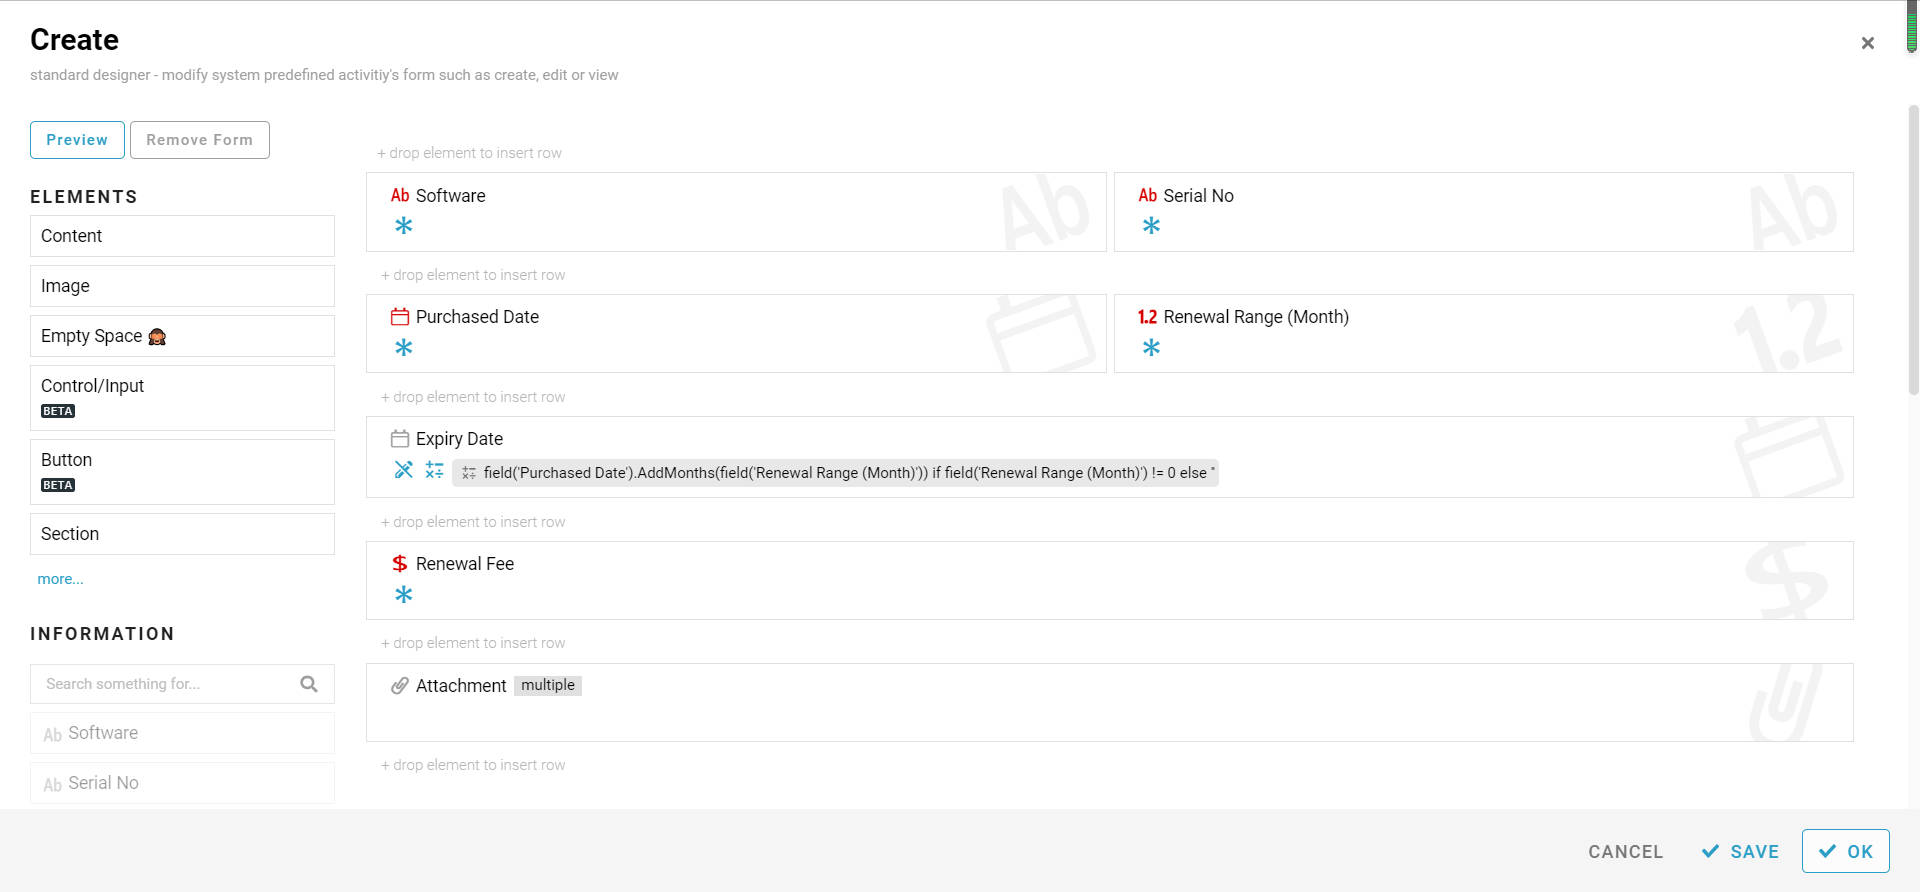
Click on the formula button on the “Expiry Date” Information to input the formula.
-
Key in "field(‘Purchased Date’).AddMonths(field(‘Renewal Range (Month)’)) if field(‘Renewal Range (Month)’) != 0 else ‘’ " in the Formula and tick the Read Only.
-
Click the “x” button to close the formula box then click on the save and OK button.
-
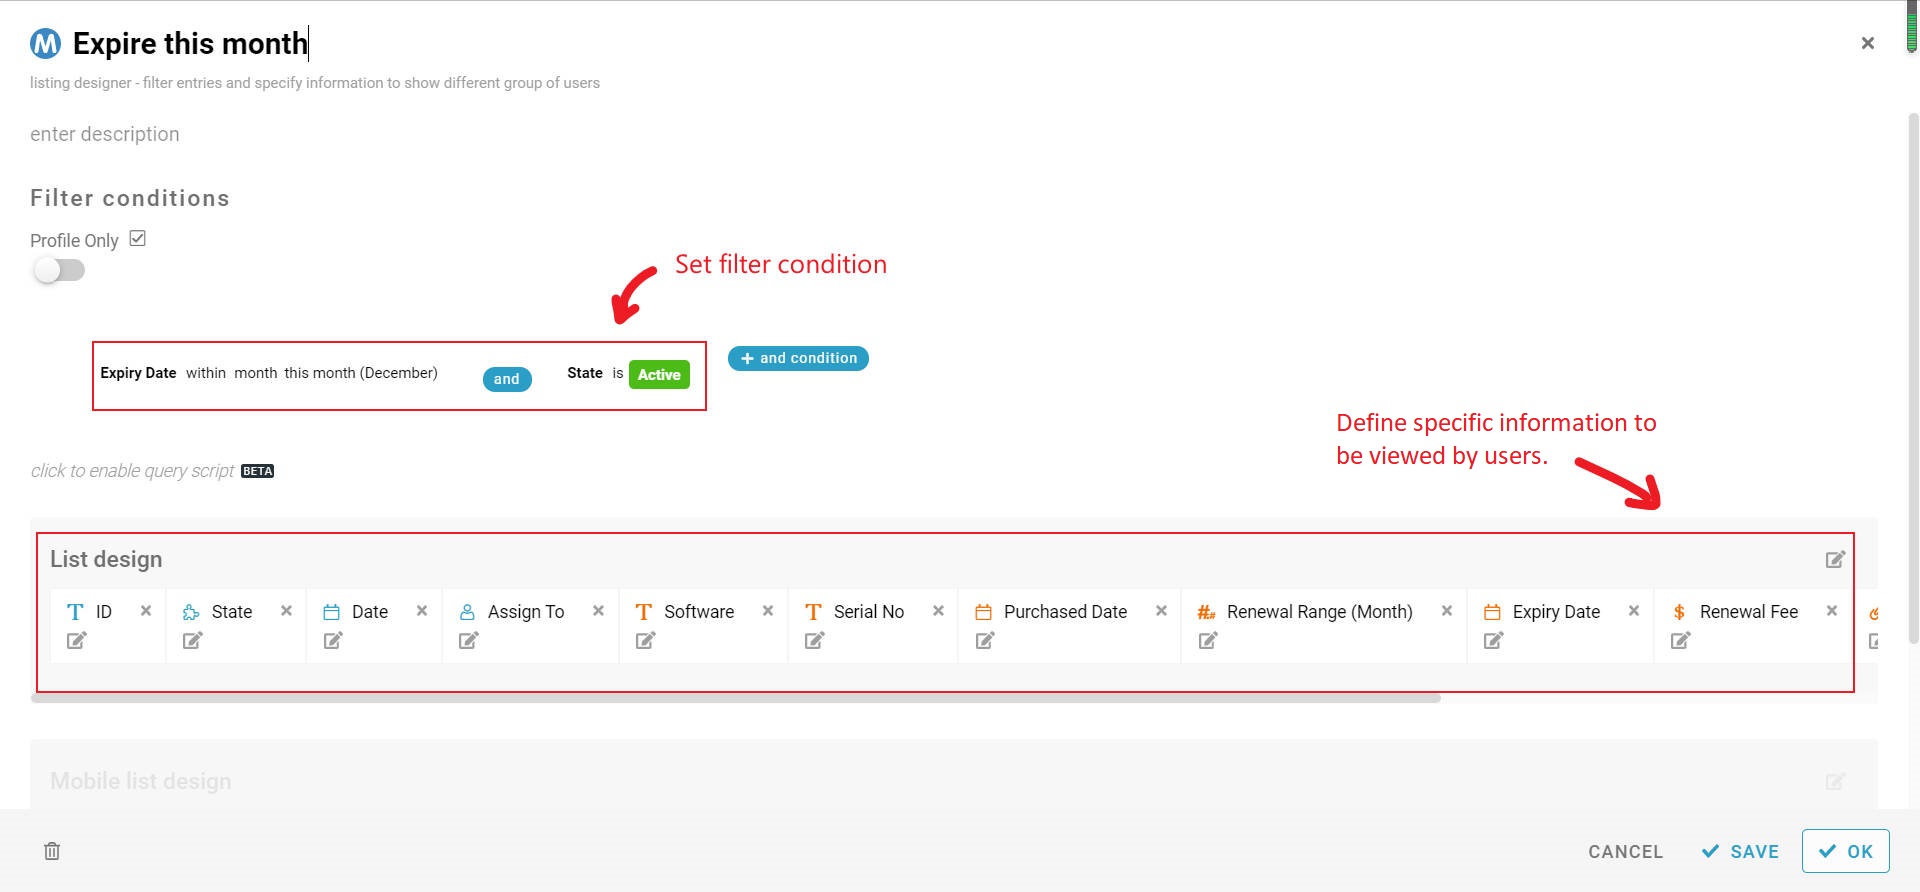
Last, click on the “+ Add” button at the Listing block to create all the Lists with filter conditions to allow specific information to be viewed by users.

- Expire this month - Condition: Expiry Date within “month” “this month” AND State is “Active”
**Listing with Condition AND / OR - Studio - FETIAS Community - Expire this year - Condition: Expiry Date within “year” “this year” AND State is “Active”
- All - no condition
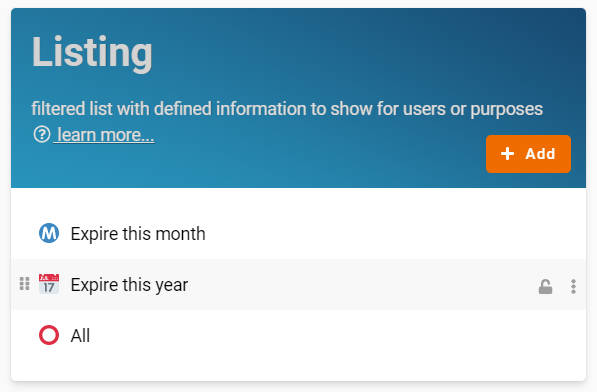
- Remember to click on the “Save” button to save the configuration.
Congratulations!!! You have successfully created a Software Renewal Tracker module.
Stay tuned to the FETIAS community for more updates.
Try FETIAS for FREE now.
Sign up at https://fetias.com
Related topic
Tutorial - Software Renewal Tracker - Support / Tutorial - FETIAS Community